One of the most versatile blocks in Minecraft to build with is concrete. However, if your entire build is 80% concrete, it can be tedious to turn concrete powder into concrete. If you’ve ever seen an experienced Minecraft player speed through this process in vanilla Minecraft, then you know it’s possible to improve this tedious work.
While you could build a redstone machine to automatically create concrete, this method is simple, and can be used on any vanilla or non-modded world! Below is a guide on how to cut your concrete conversion time in half. Keep in mind, this trick only works in the Java Edition of Minecraft.
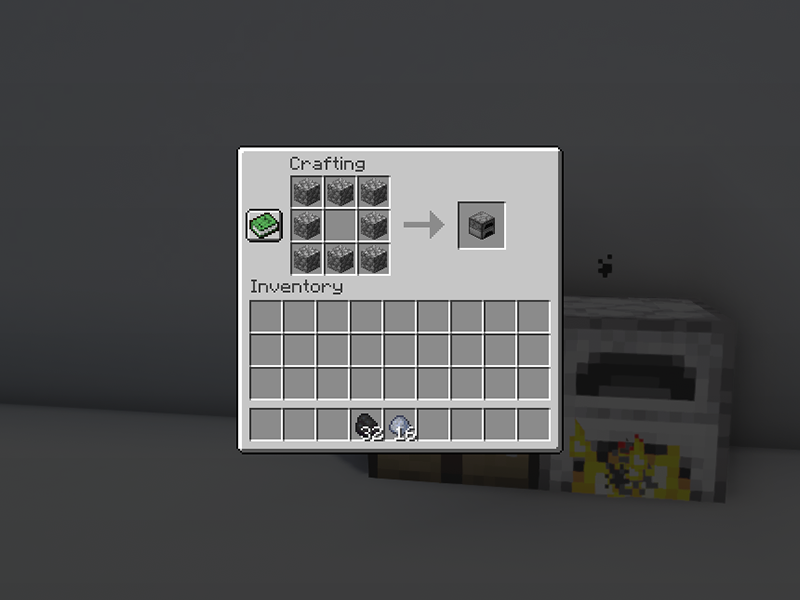
1 – Craft concrete powder
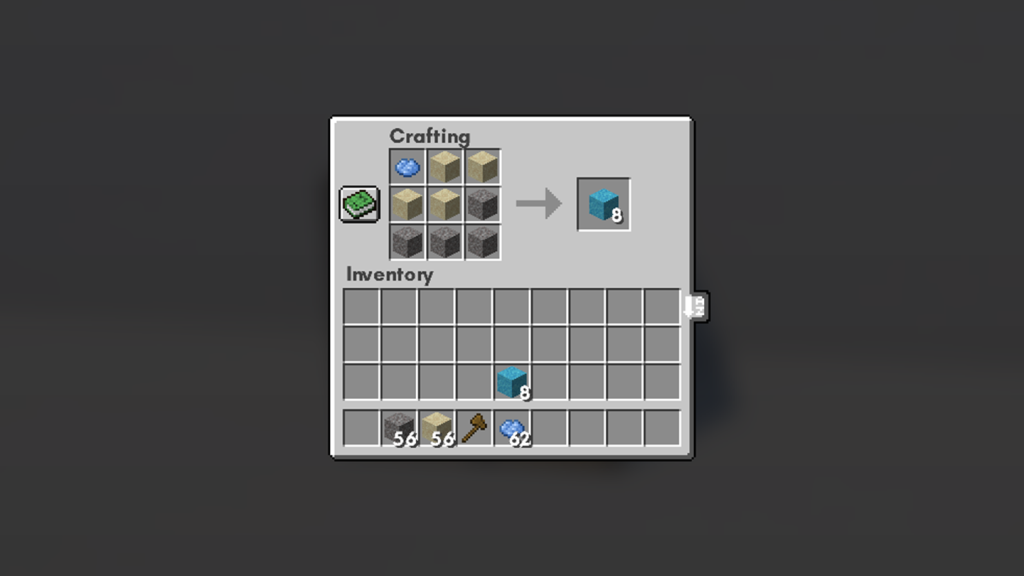
Craft the needed amount of concrete powder using the recipe shown above.
2 – Gather supplies
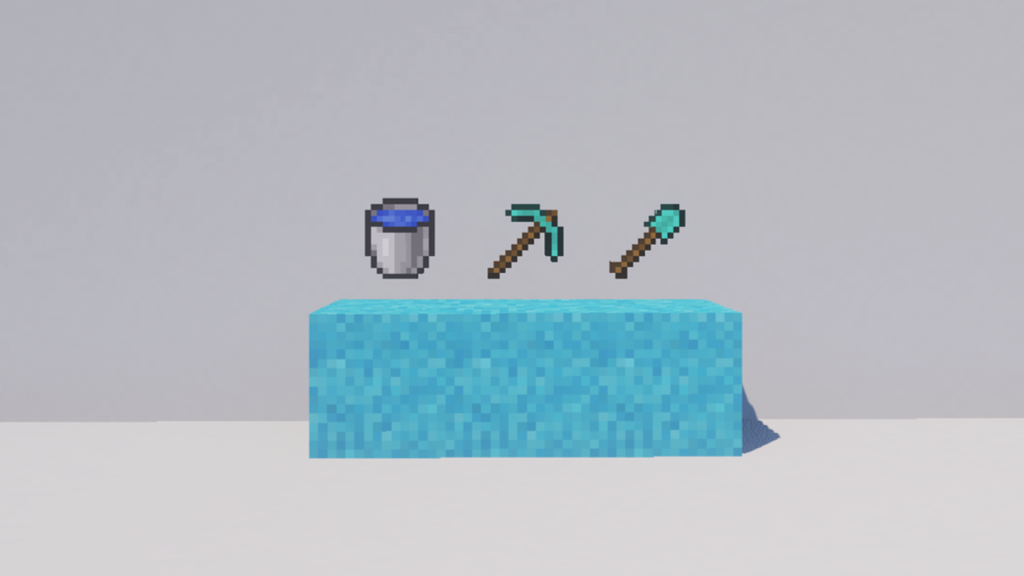
Before you begin, you’ll need to gather the following supplies in order to prepare an area to mine concrete quickly.
Water bucket
Pickaxe (the higher the level the better)
Shovel
Once you have all the supplies, move on to the next step.
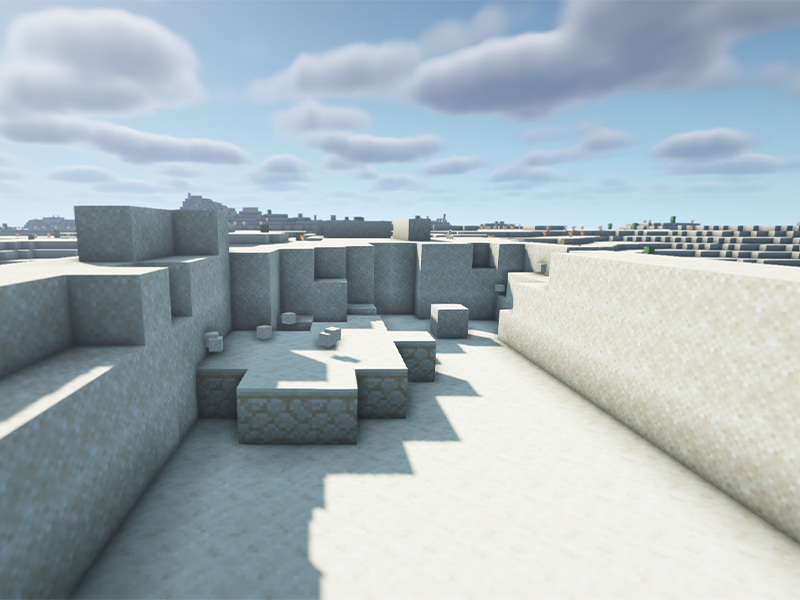
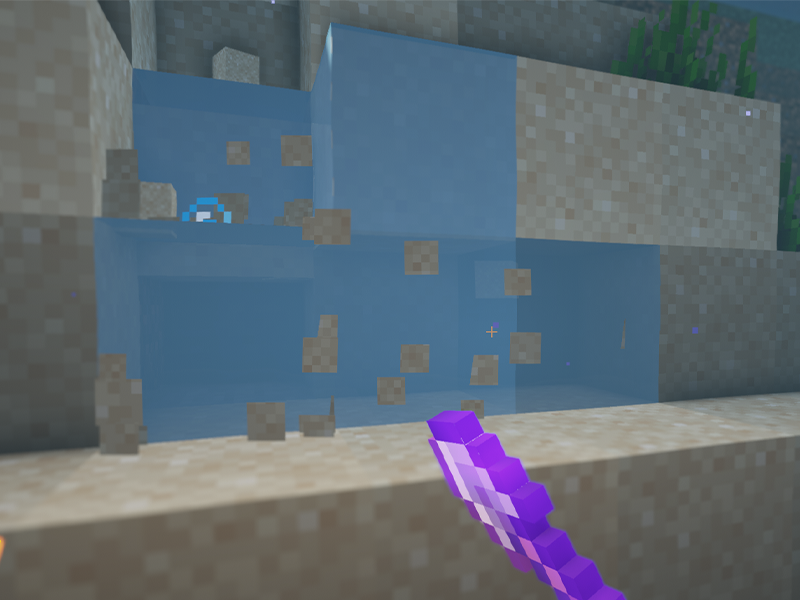
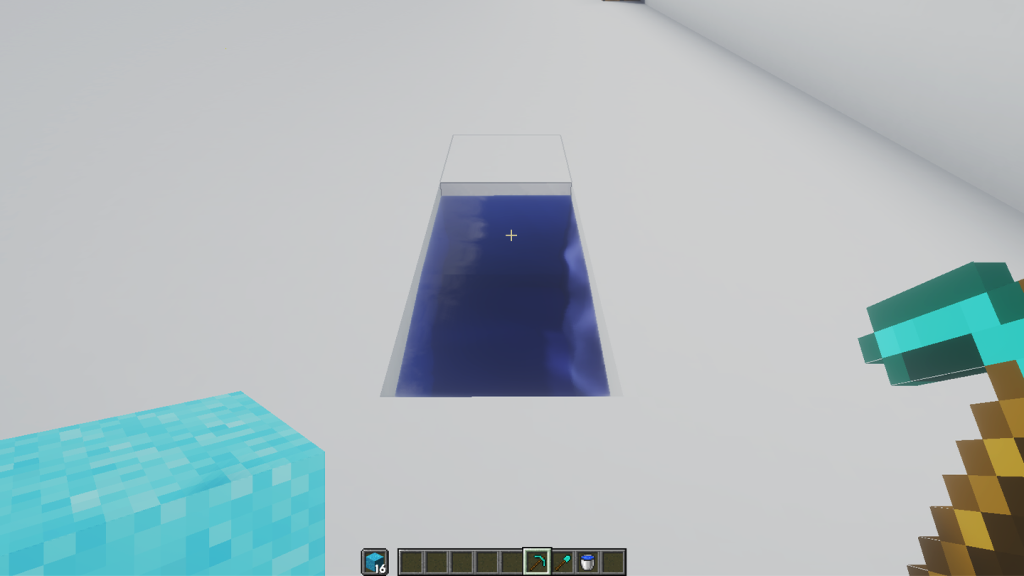
3 – Prepare the area
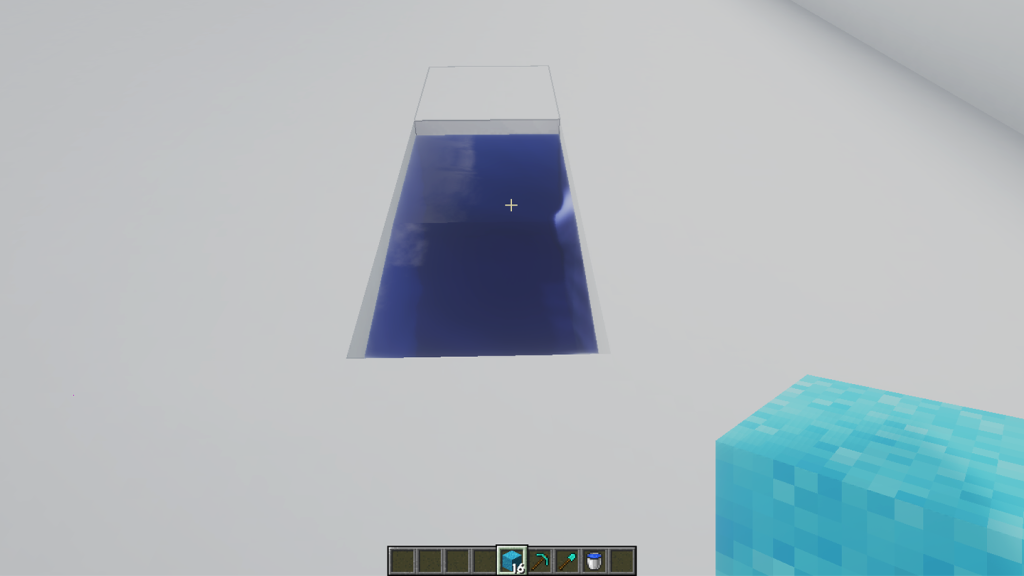
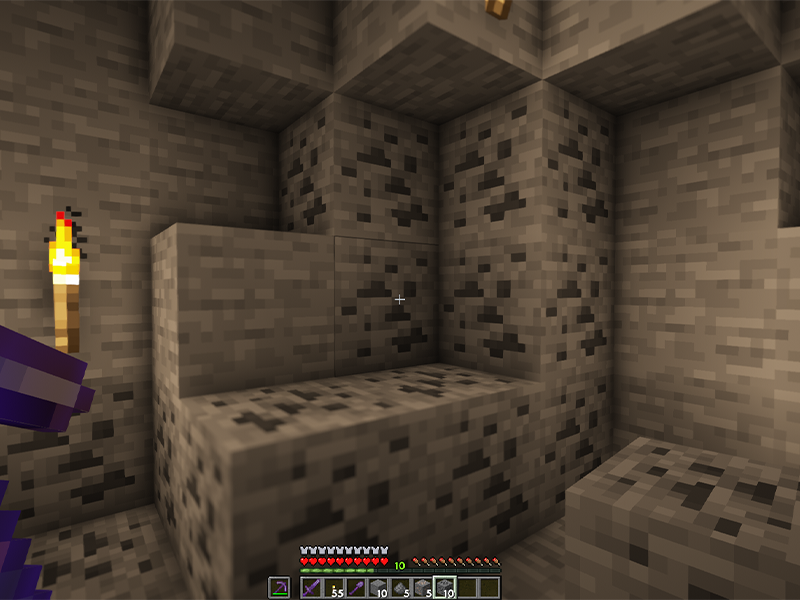
Find somewhere in your world that you can dig. Mine out a 1×2 space and place down a water source on the farthest spot from you. The space closest to you is the one where you’ll place the concrete powder later in this guide.
Use the above photo as a reference on how this is meant to look.
4 – Place concrete powder in your offhand
There are two ways to do this. The first is to click and drop the concrete powder into the offhand slot. The other option works if concrete powder is in the hotbar. Simply scroll so that the concrete powder is in the right hand, then press the F key.
5 – Mine the concrete
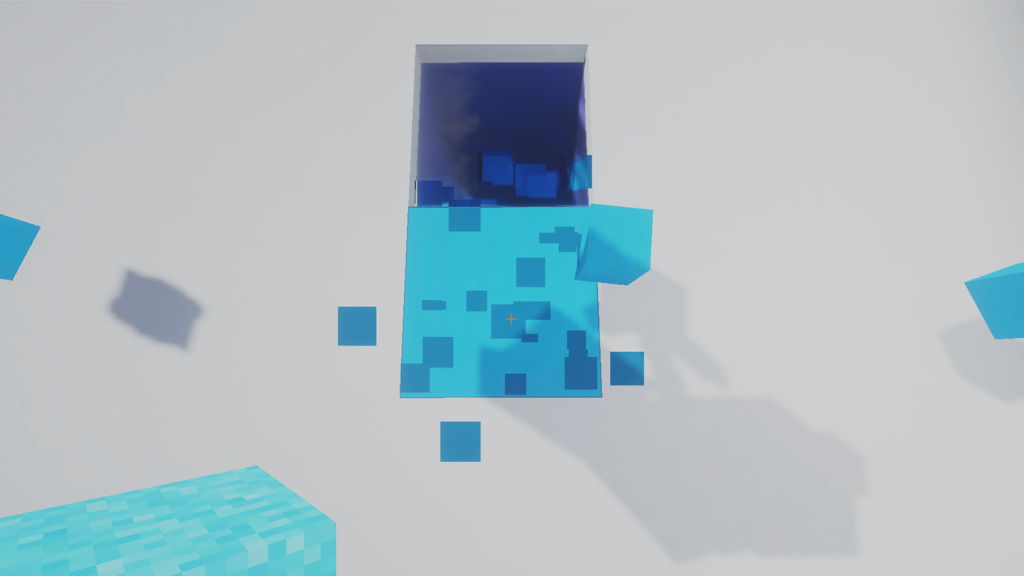
Now you’re ready for the fun part!
With your pickaxe in the right hand and aimed at the space where you’ll place the concrete powder. Hold down both mouse buttons at once.
While your left hand places a block, your right hand will mine it! Simple as that!
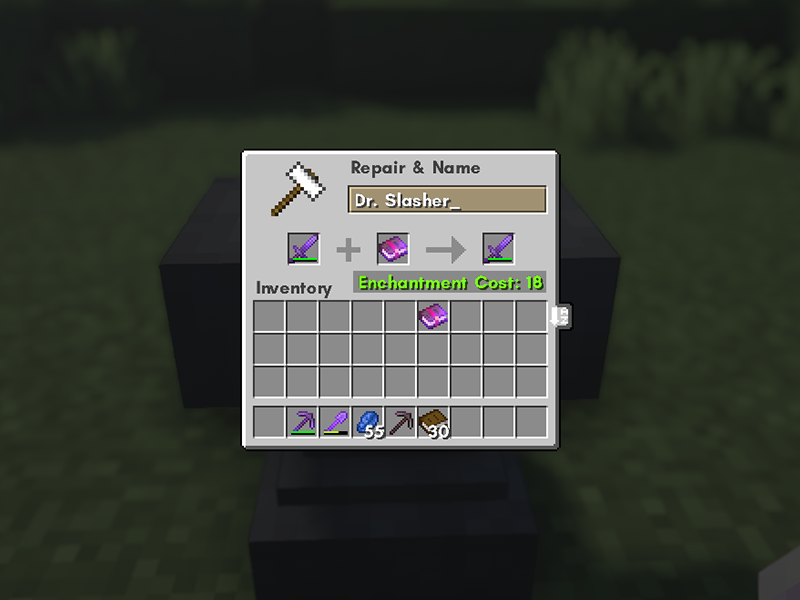
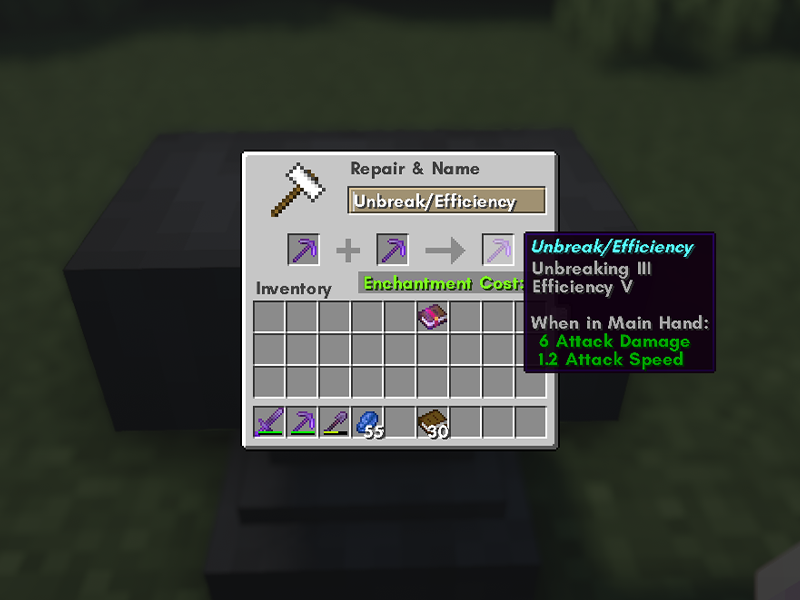
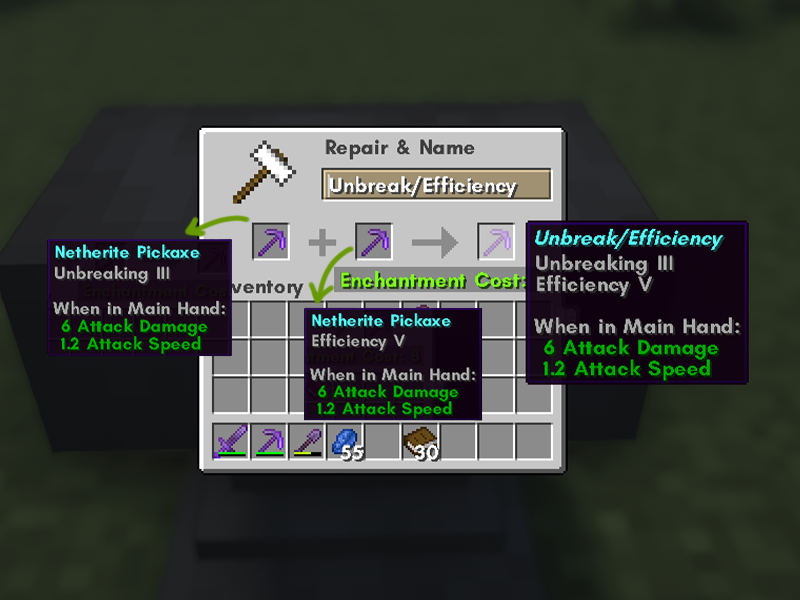
The longer you play Minecraft, the more you realize that early-game tools just won’t cut it. Exploring the enchantment feature of Minecraft can be exciting, but also intimidating. Rather than worry about researching enchantments, below are the best enchantments in Minecraft! To learn how to enchant items, check out this guide! In this guide, you’ll see
Introducing Howchoo, an enigmatic author whose unique pen name reflects their boundless curiosity and limitless creativity. Mysterious and multifaceted, Howchoo has emerged as a captivating storyteller, leaving readers mesmerized by the uncharted realms they craft with their words.
With an insatiable appetite for knowledge and a love for exploration, Howchoo’s writing transcends conventional genres, blurring the lines between fantasy, science fiction, and the surreal. Their narratives are a kaleidoscope of ideas, weaving together intricate plots, unforgettable characters, and thought-provoking themes that challenge the boundaries of imagination.
While shaders make Minecraft look pleasing, resource packs are an additional way to change a theme or aesthetic of a Minecraft world. Because resource packs are separate than shaders, you don’t need to install any mods, which makes them so versatile and vanilla-game friendly.
What is the difference between a resource pack and texture pack?
While many use both terms to mean the same thing, there is a fundamental difference between the two. A texture pack is used for 1.6.1 and earlier versions of the game 1.6.1, and they only changed the in-game textures. Resource packs were added in after 1.6.1, and allow players to change sounds, music, and particle effects. They also can modify blocks, items, and entity textures.
Let’s get into our guide on how to install resource packs to Minecraft!
1 – Find your file path
Before moving into the actual installation of resource or texture packs, it’s important to know where your Minecraft game is installed. To do so, follow these steps:
1. Open the Minecraft Launcher.
2. Make sure the launch option is the game version you plan on using.
3. Go to the Installations tab at the top of the window.
4. Hover your mouse over the game version you want to find and click the folder icon to the right of the Play button. See the image above for help.
5 . Locate the resource pack folder. This is where you’ll place any resource pack you want to use.
2 – Choose a resource or texture pack
Many websites are available to download resource packs, but some are safer than most. We recommend CurseForge or ResourcePack.net. Alternatively, you can download directly from a developer’s website as well!
Make sure it’s compatible with your Minecraft game version and then move on to the next step!
3 – Download the pack
Download the correct game version of the resource pack you’ve chosen and place it within the Resourcepack folder found in Step 1. Make sure you don’t unzip the downloaded file!
4 – Activate the resource pack
Now it’s time to run Minecraft and turn on your resource pack! Once the game has launched, follow these steps:
1. Click Options then Resource Packs.
2. Click arrow button that appears over the resource pack’s icon to move it to the right Selected column, as shown in the image below.
3. Click Done and a loading screen will appear and return you back to the Options menu when it’s finished rendering.
The longer you play Minecraft, the more you realize that early-game tools just won’t cut it. Exploring the enchantment feature of Minecraft can be exciting, but also intimidating. Rather than worry about researching enchantments, below are the best enchantments in Minecraft! To learn how to enchant items, check out this guide! In this guide, you’ll see
Introducing Howchoo, an enigmatic author whose unique pen name reflects their boundless curiosity and limitless creativity. Mysterious and multifaceted, Howchoo has emerged as a captivating storyteller, leaving readers mesmerized by the uncharted realms they craft with their words.
With an insatiable appetite for knowledge and a love for exploration, Howchoo’s writing transcends conventional genres, blurring the lines between fantasy, science fiction, and the surreal. Their narratives are a kaleidoscope of ideas, weaving together intricate plots, unforgettable characters, and thought-provoking themes that challenge the boundaries of imagination.
Traveling long distances in Minecraft can be tiresome (both in real life and the game). Thankfully, there are ways to move around faster through the Overworld! Whether you’re a skilled player or not, in the early game of Minecraft you usually don’t have elytra to fly around. But you can have horses!
Whether you want to gather leather like YouTuber Smallishbeans…
Or maybe you just want a companion on your adventure? Either way, here’s our guide on how to tame and breed horses in Minecraft!
Fun Fact: This method will also work for donkeys!
1 – Find Horses
Horses naturally spawn around the Overworld in the following biomes:
Plains
Sunflower Plains
Savanna
Savanna Plateau
Windswept Savanna
Villages
Make sure you have a spot to keep the horses, since they will wander even if tamed.
2 – Tame the Horses
Both horses and donkeys must be tamed in order to breed or even ride. In order to tame a horse, simply right click one with an empty hand. You’ll now be mounted upon the horse until it bucks you off. Repeat this as many times as it takes. You’ll know you’ve tamed the horse or donkey when hearts appear on the screen.
Horse’s Temper
Taming depends all on the horse’s temper. Every horse begins with a temper between 1 and 100 and an assigned random taming threshold. Each time a player is bucked off earns 5 temper and once it reaches past that taming threshold, the horse is tamed.
Now you can add a saddle and armor! However, there are a few more supplies needed before breeding.
3 – Gather Supplies
In order to activate love mode (aka breeding) you must feed two horses (or donkeys) either a golden carrot or a golden apple. Both can be crafted or looted!
Golden Apple
You can craft a golden apple with 8 gold ingots and 1 apple.
Golden apples also generate naturally in chests throughout the Overworld and Nether. The best places to find a golden apple are in igloos, mineshafts, and desert temples.
Golden Carrots
You can craft a golden carrot with 8 gold nuggets and 1 carrot.
Golden carrots can be looted from chests in bastion remnants and ruined portals. Bastion remnants have the highest chance of spawning 6-17 golden carrots in a chest.
4 – Activate Love Mode
Mojang call breeding “love mode”. Is that important information? Not really, but it’s still fun to know.
Once you have the above supplies, simply feed the golden carrots or apples to a pair of horses. They’ll enter love mode and produce a foal. Typically, the foal has the color or markings of one of its parents, but there is a ~29% chance for a random variation in color/markings.
If a horse and donkey are bred together, they create a mule foal. Mules can’t breed, but you at least will get an achievement for it!
The longer you play Minecraft, the more you realize that early-game tools just won’t cut it. Exploring the enchantment feature of Minecraft can be exciting, but also intimidating. Rather than worry about researching enchantments, below are the best enchantments in Minecraft! To learn how to enchant items, check out this guide! In this guide, you’ll see
Introducing Howchoo, an enigmatic author whose unique pen name reflects their boundless curiosity and limitless creativity. Mysterious and multifaceted, Howchoo has emerged as a captivating storyteller, leaving readers mesmerized by the uncharted realms they craft with their words.
With an insatiable appetite for knowledge and a love for exploration, Howchoo’s writing transcends conventional genres, blurring the lines between fantasy, science fiction, and the surreal. Their narratives are a kaleidoscope of ideas, weaving together intricate plots, unforgettable characters, and thought-provoking themes that challenge the boundaries of imagination.
You’ve done so much to acquire a full set of diamond (or even netherite) armor and tools. You’re feeling proud! So you go out exploring the world or risk battling the Ender dragon, when you unexpectedly die, realizing that you’re still too mortal.
If you’ve ever experienced or imagined this scenario, then you should consider enchanting your items before heading towards danger. Minecraft provides special blocks which can bind special abilities, or enchantments, to your armor, tools, or weapons.
What Minecraft items can you enchant?
The broad categories of items that you can enchant are armor, tools, weapons, and books.
Bonus idea to save you time: If you’re looking to add a specific set of enchantments to an item, enchant books rather than the item itself to save yourself cost and items!
There are three ways to enchant items in Minecraft:
At an enchanting table.
Combine an enchanted book and item at an anvil.
Combine two enchanted items together.
This guide will go through all three ways to enchant items in Minecraft!
1 – Method One: Enchanting Table
Supplies Needed:
1 enchanting table
15 bookshelves
Lapis lazuli
Before you can use an enchanting table, you must craft one through a crafting table.
You’ll need four obsidian, two diamonds, and one book. The above image shows the recipe and formation to craft an enchanting table.
Once placed, right-click on the enchanting table to open up the interface. The above image will show the correct placement of items, as well as an example of what you might see in the GUI.
How do you get better enchantments?
The higher the player’s level, the more enchantments you’ll gain access to. However, to increase the level of enchantment, you’ll need bookshelves! Above is an image showing the proper placement of bookshelves around an enchanting table. The must be a one block space between the bookshelf and the enchanting table in order for it to work. You can also stack bookshelf in a second row to save space.
How to create an enchanted book:
In place of an item like a sword or pickaxe, simply place a book inside the enchanting table. You’ll be able to save this enchantment for later to combine with an item at an anvil!
View our list of the best enchantments to have in Minecraft!
2 – Method Two: Combine a Book and Item
Supplies Needed:
Enchanted book
Item to be enchanted
Whether you enchanted a book yourself or you found one in a chest, you can add enchantments to an item by using an anvil.
What are enchantment incompatibilities?
There are a few enchantments that will not be able to be combined on the same item. Enchantments are incompatible if both are in one of the following groups:
Sword: Sharpness, Smite, and Bane of Arthropods
Tool: Fortune and Silk Touch (as of Java version 1.12.2 you can combine these; the sacrifice item’s enchantment is lost)
Armor: Protection, Fire Protection, Blast Protection, Projectile Protection
Boots: Depth Strider and Frost Walker
Bow: Infinity and Mending
Crossbow: Multishot and Piercing
Trident: Loyalty and Riptide or Channeling and Riptide
Books: Silk Touch and Looting or Silk Touch and Luck of the Sea
To start, right-click an anvil and follow these steps:
Place an item in the first slot.
Place the enchanted book in the second slot.
Make sure you have enough experience points to cover the enchantment cost that appears on the screen.
Click and place the now enchanted item into your inventory.
You now have completed the process of using an anvil to enchant items. Note that enchanted books are cheaper than using an enchanting table.
Before beginning, there are some things to keep in mind:
Enchantments from the second slot are transferred to the item in the first slot, keeping the highest levels of enchantment.
If two enchantments have the same level, they can combine into the next available level.
Items must be of the same type and material, unless one is an enchanted book.
Use the image above to help along with the steps for combining enchanted items on the anvil:
Place the item you wish to add enchantments to in the first slot. This is the item you will keep in the end.
Place the item you wish to get enchantments from in the second slot. This item will be destroyed along with any enchantments that aren’t transferable. If a book has multiple enchantments, only appropriate spells are transferred to the items. Any unusable enchantments are lost from the book.
Click and place the now enchanted item into your inventory.
There you have it! Three easy ways to add enchantments to items in Minecraft!
The longer you play Minecraft, the more you realize that early-game tools just won’t cut it. Exploring the enchantment feature of Minecraft can be exciting, but also intimidating. Rather than worry about researching enchantments, below are the best enchantments in Minecraft! To learn how to enchant items, check out this guide! In this guide, you’ll see
Introducing Howchoo, an enigmatic author whose unique pen name reflects their boundless curiosity and limitless creativity. Mysterious and multifaceted, Howchoo has emerged as a captivating storyteller, leaving readers mesmerized by the uncharted realms they craft with their words.
With an insatiable appetite for knowledge and a love for exploration, Howchoo’s writing transcends conventional genres, blurring the lines between fantasy, science fiction, and the surreal. Their narratives are a kaleidoscope of ideas, weaving together intricate plots, unforgettable characters, and thought-provoking themes that challenge the boundaries of imagination.
Bricks are a staple block in Minecraft for building. Whether it’s the main feature or an accent block, they’re quite attainable to make even in the early stages of survival worlds. Below is a guide to the simple gathering and crafting of brick in Minecraft!
1 – Gather Clay
Clay is commonly found at the bottom of rivers, lakes, and swamps. Mine clay blocks with a shovel or fist to break them into dropping clay balls. Clay balls are the most important part of the recipe!
2 – Make a Furnace
Next, craft a furnace. You’ll need eight cobblestone to do so.
If you have a furnace already, make sure you have enough fuel for the next step.
3 – Smelt the Clay
Place the clay ball in the top slot in the furnace GUI and fuel (such as coal or wood) in the bottom slot. With that, the furnace will smelt the clay balls into bricks!
Bricks can then be used to craft brick blocks or flowerpots!
The longer you play Minecraft, the more you realize that early-game tools just won’t cut it. Exploring the enchantment feature of Minecraft can be exciting, but also intimidating. Rather than worry about researching enchantments, below are the best enchantments in Minecraft! To learn how to enchant items, check out this guide! In this guide, you’ll see
Introducing Howchoo, an enigmatic author whose unique pen name reflects their boundless curiosity and limitless creativity. Mysterious and multifaceted, Howchoo has emerged as a captivating storyteller, leaving readers mesmerized by the uncharted realms they craft with their words.
With an insatiable appetite for knowledge and a love for exploration, Howchoo’s writing transcends conventional genres, blurring the lines between fantasy, science fiction, and the surreal. Their narratives are a kaleidoscope of ideas, weaving together intricate plots, unforgettable characters, and thought-provoking themes that challenge the boundaries of imagination.
The longer you play Minecraft, the more you realize that early-game tools just won’t cut it. Exploring the enchantment feature of Minecraft can be exciting, but also intimidating. Rather than worry about researching enchantments, below are the best enchantments in Minecraft!
In this guide, you’ll see a list of Primary Items and Secondary Items. Primary Items can receive the enchantment through an enchanting table, which Secondary Items require an enchanted book applied at an anvil.
1 – Mending
Primary Items: None Secondary Items: All armor, tools, elytra, and weapons. Max Enchantment Level: 1 Incompatibilities: Infinity
What does the Mending enchantment do?
This is the most important enchantment to get, especially once you’ve reached diamond tools and armor. Mending uses XP orbs to repair the item it’s bound to. It can only be found as an enchanted book through chest loot, fighting, raids or villager trading. The rate of repair is two durability per point of experience.
2 – Unbreaking
Only one shovel was used!
Primary Items: All armor and tools, crossbow, trident, bow, and turtle shell. Secondary Items: Shears, flint and steel, shield, carrot on a stick, warped fungus on a stick, and elytra. Max Enchantment Level: 3 Incompatibilities: None
What does the Unbreaking enchantment do?
Essentially, the Unbreaking enchantment increases an item’s durability by giving a chance for an item to avoid durability reduction during use. With Unbreaking III, an item’s average lifetime increases by 300%!
3 – Silk Touch
Primary Items: Pickaxe, shovel, axe, and hoe. Secondary Items: Shears (Bedrock Edition only) Max Enchantment Level: 1 Incompatibilities: Fortune
What does the Silk Touch enchantment do?
One of the most sought after enchantments, Silk Touch allows blocks to drop themselves rather than their usual items while mined. For example, mushroom blocks and mycelium can only be acquired with Silk Touch.
Players and mobs can be knocked back when receiving damage. The resulting disorientation could be fatal, as it’s possible to be knocked back over a cliff or into lava. The Knockback enchantment increases a sword’s knockback. For each level of enchantment, Knockback adds three blocks distance to the base knockback.
Simply put, Efficiency increases the player’s mining speed. Stone tools can only receive up Efficiency V by combining two items with Efficiency IV. Diamond tools cannot be given Efficiency V, but they can be found in an end city or bastion remnant chest. The best tools to have Efficiency on is an iron or netherite pickaxe. After all, what’s a better feeling than mining through terracotta like a knife through butter?
Feather Falling reduces fall damage, which is what makes it so vital for hardcore difficulty players. It’s one of the rarest enchantments, with only a 2.7% chance of Feather Falling IV appearing on boots enchanted with the enchanting table.
7 – Fire Protection
No damage was taken during this photo!
Primary Items: All armor and the turtle shell. Secondary Items: None Max Enchantment Level: 4 Incompatibilities: Blast Protection, Protection, Projectile Protection
What does the Fire Protection enchantment do?
Fire Protection is an armor enchantment that reduces damage from fire. It’s especially helpful to have this enchantment when exploring the Nether. Hypothetically, if all armor a player was wearing was enchanted with Fire Protection, the only way they’d burn is by standing in a fire or lava.
8 – Aqua Affinity
Primary Items: Helmet and turtle shell. Secondary Items: None Max Enchantment Level: 1 Incompatibilities: None
What does the Aqua Affinity enchantment do?
When mining underwater, blocks take five times as long to mine. With Aqua Affinity, players can increase their underwater mining speed. Match this enchantment with Depth Strider for boots, and you’ll be able to mine and move around quickly while underwater!
9 – Looting
“The real treasure was the rotten flesh we got on the way.” – No one ever
For anyone who has a mob farm in order to get more item drops, Looting is a perfect sword enchantment to have. The Looting enchantment causes mobs to drop more items and increases the chance of rare drops.
Keep in mind that there are a few restrictions to Looting:
Mobs with no drops are not affected.
Withers, iron golems, and snow golems are not affected.
Looting does not increase the amount of wool dropped by sheep or the sponge drop from an elder guardian.
Totems of undying dropped by evokers are not affected.
10 – Fortune
Primary Items: Pickaxe, shovel, axe, and hoe. Secondary Items: None Max Enchantment Level: 3 Incompatibilities: Silk Touch
What does the Fortune enchantment do?
The Fortune enchantment increases the number and/or chances of specific item drops. The best use case for the Fortune enchantment is with a pickaxe on ore blocks. For example, with Fortune II, a nether gold ore could drop up to 18 gold nuggets rather than the standard 2-6!
Traveling long distances in Minecraft can be tiresome (both in real life and the game). Thankfully, there are ways to move around faster through the Overworld! Whether you’re a skilled player or not, in the early game of Minecraft you usually don’t have elytra to fly around. But you can have horses! Whether you want to gather leather like
Introducing Howchoo, an enigmatic author whose unique pen name reflects their boundless curiosity and limitless creativity. Mysterious and multifaceted, Howchoo has emerged as a captivating storyteller, leaving readers mesmerized by the uncharted realms they craft with their words.
With an insatiable appetite for knowledge and a love for exploration, Howchoo’s writing transcends conventional genres, blurring the lines between fantasy, science fiction, and the surreal. Their narratives are a kaleidoscope of ideas, weaving together intricate plots, unforgettable characters, and thought-provoking themes that challenge the boundaries of imagination.
Enchanted Books are items used in Minecraft to improve tools and weapons. These are books that already have enchantments on them and can be added to items through an Anvil.
Usually, you can find Enchanted Books in chests hidden around the world, in locations like Dungeons, Mineshafts, Desert Temples, and Woodland Mansions. Ancient City and Stronghold chests are likely to have Enchanted Books, too. You can also get them by trading with Librarian Villagers or by making them yourself using Books and an Enchanting Table.
Whether you feel like your tools could use improvement or you feel ready to take your Minecraft world to the next level, enchantments can enhance gameplay and allow you to explore areas faster, gather more resources, and beat more enemies. Enchantments improve an item’s existing abilities or imbue them with new abilities and uses. When an item has been enchanted, it will glow, so you can differentiate it from your normal items.
You can imbue items with enchantments using an Enchanting Table or Enchanted Books. This guide quickly goes over how you can use Enchanted Books, but if you want to learn more about enchantments and enchanting items in Minecraft, the article below explores these topics in more detail:
If you have Enchanted Books on hand, you may wonder if there’s a way to enhance the enchantments already in them. Increasing an Enchanted Book’s level is sure to benefit you since higher-level enchantments naturally yield more rewards than lower-level ones.
A downside to this method is that it can be costly, requiring your experience points to increase the enchanted book’s level. You also need duplicate enchanted books, both with the enchantment you want at the same level. This sounds like a difficult requirement to get, and it can be, especially if you’re a beginner. However, you’re likely to find this useful if you’re someone who has already looted a lot of chests or has frequently used the Enchanting Table. Chances are, you have some Enchanted Books still waiting to be used.
If you ever end up with duplicate Enchanted Books, you can use them to level up identical enchantments. This is a great option if the Enchanted Books already have your desired enchantment, but not at the level you want it to be. You don’t need to get or make new Enchanted Books with only a chance of getting a better enchantment.
This guide will go through the steps to increase an enchanted book’s level, so you can get better enchantments!
1 – Gather supplies
First, you’ll need a few things before you can increase enchantment levels. Below is a list of blocks and tools you’ll need to gather:
Anvil
Duplicate Enchanted Books
Experience Points
How many books do I need?
To increase the level, make sure the books have the same enchantment and enchantment level. Otherwise, you won’t be able to combine them.
Below is a chart on how book combinations work to help you calculate just how many books you’ll need:
Book Input and Output
Level 1 + Level 1 = Level 2
Level 2 + Level 2 = Level 3
Level 3 + Level 3 = Level 4
Level 4 + Level 4 = Level 5
How many experience points do I need?
Keep in mind that combining enchanted books cost experience points.
Below is a chart that shows an example of enchantment cost based on the output level for the Efficiency enchantment:
Level Output
Enchantment Cost
Level 2
2
Level 3
4
Level 4
7
Level 5
12
2 – Use the Anvil
After you’ve placed down the anvil, right-click to bring up the anvil GUI. As you can see above, the Repair and Name menu is visible, and you can also see all the books in your inventory.
3 – Combine the Enchanted Books
Place a book in each of the first two slots. When you hover over the slot on the left, you’ll see that the output is a level higher version of the enchanted books inputted.
Once you click on the upgraded variation, your experience points are spent, and you can place the book in your inventory. You can now add the higher-level enchanted book to your items through the anvil!
The longer you play Minecraft, the more you realize that early-game tools just won’t cut it. Exploring the enchantment feature of Minecraft can be exciting, but also intimidating. Rather than worry about researching enchantments, below are the best enchantments in Minecraft! To learn how to enchant items, check out this guide! In this guide, you’ll see
Introducing Howchoo, an enigmatic author whose unique pen name reflects their boundless curiosity and limitless creativity. Mysterious and multifaceted, Howchoo has emerged as a captivating storyteller, leaving readers mesmerized by the uncharted realms they craft with their words.
With an insatiable appetite for knowledge and a love for exploration, Howchoo’s writing transcends conventional genres, blurring the lines between fantasy, science fiction, and the surreal. Their narratives are a kaleidoscope of ideas, weaving together intricate plots, unforgettable characters, and thought-provoking themes that challenge the boundaries of imagination.
Do you love your team so much that you need to block off your schedule during the game? This guide will show you step-by-step how to add your favorite team’s schedule to your Outlook Calendar.
1 – Open Outlook Calendar
Log in to your Microsoft Outlook account, and navigate to the Calendar app.
Many people choose to convert a Word file because it’s much easier to share it in Google Docs. To save a Word document as a Google Doc, it must first be converted via Google Drive. Word docs generally convert pretty well into Google Docs, so you shouldn’t have to make too many edits once it’s complete.
Introducing Howchoo, an enigmatic author whose unique pen name reflects their boundless curiosity and limitless creativity. Mysterious and multifaceted, Howchoo has emerged as a captivating storyteller, leaving readers mesmerized by the uncharted realms they craft with their words.
With an insatiable appetite for knowledge and a love for exploration, Howchoo’s writing transcends conventional genres, blurring the lines between fantasy, science fiction, and the surreal. Their narratives are a kaleidoscope of ideas, weaving together intricate plots, unforgettable characters, and thought-provoking themes that challenge the boundaries of imagination.
As with every update, Microsoft has changed Windows 11 to look different than its predecessors, and while the update looks modern and clean there are some interesting changes. Arguably the most jarring of all the changes is the one made to the Windows 11 Start Menu, which looks completely different.
Instead of a clean, easy-to-navigate series of sections, the Windows 11 Start Menu offers you a variety of “Pinned” apps and a list of “Recommended” items that vary from recent documents, to downloaded images, to recently added apps. Personally, I spent two full minutes looking for my Settings app before discovering it neatly wedged between the Calendar app I never use and Photos.
If you share this frustration with the unorganized new look of the Windows 11 Start Menu, fret not. While not completely customizable, there are a handful of things you can do to personalize the Windows 11 Start Menu and make it more functional for your every day use.
1 – Change Your Pinned Apps
Note: Nothing you do to the start menu page will impact your full list of apps. To see all of your apps, simply click the “All Apps” tab at the top right of the start menu.
You can modify what appears on your Windows 11 Start Menu by moving, pinning, and removing specific apps under this section.
Moving a Pinned App
You can simply click and drag any app on your Pinned list into the position of your choice. As you can see, I opted to have my settings app in the top right hand corner for easy access. Instead of dragging, you can also right-click on an app and select ‘Move to Top’ to have an app moved to the top of the pinned list.
Remove a Pinned App
Simply right-click an app and select ‘Unpin from Start’ to remove an app from the Start Menu.
Pinning an App
If you have an unpinned app that you want to pin, start by clicking ‘All Apps’ on the top right of the Start Menu. Then, find the app you’d like to pin and right-click, then select ‘Pin to Start.’ You’ll see the app on your pinned list when you go back to your Start Menu, and from there you can drag the app wherever you please.
2 – Change Recommended Files
For this step, you’ll need to navigate to Settings -> Personalization -> Start, and you can turn off or on several options including ‘show recently added apps.’
If you turn off all the options, the Recommended section will appear empty.
3 – Add Folders
Adding folders to the bottom of the Start Menu is another way to organize and personalize your Start Menu experience.
To do so, go to Settings -> Personalization -> Start -> Folders.
There, you’ll see a list of folders you can access from the Start Menu. Simply check any of the folders you want to ‘On’ and they’ll appear for easy access at the bottom of the Start Menu.
4 – Move the Start Button
You probably also noticed that the Windows 11 taskbar is centered at the bottom of your screen, a departure from the normal bottom-left corner. Check out our quick two-step guide on how to move the Windows 11 start button back to its rightful (or left-ful) place.
NEXT UP
How to Connect Your Child’s Messenger Kids account to a Classroom, Team, or Group
Facebook’s Messenger Kids is a free app that allows children to make video calls and send messages on smartphones and tablets, but with more control than just giving your child access to a phone. With Messenger Kids, parents can control their child’s online experience through a variety of functions that allow them to have a
Introducing Howchoo, an enigmatic author whose unique pen name reflects their boundless curiosity and limitless creativity. Mysterious and multifaceted, Howchoo has emerged as a captivating storyteller, leaving readers mesmerized by the uncharted realms they craft with their words.
With an insatiable appetite for knowledge and a love for exploration, Howchoo’s writing transcends conventional genres, blurring the lines between fantasy, science fiction, and the surreal. Their narratives are a kaleidoscope of ideas, weaving together intricate plots, unforgettable characters, and thought-provoking themes that challenge the boundaries of imagination.
Starting with MacOS Sierra and High Sierra, your Mac will no longer play a “pop” sound when you adjust your volume. If you prefer to have this sound when you adjust volume up and down (as I do), this guide will teach you how to reenable it.
1 – Open Sound System Preferences
Navigate to System Preferences > Sound.
2 – Navigate to Sound Effects
Select the Sound Effects tab.
3 – Enable volume control feedback sound
Check the box labeled Play feedback when volume is changed. Close System Preferences.
You’re all done!
NEXT UP
How to Always Show File Extensions in MacOS
Doing this saves you loads of time in the long run!
As a website designer, I work with a lot of files—and a lot of file types. Nothing’s worse than wasting time trying to fix a problem caused by an overseen missing file extension. Here are the three easy steps to always show file extensions in macOS. 1 – Open a Finder window At the bottom-left
Introducing Howchoo, an enigmatic author whose unique pen name reflects their boundless curiosity and limitless creativity. Mysterious and multifaceted, Howchoo has emerged as a captivating storyteller, leaving readers mesmerized by the uncharted realms they craft with their words.
With an insatiable appetite for knowledge and a love for exploration, Howchoo’s writing transcends conventional genres, blurring the lines between fantasy, science fiction, and the surreal. Their narratives are a kaleidoscope of ideas, weaving together intricate plots, unforgettable characters, and thought-provoking themes that challenge the boundaries of imagination.