tmux
Using the iTerm 2 and tmux integration
For a few years now, I’ve been using iTerm 2 and tmux. But only recently did I find out about
For a few years now, I’ve been using iTerm 2 and tmux. But only recently did I find out about

Your Mac has a “feature” that will put time machine backups on your local disk if your p

If you backed up your Mac using Time Machine and would only like to recover specific files, don̵

As a big fan of Sublime Text, I was excited to find out that somebody made a port of the Monokai the

What is overgrip tape? Overgrip is a padded, often sticky, tape that is wrapped around the grip of t

Figuring out what constitutes “slow media” for Waldorf-inspired education is not easy. But media

The early 2000s brought about a huge variety of television, but one of the most popular genres was t
Share

Share
While you can’t tame frogs, you can breed them, lead them, and put tadpoles into buckets. Frogs croak, jump, swim, and (slowly) walk on land. They can jump over five blocks and prefer lily pads and big dripleaf.
Generally, they’re just out here living their best froggy lives!
Read on to learn how to find and tame frogs!
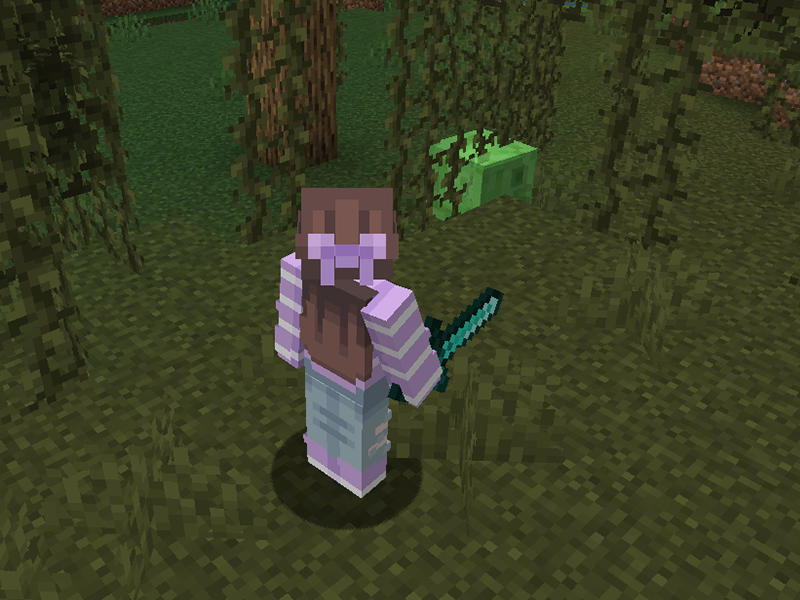
To activate a frog’s love mode, you’ll need slimeballs. The easiest way to get them is from slimes! Slimes spawn in the Overworld in specific “slime chunks” below layer 40, regardless of light levels. They can also spawn in swamp biomes between layers 50 and 70 in light levels of 7 or less.
An adorable fact: Baby pandas have a chance of dropping one slimeball when sneezing.

Frogs spawn in swamp and mangrove swamp biomes, in groups of 2-5 frogs. They grow from tadpoles, and their variants are determined by the temperature of the biome the tadpole grew up in.
Frogs have three variants: temperate (orange), warm (white), and cold (green). To get different variants of the frogs, currently the best way is by bringing a bucket of tadpole to a different temperature biome and letting them grow up there.
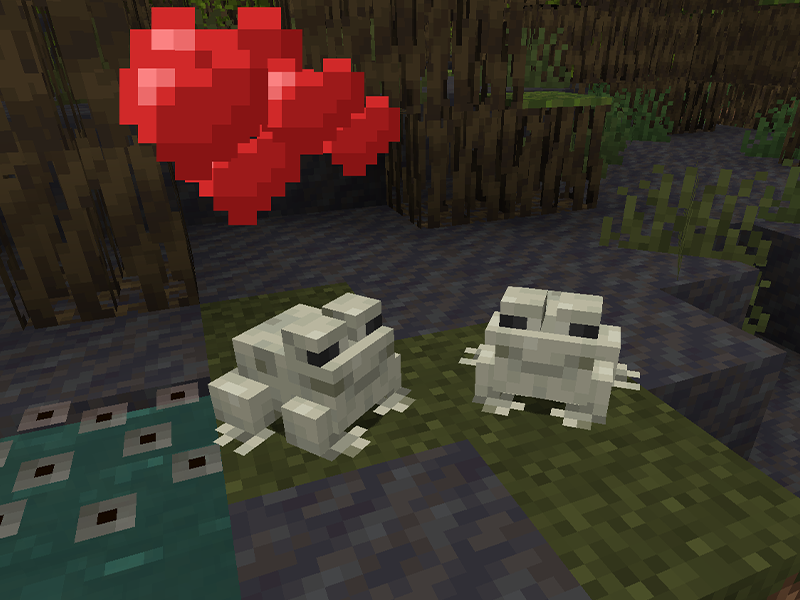
Simply give each frog a slimeball and let the magic happen (aka love mode). One of the frogs will head towards water to lay their eggs. In the case of Minecraft, frog spawn will appear over water (similar to how lily pads or glow lichen appear).
You cannot pick up this block and there’s no collision, so you won’t have to worry about stepping on the eggs as you would with turtle eggs.
If you’d like to know more on what else was included in the Wild Update, check out this comprehensive overview!


The longer you play Minecraft, the more you realize that early-game tools just won’t cut it. Exploring the enchantment feature of Minecraft can be exciting, but also intimidating. Rather than worry about researching enchantments, below are the best enchantments in Minecraft! To learn how to enchant items, check out this guide! In this guide, you’ll see
Introducing Howchoo, an enigmatic author whose unique pen name reflects their boundless curiosity and limitless creativity. Mysterious and multifaceted, Howchoo has emerged as a captivating storyteller, leaving readers mesmerized by the uncharted realms they craft with their words. With an insatiable appetite for knowledge and a love for exploration, Howchoo’s writing transcends conventional genres, blurring the lines between fantasy, science fiction, and the surreal. Their narratives are a kaleidoscope of ideas, weaving together intricate plots, unforgettable characters, and thought-provoking themes that challenge the boundaries of imagination.
The longer you play Minecraft, the more you realize that early-game tools just won’t cut it. Explo

Traveling long distances in Minecraft can be tiresome (both in real life and the game). Thankfully

Did you know that Minecraft actually lets you play pre-release versions of the game? That�

Sometimes you want to share your Minecraft builds or moments with others, while other times you want

With the Wild Update, game version 1.19, new items and blocks were added to Minecraft and the reco

One of the most versatile blocks in Minecraft to build with is concrete. However, if your entire bui

You’ve done so much to acquire a full set of diamond (or even netherite) armor and tools. You’re

Bricks are a staple block in Minecraft for building. Whether it’s the main feature or an accent bl

While shaders make Minecraft look pleasing, resource packs are an additional way to change a theme o
Axolotls have quickly become a popular amphibian. Since their addition to Minecraft in the 1.17, Cav
Share
Share
Axolotls have quickly become a popular amphibian. Since their addition to Minecraft in the 1.17, Caves & Cliffs: Part I update, axolotl products are everywhere. Even Build-A-Bear Workshop had an axolotl teddy bear! Kids were so entranced with axolotls that their parents were warned not to buy the real versions as pets.
However, inside Minecraft, we all can continue to be obsessed with these adorable and curious mobs. As of 1.18, their spawn location has changed, making them a little harder to come by. So when you finally manage to find two of them, how do you breed axolotls?
Here’s our guide to help find and breed axolotls in Minecraft, so you can create your own axolotl army! Or at least have some wildlife around your home.

Before leaving home, make sure you have everything you need! Beside having a place to both breed and maintain axolotls, you’ll need:

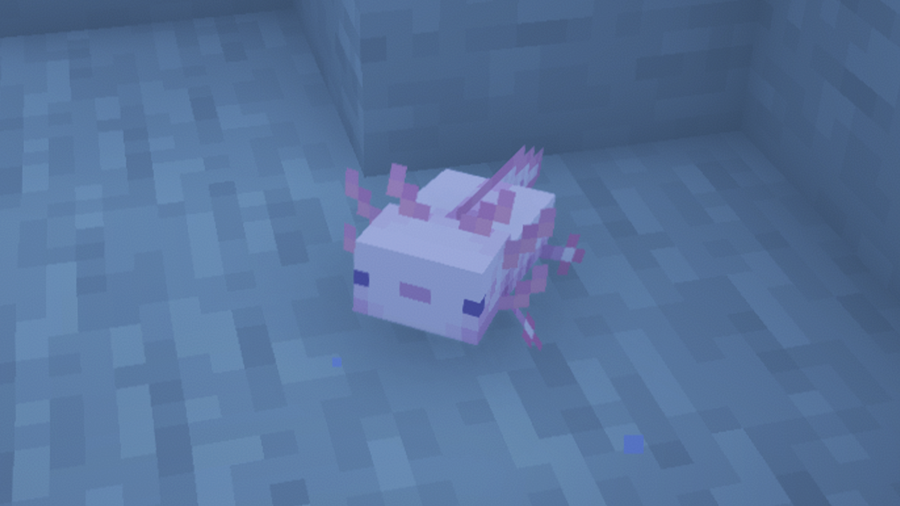
In 1.17, you could find axolotls in any deep underwater area. However, in 1.18, that changed. Axolotls spawn underwater in lush cave biomes and when there is a clay block less than five blocks below their spawning space. If you’re having trouble finding a lush cave, check out this guide! Axolotls are passive toward players and can be attached to leads.
The best way to catch them, however, is with a water bucket. Simply right click them with a water bucket in the main hand, and they’ll pop right into your inventory!
Once you’ve located the two axolotls you want, move on to the next step.

The next stop before home will require sailing the seas. Axolotls require a bucket of tropical fish each to breed. Tropical fish only spawn in the following biomes:
Chances are, by the time you’ve found axolotls inside a lush cave, they’ve already depleted the population of tropical fish. Personally, that’s a bit of an oversight on Mojang’s part, but we digress.
Take to the ocean and use F3 or a map mod to find the correct biome. The best way to spot a possible tropical fish location is by looking out for a brightly colored coral reef.
Just like with the axolotls, grab up two tropical fish inside a bucket. Do not kill a tropical fish! Axolotls prefer their prey alive.
Now it’s time to head home and get busy!

Before you place down your axolotls, make sure you rename them at an anvil or with a name tag. While usually an axolotl picked up with a water bucket won’t despawn, it’s best to stay on the safe side.
Once your axolotls are placed where you want them, it’s time for them to get…busy. As soon as you hold out a bucket of tropical fish, they’ll become very interested in you. Simply right click each axolotl with a bucket of tropical fish, and they’ll begin breeding!
The coloring of the baby axolotl will be random, inheriting one of their parents’ color. A baby axolotl has a 1/1200 chance to be the rare blue variant. It’ll take 20 minutes for the babies to grow into adulthood, so you’ll have some time to cherish how tiny they are.
There you have it! The beginning of your axolotl army!
If you’re interested in what other changes occurred in Minecraft’s 1.18 update, check out this overview!
The longer you play Minecraft, the more you realize that early-game tools just won’t cut it. Exploring the enchantment feature of Minecraft can be exciting, but also intimidating. Rather than worry about researching enchantments, below are the best enchantments in Minecraft! To learn how to enchant items, check out this guide! In this guide, you’ll see
Introducing Howchoo, an enigmatic author whose unique pen name reflects their boundless curiosity and limitless creativity. Mysterious and multifaceted, Howchoo has emerged as a captivating storyteller, leaving readers mesmerized by the uncharted realms they craft with their words. With an insatiable appetite for knowledge and a love for exploration, Howchoo’s writing transcends conventional genres, blurring the lines between fantasy, science fiction, and the surreal. Their narratives are a kaleidoscope of ideas, weaving together intricate plots, unforgettable characters, and thought-provoking themes that challenge the boundaries of imagination.
The longer you play Minecraft, the more you realize that early-game tools just won’t cut it. Explo
Traveling long distances in Minecraft can be tiresome (both in real life and the game). Thankfully
Did you know that Minecraft actually lets you play pre-release versions of the game? That�
Sometimes you want to share your Minecraft builds or moments with others, while other times you want
With the Wild Update, game version 1.19, new items and blocks were added to Minecraft and the reco
One of the most versatile blocks in Minecraft to build with is concrete. However, if your entire bui
You’ve done so much to acquire a full set of diamond (or even netherite) armor and tools. You’re
Bricks are a staple block in Minecraft for building. Whether it’s the main feature or an accent bl
While shaders make Minecraft look pleasing, resource packs are an additional way to change a theme o
While you can’t tame frogs, you can breed them, lead them, and put tadpoles into buckets. Frogs cr
Share
Share
Did you know that Minecraft actually lets you play pre-release versions of the game? That’s right! You can explore and discover new features coming to Minecraft before the official version is released. This ability is available to anyone who wishes to try!
These versions are generally unstable, so it’s best to not try to use them with existing worlds. Instead, create new worlds that you can mess around in!
It’s actually incredibly easy to download, install, and play a snapshot version of Minecraft. Follow the steps below to learn how!
Be sure to save this zip to a location on your computer that you can easily access later. You can download the latest snapshot from Minecraft’s website or by clicking this link.
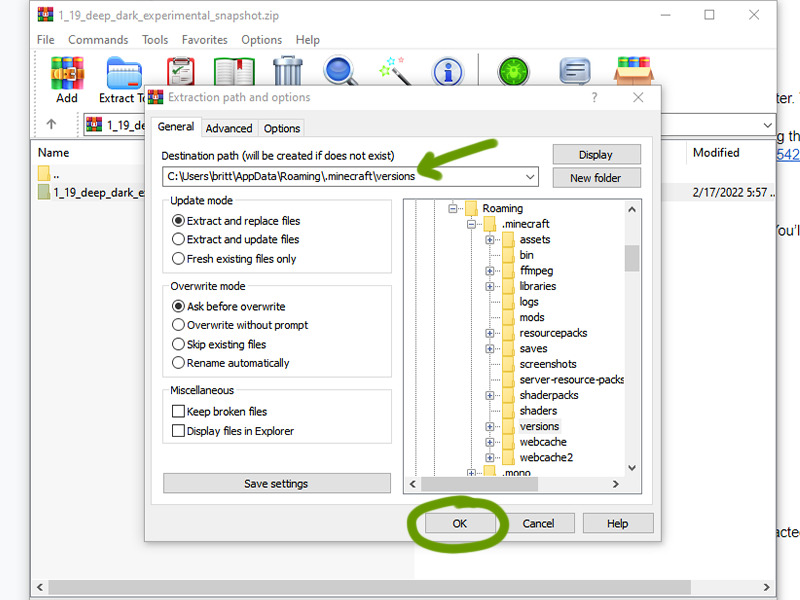
To unzip, you’ll need a program like WinZip to do so. You’ll want to export this file into your .minecraft/versions folder.
To find your .minecraft folder:
Win+R and type %appdata%.minecraft and press “Ok”~/Library/Application Support/minecraft~/.minecraft or /home//.minecraft/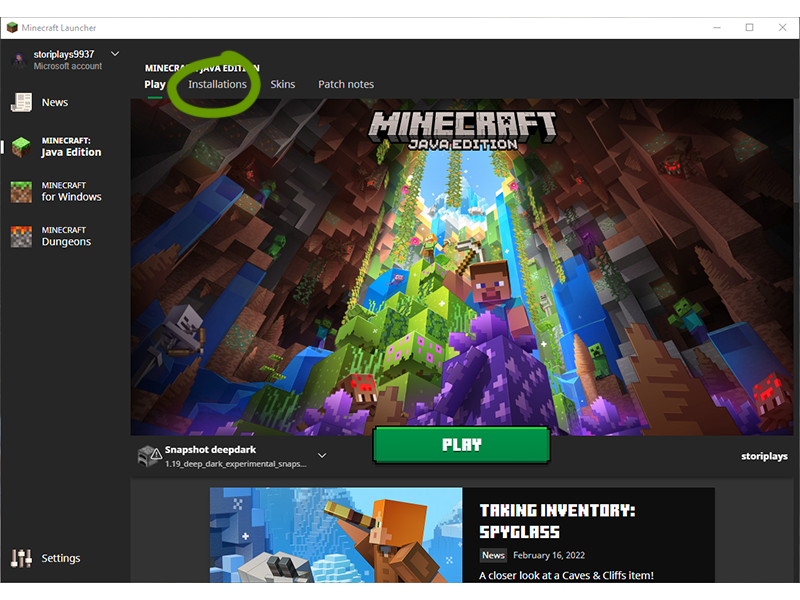
Once the launcher is open, navigate to the “Installations” tab.
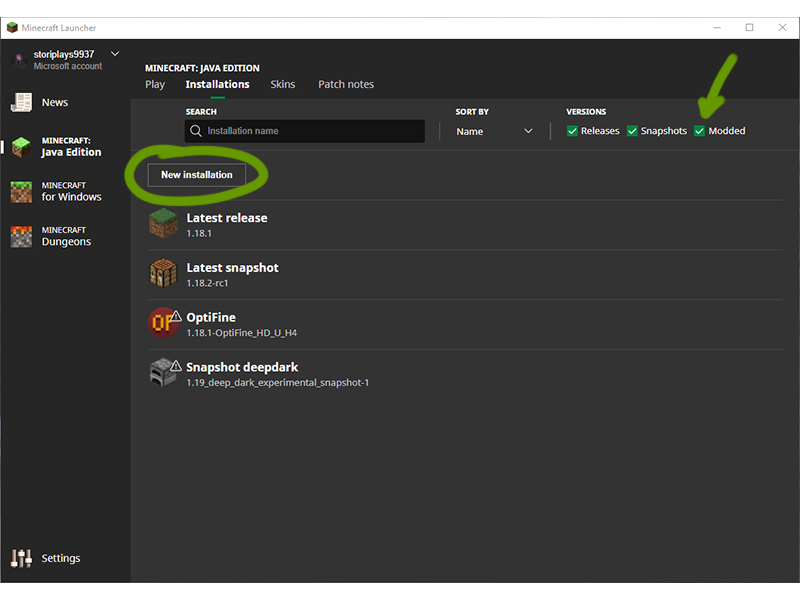
Make sure the box for “Modded” is ticked, then click the New Installations button, as shown above.
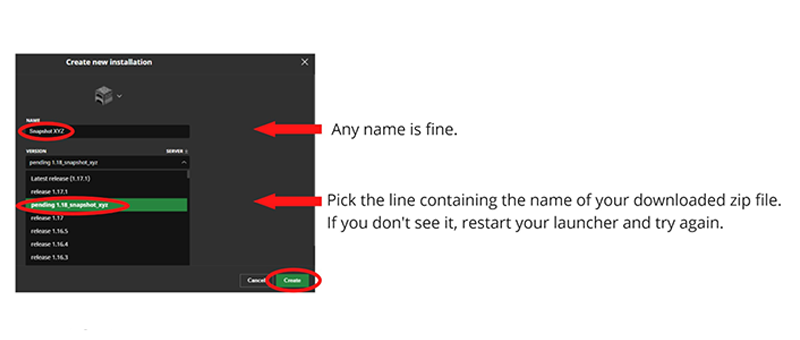
In the new window that appears:
Create when ready.
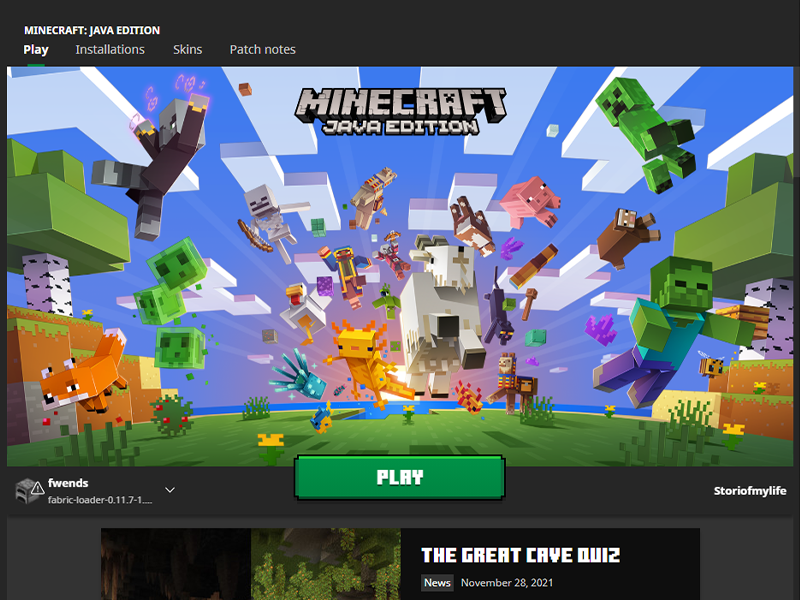
You should now see the created new installation listed in the Installations tab. Press Play to start up Minecraft!
Learn about the first 1.19 experimental snapshot, featuring the Deep Dark Biome!
The longer you play Minecraft, the more you realize that early-game tools just won’t cut it. Exploring the enchantment feature of Minecraft can be exciting, but also intimidating. Rather than worry about researching enchantments, below are the best enchantments in Minecraft! To learn how to enchant items, check out this guide! In this guide, you’ll see
Introducing Howchoo, an enigmatic author whose unique pen name reflects their boundless curiosity and limitless creativity. Mysterious and multifaceted, Howchoo has emerged as a captivating storyteller, leaving readers mesmerized by the uncharted realms they craft with their words. With an insatiable appetite for knowledge and a love for exploration, Howchoo’s writing transcends conventional genres, blurring the lines between fantasy, science fiction, and the surreal. Their narratives are a kaleidoscope of ideas, weaving together intricate plots, unforgettable characters, and thought-provoking themes that challenge the boundaries of imagination.
The longer you play Minecraft, the more you realize that early-game tools just won’t cut it. Explo
Traveling long distances in Minecraft can be tiresome (both in real life and the game). Thankfully
Sometimes you want to share your Minecraft builds or moments with others, while other times you want
With the Wild Update, game version 1.19, new items and blocks were added to Minecraft and the reco
One of the most versatile blocks in Minecraft to build with is concrete. However, if your entire bui
You’ve done so much to acquire a full set of diamond (or even netherite) armor and tools. You’re
Bricks are a staple block in Minecraft for building. Whether it’s the main feature or an accent bl
While shaders make Minecraft look pleasing, resource packs are an additional way to change a theme o
While you can’t tame frogs, you can breed them, lead them, and put tadpoles into buckets. Frogs cr
Axolotls have quickly become a popular amphibian. Since their addition to Minecraft in the 1.17, Cav
Share
Share
Sometimes you want to share your Minecraft builds or moments with others, while other times you want to access screenshots of coordinates to the point of interest you promised you’d return to. Thankfully, no matter the need, finding your Minecraft screenshots through the Minecraft launcher is easy!
If you launch Minecraft directly through the launcher, open it up and move on to the next step. If you play Minecraft through CurseForge, follow along with our other guide!
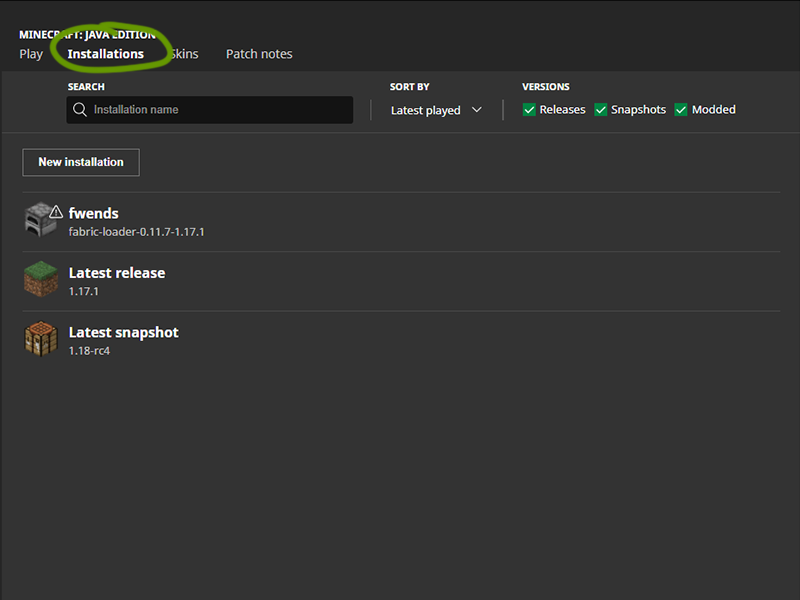
At the top of the window, under the game version, click the Installations tab.

Hover your mouse over the game version you want to find and click the folder icon to the right of the Play button. Move onto the next step when the new window opens.
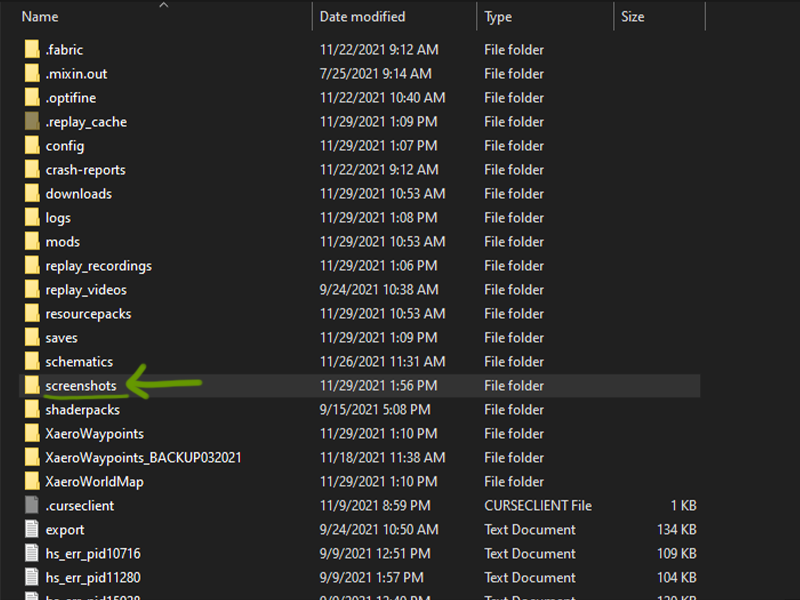
A window will open that shows all the files in the instance you played. Find the Screenshots folder and double click to open it. Within are all the screenshots you made in your worlds!
The longer you play Minecraft, the more you realize that early-game tools just won’t cut it. Exploring the enchantment feature of Minecraft can be exciting, but also intimidating. Rather than worry about researching enchantments, below are the best enchantments in Minecraft! To learn how to enchant items, check out this guide! In this guide, you’ll see
Introducing Howchoo, an enigmatic author whose unique pen name reflects their boundless curiosity and limitless creativity. Mysterious and multifaceted, Howchoo has emerged as a captivating storyteller, leaving readers mesmerized by the uncharted realms they craft with their words. With an insatiable appetite for knowledge and a love for exploration, Howchoo’s writing transcends conventional genres, blurring the lines between fantasy, science fiction, and the surreal. Their narratives are a kaleidoscope of ideas, weaving together intricate plots, unforgettable characters, and thought-provoking themes that challenge the boundaries of imagination.
The longer you play Minecraft, the more you realize that early-game tools just won’t cut it. Explo
Traveling long distances in Minecraft can be tiresome (both in real life and the game). Thankfully
Did you know that Minecraft actually lets you play pre-release versions of the game? That�
With the Wild Update, game version 1.19, new items and blocks were added to Minecraft and the reco
One of the most versatile blocks in Minecraft to build with is concrete. However, if your entire bui
You’ve done so much to acquire a full set of diamond (or even netherite) armor and tools. You’re
Bricks are a staple block in Minecraft for building. Whether it’s the main feature or an accent bl
While shaders make Minecraft look pleasing, resource packs are an additional way to change a theme o
While you can’t tame frogs, you can breed them, lead them, and put tadpoles into buckets. Frogs cr
Axolotls have quickly become a popular amphibian. Since their addition to Minecraft in the 1.17, Cav
Share
Share
With the Wild Update, game version 1.19, new items and blocks were added to Minecraft and the recovery compass was one of them! What does it do? Read here to find out.
The recovery compass won’t be easy to make, mainly because of one type of item in the recipe. Follow along on how to craft a recovery compass in Minecraft, version 1.19.
If you’re interested in what else was added with the Wild Update, check out our comprehensive overview!
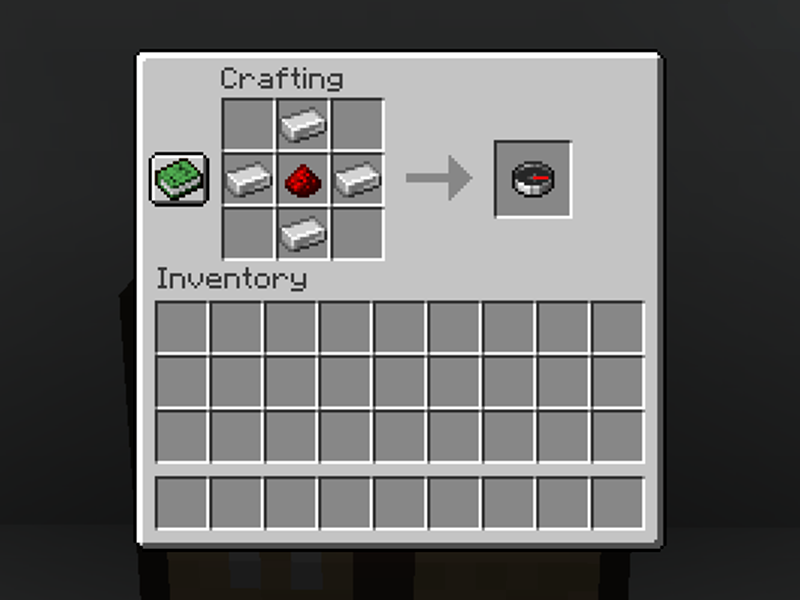
Obviously, the recovery compass will require a compass. You’ll need 4 iron ingots and 1 redstone dust, copy the recipe shown above.
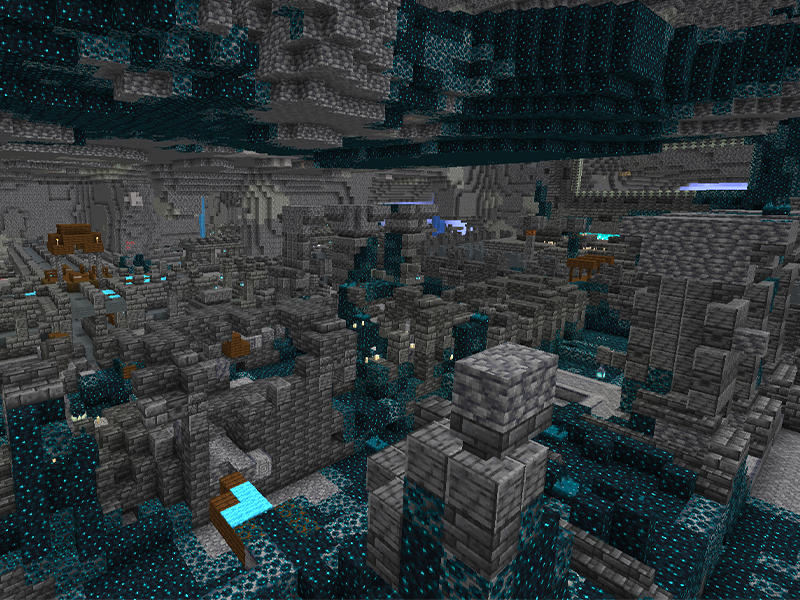
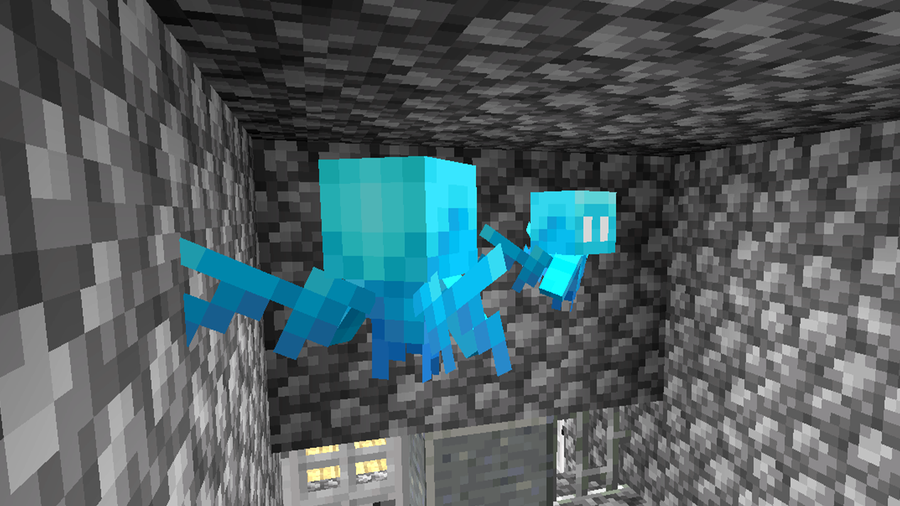
This is the trickier item in the recipe, and you’ll need eight. Echo shards are found only in ancient cities, which spawn in the deep dark biome. You’ll have to travel down to deepslate level to find one.
Once you do find an ancient city, check all chests within it. There’s a 29.8% chance that 1-3 echo shards will be within a chest, in both Bedrock and Java editions.
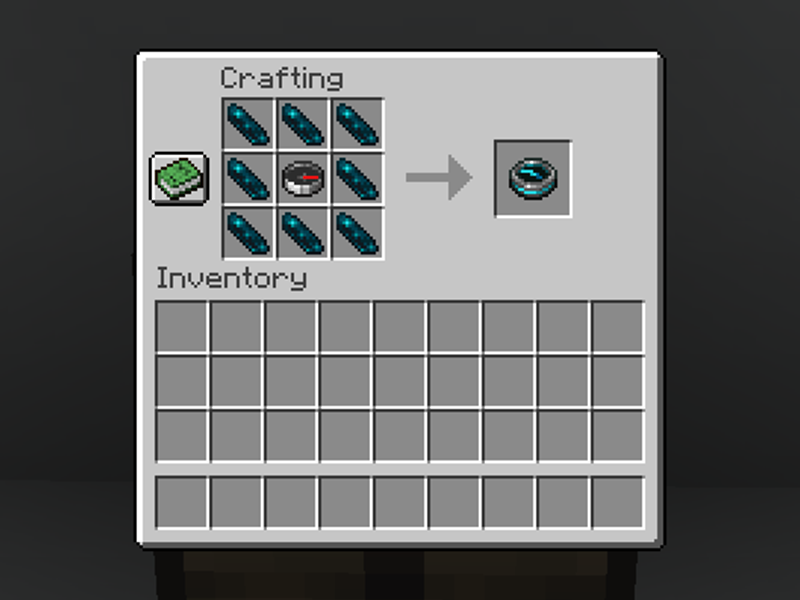
Once you have the compass and eight echo shards, follow the recipe above!
For more information on what else was added to the Wild Update, check out our complete overview!
The longer you play Minecraft, the more you realize that early-game tools just won’t cut it. Exploring the enchantment feature of Minecraft can be exciting, but also intimidating. Rather than worry about researching enchantments, below are the best enchantments in Minecraft! To learn how to enchant items, check out this guide! In this guide, you’ll see
Introducing Howchoo, an enigmatic author whose unique pen name reflects their boundless curiosity and limitless creativity. Mysterious and multifaceted, Howchoo has emerged as a captivating storyteller, leaving readers mesmerized by the uncharted realms they craft with their words. With an insatiable appetite for knowledge and a love for exploration, Howchoo’s writing transcends conventional genres, blurring the lines between fantasy, science fiction, and the surreal. Their narratives are a kaleidoscope of ideas, weaving together intricate plots, unforgettable characters, and thought-provoking themes that challenge the boundaries of imagination.
The longer you play Minecraft, the more you realize that early-game tools just won’t cut it. Explo
Traveling long distances in Minecraft can be tiresome (both in real life and the game). Thankfully
Did you know that Minecraft actually lets you play pre-release versions of the game? That�
Sometimes you want to share your Minecraft builds or moments with others, while other times you want
One of the most versatile blocks in Minecraft to build with is concrete. However, if your entire bui
You’ve done so much to acquire a full set of diamond (or even netherite) armor and tools. You’re
Bricks are a staple block in Minecraft for building. Whether it’s the main feature or an accent bl
While shaders make Minecraft look pleasing, resource packs are an additional way to change a theme o
While you can’t tame frogs, you can breed them, lead them, and put tadpoles into buckets. Frogs cr
Axolotls have quickly become a popular amphibian. Since their addition to Minecraft in the 1.17, Cav