Home Interests Python

How to Run Python in Terminal

run python in terminal
You can run any Python script in a command-line interface.
howchoo   (467)
August 18, 2023
6 minutes

Share

Interests
Posted in these interests:

python • 18 guides

Python and associated Python scripts can be run using command-line interfaces. Windows users can use command prompt while Mac and Linux users can make use of Terminal. We’ll cover how to run a Python script, open a Python shell, and how to run a Python one-liner.

1 – Run a Python script in Windows
run a python script in windows

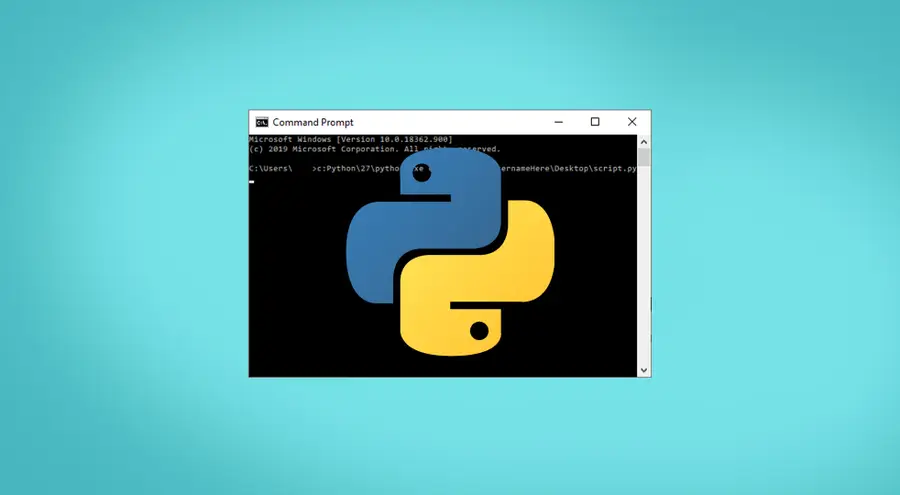
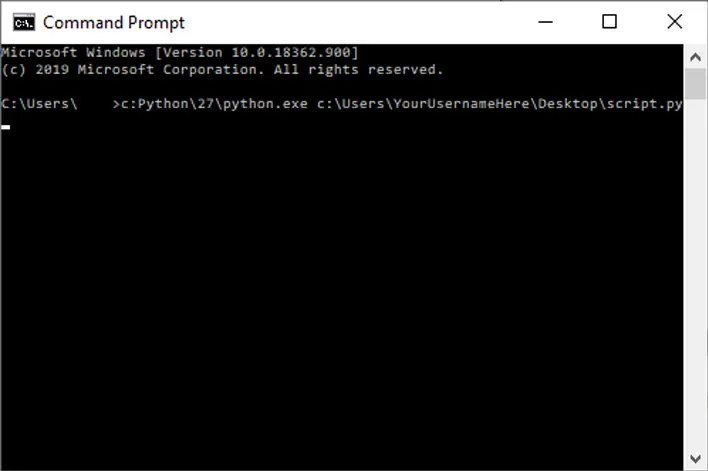
Open Command Prompt. An easy way to reach Command Prompt is by opening the Start Menu and searching for cmd. Select Command Prompt from the list of applications.

How to run a Python script

By default, you will need to point Command Prompt to the Python installation location. Here’s an example of what a command would look like when executing a Python script.

C:Python27python.exe C:UsersYourUsernameHereDesktopscript.py

If you don’t want to type the full Python installation path, you can add an exception to your PATH environment variable for python.exe.

Using the Python shell

From the Command Prompt window, type python or python3 and press enter.

Python one-liners

This will as long as Python has been added to your PATH environment variable. Here’s an example of a one-liner you can run from command prompt.

python -c "print('hello world')"

2 – Run a Python Script on a Mac or Linux

Mac users can run Python scripts using Terminal. Launch Terminal to begin.

There are two common ways to run a Python script from the command line. You can call the python program directly, and pass the name of the script to execute. Or you can make the script executable, and call it directly.

Run a script using python

Running a script using the python program is easy, and it’s probably the method most people are familiar with. Simply call python and pass the name of your script, like this:

python myscript.py

# or 

python3 myscript.py

Making a Python script executable

If your Python script includes a “shebang” (#!/usr/bin/env python or #!/usr/bin/env python3). You can make your script executable, like this:

chmod +x myscript.py

and execute it like this:

./myscript.py

Using the Python shell

You can open a Python shell simply by typing python or python3 into a Terminal window. Then you can run Python commands directly in the shell.

Python one-liners

You can also execute Python directly on the cli using the -c option. Example:

python -c "print('hello world')"
NEXT UP

Class Vs. Instance Variables in Python 3

howchoo
howchoo   (467)
November 22, 2023

When learning object oriented programming in Python, there can be a few gotchas when it comes to distinguishing between class and instance variables. In this guide I’ll explain the difference between class and instance variables and provide examples demonstrating various use cases. 1 – Class vs. instance variables First, a quick review if you’re new

Continue Reading

howchoo

 467 guides

Introducing Howchoo, an enigmatic author whose unique pen name reflects their boundless curiosity and limitless creativity. Mysterious and multifaceted, Howchoo has emerged as a captivating storyteller, leaving readers mesmerized by the uncharted realms they craft with their words. With an insatiable appetite for knowledge and a love for exploration, Howchoo’s writing transcends conventional genres, blurring the lines between fantasy, science fiction, and the surreal. Their narratives are a kaleidoscope of ideas, weaving together intricate plots, unforgettable characters, and thought-provoking themes that challenge the boundaries of imagination.

Home Interests Subaru Crosstrek

How to Disable the Lock/Unlock Sound on Your Subaru XV Crosstrek and Impreza

howchoo   (467)
August 18, 2023
5 minutes

Share

Interests
Posted in these interests:
autos • 4 guides
subaru • 3 guides
crosstrek • 3 guides

The audible chirp when my XV Crosstrek is locked or unlocked is quite annoying — worse is when someone hasn’t closed the door completely yet and it beeps 5 times. Here’s a simple (and completely reversible) way to disable your Crosstrek’s lock/unlock sound. This guide also works for other Subarus (including the Outback) of the model year 2013+.

Note: You can still make your car “chirp” (though it uses the horn) by pressing the button on your remote three times. This is handy if you want to locate your car in a parking lot, for example.

1 – Sit in the driver’s seat

Keep the key out of the ignition and make sure all doors are closed.

2 – Hold the unlock button

On the driver’s side door, hold down the unlock button.

3 – Insert and remove the key from the ignition at least 6 times

Do this while continuing to hold the unlock button.

🛈 This must be done inside of a 10 second window from when you began holding the unlock key.

4 – Open and close the driver’s door

Do this while continuing to hold the unlock button.

🛈 This must be done inside of a 10 second window from when you inserted and removed the key 6+ times.

5 – Get confirmation

After you close your door, your hazard lights on the dashboard will flash three times if this process was completely successfully. If you did not see this confirmation, repeat this process again.

🛈 There have been reports from numerous Subaru XV forums that it can take multiple times to get this to work.

6 – Reenabling the audible lock/unlock chirp

To turn the lock/unlock beep back on, simply repeat this process again to reverse the setting.

You’re all done! Next, learn how to replace your XV Crosstrek’s in-cabin air filter!

How to Replace the Subaru XV Crosstrek Cabin Air Filter (2013+)
Change your Crosstrek’s cabin air filter in 5 minutes for less than $15.

🛈 More information on this process can be found in your owner’s manual.
NEXT UP

Build Your Own Raspberry Pi Car Computer, or “Carputer”, with AutoPi

Bring your car into the future!
howchoo   (467)
September 29, 2023

Have you ever wanted to add an entertainment system to your car, only to find that most units are expensive, come with a lackluster feature set, and feature a terrible interface? Well, now you can build your own Raspberry Pi-powered car computer with AutoPi! Monitor your car’s vitals, watch movies, play retro games wiith RetroPie, use open

Continue Reading

howchoo

 467 guides

Introducing Howchoo, an enigmatic author whose unique pen name reflects their boundless curiosity and limitless creativity. Mysterious and multifaceted, Howchoo has emerged as a captivating storyteller, leaving readers mesmerized by the uncharted realms they craft with their words. With an insatiable appetite for knowledge and a love for exploration, Howchoo’s writing transcends conventional genres, blurring the lines between fantasy, science fiction, and the surreal. Their narratives are a kaleidoscope of ideas, weaving together intricate plots, unforgettable characters, and thought-provoking themes that challenge the boundaries of imagination.

Home Interests CenturyLink

How to Log in to a CenturyLink Router

howchoo
howchoo   (467)
August 18, 2023
4 minutes

Share

You’ll Need 2

What you’ll need
Interests
Series
Howchoo is reader-supported. As an Amazon Associate, we may earn a small affiliate commission at no cost to you when you buy through our links.
Posted in these interests:
centurylink • 2 guides
internet • 36 guides
router • 32 guides

Need to log into your CenturyLink router? We’ve got you covered. This guide will walk you through accessing your CenturyLink router login. Once inside, you’ll have access to a myriad of network tools to secure your network and more. I’ll also touch on how to change your CenturyLink administrator password to keep your router safe.

1 – Connect to a network

Connect to your Century Link network. You can use WiFi or an Ethernet cable to connect.

Open a browser window and visit the CenturyLink router login address:

http://192.168.0.1

3 – Enter your username and password

You should see a CenturyLink login screen. The admin username and password are located on a sticker found on the modem.

You can visit our guide for more information about how to log into a router.

To change the password choose Advanced Setup. On the left hand menu, click Administrator Password. Enter the new password, confirm it, and save to finish.

5 – Speed up your WiFi connection

Now that your router is secure, it’s time to get your network into tip-top shape! Why not check out our guide on how to optimize WiFi for speed?

Make Wi-Fi Faster: How to Speed Up Your Wi-Fi Connection
Speed up your Internet connection in just a few minutes.

NEXT UP

How to Change Your Frontier WiFi Password

howchoo
howchoo   (467)
November 25, 2023

There are a few reasons you might want to update or reset your WiFi password: making your network more secure, and making your password easier to remember and type. Improved network security You can add an extra layer of security to your network by changing the WiFi password. As long as your new password is

Continue Reading

howchoo

 467 guides

Introducing Howchoo, an enigmatic author whose unique pen name reflects their boundless curiosity and limitless creativity. Mysterious and multifaceted, Howchoo has emerged as a captivating storyteller, leaving readers mesmerized by the uncharted realms they craft with their words. With an insatiable appetite for knowledge and a love for exploration, Howchoo’s writing transcends conventional genres, blurring the lines between fantasy, science fiction, and the surreal. Their narratives are a kaleidoscope of ideas, weaving together intricate plots, unforgettable characters, and thought-provoking themes that challenge the boundaries of imagination.

Home Interests Raspberry Pi

How to Set the Timezone on Your Raspberry Pi

howchoo
howchoo   (467)
August 18, 2023
2 minutes

Share

You’ll Need 1

What you’ll need
Interests
Howchoo is reader-supported. As an Amazon Associate, we may earn a small affiliate commission at no cost to you when you buy through our links.
Posted in these interests:
pi • 92 guides

At some point in your Raspberry Pi hacking career, you’ll need to know what time it is…in your own timezone. This guide will show you how to set the timezone in your Pi.

1 – Open the Raspberry Pi Software Configuration Tool

Connect to your Pi to get to the command line. Then, open the Raspberry Pi configuration tool, better known as raspi-config, with the following command:

How to Connect to a Raspberry Pi Remotely via SSH
The preferred (and most common) method of connecting to your Pi to run commands.

sudo raspi-config

2 – Open “Localisation Options”

With Localisation Options open you’ll be able to choose Change Timezone and select your local timezone.

3 – Confirm the changes were successful

From the command line, you can simply type date and confirm the date is displayed in your desired timezone.

pi@raspberrypi:~ $ date
Wed 28 Nov 11:10:33 PST 2018
NEXT UP

How to Run a Minecraft Server on the Raspberry Pi

A whole world trapped inside your Pi.
howchoo   (467)
December 7, 2023

There are several ways to go about running a Minecraft server on the Raspberry Pi. In this guide, I’ll cover how to install Nukkit—a cross-platform Minecraft server that’s super easy to set up on the Raspberry Pi. This server should work with PCs, consoles, and tablets running Minecraft 1.14. I’ll be using a Raspberry Pi

Continue Reading

howchoo

 467 guides

Introducing Howchoo, an enigmatic author whose unique pen name reflects their boundless curiosity and limitless creativity. Mysterious and multifaceted, Howchoo has emerged as a captivating storyteller, leaving readers mesmerized by the uncharted realms they craft with their words. With an insatiable appetite for knowledge and a love for exploration, Howchoo’s writing transcends conventional genres, blurring the lines between fantasy, science fiction, and the surreal. Their narratives are a kaleidoscope of ideas, weaving together intricate plots, unforgettable characters, and thought-provoking themes that challenge the boundaries of imagination.

Home Interests ASUS

How to Reset an ASUS Router or Modem

howchoo
howchoo   (467)
August 18, 2023
5 minutes

Share

Interests
Series
Posted in these interests:
asus • 3 guides
internet • 36 guides
router • 32 guides

If you need to reset your ASUS router or modem, you’ve got a couple of options. While most devices rely on a factory reset button, ASUS provides an addition web-based option. You can factory reset your router from the comfort of your desk chair!

I’ll cover both methods, as the factory reset button can be an excellent failsafe if the web portal isn’t working as expected.

Note: Factory resetting your device will wipe out existing network settings. You will need to reconfigure all of your settings after the reset—this includes things like your WiFi network name and password.

1 – Reset ASUS device using a browser

ASUS routers and modems can be reset to factory default settings using a web browser. You will need a device connected to the ASUS network. A computer or tablet will work fine.

  1. Open a web browser of your choice (Chrome, Firefox, etc.)
  2. Navigate to http://router.asus.com or use the IP address of your router in the address bar. The default IP address for ASUS devices is 192.168.1.1.
  3. Log into your ASUS device. For help with this step, visit our guide on how to log in to an ASUS router
  4. Click Administration under the Advanced Settings panel.
  5. Go to the Restore/Save/Upload Setting tab.
  6. Choose Restore next to Factory default.
  7. Clicking OK will confirm the changes.

2 – Reset ASUS device using the reset button

You can reset your ASUS router or modem with the factory reset button.

  1. Locate the button on the back of your ASUS device. If you’re not sure which button to use, search online for a diagram of your ASUS device model. The official ASUS support page is a great place to start.
  2. While the router/modem is powered on, press and hold the Reset button for at least 5 seconds.
  3. When the LED starts to flash, let go of the button. The factory reset has been initiated.
NEXT UP

How to Change Your Frontier WiFi Password

howchoo
howchoo   (467)
November 25, 2023

There are a few reasons you might want to update or reset your WiFi password: making your network more secure, and making your password easier to remember and type. Improved network security You can add an extra layer of security to your network by changing the WiFi password. As long as your new password is

Continue Reading

howchoo

 467 guides

Introducing Howchoo, an enigmatic author whose unique pen name reflects their boundless curiosity and limitless creativity. Mysterious and multifaceted, Howchoo has emerged as a captivating storyteller, leaving readers mesmerized by the uncharted realms they craft with their words. With an insatiable appetite for knowledge and a love for exploration, Howchoo’s writing transcends conventional genres, blurring the lines between fantasy, science fiction, and the surreal. Their narratives are a kaleidoscope of ideas, weaving together intricate plots, unforgettable characters, and thought-provoking themes that challenge the boundaries of imagination.

Home Interests iPhone

Check AT&T Upgrade Eligibility Via Text

howchoo   (467)
August 18, 2023
2 minutes

Share

Interests
Posted in these interests:
att • 3 guides
cellphones • 1 guides
iphone • 9 guides
wireless • 6 guides

I’ve been eying a coworker’s Galaxy Note 3 as a replacement for my aging iPhone 4s. However, I couldn’t justify spending $700 so I wanted to check my AT&T upgrade eligibility. I found out you can do this without logging into your AT&T account or talking to an account rep.

You can check other things too, like checking your AT&T data usage via text and checking your AT&T bill amount and due date via text.

1 – Dial *639# and press the Call button

A confirmation message will appear.

2 – Check your text messages

After a few seconds, ATT will send you a text containing your upgrade eligibility.

🛈 I guess I’ll be waiting a while to upgrade! 😉
NEXT UP

How to Enable Verizon Call Forwarding

Direct your calls elsewhere.
howchoo   (467)
December 1, 2023

Call forwarding is the process of directing phone calls from one number to another. Verizon allows its customers to enable call forwarding at no additional charge. Your typical call rates will still apply. This process works for all Verizon customers regardless of your carrier—including Samsung, Apple, LG, Lenovo, and more. Note: International numbers can not

Continue Reading

howchoo

 467 guides

Introducing Howchoo, an enigmatic author whose unique pen name reflects their boundless curiosity and limitless creativity. Mysterious and multifaceted, Howchoo has emerged as a captivating storyteller, leaving readers mesmerized by the uncharted realms they craft with their words. With an insatiable appetite for knowledge and a love for exploration, Howchoo’s writing transcends conventional genres, blurring the lines between fantasy, science fiction, and the surreal. Their narratives are a kaleidoscope of ideas, weaving together intricate plots, unforgettable characters, and thought-provoking themes that challenge the boundaries of imagination.

Home Interests Python

Nested defaultdicts in Python

howchoo
howchoo   (467)
August 18, 2023
8 minutes

Share

Interests
Posted in these interests:
code • 11 guides
python • 18 guides

While this requirement may seem rare, learning how to nest defaultdicts properly in Python can be extremely powerful and save you from bloated and confusing initialization code.

In this guide we’ll cover:

  • What are nested dictionaries?
  • What is a defaultdict, and when is it used?
  • How can we create multi-level defaultdicts (or nested defaultdicts)?

If you’re already familiar with these concepts, feel free to skip ahead to step three.

We highly recommend you also read and learn about Python dictionary comprehension as well, after reviewing this guide.

1 – What is a nested dictionary?

In Python, a dictionary is a key-value map, and the value can contain any type. You can merge dictionaries and in this case, even nest them. A “nested” dictionary simply refers to a dictionary whose values are also dictionaries, and this pattern could be used for multiple levels.

Merge Dictionaries in Python

See the following example:

level_one = {
    'level_two': {
        'level_three': {
            'some_key': 'some_value' 
        }
    }
}

To access values in the terminal dictionary, you could use the following:

level_one['level_two']['level_three']['some_key']

2 – What is a defaultdict?

defaultdict is a dictionary with some added functionality. The defaultdict allows us to specify a default type to return if a key doesn’t exist.

Typically, if you try to access a non-existent key in a dictionary, it will raise a KeyError. But sometimes, rather than raising an exception, we may want to return a default value instead. There are a few ways to accomplish this, but one powerful tool is the defaultdict. See the following:

from collections import defaultdict

my_dict = defaultdict(int)

We’ve instantiated a defaultdict and set the default type to int. This means if we try to access a key in my_dict that doesn’t exist, it will return the value of int() (which is 0).

This is very powerful for a few reasons!

It always returns a value
my_dict['tyler'] = 34

print(my_dict['tyler'])
# => 34

print(my_dict['nikki'])
# => 0
We can operate on any key without initializing it

What is even more valuable is that we can operate on keys without initializing them. Imagine we want to use a dictionary to keep track of players’ scores.

scores = defaultdict(int)

# Tyler scores one point
scores['tyler'] += 1

# Nikki scores two points
scores['nikki'] += 2

The code is much more concise. With a standard dictionary, we’d have to check if the key exists and initialize the values up front.

3 – Nested defaultdicts

Now that we understand nested dictionaries and defaultdicts, we can get into nested defaultdicts.

This is concept is extremely powerful as it allows you to build complex dictionaries with a simple initialization. The only caveat is that you need to know the depth of your data structure in advance. Also, you need to know the default type of the terminal values.

If you’re wondering how this concept will be useful, think about a situation where you’d want to use a defaultdict but you actually want the default type to be defaultdict.

The first thing we have to do is define our dictionary:

from collections import defaultdict

my_dict = defaultdict(lambda: defaultdict(dict))

Notice that we have to use a lambda function as the argument to the first defaultdict. This is because defaultdict expects a callable (or None).

If necessary, we could take this concept as far as we need:

my_dict = defaultdict(lambda: defaultdict(lambda: defaultdict(dict)))

Now, using our original example, we can easily populate our data structure without having to initialize each value.

my_dict['dogs']['rover']['bathed'] = True
my_dict['dogs']['rover']['fed'] = False
my_dict['cats']['sam']['fed'] = True
NEXT UP

Secure Your Sensitive Data with Kubernetes Secrets

Learn how to create and use Kubernetes secrets.
howchoo   (467)
November 26, 2023

Kubernetes secrets are objects that store and manage sensitive data inside your Kubernetes cluster. One mistake developers often make is storing sensitive information like database passwords, API credentials, etc in a settings file in their codebase. This is very bad practice (hopefully for obvious reasons). Most developers know this, but still choose the option because it’s easy.

Continue Reading

howchoo

 467 guides

Introducing Howchoo, an enigmatic author whose unique pen name reflects their boundless curiosity and limitless creativity. Mysterious and multifaceted, Howchoo has emerged as a captivating storyteller, leaving readers mesmerized by the uncharted realms they craft with their words. With an insatiable appetite for knowledge and a love for exploration, Howchoo’s writing transcends conventional genres, blurring the lines between fantasy, science fiction, and the surreal. Their narratives are a kaleidoscope of ideas, weaving together intricate plots, unforgettable characters, and thought-provoking themes that challenge the boundaries of imagination.

Home Interests Internet

Xfinity Login: How to log in to your Xfinity account

howchoo
howchoo   (467)
August 18, 2023
2 minutes

Share

Interests
Posted in these interests:
comcast • 7 guides
internet • 36 guides

This guide will provide instructions for getting logged in to your Comcast Xfinity account.

1 – Login page

If you know your username and password, you simply head over to the Xfinity login page on the Xfinity website to log in.

2 – Recover username or password

If you’ve lost your username or password, there’s hope.

Username

If you’ve lost your username, head to the account lookup page.

Password

If you’ve lost your password, you’ll need to reset it. You can do that on the password reset page.

3 – Create an account

If you don’t have an account, you can create one here.

4 – Contact support

At this point, if you can’t get logged in, contact support:

1 (800) 934-6489

NEXT UP

How to Change Your Frontier WiFi Password

howchoo
howchoo   (467)
November 25, 2023

There are a few reasons you might want to update or reset your WiFi password: making your network more secure, and making your password easier to remember and type. Improved network security You can add an extra layer of security to your network by changing the WiFi password. As long as your new password is

Continue Reading

howchoo

 467 guides

Introducing Howchoo, an enigmatic author whose unique pen name reflects their boundless curiosity and limitless creativity. Mysterious and multifaceted, Howchoo has emerged as a captivating storyteller, leaving readers mesmerized by the uncharted realms they craft with their words. With an insatiable appetite for knowledge and a love for exploration, Howchoo’s writing transcends conventional genres, blurring the lines between fantasy, science fiction, and the surreal. Their narratives are a kaleidoscope of ideas, weaving together intricate plots, unforgettable characters, and thought-provoking themes that challenge the boundaries of imagination.

Home Interests WWW

How to commit and push in Git

howchoo   (467)
August 17, 2023
3 minutes

Share

Interests
Posted in these interests:
computers • 2 guides

Git

git • 5 guides
github • 1 guides
webdev • 10 guides

WWW

www • 2 guides

This guide will show you how to properly commit and push your work in Git. It is assumed that you have Git installed and that you’re currently in a clean master branch.

1 – Create a task branch

With a clean master branch checked out, you can create a task branch by typing:

git checkout -b task_branch

where the task_branch is the name of the branch you want to create. By using the -b option it will both create a new branch and check it out.

2 – Do your work and commit

As your are doing work you can commit regularly, and you must also commit when you are finished with your task. You can commit by typing:

git commit -am "commit message"

and you should leave a detailed commit message describing the changes you made.

3 – Merge your work into master

Now that you’ve finished your task you need to checkout master and merge your work. To checkout master simply type:

git checkout master

and to merge your task branch type:

git merge task_branch

where task_branch is the name of your branch.

4 – Push the master branch

Now that your work is merged, go ahead and push the master branch by typing:

git push origin master
NEXT UP

How to Set up Git Tab Completion

howchoo
howchoo   (467)
November 26, 2023

Tab completion, or auto-completion, is essential if you’re using Git on the command line. Tab completion is a nice feature of many shells that allows you to complete a word by hitting tab. In this case, we want to be able to use tab completion for things like branches and tags in git. Fortunately, setting

Continue Reading

howchoo

 467 guides

Introducing Howchoo, an enigmatic author whose unique pen name reflects their boundless curiosity and limitless creativity. Mysterious and multifaceted, Howchoo has emerged as a captivating storyteller, leaving readers mesmerized by the uncharted realms they craft with their words. With an insatiable appetite for knowledge and a love for exploration, Howchoo’s writing transcends conventional genres, blurring the lines between fantasy, science fiction, and the surreal. Their narratives are a kaleidoscope of ideas, weaving together intricate plots, unforgettable characters, and thought-provoking themes that challenge the boundaries of imagination.

Home Interests Code

Learn the slow (and fast) way to append elements to the DOM

howchoo
howchoo   (467)
August 17, 2023
13 minutes

Share

Interests
Posted in these interests:
code • 11 guides
javascript • 4 guides
jquery • 1 guides

jQuery is a powerful tool for front-end developers, but it does not alleviate the responsibility of ensuring your code is efficient. One common pitfall for developers is the method used to append elements to the DOM. This guide will examine the handful of different ways of doing this and point you to the most efficient way.

This subject matters most at a large scale. So for this guide, we will assume that our task is to append 10,000 divs to the body of a webpage.

1 – A naive approach

Early on I would’ve done this:

for (var i=0; i<10000; i++) {
  $("BODY").append($("
").addClass("test-div")); }

This code produced an average running time of 779.463ms. This means it took over three quarters of a second to append these elements to the DOM.

So what is the problem here?

Well, there are a few – too many reflows and too many jQuery objects. We’ll address the latter in the next step, so let’s look at reflow here.

Simply put, reflow is when the browser needs to process and draw the webpage, and it is one of the most expensive browser processes. One of the easiest ways to improve the performance of your application is to minimize the number of reflows, and that’s what we’re going to do.

Many different operations can cause a reflow, and it isn’t the same for every browser. But rest assured, appending an element to the DOM will cause a reflow. So the obvious problem with our code snippet is that we are generating 10,000 reflows. Some browsers may handle this intelligently and reduce some of the cost, but we can do better.

2 – Fix the reflow problem

Let’s fix our reflow problem by creating a node that has not yet been added to the DOM. Then we will append our divs to this node. And finally, we will append this single node to the DOM which should trigger a single reflow.

var $c = $("
").addClass("container"); for (var i=0; i<10000; i++) { $c.append($("
").addClass("test-div")); } $("BODY").append($c);

This is a little bit better but still not great. Our running time is now 432.524ms. This is still pretty bad, and there is a lot we can do to improve.

The problem here is that we’re still creating too many jQuery objects. Even though we’ve solved the reflow problem, there is a lot of overhead to create a jQuery object. Of course, for a single object the convenience of jQuery far outweighs the minimal performance hit. But if we’re dealing with 10,000 elements the inefficiency is more than noticeable.

Let’s see what happens when we skip using jQuery altogether and write this in plain JavaScript.

var c = document.createDocumentFragment();
for (var i=0; i<10000; i++) {
    var e = document.createElement("div");
    e.className = "test-div";
    c.appendChild(e);
}
document.body.appendChild(c);

Incredibly, this change reduced our total running time from 432.524ms to 16.237ms. And this makes sense because it actually takes jQuery some time to create the object. Let’s see just how long it takes to create a single jQuery object vs. creating the element using vanilla JavaScript.

console.time("jquery div");
var jqDiv = $("
"); console.timeEnd("jquery div"); // jquery div: 0.272ms console.time("js div"); var jsDiv = document.createElement("div"); console.timeEnd("js div"); // js div: 0.006ms

This is a significant difference – 0.006ms vs. 0.272ms. The point of this comparison isn’t to say that jQuery is bad but rather that as a developer you should know when to use it and when not to. jQuery provides a lot of functionality that isn’t necessary for our purpose so it doesn’t make sense to create 10,000 jQuery objects at such a high cost.

3 – Using strings instead of nodes

We don’t actually have to create 10,000 nodes. Instead we can see what happens when we use one long string of HTML.

var s = "";
for (var i=0; i<10000; i++) {
    s += "
"; } $("BODY").append(s);

At 69.874ms this performs much better than our original, but not quite as well as the pure JavaScript version. However, there is one small improvement we can make. String concatenation is expensive, especially at this scale. Let’s use an array of strings and join them in the end.

var a = [];
for (var i=0; i<10000; i++) {
    a.push("
"); } $("BODY").append(a.join(""));

This runs in 63.885ms. This probably isn’t enough of an improvement to stress out about, but since it’s faster we’ll keep it.

Let’s measure the cost of using jQuery to append the string. As we learned in the previous step, using pure JavaScript may be faster.

var a = [];
for (var i=0; i<10000; i++) {
    a.push("
"); } document.body.innerHTML = a.join("");

The main difference here is that we’re not using jQuery.append. Instead we’re setting the innerHTML attribute on the body to our string of HTML. This runs in 22.908ms so the improvement is obvious. But we’re still not as fast as the pure JavaScript version from the last step.

4 – Conclusion

In summary, the fastest code was the pure JavaScript version:

var c = document.createDocumentFragment();
for (var i=0; i<10000; i++) {
    var e = document.createElement("div");
    e.className = "test-div";
    c.appendChild(e);
}
document.body.appendChild(c);

Based on these experiments there are two major takeaways.

First, be aware of which operations will cause a reflow. This is an expensive process, and it should be reduced as much as possible.

Second, be aware of the cost of using jQuery. For operations at a low scale, the convenience of jQuery will often outweigh the performance cost. But at a large scale, jQuery should be avoided unless it is actually needed.

NEXT UP

Secure Your Sensitive Data with Kubernetes Secrets

Learn how to create and use Kubernetes secrets.
howchoo   (467)
November 26, 2023

Kubernetes secrets are objects that store and manage sensitive data inside your Kubernetes cluster. One mistake developers often make is storing sensitive information like database passwords, API credentials, etc in a settings file in their codebase. This is very bad practice (hopefully for obvious reasons). Most developers know this, but still choose the option because it’s easy.

Continue Reading

howchoo

 467 guides

Introducing Howchoo, an enigmatic author whose unique pen name reflects their boundless curiosity and limitless creativity. Mysterious and multifaceted, Howchoo has emerged as a captivating storyteller, leaving readers mesmerized by the uncharted realms they craft with their words. With an insatiable appetite for knowledge and a love for exploration, Howchoo's writing transcends conventional genres, blurring the lines between fantasy, science fiction, and the surreal. Their narratives are a kaleidoscope of ideas, weaving together intricate plots, unforgettable characters, and thought-provoking themes that challenge the boundaries of imagination.