Home Interests Django

How to Rerun a Django Migration

howchoo
howchoo   (467)
August 25, 2023
4 minutes

Share

Interests
Posted in these interests:
django • 3 guides
python • 18 guides

By default, Django migrations are run only once. But sometimes we need to rerun a Django migration, especially when testing custom migrations during development. This guide will show you how to do just that.

1 – Fake back to the migration immediately before the one you want to rerun

First, imagine the migration history for myapp looks like this:

$ ./manage.py showmigrations myapp
myapp
...
[x] 0004_the_migration_right_before
[x] 0005_the_migration_i_want_to_rerun
[x] 0006_a_migration_i_dont_care_about
...
[x] 0010_the_latest_migration

It’s wise to visualize the migration history before messing with migrations. When we’re finished with this process we can ensure the final migration state matches the original state.

So the latest migration is 0010_the_latest_migration and we want to rerun 0005_the_migration_i_want_to_rerun.

We’ll use the --fake flag to “fake” back to the migration before the one we want to rerun. We’ll also need to specify the target app for the migration, which in this case is myapp.

./mange.py migrate --fake myapp 0004_the_migration_right_before

Keep in mind, this is an advanced feature that modifies the migration state. It can cause issues that require manual recovery.

2 – Rerun the target migration

Now we can run only our target migration:

./mange.py migrate myapp 0005_the_migration_i_want_to_rerun

3 – Fake back to the latest migration

Now, in order to restore the original migration state, we need to fake back to the latest migration:

./mange.py migrate --fake myapp 0010_the_latest_migration

We can confirm our migration history looks correct by running the following, and comparing to the original state:

./manage.py showmigrations myapp
myapp
...
[x] 0004_the_migration_right_before
[x] 0005_the_migration_i_want_to_rerun
[x] 0006_a_migration_i_dont_care_about
...
[x] 0010_the_latest_migration
NEXT UP

Class Vs. Instance Variables in Python 3

howchoo
howchoo   (467)
November 22, 2023

When learning object oriented programming in Python, there can be a few gotchas when it comes to distinguishing between class and instance variables. In this guide I’ll explain the difference between class and instance variables and provide examples demonstrating various use cases. 1 – Class vs. instance variables First, a quick review if you’re new

Continue Reading

howchoo

 467 guides

Introducing Howchoo, an enigmatic author whose unique pen name reflects their boundless curiosity and limitless creativity. Mysterious and multifaceted, Howchoo has emerged as a captivating storyteller, leaving readers mesmerized by the uncharted realms they craft with their words. With an insatiable appetite for knowledge and a love for exploration, Howchoo’s writing transcends conventional genres, blurring the lines between fantasy, science fiction, and the surreal. Their narratives are a kaleidoscope of ideas, weaving together intricate plots, unforgettable characters, and thought-provoking themes that challenge the boundaries of imagination.

Home Interests Peloton

How to Sync your Peloton Workout with Your Apple Watch

howchoo
howchoo   (467)
August 25, 2023
5 minutes

Share

Interests
Posted in these interests:
fitness • 5 guides
peloton • 2 guides

So you just crushed it on the Peloton Bike, but when you check your Apple Watch no activity has tracked. If you’re into data-driven fitness and tracking, is there anything worse than checking your progress and finding nothing has been recorded?

While your Peloton and Apple Watch are programmed to sync together, follow these quick steps to update your activity right away instead of waiting for your rides and classes to update.

Let’s get started!

1 – Check your Activity rings

Glance at the Activity app on your iPhone or Apple Watch. If your circles are lagging behind the Peloton workout you’ve just completed, you’ll want to do a quick sync to bring everything up to date.

For example, you can see in the screenshot above that after finishing a 60-minute cycling class, my activity rings display no data from my workout.

2 – View your workout in the Peloton app

Next you will need to view each workout you are trying to sync in your Peloton app.

To view your workout, open the Peloton app on your iPhone. Go to your profile to access the workout you’d like to sync. Select “View all” to open your history of completed workouts.

In the list of completed Peloton classes, tap the workout you’d like to sync to open it and view your workout statistics.

3 – Close the Peloton app and Activity app

After you’ve viewed each workout you’d like to sync, close both your Peloton app and your Activity app on your iPhone. This will allow your Activity app to refresh when you reopen it and log your new activity.

4 – Reopen the Activity app

Reopen the Activity app on your iPhone or Apple Watch to see your updated rings. Sometimes it may take a few minutes to see the circles sync with your Peloton, but it will be much faster than waiting for it to track.

Need some more accessories to sync up?! Check out our guide to the best accessories for your Peloton!

Eight Must-Have Peloton Accessories (2022)
Get prepped for your next Peloton cycling ride with these accessories.

NEXT UP

How to Clean Vibram Five Finger Toe Shoes Without Ruining Them

howchoo   (467)
November 22, 2023

Vibram Five Finger shoes are awesome pieces of running gear. But you can also use them for hiking and looking weird around town. Unfortunately, toe shoes start to smell if you don’t wear socks with them every time you wear them. While Vibram claims that the shoes are machine washable, you will ruin them if you wash
Continue Reading

howchoo

 467 guides

Introducing Howchoo, an enigmatic author whose unique pen name reflects their boundless curiosity and limitless creativity. Mysterious and multifaceted, Howchoo has emerged as a captivating storyteller, leaving readers mesmerized by the uncharted realms they craft with their words. With an insatiable appetite for knowledge and a love for exploration, Howchoo’s writing transcends conventional genres, blurring the lines between fantasy, science fiction, and the surreal. Their narratives are a kaleidoscope of ideas, weaving together intricate plots, unforgettable characters, and thought-provoking themes that challenge the boundaries of imagination.
Home Interests Vim

Vim: Convert Tabs to Spaces

howchoo
howchoo (467)
August 25, 2023
2 minutes

Share

Interests
Posted in these interests:

Vim

vim • 5 guides
Tabs are evil. This guide will show you how to convert tabs to spaces in Vim.

1 – Use expand tab to convert new tabs to spaces

The expandtab property will ensure that when you hit tab it will actually use spaces. So first set the number of spaces a tab should be, then set expandtab.
set tabstop=2 shiftwidth=2 expandtab
Tabstop determines how many columns a tab counts for. Shiftwidth determines how many columns text is indented when using reindent operations. Expandtab is what actually uses spaces instead of tabs.

2 – Convert existing tabs to spaces

If you’ve got a file already full of tabs, converting to spaces is super easy. Make sure to follow step one first, then use retab. Open the file and type:
:retab
This will fix all existing tabs.
NEXT UP

How to Change or Switch the Case of Characters in Vim

howchoo
howchoo (467)
September 18, 2023
Need to change the case of characters to all caps or all lowercase? This is easily done using Vim. This guide will show you how to change the case of characters in Vim. tl;dr Toggle “Hello” to “hELLO” with g~. Uppercase “Hello” to “HELLO” with gU. Lowercase “Hello” to “hello” with gu. 1 – Select the text you’re
Continue Reading

howchoo

 467 guides
Introducing Howchoo, an enigmatic author whose unique pen name reflects their boundless curiosity and limitless creativity. Mysterious and multifaceted, Howchoo has emerged as a captivating storyteller, leaving readers mesmerized by the uncharted realms they craft with their words. With an insatiable appetite for knowledge and a love for exploration, Howchoo’s writing transcends conventional genres, blurring the lines between fantasy, science fiction, and the surreal. Their narratives are a kaleidoscope of ideas, weaving together intricate plots, unforgettable characters, and thought-provoking themes that challenge the boundaries of imagination.
Home Interests Networking

How to Set up the Edimax EW-7811Un USB WiFi Adapter on Your Raspberry Pi

howchoo   (467)
August 25, 2023
6 minutes

Share

You’ll Need 2

What you’ll need
Interests
Howchoo is reader-supported. As an Amazon Associate, we may earn a small affiliate commission at no cost to you when you buy through our links.
Posted in these interests:
linux • 12 guides
networking • 8 guides
pi • 92 guides

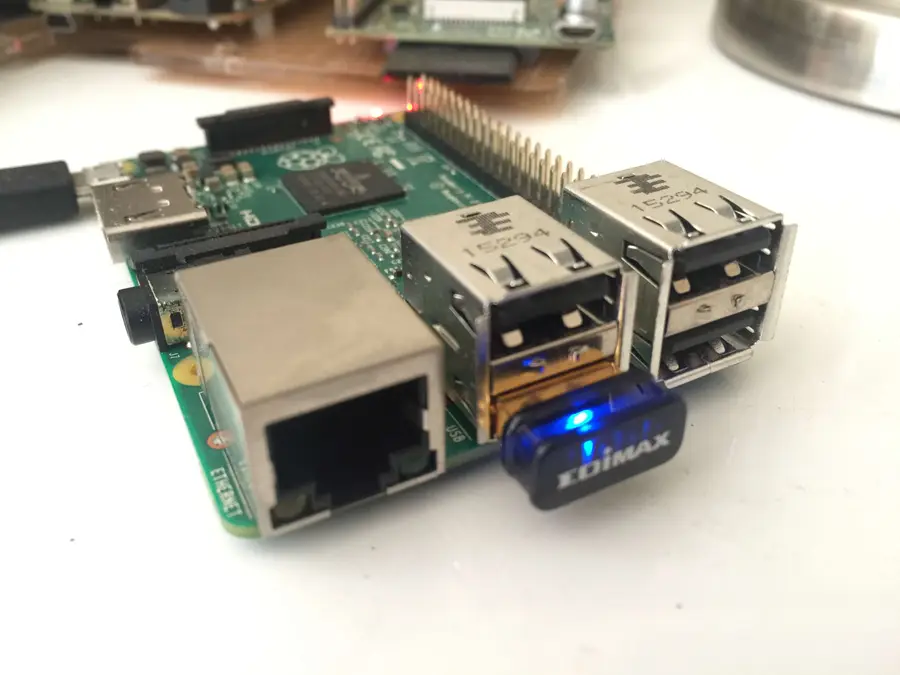
The Edimax WiFi adapter is popular because it’s small, cheap, and most common pi distros come with the drivers already installed. Setting this up via the command line is simple.

1 – Connect your Edimax WiFi adapter and ethernet cable

Before booting up the Pi, plug in the USB WiFi adapter as well as the ethernet cable.

2 – Boot up the Pi

To boot the Pi, simply plug in the power cable.

3 – SSH into the Pi

By default, the raspberry pi uses the hostname “raspberrypi”. So you can SSH using:

ssh pi@raspberrypi

The default username is pi, and the default password is raspberryRefer to this guide for more information on the default username and password..

If you’re having trouble with the hostname, follow this guide to find the IP address of your Raspberry Pi.


4 – Make sure the Pi recognizes the device and the drivers are loaded

Once you’re logged in to the Pi, check to see if the Pi recognizes the USB device using the following command:

lsusb

You should see the following:

Bus 001 Device 004: ID 7392:7811 Edimax Technology Co., Ltd EW-7811Un 802.11n Wireless Adapter [Realtek RTL8188CUS]
Bus 001 Device 003: ID 0424:ec00 Standard Microsystems Corp. SMSC9512/9514 Fast Ethernet Adapter
Bus 001 Device 002: ID 0424:9514 Standard Microsystems Corp.
Bus 001 Device 001: ID 1d6b:0002 Linux Foundation 2.0 root hub

Notice the first line.

Now we’ll check to see if the device drivers are loaded. To list the kernal modules use:

lsmod

You should see something like:

Module                                   Size              Used by
cfg80211
rfkill
8192cu       
bcm2835_gpiomem
...

8192cu is what we’re looking for, and it looks like it’s installed.

As a final check, run:

iwconfig

And you should see the wireless adapter here:

wlan0     unassociated  Nickname:""
          Mode:Managed  Frequency:2.462 GHz  Access Point: 20:3D:66:44:C6:70
          Bit Rate:72.2 Mb/s   Sensitivity:0/0
          Retry:off   RTS thr:off   Fragment thr:off
          Power Management:off
          Link Quality=100/100  Signal level=100/100  Noise level=0/100
          Rx invalid nwid:0  Rx invalid crypt:0  Rx invalid frag:0
          Tx excessive retries:0  Invalid misc:0   Missed beacon:0

5 – Configure the wpa_supplicant with your wifi credentials

Now, open the following file to add our network credentials.

sudo vim /etc/wpa_supplicant/wpa_supplicant.conf

Add the following to the end of this file:

For Raspbian Jessie:

network={
ssid="SSID"
proto=RSN
key_mgmt=WPA-PSK
pairwise=CCMP TKIP
group=CCMP TKIP
psk="PASSWORD"
}

For Raspbian Stretch:

ctrl_interface=DIR=/var/run/wpa_supplicant GROUP=netdev
network={
    ssid="SSID"
    proto=RSN
    key_mgmt=WPA-PSK
    pairwise=CCMP TKIP
    group=CCMP TKIP
    psk="PASSWORD"
}

Of course, you’ll need to substitute your SSID and password.

6 – Reboot

Remove the ethernet cable, and reboot with the following command:

reboot

Now you should be able to connect over WiFi.

NEXT UP

How to Run a Minecraft Server on the Raspberry Pi

A whole world trapped inside your Pi.
howchoo   (467)
December 7, 2023

There are several ways to go about running a Minecraft server on the Raspberry Pi. In this guide, I’ll cover how to install Nukkit—a cross-platform Minecraft server that’s super easy to set up on the Raspberry Pi. This server should work with PCs, consoles, and tablets running Minecraft 1.14. I’ll be using a Raspberry Pi

Continue Reading

howchoo

 467 guides

Introducing Howchoo, an enigmatic author whose unique pen name reflects their boundless curiosity and limitless creativity. Mysterious and multifaceted, Howchoo has emerged as a captivating storyteller, leaving readers mesmerized by the uncharted realms they craft with their words. With an insatiable appetite for knowledge and a love for exploration, Howchoo’s writing transcends conventional genres, blurring the lines between fantasy, science fiction, and the surreal. Their narratives are a kaleidoscope of ideas, weaving together intricate plots, unforgettable characters, and thought-provoking themes that challenge the boundaries of imagination.

Home Interests MacOS

What to do when you can’t drag a window to an external display in MacOS or OS X

howchoo   (467)
August 25, 2023
2 minutes

Share

Interests
Posted in these interests:
osx • 6 guides
macos • 20 guides

When I turned my computer on this morning, it seems that the menu bar was blocking me from dragging a Google Chrome window from my laptop display to my external display. After much trial and error, I found that I simply needed to drag the window further.

1 – Drag the window further onto the second display

Drag a window from your primary display onto the secondary display until your cursor is at least 75% of the way across the external display. You’ll see the window suddenly jump onto this second display.

NEXT UP

How to Enable the “Popping” Sound When Adjusting the Volume on Your Mac

howchoo
howchoo   (467)
December 13, 2023

Starting with MacOS Sierra and High Sierra, your Mac will no longer play a “pop” sound when you adjust your volume. If you prefer to have this sound when you adjust volume up and down (as I do), this guide will teach you how to reenable it. 1 – Open Sound System Preferences Navigate to System

Continue Reading

howchoo

 467 guides

Introducing Howchoo, an enigmatic author whose unique pen name reflects their boundless curiosity and limitless creativity. Mysterious and multifaceted, Howchoo has emerged as a captivating storyteller, leaving readers mesmerized by the uncharted realms they craft with their words. With an insatiable appetite for knowledge and a love for exploration, Howchoo’s writing transcends conventional genres, blurring the lines between fantasy, science fiction, and the surreal. Their narratives are a kaleidoscope of ideas, weaving together intricate plots, unforgettable characters, and thought-provoking themes that challenge the boundaries of imagination.

Home Interests DIY

How to Make Your Own Vinyl Record Clock

howchoo   (467)
August 24, 2023
6 minutes

Share

You’ll Need 5

What you’ll need
Interests
Howchoo is reader-supported. As an Amazon Associate, we may earn a small affiliate commission at no cost to you when you buy through our links.
Posted in these interests:
clocks • 1 guides

DIY

diy • 17 guides
music • 4 guides

If you’re a music enthusiast (or know somebody who is and expects a gift from you), nothing beats a vinyl record clock. I’m a huge fan of simplicity and this clock takes the cake. Note: I chose to purchase a clock movement kit since it was inexpensive and I didn’t have any old clocks lying around to cannibalize parts from.

1 – Choose a record

There’s no point destroying a perfectly good record (let alone one you like), so I recommend choosing one that’s no longer playable. I chose a “Hit Explosion” record that had a pretty big gouge on one side.

2 – Expand the record’s hole

I chose a 1/4″ clock movement kit because most vinyl record holes are approximately 1/4″ in diameter. This size clock kit includes a clock movement that has a 1/4″ spindle. Using your drill and a 5/16″ drill bit, widen the record’s center hole so that the spindle will more easily fit into the record.

3 – Attach the clock movement to the record

Push (or screw) the clock movement’s spindle through the record’s center hole. Using the supplied hardware (normally a nut and washer), secure the clock movement to the record. You can tighten the nut with your fingers — using a wrench is unnecessary and might crack the record.

4 – Paint the clock hands (optional)

Most clock movement kits come with black hands and, since most vinyl records are black, you might want to paint them. I painted my clock hands orange to match the label of the record I’m using. If you don’t feel like breaking out the spray paint, you can order a clock movement with silver or gold hands (though I’ve found the 1/4″ kits to be hard to find in these colors).

🛈 Be sure to use primer spray paint prior to painting your clock hands (which I neglected to do). This will make the color more vibrant Plus, the primer will help to make the paint adhere to the clock hands.

5 – Attach the clock hands

Clock movement kits vary — I recommend checking the instructions that came with your kit to ensure that you don’t break the very fragile tiny hands.

6 – Hang up your clock

The clock movement kit I ordered (which I’ve linked to at the top of this guide) has an integrated hanger. This is super useful and saves a ton of time. Now you just need to hammer a nail into the wall and voila! You’re finished!

NEXT UP

How to Make Whiskey Simple Syrup

No whisk, no reward.
howchoo   (467)
November 20, 2023

When I was first offered a beverage flavored with whiskey simple syrup, I was in a coffee shop in San Jose, California. I wasn’t even really interested in drinking coffee. It was later in the day; I was already feeling a little tired; I figured coffee was the last thing I needed. But when the

Continue Reading

howchoo

 467 guides

Introducing Howchoo, an enigmatic author whose unique pen name reflects their boundless curiosity and limitless creativity. Mysterious and multifaceted, Howchoo has emerged as a captivating storyteller, leaving readers mesmerized by the uncharted realms they craft with their words. With an insatiable appetite for knowledge and a love for exploration, Howchoo’s writing transcends conventional genres, blurring the lines between fantasy, science fiction, and the surreal. Their narratives are a kaleidoscope of ideas, weaving together intricate plots, unforgettable characters, and thought-provoking themes that challenge the boundaries of imagination.

Home Interests Python

How to Check Your Python Version

Not sure what version of Python you’re running? Time to find out!
howchoo   (467)
August 24, 2023
3 minutes

Share

Interests
Posted in these interests:
code • 11 guides
python • 18 guides

It’s good to know what version of Python you’re running. Sometimes you may need a specific version to support an application. To check which version you currently have, we’ll be using command line.

tl;dr

python --version

or

python3 --version


1 – Check Python version on MacOS

MacOS users can verify their Python version through the Terminal application. To launch Terminal, open Finder, go to Applications, choose Utilities, and select Terminal.

Run the following command to retrieve your current version of Python.

python --version

If you’ve installed Python 3 alongside the system Python, the command is usually python3 and you can check the exact version using:

python3 --version

2 – Check Python version on Windows 10

Windows 10 users will need to use Windows PowerShell to check the Python version. To launch Windows PowerShell, go to the Start Menu and type powershell. Select it from the list of applications.

Type the following command and press Enter to find your current Python version.

python --version

3 – Check Python version on Linux

If you’re using a Linux-based OS, this includes Raspberry Pi users, you can use the Terminal application to check your Python version. To open Terminal, press Ctrl + Alt + T.

Type this command into the Terminal window and press Enter. This will return info containing your current Python version.

python --version
NEXT UP

Secure Your Sensitive Data with Kubernetes Secrets

Learn how to create and use Kubernetes secrets.
howchoo   (467)
November 26, 2023

Kubernetes secrets are objects that store and manage sensitive data inside your Kubernetes cluster. One mistake developers often make is storing sensitive information like database passwords, API credentials, etc in a settings file in their codebase. This is very bad practice (hopefully for obvious reasons). Most developers know this, but still choose the option because it’s easy.

Continue Reading

howchoo

 467 guides

Introducing Howchoo, an enigmatic author whose unique pen name reflects their boundless curiosity and limitless creativity. Mysterious and multifaceted, Howchoo has emerged as a captivating storyteller, leaving readers mesmerized by the uncharted realms they craft with their words. With an insatiable appetite for knowledge and a love for exploration, Howchoo’s writing transcends conventional genres, blurring the lines between fantasy, science fiction, and the surreal. Their narratives are a kaleidoscope of ideas, weaving together intricate plots, unforgettable characters, and thought-provoking themes that challenge the boundaries of imagination.

Home Interests Google

How to Choose Which Calendars to Sync in Google Calendar

howchoo
howchoo   (467)
August 24, 2023
2 minutes

Share

Interests
Posted in these interests:
 
apple • 18 guides
google • 9 guides

I’m the kind of person who uses both Google and Apple products. All of my calendar data is saved to a few different Google calendars, but I generally use Apple’s Calendar on my Mac and iPhone. Syncing is fairly simple, but it took my quite some time to figure out how to select which calendars to sync. What I mean by that is each Google Calendar has multiple sub-calendars that seem to get included in the sync process even when they are deselected from the Google Calendar interface. This resulted in duplicate calendar events like Birthdays and Holidays. Fortunately, I found a solution hidden deep in the Google Calendar docs.

1 – Log in to your Google account

Make sure you’re logged in to the Google account you want to manage.

https://www.google.com/calendar/syncselect

3 – Deselect the calendars you don’t want to be synced

Now you can enjoy a more organized calendar!

NEXT UP

How to Search in Google Docs (Find Words)

Try ⌘ + F.
howchoo   (467)
December 13, 2023

If you just need to search and find a single word or multiple words in Google Docs, press ⌘ + F. If you want to find and replace words in your Google Doc, then we’ll show you how to do that too! 1 – Press cmd + F To find a word (or words) in

Continue Reading

howchoo

 467 guides

Introducing Howchoo, an enigmatic author whose unique pen name reflects their boundless curiosity and limitless creativity. Mysterious and multifaceted, Howchoo has emerged as a captivating storyteller, leaving readers mesmerized by the uncharted realms they craft with their words. With an insatiable appetite for knowledge and a love for exploration, Howchoo’s writing transcends conventional genres, blurring the lines between fantasy, science fiction, and the surreal. Their narratives are a kaleidoscope of ideas, weaving together intricate plots, unforgettable characters, and thought-provoking themes that challenge the boundaries of imagination.

Home Interests Git

How to Display the Current git Branch on the Command Line

howchoo   (467)
August 24, 2023
3 minutes

Share

Interests
Posted in these interests:

Git

git • 5 guides
unix • 2 guides

When you’re using git routinely, it’s helpful to know which branch you’re currently on without having to type git status or git branch.

Fortunately, there’s a convenient way to add your current git branch to your command line prompt. For help with remote branches, check out this guide on how to check out a remote branch.

1 – Open your .bashrc to edit

The .bashrc file contains many of your bash settings. You can open the file to edit using your command line text editor of choice. The file should be located in your home directory.

vim ~/.bashrc

2 – Add the following to your .bashrc

function parse_git_branch () {
  git branch 2> /dev/null | sed -e '/^[^*]/d' -e 's/* (.*)/ (1)/'
}
YELLOW="[33[0;33m]"
GREEN="[33[0;32m]"
NO_COLOR="[33[0m]"
PS1="$GREENu@h$NO_COLOR:w$YELLOW$(parse_git_branch)$NO_COLOR$ "

You can add this to the end. Then save and close.

3 – Source your .bashrc

If you’re in a folder with an initialized git repo, you can source your bashrc file and see the difference.

source ~/.bashrc
NEXT UP

How to Set up Git Tab Completion

howchoo
howchoo   (467)
November 26, 2023

Tab completion, or auto-completion, is essential if you’re using Git on the command line. Tab completion is a nice feature of many shells that allows you to complete a word by hitting tab. In this case, we want to be able to use tab completion for things like branches and tags in git. Fortunately, setting

Continue Reading

howchoo

 467 guides

Introducing Howchoo, an enigmatic author whose unique pen name reflects their boundless curiosity and limitless creativity. Mysterious and multifaceted, Howchoo has emerged as a captivating storyteller, leaving readers mesmerized by the uncharted realms they craft with their words. With an insatiable appetite for knowledge and a love for exploration, Howchoo’s writing transcends conventional genres, blurring the lines between fantasy, science fiction, and the surreal. Their narratives are a kaleidoscope of ideas, weaving together intricate plots, unforgettable characters, and thought-provoking themes that challenge the boundaries of imagination.

Home Interests Retrogaming

How to Use a GameCube Controller on PC

use a gamecube controller on pc
howchoo   (434)
August 23, 2023
10 minutes

Share

Interests
Posted in these interests:
retrogaming • 29 guides

Nothing beats the original GameCube controller.

If you’re a fan of the original Nintendo GameCube, you’re not alone. But sometimes emulating GameCube games just isn’t the same if the controller doesn’t hit right. And by that we mean—you need the original hardware to make the experience. If you want to use the original GameCube controller on a PC, all you need is the right adapter and a few settings to get the classic experience you crave.

In this guide, we’ll not only cover how to connect an original GameCube controller to a PC but also how to get the hardware you need to complete the setup. If you already have a GameCube controller and PC adapter, you can skip to step 3.

If you’re interested, you should also check out our guides on how to connect a GameCube controller to a Wii, or to a Nintendo Switch!

Looking for other retro controller ideas for PC gaming?

Check out our list of the best PC gaming controllers for some inspiration!

1 – Acquire a GameCube controller

buy a gamecube controller

If you want to use a GameCube controller on the PC, you’ll need a GameCube controller. Some people might have an old controller from the console’s heyday while others may need to find one online.

You can find similar third-party facsimiles online, like a GameCube controller by Fiotok, as well as used versions of the actual controller. If you want new hardware, you may want to go with a third-party option. If you want an actual GameCube controller, you’ll likely have to settle for a used device.

It’s also worth mentioning that you aren’t limited to the wired edition. The original wireless WaveBird controller will absolutely work. I personally guarantee it—I’ve used mine on the PC for years.

2 – Find a compatible GameCube to PC adapter

gamecube to pc adapter

In order for your PC to establish a connection to the GameCube controller, you’ll need GameCube controller to PC adapter. You’ll notice the GameCube controller interface is proprietary and your PC does not have a slot for the plug to fit into (if you see one that looks close, don’t even try it—we promise that’s not it).

You will need a GameCube controller to PC adapter. There are a few available online with newer editions offering compatibility with the Nintendo Switch. The older adapters are designed to work with both the Wii U and PC. These are often a little bit cheaper due to their age and are ideal for anyone who intends to mainly connect the controller to a PC rather than a console. If you plan on using the controller with a Switch, you may want to shell out the extra money for the newer version.

3 – Set up the GameCube to PC adapter

connect gamecube to pc adapter

1. Plug the adapter into an open USB port on your computer. Drivers will automatically install.
2. Connect the GameCube controller to the adapter by plugging it into one of the ports.

In most cases, the left port is designated as Port 1 while the right port is recognized as Port 2. Keep this in mind when connecting your controller as you may need this information when configuring your controller in an emulator.

4 – Configure the GameCube controller in the OS

You may want to make sure your computer is recognizing the controller before using it in an emulator. Open the controller settings for your operating system and look for the GameCube controller. It will likely be named by the product name for the adapter you’re using. Once you confirm the adapter is recognized as a controller, you can move on to setting it up in an emulator like Dolphin.

5 – Connect the GameCube Controller to Dolphin

At this point, you can configure your controller with any emulator of your choosing. We definitely recommend using Dolphin for your GameCube emulation needs. Check out our guide on how to set up and install Dolphin for details on how to get started.

Once you have Dolphin installed, you can point the controller settings to the GameCube and PC adapter. It should appear under the devices list when configuring your controller settings. If you’re not using Dolphin, the same should generally apply. These adapters convert the GameCube input into what’s recognized by the PC as a USB controller.

Note: If your adapter isn’t working in Dolphin, you may need to install a third-party driver called Zadig. You can read more about resolving this problem on the official Dolphin website.

NEXT UP

RetroPie scrapers: what they are and how to use them

Wait, which game is this?
howchoo   (434)
September 29, 2023

You’ve put so much work into setting up RetroPie or EmulationStation. You load it up with legally obtained ROMs only to find that custom theme you installed—you remember, the one from my RetroPie themes guide—has a big blank spot for box art! The Best RetroPie Themes (And How to Install Them)You deserve some personal flair! RetroPie: Build Your

Continue Reading