Setting up your work email on an Android phone is easy—everything synchronizes through Gmail, the default mail application. You can add an additional email address for your work account from within the Gmail application. The new email doesn’t have to be a Google account.
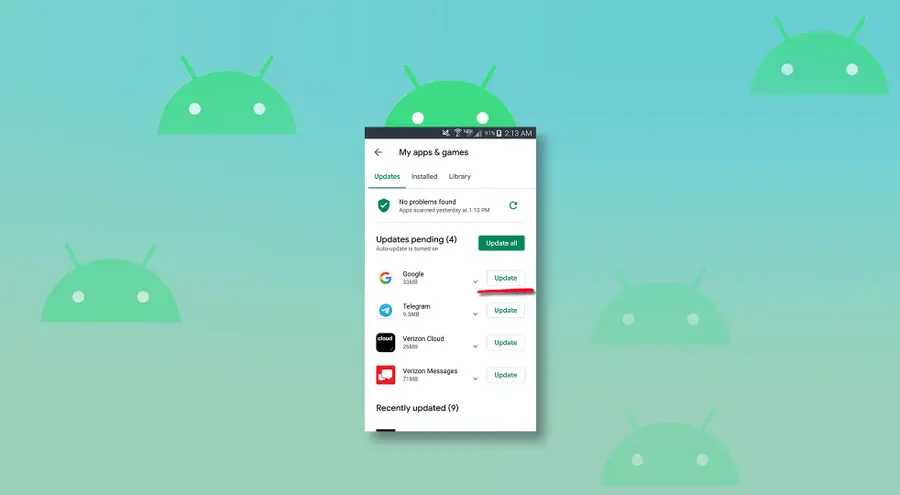
Make sure your email is up to date, check out our guide on how to update Android apps for help.
You can add an existing email account using the Gmail app.
Open the Gmail app.
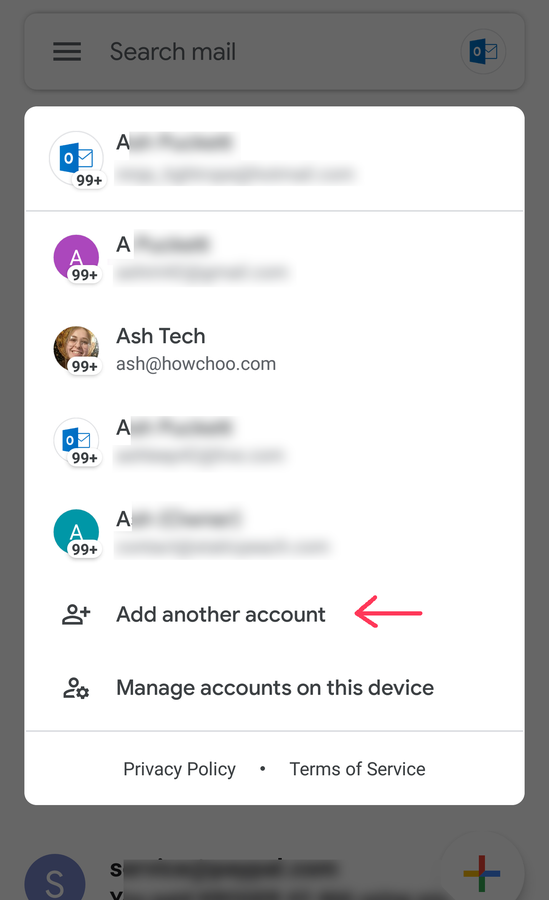
Select your profile photo in the top-right corner.
Choose Add another account.
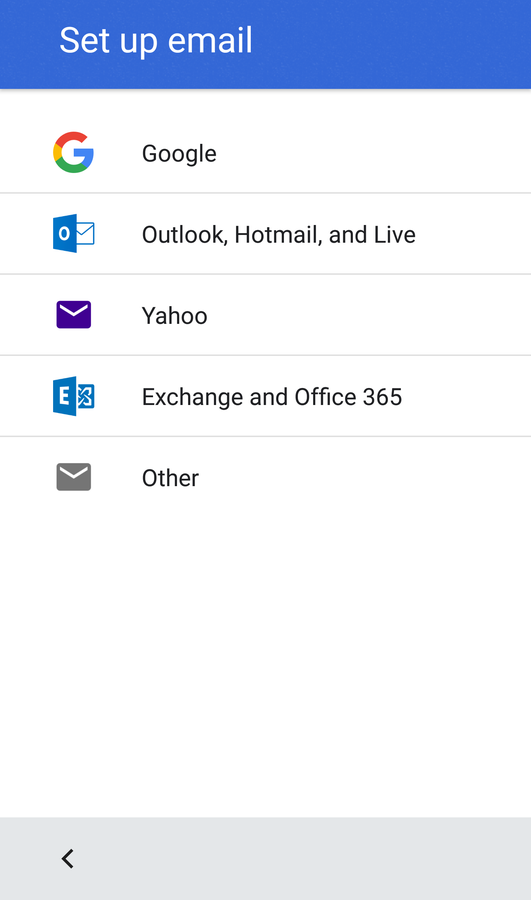
2 – Choose the account type
Choose the account type you want to add. If your company email uses one of the major providers in the list, select it. If you use Outlook in the office, you may not have an Outlook email address. Outlook emails end with domain extensions like @outlook.com, @live.com, and @hotmail.com. If your work email address has a different extension on the end, you probably need to use the Other option.
3 – Add the account details
Supported email providers
Follow the setup process to add your account details. The major providers like Yahoo and Microsoft (Outlook/Hotmail/Live) will only ask for your email address and password.
Other email providers
If you choose Other, you’ll have to manually configure your email. To do so, you’ll need the following information:
Email protocol (IMAP or POP3)
Incoming server address
Outgoing server address
Typically, your company’s IT department should be able to provide this information.
To configure your email:
Enter your email address, and choose Next.
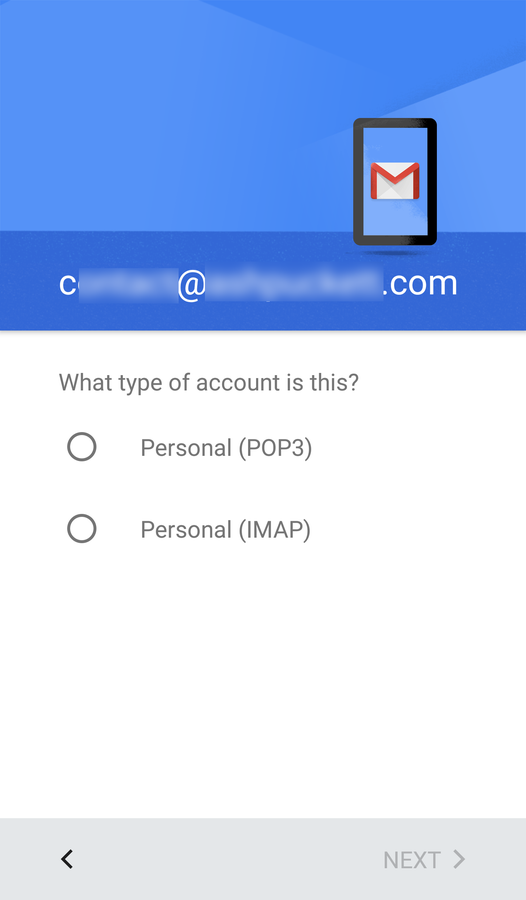
You will be prompted to confirm if the account is POP3 or IMAP. Tap Next.
Enter the password associated with the email account. Tap Next.
Confirm the incoming server address for your work email. Tap Next.
Enter the outgoing server address for your work email. IT support should have this address, as well.
Tap next and confirm the notification/sync settings for the email account.
4 – How to switch between inboxes
Once the account has been added, you can easily swap between different inboxes.
Tap your profile photo in the top-right corner.
Choose an account to switch to.
5 – How to add a signature
The Gmail app makes it possible to add a custom signature to outgoing emails.
Open Gmail.
Open the Main Menu.
Choose Settings.
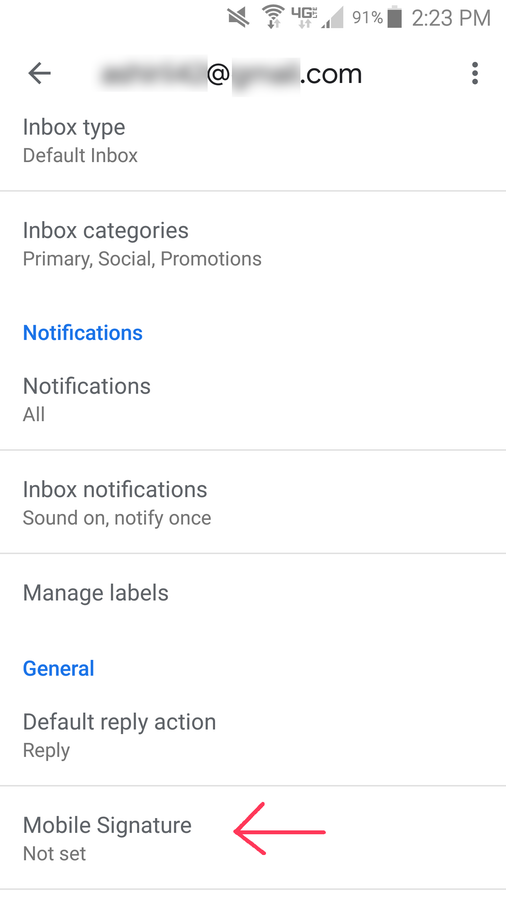
Select your account, and go to Signature settings.
Set Mobile Signature to on.
Create a custom mobile signature to use with the account.
Press the back button to save the changes.
6 – Troubleshooting
If your emails won’t come through after setting up your email, verify your network connection. If necessary, reset your network settings and try again.
How to Reset Network Settings on Android devices
Network trouble on your Android device? Try this.
NEXT UP
Everything You Need to Know About Amazon Household
If you’re an Amazon Prime member you understand just how great the benefits are. From free shipping and discounts to streaming and media sharing, Amazon has something for every member of the family. With this guide, you’ll receive a comprehensive tour of Amazon Households, and you’ll click away knowing how to set up an account, establish your
Introducing Howchoo, an enigmatic author whose unique pen name reflects their boundless curiosity and limitless creativity. Mysterious and multifaceted, Howchoo has emerged as a captivating storyteller, leaving readers mesmerized by the uncharted realms they craft with their words.
With an insatiable appetite for knowledge and a love for exploration, Howchoo’s writing transcends conventional genres, blurring the lines between fantasy, science fiction, and the surreal. Their narratives are a kaleidoscope of ideas, weaving together intricate plots, unforgettable characters, and thought-provoking themes that challenge the boundaries of imagination.
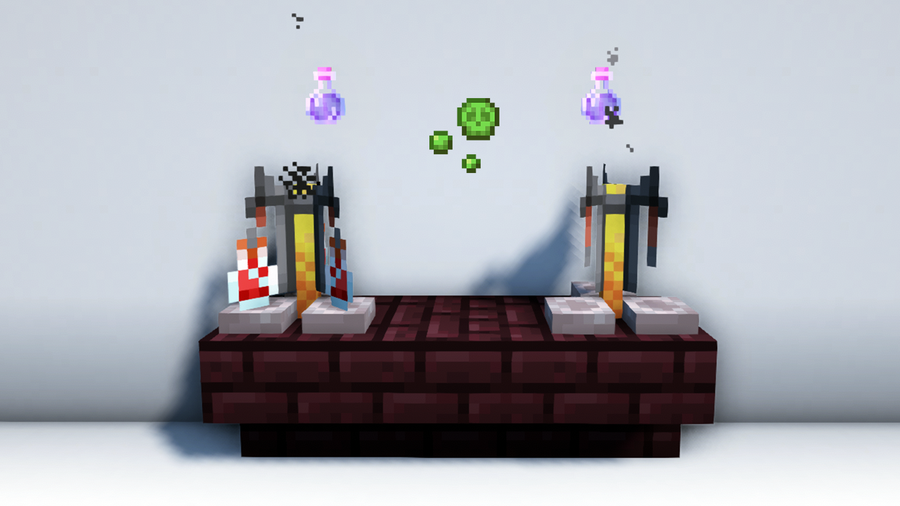
A Potion of Night Vision in Minecraft is a brewable item that gives players the Night Vision status effect when consumed. This effect allows you to see better in the dark, increasing the brightness level of your surroundings to 15. Essentially this makes everything appear to be at max light level. This works anywhere including underground and underwater locations.
This is how the surroundings look at night when a player is affected by Night Vision.
If you want to explore caves or be able to see better at night, using a Potion of Night Vision is a great option. However, light sources like torches are far easier to make than any potion, so players are likely to use these in most situations.
On the other hand, if you don’t want to bring too many light sources or clutter your surroundings with them, the potion may be what you’re looking for. Mobs also don’t spawn naturally in well-lit places or blocks with light levels above 7. Thus, players may choose Night Vision over light sources so they can still farm mobs in certain areas.
In the end, using the potion comes down to personal preference and what players consider the more convenient option for them.
One more thing to note is that Night Vision does not affect mobs. It was made only to affect the players’ visibility. If hostile mobs somehow pass through a cloud of Night Vision, rest assured this won’t give them the ability to detect you faster. Most mobs don’t even need the enhancement to find their way to you, so we recommend using this potion and its variants only on yourself or other players.
How to Brew a Regular Potion of Night Vision in Minecraft?
To brew a Potion of Night Vision, gather the required ingredients and follow the recipe below:
Ingredients required:
1 Water Bottle
1 Nether Wart
1 Golden Carrot
Tools required for the brewing process:
Brewing Stand
Blaze Powder
1 – Make a Water Bottle
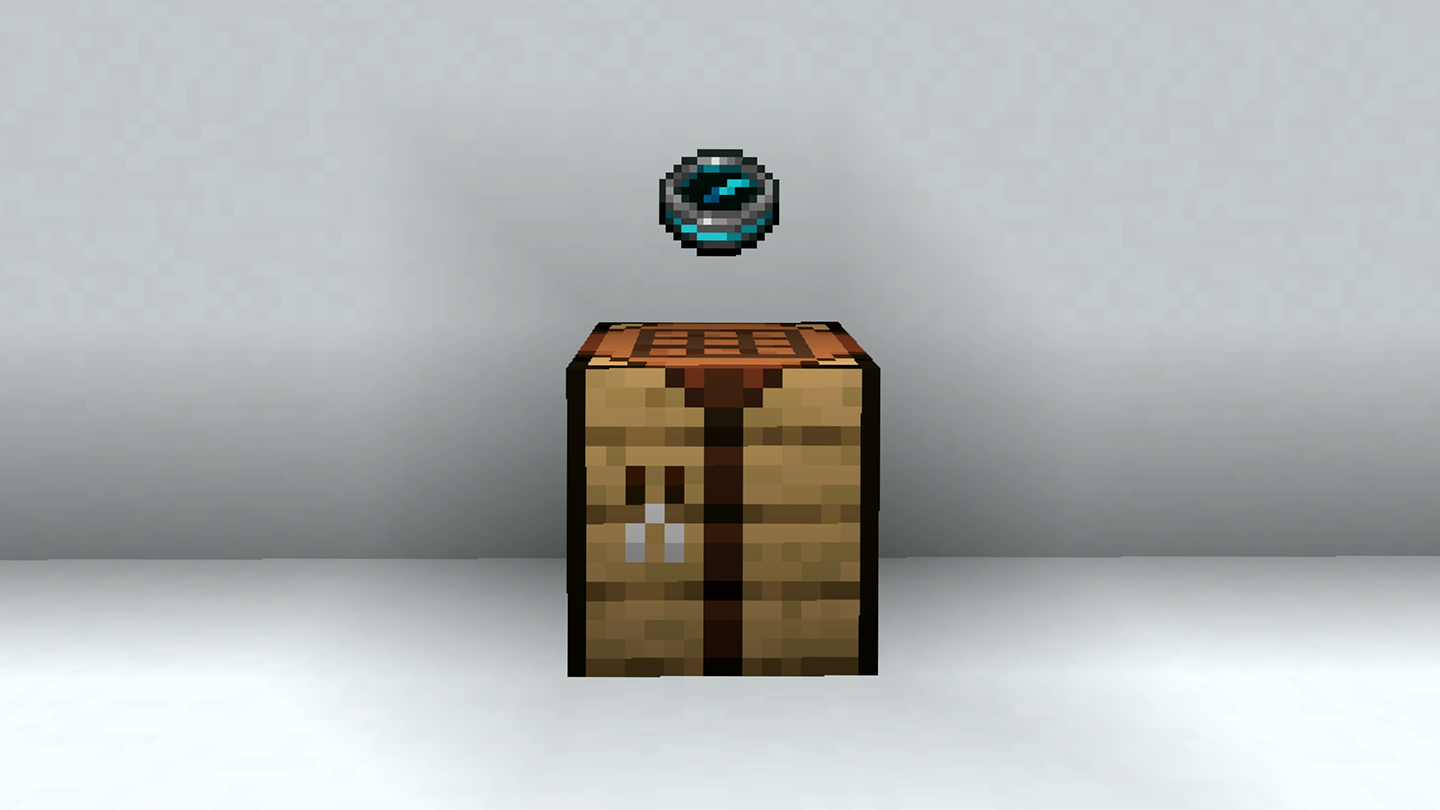
To make a Water Bottle, craft a Glass Bottle by putting 3 Glass Blocks in a Crafting Table. Then, look for a water source and interact with it.
You can use up to 3 Water Bottles to make 3 potions, but this recipe only needs 1.
2 – Obtain a Golden Carrot
Golden Carrot is the base ingredient for the Potion of Night Vision. You can get one through crafting, looting chests, or trading with farmer villagers. To craft it, put 8 Gold Nuggets and 1 Carrot in a Crafting Table.
3 – Gather Nether Wart and Blaze Rods
Next, you need Nether Wart and Blaze Rods. Both can be found in Nether Fortresses. Nether Warts are typically found growing on Soul Sand while Blaze Rods can be obtained by defeating Blazes.
Once you get some Blaze Rods, turn them into Blaze Powder using a Crafting Table to serve as fuel for the Brewing Stand.
4 – Brew an Awkward Potion
With all the ingredients gathered, put the Blaze Powder, Water Bottle, and Nether Wart in the Brewing Stand.
It will take some time to finish brewing, but once it’s done, you’ll get an Awkward Potion.
5 – Brew a Potion of Night Vision
Keep the Awkward Potion in the potion slot and put the Golden Carrot in the base ingredient slot.
Wait for it to finish brewing to get a Potion of Night Vision! Drinking this potion allows you to see better in the dark for 3 minutes.
How to Use the Potion of Night Vision?
You need to drink a Potion of Night Vision to use it.
For the Java and Education Editions, you drink the potion by equipping it and holding the right-click until the drinking action is finished.
Bedrock Edition uses the following controls:
Keyboard & Mouse: Right-click and hold.
Controller: Press the LT/L2/ZL button and hold.
Mobile: Tap the screen and hold.
Consuming the potion in any version leaves you with an empty Glass Bottle. Green particle effects will appear to show that the Night Vision status effect is active. You can check this by navigating to the inventory menu. Here, you can also see how long the effect will last.
How to Extend the Duration of a Potion of Night Vision?
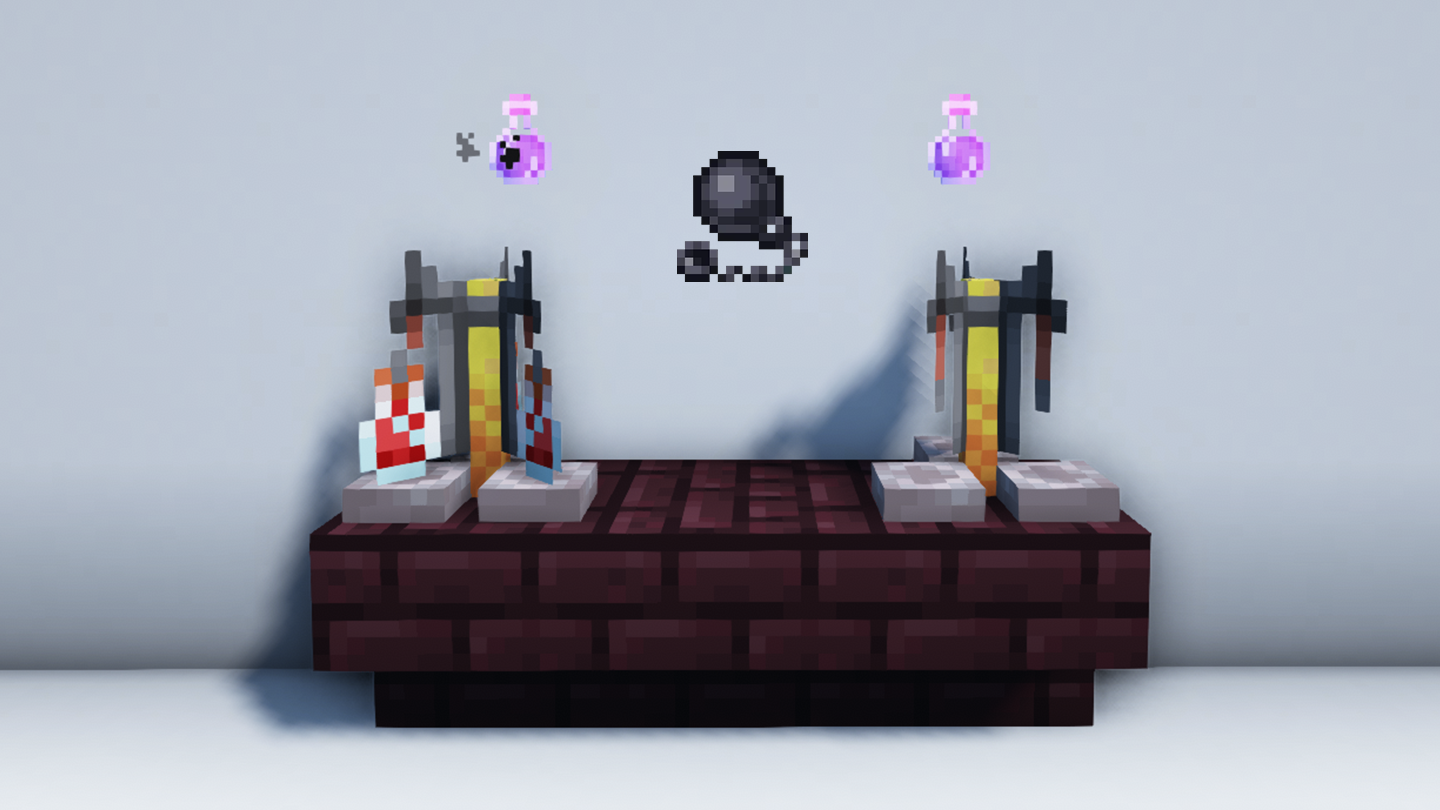
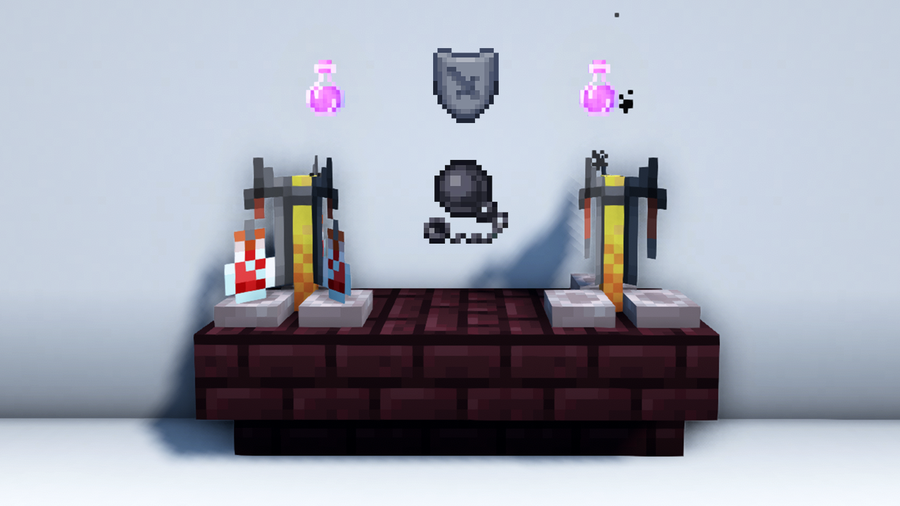
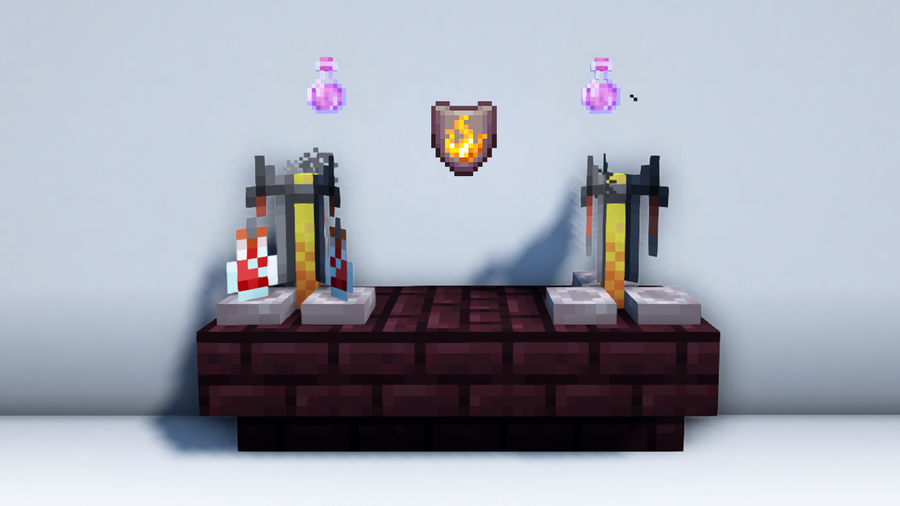
To extend the duration of a Potion of Night Vision, place a Potion of Night Vision (03:00) in the potion slot and Redstone Dust in the base ingredient slot of a Brewing Stand. This will brew an extended Potion of Night Vision that lasts for 8 minutes.
Result: Potion of Night Vision (08:00)
How to Make Other Variants of the Potion of Night Vision?
The Potion of Night Vision has Splash and Lingering variants which can be made by using Gunpowder and Dragon’s Breath respectively. Follow the recipes below to find out how to make each variant.
How to Make a Splash Potion of Night Vision
Splash Potion of Night Vision (03:00/02:15)
To create a Splash Potion of Night Vision, add Gunpowder to a Potion of Night Vision (03:00) in the Brewing Stand. Once it finishes brewing, you’ll get a regular Splash Potion of Night Vision which you can throw at other players. Its effect lasts for 3 minutes in the Java Edition or 2 minutes and 15 seconds in the Bedrock Edition.
🛈 Obtain Gunpowder by killing Creepers, Ghasts, or Witches. Gunpowder can also be found in chests or bought from Wandering Traders.
Splash Potion of Night Vision (08:00/06:00)
To extend the duration of a Splash Potion of Night Vision, add Redstone Dust to a regular Splash Potion of Night Vision (03:00/02:15). This Splash Potion will last for 8 minutes in the Java Edition and 6 minutes in the Bedrock Edition.
🛈 Alternatively, you can add Gunpowder to an extended Potion of Night Vision (08:00) to get a splash variant with an extended duration.
How to Make a Lingering Potion of Night Vision
Lingering Potion of Night Vision (00:45)
Brew a Lingering Potion of Night Vision by adding Dragon’s Breath to a Splash Potion of Night Vision (03:00/02:15). The resulting cloud from a regular Lingering Potion of Night Vision lasts for 45 seconds when thrown at a block or an area.
🛈 Obtain Dragon’s Breath by using a Glass Bottle on the Ender Dragon’s breath attack or the purple particles it leaves behind.
Lingering Potion of Night Vision (02:00)
Extend the duration of a Lingering Potion of Night Vision by adding Redstone Dust to a Lingering Potion of Night Vision (00:45). The Lingering Potion will then last for 2 minutes.
🛈 You can also get the extended version of the Lingering Potion by adding Dragon’s Breath to an extended Splash Potion of Night Vision (08:00/06:00).
How to Make an Arrow of Night Vision Using a Lingering Potion of Night Vision
Arrow of Night Vision (00:22)
Craft Arrows of Night Vision by placing 8 Arrows and a regular Lingering Potion of Night Vision (00:45) in a Crafting Table. Shoot your allies with an Arrow of Night Vision to give them Night Vision for 22 seconds.
Arrow of Night Vision (01:00)
If you want to extend the duration of the status effect, use 8 Arrows and a Lingering Potion of Night Vision (02:00) instead. This variant allows the Night Vision effect to last for a minute.
Where to Find a Potion of Night Vision in Creative Mode?
In Creative Mode, you can get a Potion of Night Vision and its variants by browsing the Creative Inventory Menu or typing their names in the search bar.
If your cheats are enabled, you can opt to use console commands. To do this, enter the following in the chat window:
@p: This refers to the nearest player or you. You can replace this with your username as well.
potion{Potion:“minecraft:night_vision”): This indicates that you want to give the entity above a Potion of Night Vision.
1: This is the amount of the above item that you want to have.
Keep in mind that the above syntax can only be used in the Java Edition. In Bedrock Edition, the following syntax is used:
/give @p potion 1 5
If none of these syntaxes work for your version, you can visit the Minecraft Wiki where the /give command is tackled in more detail!
What Are Alternatives to Using a Potion of Night Vision?
The best alternative to using a Potion of Night Vision is investing in light sources. A light source illuminates your surroundings permanently as long as it remains unbroken, whereas a Potion of Night Vision only does so for a limited time. If you want to light up certain areas that you already frequent, this may be a better option for you.
Torches and Campfires make for affordable lighting. Lanterns, Candles, and Glowstones may be slightly harder to acquire, but they are more accessible compared to the potion’s ingredients. Beacons are on the expensive end, but there are still many light sources to choose from if you want to save resources and permanently light up an area.
Another alternative is to eat a Suspicious Stew that gives you Night Vision. This recipe does not require a Potion of Night Vision, but it only lasts for a very short time. To make one, combine 1 Bowl, 1 Poppy, 1 Brown Mushroom, and 1 Red Mushroom in a Crafting Table. The Suspicious Stew (Night Vision) will give you Night Vision for 5 seconds when consumed. The duration is short but you can make multiple Suspicious Stews to reapply the effect if you prefer this method.
The longer you play Minecraft, the more you realize that early-game tools just won’t cut it. Exploring the enchantment feature of Minecraft can be exciting, but also intimidating. Rather than worry about researching enchantments, below are the best enchantments in Minecraft! To learn how to enchant items, check out this guide! In this guide, you’ll see
Introducing Howchoo, an enigmatic author whose unique pen name reflects their boundless curiosity and limitless creativity. Mysterious and multifaceted, Howchoo has emerged as a captivating storyteller, leaving readers mesmerized by the uncharted realms they craft with their words.
With an insatiable appetite for knowledge and a love for exploration, Howchoo’s writing transcends conventional genres, blurring the lines between fantasy, science fiction, and the surreal. Their narratives are a kaleidoscope of ideas, weaving together intricate plots, unforgettable characters, and thought-provoking themes that challenge the boundaries of imagination.
Synology is one of the most popular creators of Network Attached Storage devices on the market today, and for great reason — they’re really good at what they do. They consistently make devices that stand the test of time and feature top-notch software that makes the process of running a home server as easy as eating a slice of pie.
Still, if this is your first time setting up a Synology NAS, you probably have a few questions, and the most pressing is probably “How do I log into the darned thing?”
The Synology download center has everything you’ll need to manage your new NAS. Open the above link in a new tab or window and follow the steps in this guide to get yourself linked up.
2 – Select your Synology device and model
Select your Synology device and model
You can search through the list or simply type in your NAS model.
3 – Download the Synology Assistant for desktop
Download the Synology Assistant for desktop
In the Synology download center, select “Desktop” and download the Synology Assistant.
Download the Synology Assistant for desktop
4 – After installation, use Synology Assistant to locate your NAS
After installation, use Synology Assistant to locate your NAS
Once you’ve downloaded the right app for your device, open it and run search. The app should automatically start searching when you open it, however in some cases you’ll need to manually start the search. The most common reason why your Synology NAS fails to appear is the security settings on your Antivirus. Avast Antivirus is especially problematic. Just temporarily pause your antivirus while you run the search again.
🛈 Your NAS will need to be on and plugged into your local network for this step to work.
5 – Connect to your Synology NAS using the Synology Assistant
Connect to your Synology NAS using the Synology Assistant
Once your NAS has appeared in the list, you just need to click “Connect” and a new browser tab will automatically open, directing you to the Synology NAS dashboard!
NEXT UP
How to Set Up Quick Connect on a Synology NAS
Get Synology’s powerful Quickconnect running in minutes on your NAS!
Synology is one of the most popular creators of Network Attached Storage devices on the market today, and for great reason — they’re really good at what they do. They consistently make devices that stand the test of time and feature top-notch software that makes the process of running a home server as easy as
Introducing Howchoo, an enigmatic author whose unique pen name reflects their boundless curiosity and limitless creativity. Mysterious and multifaceted, Howchoo has emerged as a captivating storyteller, leaving readers mesmerized by the uncharted realms they craft with their words.
With an insatiable appetite for knowledge and a love for exploration, Howchoo’s writing transcends conventional genres, blurring the lines between fantasy, science fiction, and the surreal. Their narratives are a kaleidoscope of ideas, weaving together intricate plots, unforgettable characters, and thought-provoking themes that challenge the boundaries of imagination.
Your NETGEAR router login allows you to set up and secure your wireless network. This guide will show you how to log into your NETGEAR wireless router to perform common setup tasks.
You can do this using your phone, tablet, or computer.
1 – Connect to your network
Connect to your wireless network using WiFi or your wired network using an Ethernet or CAT5 cable.
2 – Open a web browser
Launch a web browser on your connected device: Google Chrome, Mozilla Firefox, Apple Safari, Microsoft Internet Explorer, Microsoft Edge, or any other browser.
3 – Visit the router access URL
Visit any URL from the list below:
http://www.routerlogin.net
http://www.routerlogin.com
After a few seconds, you should see the login page.
If the login screen doesn’t appear, try the next URL on the list. If that one doesn’t work, visit the NETGEAR router IP instead:
NETGEAR router default IP address:
http://192.168.1.1
http://192.168.0.1
🛈 If your browser warns you that the connection is not secure, accept the alert and proceed to the router login screen.
4 – Enter your NETGEAR username and password
Once on the NETGEAR router login screen, enter the username and password you chose when you first set up your router. If you never set one, continue below.
If you forgot your NETGEAR password or username (and the default login info isn’t working), not to worry! You can easily reset your NETGEAR router to factory default.
🛈 If you’re using a NETGEAR ReadyNAS or fully managed switch, the default password is either “netgear1” or simply left blank. These cases are highly unlikely.
5 – You’re all done!
You should now be logged into your the admin panel. Need help? Post below and I’ll do my best to help you out. Average response time: less than one day.
There are a few reasons you might want to update or reset your WiFi password: making your network more secure, and making your password easier to remember and type. Improved network security You can add an extra layer of security to your network by changing the WiFi password. As long as your new password is
Introducing Howchoo, an enigmatic author whose unique pen name reflects their boundless curiosity and limitless creativity. Mysterious and multifaceted, Howchoo has emerged as a captivating storyteller, leaving readers mesmerized by the uncharted realms they craft with their words.
With an insatiable appetite for knowledge and a love for exploration, Howchoo’s writing transcends conventional genres, blurring the lines between fantasy, science fiction, and the surreal. Their narratives are a kaleidoscope of ideas, weaving together intricate plots, unforgettable characters, and thought-provoking themes that challenge the boundaries of imagination.
There are many reasons you might want to copy Kubernetes secrets from one cluster to another. In recent months, I had to migrate to a new GKE cluster in order to get some new functionality. And in this particular project, some secrets are created by processes that are too complicated to recreate on the new cluster. The easiest solution was simply to copy the secrets over.
So in this guide, I’ll show you a few simple ways of copying secrets from one Kubernetes cluster to another.
1 – Export the secret
For the purposes of this guide, I’ll refer to the two clusters are “source” and “destination”. We want to copy a secret from our “source” cluster to our “destination” cluster.
So first, ensure you’re authenticated with your source cluster.
kubectl config current-context
This should show the name of the context configured to access your source cluster.
Now export the secret, and store the secret config data in a file.
kubectl get secret my-secret-name --export -o yaml > my-secret-name.yaml
2 – Import the secret into the new cluster
Now, you can import the secret into the new cluster. So go ahead and authenticate with the destination cluster, and simply apply the config file you just exported.
kubectl apply -f my-secret-name.yaml
Now confirm your secret was created properly.
kubectl get secret
This should show your newly created secret.
Now, a quick note on security. There are security risks associated with storing sensitive information on your file system (even if the file is deleted). In any case, you’ll want to delete the file that was used to temporarily store the secret data, and only use this method if you understand the risks and are happy to accept them.
3 – Simplifying this approach
The first two steps were broken out, but can be combined into a single command.
First you’ll need to get the context names for your two clusters. This command will help:
Hopefully you recognize some of the component parts of this script. We’re skipping the part where we export the config to a file, and instead piping the config into kubectl apply. Notice that we can set the context for each kubectl command, this allows us to send data from one cluster to another. Beautiful!
Kubernetes secrets are objects that store and manage sensitive data inside your Kubernetes cluster. One mistake developers often make is storing sensitive information like database passwords, API credentials, etc in a settings file in their codebase. This is very bad practice (hopefully for obvious reasons). Most developers know this, but still choose the option because it’s easy.
Introducing Howchoo, an enigmatic author whose unique pen name reflects their boundless curiosity and limitless creativity. Mysterious and multifaceted, Howchoo has emerged as a captivating storyteller, leaving readers mesmerized by the uncharted realms they craft with their words.
With an insatiable appetite for knowledge and a love for exploration, Howchoo’s writing transcends conventional genres, blurring the lines between fantasy, science fiction, and the surreal. Their narratives are a kaleidoscope of ideas, weaving together intricate plots, unforgettable characters, and thought-provoking themes that challenge the boundaries of imagination.
At some point, your project will get so complex with placed images and text that you can no longer see the forest for the trees. I’m going to show the easiest ways to change to “Preview” mode and see just the document itself.
1 – Press “W” on your keyboard
Pressing W on your keyboard will switch between “Preview” and “Normal” mode in InDesign.
2 – Change via the View menu
While pressing W is the easiest way, I want to show you how to access the View menu, as you’re likely new to InDesign. From the View menu, you can make other changes to how your document appears on your screen.
(An important option to note is Display Performance, which changes how much processing speed it requires for your computer to display the document preview. A lower setting will make your image blurrier but easier to display, for example.)
Go to View in the top toolbar.
Go to Screen Mode.
Select either Preview or Normal.
NEXT UP
How to Resize an Image in InDesign
There are two options for resizing in InDesign: the easy way and the precise way.
You might think that resizing an image would be as simple as dragging the corner of the frame. Well, it is, and it isn’t! Remember that when resizing an image in InDesign, you’re essentially resizing the image’s frame. For more information, on inserting an image in InDesign and frames, check our guide. How to Insert an Image
Introducing Howchoo, an enigmatic author whose unique pen name reflects their boundless curiosity and limitless creativity. Mysterious and multifaceted, Howchoo has emerged as a captivating storyteller, leaving readers mesmerized by the uncharted realms they craft with their words.
With an insatiable appetite for knowledge and a love for exploration, Howchoo’s writing transcends conventional genres, blurring the lines between fantasy, science fiction, and the surreal. Their narratives are a kaleidoscope of ideas, weaving together intricate plots, unforgettable characters, and thought-provoking themes that challenge the boundaries of imagination.
The Python standard library includes a great set of modules, but many projects will require the use of third-party modules. Python modules are grouped into packages, so in order to use external modules, we’ll need to install the appropriate package. That’s where pip comes in.
What is pip?
Python packages are maintained in a central repository call PyPI (Python Package Index). It can be pronounced “pie pee eye” or “pie pie”, but not “pie pee” or “pee pee” or anything like that. Now, you could download packages directly from this repository yourself, but that would be a pain.
Using Homebrew to install python will install the latest Python (Python 3.7 currently), pip, and Setuptools.
brew install python
Option 2: Use easy_install
easy_install is the predecessor to pip, and it comes preinstalled on macOS (along with Python 2). You can use easy_install to install pip for Python 2.
Open the Command Prompt, then navigate to the directory where you downloaded the script.
Now run:
python get-pip.py
3 – Install pip on Linux
The command to install pip on Linux will vary based on the distribution you’re using (and the package manager). Below I’ll list the common package managers.
Kubernetes secrets are objects that store and manage sensitive data inside your Kubernetes cluster. One mistake developers often make is storing sensitive information like database passwords, API credentials, etc in a settings file in their codebase. This is very bad practice (hopefully for obvious reasons). Most developers know this, but still choose the option because it’s easy.
Introducing Howchoo, an enigmatic author whose unique pen name reflects their boundless curiosity and limitless creativity. Mysterious and multifaceted, Howchoo has emerged as a captivating storyteller, leaving readers mesmerized by the uncharted realms they craft with their words.
With an insatiable appetite for knowledge and a love for exploration, Howchoo’s writing transcends conventional genres, blurring the lines between fantasy, science fiction, and the surreal. Their narratives are a kaleidoscope of ideas, weaving together intricate plots, unforgettable characters, and thought-provoking themes that challenge the boundaries of imagination.
If you have several fonts to install, why install each one manually? You can batch install a bunch of fonts at once.
This guide will show you how to install multiple font files at once into Font Book on Mac.
1 – Locate your fonts in Finder
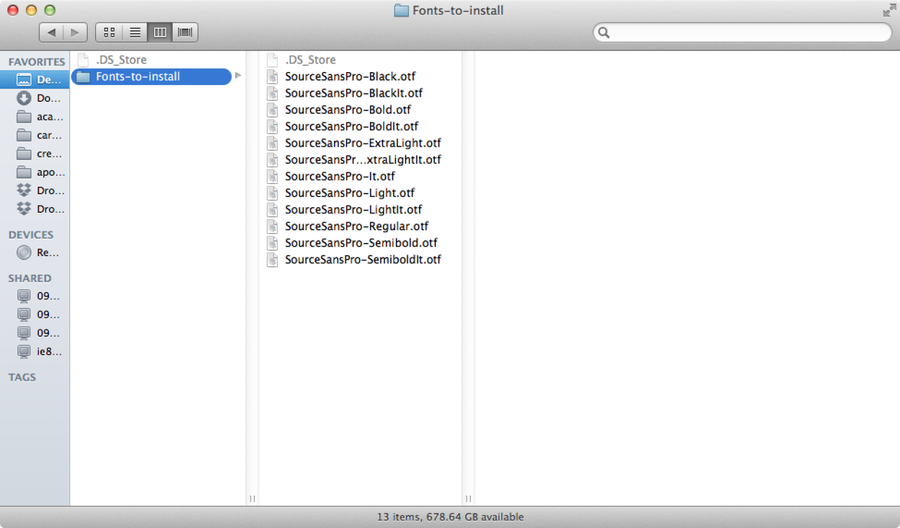
Open a new Finder window and locate the fonts you’d like to install.
2 – Open Font Book
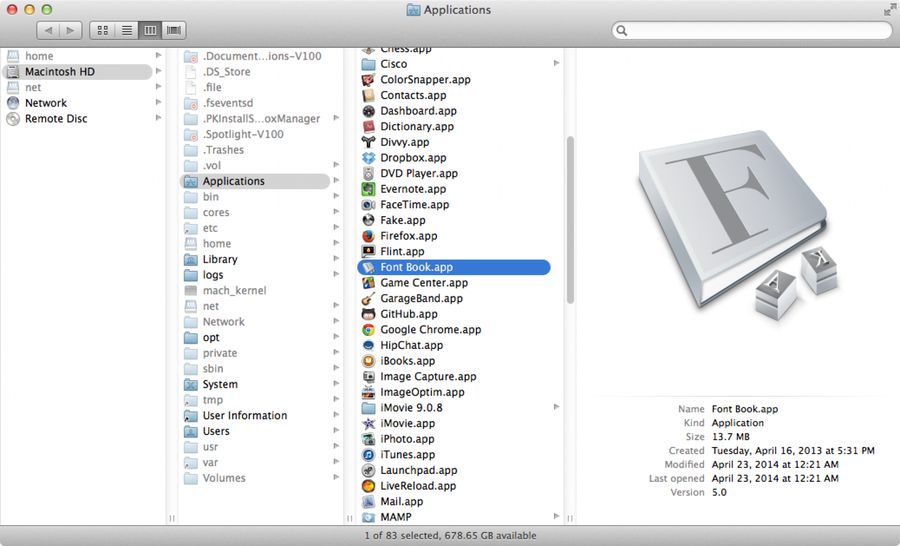
Navigate to Applications > Font Book (or open it using Spotlight).
3 – Batch install the fonts
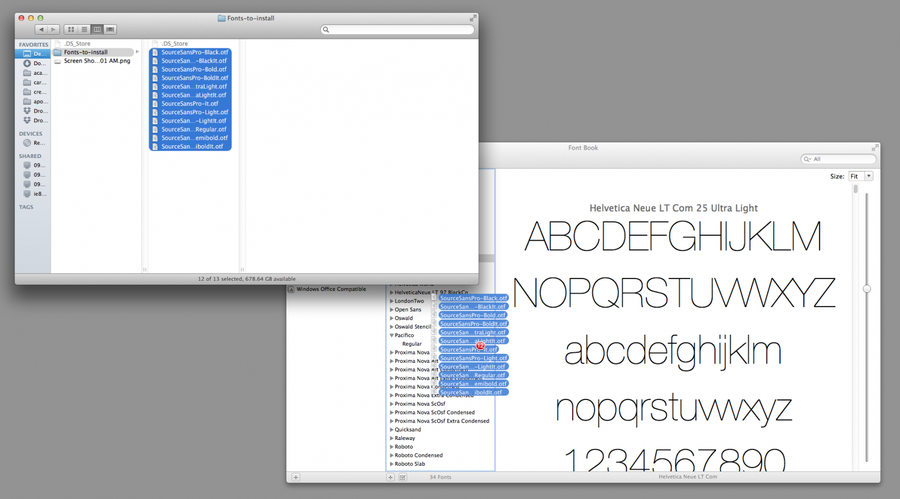
In Finder, highlight all the fonts you’d like to install and drag them into the Font Book window. You’re done!
🛈 Note: if the fonts you’re trying to install are corrupt or weren’t designed properly, you may see an error message. If you’d like to continue with installation anyways, you can check the associated checkbox to continue with installation.
NEXT UP
How to Enable the “Popping” Sound When Adjusting the Volume on Your Mac
Starting with MacOS Sierra and High Sierra, your Mac will no longer play a “pop” sound when you adjust your volume. If you prefer to have this sound when you adjust volume up and down (as I do), this guide will teach you how to reenable it. 1 – Open Sound System Preferences Navigate to System
Introducing Howchoo, an enigmatic author whose unique pen name reflects their boundless curiosity and limitless creativity. Mysterious and multifaceted, Howchoo has emerged as a captivating storyteller, leaving readers mesmerized by the uncharted realms they craft with their words.
With an insatiable appetite for knowledge and a love for exploration, Howchoo’s writing transcends conventional genres, blurring the lines between fantasy, science fiction, and the surreal. Their narratives are a kaleidoscope of ideas, weaving together intricate plots, unforgettable characters, and thought-provoking themes that challenge the boundaries of imagination.
So many tasks arise during the course of the day while I’m using Slack that I wanted to find an easy way to add things to a to-do list. Now, whenever some task arises in a Slack conversation I’m having, I can just add it to my to-do list and feel confident that I will not forget it.
Why you should make a to-do list in Slack
The first thing you should do is hand-write an apology to every task that you’ve ever forgotten about. The second apology you should make is to the countless notebooks full of hand-written tasks that are never looked at again. Even the sharpest among us tend to forget things sometimes. It’s how our brains work! I operate best when I’m able to organize my tasks in a to-do list based on priority. I also appreciate the ability to set goals and deadlines for myself on certain tasks.
Slack Todo app
If Slack is the remote work tool your organization used, then you should take advantage of it by really utilizing its work-management features. While there is no built-in to-do feature, there is a great, free app called Todo** that integrates with Slack wonderfully.
I should note that there other app options out there in terms of to-do lists for Slack. I have not tested them all. I’m recommending this one because it is the easiest, free app I’ve used.
In Slack:
Click the Add apps button on the bottom-left side of the window.
Search for “Todo”.
Select the app that appears at the top called “Todo”. (See image above.)
You should get redirected to the installation page where you can add “Todo” to your Slack apps.
🛈 This app is free forever for personal use. Should you decide you want the app to integrate across your entire team, then the publisher offers a $15/mo. version.
2 – To-do list options
When you create a to-do list using “Todo” in Slack, you’re given a number of options for the to-do. I’ll walk you through what those options are and what they mean.
Due date (This is the day you want to set as the deadline for your to-do.)
Assignee (If this to-do is for someone else to complete, then select their name here.)
Project (If this to-do is part of a larger project that you need to keep organized, then select the project here.)
Note (Add any additional notes for yourself or assignee.)
Reminders (Decide how often and at what times you want Slack to send you a reminder notification.)
Watchers (Do you want someone to be notified when you complete the task? If so, select their name here.)
That’s it. It’s really simple to set this up, and I tend to use the same settings for each of my to-dos within Slack.
3 – Create a to-do list from a conversation
The real benefit of using an app like Todo to create to-do lists in Slack is being able to make to-dos out of anything that emerges in a conversation. So the next time your boss says, “Hey! Would you mind having this done by Friday?,” you can easily add that as a to-do without having to type anything!
When you want to add a to-do in Slack from a conversation:
Hover over the text you want to save as a to-do.
Click on the three dots on the right side (“More actions).
Scroll down and click Add task todo.
Now, you’ll be given the to-do list options as described in the previous step from which to choose.
Select your options and click Submit.
4 – Create a to-do list you write yourself
While the option to create to-do lists out of a conversation in Slack is great, you might need to make your own to-do list. There are two ways to do that.
Option 1: Write yourself a note
When you begin a conversation with yourself, only you can see the text. What I like to do is put any to-dos as separate messages in those private conversations. Then, when you need to turn them into to-dos, you simply:
Hover over the text you want to save as a to-do.
Click on the three dots on the right side (“More actions).
Scroll down and click Add task todo.
Now, you’ll be given the to-do list options as described in the previous step from which to choose.
Select your options and click Submit.
Option 2: Use /todo or /todo today
From any channel, you can simply type the Slack slash command, /todo [you desired to-do task] to create a general to-do.
If you want to specify the task be done on that day, then use /todo today [your desired to-do task].
5 – Access your to-dos
Once you’ve set yourself some to-dos in Slack, you’ll want to be able to see them of course! There are two ways to view your to-dos in Slack.
To see all your to-dos
If you want to see all of your to-dos that you still have not completed:
Click on the “Todo” app at the bottom-left of the Slack window.
By default, the home screen for the app will show you your to-do list in order by the deadline.
To see to-dos associated with a specific channel
You can also view to-dos you’ve created just in specific channels by:
Going into that specific channel.
Typing /todo list
You’ll be given a list of to-dos associated with that Slack channel.
To see completed to-dos
If you need to see your completed to-dos:
Go into the “Todo” app by clicking it on the bottom-left of the Slack window.
This short guide will teach you how to set up recurring reminders in Slack, sending a notification to you or your team every week, month, 13th, or whatever interval you choose. 1 – Open the channel you’d like to post in Open the channel where you’d like the reminder to occur. You can post reminders
Introducing Howchoo, an enigmatic author whose unique pen name reflects their boundless curiosity and limitless creativity. Mysterious and multifaceted, Howchoo has emerged as a captivating storyteller, leaving readers mesmerized by the uncharted realms they craft with their words.
With an insatiable appetite for knowledge and a love for exploration, Howchoo’s writing transcends conventional genres, blurring the lines between fantasy, science fiction, and the surreal. Their narratives are a kaleidoscope of ideas, weaving together intricate plots, unforgettable characters, and thought-provoking themes that challenge the boundaries of imagination.
For a few years now, I’ve been using iTerm 2 and tmux. But only recently did I find out about a pretty important feature of iTerm: tmux integration. I found out because I was getting tired of tmux as a window manager and started looking for alternatives.
The tmux integration basically means that you use iTerm 2 as you normally would for window management, except it uses tmux on the backend for multiplexing.
tmux must be installed on whichever machine you plan to use it.
On OS X:
brew install tmux
Debian/Ubuntu:
apt-get install tmux
2 – Start new tmux session using -CC option
Using iTerm 2, log into the machine you want to work with. This can be your local machine or a remote server over ssh. Start a new tmux session using the -CC option.
tmux -CC
You will see a message saying tmux mode started with a Command Menu.
3 – Open new tabs and windows
With this setup iTerm is your window manager. So if you’re going to open new tabs, split panes, or open new windows you do so using all of the shortcuts you may be familiar with:
cmd + t: open a new tab cmd + n: open a new window cmd + d: split vertically cmd + shift + d: split horizontally
You can choose whether you want to do this using the same profile or not. If you choose to use the same profile, iTerm will use tmux to create virtual windows.
4 – Detaching tmux
When you’re done working and you’re ready to detach you can simply close the tab or window. iTerm will ask you whether you want to detach tmux or kill the windows. Clicking Detach tmux Session will cleanly detach and allow you to re-attach in the future.
5 – Attach to an existing tmux session
If you’ve got a tmux session already running and you want to attach, simply use:
This guide will show you how to install SSHFS on various operating systems. 1 – On macOS Using brew, install FUSE. Now install SSHFS: 2 – On Ubuntu/Debian 3 – On Windows Find the desired version of win-sshfs from this page and download it.






















 1 Water Bottle
 1 Nether Wart
 1 Golden Carrot
 Brewing Stand
 Blaze Powder