Google Forms is a tool that has a variety of uses. Whether you need to gather customer feedback, proctor an exam, or enable users to submit a help ticket, Google Forms provides a way to gather information easily.
Most likely, you already have questions listed out in a document or spreadsheet. Instead of copy and pasting between a form and document, the steps below will show how to use an add-on to import questions from Google Slides, Sheets, or Docs.
This method does require you to install a third-party add-on. If you need help installing an add-on to Google Forms, check out our guide here!
1 – Install Form Builder
Using the Form Builder add-on, you can import questions from Google Sheets, Docs, or Slides. Form Builder supports importing questions, questions with answers, and quiz into Google Forms. You can even set a column to mark questions as required!
2 – Open Form Builder
When you’re ready to import, click the Add-on button shown in the image above and select Form Builder. A pop-up window will appear, hit Start to begin the importing process.
If you don’t see the Add-on menu, simply refresh your page.
3 – Choose import location
Now is the time to choose where you want to import questions from using the Form Builder window. In this example, we’re importing from a Google Sheet, however you can import from Docs, Slides, or Forms. Make sure to hit the Select button in the window before moving on.
4 – Choose questions to import
Select the format or pattern of the questions:
Q’s: Only the questions will be imported.
Q & A’s: Questions will be imported with answers
Quiz: Questions will be imported with correct answers and points
Choose the correct formatting for your imported questions. In this case, we’ve indicated that column A hold the question, while the answers range from column B to C.
5 – Choose the correct question type
The final step before importing is to make sure the add-on has chosen the correct question type. By hovering over the question name, you’ll be able to see the full question.
Use the drop-down menu in the Type column to choose the correct question type. When ready, move on to the next step.
6 – Import questions
Before you import, look over your questions to be imported and make sure you’ve grabbed the correct information.
When ready, click the Import Selected button and questions will now be imported into your Google Form!
There you have it: two easy ways to import questions into Google Forms! As we stated before, anything is possible with Google Forms. If you’re interested in more add-ons for Google Forms, check out our list here!
If you just need to search and find a single word or multiple words in Google Docs, press ⌘ + F. If you want to find and replace words in your Google Doc, then we’ll show you how to do that too! 1 – Press cmd + F To find a word (or words) in
Introducing Howchoo, an enigmatic author whose unique pen name reflects their boundless curiosity and limitless creativity. Mysterious and multifaceted, Howchoo has emerged as a captivating storyteller, leaving readers mesmerized by the uncharted realms they craft with their words.
With an insatiable appetite for knowledge and a love for exploration, Howchoo’s writing transcends conventional genres, blurring the lines between fantasy, science fiction, and the surreal. Their narratives are a kaleidoscope of ideas, weaving together intricate plots, unforgettable characters, and thought-provoking themes that challenge the boundaries of imagination.
The first few days of Minecraft are the most stressful, which means a good starter house is required to keep you safe from mobs and the elements (and have a place to spawn back to in the event of an unfortunate interaction with a skeleton or zombie).
What defines a good starter house?
Simplistic Design: Regardless of building skill level, large builds are realistic to starter houses. They should take a few days, at most, and even a new player should be able to build it.
Attainable Materials: The materials need to be easy to gather or find, which is why most builds are made of stone and wood.
Includes the Essentials: What good is a house if it doesn’t have a bed? It should also have space for farming and storage to help you survive long enough to get better tools and experience.
What makes up a cottagecore style house?
In Minecraft, there are blocks for all types of builds. Cottagecore starter house designs include a lot of stone, wood, and (of course) greenery. They’re great for early game in Minecraft because their resources are easily found in the Overworld. For those who have fallen down a TikTok cottagecore hole or simply just want a cozy cabin to escape to, cottagecore and fairycore Minecraft builds are meant for you.
However, that doesn’t mean concrete, sandstone, or even terracotta are out of the running. The following builds vary in shape and location so that anyone looking for a cottagecore starter base can build it!
From desert to flower forest (to even a mushroom), this list features cottagecore starter homes for all skill levels!
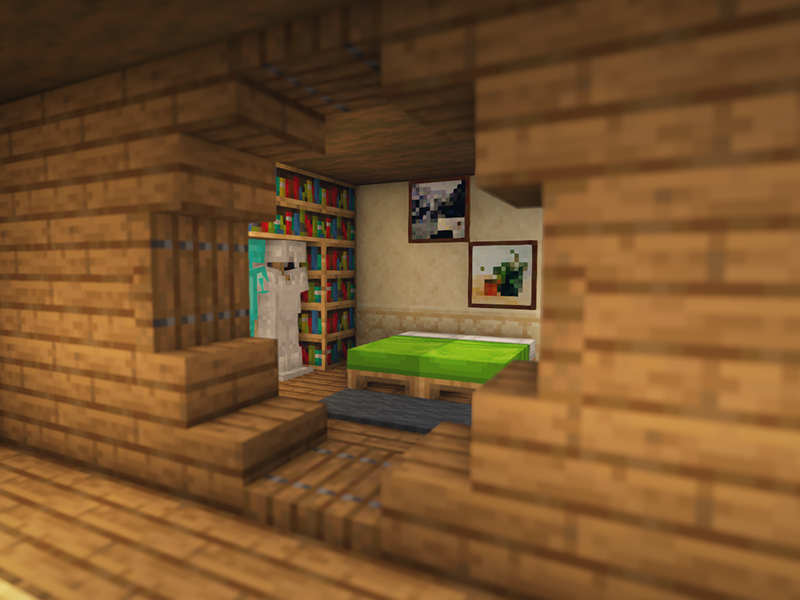
A delightful build which looks amazing with Mizuno’s 16 resource pack! For anyone looking for a simple but detailed cottage in the woods, look no further than this tutorial. If you’d like to use vanilla textures, then this build still looks great (just change up the indoor flooring).
While this cottage is perfectly tiny, with just enough room for starting tools, it can also be translated to a bigger scale if wanted! The structure is a simplistic design and made of materials easy to get in early game!
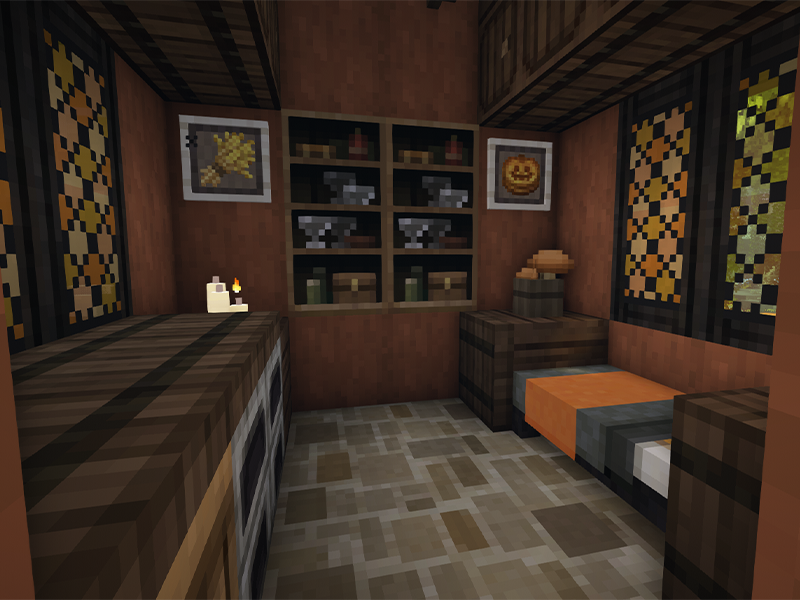
A perfect fall inspired house! Not only does it have easy-to-obtain blocks, but it’s a great build for anyone new to Minecraft to try. The outside decor is made of a simple palette, but still manages to fill up the space so that the house doesn’t feel foreign to the area. This build was done with Mizuno’s 16 resource pack.
This specific design is one I’ve used in multiple servers and Minecraft gameplay. It’s such an easy build for those in early game or for those who want a home that blends in with the landscape. Our list of Traditional Starter Houses features a similar build if you’re looking for an alternative block palette!
This build is meant for those looking for an early game challenge. Or just want a nice greenhouse to store their crops. This might be the starter house that takes the longest to build on this list, but it’s so worth it! This cottage is meant to last you some time, as there’s room for anything you could want!
An alternative to TinyCraft’s design is this lovely home! It’s cozy, it’s cute, it’s just so cottagecore! Using Mizuno’s 16 resource pack, this home has space for all the flowers you could want. It’s a quick and easy build that fits just about any biome!
Similar to a traditional style home, it’s really a quaint starter house for any type of player. We love the farm area off to the side, and this building allows for a secret water source so that you can surround your house with farmland if you wanted!
Our favorite thing about this tutorial is that SheraNorm showcases how to build the base structure, and then offers up ways to alter it with different blocks and decorations! This build design is perfect for fitting all your needs compactly, even including a mine entrance!
We’ll preface this by saying the interior design should be altered to fit your needs. While this design has a small interior, it’s perfect for those looking to get shelter early in the game. What we love about this house is that all blocks can be altered to fit your preferred color scheme or aesthetic!
This build is absolutely beautiful and one of our favorites. We did deter the palette in our version, however. Rather than quartz, we switched to white concrete for an early-game friendly version. We also found that using Mizuno’s 16 resource pack made the build look even cozier!
Are you a witch, wizard, or wix looking for a quaint home to build in the forest? This fantasy cottage is made just for you! Using [JermsyBoy’s Vanilla Edits](https://www.curseforge.com/minecraft/texture-packs/jermsyboys-vanilla-edits], this overgrown roof is the perfect addition to any home wanting a more fantasy vibe. The tutorial is easy to follow, even offering up variations and ideas on what to do within and around the cottage.
Don’t go thinking that savanna biomes can’t also be cottagecore! This build is all about using sandstone and other warm biome blocks in a cottagecore design. Featuring a combination of sandstone, bricks, and spruce, this build fits right into the landscape that usually doesn’t feel so cozy.
In terms of cottagecore starter houses, this build is as simple and basic as they come. Each block is easy to get early on in the game. It’s even easy to switch out the wood or colors to whatever you want! This build is actually perfect for those who prefer modern architecture, but want to dip their toes into cottagecore in Minecraft.
Those looking for a challenge starter base should give this a try. Not only is it a treehouse with room for crafting and sleeping, but there’s an entire base underneath the lake and tree! There’s plenty of room to enchant, sleep, smelt, and even go to the Nether! Just make sure to put a gate by the Nether portal, since too many zombified piglins were coming through while building.
This video is packed with leaves and cottagecore! Not only will you learn how to build a large, homey cottage, but you’ll also learn how to make an entrance gate right out of a fairytale! This build is one of my favorites. Not just because of how many leaves I could place down, but because of how versatile the block palette can be. Don’t like birch? You can just replace it with some white terracotta, and it’ll still look like an overgrown cottage.
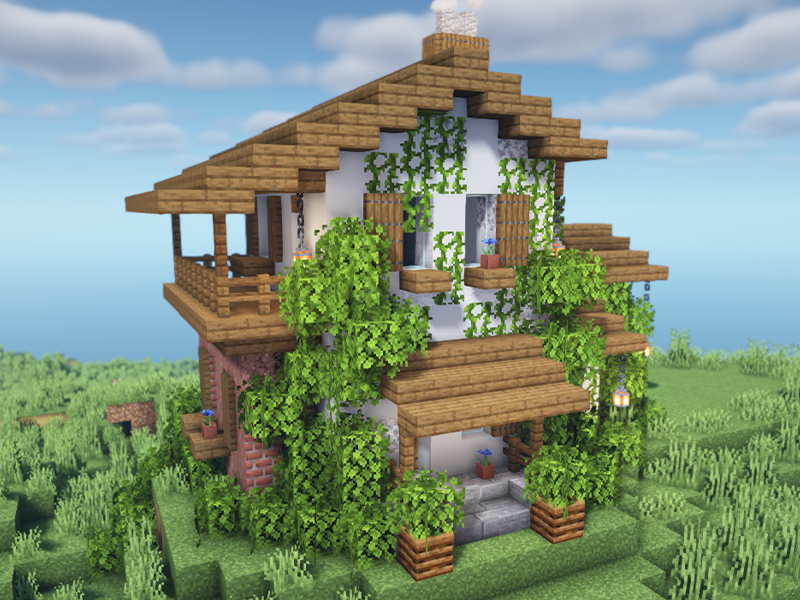
When you see “cottagecore” you immediately imagine a cottage looking much like this one! The vines and details are what turn this home into the perfect cozy cottage tucked away in the forest. It’s a decently sized home that’s easy to put together, no matter the skill.
Whether you’re risking the treacherous snowy peaks or just want a small cabin to retreat to, this winter cabin is simplistically cozy. With plenty of windows to view the landscape and a small chimney, this home is meant to be loved forever. Be careful of the front sweet berries, however, and make sure to stay safe while skating on the frozen pond.
I’d consider this to be a fairy-lite house. It’s enough of a fantastical design that you can still build more traditional style buildings around it. It’s very simple to build and perfectly sized for fairy activities!
What’s more cottagecore than a hobbit hole?! Perhaps nothing at all. Bringing classic Lord of the Rings architecture into Minecraft, this tutorial helps you create your hole-in-the-hill dreams come true. Who knew how simple making a hobbit home could be! It’s also a build that can grow with you as you gain more blocks, expand your enchantments, and more!
What better way to blend into the flower forest landscape than with a pop of color? This build takes you step-by-step into building a colorful and cozy cottage surrounded by a picturesque landscape.
This house showcases the classic cottagecore style of mixing bright blocks with vines and leaves. At first, the combination of so many blocks may seem like a bad design choice, but all together it forms a beautiful picture. We built this house right next to a village to show those villagers what true architecture genius looks like.
Dark forests may be hard to survive in (with all the mobs spawning), but this home will make it a little more liveable! While the tutorial itself only guides through building the exterior, the creator does go through a tour of the house and its surrounding area.
Live out your fairy dreams in this fantasy inspired home! Whether tucked away in a forest or alongside a farm in the plains, this home is made of blocks easily attainable early on. So there’s no need to worry about sacrificing your magical needs by gathering later game materials.
Any good fairycore or fantasy build can only be improved with a grass roof. This build combines many design elements of other builds on this list. The rounded doorway, natural roof, and wooden frame, all mix together to create a perfect fantasy home for any early game player.
It doesn’t take a rocket scientist to build a mushroom in Minecraft! This tiny home is perfect as a starter house, but it can also serve as a home for other mobs in Minecraft as well! Imagine a whole mushroom town filled with villagers to trade with!
The longer you play Minecraft, the more you realize that early-game tools just won’t cut it. Exploring the enchantment feature of Minecraft can be exciting, but also intimidating. Rather than worry about researching enchantments, below are the best enchantments in Minecraft! To learn how to enchant items, check out this guide! In this guide, you’ll see
Introducing Howchoo, an enigmatic author whose unique pen name reflects their boundless curiosity and limitless creativity. Mysterious and multifaceted, Howchoo has emerged as a captivating storyteller, leaving readers mesmerized by the uncharted realms they craft with their words.
With an insatiable appetite for knowledge and a love for exploration, Howchoo’s writing transcends conventional genres, blurring the lines between fantasy, science fiction, and the surreal. Their narratives are a kaleidoscope of ideas, weaving together intricate plots, unforgettable characters, and thought-provoking themes that challenge the boundaries of imagination.
LEDs can take your project from trashy to flashy but why waste valuable GPIO pins on something so simple when you could dedicate the control with something like the Raspberry Pi Pico?
If you’re not familiar with the Pico, it’s the latest (and first) microcontroller from the Raspberry Pi Foundation. It’s about the size of your thumb and costs only $4, making it a viable board for many simple microelectronics projects. It features the new RP2040 chip which can be found on a growing number of boards but today we’re focusing on the Pico module.
There are a few different ways to control LEDs using the Pico. In this guide, I’ll go over the three most common LEDs used:
The Pico has a built-in LED.
GPIO pins can be used to control individual LEDs.
The board can also control LED strips—some of which offer individual LED control.
1 – Set up and use MicroPython
Each of these methods will require the use of MicroPython. This relies on an application called Thonny which must be installed on a Windows, Linux, or Mac machine. We have a guide breaking down how to set up and use MicroPython for the first time.
Point Thonny to the Pico using the drop-down menu in the bottom-right corner.
Enter your MicroPython code into the top half of the Thonny window.
Save the script, be sure to choose the option to store the script on the Pico.
2 – Control the on-board LED
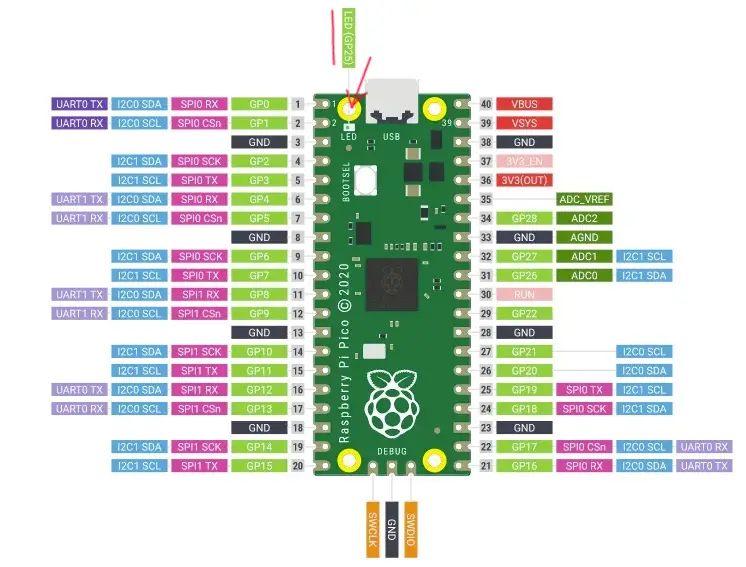
If you need a simple status indicator and don’t want to waste any GPIO pins, you can always use the built-in LED. This component is found on top of the Pico near the mounting button.
Here’s a quick sample script that shows how to call and address the onboard LED. Running this script will turn the LED off or on depending on its current state.
from machine import Pin
led = Pin(25, Pin.OUT)
led.toggle()
You can use this to develop your own code and control the onboard LED. However, you may find this doesn’t suit your project needs. If you need to control different colored LEDs or more than one, you need to use the GPIO pins.
3 – Control a separate LED
Individual LEDs can be easily programmed once wired into place. Single color LEDs will take up fewer GPIO pins than multicolored ones as RGB LEDs require pins for each color it supports in addition to the ground.
Wire the LED to the Pico
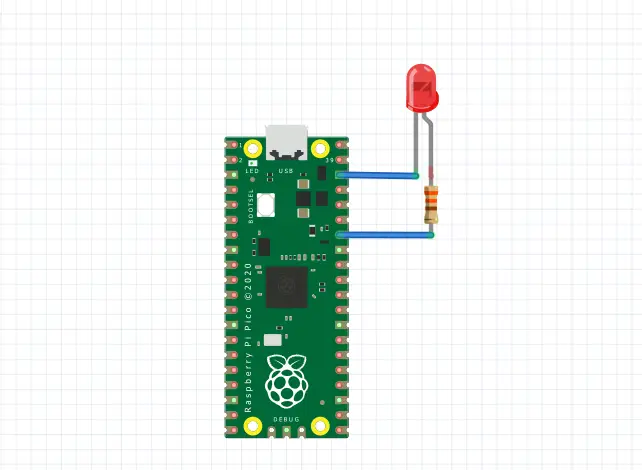
Once you choose what kind of and how many LEDs to use, you’ll need to wire them to the Pico. A resistor is required for the connection—a quick google search will let you know what resistance value is necessary for your LED but 330 ohms is a good rule of thumb.
You can solder the pins into place or use wires to add distance between the Pico and LED. The method you choose depends on what you’re using the LED for. The picture attached shows a general example of how to wire an LED to the Raspberry Pi Pico.
Program the LED
Here’s a sample script that demonstrates how to toggle an external LED. I’m using pin number 34, or GP28, in my sample code. Make sure your code uses the right GPIO pin number that corresponds with your LED.
from machine import Pin
led = Pin(28, Pin.OUT)
led.toggle()
4 – Control a LED strip
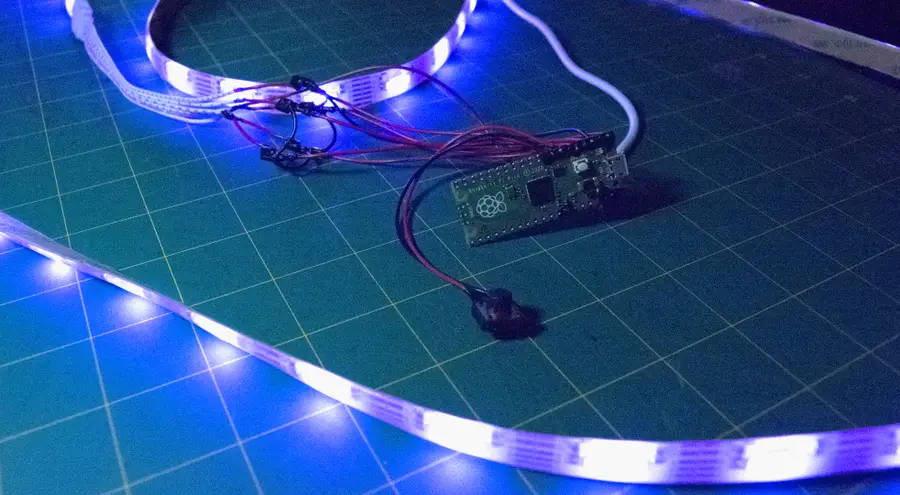
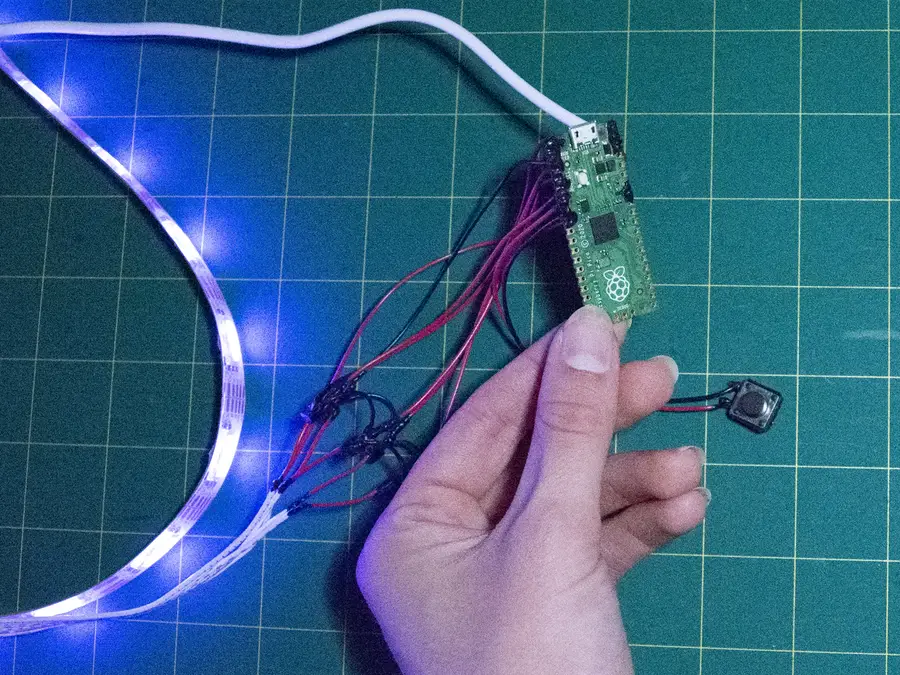
It’s also possible to control a full-sized LED strip. I’m using a random, non-individually addressable strip I found at Walmart. It has RGB colors as well as cool/warm white options, this means that I need 5 open GPIO pins to control each color and one ground pin. A resistor is required for each color but not the ground wire.
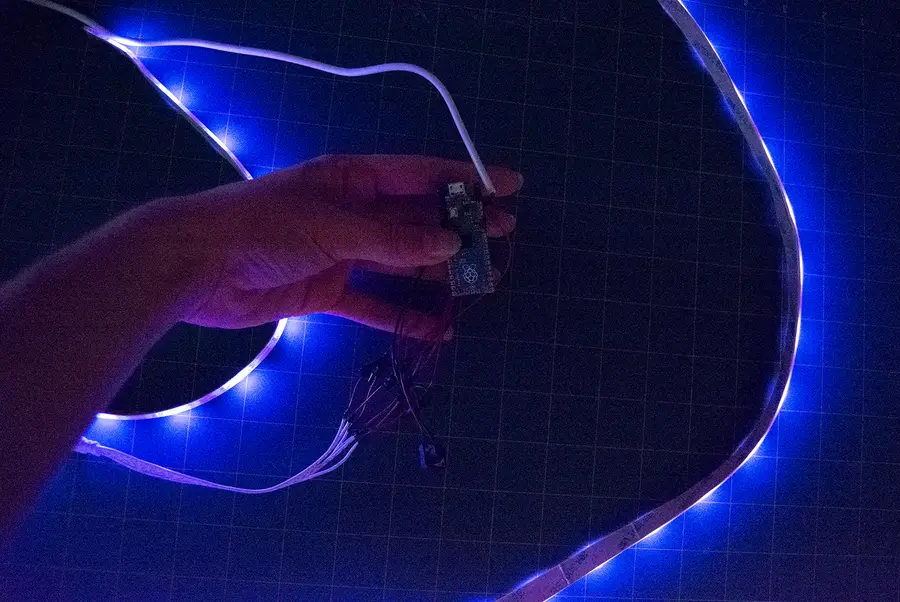
Because the LEDs are not individually addressable, the entire strip will illuminate with the same color at the same time. Here’s some example code demonstrating how to set a custom color on the LED strip. The frequency values can be changed for each individual color. The values in this demo will create a soft blue glow. Experimenting with the values will cause colors to mix.
from machine import Pin, PWM
cool_white = PWM(Pin(0))
blue = PWM(Pin(1))
red = PWM(Pin(2))
green = PWM(Pin(3))
warm_white = PWM(Pin(4))
cool_white.freq(500)
blue.freq(10000)
red.freq(500)
green.freq(500)
warm_white.freq(500)
5 – Add your LEDs to a project
You can use these basic principles to incorporate LEDs into a myriad of projects. The Pico adapts easily into projects with Raspberry Pi’s and maintains flexibility at a low cost. At the end of the day, this $4 microcontroller is more than ready to help you build your next flashy project. Congratulations! You’re ready to master LED with the power of the Pico.
There are several ways to go about running a Minecraft server on the Raspberry Pi. In this guide, I’ll cover how to install Nukkit—a cross-platform Minecraft server that’s super easy to set up on the Raspberry Pi. This server should work with PCs, consoles, and tablets running Minecraft 1.14. I’ll be using a Raspberry Pi
Introducing Howchoo, an enigmatic author whose unique pen name reflects their boundless curiosity and limitless creativity. Mysterious and multifaceted, Howchoo has emerged as a captivating storyteller, leaving readers mesmerized by the uncharted realms they craft with their words.
With an insatiable appetite for knowledge and a love for exploration, Howchoo’s writing transcends conventional genres, blurring the lines between fantasy, science fiction, and the surreal. Their narratives are a kaleidoscope of ideas, weaving together intricate plots, unforgettable characters, and thought-provoking themes that challenge the boundaries of imagination.
You’ve placed that great image into your InDesign document, but only want to use a portion of it. We’ve all been there.
Of course, you could crop your placed image in a separate software application like Photoshop or Lightroom. There’s really no need to open up another application, however. You can easily crop the image in InDesign.
In this guide, we’ll show you how!
We’re going to assume you’ve already placed and fit your image into the frame. If you need help with this, then see our guide on inserting images in InDesign.
1 – Click the gray circle in the center of your image
You should see a small gray circle in the center of your image’s frame. Click it. This should change the frame and box color to red. (See step image.)
This gray circle allows you to do a couple of things:
Select the image in the frame, as opposed to the frame.
Adjust the image, separate from its frame.
Think about the frame and image as a literal window frame with a cloudy sky in the background respectively. InDesign allows you to actually edit and move around the sky in the background while keeping the frame the same.
2 – Constrain your image proportions
In the “Transform” pane near the top-right of your InDesign screen, make sure the chain links are locked (as shown). This will ensure that your image does not lose its proportions as you enlarge it.
Also, note that if your original image was quite small, you may not be able to enlarge it enough for cropping into your frame (whether in InDesign or elsewhere). You’ll need a bigger image from which to work.
3 – Click and drag a corner out to expand the image
Click on one of the corner boxes and drag it outward to expand your image’s size.
Notice that:
The frame does not change. Just like a window, you can only see what’s showing through the frame.
Some of the image is missing and can’t be seen. (It’s what’s outside of the frame.)
4 – Drag the gray circle to crop the image
When you click and drag the gray circle now, you’ll essentially be cropping the image into your frame. Just drag the image until only the portion you want appears in the frame.
If you need to, you can enlarge or shrink the image (step 3) as needed to make the perfect crop.
NEXT UP
How to Resize an Image in InDesign
There are two options for resizing in InDesign: the easy way and the precise way.
You might think that resizing an image would be as simple as dragging the corner of the frame. Well, it is, and it isn’t! Remember that when resizing an image in InDesign, you’re essentially resizing the image’s frame. For more information, on inserting an image in InDesign and frames, check our guide. How to Insert an Image
Introducing Howchoo, an enigmatic author whose unique pen name reflects their boundless curiosity and limitless creativity. Mysterious and multifaceted, Howchoo has emerged as a captivating storyteller, leaving readers mesmerized by the uncharted realms they craft with their words.
With an insatiable appetite for knowledge and a love for exploration, Howchoo’s writing transcends conventional genres, blurring the lines between fantasy, science fiction, and the surreal. Their narratives are a kaleidoscope of ideas, weaving together intricate plots, unforgettable characters, and thought-provoking themes that challenge the boundaries of imagination.
If your Mac is connected to both an Ethernet cable and Wi-Fi, you probably want to use Ethernet by default since it’s generally faster. This short guide will teach you how to prioritize the wired (Ethernet) connection when your Mac is connected to both Ethernet and Wi-Fi.
This approach is better than toggling Wi-Fi off when you connect your Ethernet cable since Wi-Fi is needed for things like unlocking your Mac using your Apple Watch.
Open the Network system preferences pane by navigating to Apple Icon > System Preferences > Network.
2 – Access the Service Order pane
Click on the settings “gear” icon and select Set Service Order… from the dropdown menu.
3 – Reorder macOS network services
You’ll see several network devices listed. I use a USB hub with tons of features, so your Ethernet connection might be aliased as “Thunderbolt Ethernet Slot 1” or “Thunderbolt Bridge”.
Either way, drag the Wi-Fi item to the bottom of the list to prioritize it lower than whichever Ethernet device your computer is using.
When you’re done, click OK and then the Apply button.
NEXT UP
How to Enable the “Popping” Sound When Adjusting the Volume on Your Mac
Starting with MacOS Sierra and High Sierra, your Mac will no longer play a “pop” sound when you adjust your volume. If you prefer to have this sound when you adjust volume up and down (as I do), this guide will teach you how to reenable it. 1 – Open Sound System Preferences Navigate to System
Introducing Howchoo, an enigmatic author whose unique pen name reflects their boundless curiosity and limitless creativity. Mysterious and multifaceted, Howchoo has emerged as a captivating storyteller, leaving readers mesmerized by the uncharted realms they craft with their words.
With an insatiable appetite for knowledge and a love for exploration, Howchoo’s writing transcends conventional genres, blurring the lines between fantasy, science fiction, and the surreal. Their narratives are a kaleidoscope of ideas, weaving together intricate plots, unforgettable characters, and thought-provoking themes that challenge the boundaries of imagination.
This short guide shows you various ways to find the IP address of your Raspberry Pi.
1 – Connect your Raspberry Pi to the network
Using an ethernet cable or WiFi, connect your Raspberry Pi to your local network. Make sure the device is powered on.
2 – Use `ping` to find your Raspberry Pi’s IP
Open a shell on Unix systems, or open the Command Prompt on Windows and run the following command:
ping raspi
This should ping your Raspberry Pi and return its IP address. If you see an error similar to cannot resolve raspi: Unknown host, try running the following instead:
ping raspberrypi
If you’re running RetroPie, you can try the following hostname:
ping retropie
If you’re having problems with this, or if you have multiple Raspberry Pi’s on the same network move on to the next step.
3 – Use `nmap` to find your Raspberry Pi’s IP
We can use nmap to scan our local network to find all devices that are connected. To do this we’ll have to find the IP address of our local computer.
macOS
On a Mac, open the Network Utility (cmd + space, then search for Network Utility).
Windows
On Windows, open the Network and Sharing Center (Control Panel > Network and Sharing Center > View network connections).
Linux
And on linux, type hostname -I in a shell.
You’re IP address will likely be something like: 192.168.1.181. So other devices on the same network are going to have addresses that share the first three octets: 192.168.1. The notation to describe the entire range of IP addresses between 192.168.1.0 and 192.168.1.255 is 192.168.1.0/24.
Once we determine the subnet range, we’ll use it with the nmap command:
nmap -sn 192.168.1.0/24
If you’re running on a unix system, you might be required to run this command using sudo:
sudo nmap -sn 192.168.1.0/24
You’ll then see a list of devices connected to the network:
Nmap scan report for Chromecast.attlocal.net (192.168.1.78)
Host is up (0.042s latency).
MAC Address: 54:60:09:06:76:0A (Google)
Nmap scan report for unknownc24b2b235d18.attlocal.net (192.168.1.178)
Host is up (0.038s latency).
MAC Address: C2:4B:2B:23:5D:18 (Unknown)
Nmap scan report for docker1.attlocal.net (192.168.1.181)
Host is up (0.51s latency).
MAC Address: B8:27:EB:79:49:F2 (Raspberry Pi Foundation)
Nmap scan report for raspberrypi.attlocal.net (192.168.1.183)
Host is up (0.51s latency).
MAC Address: B8:27:EB:95:6D:7A (Raspberry Pi Foundation)
You’ll notice here that I have a few devices, but after a quick scan you’ll notice a few Raspberry Pi’s connected to the network. From here you can discover the IP address for each Pi.
NEXT UP
How to Enable the “Popping” Sound When Adjusting the Volume on Your Mac
Starting with MacOS Sierra and High Sierra, your Mac will no longer play a “pop” sound when you adjust your volume. If you prefer to have this sound when you adjust volume up and down (as I do), this guide will teach you how to reenable it. 1 – Open Sound System Preferences Navigate to System
Introducing Howchoo, an enigmatic author whose unique pen name reflects their boundless curiosity and limitless creativity. Mysterious and multifaceted, Howchoo has emerged as a captivating storyteller, leaving readers mesmerized by the uncharted realms they craft with their words.
With an insatiable appetite for knowledge and a love for exploration, Howchoo’s writing transcends conventional genres, blurring the lines between fantasy, science fiction, and the surreal. Their narratives are a kaleidoscope of ideas, weaving together intricate plots, unforgettable characters, and thought-provoking themes that challenge the boundaries of imagination.
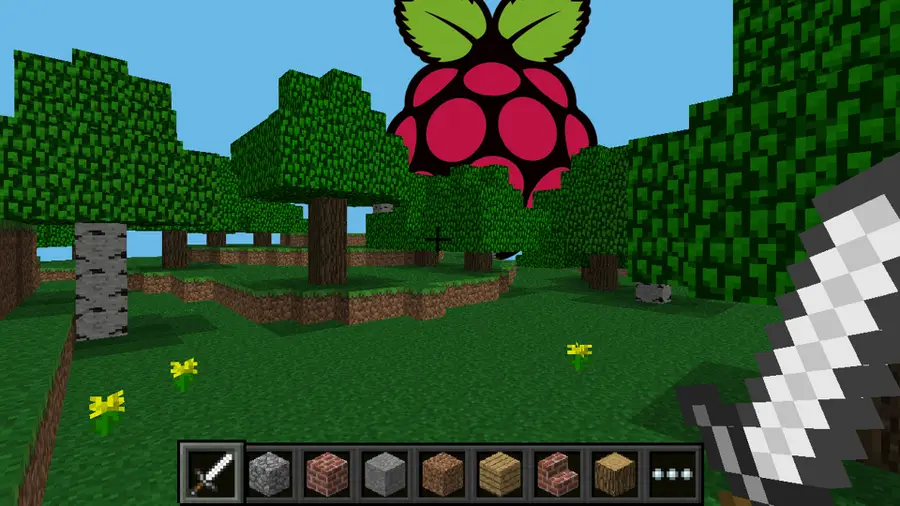
Not only can you play Minecraft on the Raspberry Pi, but you can also do it for free using Minecraft Pi Edition! This special edition of Minecraft was made just for the Raspberry Pi and released in 2012. In this guide, I’ll be using a Raspberry Pi 3 B+.
It’s important to note Minecraft Pi Edition’s limitations compared to the game we know on PC and console. You can create new worlds, but they’re limited in size and will always be set to creative mode (yes, that means no crafting). There are no mobs of any kind—that includes animals, monsters, and villagers. And lastly, the skin cannot be changed from the default “Steve”.
Minecraft Pi Edition runs on top of Raspberry Pi OS (formerly Raspbian). It was designed for Wheezy, but I had no issues running it with Buster. Newer versions of Raspberry Pi OS sometimes include Minecraft. Check under the Main Menu > Games folder to see if it’s already installed.
Make sure your OS is up to date before moving forward. Visit our guide for more details on how to update Raspberry Pi OS.
Minecraft Pi Edition can be downloaded from the terminal. Make sure your Pi has a connection to the internet before completing this step.
Open a terminal window and run the following command:
sudo apt install -y minecraft-pi
Minecraft Pi Edition will download and install to the Raspberry Pi.
3 – Launch the game
When the game is finished installing, restart the Raspberry Pi.
When the Pi is finished booting, try launching the game. You can find the executable under the Main Menu > Games > Minecraft Pi.
The game will launch in a new window.
4 – Start a new world
Starting a new world is easy. On the main menu in Minecraft Pi Edition, click Start game and then Create new. The game will automatically generate a new world. It’s a basic 256 × 256 × 128 block world, very similar to Minecraft Pocket Edition.
5 – Join a game
To join a local game with another Minecraft Pi Edition user, click Join Game on the main screen. You can then choose from a list of available worlds.
6 – Saving a game
Games are saved automatically. You can sort through your list of worlds on the Select world screen using the A and D keys.
Congratulations! You’re running Minecraft on a Raspberry Pi.
The longer you play Minecraft, the more you realize that early-game tools just won’t cut it. Exploring the enchantment feature of Minecraft can be exciting, but also intimidating. Rather than worry about researching enchantments, below are the best enchantments in Minecraft! To learn how to enchant items, check out this guide! In this guide, you’ll see
Introducing Howchoo, an enigmatic author whose unique pen name reflects their boundless curiosity and limitless creativity. Mysterious and multifaceted, Howchoo has emerged as a captivating storyteller, leaving readers mesmerized by the uncharted realms they craft with their words.
With an insatiable appetite for knowledge and a love for exploration, Howchoo’s writing transcends conventional genres, blurring the lines between fantasy, science fiction, and the surreal. Their narratives are a kaleidoscope of ideas, weaving together intricate plots, unforgettable characters, and thought-provoking themes that challenge the boundaries of imagination.
The battery in your ADT Safewatch Pro 3000 alarm system ensures that your system continues to work during a power outage. Unfortunately, when your ADT backup battery is low, it will continuously beep until replaced—sometimes in the middle of the night.
This guide will show you how to change your ADT chime or backup battery in about 5 minutes.
1 – Put the alarm system into test mode
Enter your [CODE] and then press the TEST button.
2 – Locate and open your control panel
Mine is in my loft.
Your alarm system’s control panel is most often located in a garage, basement, or attic. Once located, open the control panel by removing the two screws.
3 – Remove the old battery
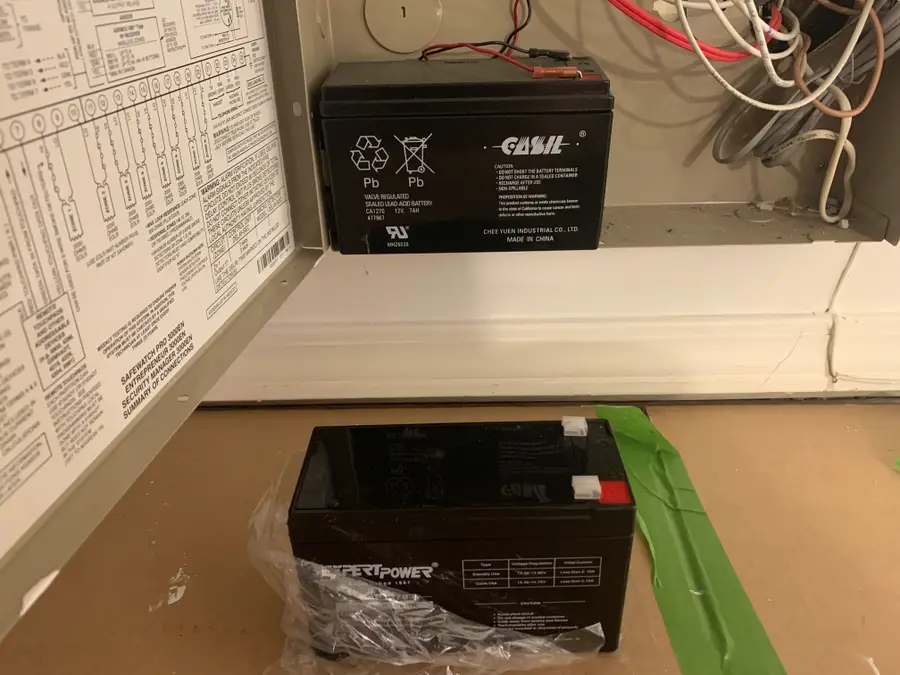
Disconnect the two connectors from the old battery and remove it from the control panel.
🛈 Be sure to recycle the old battery or dispose of it properly.
4 – Install the new battery
You’ll need to use this 12V 7A battery as a replacement.
Place the new battery in the control panel and connect it to the alarm system, being sure to connect the red positive (+) and black negative (-) connectors correctly.
When you’re done, close the control panel.
🛈 Be sure to properly dispose of the old battery at your local battery recycling center.
5 – Exit test mode
To exit test mode, reenter your [CODE] and press the TEST button again.
You’re all done!
NEXT UP
How to Properly Dispose of a Worn or Damaged American Flag
Since our country was conceived, the U.S. Flag has been a symbol of our country’s freedom. Our country’s Flag Code provides specific guidelines for how to “retire” a damaged or worn-out American flag. When should my American flag be retired? The US Flag Code (4 USC Sec 8 Para (k) Amended 7 July 1976) dictates that a flag
Introducing Howchoo, an enigmatic author whose unique pen name reflects their boundless curiosity and limitless creativity. Mysterious and multifaceted, Howchoo has emerged as a captivating storyteller, leaving readers mesmerized by the uncharted realms they craft with their words.
With an insatiable appetite for knowledge and a love for exploration, Howchoo’s writing transcends conventional genres, blurring the lines between fantasy, science fiction, and the surreal. Their narratives are a kaleidoscope of ideas, weaving together intricate plots, unforgettable characters, and thought-provoking themes that challenge the boundaries of imagination.
You can check your bill balance any time you’d like — without sitting through annoying voice recording prompts. Your bill balance, bill due date and most recent bill payment information will appear on your screen — even better than receiving it via text message.
1 – Dial #225# and press the Call button
I know what you’re thinking! You are making a call. But read on..
2 – Your bill information will appear on-screen
You will see a loading screen while T-Mobile is processing your information. After a few seconds, your requested information will appear.
NEXT UP
Call forwarding is the process of directing phone calls from one number to another. Verizon allows its customers to enable call forwarding at no additional charge. Your typical call rates will still apply. This process works for all Verizon customers regardless of your carrier—including Samsung, Apple, LG, Lenovo, and more. Note: International numbers can not
Introducing Howchoo, an enigmatic author whose unique pen name reflects their boundless curiosity and limitless creativity. Mysterious and multifaceted, Howchoo has emerged as a captivating storyteller, leaving readers mesmerized by the uncharted realms they craft with their words.
With an insatiable appetite for knowledge and a love for exploration, Howchoo’s writing transcends conventional genres, blurring the lines between fantasy, science fiction, and the surreal. Their narratives are a kaleidoscope of ideas, weaving together intricate plots, unforgettable characters, and thought-provoking themes that challenge the boundaries of imagination.
While shaders make Minecraft look pleasing, resource packs are an additional way to change a theme or aesthetic of a Minecraft world. Because resource packs are separate than shaders, you don’t need to install any mods, which makes them so versatile and modded game friendly.
What is the difference between a resource pack and texture pack?
While many use both terms to mean the same thing, there is a fundamental difference between the two. A texture pack is used for 1.6.1 and earlier versions of the game 1.6.1, and they only changed the in-game textures. Resource packs were added in after 1.6.1, and allow players to change sounds, music, and particle effects. They also can modify blocks, items, and entity textures.
Let’s get into our guide on how to install resource packs with CurseForge!
1 – Find the correct file path
Before you can download and install a resource or texture pack, you’ll need to find where in CurseForge your game is!
Open CurseForge and navigate to the modpack you’re using.
Click the ... button to the left of the Play button.
In the drop-down menu, click Open Folder.
Locate the Resourcepacks folder. This is where you’ll install your resource pack!
Many websites are available to download resource packs, but some are safer than most. We recommend CurseForge or ResourcePack.net. Alternatively, you can download directly from a developer’s website as well!
Make sure it’s compatible with your Minecraft game version and then move on to the next step!
3 – Download the pack
Download the correct game version of the resource pack you’ve chosen and place it within the Resourcepack folder found in step 1. Make sure you don’t unzip the downloaded file!
4 – Activate the resource pack
Now it’s time to run Minecraft and turn on your resource pack! Once the game has launched, follow these steps:
Click Options then Resource Packs.
Click the arrow button that appears over the resource pack’s icon to move it to the right Selected column, as shown in the image below.
Click Done and a loading screen will appear and return you back to the Options menu when it’s finished rendering.
The longer you play Minecraft, the more you realize that early-game tools just won’t cut it. Exploring the enchantment feature of Minecraft can be exciting, but also intimidating. Rather than worry about researching enchantments, below are the best enchantments in Minecraft! To learn how to enchant items, check out this guide! In this guide, you’ll see
Introducing Howchoo, an enigmatic author whose unique pen name reflects their boundless curiosity and limitless creativity. Mysterious and multifaceted, Howchoo has emerged as a captivating storyteller, leaving readers mesmerized by the uncharted realms they craft with their words.
With an insatiable appetite for knowledge and a love for exploration, Howchoo’s writing transcends conventional genres, blurring the lines between fantasy, science fiction, and the surreal. Their narratives are a kaleidoscope of ideas, weaving together intricate plots, unforgettable characters, and thought-provoking themes that challenge the boundaries of imagination.