Home Interests Minecraft

10 Best World Generation Mods for Minecraft (Forge)

Forge mods that improve the base game’s biomes or adds in new ones!
howchoo   (467)
September 28, 2023
10 minutes

Share

Interests
Posted in these interests:
READY PLAYER 1
gaming • 85 guides
Minecraft is an epic sandbox video game developed by Swedish game developer Mojang Studios.
minecraft • 66 guides
minecraftforge • 5 guides

The variety of mods available for Minecraft is just as vast as the worlds within the game itself. Most likely, any mod you could want or dream of has already been developed. As an avid Minecraft player, I’ve recently become obsessed with Forge Minecraft mods and expanding the world of Minecraft, literally.

This guide will go through mods available for Minecraft Forge that either improve the base game’s biomes or adds in new ones! If you’ve ever wanted to roam and explore new environments or dive deep into a cave, below you’ll find a mod for either. So whether you’re hosting a survival multiplayer server or you’re playing alone, you’ll find a mod that opens up your world even more!

Note that the game versions available may change since the time of publishing. Most photos were taken using BSL Shaders and Optifine in 1.16.5.

1 – Nature’s Compass

By Chaosyr

Game Versions: 1.12, 1.14, 1.15, 1.16, 1.17

A perfect welcome gift for players! Nature’s Compass is an item that allows players to search for a biome’s location in the world. It will automatically list biomes added from other mods, so all you need to worry about is the travel time!

2 – Twilight Forest

By Benimatic

Game Versions: 1.12, 1.16

While Twilight Forest is a large mod, it is certainly worth it. This mod adds a dimension that’s focused on exploration and adventures. It’s not for casual players as it will require a lot of work to even survive, but Twilight Forest is filled with new creatures and loot to discover. It also has integration with other mods, like Tinkers’ Construct and Chisel, to provide more content.

3 – YUNG’s Better Mineshafts and Caves

By YUNGNICKYOUNG

Better Mineshafts

Game Versions: 1.12, 1.15, 1.16

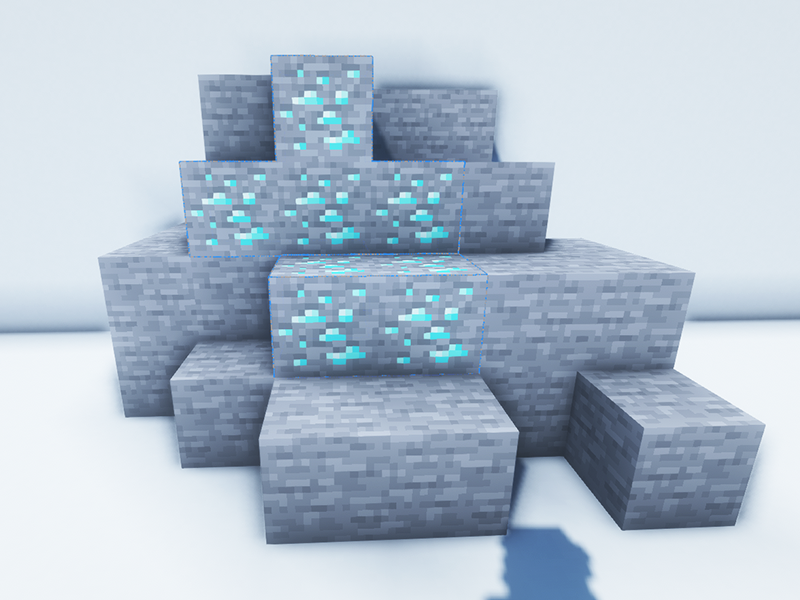
If you’re bored with Minecraft’s standard mineshafts, then download this mod to your world. It expands mineshafts with tunnels, loot, abandoned workstations, and more! There are nine biome variants, including a rare mushroom mineshaft.

Better Caves

Game Versions: 1.12, 1.14, 1.15, 1.16

Much like the above mod, Better Caves overhauls Minecraft’s cave systems. It adds in lava caverns, underground lakes and rivers, flooded caverns and more! It’s perfect for those wanting more exploration in caves!

4 – Valhelsia Structures

By ValhelsiaTeam

Game Versions: 1.14, 1.15, 1.16

If you’ve ever felt like the Minecraft world felt a little empty, then add Valhelsia Structures to your modpack. It generates new structures throughout the world, like abandoned houses, dungeons, and witch huts. There are also some new decorative blocks added for builders.

5 – Oh The Biomes You’ll Go

By AOCAWOL

Game Versions: 1.12, 1.15, 1.16

This is my new favorite biome mod to add to a survival world because it adds over 80 biomes that each are unique. They’re not just in the Overworld either! This mod adds new biomes to discover in both the Nether and End! It comes with over 40 trees, 28 wood types, and 200 new blocks and items. It’s a great mod if you’re tired of seeing the same places over and over again.

6 – Repurposed Structures

By telepathicgrunt

Game Versions: 1.15, 1.16

This mod takes vanilla Minecraft structures and makes them better! By adding biome variants or just new versions of structures, each building feels like it belongs in the world instead of standing out. It’s perfect for any servers that wants the players to explore.

7 – BetterEnd

By Beethoven92

Game Version: 1.16

The BetterEnd mod fills up the void that is the End dimension. It adds a bunch of new blocks, items, and game mechanics. Biomes include crystal mountains, chorus forest, sulphur springs, and more! It’s also compatible with a handful of other mods, even ones that add other End biomes!

8 – Biomes O’ Plenty

By Forstride

Game Versions: 1.12, 1.14, 1.15, 1.16

Another well-known mod is Biomes O’ Plenty which adds a multitude of new biomes to your Minecraft world. Each biome comes with unique plants, trees, and building blocks, and it integrates with other mods on this list as well!
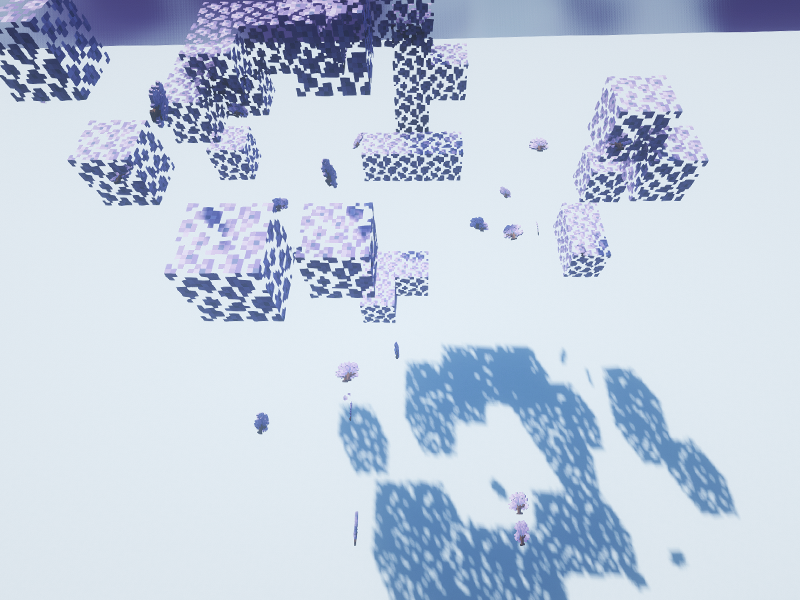
9 – Gaia Dimension

By Squiggly_Androsa

Game Versions: 1.12, 1.14, 1.15, 1.16

One of the best dimension mods out there, Gaia is a realm filled with crystals and magic. There are a handful of unique biomes, cave dungeons, towers, and special mobs to interact with. It’s a great addition for servers with many people who like to mine and explore!

10 – Stoneholm, Underground Villages

By TheGrimsey

Game Version: 1.16

With this mod, you’ll discover underground settlements of villagers that are filled with loot and resources to gain. Each village has multiple rooms and floors, with abandoned sections for players to explore.

NEXT UP

Top 10 Enchantments in Minecraft

howchoo   (467)
March 25, 2024

The longer you play Minecraft, the more you realize that early-game tools just won’t cut it. Exploring the enchantment feature of Minecraft can be exciting, but also intimidating. Rather than worry about researching enchantments, below are the best enchantments in Minecraft! To learn how to enchant items, check out this guide! In this guide, you’ll see

Continue Reading

howchoo

 467 guides

Introducing Howchoo, an enigmatic author whose unique pen name reflects their boundless curiosity and limitless creativity. Mysterious and multifaceted, Howchoo has emerged as a captivating storyteller, leaving readers mesmerized by the uncharted realms they craft with their words. With an insatiable appetite for knowledge and a love for exploration, Howchoo’s writing transcends conventional genres, blurring the lines between fantasy, science fiction, and the surreal. Their narratives are a kaleidoscope of ideas, weaving together intricate plots, unforgettable characters, and thought-provoking themes that challenge the boundaries of imagination.

Home Interests Game Boy

The Ultimate Original Game Boy (DMG-01) Troubleshooting and Repair Guide

Something wrong with your Game Boy? Let’s fix it!
howchoo   (467)
September 28, 2023
15 minutes

Share

You’ll Need 1

What you’ll need
Interests
Series
Howchoo is reader-supported. As an Amazon Associate, we may earn a small affiliate commission at no cost to you when you buy through our links.
Posted in these interests:
gameboy • 8 guides
nintendo • 13 guides
retrogaming • 29 guides

Nobody wants to spend the whole day troubleshooting. Do you have a problem with your hand held?

Nintendo doesn’t offer official support anymore, so we’re stepping up with our own official Gameboy troubleshooting guide! In this guide, we’re taking a look at some of the most common issues to arise from the Nintendo Game Boy.

1 – Game Boy shell is damaged

How it happens

Shell damage is often caused by natural wear and tear. Game Boys were made to be mobile, so it’s common to find scrapes, scratches, dents, and much more on the outer shell.

How to fix it

The Game Boy shell can be removed to be cleaned with warm water and dish soap. If the damage is beyond something you can fix yourself, it might be necessary to replace the shell completely.

Head over to our Game Boy shell replacement guide to get started!

How to replace an original Game Boy shell
In this guide, I’ll be updating a back-lit Game Boy with a yellow Play It Loud shell.

2 – Game Boy buttons are sticky

How it happens

Another common problem with mobile devices is the inevitable build up of grime. This can cause some serious issues with moving parts and is the leading cause of sticky buttons.

How to fix it

You’ll need to open the Game Boy and thoroughly clean the internal components. There are several pieces that need to be addressed, including buttons, contacts, and silicone pads. You can find more information on fixing sticky buttons on your Game Boy here.

How to Fix Sticky Game Boy Buttons
You can’t play anything like this. Let’s fix it!

3 – Game Boy is missing parts

How it happens

It doesn’t take much for something important to wiggle loose and completely out of sight. Some of the most common components to go missing on a Game Boy are link port covers, screws, and battery covers.

How to fix it

Official support for the Game Boy from Nintendo is no longer available. Parts must be replaced from used Game Boys or using third party reproductions. The Game Boy community is alive and well. It’s not hard to find several online retailers with custom parts, components, and shells.

4 – Game Boy screen has scratches

How it happens

Game Boys were released with plastic bezels (the front plate covering the actual screen). This plastic is very sensitive to scuffs and scratches—especially after almost 30 years of gaming.

How to fix it

Scuffed screens can be easily replaced with aftermarket bezels. Vendors offer custom colors, designs, and even tougher materials like glass.

5 – Game Boy screen is hard to see or blurry

How it happens

Game Boy screens are already hard enough to see. Anything that makes it harder isn’t doing us any favors. But if you’re struggling to make out those pixels, it’s not the end of the world!

How to fix it

Make sure of the obvious stuff is out of the way and find yourself a good lamp. It’s impossible to make out a Game Boy display without an appropriate light source. But if lighting isn’t your issue, you may have to look a little deeper.

The Game Boy features a component not found on modern hardware. The contrast can be adjusted with a small wheel found on the side of the device. Use this to adjust the display until you find the perfect resolution.

6 – Game Boy has vertical lines

How it happens

This issue is caused by micro-tears and general breakdown of the display cable wires. This ribbon cable is very delicate. As a result, it’s common to find vertical lines on the display as it breaks down.

How to fix it

The wires can be reheated using a soldering iron. This rebuilds the broken connections and allows display information to pass through again. You can find more information on how to fix Game Boy vertical screen lines here.

7 – Game Boy won’t turn on

How it happens

The most common reason that your Game Boy won’t turn on is due to battery corrosion damage.

This is a common issue for Game Boys that have recently been dug out of storage. Many Game Boys end up in storage with a full pack of batteries. Battery corrosion can cause a multitude of problems if it reaches the internal components.

How to fix it

Battery acid damage does not mean the end of the world for your Game Boy. Most of the time, all you need is a little patience to get the hardware restored. Follow our guide here to learn how to clean the battery contacts on your Game Boy.

8 – Game Boy has no sound

How it happens

If your Game Boy has no audio, the cause is likely due to one of these three components—the speaker, the speaker wires, or the headphone jack. Damage to any of these pieces can cause a complete lack in audio.

How to fix it

It can be tricky to identify the problem component, but each can be resolved by soldering a replacement into the Game Boy.

9 – Game Boy games won’t save

This is actually an issue with the game, not the Game Boy, but it’s easy to fix by replacing the battery in the game. Learn how to fix your Game Boy games that won’t save.

10 – Backlight-modded Game Boy has speaker whine

How it happens

Backlit Game Boys draw a lot of power. This draw can cause a serious strain on the components inside. If you find your backlit Game Boy extra whiny, it’s time to do something about it.

How to Install a Backlight in a Game Boy
You can play your Game Boy in the dark now!

How to fix it

The Game Boy can be upgraded with a specific capacitor to let more power through, reducing whine from the speaker. I wrote an entire guide on how to fix Game Boy speaker whine!

How to Fix Speaker Whining on a Backlit Game Boy
Was that a boop or a beep? I can’t tell—let’s just fix it!

11 – Still having issues?

If none of the fixes below worked for you, post in the comments section below and I’ll do my best to help you out!

12 – Next: Mod your Game Boy

Now that your Game Boy is up to snuff, let’s get to modding!

Ever wanted to play your Game Boy in the dark? Or install a bigger screen or new Game Boy case and buttons? Check out my ultimate Game Boy modding guide!

The Ultimate Original Game Boy Modding Guide
Game Boys are awesome. Let’s make them even better!

NEXT UP

RetroPie scrapers: what they are and how to use them

Wait, which game is this?
howchoo   (467)
September 29, 2023

You’ve put so much work into setting up RetroPie or EmulationStation. You load it up with legally obtained ROMs only to find that custom theme you installed—you remember, the one from my RetroPie themes guide—has a big blank spot for box art! The Best RetroPie Themes (And How to Install Them)You deserve some personal flair! RetroPie: Build Your

Continue Reading

howchoo

 467 guides

Introducing Howchoo, an enigmatic author whose unique pen name reflects their boundless curiosity and limitless creativity. Mysterious and multifaceted, Howchoo has emerged as a captivating storyteller, leaving readers mesmerized by the uncharted realms they craft with their words. With an insatiable appetite for knowledge and a love for exploration, Howchoo’s writing transcends conventional genres, blurring the lines between fantasy, science fiction, and the surreal. Their narratives are a kaleidoscope of ideas, weaving together intricate plots, unforgettable characters, and thought-provoking themes that challenge the boundaries of imagination.

Home Interests Ender 3

Creality Ender 3 Silent Mainboard Upgrade: Better Prints with Less Noise!

Make your Ender 3 quieter and improve your prints with this board upgrade.
howchoo   (467)
September 28, 2023
13 minutes

Share

You’ll Need 4

What you’ll need
Interests
Series
Howchoo is reader-supported. As an Amazon Associate, we may earn a small affiliate commission at no cost to you when you buy through our links.
Posted in these interests:
3dprinting • 36 guides
ender3 • 19 guides

If your 3D printer is located in your room, office, or some other area where you like to spend your time, the sound it makes while printing can be maddening. The “whining” and “whirring” noises generated by your 3D printer are caused by the cheap stepper motor drivers used on the stock motherboard.

In addition to reducing noise, an upgraded mainboard uses higher quality stepper motor drivers and other components, improving overall print quality.

Today I’ll show you how to perform this board upgrade on your Ender 3 or Ender 3 Pro. This is one of the best Ender 3 mods for the money.

1 – Choose a board

I chose the V1.1.5 upgrade board from Creality.

Before choosing an upgrade board, I took a look at both third-party boards and those created by the original manufacturer, Creality.

Creality upgrade boards

Creality offers an upgraded board for under $50 that uses TMC2208 stepper motor drivers instead, eliminating stepper motor noise.

This upgrade effectively reduces the printer’s sound output from 48dB to 36dB, with the remaining noise comes from the Ender 3’s fans, which are also easy to upgrade.

This is the board I’ll be using: the Creality Silent Mainboard (v1.1.5). I chose to go with a Creality-made board as they’re reportedly more stable and reliable.

Third-party boards

There are also numerous third-party board upgrades available for the Ender 3. A popular choice is the SKR Mini E3, which uses TMC2209 stepper motor drivers and adds 32-bit support.

Keep in mind, some third-party boards, including the Mini E3, have been reported to have issues—including input errors and power back-feeding. Therefore, third-party boards are less of a direct replacement and may require some troubleshooting. Still, if you’re up for the challenge, they’re a great upgrade option.

2 – Unplug your printer

Before starting, unplug your Ender 3 from the wall. This is for safety reasons and also to prevent shorts when swapping the board out.

3 – Remove the main board cover

Using the M2 hex key your printer originally came with, remove the 3 screws securing the main board cover.

Then, unhook the fan connector and set the cover aside.

4 – Remove the old board screws

With all the wires still connected, use your M2 hex key to carefully remove the four screws securing the board to the printer chassis.

🛈 These screws are shorter than the cover screws, so don’t mix them up.

5 – Remove the hot glue

At the factory, Creality’s employees added some hot glue to each connector to prevent them from shaking loose during shipping.

Carefully remove these bits of glue using your fingers. You can also use a dot of acetone to help dissolve the glue, but don’t let it get on anything else (i.e. plastic) since acetone is a solvent for many types of plastics.

I just peeled each piece of glue off with my fingernails without using acetone.

🛈 Unless you plan on shipping your printer, you probably don’t need to add hot glue to your new connectors.

6 – Swap the wires

You’ll need to move each wire to the new board so that everything is wired exactly the same. You have two options for doing this:

Option A: Label everything

Carefully label each wire with tape and marker and draw a map of where each label goes. Pay attention to the labels printed on the PCB. Then, remove all the old wires and connect them to the new board. Take lots of photos.

Option B: Do a 1:1 swap (my approach)

Before removing any wires, place the new board on top of the old board. Then, swap wires from the old to the new—one at a time—taking careful notice of placement. This approach can save you a lot of time if you’re vigilant. When you’re done, you can unhook individual wires to route them more cleanly.

Get to swappin’

Swap the wires from the old board to the new one using your preferred method. I used option B: swapping the wires, in place, one at a time.

In addition to swapping connectors, you’ll also need to use a small flathead screwdriver to move wires between terminal blocks. For safer and more effective conductivity, I recommend stripping and cutting the tinned solder off of each terminal block wire before reinserting it.

7 – Secure the new board

Reattach the new board using the four mounting screws. The front-left hole has no matching stud, so leave that hole empty.

If you have giant hands, this will probably be the hardest part of the project.

🛈 Protip: Use a pair of tweezers to place each screw and then secure it in place.

8 – Close the control panel and reconnect the fan

Reconnect the control panel fan to the only empty board connector.

Then, reattach the control panel cover using the three control panel cover screws. The longer screw goes in the back.

9 – Run a test print

Power on your printer and run a test print to make sure everything is running smoothly. If it isn’t, remove the cover and inspect your wiring.

10 – Next: Check and update firmware

The Ender 3’s firmware can be updated using a cheap Arduino.

This version of the board is supposed to ship with an updated Marlin firmware version (v1.1.8) that adds thermal runaway protection. You can verify this in the printer menu by selecting the About Printer menu item.

If your board shipped with an older firmware version, or if you’d like to update your firmware to the latest version (v1.1.9+), check out my Ender 3 firmware update guide!

Ender 3: How to Install a Bootloader and Update Marlin Firmware
Update your 3D printer’s firmware and add thermal runaway protection.

Spring upgrade

If you’re looking for another upgrade, I recommend upgrading your Ender 3 springs for under $10.

Ender 3 Spring Upgrade: Choosing and Installing New Bed Springs
An inexpensive upgrade that greatly reduces bed leveling frequency!

NEXT UP

How to Update Blender

Get the latest Blender has to offer.
howchoo   (467)
November 24, 2023

Blender is one of the most popular open-source 3D creation suites today. It doesn’t cost a dime to use and everything you create is yours to own for good. The community is robust and the dev team still releases new updates on the regular. If you want to get the latest version, you may have

Continue Reading

howchoo

 467 guides

Introducing Howchoo, an enigmatic author whose unique pen name reflects their boundless curiosity and limitless creativity. Mysterious and multifaceted, Howchoo has emerged as a captivating storyteller, leaving readers mesmerized by the uncharted realms they craft with their words. With an insatiable appetite for knowledge and a love for exploration, Howchoo’s writing transcends conventional genres, blurring the lines between fantasy, science fiction, and the surreal. Their narratives are a kaleidoscope of ideas, weaving together intricate plots, unforgettable characters, and thought-provoking themes that challenge the boundaries of imagination.

Home Interests Minecraft

Best Food and Farming Mods for Minecraft (Fabric)

Fabric mods that add new crops, food, or farming mechanics to Minecraft!
howchoo   (467)
September 28, 2023
10 minutes

Share

Interests
Posted in these interests:
READY PLAYER 1
gaming • 85 guides
Minecraft is an epic sandbox video game developed by Swedish game developer Mojang Studios.
minecraft • 66 guides
minecraftfabric • 8 guides

In the base game, Minecraft encourages players to farm and become self-sustaining. However, it can get quite boring to keep planting the same crops over and over again. That’s where this list of Forge farming or food mods come in!

This guide will go through mods available for Minecraft Fabric that adds either new crops, food, or farming mechanics to Minecraft. While most add a multitude of new culinary treats, there is one mod below that lets you create your own custom food items. So whether you’re hosting a survival multiplayer server or you’re playing alone, you’ll find a mod that opens up your world even more!

If you’re interested in more mods for Minecraft, check out the Minecraft interest!

Note that the game versions available may change since the time of publishing. Most photos were taken using BSL Shaders and Optifine in 1.16.5.

1 – AppleSkin

By squeek502

Game Versions: 1.12, 1.14, 1.5, 1.16, 1.17

By default, hunger and saturation is hidden, but with AppleSkin that changes. The main features of this mod are the addition of food value information to tooltips and visualization of saturation, hunger, and exhaustion on the player HUD.

2 – Croptopia

CurseForge

By thethonk

Game Versions: 1.16, 1.17

If you’d like to add more farming to the world but don’t want to include a multi-file mod (see below), then try Croptopia. This mod adds over 200 new food items, plus plantable crops and trees. Paired with the Patchouli mod, your server can also have a recipe book for their culinary adventures!

3 – Mystical Agriculture: Refabricated

By AlexSa1000

Game Version: 1.16

Have you ever needed a resource but just didn’t want to have to go mining for it? That’s where Mystical Agriculture comes in. Now you can just grow resources with crops! This mod adds a bunch of resource crops, tools, armor, and fun blocks to add a unique mechanic to Minecraft. It even integrates with other mods like Applied Energistics 2, Industrial Revolution, Tech Reborn, and more!

4 – Plant In A Jar

By cool_mineman

Game Versions: 1.16, 1.17

As the name implies, this mod allows you to grow any Minecraft plant inside a 1x1x1 jar. While it might not appear to have practical use, you can use them to farm for resources. Plus, it makes for fantastic decoration in a build!

5 – Sandwichable

CurseForge

By FoundationGames

Game Versions: 1.15, 1.16

This is a mod that does more than you’d think based on the name. While, yes, you can create your own sandwiches (and make them as tall as you want), it also adds multiple new food mechanics to Minecraft. You can make cheese, use a toaster, extract salt from ocean water, and even make pickles! Sandwichable is a great mod to add to a multiplayer server or a singleplayer world!

6 – Croptosis

By LordDeatHunter

Game Versions: 1.16, 1.17

While singleplayer worlds allow players to speed up crop growth via tick speed, that’s not possible in a multiplayer world. Croptosis adds four new fertilizers and fertilized variants of dirt, farmland, and sand, that help crops grow 2x the normal rate.

7 – Farmer’s Delight

By NewHoryzon

Game Versions: 1.16, 1.17

If you’re a farmer who prefers the vanilla game experience, but also crave slight variety, then Farmer’s Delight is for you. This mod expands on Minecraft’s farming and food items with the addition of more meals, a way to improve soil, and even some gear to help with adventuring!

8 – Improved Hoes

By Furgle

Game Versions: 1.12, 1.16, 1.17

One of my biggest pet peeve with hoes is that even if you upgrade them, they don’t really do much. Improved Hoes fixes that by making farming with hoes quicker and easier. Each type of hoe has a tiered range of blocks that it can till, harvest, and (for some) replant crops!

9 – TacoCraft

By ffrannny

Game Versions: 1.15, 1.16, 1.17

Who doesn’t love a good taco? Now you can make one inside Minecraft! With over ten variations of tacos to try and the crops to make them, TacoCraft is a great food addition to any game.

10 – Ignis Fatuus

By cool_minerman

Game Versions: 1.16, 1.17

While this can’t be fully considered a farming mod, it fits the aesthetic enough to be on this list. It’s a simple-to-use mod that allows players to carve their own pumpkins into any design they can dream up!

NEXT UP

Top 10 Enchantments in Minecraft

howchoo   (467)
March 25, 2024

The longer you play Minecraft, the more you realize that early-game tools just won’t cut it. Exploring the enchantment feature of Minecraft can be exciting, but also intimidating. Rather than worry about researching enchantments, below are the best enchantments in Minecraft! To learn how to enchant items, check out this guide! In this guide, you’ll see

Continue Reading

howchoo

 467 guides

Introducing Howchoo, an enigmatic author whose unique pen name reflects their boundless curiosity and limitless creativity. Mysterious and multifaceted, Howchoo has emerged as a captivating storyteller, leaving readers mesmerized by the uncharted realms they craft with their words. With an insatiable appetite for knowledge and a love for exploration, Howchoo’s writing transcends conventional genres, blurring the lines between fantasy, science fiction, and the surreal. Their narratives are a kaleidoscope of ideas, weaving together intricate plots, unforgettable characters, and thought-provoking themes that challenge the boundaries of imagination.

Home Interests Minecraft

Best Server Utility Mods for Minecraft (Forge)

Forge mods that help with server management or improves performance!
howchoo   (467)
September 28, 2023
22 minutes

Share

Interests
Posted in these interests:
READY PLAYER 1
gaming • 85 guides
Minecraft is an epic sandbox video game developed by Swedish game developer Mojang Studios.
minecraft • 66 guides
minecraftforge • 5 guides

The variety of mods available for Minecraft is just as vast as the worlds within the game itself. Most likely, any mod you could want or dream of has already been developed. As an avid Minecraft player, I’ve recently become obsessed with Forge Minecraft mods and run a survival multiplayer server (SMP)!

This guide will go through mods available for Forge Minecraft multiplayer servers that add tools for server management or improves performance. The following list includes not just one type of mod, but a large variety. So whether you’re hosting a server that’s PVP or casual, you’ll find something for any type of Minecraft player!

Note that at the game versions available may change since the time of publishing. Most photos were taken using BSL Shaders and Optifine in 1.16.5.

1 – Fast Leaf Decay

By olafskiii

Game Versions: 1.12, 1.14, 1.15, 1.16

One of the more annoying aspects of Minecraft are the floating leave blocks that sit in the air after you’ve chopped down a tree. The Fast Leaf Decay mod speeds up leaf decay, so you can get your loot and airspace back in under five seconds!

2 – Feed the Best Mods

I’ve bundled all the Feed the Beast (FTB) mods together because they’re great as a package and tend to rely on one another for full functionality. They’re what I currently use for a modded Minecraft server! My main complaint, however, is the lack of accurate documentation for some mods. Just something to keep in mind for consideration.

FTB Backups
Game Versions: 1.12, 1.14, 1.15, 1.16
Provides a configurable backup system for servers and creates them only when players are online to save space from clutter!

FTB Quests
Game Versions: 1.12, 1.15, 1.16
For those that want a server with quests, this is a great mod to have. It makes it easy to create custom quests for players.

FTB Chunks
Game Versions: 1.15, 1.16
This mod comes with its own world map and minimap. More importantly, it allows for players to claim chunks. Only those the player allies with will be able to interact or affect blocks in the claimed area. I highly recommend using in conjunction with FTB Teams for full functionality.

FTB Teams
Game Versions: 1.15, 1.16
This mod adds the ability for teams to be made. On its own, it’s not very impressive, but matched with FTB Chunks and FTB Quests, servers run smoothly.

FTB Ultimine
Game Versions: 1.12, 1.15, 1.16
This is a great VeinMeiner alternative for newer game versions. With a configurable key, players can harvest multiple blocks at once. You can also configure a whitelist of blocks for the server!

FTB Essentials
Game Version: 1.16
This mod adds utility commands that are essential to running and maintaining a server. It allows players to teleport to one another, change nicknames, set homes, and more!

FTB Ranks
Game Versions: 1.15, 1.16
This is essential if you want to enable permissions on a server. Completely configurable, you can set ranks for new players, moderators, and any other type that give specific access to mod commands.

3 – Xaero’s Minimap and World Map

By xaero96

Game Versions: 1.12, 1.14, 1.15, 1.16, 1.17

These are two mods I’ve grouped together for obvious reasons. This is an easy to use, completely customizable minimap that also benefits from the larger World Map mod, but doesn’t require it. It has an infinite amount of waypoints and integrates with the Waystones mod. It also displays dots for various items or entities on the map. I highly recommend these mods and use them frequently in my own playthrough.

4 – AI Improvements

By QueenOfMissiles

Game Versions: 1.12, 1.14, 1.15, 1.16

This mod helps the base game deal with heavily modded worlds and take away the stress of a modded ecosystem. AI Improvements can be customized so it only affects certain AI functions, but overall does help improve server performance for older versions of the game.

5 – NetherPortalFix

By BlayTheNinth

Game Versions: 1.12, 1.14, 1.15, 1.16

A common problem that can occur on multiplayer servers is that Nether portals will sometimes cross paths. This means that players can go through their own portal to the Nether, but end up at a neighbor’s on their way back home. This mod keeps track of which portals a player went through to make sure they go back through it properly.

6 – Morpheus

By Quetzi

Game Versions: 1.12, 1.14, 1.15, 1.16

This is a server-side mod that enables for nighttime to be passed based on a pre-configured percentage. By default, it’s set to 50% of players need to be in bed in order to skip the night. You can also customize the messages that are shown in the morning.

7 – Clumps

These chickens are absolutely, totally, completely fine…

By Jaredlll08

Game Versions: 1.16, 1.17

When running a server, you need to find ways to reduce lag everywhere. Experience orbs are one of the most forgotten aspects, which is why Clumps is a perfect mod for servers. It groups together XP orbs into one entity and makes the player collect them once they’re touched to help reduce lag.

8 – In Control!

By McJty

Game Versions: 1.12, 1.15, 1.16

When I first started running a modded server, the biggest problem was the amount of mobs spawning around players. Even on normal mode, it was out of control. The In Control! mod makes customizing the world easy. Using the included wiki and configuration files, server owners or single players can set conditions for mob spawns and even the experience or loot dropped by mobs.

9 – Corail Tombstone

By Corail_31

Game Versions: 1.12, 1.14, 1.15, 1.16

Most servers have a lot of in-game deaths and a lack of a solution for holding items at a player’s death point. Corail Tombstone has more than just graves that hold player items and experience orbs. It also comes with a perk and magic system called Knowledge of Death. You can also customize your grave or craft graves of your own to place around your area.

10 – WorldEdit

By sk89q

Game Versions: 1.12, 1.14, 1.15, 1.16, 1.17

If there’s ever a mod that server admins need to learn, it’s WorldEdit. My entire gameplay and building has changed since learning to just the basics of WorldEdit. This is the best Minecraft map editor mod out there. Change the landscape, copy or paste blocks, import schematics, and so much more. It’s the best mod to use when wanting to build a world spawn area in a server.

11 – PackMenu

By Shadows_of_Fire

Game Versions: 1.14, 1.15, 1.16

This mod is mostly for client-side, but I really wanted to include it in the list, as it enables players to change the main menu to however they see fit. For server admins, you can customize the main menu to match your server’s branding and import it into your modpack as a resource pack, so all players have the same menu!

12 – FPS Reducer

By bre2el

Game Versions: 1.12, 1.14, 1.15, 1.16

This mod helps your computer while you run Minecraft! It reduces FPS if there’s no user activity for a certain amount of time or if the game window is inactive or minimized. It also suppresses sound volume if you move to another active window and displays the current FPS on the screen for you to monitor.

13 – Blur

By tterrag1098

Game Versions: 1.12, 1.14, 1.15, 1.16

This is a UI improvement mod that I personally love. Sometimes you just need to focus in on your inventory or want a less distracting look to your recorded Minecraft content. The Blur mod adds a Gaussian blur to the background of all GUIs, plus it’s configurable to your personal preference!

14 – Simple Voice Chat

CurseForge

By henkelmax

Game Versions: 1.15, 1.16, 1.17

This is a must-have for servers that want to foster community as well as exploration. This adds proximity chat to the server, which can be set for push to talk or voice activation. It’s completely configurable for volume control, and you can even test your microphone with a playback feature to make sure the quality is good.

15 – Origins

By EdwinMindcraft

Game Version: 1.16

Origins enables players to choose a present origin type that have unique abilities and weaknesses that add challenge to a Minecraft playthrough. While the Forge version doesn’t have as many add-ons as the Fabric one, it’s still worth giving a try if you’re new to running an Origins SMP server.

16 – Lootr

CurseForge

By Noobanidus

Game Version: 1.16

Lootr is another essential server mod. One of the more common problems in a Minecraft server is when players find a chest only to discover it’s already been looted. This mod turns each chest into a loot chest with unique inventories for every player! No more excursions that lag the server with chunk generation or disappointment when searching for resources!

17 – Chat Heads

By dzwdz

Game Version: 1.16

This is a mod for clients that makes chat just a little more developed. It adds the player head beside their messages, which makes it much easier to tell people apart in a larger sized server.

18 – Just Player Heads

By Serilum

Game Versions: 1.12, 1.14, 1.15, 1.16

This could be a bit macabre, but this mod allows for players’ heads to drop upon death or a specified command. It’s a light mod to make things a little more interesting on a server!

19 – Just Mob Heads

By Serilum

Game Versions: 1.12, 1.14, 1.15, 1.16

Just like the one above, this mod adds a configurable chance for mobs to drop their heads upon death. This is great for survival servers where players can feel accomplished by their actions.

20 – Waystones

By BlayTheNinth

Game Versions: 1.12, 1.15, 1.16

This mod is essential for multiplayer servers where players spread out and claim areas for themselves. Waystones adds blocks for the player to return to once they’re activated. There’s also Warp Scrolls and Warp Stones, which players can have on hand to use to hop to a waystone they’ve already found. It’s very customizable for server administrators to set the cost and permissions.

NEXT UP

Top 10 Enchantments in Minecraft

howchoo   (467)
March 25, 2024

The longer you play Minecraft, the more you realize that early-game tools just won’t cut it. Exploring the enchantment feature of Minecraft can be exciting, but also intimidating. Rather than worry about researching enchantments, below are the best enchantments in Minecraft! To learn how to enchant items, check out this guide! In this guide, you’ll see

Continue Reading

howchoo

 467 guides

Introducing Howchoo, an enigmatic author whose unique pen name reflects their boundless curiosity and limitless creativity. Mysterious and multifaceted, Howchoo has emerged as a captivating storyteller, leaving readers mesmerized by the uncharted realms they craft with their words. With an insatiable appetite for knowledge and a love for exploration, Howchoo’s writing transcends conventional genres, blurring the lines between fantasy, science fiction, and the surreal. Their narratives are a kaleidoscope of ideas, weaving together intricate plots, unforgettable characters, and thought-provoking themes that challenge the boundaries of imagination.

Home Interests MacOS

How To Connect Your AirPods With a Keyboard Shortcut in MacOS

Automate the task that you probably do 10 times per day!
howchoo   (467)
September 28, 2023
11 minutes

Share

You’ll Need 1

What you’ll need
Interests
Howchoo is reader-supported. As an Amazon Associate, we may earn a small affiliate commission at no cost to you when you buy through our links.
Posted in these interests:
 
apple • 18 guides
macos • 20 guides
Note: This guide does not work on MacOS 11 Big Sur. Look out for an updated guide coming soon.

According to xkcd, if you can shave 5 seconds off of this task each time you perform it, it is worth spending about 12 hours to automate the task (over the course of 5 years):

XKCD

We’re big fans of automation and time-saving at howchoo! We’ve made shortcut guides in the past, such as showing you how to auto-hide your dock in MacOS and setting up a Mac mail search box shortcut.

And here’s another great one! If you follow this guide closely, it only takes 10 minutes to automate connecting your Airpods with a keyboard shortcut in macOS!

1 – Copy the following script

activate application "SystemUIServer"
tell application "System Events"
  tell process "SystemUIServer"
    -- Working CONNECT Script.  Goes through the following:
    -- Clicks on Bluetooth Menu (OSX Top Menu Bar)
    --    => Clicks on SX-991 Item
    --      => Clicks on Connect Item
    set btMenu to (menu bar item 1 of menu bar 1 whose description contains "bluetooth")
    tell btMenu
      click
      tell (menu item "{{ The name of your airpods here }}" of menu 1)
        click
        if exists menu item "Connect" of menu 1 then
          click menu item "Connect" of menu 1
          return "Connecting..."
        else
          click btMenu -- Close main BT drop down if Connect wasn't present
          return "Connect menu was not found, are you already connected?"
        end if
      end tell
    end tell
  end tell
end tell

Thanks @erebusbat for this applescript!

2 – Open Script Editor

Open Script Editor.

It lives in /Application/Utilities/, but just use spotlight (cmd + space).

Click New Document to get a blank editor.

3 – Paste the code

Paste the code into the editor.

4 – Carefully add the name of your airpods to the code

Find the name of your AirPods from your Bluetooth settings. Whatever shows up in the menu is the official name of your AirPods. This name is case sensitive and only allows curly quotes. A curly quote is , not '. A curly quote can be entered using shift + option + ]

Find the section that says {{ The name of your AirPods here }} and replace it with the name of your AirPods.

For me, “Dayne’s AirPods Pro” becomes “Dayne’s AirPods Pro”.

See the completed code below:

activate application "SystemUIServer"
tell application "System Events"
  tell process "SystemUIServer"
    -- Working CONNECT Script.  Goes through the following:
    -- Clicks on Bluetooth Menu (OSX Top Menu Bar)
    --    => Clicks on SX-991 Item
    --      => Clicks on Connect Item
    set btMenu to (menu bar item 1 of menu bar 1 whose description contains "bluetooth")
    tell btMenu
      click
      tell (menu item "Dayne’s AirPods Pro" of menu 1)
        click
        if exists menu item "Connect" of menu 1 then
          click menu item "Connect" of menu 1
          return "Connecting..."
        else
          click btMenu -- Close main BT drop down if Connect wasn't present
          return "Connect menu was not found, are you already connected?"
        end if
      end tell
    end tell
  end tell
end tell

5 – Save As an Application

  • Hit cmd + S to save.
  • Select “Application.”
  • Give your application a catchy, memorable name.

6 – Give security privileges to your script

Go to System Preferences > Security & Privacy

If the settings are locked, click the lock at the bottom left and enter your password to unlock it.

7 – Add your new application to “Accessibility”

  • Select Accessibility on the left side.
  • Click the + sign.
  • Find the new Application you just created and select it.

8 – Open Automator

  • Open the Automator Application which can be found at /Applications/Automator, but again, just use spotlight (cmd + space).
  • Click New Document.
  • Select the cog that says “Quick Action” (it may be called “Service” on older MacOS versions).

9 – Select “no input”

In your new Automator action, under “Workflow receives”, select no input. Make sure it reads “Workflow receives no input in any application.”

10 – Select “Launch Application”

In your new Automator action, under “Workflow receives”, select no input. Make sure it reads “Workflow receives no input in any application.”

11 – Select “Launch Application”

  • Click the dropdown, select Other,
  • Find and select your new application.

12 – Save your application

Hit cmd + save and give your action a catchy name.

13 – Go to keyboard shortcuts settings

Go to System Preferences > Keyboard > Shortcuts

14 – Find your new action

  • Click Services on the left side and look for your new action under the “General” section. Mine was at the very bottom.
  • Make sure the checkbox is enabled here.
  • Click Add Shortcut next to it.

15 – Press a keyboard shortcut

Think of a memorable keyboard shortcut and enter it. It will appear next to the action.

16 – Test it

Hit your keyboard shortcut and, voila, things should happen! You may get a security alert the first time you run it, but other than that, you’re all set!

NEXT UP

How to Enable the “Popping” Sound When Adjusting the Volume on Your Mac

howchoo
howchoo   (467)
December 13, 2023

Starting with MacOS Sierra and High Sierra, your Mac will no longer play a “pop” sound when you adjust your volume. If you prefer to have this sound when you adjust volume up and down (as I do), this guide will teach you how to reenable it. 1 – Open Sound System Preferences Navigate to System

Continue Reading

howchoo

 467 guides

Introducing Howchoo, an enigmatic author whose unique pen name reflects their boundless curiosity and limitless creativity. Mysterious and multifaceted, Howchoo has emerged as a captivating storyteller, leaving readers mesmerized by the uncharted realms they craft with their words. With an insatiable appetite for knowledge and a love for exploration, Howchoo’s writing transcends conventional genres, blurring the lines between fantasy, science fiction, and the surreal. Their narratives are a kaleidoscope of ideas, weaving together intricate plots, unforgettable characters, and thought-provoking themes that challenge the boundaries of imagination.

Home Interests DIY

How to Make Chamomile Simple Syrup

When chamomile meets delicious.
howchoo   (467)
September 28, 2023
6 minutes

Share

You’ll Need 10

What you’ll need
Interests
1
Lemon
1 tablespoon
Chamomile Flowers
1 cup
Sugar
1 cup
Water
Howchoo is reader-supported. As an Amazon Associate, we may earn a small affiliate commission at no cost to you when you buy through our links.
Posted in these interests:

DIY

diy • 17 guides
food • 7 guides

For thousands of years, chamomile has been used to calm anxiety and settle sour stomachs, but recently that we’ve started broadening our chamomile horizons to simple syrup.

Certainly one of the more obscure sides of simple syrup recipes, learning how to make chamomile simple syrup is a great way to add some floral flavors to your favorite cocktails (like a Tom Collins or a Gin Fizz).

What makes this particular recipe is even tastier is the use of fresh lemon peels.

Now, grab your vegetable peeler, your sugar, and let’s learn how to make chamomile simple syrup.

What to learn how to make something really delicious? Check out my recipe for blackberry simple syrup.

1 – How to choose your chamomile flowers

Like our rose water simple syrup guide, you can use freshly grown chamomile flowers, or you can use dried flowers.

If you’re using dried flowers, try to buy organic. For example, while chamomile leaves are widely sold to be used for home growth, it’s important to make sure they’re actually safe for consumption.

Check and research everything that’s listed on the packs you’re buying. A quick search with a reputable source will help you determine whether your flowers are safe or not.

Otherwise, buying organic is always a good route to take.

Once you have your flowers, you’ll be ready to make your syrup.

2 – Add your ingredients to your sauce pan

Carefully use your vegetable peeler to peel the skin of 1 lemon. Drop the peels into your sauce pot.

Measure out 2 tbsp of chamomile flowers and add them to your lemon peel.

Measure out 1 cup of sugar and add them to your pot.

Finally, add 1 cup of water to the pan.

3 – Heat your chamomile, sugar, lemon peel, and water

Place your pot over medium-high heat.

Stirring occasionally to help your sugar dissolve, bring your syrup to a boil. Once your sugar has dissolved, turn off your stove, and remove your pot from the burner. Allow it to cool for 10 minutes.

4 – Strain your simple syrup

Once your pot has cooled, pour your syrup through a strainer and into your mason jar (or any airtight container).

Now that you known how to make chamomile simple syrup, it will keep in the fridge for up 4 weeks, which gives you enough time to enjoy a beverage (or two). Whether you’re pouring this syrup into a cup of tea or your favorite cocktail or a combination of the two (try a little of your simple syrup in a glass of whiskey, with a dash of honey, and your favorite sleepy tea) and enjoy!

Pro tip: Clean up your sauce pot before your sugar evaporates and crystalizes to the side of your cookware. Nothing is worse than scraping off sugar.

NEXT UP

HeaterMeter: Control your Grill Using a Raspberry Pi!

Fire up the summer with a new Pi project.
howchoo   (467)
November 28, 2023

With summer right around the corner, it’s time to fire up the grill! But who will watch the grill while you’re beating the heat? This year, kick things up a notch with your own Raspberry Pi-powered HeaterMeter. Don’t just throw a BBQ, be a part of it. HeaterMeter lets you keep a close eye on

Continue Reading

howchoo

 467 guides

Introducing Howchoo, an enigmatic author whose unique pen name reflects their boundless curiosity and limitless creativity. Mysterious and multifaceted, Howchoo has emerged as a captivating storyteller, leaving readers mesmerized by the uncharted realms they craft with their words. With an insatiable appetite for knowledge and a love for exploration, Howchoo’s writing transcends conventional genres, blurring the lines between fantasy, science fiction, and the surreal. Their narratives are a kaleidoscope of ideas, weaving together intricate plots, unforgettable characters, and thought-provoking themes that challenge the boundaries of imagination.

Home Interests Practical Prints

15+ Useful 3D prints for your kitchen – Practical Print Series

Save money while impressing your family, friends, and pets! 🙂
howchoo   (467)
September 28, 2023
15 minutes

Share

You’ll Need 1

What you’ll need
Interests
Series
Howchoo is reader-supported. As an Amazon Associate, we may earn a small affiliate commission at no cost to you when you buy through our links.
Posted in these interests:
3dprinting • 36 guides
practicalprints • 1 guides

It’s time to put your printer to work with some useful, functional kitchen prints! Aside from creating fun printed models, the true promise of 3D printing is the ability to supplant your purchases with printed alternatives, saving you time and money. And each of these kitchen-prints can be printed on any decent budget-friendly 3D printer.

This guide covers some of the most useful things to 3D print for your kitchen including kitchen accessories, organization tools, replacement parts, utensils, and more.

1 – Kitchen pot lid holder

DSkolnik on Thingiverse

This print is brilliant. If your pan lids run for their lives every time you open your cabinet, now you can pin them in place with these wall-mounted lid mounts.

You’ll need a few screws whose length depend on the thickness of your cabinet doors. I can’t stress how insanely useful these things are.

🛈 This is a good opportunity to show your spouse how useful your 3D printing hobby is. 🙂 Then you can buy more printers. ALL THE PRINTERS.

2 – Cabinet shelf pegs

If you have missing or broken shelf pegs, you might not think to print one. These are the little things that slot into the side of the cabinet to support a shelf.

I had a few broken shelf pegs and Home Depot wanted $7 for a bag — no thanks. with 100% infill and proper print orientation (arrange the peg long-ways), 3D-printed shelf pegs are more than strong enough.

Peg sizing

There are a few different shelf peg sizes, both in terms of peg diameter and depth. Pull out an old peg and use a pair of calipers, ruler, or tape measure to determine the size you need. Or, print a few models and try each until you find the one that works.

Bonus: Each peg only takes about 5 minutes to print.

This is the peg I used, but you can find tons of other sizes with a quick search.

🛈 Once you find the right size, print a dozen or so pegs and throw them in a drawer for later!

3 – Nespresso pod holder

the_mike on Thingiverse

If you’re a fan of Nespresso, then you might have thought about shelling out $20 for something that will hold your pods. Shell out $0.30 instead and print your own! There are tons of great models out there for printing, but my favorite mounts to the wall with a bit of foam tape.

Add as many rows as you have flavors; each one holds an entire sleeve of Nespresso capsules. And because the model requires such little material, these things print super fast.

You can download the model I used from Thingiverse.

4 – K-cup holder

Atwgoodman on Thingiverse

If you’re a drip coffee fan instead, you can also save a few bucks by printing your own K-cup holder. You can find both tabletop and wall-mounted version on Thingiverse.

5 – Oven mitt hooks

cfinke on Thingiverse

This is an obvious one! There are tons of great options for keeping the ol’ oven mitts handy. I wanted to find some hooks that would connect to my oven door handle without coming off every time I opened the door. I found a great set on Thingiverse that are looped on one end; I can open the door all day and neither the hooks nor mitts will fall off.

6 – Kitchen sponge holder

blackllama on Thingiverse

Whats more exciting than sponges? Nearly everything on the planet.

But if you’re of pulling your mushy, cold, wet sponge out of the sink, print a sponge holder! Designers have gotten creative so you have your choice of a suction cup-mounteddouble sponge holder, or even one with a drain.

🛈 Also, tell whoever you live with to squeeze the sponge out when they’re done. For reals.

7 – Egg separator

mussy on Thingiverse

This one is pretty self-explanatory: it separates the egg yolk from the egg, leaving you with just the whites.

I recommend printing this, and anything else that touches food, using a food-safe 3D printing filament.

8 – Kitchen funnel

jckray on Thingiverse

Every time I buy a funnel for my kitchen, it ends up finding another purpose. No matter, you can print a new kitchen funnel in minutes and be on your way.

🛈 Print this one using food-safe filament.

9 – Cooking ingredient dispenser

ewap on Thingiverse

Here’s another useful kitchen organization print: a cooking ingredient dispenser. Organize your packets with this wall-mounted cooking ingredient dispenser.

10 – Paper towel holder

t0bi on Thingiverse

This is another common object that I never thought to print until now. Forget buying a paper towel dispenser — this one will do! Its adjustable hooks attach to any cabinet/board.

Or, if you prefer, you can print a tabletop roll holder or one that mounts using screws.

11 – Towel hook

dmatsumoto on Thingiverse

This towel hook/hanger hangs from your cabinet doors, making your towels more accessible while allowing them to dry more quickly.

12 – Kitchen drawer organizer

mrmacnology on Thingiverse

Holy modularity, Batman! Forget those cheap silverware trays or expensive drawer organizers — this 3D-printable kitchen drawer organizer is super modular.

You’ll still need some wood for this project — cut some strips to length and 3D print your brackets to customize your drawer as needed.

13 – Kitchen sink drain strainer

nanowhisker on Thingiverse

Stop food from clogging the drain by printing a simple drain strainer.

OogiMe on Thingiverse

From Halloween spiders to Star Wars characters, 3D-printed cookie cutters are a great way to get your kids involved in 3D printing!

Top 10 3D-Printed Toys for Kids
Get the printer ready, it’s time to play!

🛈  Don’t forget to share.

15 – All the utensils!

vr50bt on Thingiverse

There’s no shortage of kitchens, knives, and other 3D-printable utensils available on Thingiverse. I won’t cover them all here because you can simply thing of one and it likely exists.

Remember to use a food-safe printing filament to print anything that you will use to eat. For something simple like a stirrer I recommend ABS; make sure you use a printer, such as the Ender 3, that can print ABS.

For things coming into contact with heat, you’ll need a high temperature heat-resistant filament.

15 – Cocktail jigger

hmhamster on Thingiverse

Nothing like drinking and printing. Make your cocktails amazing by measuring out just the perfect amount of booze! Check out the model on Thingiverse. It’s double-sided, allowing you to measure out both 25ml and 50ml.

17 – Puzzle organizer

bq3D on Thingiverse

This one is part art, part organization; each set prints 9 puzzle pieces which you can organize in any way you want. The pieces mount with double-sided foam tape to any surface you’d like.

18 – Follow-up

We also created a Thingiverse collection containing these models for easy reference later!

Did I miss something?

If you have any favorite 3D-printed objects for your kitchen that you think should be on this list, leave a comment below!

NEXT UP

How to Update Blender

Get the latest Blender has to offer.
howchoo   (467)
November 24, 2023

Blender is one of the most popular open-source 3D creation suites today. It doesn’t cost a dime to use and everything you create is yours to own for good. The community is robust and the dev team still releases new updates on the regular. If you want to get the latest version, you may have

Continue Reading

howchoo

 467 guides

Introducing Howchoo, an enigmatic author whose unique pen name reflects their boundless curiosity and limitless creativity. Mysterious and multifaceted, Howchoo has emerged as a captivating storyteller, leaving readers mesmerized by the uncharted realms they craft with their words. With an insatiable appetite for knowledge and a love for exploration, Howchoo’s writing transcends conventional genres, blurring the lines between fantasy, science fiction, and the surreal. Their narratives are a kaleidoscope of ideas, weaving together intricate plots, unforgettable characters, and thought-provoking themes that challenge the boundaries of imagination.

Home Interests Game Boy

Rare Game Boys Your Collection is (Probably) Missing

Super rare and super awesome!
howchoo   (467)
September 28, 2023
17 minutes

Share

Interests
Posted in these interests:
gameboy • 8 guides
news • 3 guides
nintendo • 13 guides
retrogaming • 29 guides

The Nintendo Game Boy is one my favorite retro hand-helds. They came in a surprising number of variations, some of which are very hard to get ahold of.

Today we’re looking at the rarest Game Boys out there. These are less than typical finds that make every Game Boy collector drool.

Note: This list isn’t sorted by rarity. There’s a lot we don’t know about some variations due to a lack of information. For example, a surprising number of promotional editions have surfaced over the years. While Nintendo has verified their existence, they have yet to provide official release numbers. Regardless, I am saving the best for last.

1 – Play it loud!

In March of 1995, Nintendo released the Play It Loud series. These were Game Boys with new, colorful shells. They came in red, blue, green, yellow, black, clear, and white.

The Play It Loud models have a dark gray bezel with matching dark gray buttons. Most of them have black logo and button text. The black and clear edition both have red logo/button text. There exists a rare version of the clear shell that features black text. The rarest Play It Loud edition is the white one, which can go for a few hundred online.

2 – V Drink

Console Variations

In the late 90’s, Nintendo began licensing Game Boy rights to third party companies. These companies would release custom Game Boy editions as promotional prizes, often branding them with the company logo. The V Drink Game Boy edition was released in an unknown but limited quantity. The release was isolated to Australia.

3 – Planet Hollywood

Coleka

In 1995, a new deal was announced between Planet Hollywood and Nintendo. Planet Hollywood began selling custom Game Boys with the company logo printed on the shell. They were available in Planet Hollywood gift shops for a limited time. They are reported to be a European exclusive release. If you find one for sale online, they’re usually priced in the $200 range.

4 – Bee Ind

Console Variations

This Game Boy is another promotional item. It features a small design in the bottom left corner. It comes only in the usual off white color. The image is reported to be the logo of a company called Bee Ind.

5 – Iveco Truck

 Console Variations

For a gaming experience that’s built Ford tough, you need the Iveco Truck edition. It was released in America as part of a contest. It features the Ford logo surrounded by “Iveco Truck”. The image is printed on the original off white Game Boy.

6 – FIAT

 Console Variations

This edition was made to be won in a contest. It appears to be a black Play It Loud Game Boy, evident by the dark gray bezel/buttons and red logo/button text. The bottom left corner displays the FIAT logo in white. It’s reported that 100 of these were released.

7 – Electronic Boutique

Console Variations

The Electronic boutique edition is another promotional item. It features the Electronic Boutique logo on what appears to be a typical red Play It Loud shell. This edition was only available in EB stores. The package, which had a really cool design, also came with Killer Instinct.

8 – Lustucru

Console Variations

Lusticru is a French company that specializes in making pasta. Like many European businesses in the 90s, they decided to release a promotional Game Boy. The official number released is uncertain, but some estimate around 50 units exist. One thing is for sure, they are few and far between in online auctions.

9 – Body Glove

Console Variations

This edition was released by the water-based apparel company known as Body Glove. The release was a European exclusive. It looks like a normal, black Play It Loud device. But this version features a yellow Body Glove logo in the center with the words “Limited Edition” in the bottom left.

10 – JAL

Console Variations

This is the JAL edition. JAL stands for Japanese Airlines. It’s unknown exactly how many are in circulation. They feature the JAL logo on the mid-right section of an off white shell. The serial number on these editions always begins with JAL. These Game Boys are very hard to find online.

11 – Pink Heart

Console Variations

This is a really special edition. It’s the only Game Boy shell to be released in this shade of pink. There is no logo text or button text. It appears to use the original bezel and button color scheme. There is a large, red heart in the center of the Game Boy.

This Game Boy was released as a prize for a European game show. One user on Reddit claims to have one won by his mother on a show called “Ant and Dec’s Saturday Night Takeaway”. She reportedly won the Game Boy after calling in to share a Valentine’s themed poem on the show. In the thread, the user provided some of the only pictures you can find of this edition. It’s unknown how many were released.

12 – Wario

Console Variations

The Wario edition is another super rare find. It features your favorite baddie Wario on a solid black Game Boy. There is no logo or button text. The unit comes with the original bezel and button colors. This edition was a winnable prize on a UK TV show known as “Ghost Train Show”.

13 – Manchester United

Console Variations

This rare Game Boy was made for the English Football club known as Manchester United. The Game Boy appears to be a red Play It Loud edition with Manchester United graphics. It says “Manchester United Football Club” across the front. A Manchester United seal is placed in the center of the Game Boy with a logo in the bottom left.

14 – Toyota

Console Variations

This Game Boy was released as a prize for Toyota. Contest winners would receive the custom Toyota Game Boy unit. It looks just like an original Game Boy. The only change is a small Toyota logo on the front. It’s estimated there are around 100 of these in circulation.

15 – Milka

Console Variations

Milka is a German chocolate company. The Milka Game Boy edition features the Milka cow logo on the front of the shell. It was part of a sweepstakes promotion created just for Milka in the ’90s. It’s unknown how many of them were made. Some estimates put the mark around 50 possible units.

16 – Altus Newing

Console Variations

The Altus Newing edition is a really neat find. This Game Boy was released on the already rare white Play It Loud edition. It features the Altus Newing logo across the front in a striking blue print. I really like the look of these Game Boys. These variants were released in Japan and are said to have been prizes for a contest in the 90s.

17 – Comboy

Console Variations

This Game Boy variant has a really interesting history. Back when the Game Boy was released, there was unresolved tension between South Korea and Japan. Japanese products weren’t easily sold in South Korea. In an effort to circumvent these restrictions, Nintendo licensed the Game Boy for production under Hyundai. The Comboy, as it became known, looks almost exactly like a regular Game Boy. It features the Hyundai logo with the word “Comboy” on the front.

18 – Kirby Pinball

eBay

This is by far the rarest Game Boy edition. It’s known as the pink Kirby Pinball edition. It comes with a deep pink shell and features lineart of Kirby on the front. It was part of a mail-in sweepstakes promotion for a company in the UK called The Jacob’s Bakery Limited.

Only 25 units were created.

One recently appeared on ebay with a Buy It Now price of over $18,000. If you’re looking to complete your Game Boy collection, now is the time. This one still has its link port cover.

NEXT UP

RetroPie scrapers: what they are and how to use them

Wait, which game is this?
howchoo   (467)
September 29, 2023

You’ve put so much work into setting up RetroPie or EmulationStation. You load it up with legally obtained ROMs only to find that custom theme you installed—you remember, the one from my RetroPie themes guide—has a big blank spot for box art! The Best RetroPie Themes (And How to Install Them)You deserve some personal flair! RetroPie: Build Your

Continue Reading

howchoo

 467 guides

Introducing Howchoo, an enigmatic author whose unique pen name reflects their boundless curiosity and limitless creativity. Mysterious and multifaceted, Howchoo has emerged as a captivating storyteller, leaving readers mesmerized by the uncharted realms they craft with their words. With an insatiable appetite for knowledge and a love for exploration, Howchoo’s writing transcends conventional genres, blurring the lines between fantasy, science fiction, and the surreal. Their narratives are a kaleidoscope of ideas, weaving together intricate plots, unforgettable characters, and thought-provoking themes that challenge the boundaries of imagination.

Home Interests Raspberry Pi

How to Use an LED Matrix Panel with Your Raspberry Pi

An LED matrix will make any project better.
howchoo   (467)
September 28, 2023
23 minutes

Share

You’ll Need 5

What you’ll need
Interests
Howchoo is reader-supported. As an Amazon Associate, we may earn a small affiliate commission at no cost to you when you buy through our links.
Posted in these interests:
pi • 92 guides

LED matrix panels are just awesome. They look retro and have the added benefit of being useful. You can build just about anything using an LED matrix—a ticketing system display, an NHL scoreboard, a stock ticker, a clock, etc.

You might be surprised, however, as to how difficult it is to integrate an LED matrix into your project, especially for beginners. Since I needed this display for a cryptocurrency ticker I’m working on, I decided to write a generic guide that makes using the display a bit more accessible for beginners.

In this guide, you’ll learn how to set up and start using an LED matrix with your Raspberry Pi.

1 – Prepare your Pi

We’ve listed the Raspberry Pi Zero WH as the preferred Pi for this project because it’s small enough to fit behind the display, includes WiFi, and comes with GPIO headers pre-soldered.

If you happen to be using a Pi Zero W (without headers), you’ll need to go ahead and solder on your headers.

Need a soldering iron? Check out our guide to the best soldering irons.

The Best Soldering Irons: Read This Before You Invest (2022)
We’ve put together a guide to help you find the best soldering iron for your next project.

2 – Install Raspberry Pi OS

Next, you’ll need to install Raspberry Pi OS. To do so, please check out our detailed guide on how to install Raspberry Pi OS on your Raspberry Pi. After installing the OS, I recommend that you enable SSH and configure Wi-Fi as well, but this is only required if you’re using a fully headless setup.

How to Install Raspberry Pi OS on Your Raspberry Pi
Get the new official Raspberry Pi OS on your Pi.

3 – Connect the bonnet to the Raspberry Pi

The Adafruit RGB Matrix bonnet is one of the best Raspberry Pi HATs for this purpose. Connect it to the Raspberry Pi. To do this, you’ll need to line up the GPIO pins on the Pi with the female adapter on the bonnet.

Don’t rush this step. If you push too hard or try to do it too quickly, you could damage the GPIO pins.

With the pins lined up, press firmly and evenly across the GPIO pins. Squeeze the boards together between your thumb and index fingers. If you do it correctly, you should see the GPIO pins entering the female adapter evenly all the way across.

Optional:

You could add standoffs between the Pi and the bonnet on the non-GPIO side if you want to add support. This isn’t necessary as long as you’re careful when you’re connecting the rest of the hardware.

4 – Connect the panel’s power cables to the bonnet

The RGB matrix bonnet will provide power to both the panel and the Raspberry Pi. The Raspberry Pi will receive power through the GPIO pins, but we’ll need to connect the panel to the bonnet to provide power to the panel.

Depending on the exact panel you purchase, you will likely need to cut and strip the red and black wires.

Then on the bonnet:

  • Unscrew the small screws at the top of the terminals.
  • Slide the exposed copper from the cables into the terminals
  • Then tighten the screws to secure them.

5 – Connect the ribbon cable

At this point, you’re ready to connect all of the hardware.

  • Connect the ribbon cable from the panel to the RGB matrix bonnet.
  • Install your SD card in the Raspberry Pi.
  • Connect your power supply to the bonnet.

Now, you’re ready to write some code!

6 – Optional: Print the LED panel housing

This photo shows the two cover pieces attached using M3x12mm bolts, but you should be able to use M3x8mm as well.

Print the housing

If you’ve got a 3D printer, you should consider printing a housing for your project. You can find the model on Thingiverse. If you don’t have a 3d printer, you can look into other ways to get the model printed.

How to Get Things 3D Printed Without a Printer
No printer? No problem.

You’ll only need to print the following parts:

  • Frame_Rasp_Pi_Side_Slots_3.stl
  • Frame_Battery_Side_Slots3.stl
  • Cover_RPi_side.stl
  • Cover_Battery_Side.stl

The names may be updated by the time you download the model, but in short, you you need to print both frame pieces and both cover pieces.

Assemble the panel

Assemble the panel using M3x8mm bolts and nuts, which you can find included in our recommended kit on Amazon. Start by attaching the frames to the panel, then secure both pieces of the cover together. When you’re ready to enclose your project, secure the case to the frame. If you need more detailed instructions, check out the tutorial written by the creator of the housing.

7 – Optional: Add a power button

A power button is a nice addition, especially if you’re going to use the housing. As you may know, the Raspberry Pi doesn’t ship with a physical power button, so adding a power button provides a quick and safe way to shut down the Pi when you’re not using it.

To add the power button, I recommend you start by reading our full guide on how to add a power button to your Raspberry Pi. The guide will show you how to wire up the button and provide all of the software required to use it.

How to Add a Power Button to Your Raspberry Pi
Because you should always safely shut down your Pi.

Solder the male header pins

The RBG Matrix Bonnet provides the GPIO holes you need to wire up the power button. You can solder the wires directly to the board, but I recommend soldering male header pins. For simplicity, I would use a 2×2 square such that it covers both the SCL and GND holes on the bonnet. If you’ve got a breakaway header you can use a pair of snips to cut out the 2×2 square.

Drill a 1/2″ hole in the housing

It should be noted that for this particular project, our recommended button requires a 1/2″ hole, which is larger than the hole provided by the housing. You can find a smaller button, but I recommend using the button we sell because it comes from a reliable source and you get to support your favorite DIY site 🙂

To use our button, you’ll need to drill a 1/2″ hole in the housing. You can put it wherever you’d like, but you’ll likely need male-to-female jumper cables to reach from the Pi to the leads on the button.

Connect the leads to the bonnet

When you’re ready to secure the housing, attach the leads on from the power button to the SCL and GND pins on the bonnet. If necessary, use jumper wires to extend the leads.

8 – Install the rpi-rgb-led-matrix library

From here, you’ll need to either connect your Pi to a keyboard and monitor or if you’re comfortable with the command line, you can work via ssh. If you’re using the Raspberry Pi OS Desktop, you’ll need to log in and open Terminal.

There are a few ways to configure this library. I’m going to configure the library for use with Python 3. You can also install the bindings for Python 2, C++, or C#, or just use it as a command-line tool.

To get going, you’ll need to install some dependencies:

sudo apt-get update  && sudo apt-get install -y git python3-dev python3-pillow

Then you’re going to install the rpi-rgb-led-matrix library. Let’s start by cloning the repository:

git clone https://github.com/hzeller/rpi-rgb-led-matrix.git

Now, cd into the repo folder and install:

cd rpi-rgb-led-matrix
make build-python PYTHON=$(which python3)
sudo make install-python PYTHON=$(which python3)

Each of these commands should run without a hitch.

9 – Hello, world!

With our hardware set up and the software installed, let’s run a simple test.

The library ships with some sample code to get us started. You’re going to use a Python script called runtext.py that scrolls text across the screen on repeat.

Navigate to the samples directory:

cd bindings/python/samples

Now run the following command:

sudo python3 runtext.py --led-cols=64 --led-gpio-mapping=adafruit-hat --text="Hello, world!"

Note: Some of the sample scripts are a little bit feeble. You must be in the samples directory for the fonts to load properly.

Let’s break down this command.

  1. This is important. We’re calling this script with python3 because that’s how we built the library. It will not work using python or ./.
  2. Then, because the default display size is 32×32 and my panel is 64×32, I’m passing in --led-cols=64 to override the number of columns.
  3. And, because we’re using the adafruit bonnet, we need to specify the hardware with --led-gpio-mapping=adafruit-hat. Finally, for this particular sample script, we can pass in the text we want to scroll with --text.

Give this a shot to make sure everything is set up correctly.

10 – Display an image

For this example, you’ll work from another directory. Feel free to create a working directory of your choice, but I’m going work right out of the home directory:

cd 

First, you need to download a sample image:

wget /media/nz/i3/md/howchoo-low-res-h.png

Then you’ll use the following script. Create a new file called test-image.py and add the following:

#!/usr/bin/env python3

import time
import sys

from rgbmatrix import RGBMatrix, RGBMatrixOptions
from PIL import Image

if len(sys.argv) < 2:
    sys.exit("Require an image argument")
else:
    image_file = sys.argv[1]

image = Image.open(image_file)

# Configuration for the matrix
options = RGBMatrixOptions()
options.rows = 32
options.cols = 64
options.chain_length = 1
options.parallel = 1
options.hardware_mapping = 'adafruit-hat' 

matrix = RGBMatrix(options=options)

# Create a thumbnail that first our screen
image.thumbnail((matrix.width, matrix.height), Image.ANTIALIAS)

matrix.SetImage(image.convert('RGB'))

try:
    print("Press CTRL-C to stop.")
    while True:
        time.sleep(100)
except KeyboardInterrupt:
    sys.exit(0)

Now make the script executable:

chmod +x test-image.py

And run the script passing in your image as an argument:

sudo ./test-image.py howchoo-low-res-h.png

For best results, you’ll want to use an image that’s the same aspect ratio as your panel or else build some cropping functionality into the script.

11 – More examples

If you browse the repository there are plenty of examples to choose from. You can also check out some projects that use this panel, like our Raspberry Pi Scoreboard (see video below) and our cryptocurrency ticker.

If you have trouble with this guide or would like to see more examples, let me know in the comments below. I might be able to help 🙂

NEXT UP

How to Run a Minecraft Server on the Raspberry Pi

A whole world trapped inside your Pi.
howchoo   (467)
December 7, 2023

There are several ways to go about running a Minecraft server on the Raspberry Pi. In this guide, I’ll cover how to install Nukkit—a cross-platform Minecraft server that’s super easy to set up on the Raspberry Pi. This server should work with PCs, consoles, and tablets running Minecraft 1.14. I’ll be using a Raspberry Pi

Continue Reading

howchoo

 467 guides

Introducing Howchoo, an enigmatic author whose unique pen name reflects their boundless curiosity and limitless creativity. Mysterious and multifaceted, Howchoo has emerged as a captivating storyteller, leaving readers mesmerized by the uncharted realms they craft with their words. With an insatiable appetite for knowledge and a love for exploration, Howchoo's writing transcends conventional genres, blurring the lines between fantasy, science fiction, and the surreal. Their narratives are a kaleidoscope of ideas, weaving together intricate plots, unforgettable characters, and thought-provoking themes that challenge the boundaries of imagination.