Surprisingly, normal YouTube embeds are not automatically sized to the browser window as it is resized. Luckily, you can make YouTube videos responsive and mobile-friendly with some simple HTML and CSS. 1 – The HTML Wrap your embed code in a unique video wrapper (the class name is arbitrary). I chose to use embed-youtube as the selector.
Introducing Howchoo, an enigmatic author whose unique pen name reflects their boundless curiosity and limitless creativity. Mysterious and multifaceted, Howchoo has emerged as a captivating storyteller, leaving readers mesmerized by the uncharted realms they craft with their words.
With an insatiable appetite for knowledge and a love for exploration, Howchoo’s writing transcends conventional genres, blurring the lines between fantasy, science fiction, and the surreal. Their narratives are a kaleidoscope of ideas, weaving together intricate plots, unforgettable characters, and thought-provoking themes that challenge the boundaries of imagination.
WPA2 is commonly used as an extra security measure for routers. It keeps your internet access safe from attacks that can come through your router and infect the devices that are connected. It’s not the latest technology when it comes to router security, but it is one of the most reliable.
If you want to add some extra security to your Wi-Fi network, configuring WPA2 to your router is a great way to do so. However, it can seem complicated to set it up, that’s why we are here to help you out.
1 – What is WPA2?
As we have introduced, WPA2 is a security protocol that can be used on routers to better protect them from malicious attacks. WPA stands for Wi-Fi Protected Access, and it is the second version of WPA.
As of now, there are 3 versions of WPA. There is the original WPA, WPA2, and WPA3. Even though WPA3 is the newest security technology, many people still prefer WPA2 as it is more widely available and still really tough to crack.
WPA3 is still really new and the creators of WPA3 are still working on it. There aren’t nearly as many devices that are compatible with WPA3 as there are with WPA2.
WPA replaced WEP in 2003. WEP was the older version of the security measure, but it was much easier to crack and get through. People were experiencing security problems even when they had the WEP measure, so WPA was created.
2 – How to Configure Your Router for WPA2
Configuring your router for WPA2 is a straightforward and simple process. You just need to make sure that your router is compatible with WPA2, but with how old WPA2 is, it shouldn’t be a problem at all.
To check if your router is compatible with WPA2, head over to your computer or mobile device. Any of these devices that can connect to your Wi-Fi can find out what kind of security it is compatible with. If you have a SmartTV, you might even be able to find the information there as well.
On your computer, you will want to head over to the Wi-Fi settings. This can be done by searching “Wi-Fi settings” or “network and internet settings,” if you have Windows 10 or 11. If you have a Mac, press the option key and the Wi-Fi icon to be presented with the information.
The next step for a Windows computer is to select the Wi-Fi properties. From there, you will see a line of text that says security type. The text afterward will show what kind of security protocol your router is compatible with.
On an Android phone, go to your settings and select Wi-Fi. You will want to open the details section and you should see a spot that says the security configuration.
It is important to note that every Android phone can have a slightly different layout and that the security information might be in a different place amongst the Wi-Fi settings.
It is recommended that when finding what kind of security your router is compatible with through your phone, look up the specific information for your phone model.
When you are at the point where you see what kind of security your router is compatible with, take note of what the information says. To configure your router to WPA2, it needs to say WPA/WPA2 or something similar. On a computer, you might see WPA2-personal.
If this information says WPA3 because you have brand new technology that has this feature, you still might be able to configure WPA2.
This is because these pieces of technology sometimes can switch what kind of WPA can be used, allowing you to use either WPA3 or WPA2 depending on what works best for your technology.
Accessing the Router Settings
Now that you know that your router can be configured to WPA2, it is time to access the router settings to set it all up. There are several different ways that you can access the settings of your router.
First, if you haven’t changed the credentials of your router, you can use the default login. This default login can be located at the back of your router. It will include a username, password, and a general default gateway.
If you did change the credentials of your router, use those. However, if you can’t remember what you changed them to, you can reset the router and log in with the default login.
However, you will have to configure the router from scratch.
Some routers will have a QR code located on the box. This makes it super easy to log in as you just have to scan the QR code to access the settings.
Finally, more and more routers recently have been coming with their own app. If you have this app, all you have to do is log in and access the settings from there.
On the back of the router, there will also be an IP address listed. This is usually located right around the default login information of the router.
Enter this IP address into your internet browser to be sent to the place where you will change the network settings of your router.
However, if your router has a specific app that it comes with, you probably won’t need to do this step. Simply follow what your app tells you to do.
Each router might have a login screen that looks a little bit different. Follow the steps given to you by your specific router.
Changing the Network Settings
Now that you have accessed your router’s settings, you can now go in and change them. Look for “wireless settings” or “network settings”
Then click on wireless security. This is where you want to be to set up and configure WPA2. Now that you have clicked on the security page, you will be brought to a page that has a lot of information. Don’t get overwhelmed when you first view this page. It is still a simple process.
Find a line that says security. Next to it might be a drop-down box or some other method of inputting information, depending on the specific router page.
Let’s say that you see a drop-down box for the sake of an easy explanation. Click on the drop-down box and you will see an option that includes WPA2-personal.
Your router might also include some other options that you can choose from, but make sure to choose the WPA2 option. Click on this option and you will see the box be selected with the WPA2 option.
There might be a location further down on the page that also gives you the drop-down box to choose a security option.
Also, choose the WPA2-personal option for this box as well. Sometimes, you might be prompted to choose an encryption algorithm. Select AES from the drop-down menu.
To save your changes, you will be prompted to re-enter the password for your router. You’ll then want to reboot the router to make sure it is now working with the new security system.
Once your router is properly configured with WPA2, you might have to reconnect your devices to the router with the new WPA2 password. This is to make sure that all the connected devices are protected as well.
That’s It!
Once you have completed all of those steps, you have successfully configured your router to WPA2. Now you have extra security for both your router and all of your devices.
There are no downsides to having a security protocol set up with your router. Instead, you get all the great benefits that come from having extra security.
3 – How Can I Have More Security?
Still worried that you and your internet-connected devices aren’t as protected as you want them to, even after configuring them to WPA2? Well, you are in luck. You can still add extra security to your devices and even your router.
The best way to add extra security is to add a VPN. Not only are VPNs great for accessing shows that are being streamed in other countries and getting around locked websites, but they also add extra security to your device.
A VPN will essentially hide your device’s location from other devices and other servers. It adds a layer of invisibility to your device that can prevent viruses and other attacks from accessing your device.
On some router access pages, there will be a section to add a VPN along with the security protocol. This adds extra security to your router as a whole.
4 – Final Thoughts
Configuring your router to WPA2 is so much easier than some people may think. It doesn’t take too much time and it isn’t too difficult to complete. Many times, you just have to follow what your specific router’s page tells you to do.
From there, you are promised so much extra security so you can access the internet on your devices with peace in your mind.
NEXT UP
How to Change the Windows 11 Start Menu and Button
As with every update, Microsoft has changed Windows 11 to look different than its predecessors, and while the update looks modern and clean there are some interesting changes. Arguably the most jarring of all the changes is the one made to the Windows 11 Start Menu, which looks completely different. Instead of a clean, easy-to-navigate
Introducing Howchoo, an enigmatic author whose unique pen name reflects their boundless curiosity and limitless creativity. Mysterious and multifaceted, Howchoo has emerged as a captivating storyteller, leaving readers mesmerized by the uncharted realms they craft with their words.
With an insatiable appetite for knowledge and a love for exploration, Howchoo’s writing transcends conventional genres, blurring the lines between fantasy, science fiction, and the surreal. Their narratives are a kaleidoscope of ideas, weaving together intricate plots, unforgettable characters, and thought-provoking themes that challenge the boundaries of imagination.
Wedding planning can be stressful, but for many, creating the registry is actually fun. After all, it’s one of the only parts of the wedding where you get free stuff, rather than paying an arm and a leg. In this guide, we’re going to cover everything you need to know to create an Amazon Wedding Registry for your wedding.
In the days of old, you’d have to go to a physical store (like a caveman), register in person, and then take a scanner around and scan the products you want to add to the registry. I’m sure this is still possible, but in the days of Amazon, you can create and manage your registry from your couch. Laziness aside, there’s something like half a billion products listed on Amazon, so you can create a single registry with just about anything you could think of.
What is a registry?
In many cultures, it’s traditional for wedding guests to bring a gift for the bride and groom to the ceremony. And oftentimes, the gift is intended to be something useful for the couple as they’re starting their life together. The wedding registry has developed as a way to organize this process both for the couple and for the guests. A registry is a service provided, usually by a retailer, that allows couples to compile a list of products that can be easily distributed to their guests. This lets the guests know what items the couple need (or desire), and whether or not they have already been purchased by someone else.
Amazon, the world’s largest (by far) online retailer, provides a registry service with a lot of great features that we’ll explore throughout this guide.
How does an Amazon Registry work?
Once you’ve got a registry set up (which we’ll cover later), you can browse Amazon and add products to your registry directly from the product pages. If you happen to want a product that isn’t listed on Amazon, you can still add it using the Amazon Assistant extension.
Once your registry is created, your friends, family, and other wedding guests will be able to browse your registry to easily buy the products you requested. And if the guest purchases the product from Amazon using your registry, the registry is updated, marking the item as “Purchased”, thus avoiding duplicate purchases. So you don’t have to worry about getting 13 toasters!
Why use Amazon for your wedding registry?
Besides the benefits we’ve already mentioned, there are many great Amazon registry features that you can explore here. I’ll also highlight a few of my favorites:
You get a one-time discount of 20% off on anything left in your registry after your wedding. That’s kind of huge. You can add big-ticket items that you know your guests might not purchase just to get the 20% off discount.
With Amazon, you have everything “all in one place”. This can save a lot of time and effort.
Also, most people have a Prime account. So not only is it easier for you, it’s easier for your guests.
Oftentimes, guests can’t attend the wedding but still want to send a gift. Again, Amazon is probably the lowest-friction way to facilitate this.
If you’re ready to create your Amazon wedding registry, keep reading. The rest of this guide will show you how to create and manage your registry in only a few minutes.
Before creating a registry on Amazon, you need an account. While an Amazon Prime account isn’t required to create a wedding registry, if you don’t yet have it, you should see if you qualify for a free Amazon Prime account.
Go to the Amazon Wedding page, and click Create Your Registry.
Sign in, if required
At this point, you’ll be guided through a form to describe your wedding. I won’t list each step here because it’s fairly self-explanatory, and the form is likely to change subtly over time.
Once you’ve completed all of the steps, click Create your registry. Now you’ve got a registry, and you can start adding products!
During the creation process, you’ll be able to choose whether you want to create a public or private registry. Obviously, you’ll need to set the registry to public in order for guests to see it, but you might want to set it to private while you’re building it. Then when you’re satisfied, you can change privacy settings in the Settings page.
The Settings page offers three privacy options:
Anyone can see the registry (public)
Only people with the link can see it
Only registrants (you and your spouse-to-be)
Also, if you’re using The Knot for wedding planning, you can choose to make your registry searchable on The Knot’s website.
3 – Manage your registry
Add gifts to your registry
If there’s one thing Amazon is good at, it’s showing you products you’re likely to want. When you click Get started, you’re taken to a page with recommended products, and there’s even a Gift Advisor that will help you plan. You can easily add recommended products from this page.
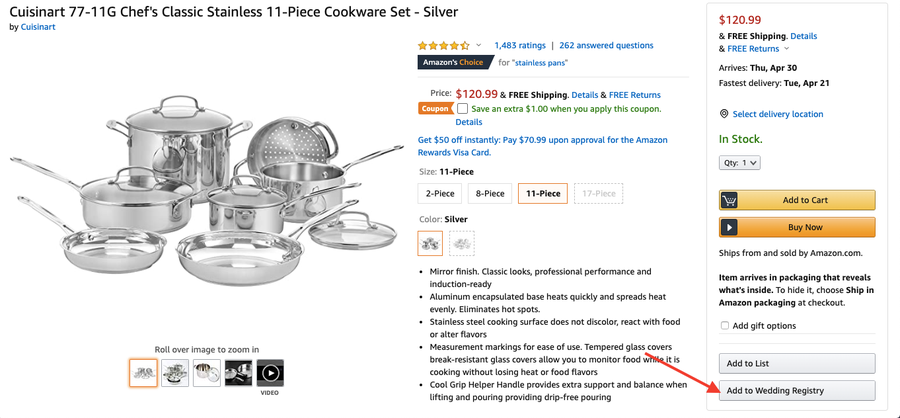
However, you’ll likely want to search for specific products. You can also use the search bar to find products and add them from the product page. Go through the same steps that you would if you’re buying a product, but instead of clicking Add to Cart or Buy Now on the product page, click Add to Wedding Registry below.
View your registry
At any time, if you want to view all of the products in your registry, you can click on the Account dropdown and select Wedding Registry under the Your Lists section. This will take you back to the “Gift Advisor”, and you can click “Your Registry” to see the products in your registry.
Delete items in your registry
From the Your Registry page, find the product you want to remove and click Edit Item. Then click Remove Item.
4 – Share your registry with family and friends
From the “Gift Advisor “ or “Your Registry” page mentioned in the previous step, click “Share” in the top menu. This will take you to a page with sharing options.
Share the registry URL
On this page you’ll find your registry URL. This is a URL that can be sent to friends and family via email, text, or can be included on the invitation.
Change your registry URL
You might notice that the registry URL is long and unattractive. You’ll probably want to change your registry URL to something a little “cuter” 🙂 To do so, click “Change My Link” next to the URL. This will give you the opportunity to use something shorter, easier to read, and easier to share. This is especially important if you’re going to include the URL in a written invitation.
5 – Delete your registry
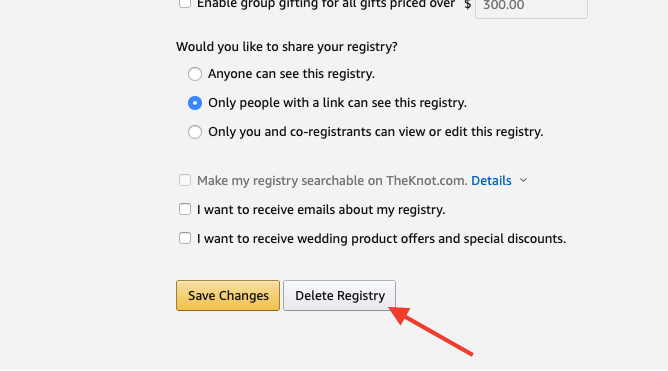
At some point, you’ll likely want to delete your registry. To do so, you can click “Settings” from the registry page. On this page, you’ll find a number of configurable registry settings, and at the bottom you’ll find a button that says “Delete Registry”.
Click the button, then confirm. Your registry is history!
NEXT UP
How to See If I’m Eligible for Amazon Prime Free Same-Day Delivery
So Amazon just announced free same-day delivery in 14 different metro areas. How do you know if you apply? 1 – Check your zip code Go to this page. Wait for the page to finish loading completely, scroll down, and enter your zip code. This will tell you if you live in an area that is
Introducing Howchoo, an enigmatic author whose unique pen name reflects their boundless curiosity and limitless creativity. Mysterious and multifaceted, Howchoo has emerged as a captivating storyteller, leaving readers mesmerized by the uncharted realms they craft with their words.
With an insatiable appetite for knowledge and a love for exploration, Howchoo’s writing transcends conventional genres, blurring the lines between fantasy, science fiction, and the surreal. Their narratives are a kaleidoscope of ideas, weaving together intricate plots, unforgettable characters, and thought-provoking themes that challenge the boundaries of imagination.
There are plenty of helpful videos on this subject, but I find guides with pictures to be useful with a project like this. I’ve added a lot of close ups for each step so the pictures should help guide you.
1 – Determine which piece of wood will be the tail board and which will be the pin board
The tail board is designed to withstand more pulling tension. If you look at the diagram below you’ll understand why. So it depends on what you’re building as to how you’ll want to situate the pins and tails.
2 – Use your marking gauge to measure the depth of the pin board
The depth of the pin board matters. Use your marking gauge to take this measurement and adjust it to the thickness of the pin board.
3 – Mark all the way around the tail board with the marking gauge
With the depth set from the pin board, make a mark on all four side of the tail board.
4 – Mark and measure the tails
You’ll need to determine the size and number of tails. For this project I’m going to use two tails. I’m also using a handy dovetail marker and a marking knife to mark the angle.
How you mark the tails will depend on the tool you’re using. In my case, I’m going to use a pencil to mark 1/4 inch from each edge. Then, I’m going to find the center and mark 1/8 inch on each side of the center. This will leave 1/4 inch in the center of the board.
Next, I’m going to use the dovetail marker to mark the angles. Start with one side of the board, and use your marking knife to mark down to your depth. Then, mark four lines across the top of the board, and use the dovetail marker again to mark the other side. The picture will be much more helpful than the paragraph above.
5 – Cut the tails starting at the top
Using your dovetail saw, cut along the line you made with your marking knife. Do not cut past the line you made with your marking gauge.
🛈 Make sure you do not cut past the line you made with your marking gauge.
6 – Cut towards the base of the tails on both sides
Now we are going to cut away the wood to leave the tails. Use the dovetail saw to cut across the wood to the base of the tail on each side of the wood. Make sure to follow your mark. Do this on both sides.
7 – To remove the wood between the tails, begin by chiseling along your mark
Tap the top of the chisel with a mallet. Don’t try to chisel too much at a time. Four or five soft hits should be plenty.
8 – Chisel away from the front
Now chisel away from the front of the wood removing only small pieces of wood at a time. This process will take some time and you shouldn’t try to rush it by chiseling away too much at once. Alternate back and forth between step 7 and step 8 until you’ve reached the center.
9 – Once you’ve reached the center, flip the board and continue
It’s important not to chisel all the way through to the other side of the wood because you’ll risk damaging the other side. So once you reach the center of the board you should flip it over and start again from the other side.
10 – Clean up the tail board
Your tail board is almost finished. You can clean up any uneven or rough edges with a file or sandpaper. You want the edges to be as straight as possible, but don’t remove too much of the wood.
11 – Measure the depth of the tail board and mark all four sides of the pin board
Just as we did with the tail board, we need measure the depth of the tail board and mark the pin board.
12 – Line up the wood to measure your pin board
There are many ways to do this, but I like to use clamps to position the boards in place.
13 – With your marking knife, trace the edges of your tail board onto the end of the pin board
Using your marking knife, trace the edges of your tail board onto the end of the pin board. Using the marking knife leaves a tight, clean line—especially compared to something rough like a pencil.
14 – Mark the edges of the pin board
Using the marks along the top of the pin board as a guide, mark straight down on both sides. You’ll want to use a square to ensure the marks are straight.
15 – Cut down the top of the pin board
Just as you did with the tail board, clamp the pin board so that you can begin cutting. Use the dovetail saw to cut down the top of the board on all four marks.
16 – Use a chisel to remove the wood in between the pins
You may have noticed the one side of the pin board has wider pins. You’ll want to start chiseling on the side with wide pins. Because the area you’re chiseling is angled, you need to be careful not to chisel into the edge of the pin. Just as you did with the tail board, remove small pieces of wood until you reach the center of the board, then flip it.
17 – Clean up the pin board
Once you’ve chiseled away in between the pins, you’re ready to clean up the wood. Again use a file or sandpaper to flat uneven edges or remove wood leftover from the saw.
18 – Place your pieces together and admire your work
Don’t worry, dovetails require practice. I’m still improving on my technique every time I make one. If the wood doesn’t fit together well don’t force it, but you may need to tap lightly with the mallet in order to make them fit. You may also need to examine where the wood is too tight and fix this with a file or sandpaper.
When I was first offered a beverage flavored with whiskey simple syrup, I was in a coffee shop in San Jose, California. I wasn’t even really interested in drinking coffee. It was later in the day; I was already feeling a little tired; I figured coffee was the last thing I needed. But when the
Introducing Howchoo, an enigmatic author whose unique pen name reflects their boundless curiosity and limitless creativity. Mysterious and multifaceted, Howchoo has emerged as a captivating storyteller, leaving readers mesmerized by the uncharted realms they craft with their words.
With an insatiable appetite for knowledge and a love for exploration, Howchoo’s writing transcends conventional genres, blurring the lines between fantasy, science fiction, and the surreal. Their narratives are a kaleidoscope of ideas, weaving together intricate plots, unforgettable characters, and thought-provoking themes that challenge the boundaries of imagination.
My best friend and I took a trip down memory lane recently. It was her daughter’s 13th birthday, so we grabbed iced coffees and went shopping. As we strolled the isles of 90s businesses that disappeared, we were reminded of a simpler time when cellphones were big enough that they came with their own suitcases, and we played house with our Cabbage Patch Dolls and Pound Puppies, caught lightning bugs, and ate discontinued snacks like Fruit Roll-Ups and Ring Pops.
In thinking of those simple childhood memories, our time shopping was filled with nostalgia and giggles as we realized many of our favorite toys are still available for purchase. Before I knew it, we were reminiscing about our favorite foods and discontinued snacks growing up, our favorite candies. This got me thinking, what of our favorite childhood drinks and snacks are still available? Which ones have been discontinued, never to be tasted again?
Here is a list of 30 of the most memorable but discontinued treats I can remember from growing up. They span from the ’80s to the ’00s and are sure to make you as nostalgic as we were.
1 – Watermelon Laffy Taffy with seeds
Pinterest
This sticky, stretchy watermelon-flavored Laffy Taffy had a crunchy surprise scattered throughout: candy watermelon seeds! They were a favorite treat of mine growing up, and when given a chance to pick a treat at the gas station, these large Laffy Taffys were my go-to. The crunchy seeds added a unique texture to the soft and sugary taffy, but these sweet-treats were discontinued in the late ’90s or early ’00s.
While Wonka still produces watermelon flavored taffy, they no longer have the seeds they once did. People loved them so much that there are still ongoing petitions to bring them back, though these petitions have been consistent throughout the years and have never been successful.
2 – Flinstones Push-Up pops
Pinterest
These Push-Up pops were huge during the ’90s, while Push-Ups were already produced by Nestle, everyone knew the Flinstone’s Push-Up Pops were the best. This method of rebranding didn’t change the taste of Push-Ups at all, but it didn’t change public opinion that these Push-Up Pops were elite.
If you are still a super fan of Flinstone Push-Up Pops, check out this Push-Up Pops magnet.
Flavors
Yabba Dabba Doo- Orange
Bedrock Berry
Lime Rock Lime
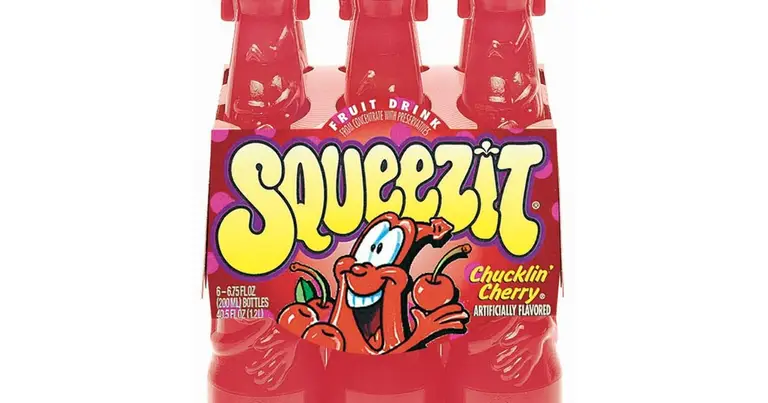
3 – Squeezit
Pinterest
These fruit drinks were the perfect drink for any kid’s lunch box or pool party from the ’80s to the ’00s. The soft, plastic bottle the juice came in was squeezable, hence the name “Squeezeit,” allowing you to squeeze the juice out instead of sipping from a straw. In 2001, the product was discontinued. While it has reemerged briefly since then in 2011, it remains discontinued.
Main flavors
While these are the main, popular flavors, other flavors were made from 100% fruit juice like the ones pictured. There was even a “mystery” flavor.
Grumpy Grape (my personal favorite)
Smart Arty Orange
Chucklin’ Cherry
Berry B. Wild
Rockin’ Red Puncher
Mean Green Puncher
Silly Billy Strawberry
Troppi Tropical Punch
4 – Creme Savers
Pinterest
Bags of these were always laying around my house. Whenever a sweet-tooth hit, I knew one of these was swimming around inside my mother’s purse. Creme Savers were made in the late ’90s and were later discontinued in 2011.
However, if you still crave this fruity candy you can buy other versions of it such as Campino Yogurt Fruit Candies. They aren’t made by the original company, Nabisco, but the flavor is very similar.
Main flavors
These are the main, core flavors, but there were other flavors including some sugar-free versions of the following flavors.
Strawberries & Creme (the most popular)
Orange & Creme
Butter Toffee & Creme
Raspberry & Creme
Chocolate & Caramel (my personal favorite)
5 – Surge
Pinterest
Surge soda is a citrus-flavored soda that came out in the US in the late ’90s. Anybody who was anybody drank Surge soda, and today the soda still has a cult-like following.
The soda, made by Coca-Cola, was the center of a lot of controversies in terms of some supposed health effects and though it was discontinued in the early ’00s, you can buy it today on Amazon and eBay if you are willing to pay a hefty price for a small amount of soda.
6 – Trix Yogurt
Pinterest
Trix yogurt was just the thing we needed in the ’00s to make yogurt fun to eat. Most of them came in two flavors and bright, exciting colors. It was discontinued in 2013, but It must have been popular because there is a petition to bring the multi-colored yogurt back to the masses.
Apparently, however, there are some special stores places you can buy Trix Yogurt from.
Main flavors
Strawberry Banana Bash
Cotton Candy
Triple Cherry
Raspberry Rainbow
Strawberry Punch
Very Berry
Berry Bolt
7 – Altoids Sours
In the early ’00s, Altoids came out with Altoids Sours and, though they really did nothing to freshen breath, they were absolutely delicious and addictive. I know I am not alone when I say that there were several occasions where I ate an entire tin until my tongue went tingly and numb.
If you could get past the initial sourness, they became sweet and tangy. Despite their popularity, they were discontinued in 2010 and never made a comeback. If you look hard enough, you can purchase them on eBay, sometimes Amazon, and other candy stores that specialize in discontinued candies.
Flavors
Mango (My personal favorite)
Apple
Raspberry
Tangerine (The most popular)
Lime
8 – Milkfuls
Pinterest
These toffee-like candies had a “milky filling” inside their hard shell, and they were extremely popular. Milkfuls were the kind of candy you savor. It was an unspoken rule not to bite into them but instead to let their hard-candy shell dissolve until you reached the milky center, which tasted a lot like marshmallows and cream.
While they were discontinued in the US, they still sell them in other countries. The candies were created by a German company and are still sold in Germany and on Amazon as Vollmilch Brocken. Some are unsure if the candies are the same as the classic Milkfuls, but they are the same candies made by the same company, Storck.
9 – Oreo Cakesters
Pinterest
These fan favorites were all the cookies n’ cream goodness that comes with an Oreo with a more cake-like texture and flavor. Two sweet Oreo cookie cakes and Oreo cream filling made for a delicious snack that came out in 2007. They were discontinued in 2012, leaving most consumers baffled.
If you remember this commercial, then you remember how good they were!
Main flavors
Regular Cakesters
Double Stuf Cakesters
Golden Cakesters
Chocolate Creme
Mini Cakesters
10 – Pizzarias
Pinterest
In 1991, Keebler launched these pizza-flavored chips that, much like Surge, developed a massive cult following. They were covered in a delicious pizza flavoring that, though there have been many pizza-flavored chips made since, cannot be rivaled.
Discontinued in the late ’90s, Pizzarias left behind many disappointed consumers who loved the chips. They were so popular that there are even Pizzarias t-shirts.
11 – Swoops
Pinterest
Swoops, made by Hershey’s, came out in the early ’00s and became a must-have afternoon snack for kids and adults alike. I’m pretty sure my dad stole these chocolaty chips from me at least a handful of times. Easily a snack worth fighting over, these chips, which didn’t actually include a chip and were purely made of chocolate and other ingredients, came in lunch-sized sets of 6 in each package.
They were discontinued in 2006, for the most part, because they were misleading. Many people were confused by the shape and marketing because they believed there would be a salty chip inside the delicious chocolate.
Main flavors
Though these were the main flavors, there were other limited, special-edition flavors such as Strawberries & Creme.
Reese Swoops (The most popular)
Hershey’s Milk Chocolate
Almond Joy
White Chocolate Reese
York Peppermint Patty
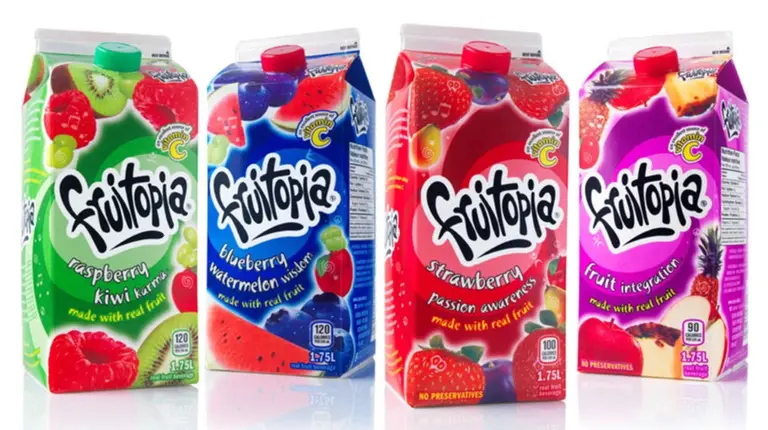
12 – Fruitopia
Pinterest
I know I am not the only one who had this with my lunch every chance I got. It was often out of stock in my junior high’s vending machine, and even came in bigger juice containers for the whole family to enjoy. Coca-Cola came out with Fruitopia in the early ’90s but didn’t make it in the US past the early ’00s.
While Fruitopia can apparently be bought in other countries, in the US the closest you might get are fruity Minute Maid drinks.
Main flavors
Strawberry Passion Awareness
Kiwiberry Ruckus
Fruit Integration
Blueberry Watermelon Wisdom
Beachside Blast Fruit
Tangerine Wavelength
Orange Undercurrent
Raspberry Psychic Lemonade
13 – Oreo O’s
Pinterest
Oreo O’s were the best cereal of the late ’90s and early ’00s. There I said it. I remember the sound of my brother slurping up milk, and click of his spoon against the bowl and he shoveled up this cereal in big spoonfuls. Made by Kraft, these crunchy Oreo-flavored O’s were delicious, adding milk only made them better. Oreos + Cereal + Milk = cookies and cream cereal. Sounds good, right?
While the recipe changed in the early ’00s, and they were then discontinued in 2007, they actually made a comeback. You can go to the store right now and buy them. This is not a drill. If you want to avoid the store, try buying Oreo O’s on Amazon!
Remember this commercial from 1998?
14 – SqueezePops
Pinterest
Squeezing food and drinks was apparently a big thing in the ’80s, ’90s, and early ’00s. These were no exception. I can remember vividly the unique cherry flavor of a cherry Hubba Bubba SqueezePop and how sticky my fingers would get after eating them. They were discontinued in the 00’s and haven’t made a comeback, but there are petitions to bring them back.
Flavors
Watermelon
Cherry
Blue Raspberry
15 – Sparkle Cherry Laffy Taffy
Pinterest
Sparkle Cherry Laffy Taffys were glorious and are sorely missed. These huge, sprinkle-filled taffy were extra stretchy and came with a surprise crunch in the form of sprinkles. I used to use mine as a fairy wand in the ’90s while running around in my jelly shoes.
Did you know you can still purchase Sparkel Cherry Laffy Taffys on Amazon and some other specialty candy stores?
16 – Munch ’ems
Pinterest
If you ever ate these crackers, you know they had a special type of crunch unique to chips. Keebler marketed them as a type of chip and cracker hybrid, and they really delivered. While Munch ’ems were delicious, crunchy snacks that were very popular in the late ’90s, the sales weren’t correlating that popularity.
In the early ’00s, they were discontinued, and
Main flavors
Cheddar Munch ’ems
Ranch Munch ’ems (My personal favorite)
Sour Cream And Onion Munch ’ems
Chill Cheese Keebler Munch ’ems
Nacho Munch ’ems
Mesquite BBQ Munch ’ems
Salsa Munch ’ems
Southwest Chili Munch ’ems
Southwest Salsa Munch ’ems
Reduced-Fat Sour Cream And Onion Munch ’ems
Reduced Sodium Munch ’ems
Watch this blast from the past:
17 – Kudos
Pinterest
In the late ’80s, these candy-flavored Granola bars came out and made breakfast fun again. Part candy, part granola with a big sugary hit, these were the perfect snack to fit in your purse or lunch box. I used to eat these on the bus on my way to school. Kudos granola bars, made by Mars, were discontinued in the late 2010s.
Flavors
M&M
Chocolate Chip
Snickers
Peanut Butter
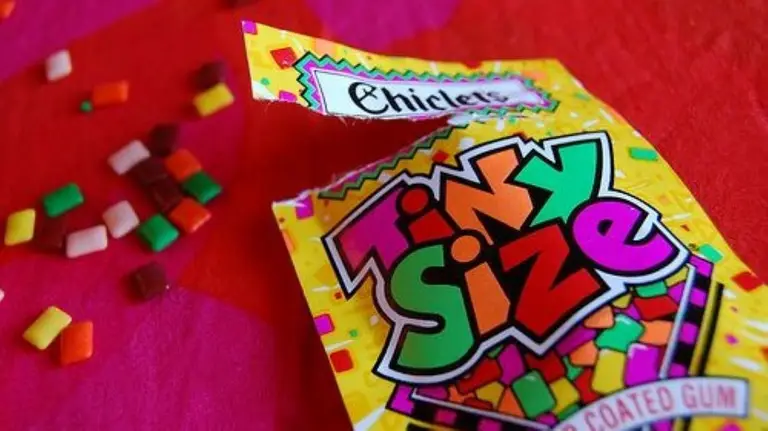
18 – Tiny Size Chiclets
Pinterest
These tiny, colorful chiclets were the most fun way to eat handfuls of fruity gum. They had a crunchy outer coating and came in all the colors of the rainbow. What’s not to love?
Did you know they came out in the early 1900s in the flavor peppermint? Though the companies changed over the years, and the gum evolved, the gum remained tiny and wonderful. In 2016, the tiny gum was discontinued by the original brand. Though the gum was discontinued, you can buy huge bags of Chiclets and reminisce on simpler times.
19 – Guacamole Doritos
Pinterest
For a small, brilliant, blip between 2003 and 2006, these guacamole flavored chips ruled the chip world. They were disappointingly discontinued to everyone’s surprise. Guacamole flavoring + Chips = flavor explosion.
Currently, you can buy a version of them on Amazon, but the reviews are extremely cautious, so I did not include them here. Turns out, they are sadly not the real thing.
20 – Pop Tarts Snak-Stix
Pinterest
I’m not really sure what the appeal of Pop-Tarts Snak-Stix was, but they were definitely popular and found a special place in the cupboards of kids everywhere in the early ’00s. The Kit-Kat of Pop-Tarts, these Pop-Tarts broke into sticks that were great for snacking in the back of the classroom when your math teacher wasn’t looking.
They only lasted on the market for about a year, because they were really just Pop-Tarts in stick form, but they had their 15 minutes of fame.
Flavors
Cookie and Creme
Frosted Berry
Frosted Double Chocolate
Frosted Caramel Chocolate
21 – Philadelphia Snack Bars
Twitter
In the ’00s, these were a snack favorite. These snack bars were like little portable cheesecakes that were somehow acceptable for breakfast, which is pretty much why there were so beloved. They were delicious—pure snack-sized magic. Like many snacks on this list, there is currently an active petition to bring them back.
Main flavors
These main flavors don’t include some of the Snack Bites and specialty flavors that came out, such as Turtle or Marble Brownie.
Classic
Strawberry (The most popular)
Chocolate Chip (My personal favorite)
White Chocolate Raspberry
For a little extra nostalgia, take a peek at this classic ’00s commercial:
22 – Pepsi Twist
Pinterest
Pepsi Twist. I can literally smell Pepsi Twist as I write these words– that bright, sweet, citrusy cola spray when I first cracked open the can. Originally, Pepsi Twist came to the US in the early ’00s and found itself in vending machines everywhere. This and a bag of Gardettos was the ultimate combination.
While Pepsi Twist was temporarily discontinued in the early ’00s, it was introduced only a couple of years later. Luckily, you can still buy Pepsi Twist today, and it’s just as tasty as it always was.
23 – DunkAroos
Pinterest
In the late ’80s early ’90s, DunkAroos took the world by storm. Everyone who has ever had DunkAroo dip, knows the creamy, sugary deliciousness is like no other. I remember begging for these in the grocery store. Originally, Dunkaroos came in the shape of Sydney the Kangaroo and came with chocolate or vanilla frosting (it didn’t yet come with sprinkles as we know it today). However, it had other shapes and even many other frosting flavors as the product become more popular.
DunkAroos were sadly discontinued in the US temporarily between 2012 and 2016. Lucky for us, though the product has changed and evolved, it is still available today due to petitioning by consumers. You can buy DunkAroos on Amazon as well as many of your local grocery stores.
Main Flavors
Vanilla
Chocolate
Rainbow (The most popular)
Cinnamon
Chocolate chip
Peanut butter
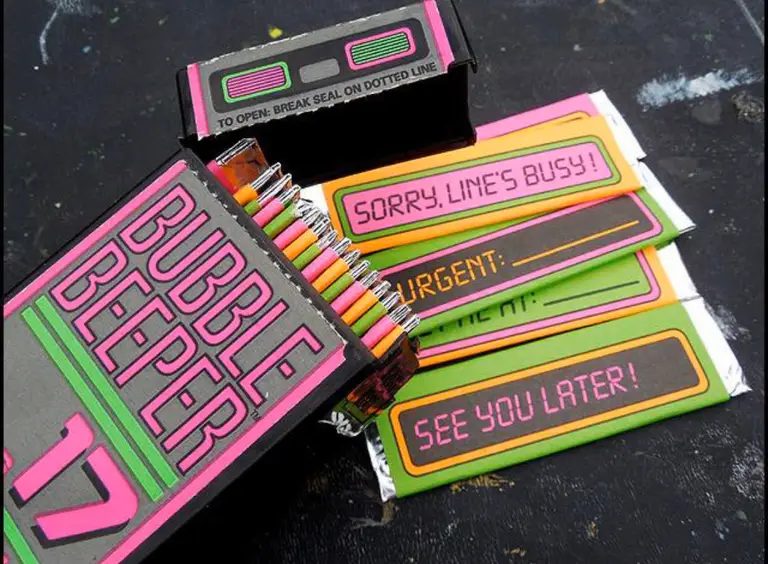
24 – Bubble Beeper
Twitter
They were part chewing gum, part cute accessory. I thought I was so cool riding my bike with my bubble beeper gum in my pocket. Bubble beeper gum, like the technology of the beeper itself, was sadly short-lived in the ’90s. Each stick of Bubble Beeper gum came with a different message inside its plastic beeper case. While it tended to disintegrate too quickly, it was soft, sweet, fruity, and smelled delicious.
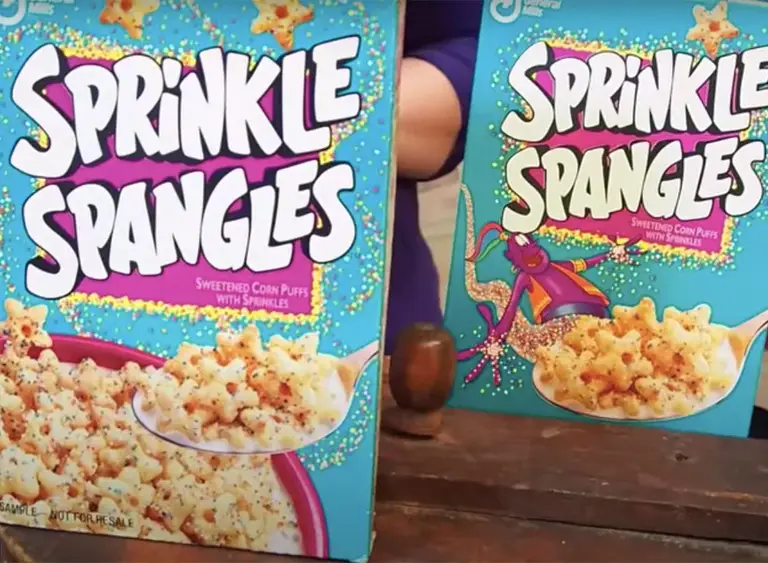
25 – Sprinkle Spangles
Pinterest
From the early ’90s to the late ’90s, this delicious cereal by General Mills was a huge hit. They were sweet, colorful, full of sprinkles, and star-shaped. Sprinkles in cereal, how can it go wrong, right? Personally, I was a huge fan. With just the right amount of cereal crunch, they were the perfect cereal for an over-sized bowl of cereal late at night in front of the TV.
Though they were discontinued in the late ’90s, you can still find memorabilia online. If you were a super enthusiast, there are even Sprinkle Spangles t-shirts on Amazon.
26 – SnackWell’s
Pinterest
These delicious cakes, which came out in the early ’90s, were one of my favorite chocolate snacks to add to my lunch box. If you liked chocolate and cake and cookies, you liked these rich little snack cakes. Being part cookie, part cake, tons of chocolate, and fat-free, they really had it all. SnackWell’s was later sold from Nabisco to Nature foods.
Somewhere during this process, it’s rumored the recipes of many SnackWell’s snacks were changed, which was a major complaint by many consumers. The recipe’s biggest change was the switch from corn syrup to sugar within the recipe, so there has been a somewhat major change; however, I am just happy they are still around!
While the snacks are more accessible in Canada, they are still available for purchase in the US. Did you know that you can still buy SnackWell’s Devil’s Food cookie cakes on Amazon and many other locations and grocery stores?
27 – Waffle Crisp
Pinterest
Growing up, I loved Waffle Crisp. The sweet, syrupy flavor it gave the milk is what made it, and I think the signature maple syrup flavor that Waffle Crisp was known for is why it was so popular and survived for so long. It came out in 1996, making its way into cupboards everywhere, but the recipe was changed in 2013 to “Waffle Crunch.” After this change, the product couldn’t survive the brand change and was later discontinued in 2018.
Post, lucky for all of us, recently relaunched the product in bulk bags as of 2021. Get some right this minute! You know you want to!
28 – Hubba Bubba
Pinterest
In the late ’80s, Hubba Bubba Brand, who makes the tastiest gum of all time, came out and quickly became a must-have for kids of all ages. Did you know Hubba Bubba was actually discontinued before making its way into the 1990s? Thank goodness it did make a comeback in the early ’00s because it was such a major part of my childhood, and it is hard to imagine what my childhood would have been like without chewing the classic Hubba Bubba gum while playing on my GameBoy Advance.
If it’s been a while since you’ve had Hubba Bubba Bubble Tape, let your senses take you way back and get yourself some Hubba Bubba.
29 – Ice Breakers Liquid Ice
Pinterest
If you never popped one of these into your mouth only to feel like an ice-breathing dragon, you really missed out. Inside their gelly-like shell was a mighty, minty liquid. I was addicted to these extremely strong but tiny mints. They might be the strongest mints I can ever remember tasting, but they are somewhat similar to the strength of Breath Strips.
They came out in the late ’00s but were discontinued not much later.
Main flavors
These main flavors do disclude the Center Ice flavors, such as Raspberry Peppermint and Raspberry Lemonade.
Cool Mint (The most popular)
Cinnamon
Spearmint
Alpine Smash
30 – Pillsbury Waffle Sticks
Pinterest
Pillsbury Waffle Sticks were the best breakfast to eat on the bus or while catching up on homework in the morning. They took a bit of the messiness out of eating waffles. No knife. No fork. Easy to dip syrup. What’s not to love, right? Unfortunately, in 2007, they were discontinued along with several other Pillsbury products that were made for kids or geared towards kids. This was hugely controversial at the time because many people lost their jobs due to that discontinuation.
With summer right around the corner, it’s time to fire up the grill! But who will watch the grill while you’re beating the heat? This year, kick things up a notch with your own Raspberry Pi-powered HeaterMeter. Don’t just throw a BBQ, be a part of it. HeaterMeter lets you keep a close eye on
Introducing Howchoo, an enigmatic author whose unique pen name reflects their boundless curiosity and limitless creativity. Mysterious and multifaceted, Howchoo has emerged as a captivating storyteller, leaving readers mesmerized by the uncharted realms they craft with their words.
With an insatiable appetite for knowledge and a love for exploration, Howchoo’s writing transcends conventional genres, blurring the lines between fantasy, science fiction, and the surreal. Their narratives are a kaleidoscope of ideas, weaving together intricate plots, unforgettable characters, and thought-provoking themes that challenge the boundaries of imagination.
Chances are, if you’re reading this, then you’ve played Minecraft long enough to realize that there are some features that are lacking from the vanilla game. This guide will go through quality of life fabric mods available for Minecraft that either improve or add new features and tweaks. They each will make gameplay smoother and more enjoyable! So whether you’re hosting a survival multiplayer server or you’re playing alone, you’ll find something below for any type of Minecraft player!
This mod is perfect for those of us who aren’t familiar with enchantments. The Enchantment Description mod enables players to see a description of an enchanted book. Pair it with REI to enable players to see any enchantment description they want!
This incredibly useful mod shows in game tooltips with information on the block or fluid the player is looking at! WTHIT also has an API for other mods to add information about blocks.
This mod does exactly what the name sounds like. CleanCut allows you to hit mobs that are behind grass, flowers, saplings, and other obstructions! Bonus: It works for Forge too!
This is a mod for mods. It installs a searchable menu for installed mods that can also be sorted. Mod Menu shows links to a mod’s homepage and issues, as well as its description!
This mod does just as the name implies. It blends together the biome blocks to make the world seem more connected, rather than chunks just put together. It has little effect on game performance, so don’t be afraid to add it to a server’s modpack!
The downside to having mods on a server is the key binds. Save yourself and your players the time and use Controlling which adds a search bar for key binds and allows you to find conflicting keys.
This mod is very non-intrusive compared to others. It doesn’t change anything visible to players, but it does make changes for things otherwise hard-coded into Minecraft. Patches include higher connection read timeout, changing the maximum player speeds, boat buoyancy, and allows mobs to cross rails.
The quintessential tool for a modded server. Not only does Roughly Enough Items (REI) display a directory of items in the world, it also shows how to craft those items. You can search by item or mod name (or both together), plus you can exclude search terms!
The Cosmetic Armor mod enables players to have more than one set of armor on. One set is for function, while the other is purely cosmetic. It also allows you to hide your armor while still maintaining their effects.
This mod adds slots for various accessories and mods that add extra armor or tools. It’s neccesary if a server has mods with effect-causing items that the player can equip.
A perfect mod to help keep chests and inventory organized. Using either a key-bind, the middle mouse button, or the UI button, everything will pop right into an organized state!
This is a vein mining mod which allows players to mine identical blocks near each other. It’s easy to use and configure for server admins who want to specify which blocks this mod can be used on!
This is a mod for those who love HWYLA (Here’s What You’re Looking At). It adds in information to the tooltip on the mining level and the effective tool for blocks.
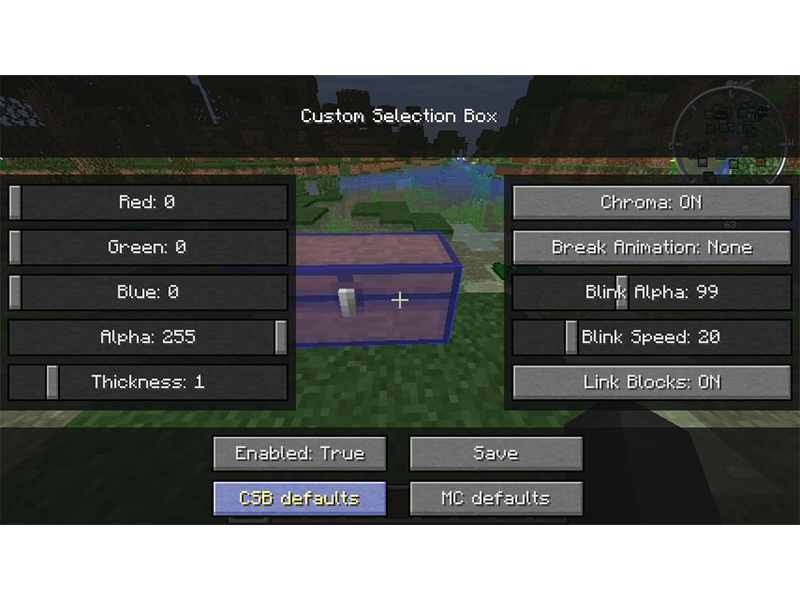
While Minecraft has accessibility settings, they don’t let you customize the selection boxes around blocks. Whether you need or want to, Custom Selection Box lets you choose a variety of settings to make things easier to place, destroy, or edit.
This mod adds information about a tool to the tooltip when you hover over them inside the inventory. Tool Stats very helpful when trying to compare different tools or weapons within the game for harvest level, mining efficiency, and enchantability.
The annoying part about having elytra in the vanilla game is that it takes up your chestplate slot. With this mod, however, that problem disappears! This adds a back slot to the player inventory just for the elytra to be placed!
This is a must-have mod no matter if it’s for a server pack or single player game. It turns the loading screen dark and the colors can even be configured through Mod Menu if installed as well!
Much like Dynamic Surroundings for Forge, MAmbience adds ambient sound and visuals that depend on the player’s surroundings. Wood creaks, water sloshes, and animal sounds vary based on the time of day.
There are plenty of other map mods available, but Antique Atlas is so unique I needed to include it. This map is themed for fantasy or medieval worlds with its hand-drawn style. It even has marker capabilities and lets players export the map to an image file.
One of the most annoying resources gathered in Minecraft is rotten flesh. You can’t do anything useful with it, but instead of tossing it out or letting it take up storage, add this handy mod! Using a furnace convert that rotten flesh into useful leather. It also comes with multiple mods, so server admins can decide how easy or hard they want gameplay to be!
This is merely a cosmetic fix, but it’s a cool mod that I felt it needed to be mentioned. Better Dropped Items does as the name says. It adds physics to items thrown or dropped by having them land flat on the ground rather than hovering above it.
The longer you play Minecraft, the more you realize that early-game tools just won’t cut it. Exploring the enchantment feature of Minecraft can be exciting, but also intimidating. Rather than worry about researching enchantments, below are the best enchantments in Minecraft! To learn how to enchant items, check out this guide! In this guide, you’ll see
Introducing Howchoo, an enigmatic author whose unique pen name reflects their boundless curiosity and limitless creativity. Mysterious and multifaceted, Howchoo has emerged as a captivating storyteller, leaving readers mesmerized by the uncharted realms they craft with their words.
With an insatiable appetite for knowledge and a love for exploration, Howchoo’s writing transcends conventional genres, blurring the lines between fantasy, science fiction, and the surreal. Their narratives are a kaleidoscope of ideas, weaving together intricate plots, unforgettable characters, and thought-provoking themes that challenge the boundaries of imagination.
Occasionally, however, these cool drones capture some pretty terrifying shots of sharks (sometimes as big as great whites) coming dangerously close to surfers or swimmers off the coast.
Please note that in each drone sighting listed, NO ONE was harmed. There are no images of anyone being harmed by sharks below.
1 – Western Australia (Great White Shark)
Crystal clear waters and an excellent drone camera combine to bring you one of the best shots of a Great White shark heading straight for a group of kayakers and one swimmer off the coast of Australia.
What happened?
In the video of the incident, you can clearly see the Great White shark circling the kayakers. Then, he takes a dangerous turn toward the surfer. Those in the kayaks yell out to the surfer to get away.
And thankfully the surfer is able to ride the next wave back to shore.
2 – Maldives (Nurse Sharks)
This might be the craziest scene we’ve seen of someone swimming near sharks. The sharks surrounding the woman in the ocean are nurse sharks.
What happened?
While it’s hard to imagine someone intentionally jumping into the water with sharks swarming, that’s exactly what Instagram user ShadowPalmMaldives did—all for this incredible footage.
Nurse sharks are some of the most harmless sharks and are not known to attack humans. Still…who would have the courage to float around hundreds of them?!
3 – Eastern Australia (Great White Shark)
Beautiful drone footage captures a curious Great White shark approaching two children swimming on the shore. The children and man on the shore seem pretty unsuspecting and likely don’t even know the shark is so close.
What happened?
Like most encounters with sharks, the sharks appear to be more curious than threatening to the children. While the shark does get close to the kids playing, it eventually veers off toward the breakers and looks elsewhere for his next meal. The children were fine.
4 – New South Wales (Great White Shark)
Unsuspecting surfer Matt Wilkinson has the closest encounter of his life off of Ballina in New South Wales. World champion surfer, Wilkinson, heard a splash and felt something odd. Then he stopped and looked back.
What happened?
A lifesaving drone program called Surf Life Saving NSW spotted the Great White shark eying Wilkinson. The drone was able to broadcast to Wilkinson to head back to the beach. He made it safely back to shore.
In the drone video, you can see just how close the shark came to biting on Wilkinson’s feet before it swam away.
5 – Plattenburg Bay, South Africa (Great White Shark)
Sea Rescue South Africa (NSRI), a non-profit organization, released a Twitter warning to surfers and swimmers in the ocean off of the Capetown coast. The tweet included this drone footage of a Great White shark circling a group of surfers in the ocean.
What happened?
This encounter went viral and stirred up fears about sharks along the beach. No one was injured in the event, but it did cause the South African officials to close the shoreline until the shark activity subsided.
Referred to as the Gold Coast of Australia, the Palm Beach area is popular with surfers for its wicked waves. But, as you can see, there’s something else that’s wicked lurking just underneath of them.
What happened?
A drone was dispatched to keep an eye on the coastline after several surfers reported spotting sharks in the water. Sure enough, the drone spotted the shark circling a group of surfers.
No one was hurt, but one surfer had an almost fatal near miss when the shark swiped at his board.
7 – Pismo Beach, California
Groups of surfers off the beautiful coast of Pismo Beach in California are caught unaware as a pair of 10-foot sharks come out of nowhere right below them. (The Stork captured this incredible footage on their DJI Phantom 3 drone.)
What happened?
While this was a surprise for the drone operators, it wasn’t completely surprising to see at least a shark or two in the water. To see one so close to the surfer…well, that was scary! Luckily, the surfer caught a wave to shore and escaped unharmed.
8 – Western Australia (Tiger Sharks)
While no human was in danger during this video, this is some incredible drone footage captured by Eco Abrolhos. Nearly 100 tiger sharks swarm and feast on a dead humpback whale.
What happened?
We can only imagine what it must have been like to be on one of those tourist boats and spot the massacre of a lifetime right below! No one was in danger; though, we’re certain that danger was felt by those there.
Once the sharks finished eating, some people on the boat decided to try touching them. The sharks were very docile (having just eaten) and allowed themselves to be touched.
9 – Miami Beach, Florida (Hammerhead Shark)
Jason McIntosh, a Miami resident, was casually shooting some drone footage of a swimmer at the beach when he got the surprise of his life! Hammerheads are rare sightings, and it’s even rarer to see one so close to the shore.
What happened?
Shark attacks by hammerheads are extremely rare, so the swimmer was in relatively little-to-no danger. The swimmer was not harmed but was sure in for a shock when he finally saw just how close he was to the shark.
He was only about 40 feet away from shore at the time and gave an ominous thumbs-up to the camera as he was swimming.
10 – Kiami Beach, Australia
On Kiami Beach in southern Australia, a drone operator caught a shark circling dangerously close to some unsuspecting swimmers enjoying the good weather.
What happened?
David Finlay, the drone operator, called the surf lifesavers on the phone and notified them immediately of the situation. The lifeguards then notified the swimmers to come in immediately, and no one was harmed.
The surfers caught the next wave into the shore. Their dangling feet came awfully close to the swarming sharks, however.
11 – Florida Coast (Blacktip Sharks)
Sharks, like birds, migrate naturally to find the right water temperature for breeding. A group of surfers happened to be in the wrong place at the wrong time when this group of blacktip sharks circled nearby.
What happened?
Though there were literally hundreds of sharks surrounding the surfers, none of the sharks showed any threat to the people. They appeared to be more curious about the surfers than anything else.
This kind of response is common with sharks, who generally don’t attack humans for food.
12 – Pismo Beach, California
Wait. Is that seaweed? Or is it a shark? This drone footage was captured just off the coast of Pismo Beach in sunny California—a popular spot for surfers year-round.
What happened?
The surfers initially claimed that they thought the black spots under the water were seaweed. It wasn’t until they saw the frightening drone footage that they learned how close they came to a pair of rather large sharks.
None of the surfers were harmed or attacked.
13 – The Bahamas
The Bahamas are known as one of the best places to swim in the ocean. Sometimes danger does lurk below, however.
Here, a small boy jumped into the water to swim. A second later, a drone flown by Artem Tkachenko, captured four sharks heading right for the unsuspecting boy.
What happened?
The drone operator yelled out to the boy to run as soon as he noticed the sharks on the drone video. Luckily, the boy heard the man in time and swam quickly to safety. At one moment, the sharks were only about five feet away from the boy.
A large shark is seen circling a swimmer who decided to swim out far from the coastline at New Brighten State Beach in California.
What happened?
The swimmer apparently was aware of the danger around him. He spotted the signs on the beach and heard the drone operator notify him of the shark situation. He probably remembered just how unlikely a shark attack really is for a human. No harm came to him.
Often when you’re snorkeling and swimming with whale sharks and rays, you don’t get to see just how incredible it looks from a birds-eye view.
What happened?
For these lucky swimmers, a drone just off the coast of Isla Mujeres captured the breathtaking scene in all its glory! What makes this sighting even more special is that whale sharks are rarely seen in groups in the wild, even if they are the largest fish in the sea.
16 – Quiz time: shark or dolphin?
Researchers at Southern Cross University and NSW Department of Primary Industries have been monitoring the beaches off the coast of New South Wales in south-eastern Australia with drones for a number of years.
They note that most “shark” sightings, particularly those that appear to be close to swimmers and surfers, are actually dolphins.
So can you tell the difference in the above image? What do you think? Dolphin…or a shark?
Which is it?
The researchers at Southern Cross University say that this is most likely a dolphin. (It’s even hard for them to tell sometimes when looking from the height of the drone.)
Maybe this will alleviate some fears about sharks swarming near beaches for some!
17 – Malibu, California
TheMalibuArtist is known for capturing some incredible shots with his ocean drones. But even he couldn’t have known just how scary the footage would be as his drone spied a great white shark getting very close to a family of kayakers.
What happened?
As he explains in the video, he was able to warn the kayakers of the imminent danger below. They stopped paddling, which caused the shark to lose interest and swim off eventually. No one was hurt, but that family sure does have the story of a lifetime to tell.
18 – Miami, Florida
Tiger sharks are rarely seen anywhere near beaches. They tend not to get too close to shore. But drone operator Kenny Melendez, as reported by CBS Miami, was in for a shock when he saw a large shadow near this swimmer just off the beach.
It’s amazing just how clear the water is off the coast of the Bahamas. The water is so clear that drones can easily see straight to the bottom of the ocean floor. So when The Cub Life flew his drone near the beaches, it was easy to spot this shark eyeing a swimmer.
This shark seen approaching swimmer at Bondi beach in Australia may look small, but even a small shark can do some major damage and prove lethal. (Bondi Beach is a favorite destination for snorkelers and surfers, as shown in the beautiful footage of Bondi Nation.)
What happened?
Sharks are fairly common sightings at Bondi Beach in Australia—so common, in fact, that swimmers know that they will likely get close to at least one when they head out in the ocean there. The shark locals, including a nurse shark and a hammerhead shark, haven’t been known to attack humans. So no one was hurt.
Introducing Howchoo, an enigmatic author whose unique pen name reflects their boundless curiosity and limitless creativity. Mysterious and multifaceted, Howchoo has emerged as a captivating storyteller, leaving readers mesmerized by the uncharted realms they craft with their words.
With an insatiable appetite for knowledge and a love for exploration, Howchoo’s writing transcends conventional genres, blurring the lines between fantasy, science fiction, and the surreal. Their narratives are a kaleidoscope of ideas, weaving together intricate plots, unforgettable characters, and thought-provoking themes that challenge the boundaries of imagination.
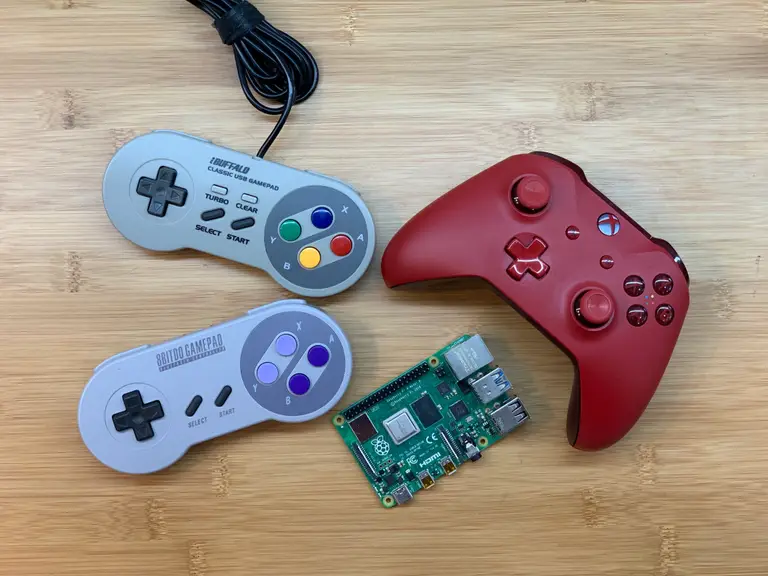
If you want to play retro games on RetroPie, you need a controller. But not all controllers are created equal and the best one for you depends on what you want to play, how you like to play, and how much you’re willing to spend.
Most of these controllers are USB only, but there are a few wireless options sprinkled throughout the list. You should be able to find at least one controller to suit your retro gaming needs.
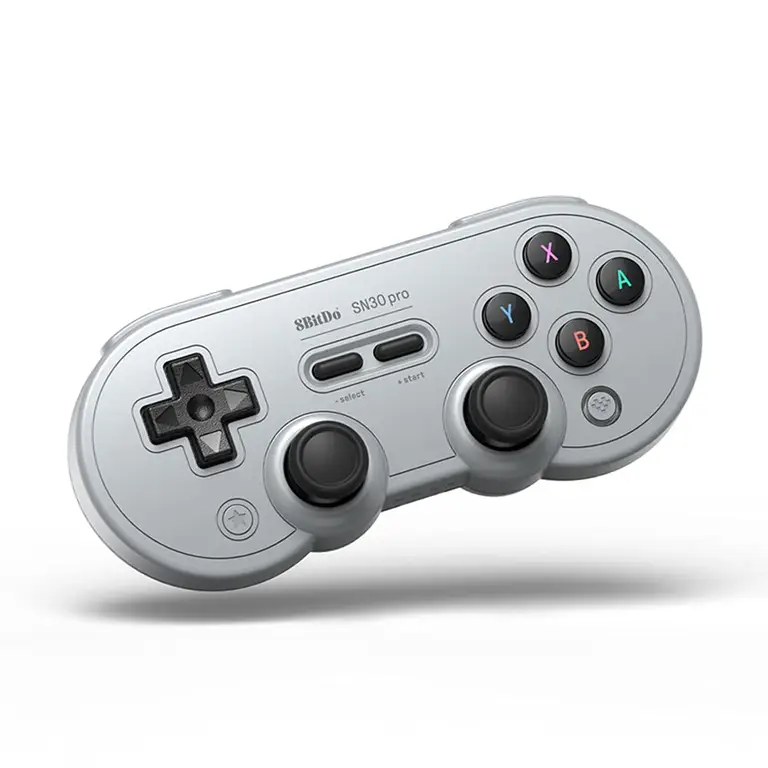
1 – All-around best wireless
Cables? Forget ’em. The 8Bitdo SN30 Pro+ is your best option when it comes to wire-free gaming on RetroPie.
8BitDo has established itself in the retrogaming community as a reliable brand and somewhat of a staple. If you’re after a retro-themed controller with plenty of buttons, check out the SN30 Pro+ from 8BitDo.
Spec
SN30 Pro+
Battery Life
20 Hours
Price
$49.99 on Amazon
Connection Type
Wireless / Bluetooth / USB – C
Material
Plastic
Style
SNES
Quality
High
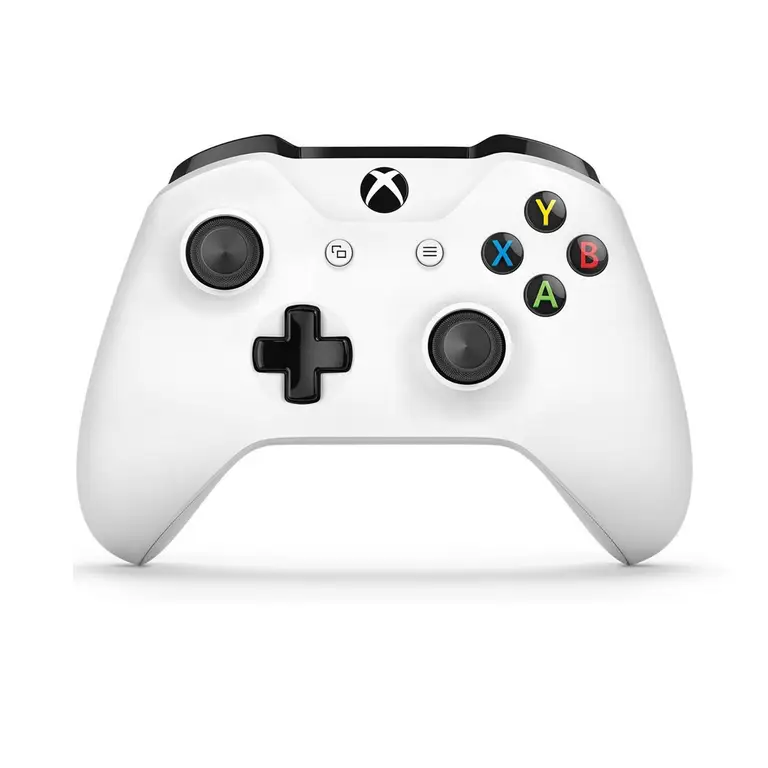
2 – All-around best wired
If wired controllers are your speed, you need something reliable.
This official Xbox One controller from Microsoft connects via USB and has the nearly instantaneous response times you want from a wired device.
Because this is an officially licensed controller, you can expect industry-standard quality with the feel of a modern console.
Spec
Xbox One Wired Controller
Battery Life
N/A (Wired)
Price
$66 on Amazon
Connection Type
USB
Material
ABS
Style
Xbox One
Quality
Industry Standard
Microsoft
3 – Best Bluetooth controller for RetroPie
The Xbox One Wireless controller relies on a Bluetooth connection. Because of the number of buttons, it’s versatile enough to use with many different console emulators—from NES to Dreamcast.
You will need a Bluetooth compatible Pi to connect. Check out our list of Raspberry Pi models for detailed specs to see if yours will work.
Like we said before, 8bitDo is a hit in the RetroPie community. But which controller is the top-dog when it comes to 8BitDo? We believe that honor goes to the SN30 Pro.
It uses Bluetooth to connect and has a classy retro look—perfectly shaped for an SNES experience. It’s definitely pricier than some other models, the payoff is worth it for retrogaming aficionados. It has rumble support, motion controls, and USB-C support.
Spec
SN30 Pro
Battery Life
20 Hours
Price
$44.99 on Amazon
Connection Type
Wireless / Bluetooth
Material
Plastic
Style
Retro Original
Quality
High
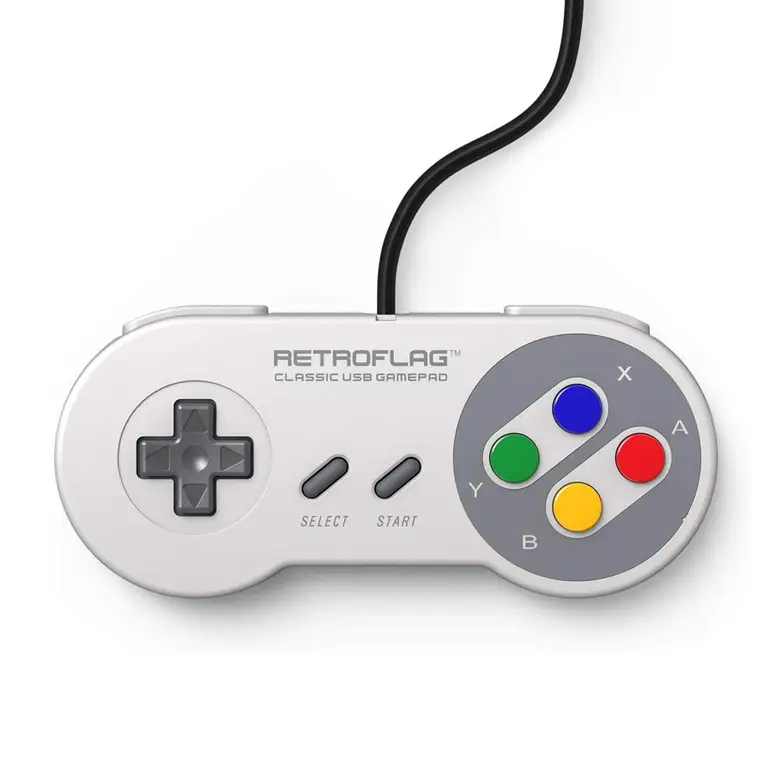
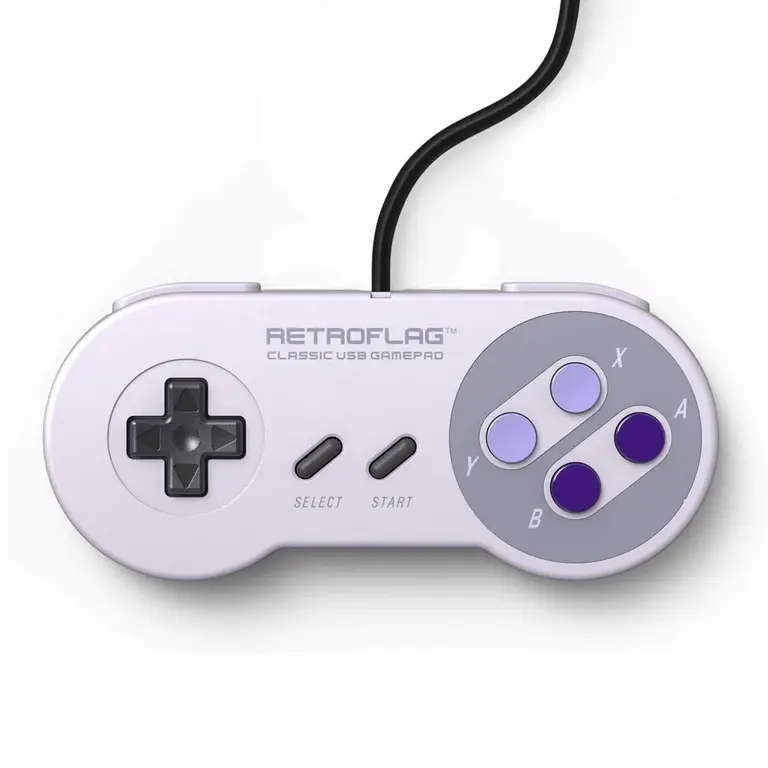
5 – Best budget RetroPie controller
If the retrogaming hobby is burning a hole in your wallet, take control and invest in a reliable budget controller.
The cheapest knock-offs will cost you more in the long run. The RetroFlag Classic Gaming Controller (Jpad) is perfect for anyone who wants something that looks old-school but plays with modern finesse.
Spec
RetroFlag Classic Gaming Controller (Jpad)
Battery Life
N/A (Wired)
Price
$16.99 on Amazon
Connection Type
USB
Material
Plastic
Style
SNES
Quality
Good
RetroFlag
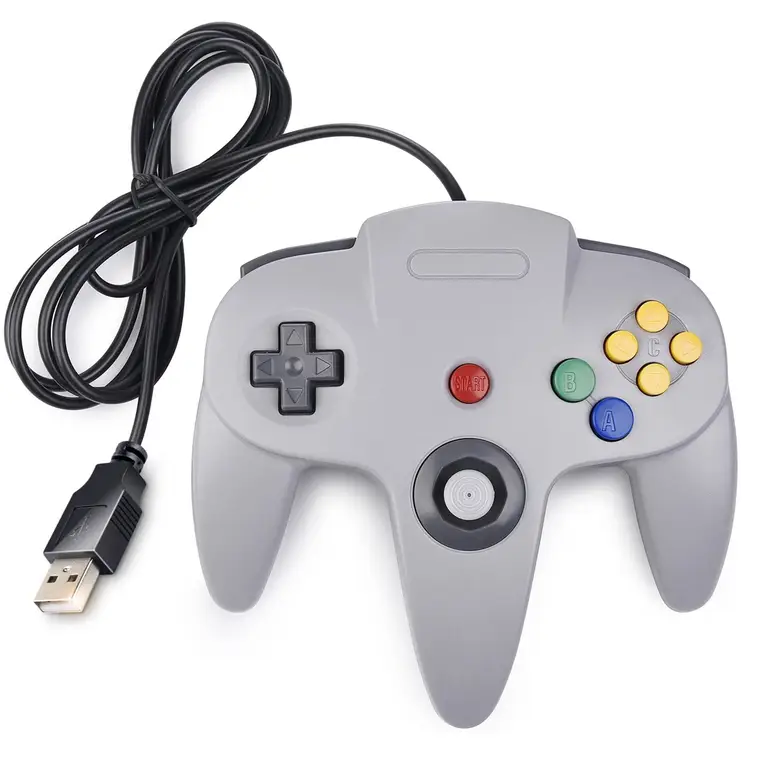
6 – Best Nintendo 64 RetroPie controller
When it comes to emulating the Nintendo 64, controller shape is almost everything!
The buttons and joysticks need to be ready for some serious abuse, especially if you plan on playing anything remotely as off-the-wall as Mario Party. Check out this USB N64 controller from iNNEXT for the reliable tri-grip delight you’re most familiar with.
Spec
Saffun N64
Battery Life
N/A (Wired)
Price
$17.99 on Amazon
Connection Type
USB
Material
Plastic
Style
Nintendo 64
Quality
Good
iNNEXT
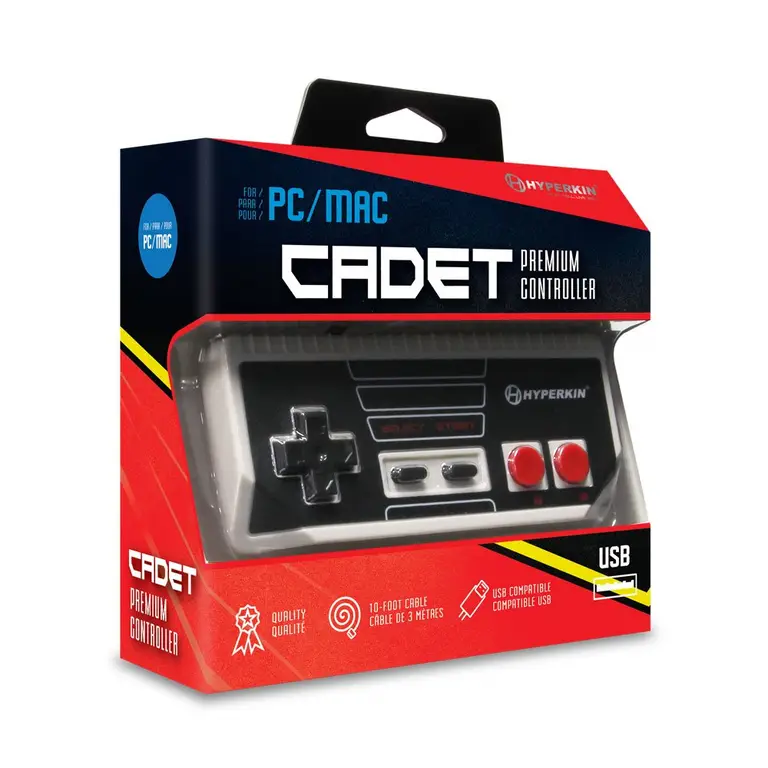
7 – Best NES controller for RetroPie
If you want a realistic NES experience, a SNES controller won’t do. This classic Nintendo platform had a unique controller with a distinct look and feel.
That’s why we chose Hyperkin’s Premium NES controller as the best option for NES emulation on RetroPie. It brings the quality and feedback you expect from a modern controller with the design and button placement you remember.
Spec
Hyperkin Premium NES
Battery Life
N/A (Wired)
Price
$19.99 on Amazon
Connection Type
USB
Material
Plastic
Style
NES
Quality
Good
8 – Best SNES controller for RetroPie
The SNES controller was a well-received upgrade to the NES controller. It had more buttons and a rounded design that fits comfortably in your hands. This controller is one of the most preferred when it comes to retrogaming emulation.
If you want a reliable device for SNES emulators, check out the RetroFlag Classic Gaming Controller (Upad). This is from the same team that brought us the Raspberry Pi GPi Case.
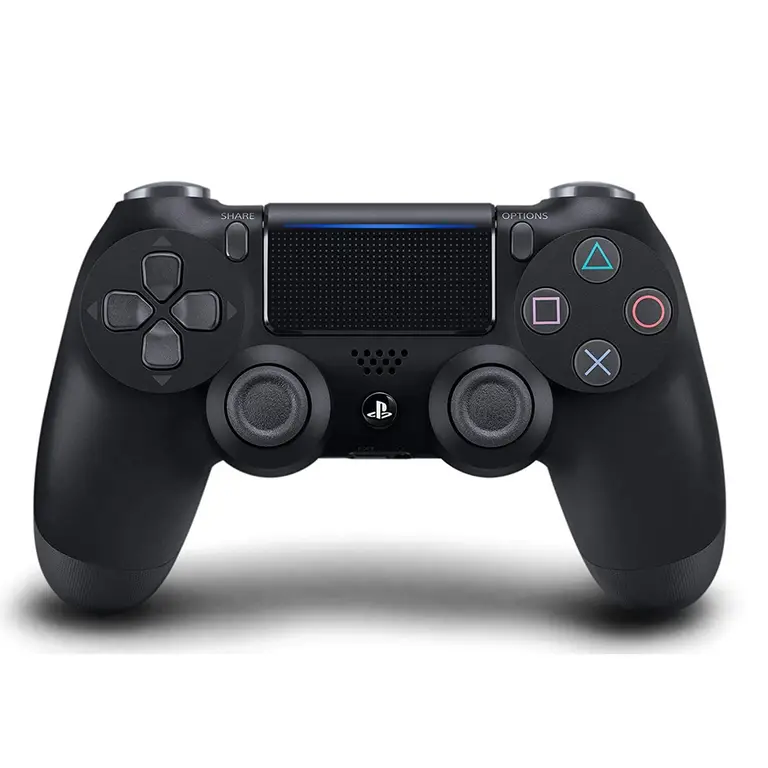
Whether you want a PlayStation experience or just prefer the classic design, PlayStation controllers are definitely a good option when it comes to RetroPie.
They have plenty of buttons for older and newer platforms and come with industry-standard quality. The DualShock 4 Wireless Controller from PlayStation works seamlessly with the Raspberry Pi while delivering the highly-responsive feedback you want while gaming.
Spec
DualShock 4 Wireless Controller
Battery Life
4 – 8 Hours
Price
$59.99 on Amazon
Connection Type
Wireless / Bluetooth
Material
Style
PlayStation 4
Quality
Industry Standard
Sony
10 – Best arcade controller for RetroPie
This arcade controller, known as the Switch Fighting Stick Mini from HORI, is officially licensed for the Nintendo Switch, but works just as well with the Raspberry Pi.
It has a classic arcade-style joystick and button layout, connecting with USB support. Short of making your own Raspberry Pi arcade controller, this is one of your best options when it comes to simulating arcade hardware.
There are several ways to go about running a Minecraft server on the Raspberry Pi. In this guide, I’ll cover how to install Nukkit—a cross-platform Minecraft server that’s super easy to set up on the Raspberry Pi. This server should work with PCs, consoles, and tablets running Minecraft 1.14. I’ll be using a Raspberry Pi
Introducing Howchoo, an enigmatic author whose unique pen name reflects their boundless curiosity and limitless creativity. Mysterious and multifaceted, Howchoo has emerged as a captivating storyteller, leaving readers mesmerized by the uncharted realms they craft with their words.
With an insatiable appetite for knowledge and a love for exploration, Howchoo’s writing transcends conventional genres, blurring the lines between fantasy, science fiction, and the surreal. Their narratives are a kaleidoscope of ideas, weaving together intricate plots, unforgettable characters, and thought-provoking themes that challenge the boundaries of imagination.
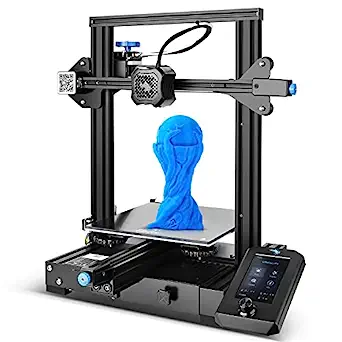
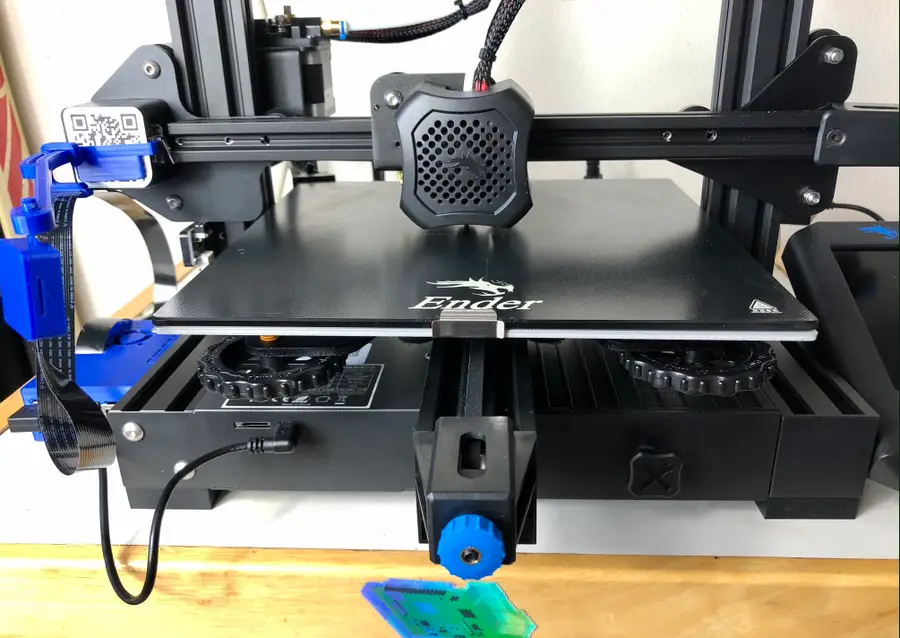
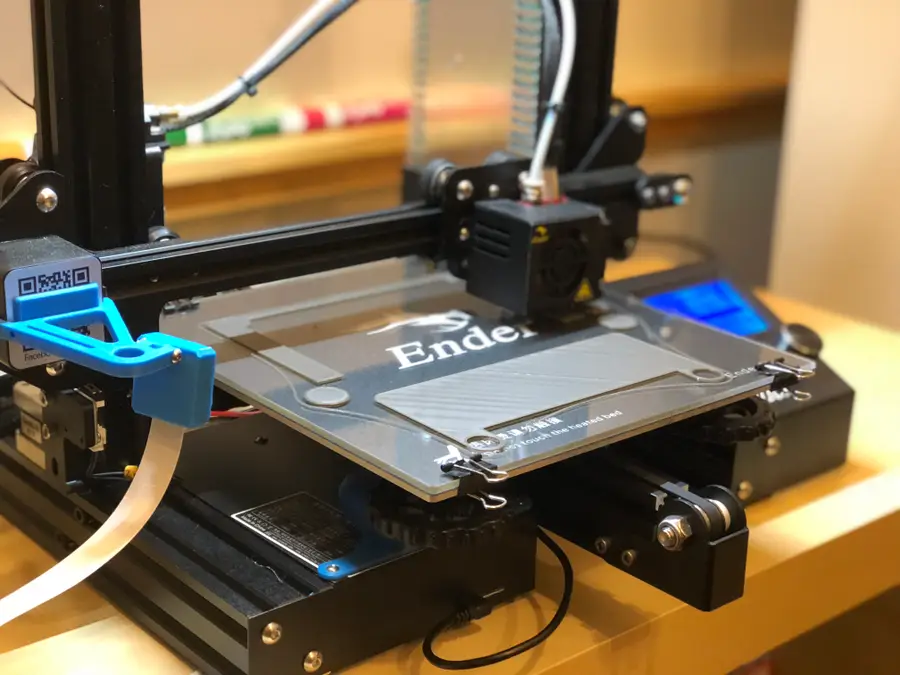
With the release of the Creality Ender 3 V2, many of the Ender’s biggest fans who upgraded to the latest version are noticing many small differences in setting up mods like OctoPrint. While we have a great guide on the original Ender 3 OctoPrint, the differences are substantial enough to warrant a completely new guide on setting up OctoPrint specifically on the Ender 3 V2.
While making this guide I ran into many Ender 3 V2-specific bumps and stops, and I’ve worked through them all so you don’t have to spend the time.
Let’s get you set up with OctoPrint on your Ender 3 V2!
1 – Ender 3 V2 OctoPrint settings
Setup OctoPrint on Raspberry Pi
First, you should follow our full guide to learn how to set up OctoPrint on your Raspberry Pi. Then hop back over this guide for the Ender 3 V2 specifics.
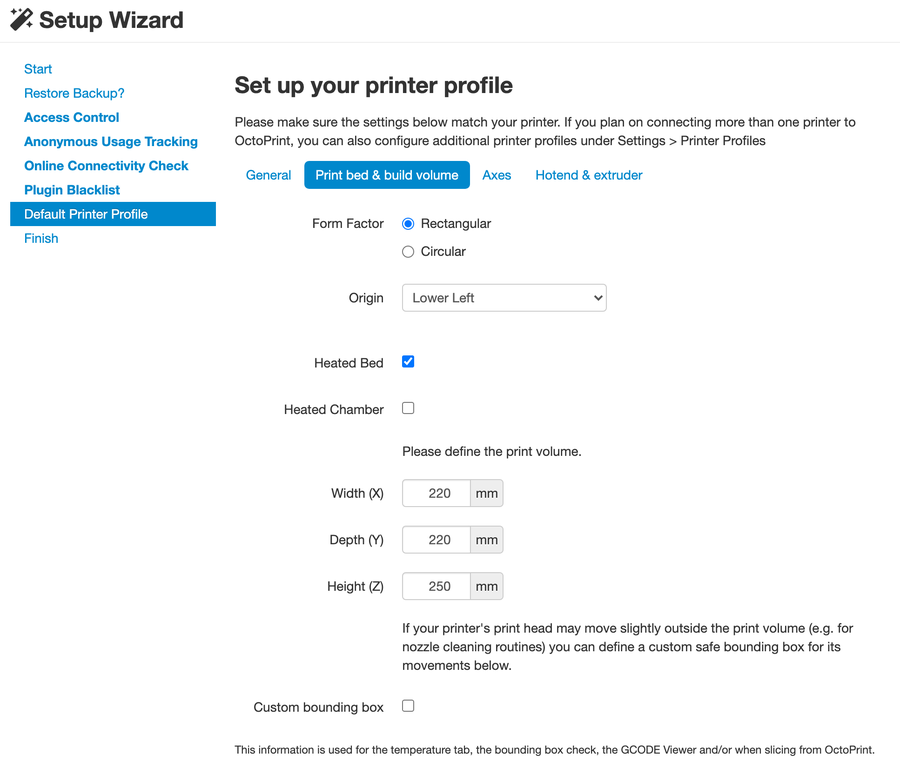
Form factor: Rectangular
Origin: Lower Left
Heated Bed: Yes (checked)
Heated Chamber: No (unchecked)
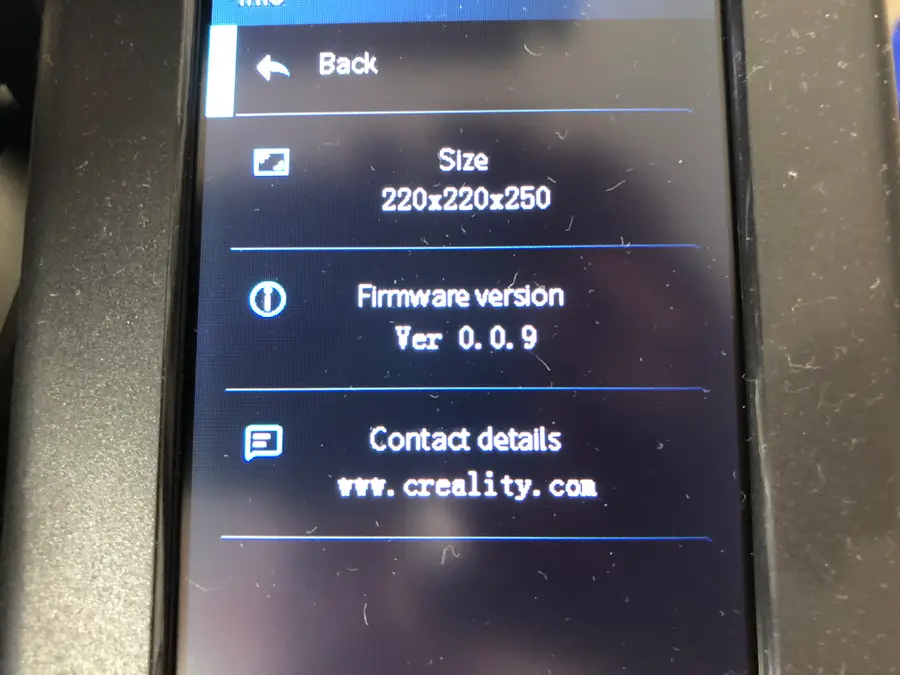
Width: 220mm
Depth: 220mm
Height: 250mm
Axes: Default**
Custom Bounding Box: No (unchecked)
Nozzle Diameter: 0.4mm
Number of Extruders: 1
** The Axes setting is only used for manually controlling the printer — as I slice my models before putting them into OctoPrint, I didn’t bother filling this out. However, you can if you choose; remember the Axes speed settings are per minute, whereas the settings in most slicing programs are per second.
Connection settings
Serial Port: AUTO
Baudrate: AUTO
Most of the settings are the same as with the original Ender 3, with the noticeable difference being that OctoPi can now detect the serial port automatically.
Download Ender 3 V2 OctoPrint Plugins
As of the writing of this guide (Nov. 2020), there are two mandatory plugins you need to install for the Ender 3 V2 in OctoPrint:
Updating your firmware may be required when using the Ender 3 V2 with OctoPrint. After connecting to the printer inside of OctoPrint, you might see the following message: “Warning: Firmware Broken”. In this case, you’ll need to have the latest firmware version to print remotely from your Raspberry Pi.
Even without this warning, OctoPrint caused my print speed to max out, no matter what setting I used. When I updated the firmware, however, this issue disappeared. So I recommend updating the firmware either way.
If you update your firmware and still get the “Warning: Firmware Broken” message, install this plugin to solve the issue until Creality can fix it in an upcoming firmware version (the message will persist but the underlying issue will be fixed).
🛈 Make sure your Pi is connected to the Ender 3 V2 when trying to change the connection settings.
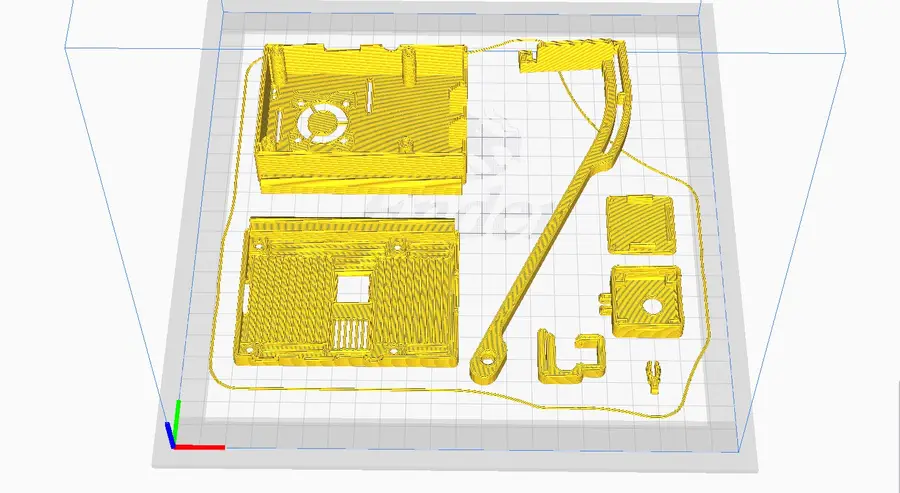
2 – Print the Ender 3 V2 OctoPrint parts
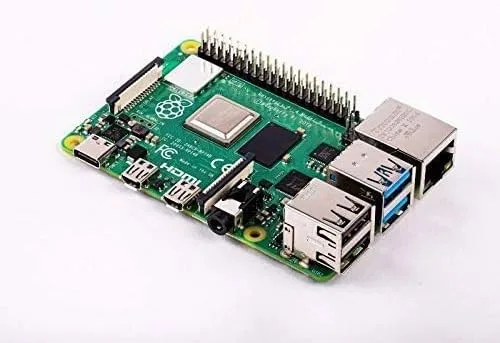
Before I begin, I should note that I had a heck of a time finding components on Thingiverse that would work for my Ender 3 V2 OctoPrint setup. With the Ender 3 V2 still being relatively new (as of November 2020), there aren’t as many specific models for the printer. I am also using a Raspberry Pi 4, which needs a fan, so I needed to find a case specifically with a fan.
That said, here are the Ender 3 V2 components that I used for setting up OctoPrint. Depending on what Pi and fan you’re using, you’ll likely need to adjust these parts as noted below.
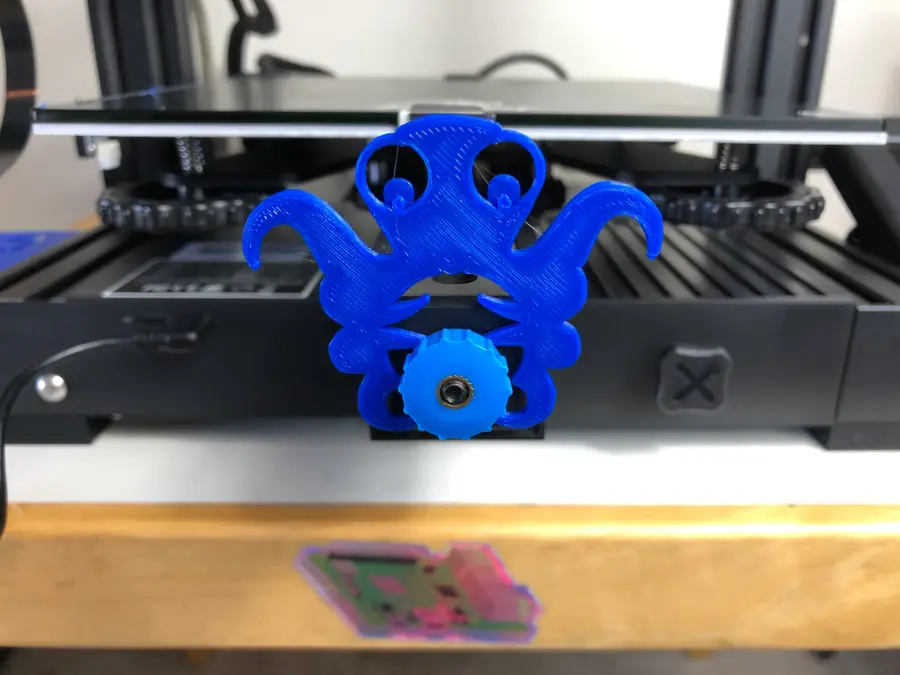
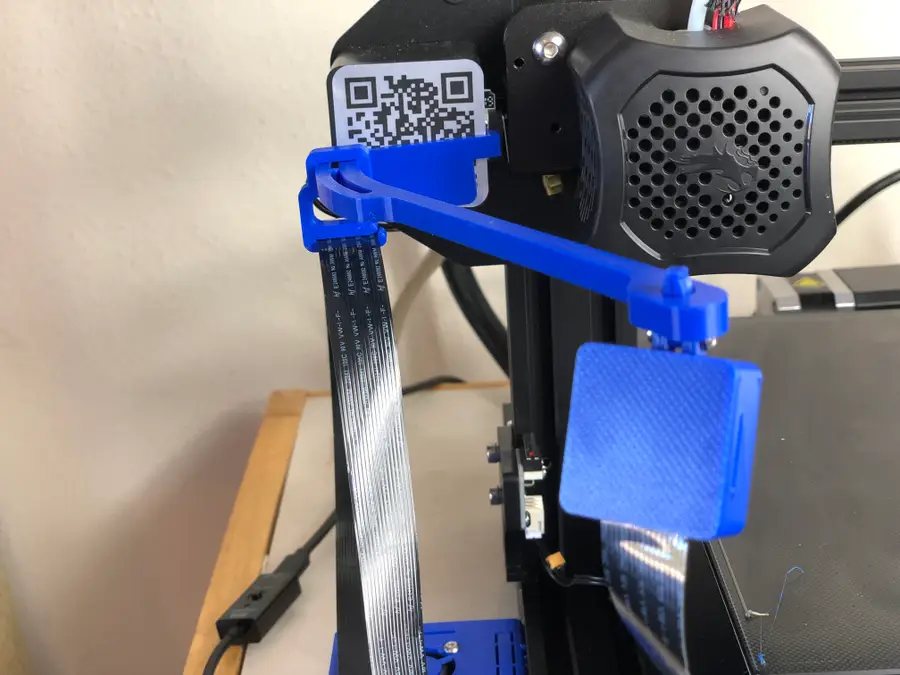
Ender 3 V2 Camera Mount
Mounting a camera to your Ender 3 V2 really turns the OctoPrint experience from “this is pretty cool” to “this is freakin’ awesome!” As the Z-axis stepper motor travels up during your 3D printing, the camera follows it. You get to watch the whole print take place remotely on your computer or anywhere—if you want to use our guide to access OctoPrint from anywhere. You can even record the entire print as a time-lapse if you choose.
Print out the camera case and camera mount. If you’re using my components, you should have no trouble. Do note that the case attaches to the mount very tightly. You need a tight fit so the camera does not shake when the printer is on.
There are two additional options for a shorter boom-arm and a bolt-less installation. I like the long boom arm personally because of the low angle it allows while viewing the print.
Ender 3 V2 Raspberry Pi Enclosure
The case I linked to earlier is for the Raspberry Pi 3 with a 25mm fan. You likely aren’t using the exact same fan, so here’s the same case for the 30mm fan. It does fit the Ender 3 V2 and attaches to the side 80/20 aluminum rail. By the time you read this, there may be even more available on Thingiverse, so feel free to browse around.
Notes
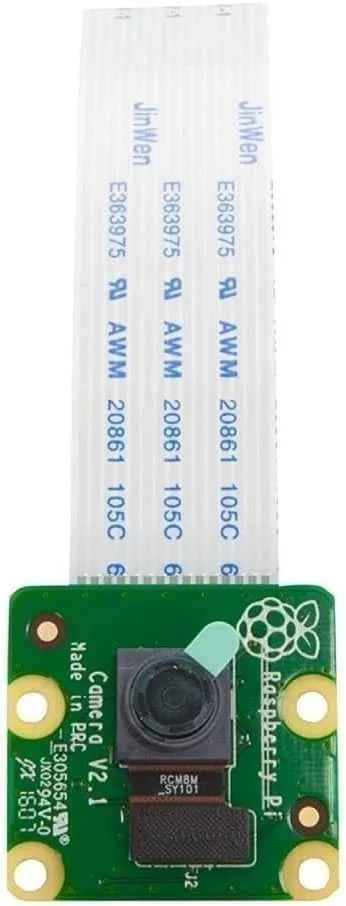
The camera I used was the official Raspberry Pi Camera Module V2.
You’re looking for a camera mount that attaches across the front Ender 3 V2 Z-axis motor, as that has the same specs as the Ender 3. Do not use an original Ender 3 camera mount that attaches to the side of the motor, as it might not fit properly.
The camera mount and case I used do fit easily and even have an option for installation without the recommended 2mm bolt/nut.
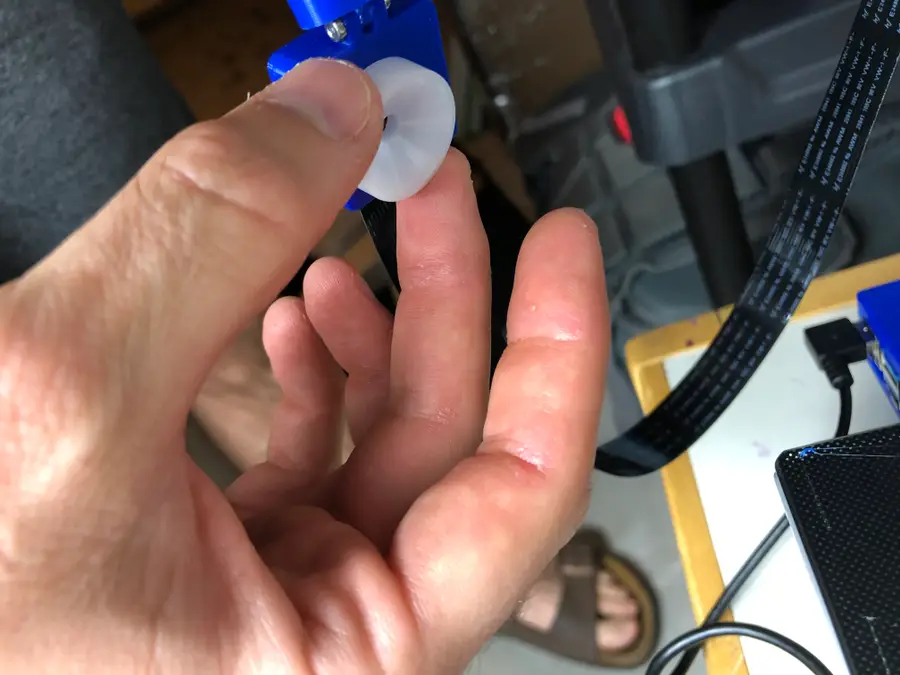
3 – Mount the Raspberry Pi Camera on the Ender 3 V2
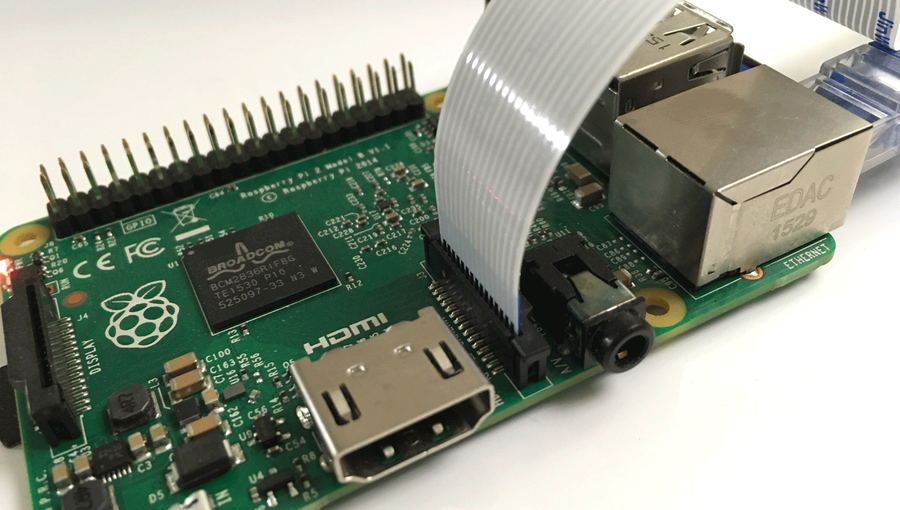
Do this step prior to putting your Raspberry Pi into its case so you can more easily connect the ribbon cable to it.
Decide if you want to mount the camera above the boom-arm or below. (I mounted mine below, as I think it gives a better view of the print.)
Insert your printed swivel pin accordingly, until it snaps in place.
Use an M2 x 20mm bolt to connect the camera case to the mount.
Note: If you’re using the mount I selected, it will be difficult to get the bolt through. This is intentional, as everything needs to be tight so the camera holds its position. Just take your time. – Connect the Raspberry Pi ribbon cable to the camera. – Carefully click the camera into place. – Snap the back of the camera case into place.
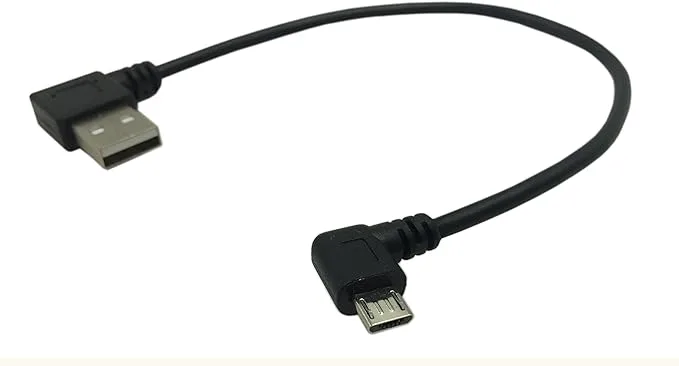
You’re absolutely going to need to use this extension cable when connecting your camera to your Raspberry Pi. The cable that comes with the Pi camera is not long enough and will break if you try to use it.
As with anything you do, when connecting the ribbon cable—take your time and be careful not to break the camera.
We like using the official Raspberry Pi camera for OctoPrint, but there are other OctoPrint cameras and webcams that you can use too.
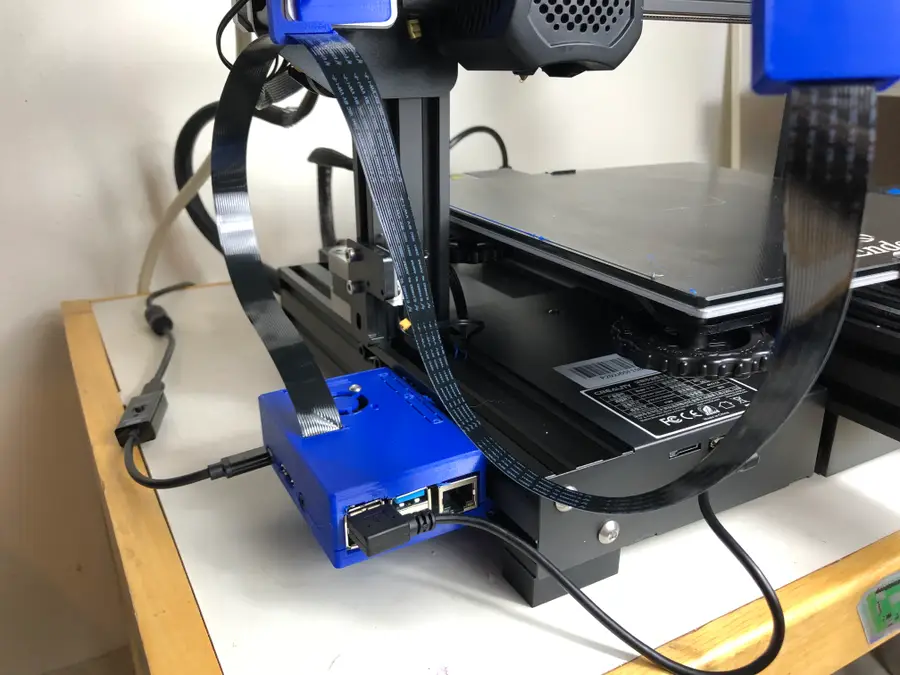
If you printed the optional ribbon clip that comes with the camera mount, then you can use this to guide your extension cable some. Don’t loop it on the clip. Only put it through once, leaving plenty of slack for when the Z-axis motor raises up on high prints.
4 – Put the Raspberry Pi into the case
You should have two 3D-printed pieces—a faceplate (with the fan opening) and the case itself.
Fan installation
If your case fits the fan size properly, then simply bolt the fan to the case using 4 M3 x 12mm bolts/nuts.
You’ll need to slide your camera ribbon cable through the slot on your Raspberry Pi case. If your case does not have a slot, then you’ll need to manually cut one.
Bolt case together
Carefully add the four M3 x 16mm bolts to connect the case. Lightly tighten each bolt one at a time. Then, fully tighten each bolt.
🛈 If you’re using a Raspberry Pi 4, then you should definitely install the fan.
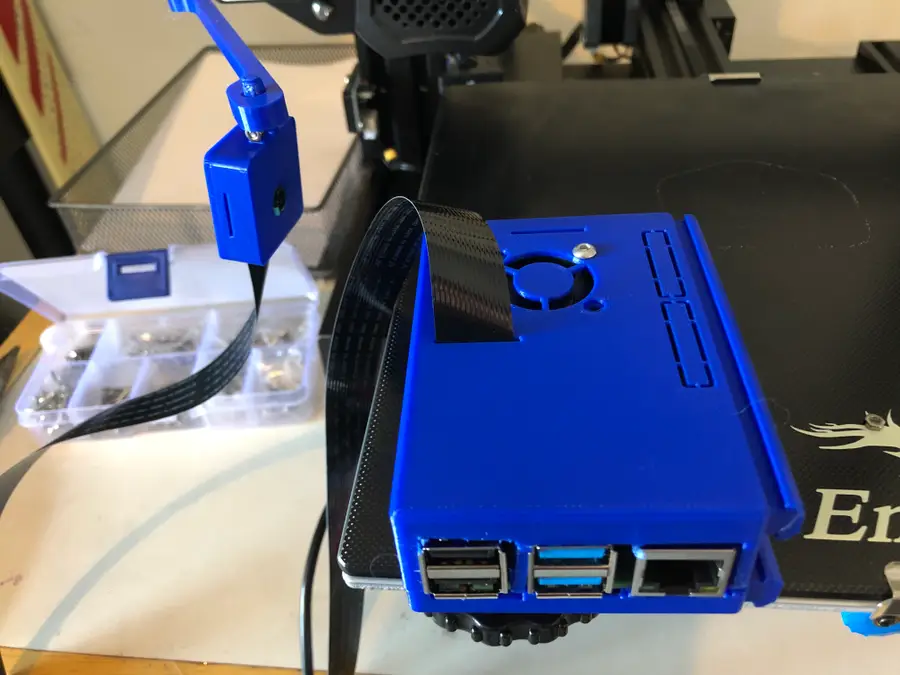
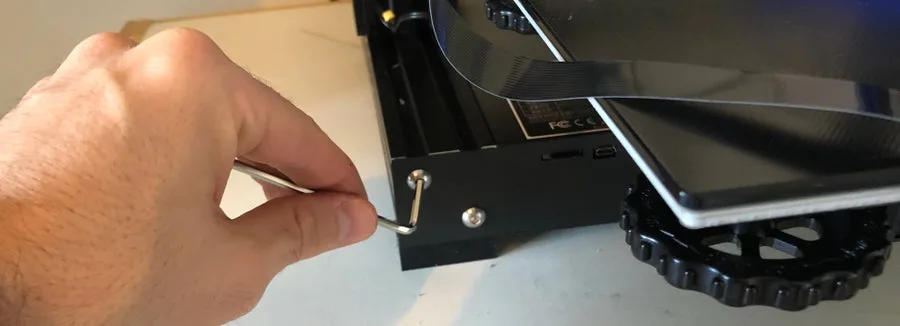
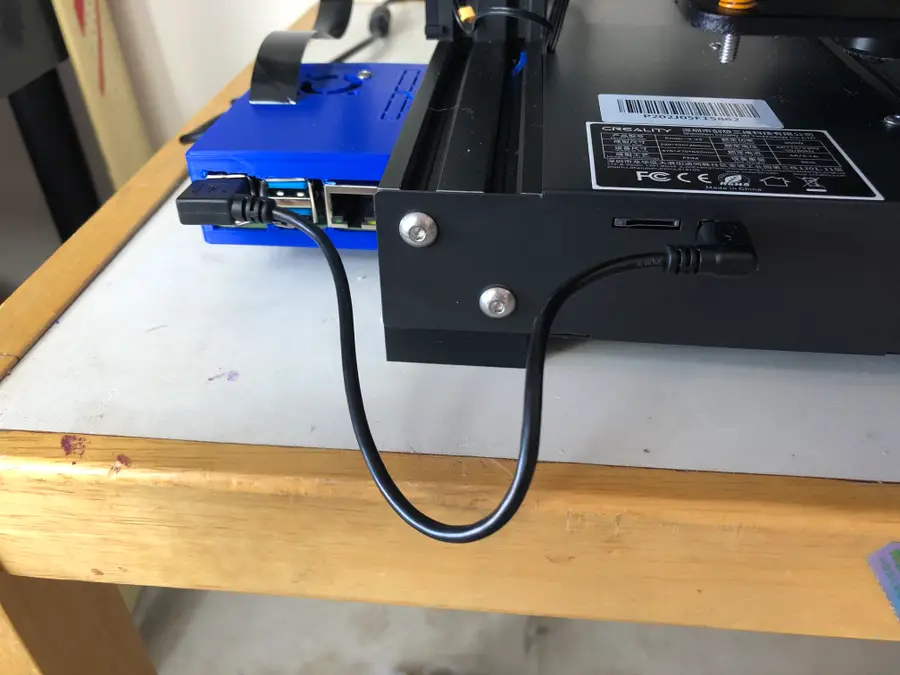
5 – Mount the Raspberry Pi
The case that I chose slides into the side rail of the Ender 3 V2, so you won’t need any nuts or bolts.
Optional: file down the brackets on the case some to loosen the fit. It will be a very tight fit otherwise.
Unbolt the front-left cover of the Ender 3 V2, so you can create room in which to slide the case. Make sure your MicroSD is removed.
Push the case brackets through the sidebar slowly. Don’t damage your Pi. If you need to, you can file down the brackets more.
Reattach the front cover.
Route camera cable
Route the camera cable up through the cable clip (if using one), and into your camera. Make sure the ribbon cable is straight and not bent.
🛈 You may find you need to tilt/move your Ender 3 V2 some when sliding the case into the brackets. Just be careful when doing this.
6 – Connect the Raspberry Pi to your Ender 3 V2
Lastly, use a short Micro-USB cable to connect the Raspberry Pi to your Ender 3 V2.
7 – Optional: Power the Pi from the Ender 3 V2
If you want to power your Raspberry Pi directly from your Ender 3 V2, then you’ll need to modify our guide on powering the pi from the original Ender 3. We only recommend you do this if you have enough knowledge of electronics and power supplies.
I’m fine with my Raspberry Pi being plugged directly into the wall, so I did not do this.
8 – Focus the Pi Camera
While viewing the camera feed in the OctoPi/OctoPrint interface:
Slide your bed to center it.
Place a small object in the center of the bed on which to focus the camera. (I chose a small bottle with some text, so I could easily focus the camera.)
Use the small white wheel that came with your Raspberry Pi camera to turn the camera lens until the object is perfectly focused.
Feel free to comment below letting us know what worked for you and what did not. And share your own OctoPrint setup with us over at Facebook and Twitter.
Be sure to check out our OctoPrint FAQs if you have any questions about using OctoPrint. We also have a full OctoPrint interest!
Blender is one of the most popular open-source 3D creation suites today. It doesn’t cost a dime to use and everything you create is yours to own for good. The community is robust and the dev team still releases new updates on the regular. If you want to get the latest version, you may have
Introducing Howchoo, an enigmatic author whose unique pen name reflects their boundless curiosity and limitless creativity. Mysterious and multifaceted, Howchoo has emerged as a captivating storyteller, leaving readers mesmerized by the uncharted realms they craft with their words.
With an insatiable appetite for knowledge and a love for exploration, Howchoo’s writing transcends conventional genres, blurring the lines between fantasy, science fiction, and the surreal. Their narratives are a kaleidoscope of ideas, weaving together intricate plots, unforgettable characters, and thought-provoking themes that challenge the boundaries of imagination.
There are a lot of different 3D printing surfaces out there — metal, BuildTak, painter’s tape, glass, and more. But for most 3D printers, glass is the ultimate printing surface.
In this guide, I’ll explain reasons why you should print on a glass bed, whether or not your printer can use one, where you can find one, and the differences between various types of glass.
Chances are your printer didn’t come with a glass bed; no matter, it’s easy and inexpensive to add one to your setup.
1 – Reason #1: Glass is supremely flat
Your printer’s build plate is not flat. It’s probably made from aluminum and, even when new, is slightly bowed toward the center or edges. This is just the nature of thin, machined, often mediocre-quality aluminum.
Why is this important?
Print quality is all about tolerances. Well, it’s about a lot of other things too, but tolerances and precision are really important. When your 3D printer is laying layer after layer of filament to form your print, it’s very helpful if the distance between the extruder and bed is identical for the entire layer, right?
Imagine you’re printing a large cube. If the bed isn’t flat, the center of the cube doesn’t exist on the same exact plane as its edges. Thus, you end up with an imperfect print with poor layer adhesion and quality.
Lastly, repeated print and bed heat cycles can warp your aluminum build plate further.
A high quality glass bed is supremely flat, hard, and rigid
Go with glass. Glass will always remain flat and smooth, will always love you, will never give you up, and will never let you down.
🛈 Nor will it run around and desert you.
2 – Reason #2: Glass beds save on prep time
If you’ve ever spent time removing painter’s tape or replacing a BuildTak-like surface while hating your life, then you know the pain. With a proper glass bed, cleaning takes about 30 seconds and applying a new layer of adhesion material takes seconds (more on this later).
No more replacing things or running out of materials between prints. The time you save really adds up.
3 – Reason #3: Glass is easy to clean
File this under “reduced prep time”. Cleaning a glass bed takes less than a minute and isn’t always necessary between prints.
Later on in this guide, I’ll teach you how to clean your glass bed properly. For now, know that glass is very easy to clean of dust, adhesion material, and stray filament remnants.
4 – Reason #4: Glass beds give your prints a smooth, shiny surface
If you’ve ever seen a print online that has a supremely shiny, flat surface, it was probably printed on a glass bed. The super smooth nature of the glass itself leads to shiny, smooth, ultra flat prints without added texture.
5 – Reason #5: Glass beds are an inexpensive upgrade
In terms of non-printable upgrades, glass beds offer a lot of bang for your buck. Depending on your bed size, a quality borosilicate glass bed can be had for $12-30. I picked up my Ender 3 glass bed for under $20 on Amazon. This is a small price to pay for such an impactful upgrade that saves time and improves the quality of your prints.
6 – Reason #6: Effortless print removal
After your print and the glass bed have cooled, removing the print is a breeze. Sometimes the print will “pop” right off the bed; other times, you can simply pull it off with your fingers. No more tireless scraping, saving you time and effort while reducing the risk of damaging the print upon removal.
🛈 If you do need to use a scraping tool on your glass bed, try to use a plastic one so as not to scratch the bed.
7 – Glass bed types (choose borosilicate)
There are several types of glass that you can use for your bed — and several types of glass in general. Let’s start there:
Types of glass
Not all glass is created equally. There are 3 main types of glass. Windows, glass jars, and lab equipment all use different types of glass with different properties.
Glass Type
Thermal Shock Resistance*
Chemical Resistance
Applications
Soda-lime silicate
Low
Average
Food and beverage containers, windows, lamp envelopes
Phosphates
Low
Low, except for hydrofluoric acid
Bone scaffolds, optical fibers, heat absorbers
Borosilicate
Average-High
High
Industrial equipment, exterior lighting, laboratory and kitchen glassware
*Thermal shock resistance
Thermal shock resistance is an important property to consider when choosing a glass for your bed. It is essentially the ability of a solid to withstand sudden changes in temperature during heating or cooling.
Your glass bed will rapidly cool or heat when your heated bed is activated, when the extruder comes into close contact with the print surface, or when a print finishes in a cold environment. Therefore, it’s important that your bed not explode with sudden temperature changes.
Additionally, cheap glass like soda-lime silicate can contain bubbles; when this glass is heated, the air in these bubbles can expand and shatter the glass.
Go with borosilicate
Borosilicate glass is the same type used in labs for beakers and other neat labware. There’s a reason scientists choose this type of glass: it’s highly resistant to temperature changes and chemicals. It’s consistently smooth and flat and doesn’t contain bubbles that can cause the glass to fracture or explode while heating.
You probably shouldn’t have Home Depot cut your bed for you
Some people have cut inexpensive soda-lime silicate glass panes or IKEA mirrors to size for use on their printer and have experienced success for some time with them; this doesn’t mean that they’re safe to use, nor does it mean that they will last a long time.
tl;dr; Use borosilicate glass. A proper borosilicate glass bed is very inexpensive (more on that later).
🛈 Exploding glass beds are bad.
8 – How to get good print adhesion on a glass bed
There are a few ways to make sure your prints stick nicely to your glass bed: the magic formula is heat and hair spray or heat and glue.
Heat
A heated bed is key to printing on glass. While it is possible to use a glass bed on an unheated printer, I wouldn’t recommend it. You’re going to run into issues with adhesion.
Hair spray
Hair spray is a tried-and-true method for getting good bed adhesion. Simply spray a light, even coat across the entire thing — similar to how you would with spray paint. I recommend removing the bed before doing this so you don’t cover your printer in sticky hair spray. Let it dry for a few minutes until it has a hazy appearance to it.
Any hair spray will do. At some point, Aqua Net became the de facto 3D printing hairspray. I have no idea why, except that it’s usually the cheapest hair spray available at your local pharmacy or grocery store. A single can will probably outlast your printer.
Glue sticks
Grab a normal glue stick and rub it on your bed, coating it evenly. You can add a bit of water and smear it around for a more even coat. I don’t generally use glue sticks because they’re messy and hair spray has always worked out fine for me, but some people do prefer them.
Commercial adhesion products
Commercial bed adhesion products also exist, but I’ve never found the extra cost to be necessary. Much of the time, they seem like a repackaged hair spray or glue stick with less scent and a larger price tag.
9 – How to hold the glass bed in place
There are a few ways to securely attach a glass bed to your printer:
Binder clips
The easiest way to affix your glass bed to your 3D printer’s bed is to use small binder clips. Much like using hair spray for adhesion, this is the method generally accepted by the 3D printing community.
Be sure to use small binder clips so that, when fully stretched, the binder clip arms are parallel to the build plate. This will ensure that the extruder and other parts of the print head never make contact with the binder clips. These are the binder clips I normally use.
Simply attach two binder clips to the front and two to the back of the build plate, pressing the glass bed onto the build plate. Sometimes, though rarely, you might have a print that goes right to the edge of the plate in these areas. In that case, you can shift the clips around to accommodate.
Print bed clips
You can also find glass bed clips on Thingiverse and print them; just make sure you use a high-temp filament that won’t warp with normal prints. For example, if you normally print PLA or PETG, print the clips in ABS. If you print a lot in ABS, you probably shouldn’t use plastic bed clips.
Buy bed clips
You can find and buy metal bed clips online.
🛈 After adding your bed, it will now be thicker! You’ll need to either adjust your printer’s z-axis endstop or adjust your printer’s height using its normal adjustment mechanism to lower it to account for the new thickness.
10 – How to clean your glass bed
Cleaning the glass bed is one of the best parts about using it as a build medium. Gone are the days of removing and replacing painter’s tape or BuildTak.
Wash the bed
After you’ve let your print cool and set it aside, remove the binder clips and glass bed. Run the glass bed under your kitchen faucet and use a sponge and bit of soap to scrub off the hair spray/glue residue and tiny bits of filament left behind. Most hair spray and glue sticks are water-soluble, making the whole process easy and satisfying.
Dry the bed
To dry the bed, set it on your counter on a clean paper towel and use another to dry the top. After the glass is dry, put it back onto your printer.
Before starting a new print, make sure the bottom is fully dry. When you heat your bed, any water trapped between the glass and build plate will turn to steam and can crack or chip your bed. Learn from my mistakes. 🙂
🛈 You can often go several prints without needing to clean the plate!
11 – Where to find a glass bed for your printer
You can find a glass bed for your printer on Amazon. Simply look up the dimensions of your bed by Googling the model, and then punch that into Amazon. Make sure the result you find explicitly mentions borosilicate.
12 – Can you use a glass bed without a heated bed?
Yes and no. You technically can use a glass bed on an unheated printer. However, similar to layer adhesion issues sans heat, you may have issues getting your print to stick to the bed — even with glue or hair spray. While I don’t recommend using a glass print surface if your bed is not heated, it is certainly possible to do so.
13 – Am I wrong?
I know this is a very opinionated guide and a strong standpoint to take. I’ve reached this conclusion after owning half a dozen printers, experimenting with every possible type of build surface, and consulting with several full-time 3D printing professionals.
There are certainly exceptions: specialized types of printers, printers that must touch a bed made of a particular material (like metal) to self-level, etc.
If you don’t agree that glass is the ultimate build surface, please let me know in the comments section below. I’d love to hear your viewpoint so that I, and other readers, can learn.
After all, one of the most amazing things about 3D printing culture, and the community in general, is sharing and openness to new ideas. 🙂 I’ll also update this article with any relevant information you provide.
Blender is one of the most popular open-source 3D creation suites today. It doesn’t cost a dime to use and everything you create is yours to own for good. The community is robust and the dev team still releases new updates on the regular. If you want to get the latest version, you may have
Introducing Howchoo, an enigmatic author whose unique pen name reflects their boundless curiosity and limitless creativity. Mysterious and multifaceted, Howchoo has emerged as a captivating storyteller, leaving readers mesmerized by the uncharted realms they craft with their words.
With an insatiable appetite for knowledge and a love for exploration, Howchoo’s writing transcends conventional genres, blurring the lines between fantasy, science fiction, and the surreal. Their narratives are a kaleidoscope of ideas, weaving together intricate plots, unforgettable characters, and thought-provoking themes that challenge the boundaries of imagination.