Home Interests Minecraft

How to Make and Use a Potion of Harming in Minecraft

Win any battle.
howchoo   (467)
February 23, 2024
18 minutes

Share

A Potion of Harming in Minecraft is a consumable item which inflicts Instant Damage. Instant Damage is a status effect that immediately depletes an entity’s health. This effect does not have a duration, but its potency can be increased. 

🛈  The cloud of Harming left by a Lingering Potion of Harming stays for 5 seconds but still deals Instant Damage (no duration).

Potions of Harming have the following potency levels: Instant Damage I and Instant Damage II. Instant Damage I deals 6 points (× 3) of damage, while Instant Damage II deals 12 points (× 6). Use this potion to help you deal more damage in combat, especially against entities with high amounts of health.

Since Instant Damage is instantaneous, you can’t remove the effect by using a Milk Bucket like other status effects, so it’s never fun to be on the receiving end of it. As much as possible, try to avoid getting hit by a Splash or Lingering Potion of Harming, or shot by an Arrow of Harming. If you receive Instant Damage, restore your health with food and healing potions as soon as possible.

🛈 Witches sometimes use Potions of Harming against players. The Ender Dragon’s fireballs also leave behind a cloud of Harming. Be careful not to get hit by either or get ready to heal when you do.

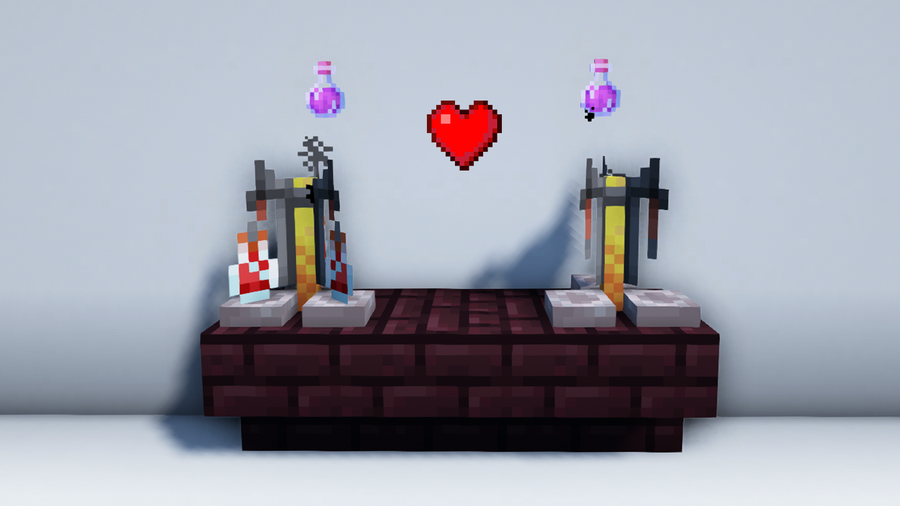
Be warned that when the Potion of Harming is used against undead mobs, it will heal them instead of damaging them. Instant Damage I heals the undead mob by 4 points (× 2), while Instant Damage II heals them by 8 points (× 4). Undead mobs you need to avoid using the Potion of Harming on are zombified mobs, Skeletons and their variants, Phantoms, and the Wither.

How to Brew a Regular Potion of Harming in Minecraft?

Ingredients required:

1 Fermented Spider Eye

  1 Potion of Poison

🛈 Note: This article briefly goes over how to make a Potion of Poison. If you want to learn more about the Potion of Poison and its variants, you can visit this article!

Tools required for the brewing process:

Brewing Stand

Blaze Powder

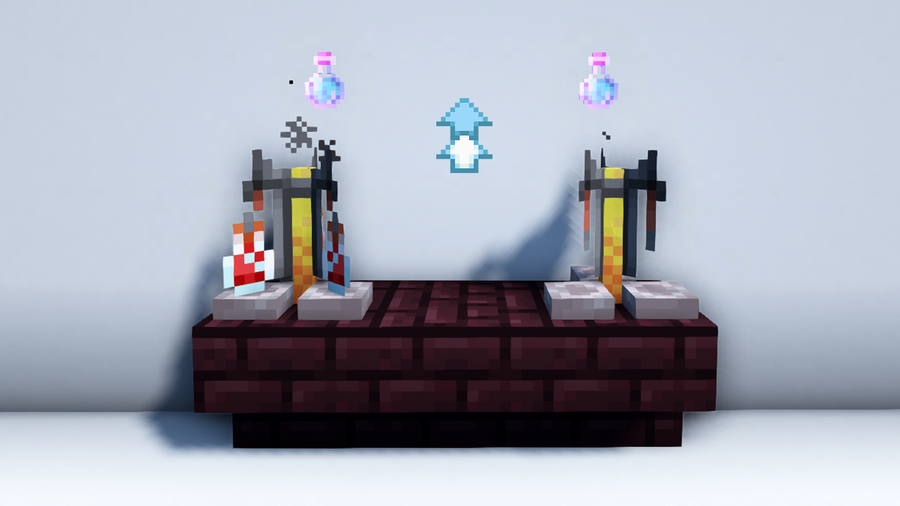
1 – Make a Fermented Spider Eye

Before anything else, make a Fermented Spider Eye by placing 1 Spider Eye, 1 Brown Mushroom, and 1 Sugar in a Crafting Table.

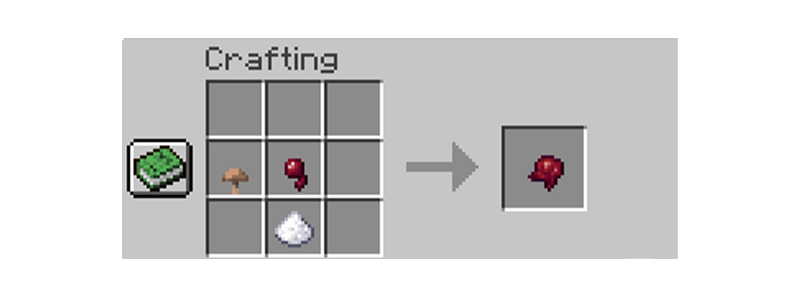
Get Spider Eyes by defeating Spiders which can be found roaming the Overworld at night or deep inside caves. Brown Mushrooms can be found growing under trees or in dimly lit areas like swamps, mushroom fields, and the Nether. Lastly, you can get Sugar by either putting Sugar Canes or Honey Bottles in a Crafting Table, or defeating Witches.

2 – Make Blaze Powder

Blaze Powder serves as your fuel for the Brewing Stand. Before making some, you need Blaze Rods which can be obtained by defeating Blazes in Nether Fortresses.

Once you have at least one, put the Blaze Rod in a Crafting Table to get 2 units of Blaze Powder.

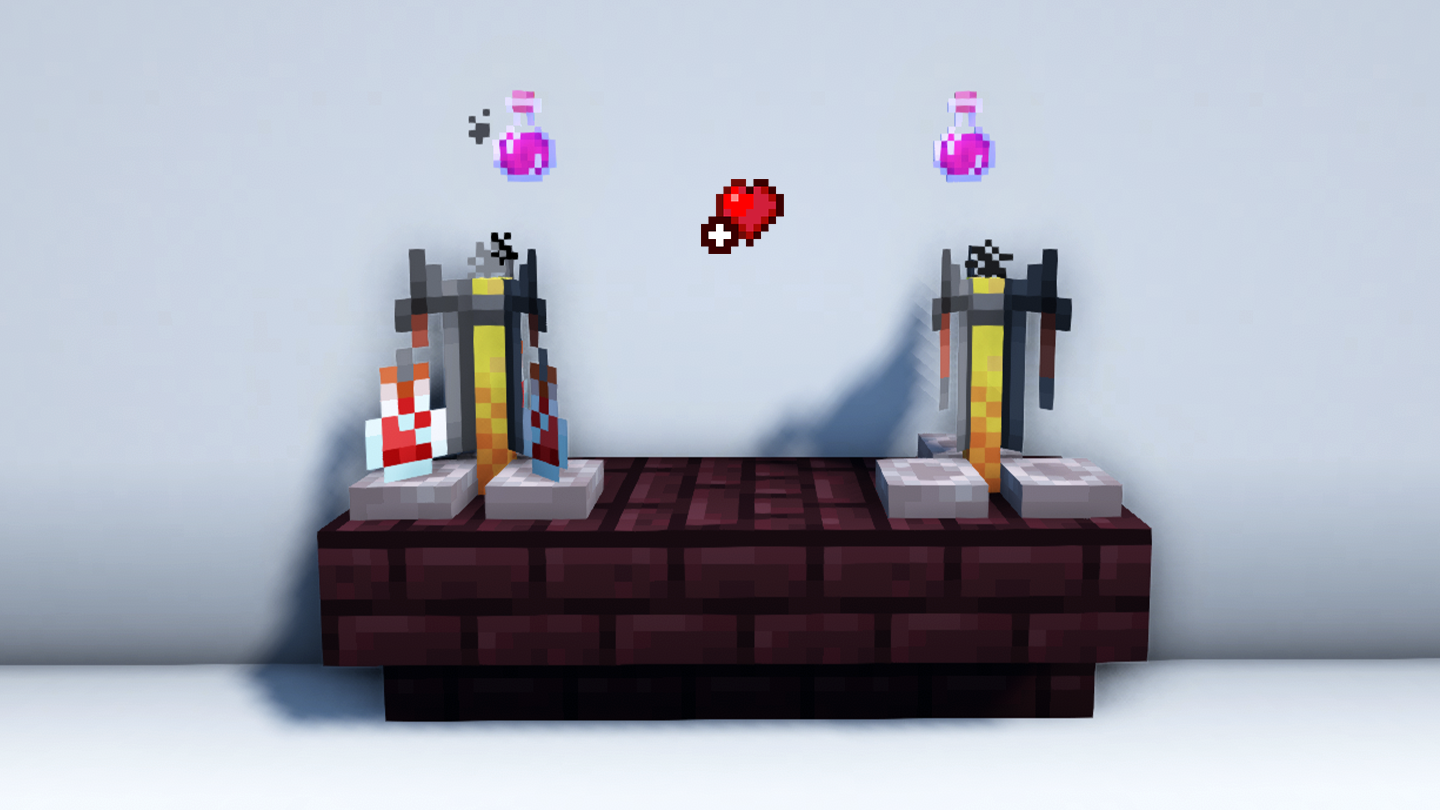
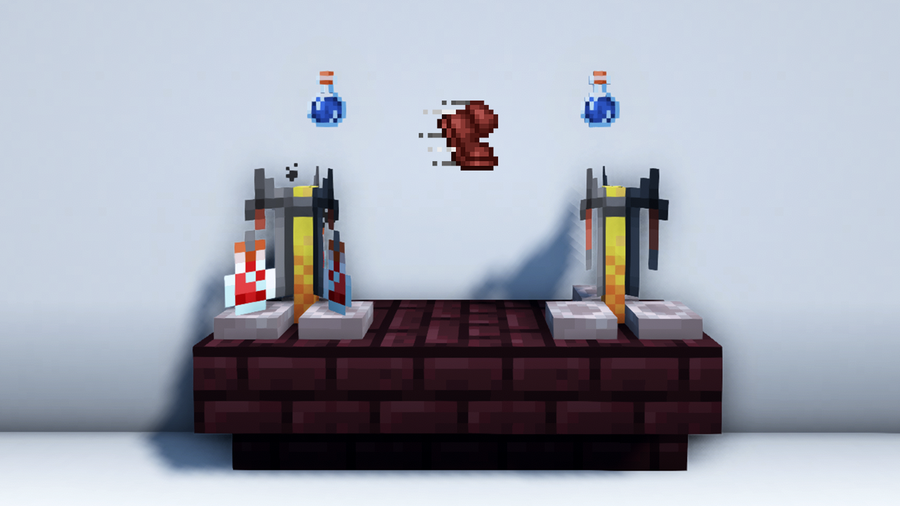
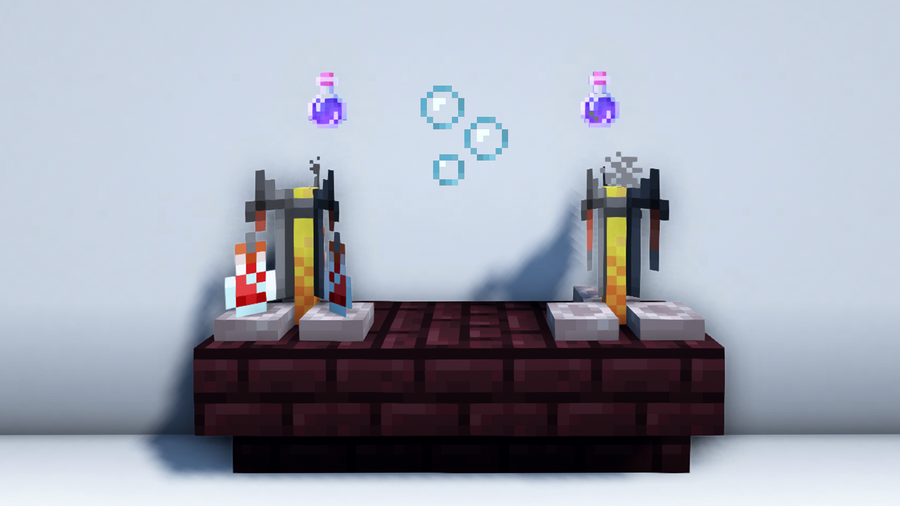
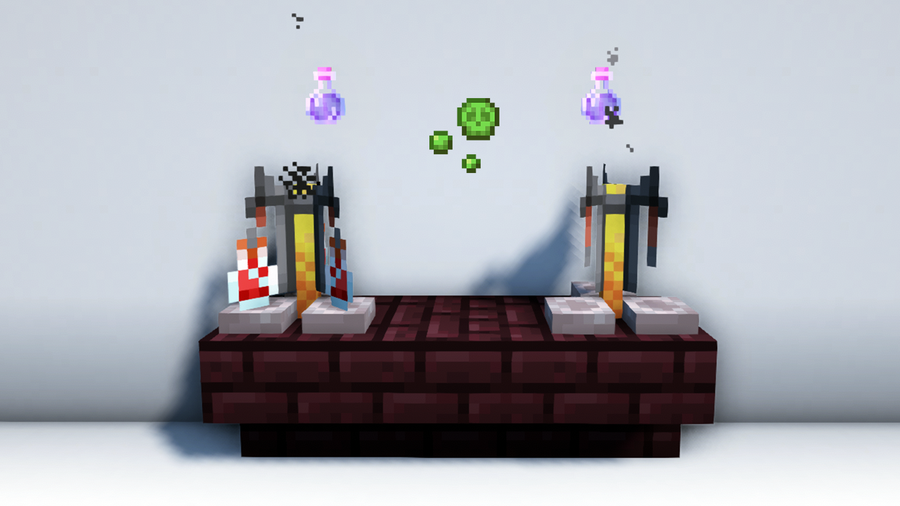
3 – Brew a Potion of Poison

You need a Potion of Poison to make a Potion of Harming. To make one, add a Spider Eye to an Awkward Potion in a Brewing Stand. You can use up to 3 Awkward Potions as long as you have enough fuel. In this case, 1 unit of Blaze Powder is more than enough.

Similar to the Potion of Harming, the Potion of Poison can help you deal more damage in combat. However, unlike the Potion of Harming, it inflicts damage over time. You can follow this guide if you want to learn more about it:

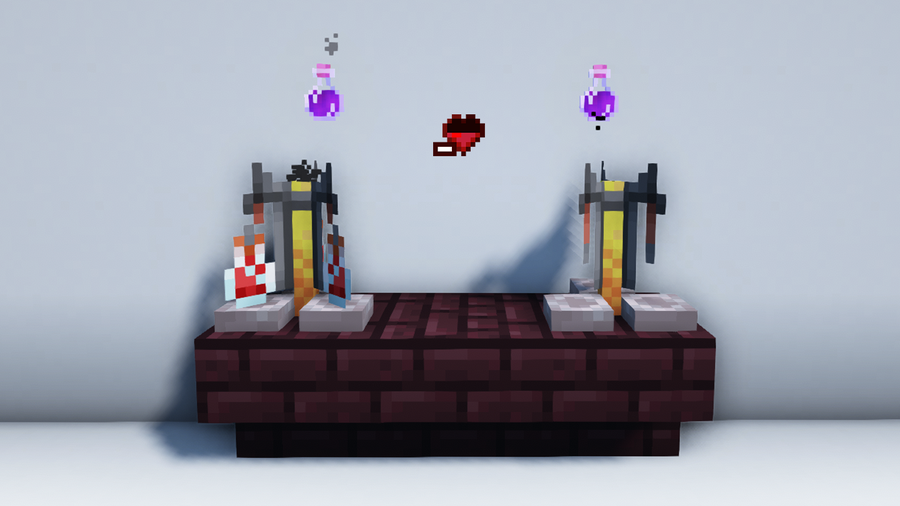
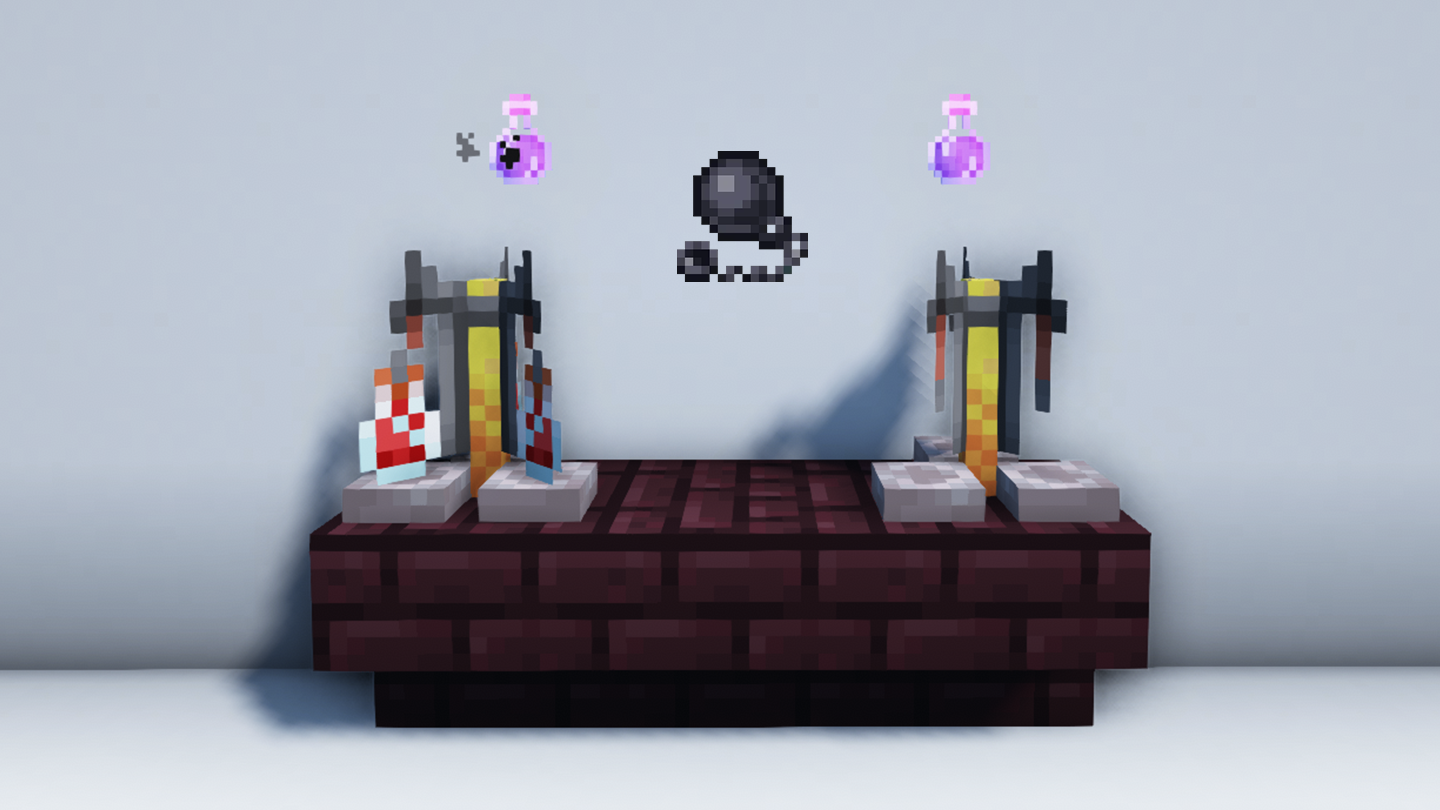
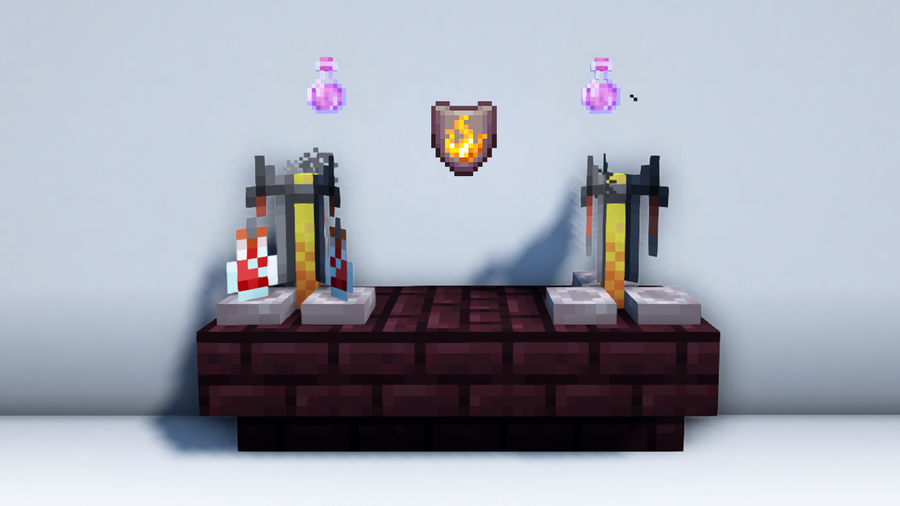
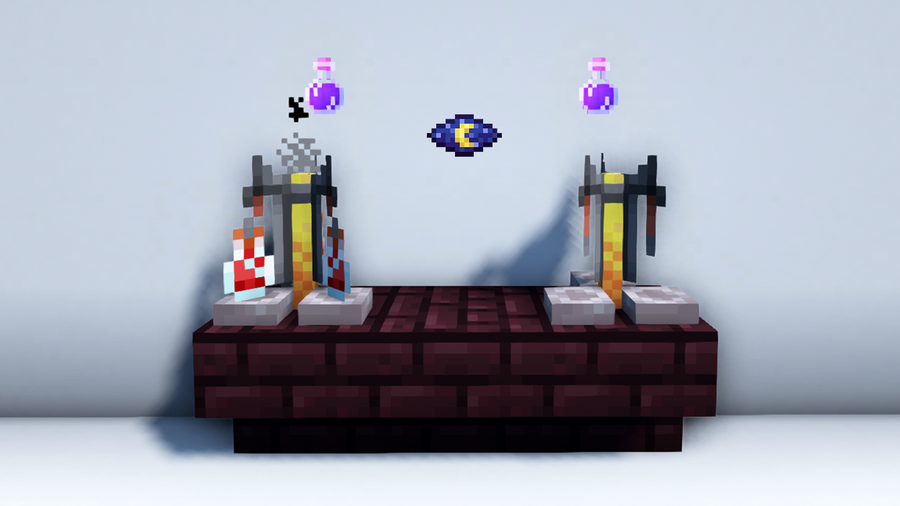
4 – Brew a Potion of Harming

Once you have a Potion of Poison, add your Fermented Spider Eye to it using a Brewing Stand. Wait for the brewing to finish to get a Potion of Harming.

This recipe gives you a regular Potion of Harming that inflicts Instant Damage when consumed.

Result: Potion of Harming (Instant Damage I)

How to Use the Potion of Harming in Minecraft?

Similar to all regular potions, the only way to use a Potion of Harming is to drink it.

To do this in the Java and Education Editions, press right-click and hold until the drinking action is done.

The Bedrock Edition uses the following controls:

  • Keyboard & Mouse: Right-click and hold.
  • Controller: Press the LT, L2, or ZL button and hold.
  • Mobile: Tap the screen and hold.

After drinking the potion, you will be left with an empty Glass Bottle. Particle effects will appear on the screen to indicate that the status effect is active. You can check more details on the status effect such as its duration by opening the inventory menu.

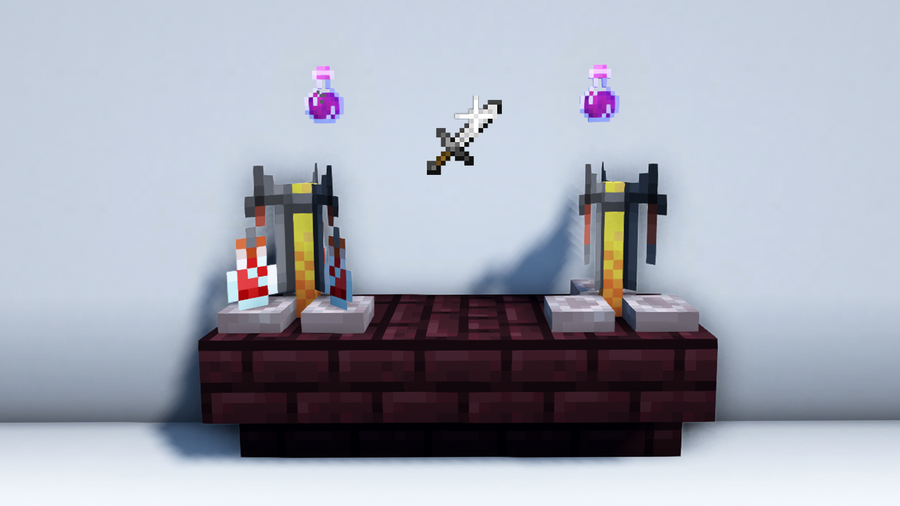
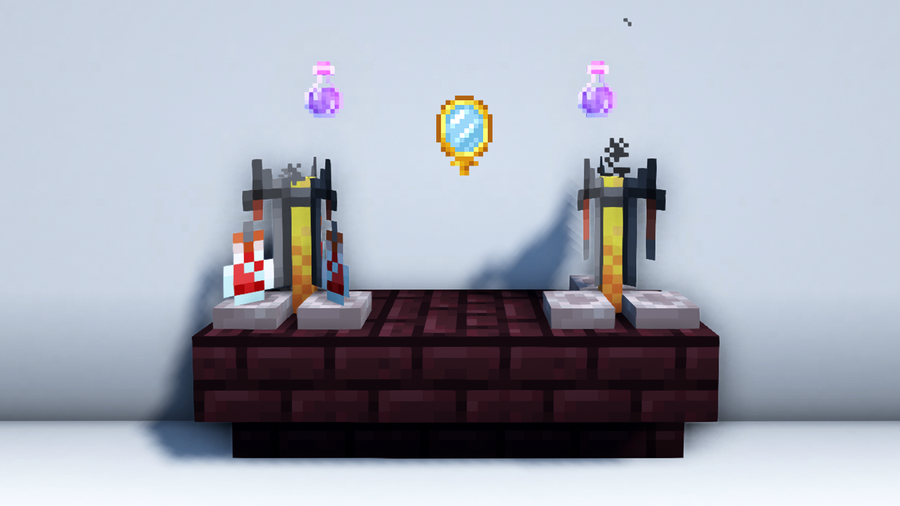
How to Make a Potion of Harming II?

A Potion of Harming II deals Instant Damage II when consumed. To make this, add Glowstone Dust to a regular Potion of Harming in a Brewing Stand.

This potion will deal 12 points (× 6) of damage when consumed.

Result: Potion of Harming II (Instant Damage II)

How to Make Other Variants of the Potion of Harming?

The Potion of Harming has Splash and Lingering variants that can be brewed by using Gunpowder and Dragon’s Breath respectively. Find out how to make each one by following the recipes below:

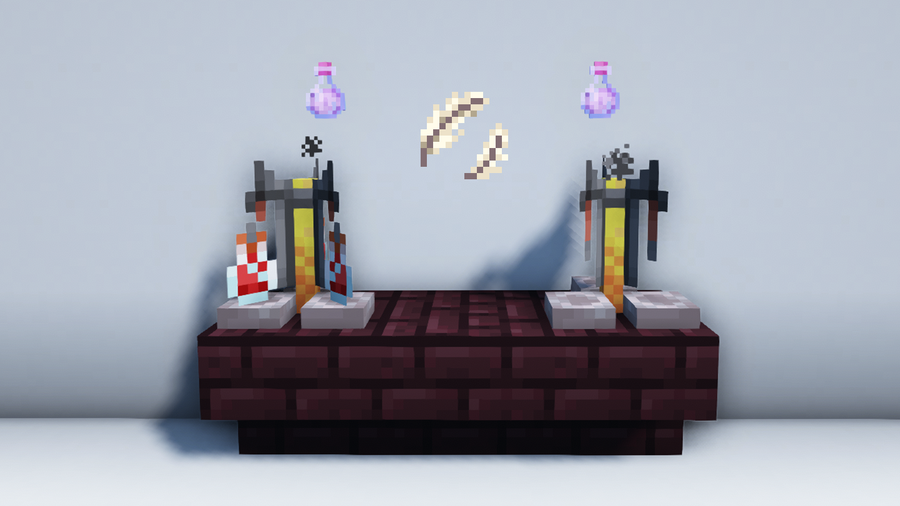
How to Make a Splash Potion of Harming

Splash Potion of Harming

To make a Splash Potion of Harming, add Gunpowder to a regular Potion of Harming in a Brewing Stand. 

The regular Splash Potion variant deals 6 points (× 3) of damage.

It heals the undead by 4 points (× 2) of health.

Splash Potion of Harming II

To make a Splash variant with enhanced potency, you can do either of the following:

  • Add Glowstone Dust to a Splash Potion of Harming. 
  • Add Gunpowder to a Potion of Harming II.

The resulting Splash variant will affect an entity with Instant Damage II, dealing 12 points of damage (× 6).

When used on the undead, it restores their health by 8 points (× 4).

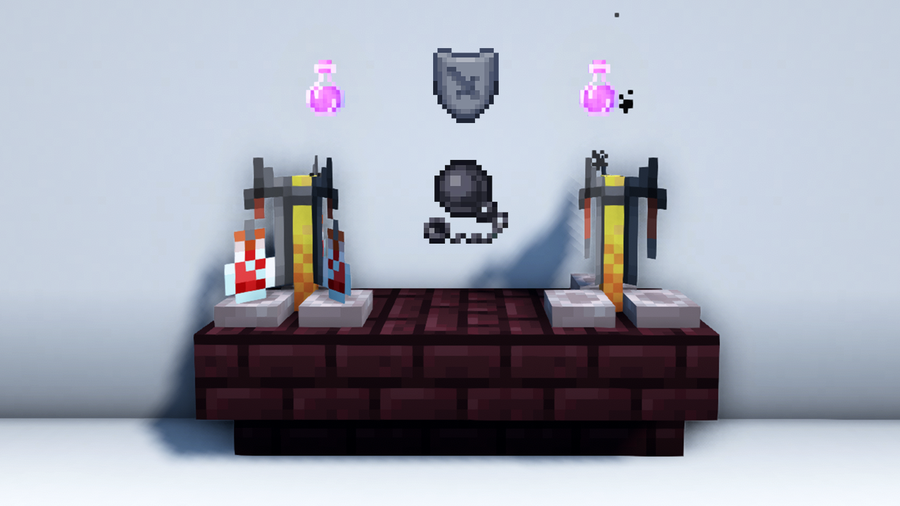
How to Make a Lingering Potion of Harming

Lingering Potion of Harming

To get a Lingering Potion of Harming, add Dragon’s Breath to a Splash Potion of Harming in a Brewing Stand. The cloud it leaves behind will last for 5 seconds, inflicting 3 points of damage (× 1.5) per second or 15 points (× 7.5).

Undead mobs passing through this cloud will receive 2 points (× 1) of health per second, totaling up to 10 points (× 5).

Lingering Potion of Harming II

To get a Lingering variant, you can do either of the following:

  • Add Glowstone Dust to a Lingering Potion of Harming. 
  • Add Dragon’s Breath to a Splash Potion of Harming II.

When this Lingering variant is used, the cloud of Harming will last for 5 seconds, inflicting 6 points (× 3) of damage per second, reaching up to 30 points (× 15).

Undead mobs passing through this cloud will have their health restored by 4 points (× 2) per second, totaling up to 20 points (× 10).

How to Make an Arrow of Harming Using a Lingering Potion of Harming

Arrow of Harming

To make an Arrow of Harming, put 8 Arrows and 1 Lingering Potion of Harming in a Crafting Table. 

When an entity is hit by this arrow, they will receive 6 points (× 3) of damage.

Undead mobs hit by Arrows of Harming will receive 4 points (× 2) of health.

Arrow of Harming II

To make an Arrow of Harming with enhanced potency, put 8 Arrows and 1 Lingering Potion of Harming II in a Crafting Table. 

Entities hit by this arrow will receive Instant Damage II, inflicting 12 points (× 6) of damage.

Undead mobs hit by this arrow will be healed up to 8 points (× 4) of health.

Where to Find a Potion of Harming in Creative Mode?

In Creative Mode, you can find the Potion of Harming and its variants in the Creative Inventory Menu by looking for them or searching their names.

You can also use console commands. For this, you need to have cheats enabled. If you’re using the Java Edition, enter the following command in the chat window:

/give @p potion{Potion:"minecraft:harming"} 1
  • give: This is the main command.
  • @p: This refers to the nearest player or you. This can also be replaced by your username.
  • potion{Potion:”minecraft:[harming]”}: This indicates that you want to give the entity above a Potion of Harming.
  • 1: This is the amount of the above item that you want to have.

If you’re using the Bedrock or Education Edition, enter the following command instead:

/give @p potion 1 23

If you want to know what other syntaxes you can use, you can check out the Minecraft Wiki to learn more about the /give command!

NEXT UP

Top 10 Enchantments in Minecraft

howchoo   (467)
March 25, 2024

The longer you play Minecraft, the more you realize that early-game tools just won’t cut it. Exploring the enchantment feature of Minecraft can be exciting, but also intimidating. Rather than worry about researching enchantments, below are the best enchantments in Minecraft! To learn how to enchant items, check out this guide! In this guide, you’ll see

Continue Reading

howchoo

 467 guides

Introducing Howchoo, an enigmatic author whose unique pen name reflects their boundless curiosity and limitless creativity. Mysterious and multifaceted, Howchoo has emerged as a captivating storyteller, leaving readers mesmerized by the uncharted realms they craft with their words. With an insatiable appetite for knowledge and a love for exploration, Howchoo’s writing transcends conventional genres, blurring the lines between fantasy, science fiction, and the surreal. Their narratives are a kaleidoscope of ideas, weaving together intricate plots, unforgettable characters, and thought-provoking themes that challenge the boundaries of imagination.

Home Interests Minecraft

How To Make and Use a Potion of Weakness in Minecraft

Converting zombified villagers is totally humane.
howchoo   (467)
February 21, 2024
19 minutes

Share

A Potion of Weakness in Minecraft is a consumable item that significantly reduces an entity’s melee damage by inflicting Weakness. The Weakness status effect reduces an entity’s base damage by 20% or 4 points of Attack Damage multiplied by the effect level. The higher the level, the lower the damage dealt. Potions of Weakness only apply Weakness I. However, this is potent enough for players to notice the difference.

On its own, a Potion of Weakness is not recommended for consumption due to its negative effects. However, when used to create its Splash and Lingering variants, the Potion of Weakness becomes a formidable weapon against enemies that are stronger than you, be it a hostile mob or another player. Unfortunately, the potion doesn’t work on the Ender Dragon, the Wither, or passive mobs, but you can use it on any other entity to give you an advantage in fights.

The Potion of Weakness is also a key item in turning Zombie Villagers back into regular Villagers. This process will be discussed further in the guide, so keep reading to find out how!

Whether you want to weaken your opponents or bring Villagers back to life, it’s worth learning how to make a Potion of Weakness.

How to Brew a Regular Potion of Weakness in Minecraft?

To brew a regular Potion of Weakness in Minecraft, gather the required ingredients and tools, then follow the recipe below:

Ingredients required:

1 Water Bottle

1 Nether Wart

1 Fermented Spider Eye

Tools required for the brewing process:

Brewing Stand

Blaze Powder

1 – Make a Water Bottle

Before you start brewing, you need a Water Bottle. This recipe uses only 1 Water Bottle but you can use up to three in the Brewing Stand.

To get a Water Bottle, first make a Glass Bottle by putting 3 Glass Blocks in a Crafting Table. Then, equip the Glass Bottle and use it on a water source.

2 – Make a Fermented Spider Eye

The main ingredient for the Potion of Weakness is a Fermented Spider Eye. This item can be crafted by putting 1 Spider Eye, 1 Brown Mushroom, and 1 Sugar in a Crafting Table. 

If you don’t know where to find these ingredients, you can get Spider Eyes by defeating Spiders which appear at night. Brown Mushrooms generate naturally in areas with not much light such as under trees, in swamps, in mushroom fields, and in the Nether. Lastly, you can get Sugar by either putting a Sugar Cane or a Honey Bottle in a Crafting Table, or by defeating Witches.

🛈 Fermented Spider Eye is a base ingredient for three other potion recipes: Potion of Slowness, Potion of Harming, and Potion of Invisibility.

3 – Gather Nether Wart and Blaze Rods

Next, you need to find Nether Wart and some Blazes. You can find both in Nether Fortresses. Nether Warts typically grow on Soul Sand and are easy to spot. Blazes, on the other hand, drop Blaze Rods upon death. Make sure to get both, then put the Blaze Rods in a Crafting Table to get some Blaze Powder.

4 – Brew a Potion of Weakness

Most potions need a base potion, the most common one being the Awkward Potion. When brewing a Potion of Weakness, you don’t need one. 

Simply put the Fermented Spider Eye in the base ingredient slot of the Brewing Stand. Then, place the Water Bottle in any of the potion slots to begin the brewing process.

Once it’s done, you will get a regular Potion of Weakness (01:30)! This potion inflicts Weakness on anyone who drinks it for 1 minute and 30 seconds.

🛈 The Potion of Weakness is the only potion that doesn’t require you to brew an Awkward Potion or any other base potion beforehand. In the Bedrock Edition, you can use a Mundane Potion as an alternative base potion, but it’s not needed.

How to Use a Potion of Weakness

Like all regular potions, the only way to use a Potion of Weakness is to drink it.

In the Java and Education Editions, you can do this by pressing right-click and holding until the drinking action is done.

In the Bedrock Edition, the following controls are used:

  • Keyboard & Mouse: Right-click and hold.
  • Controller: Press the LT, L2, or ZL button and hold.
  • Mobile: Tap the screen and hold.

An empty Glass Bottle will be left behind after drinking. Particle effects will also appear on the screen to indicate that you’re affected by Weakness. You can check the effect’s duration by opening the inventory menu.

How to Extend the Duration of a Potion of Weakness?

To extend the duration of a Potion of Weakness, add Redstone Dust to a regular Potion of Weakness (01:30). The extended variant’s effects will then last for 4 minutes.

Result: Potion of Weakness + (04:00)

How to Make Other Variants of the Potion of Weakness?

The Potion of Weakness has Splash and Lingering variants that can be brewed by using Gunpowder and Dragon’s Breath respectively. Find out how to make each one by following the recipes below:

How to Make a Splash Potion of Weakness

Splash Potion of Weakness (01:30/01:07)

To create a Splash Potion of Weakness, simply add Gunpowder to a regular Potion of Weakness (01:30) in a Brewing Stand. When this Splash variant is thrown at another entity, it inflicts Weakness for 1 minute and 30 seconds in the Java Edition, and 1 minute and 7 seconds in the Bedrock Edition.

Splash Potion of Weakness + (04:00/03:00)

There are two ways to extend the duration of the Splash Potion variant:

  • Add Redstone Dust to a Splash Potion of Weakness (01:30/01:07) in a Brewing Stand.
  • Add Gunpowder to a Potion of Weakness + (04:00) in a Brewing Stand.

Both methods return an extended variant of the Splash Potion of Weakness that inflicts Weakness for 4 minutes in the Java Edition and 3 minutes in the Bedrock Edition.

How to Make a Lingering Potion of Weakness

Lingering Potion of Weakness (00:22)

To create a Lingering Potion of Weakness, add Dragon’s Breath to a Splash Potion of Weakness (01:30/01:07). When this Lingering variant is thrown at a block or area, any entity passing through the resulting cloud will be affected by Weakness for 22 seconds.

Lingering Potion of Weakness + (01:00)

There are two ways to extend the duration of the Lingering Potion variant:

  • Add Redstone Dust to a Lingering Potion of Weakness (00:22) in a Brewing Stand.
  • Add Dragon’s Breath to a Splash Potion of Weakness + (04:00/03:00) in a Brewing Stand.

Both methods return an extended variant of the Lingering Potion of Weakness that inflicts Weakness for 1 minute.

How to Make an Arrow of Weakness Using a Lingering Potion of Weakness

Arrow of Weakness (00:11)

To make an Arrow of Weakness, put 8 Arrows and 1 Lingering Potion of Weakness (00:22) in a Crafting Table. When another entity is hit by an Arrow of Weakness, they will be affected by Weakness for 11 seconds.

Arrow of the Weakness + (00:30)

To make this variant of the Arrow of Weakness, put 8 Arrows and 1 Lingering Potion of Weakness + (01:00) in a Crafting Table. The resulting Arrows of Weakness will have an extended duration, giving affected entities Weakness for 30 seconds.

How to Remove the Effects of a Potion of Weakness?

Like all status effects, drinking milk will remove the negative effects of a Potion of Weakness. You can drink milk by using a Milk Bucket.

To make a Milk Bucket, simply craft a Bucket using 3 Iron Ingots and use it on a cow, mooshroom, or goat.

How to Cure a Zombie Villager Using a Potion of Weakness?

To cure a Zombie Villager, you need a Golden Apple and a Splash Potion of Weakness (any variant). You can get Golden Apples by looting chests or simply crafting one using 8 Gold Ingots and 1 Apple.

Before you do anything, we recommend either trapping the Zombie Villager with a roof above their head to prevent them from burning in the daylight or doing this at night.

When you’re ready, throw the Splash Potion of Weakness at the Zombie Villager. Then, equip the Golden Apple and feed it to the Zombie Villager by interacting with them. The Zombie Villager will begin to shake with particle effects surrounding their form.

Wait for 3-5 minutes and the villager will return to normal.

Where to Find a Potion of Weakness in Creative Mode?

In Creative Mode, you can find the Potion of Weakness and its variants in the Creative Inventory Menu by simply looking for them or searching their names.

You can also use console commands if you have cheats enabled. If you’re using the Java Edition, enter the following command in the chat window to get a Potion of Weakness:

/give @p potion{Potion:"minecraft:weakness"} 1
  • give: This is the main command.
  • @p: This refers to the nearest player or you. This can also be replaced by your username.
  • potion{Potion:”minecraft:weakness”}: This indicates that you want to give the entity above a Potion of [].
  • 1: This is the amount of the above item that you want to have.

If you’re using the Bedrock Edition, enter the following command instead:

/give @p potion 1 34

Check out the Minecraft Wiki to learn more about the /give command and other syntaxes you can use!

NEXT UP

Top 10 Enchantments in Minecraft

howchoo   (467)
March 25, 2024

The longer you play Minecraft, the more you realize that early-game tools just won’t cut it. Exploring the enchantment feature of Minecraft can be exciting, but also intimidating. Rather than worry about researching enchantments, below are the best enchantments in Minecraft! To learn how to enchant items, check out this guide! In this guide, you’ll see

Continue Reading

howchoo

 467 guides

Introducing Howchoo, an enigmatic author whose unique pen name reflects their boundless curiosity and limitless creativity. Mysterious and multifaceted, Howchoo has emerged as a captivating storyteller, leaving readers mesmerized by the uncharted realms they craft with their words. With an insatiable appetite for knowledge and a love for exploration, Howchoo’s writing transcends conventional genres, blurring the lines between fantasy, science fiction, and the surreal. Their narratives are a kaleidoscope of ideas, weaving together intricate plots, unforgettable characters, and thought-provoking themes that challenge the boundaries of imagination.

Home Interests Sports

How to Add Your Favorite Sports Team’s Schedule to Microsoft Outlook Calendar

Because sports!!
howchoo   (455)
December 13, 2023
2 minutes

Share

Interests
Posted in these interests:
microsoft • 2 guides
sports • 2 guides

Do you love your team so much that you need to block off your schedule during the game? This guide will show you step-by-step how to add your favorite team’s schedule to your Outlook Calendar.

1 – Open Outlook Calendar

Log in to your Microsoft Outlook account, and navigate to the Calendar app.

(Or click here.)

2 – Click on Discover Calendars

Find the link that reads Discover calendars and click on it.

3 – Choose your league and team

Find the league on the left, then click on your team.

NEXT UP

How to Save a Word Document as a Google Doc

Convert your Word Doc to a Google Doc…
howchoo   (455)
November 21, 2023

Many people choose to convert a Word file because it’s much easier to share it in Google Docs. To save a Word document as a Google Doc, it must first be converted via Google Drive. Word docs generally convert pretty well into Google Docs, so you shouldn’t have to make too many edits once it’s complete.

Continue Reading

howchoo

 455 guides

Introducing Howchoo, an enigmatic author whose unique pen name reflects their boundless curiosity and limitless creativity. Mysterious and multifaceted, Howchoo has emerged as a captivating storyteller, leaving readers mesmerized by the uncharted realms they craft with their words. With an insatiable appetite for knowledge and a love for exploration, Howchoo’s writing transcends conventional genres, blurring the lines between fantasy, science fiction, and the surreal. Their narratives are a kaleidoscope of ideas, weaving together intricate plots, unforgettable characters, and thought-provoking themes that challenge the boundaries of imagination.

Home Interests MacOS

How to Enable the “Popping” Sound When Adjusting the Volume on Your Mac

howchoo
howchoo   (467)
December 13, 2023
2 minutes

Share

Interests
Posted in these interests:
 
apple • 18 guides

Mac

mac • 24 guides
macos • 20 guides

Starting with MacOS Sierra and High Sierra, your Mac will no longer play a “pop” sound when you adjust your volume. If you prefer to have this sound when you adjust volume up and down (as I do), this guide will teach you how to reenable it.

1 – Open Sound System Preferences

Navigate to System Preferences > Sound.

Select the Sound Effects tab.

3 – Enable volume control feedback sound

Check the box labeled Play feedback when volume is changed. Close System Preferences.

You’re all done!

NEXT UP

How to Always Show File Extensions in MacOS

Doing this saves you loads of time in the long run!
howchoo   (467)
December 7, 2023

As a website designer, I work with a lot of files—and a lot of file types. Nothing’s worse than wasting time trying to fix a problem caused by an overseen missing file extension. Here are the three easy steps to always show file extensions in macOS. 1 – Open a Finder window At the bottom-left

Continue Reading

howchoo

 467 guides

Introducing Howchoo, an enigmatic author whose unique pen name reflects their boundless curiosity and limitless creativity. Mysterious and multifaceted, Howchoo has emerged as a captivating storyteller, leaving readers mesmerized by the uncharted realms they craft with their words. With an insatiable appetite for knowledge and a love for exploration, Howchoo’s writing transcends conventional genres, blurring the lines between fantasy, science fiction, and the surreal. Their narratives are a kaleidoscope of ideas, weaving together intricate plots, unforgettable characters, and thought-provoking themes that challenge the boundaries of imagination.

Home Interests Guides

How to Change the Windows 11 Start Menu and Button

howchoo   (467)
December 13, 2023
7 minutes

Share

Interests
Posted in these interests:
guides • 10 guides

As with every update, Microsoft has changed Windows 11 to look different than its predecessors, and while the update looks modern and clean there are some interesting changes. Arguably the most jarring of all the changes is the one made to the Windows 11 Start Menu, which looks completely different.

Instead of a clean, easy-to-navigate series of sections, the Windows 11 Start Menu offers you a variety of “Pinned” apps and a list of “Recommended” items that vary from recent documents, to downloaded images, to recently added apps. Personally, I spent two full minutes looking for my Settings app before discovering it neatly wedged between the Calendar app I never use and Photos.

If you share this frustration with the unorganized new look of the Windows 11 Start Menu, fret not. While not completely customizable, there are a handful of things you can do to personalize the Windows 11 Start Menu and make it more functional for your every day use.

1 – Change Your Pinned Apps

Note: Nothing you do to the start menu page will impact your full list of apps. To see all of your apps, simply click the “All Apps” tab at the top right of the start menu.

You can modify what appears on your Windows 11 Start Menu by moving, pinning, and removing specific apps under this section.

Moving a Pinned App

You can simply click and drag any app on your Pinned list into the position of your choice. As you can see, I opted to have my settings app in the top right hand corner for easy access. Instead of dragging, you can also right-click on an app and select ‘Move to Top’ to have an app moved to the top of the pinned list.

Remove a Pinned App

Simply right-click an app and select ‘Unpin from Start’ to remove an app from the Start Menu.

Pinning an App

If you have an unpinned app that you want to pin, start by clicking ‘All Apps’ on the top right of the Start Menu. Then, find the app you’d like to pin and right-click, then select ‘Pin to Start.’ You’ll see the app on your pinned list when you go back to your Start Menu, and from there you can drag the app wherever you please.

For this step, you’ll need to navigate to Settings -> Personalization -> Start, and you can turn off or on several options including ‘show recently added apps.’

If you turn off all the options, the Recommended section will appear empty.

3 – Add Folders

Adding folders to the bottom of the Start Menu is another way to organize and personalize your Start Menu experience.

To do so, go to Settings -> Personalization -> Start -> Folders.

There, you’ll see a list of folders you can access from the Start Menu. Simply check any of the folders you want to ‘On’ and they’ll appear for easy access at the bottom of the Start Menu.

4 – Move the Start Button

You probably also noticed that the Windows 11 taskbar is centered at the bottom of your screen, a departure from the normal bottom-left corner. Check out our quick two-step guide on how to move the Windows 11 start button back to its rightful (or left-ful) place.

NEXT UP

How to Connect Your Child’s Messenger Kids account to a Classroom, Team, or Group

howchoo   (467)
November 27, 2023

Facebook’s Messenger Kids is a free app that allows children to make video calls and send messages on smartphones and tablets, but with more control than just giving your child access to a phone. With Messenger Kids, parents can control their child’s online experience through a variety of functions that allow them to have a

Continue Reading

howchoo

 467 guides

Introducing Howchoo, an enigmatic author whose unique pen name reflects their boundless curiosity and limitless creativity. Mysterious and multifaceted, Howchoo has emerged as a captivating storyteller, leaving readers mesmerized by the uncharted realms they craft with their words. With an insatiable appetite for knowledge and a love for exploration, Howchoo’s writing transcends conventional genres, blurring the lines between fantasy, science fiction, and the surreal. Their narratives are a kaleidoscope of ideas, weaving together intricate plots, unforgettable characters, and thought-provoking themes that challenge the boundaries of imagination.

Home Interests Google Docs

How to Search in Google Docs (Find Words)

Try ⌘ + F.
howchoo   (467)
December 13, 2023
3 minutes

Share

You’ll Need 1

What you’ll need
Interests
Howchoo is reader-supported. As an Amazon Associate, we may earn a small affiliate commission at no cost to you when you buy through our links.
Posted in these interests:
google • 9 guides
googledocs • 4 guides
googleworkspace • 6 guides

If you just need to search and find a single word or multiple words in Google Docs, press ⌘ + F.

If you want to find and replace words in your Google Doc, then we’ll show you how to do that too!

1 – Press cmd + F

To find a word (or words) in your Google Doc:

  • Press ⌘ (cmd) + F on your keyboard.
  • Type the word (or words) you’re looking to find.
  • Scroll through the found words by using the arrows next to the search box.

2 – Bonus: find and replace words in Google Docs

If you want to both find and replace words in your Google Doc:

  • Go to Edit.
  • Choose Find and replace.
  • In “Find,” type the word you want to replace.
  • In “Replace with,” type the word or words you want to auto-replace it with.

You can choose to replace a single instance of the word, or you can choose to replace all instances by selecting Replace all.

NEXT UP

How to Create a CSV From a Google Spreadsheet

howchoo   (467)
November 29, 2023

A CSV (Comma Separated Values) file is the default file format for importing and exporting data between various applications. The default file extension for a Google spreadsheet is .gsheet. Often, after you create your spreadsheet in Google Sheets, you’ll need to download the file as a .csv file in order to make use of it. Fortunately, downloading a Google spreadsheet

Continue Reading

howchoo

 467 guides

Introducing Howchoo, an enigmatic author whose unique pen name reflects their boundless curiosity and limitless creativity. Mysterious and multifaceted, Howchoo has emerged as a captivating storyteller, leaving readers mesmerized by the uncharted realms they craft with their words. With an insatiable appetite for knowledge and a love for exploration, Howchoo’s writing transcends conventional genres, blurring the lines between fantasy, science fiction, and the surreal. Their narratives are a kaleidoscope of ideas, weaving together intricate plots, unforgettable characters, and thought-provoking themes that challenge the boundaries of imagination.

Home Interests Raspberry Pi

How to Run a Minecraft Server on the Raspberry Pi

A whole world trapped inside your Pi.
howchoo   (467)
December 7, 2023
9 minutes

Share

You’ll Need 1

What you’ll need
Interests
Howchoo is reader-supported. As an Amazon Associate, we may earn a small affiliate commission at no cost to you when you buy through our links.
Posted in these interests:
READY PLAYER 1
gaming • 85 guides
Minecraft is an epic sandbox video game developed by Swedish game developer Mojang Studios.
minecraft • 66 guides
pi • 92 guides

There are several ways to go about running a Minecraft server on the Raspberry Pi. In this guide, I’ll cover how to install Nukkit—a cross-platform Minecraft server that’s super easy to set up on the Raspberry Pi. This server should work with PCs, consoles, and tablets running Minecraft 1.14.

I’ll be using a Raspberry Pi 3 B+. You may be able to use a Raspberry Pi 1 or 2 for this project, but the performance will be much better with a Pi 3 or 4.

Looking to play Minecraft directly on your Raspberry Pi instead? Check out my guide on that!

1 – Install and set up Stretch

Raspberry Pi OS is the latest Raspberry Pi operating system. However, I recommend installing Raspbian Stretch for this project. I tested this release with Buster and ran into a few Java issues. By switching to Stretch, everything went buttery smooth.

How to Install Raspberry Pi OS on Your Raspberry Pi
Get the new official Raspberry Pi OS on your Pi.

Visit our guide on how to install Raspbian Stretch if you need it. When Stretch is installed, follow the setup wizard. Connect to the internet using either an ethernet cable or WiFi. Be sure not to update Stretch to Buster.

2 – Adjust Raspbian settings

Once the OS has been installed, you should prepare your Raspberry Pi with a few settings in the raspi-config menu. If you don’t have a screen to connect to the Pi, visit our guide on how to enable SSH without a monitor.

How to Enable SSH on Raspberry Pi OS Without a Screen
The SSH protocol is disabled by default.

  1. Open a Terminal on the Raspberry Pi.
  2. Enter sudo raspi-config.
  3. Enable SSH under Interfacing Options > SSH.
  4. Open Advanced Options and go to Memory Split. Set this to 16MB to free memory resources for our Minecraft server.
  5. Under Boot Options look for Desktop/CLI and set it to Console.
  6. Go to Advanced and choose Expand Filesystem.
  7. Select Finish.

3 – Install Java

Install Java on the Raspberry Pi by running the following command.

sudo apt install oracle-java8-jdk

4 – Create a Nukkit folder

Create a folder just for Nukkit using the following command.

mkdir nukkit

Go into the Nukkit folder.

cd nukkit

5 – Install Nukkit

Install Nukkit using the following command.

wget -O nukkit.jar https://ci.nukkitx.com/job/NukkitX/job/Nukkit/job/master/lastSuccessfulBuild/artifact/target/nukkit-1.0-SNAPSHOT.jar

6 – Set Nukkit language

When Nukkit is installed, run it with this command.

sudo java -jar nukkit.jar

You will be prompted to choose a language. Go ahead and set the language for your server.

7 – Managing your Minecraft server

Once the server is installed and running, you can apply custom settings. Managing your Minecraft server is as easy as editing a file. Make sure you’re in the Nukkit folder and run the following.

sudo nano server.properties

Edit this file to adjust things like player count, difficulty, game mode, white lists, and more. Save your changes with Ctrl + X and close out of the file.

8 – Connect to the server

Restart the Raspberry Pi and run your server with the following command.

sudo java -jar nukkit.jar

This server runs version 1.14. Connect to the server with a client that’s running the same version of Minecraft. Nukkit should work with PC, console, and tablet users (but not Minecraft Pi Edition).

Note: The Java version of Minecraft on PC will not connect to the Nukkit server. You must use the Windows version. The screenshot on this step was taken using the Windows edition.

The server IP address and port number will be visible in the Nukkit terminal window. The server IP will be the same as the Raspberry Pi by default.

Congratulations! You should have a private Minecraft server running on the Raspberry Pi.

NEXT UP

Top 10 Enchantments in Minecraft

howchoo   (467)
March 25, 2024

The longer you play Minecraft, the more you realize that early-game tools just won’t cut it. Exploring the enchantment feature of Minecraft can be exciting, but also intimidating. Rather than worry about researching enchantments, below are the best enchantments in Minecraft! To learn how to enchant items, check out this guide! In this guide, you’ll see

Continue Reading

howchoo

 467 guides

Introducing Howchoo, an enigmatic author whose unique pen name reflects their boundless curiosity and limitless creativity. Mysterious and multifaceted, Howchoo has emerged as a captivating storyteller, leaving readers mesmerized by the uncharted realms they craft with their words. With an insatiable appetite for knowledge and a love for exploration, Howchoo’s writing transcends conventional genres, blurring the lines between fantasy, science fiction, and the surreal. Their narratives are a kaleidoscope of ideas, weaving together intricate plots, unforgettable characters, and thought-provoking themes that challenge the boundaries of imagination.

Home Interests InDesign

How to Resize an Image in InDesign

There are two options for resizing in InDesign: the easy way and the precise way.
howchoo (467)
December 7, 2023
4 minutes

Share

You’ll Need 1
What you’ll need
Interests
Series
Howchoo is reader-supported. As an Amazon Associate, we may earn a small affiliate commission at no cost to you when you buy through our links.
Posted in these interests:
 
adobe • 7 guides
design • 4 guides
indesign • 4 guides
You might think that resizing an image would be as simple as dragging the corner of the frame. Well, it is, and it isn’t! Remember that when resizing an image in InDesign, you’re essentially resizing the image’s frame. For more information, on inserting an image in InDesign and frames, check our guide.
How to Insert an Image in InDesign Knowing how to insert images is an essential skill for indesign work. We can show you how!
In this guide, we’ll show you the two ways to resize an image: an easy solution and a more precise method.

1 – Easy method: click and drag

You can easily click and drag an image to resize it in InDesign, if you don’t need to make it a precise size.
  1. Select the image by clicking it.
  2. Click and drag any corner of the image frame to resize.
You may need to adjust the image in the frame again by using the Frame Fitting tool (see below). You can select to Auto-Fit to have it automatically resize as you adjust the size of the frame.

2 – Precise method: manually resize image

You might need to resize an image in InDesign using precise measurements for a particular project. Here’s how.
  1. Select the image you want to resize
  2. In the Transform toolbar of the Properties screen (see below), select the point of reference using the tic-tac-toe-like grid on the left. This affects how the image will resize (in which direction).
  3. From here, you can change the image’s width, height, and X/Y coordinates.
If you need to change the units of measurement, we made a great guide for that!
How to Change Pixels to Inches in InDesign From Picas to Pixels to Inches and more. This guide will show you how.
NEXT UP

How to Remove a Background in Illustrator

And transparency to your work in Illustrator.
howchoo (467)
November 21, 2023
Adobe Illustrator has a few tools available that allow users to remove the background from their work. This process makes it possible to create artwork with transparent areas anywhere they want. In guide this, I’ll go over the easiest ways to do this, as there are more complex processes don’t always apply to general use
Continue Reading

howchoo

 467 guides
Introducing Howchoo, an enigmatic author whose unique pen name reflects their boundless curiosity and limitless creativity. Mysterious and multifaceted, Howchoo has emerged as a captivating storyteller, leaving readers mesmerized by the uncharted realms they craft with their words. With an insatiable appetite for knowledge and a love for exploration, Howchoo’s writing transcends conventional genres, blurring the lines between fantasy, science fiction, and the surreal. Their narratives are a kaleidoscope of ideas, weaving together intricate plots, unforgettable characters, and thought-provoking themes that challenge the boundaries of imagination.
Home Interests MacOS

How to Always Show File Extensions in MacOS

Doing this saves you loads of time in the long run!
howchoo   (467)
December 7, 2023
2 minutes

Share

Interests
Posted in these interests:
finder • 2 guides

Mac

mac • 24 guides
macos • 20 guides

As a website designer, I work with a lot of files—and a lot of file types. Nothing’s worse than wasting time trying to fix a problem caused by an overseen missing file extension.

Here are the three easy steps to always show file extensions in macOS.

1 – Open a Finder window

At the bottom-left of your dock, click on the Finder icon.

2 – Open Preferences

Go to Finder > Preferences.

3 – Select “Show all filename extensions”

Make sure that “Show all filename extensions” is checked. Now, you should always see file extensions in macOS.

NEXT UP

How to Enable the “Popping” Sound When Adjusting the Volume on Your Mac

howchoo
howchoo   (467)
December 13, 2023

Starting with MacOS Sierra and High Sierra, your Mac will no longer play a “pop” sound when you adjust your volume. If you prefer to have this sound when you adjust volume up and down (as I do), this guide will teach you how to reenable it. 1 – Open Sound System Preferences Navigate to System

Continue Reading

howchoo

 467 guides

Introducing Howchoo, an enigmatic author whose unique pen name reflects their boundless curiosity and limitless creativity. Mysterious and multifaceted, Howchoo has emerged as a captivating storyteller, leaving readers mesmerized by the uncharted realms they craft with their words. With an insatiable appetite for knowledge and a love for exploration, Howchoo’s writing transcends conventional genres, blurring the lines between fantasy, science fiction, and the surreal. Their narratives are a kaleidoscope of ideas, weaving together intricate plots, unforgettable characters, and thought-provoking themes that challenge the boundaries of imagination.

Home Interests Home

How to Properly Dispose of a Worn or Damaged American Flag

howchoo   (467)
December 7, 2023
8 minutes

Share

You’ll Need 1

What you’ll need
Interests
Howchoo is reader-supported. As an Amazon Associate, we may earn a small affiliate commission at no cost to you when you buy through our links.
Posted in these interests:
america • 1 guides
flags • 1 guides
home • 7 guides

Since our country was conceived, the U.S. Flag has been a symbol of our country’s freedom. Our country’s Flag Code provides specific guidelines for how to “retire” a damaged or worn-out American flag.

When should my American flag be retired? The US Flag Code (4 USC Sec 8 Para (k) Amended 7 July 1976) dictates that a flag should be destroyed “when it is in such condition that it is no longer a fitting emblem of display”. This includes the flag becoming tattered or overly worn or sun-bleached.

How do I dispose of my American flag? The same section of our Flag Code states that the flag “should be destroyed in a dignified way, preferably by burning”. When I was first researching how to properly dispose of my U.S. flag, I was surprised to find that the proper method is to burn the flag. Burning the flag just seemed wrong — but apparently this is how it is done. This short guide will show you how to perform a flag retirement ceremony properly.

What if I can’t burn my American Flag? Burning the flag is the only preferred method of flag disposal per the U.S. flag code. However, if you live in an area where you cannot perform the burning ceremony, there are still many other accepted options for respectfully retiring your flag: – Contact your local VFW Post and they can perform the flag ceremony for you. – Bury and/or shred the flag: use a pair of scissors to carefully and methodically separate the thirteen stripes and leave the blue star-spangled section intact. Then, place in a wooden box and bury the flag, giving it a short “funeral” ceremony (e.g. recite the Pledge of Allegiance or other respectful words).

1 – Determine whether your American flag should be destroyed

My American flag had a hole in it (presumably from a falling branch) and appeared very worn. Nylon flags, when flown continuously outdoors, generally last less than a year. This is why most government buildings remove their flags at sundown and raise them at sunup.

2 – Remove and fold your flag

Remove the flag from its flagpole and fold it into a triangle. Do not let the flag touch the ground.

3 – Build a fire

Build a campfire in a safe area and wait for the coals to get hot (think “cooking” hot).

4 – Carefully place and burn the flag

Carefully place the flag in the center of the fire. I say carefully because you want to be able to collect all of the flag ashes later. While the flag is burning, it is customary to recite the Pledge of Allegiance.

Wait until the flag material has been completely converted into ash. Then, you can either wait for the fire to go out on its own or use a fire extinguisher to put the fire out.

5 – Bury the flag

Bury the flag in an area where people won’t often walk over it. It is also customary to leave a marker of some kind to mark its location.

🛈 Do not bury hot coals — this can be dangerous to the feet around you, especially if performing the ceremony in a public area.

6 – Raise a new flag

And of course, after disposing of your old flag, be sure to replace it with a new one!

NEXT UP

How to See If I’m Eligible for Amazon Prime Free Same-Day Delivery

howchoo
howchoo   (467)
November 24, 2023

So Amazon just announced free same-day delivery in 14 different metro areas. How do you know if you apply? 1 – Check your zip code Go to this page. Wait for the page to finish loading completely, scroll down, and enter your zip code. This will tell you if you live in an area that is

Continue Reading

howchoo

 467 guides

Introducing Howchoo, an enigmatic author whose unique pen name reflects their boundless curiosity and limitless creativity. Mysterious and multifaceted, Howchoo has emerged as a captivating storyteller, leaving readers mesmerized by the uncharted realms they craft with their words. With an insatiable appetite for knowledge and a love for exploration, Howchoo’s writing transcends conventional genres, blurring the lines between fantasy, science fiction, and the surreal. Their narratives are a kaleidoscope of ideas, weaving together intricate plots, unforgettable characters, and thought-provoking themes that challenge the boundaries of imagination.