Sydney
- Written by Sydney 0
Sydney hasn’t written any guides yet.

- Favorited 0
- Subscribed 0
Sydney hasn’t subscribed to any interests yet.
Sydney hasn’t written any guides yet.

Sydney hasn’t subscribed to any interests yet.
Share

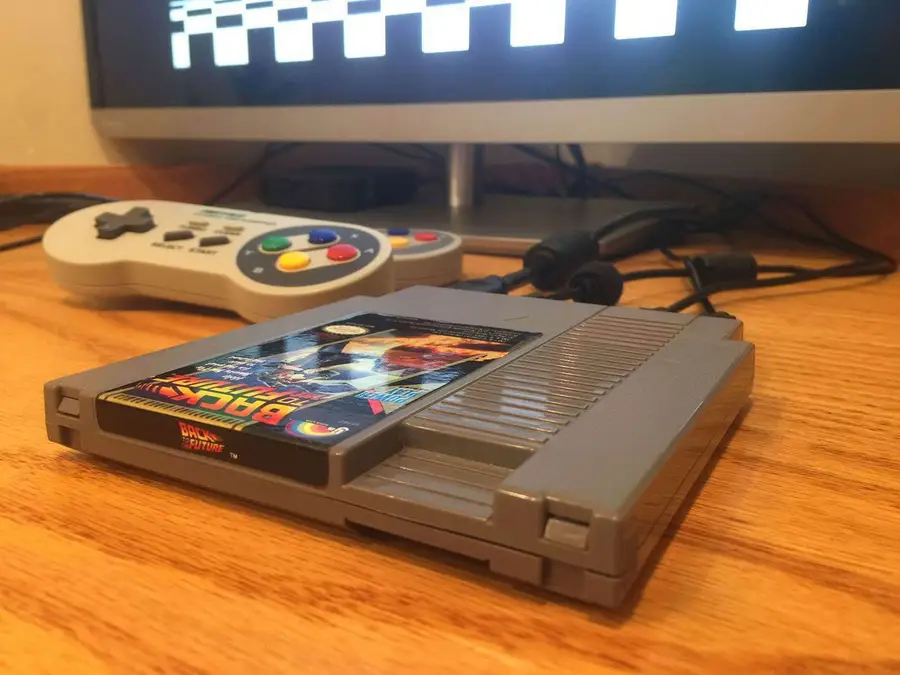
For around 50 bucks, you can build your very own vintage gaming rig that will hook up to any HDMI-enabled TV or monitor. This guide will show you everything you need to do to get playing.
For this build, we’re going to use RetroPie, an awesome software package that handles all your emulation needs.
RetroPie is a software library used to emulate retro video games on the Raspberry Pi computer. It’s one of the most popular Raspberry Pi projects out there and the most popular emulation system for the Raspberry Pi. RetroPie features a user-friendly interface and an even friendlier setup process.
RetroPie runs Emulation Station and supports all major retro video game emulators, allowing you to play games from the NES, SNES, Genesis, Atari, and more on your Pi, thus becoming your own Raspberry Pi emulator. I always wondered why the developers called it RetroPie instead of RetroPi… but I digress.
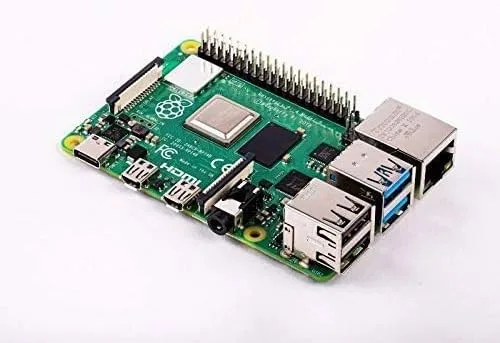
Any Raspberry Pi model can run RetroPie, but I recommend using the Raspberry Pi 4 since its more powerful GPU, CPU, and RAM capabilities will maximize the range of games you can play. I recommend the 2GB version of the Raspberry Pi 4; RAM doesn’t matter too much beyond a certain point for emulating retro games. In other words, at a certain point, the limitation is on CPU and GPU, not RAM.

The Raspberry Pi ships by itself, without a case. I recommend you buy a case to avoid damaging your Pi. Using a screwdriver, place your Raspberry Pi into its case. Some cases do not require the use of a screwdriver — however, I prefer cases that use screws to secure the Pi for extra stability.
If you’re using the Raspberry Pi 3 or 4, I recommend choosing a case with a built-in heatsink. I highly recommend this FLIRC case since it provides passive cooling for the Raspberry Pi 4. Basically, the entire case is a giant heatsink, keeping your Pi cool. There’s also a version for the Raspberry Pi 3.
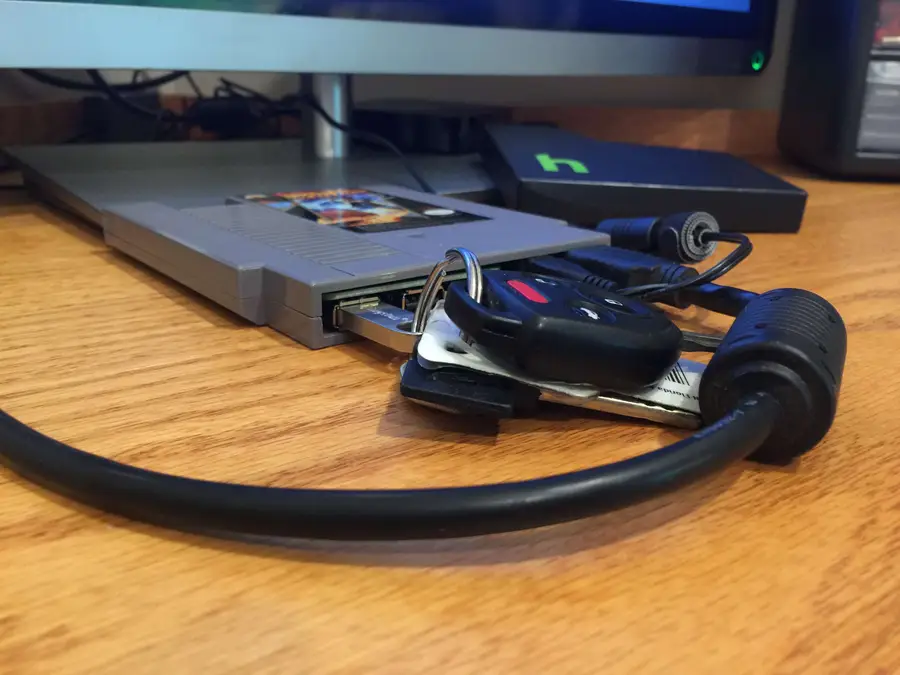
If you don’t use a passive cooling case, you’ll want to pick up a case that comes with heatsinks. If you’re using a Raspberry Pi Zero, you can also use an NES cartridge as a case for your RetroPie gaming rig.
| 🛈 Your Pi may look different than mine! This photo shows a Raspberry Pi 3, though I’ve now updated this guide for the Pi 4. |

RetroPie is a software package for the Raspberry Pi that is based on the Raspberry Pi OS, a Linux distribution. It combines a full suite of tools and utilities that will allow you to quickly and easily run retro game ROMs for various vintage gaming emulators.
We’re going to perform our RetroPie setup using an SD card image — essentially a snapshot of an entire working installation of RetroPie rather than doing a manual RetroPie install.
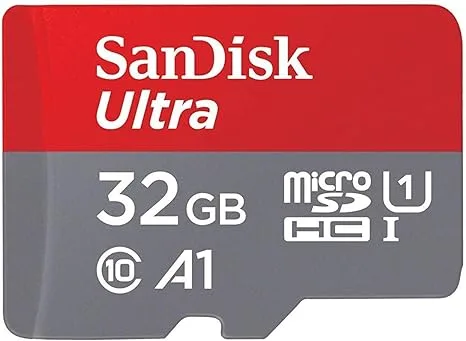
Because the Raspberry Pi doesn’t have an internal hard drive, it uses a microSD card for storage of the entire operating system and all files contained therein.
To set up RetroPie, Download and unzip the latest RetroPie SD-Card Image. There are two versions of the RetroPie SD-Card Image:
Select the appropriate image for your Pi.
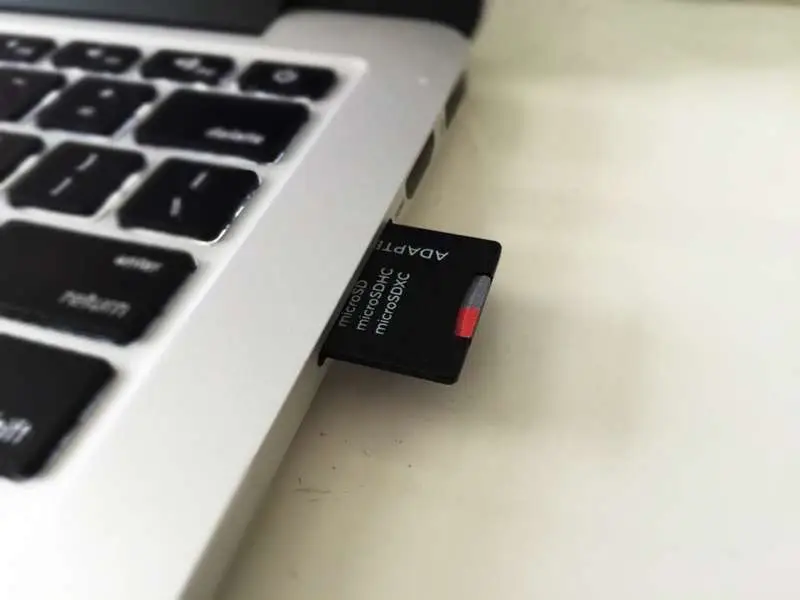
| 🛈 The Raspberry Pi A and B use a full-sized SD card; the Raspberry Pi B+, 2 and 3, and Zero use a MicroUSB card. I recommend using a 32GB card at the minimum so that you have lots of space for game ROMs; however, a smaller SD card will also work. Note: the Raspberry Pi requires a minimum 4GB card to operate. |
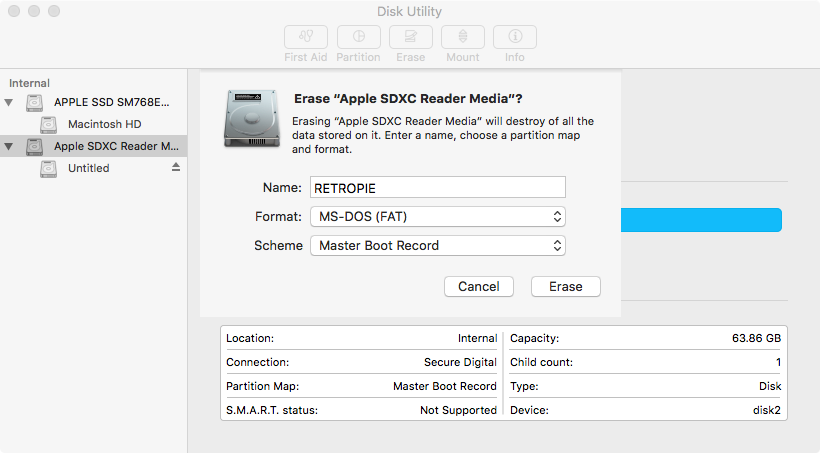
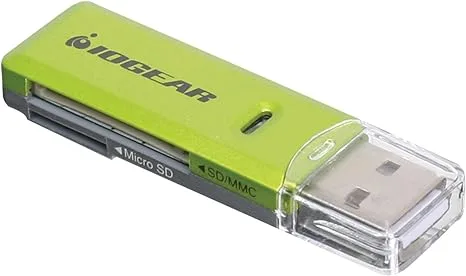
First, you’ll need to format the SD card as FAT. Insert the SD card into your SD card reader. Your SD card will now show up as a mounted drive on your computer.
If your SD card is 32GB or smaller, we’ll format it as MS-DOS (FAT). If your SD card is 64GB or larger, we’ll format it as ExFAT.
Open up Explorer, locate the SD card, right-click it, and select Format from the context menu. Select the desired format and click the Start button.
Open Disk Utility by navigating to Applications > Utilities > Disk Utility. Select your SD card in the left pane. Click the Erase button, select the desired format, give it a name, and click the Erase button. For OS X Yosemite and older, you’ll need to navigate to the Erase tab first.
| 🛈 Reformatting your SD card destroys all the data on it. |
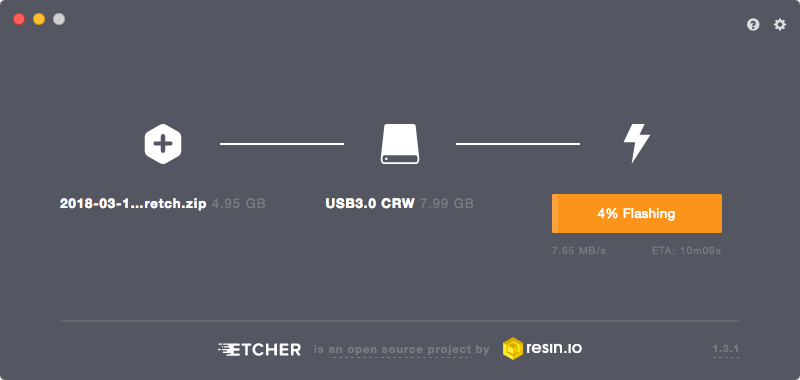
To install RetroPie, we’ll use a third-party utility called Etcher. Etcher works on both Windows and Mac.
Download and install Etcher, open it, and select your SD card drive and downloaded image to “flash” the image to your SD card.
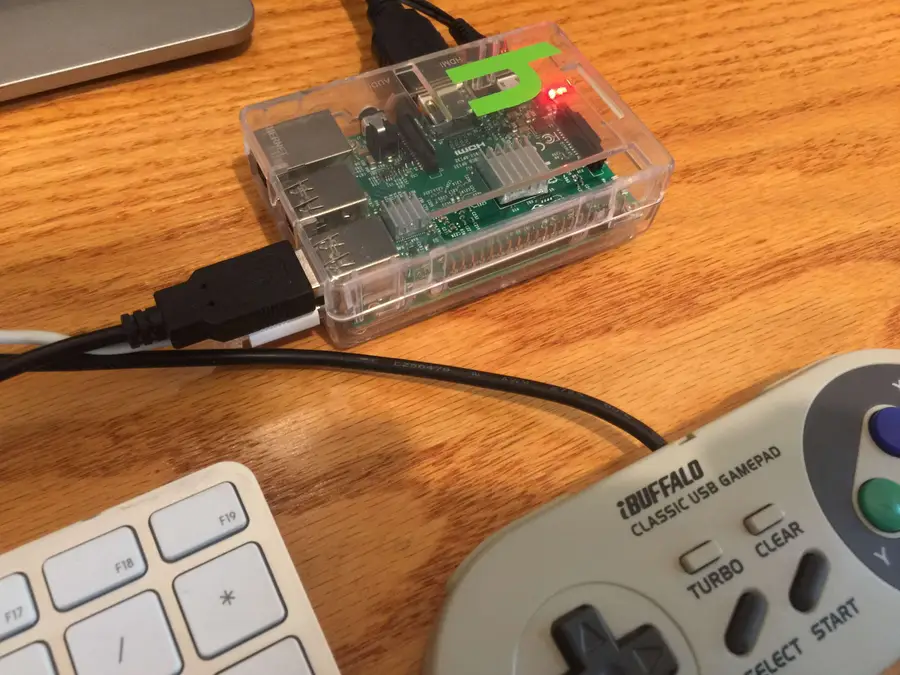
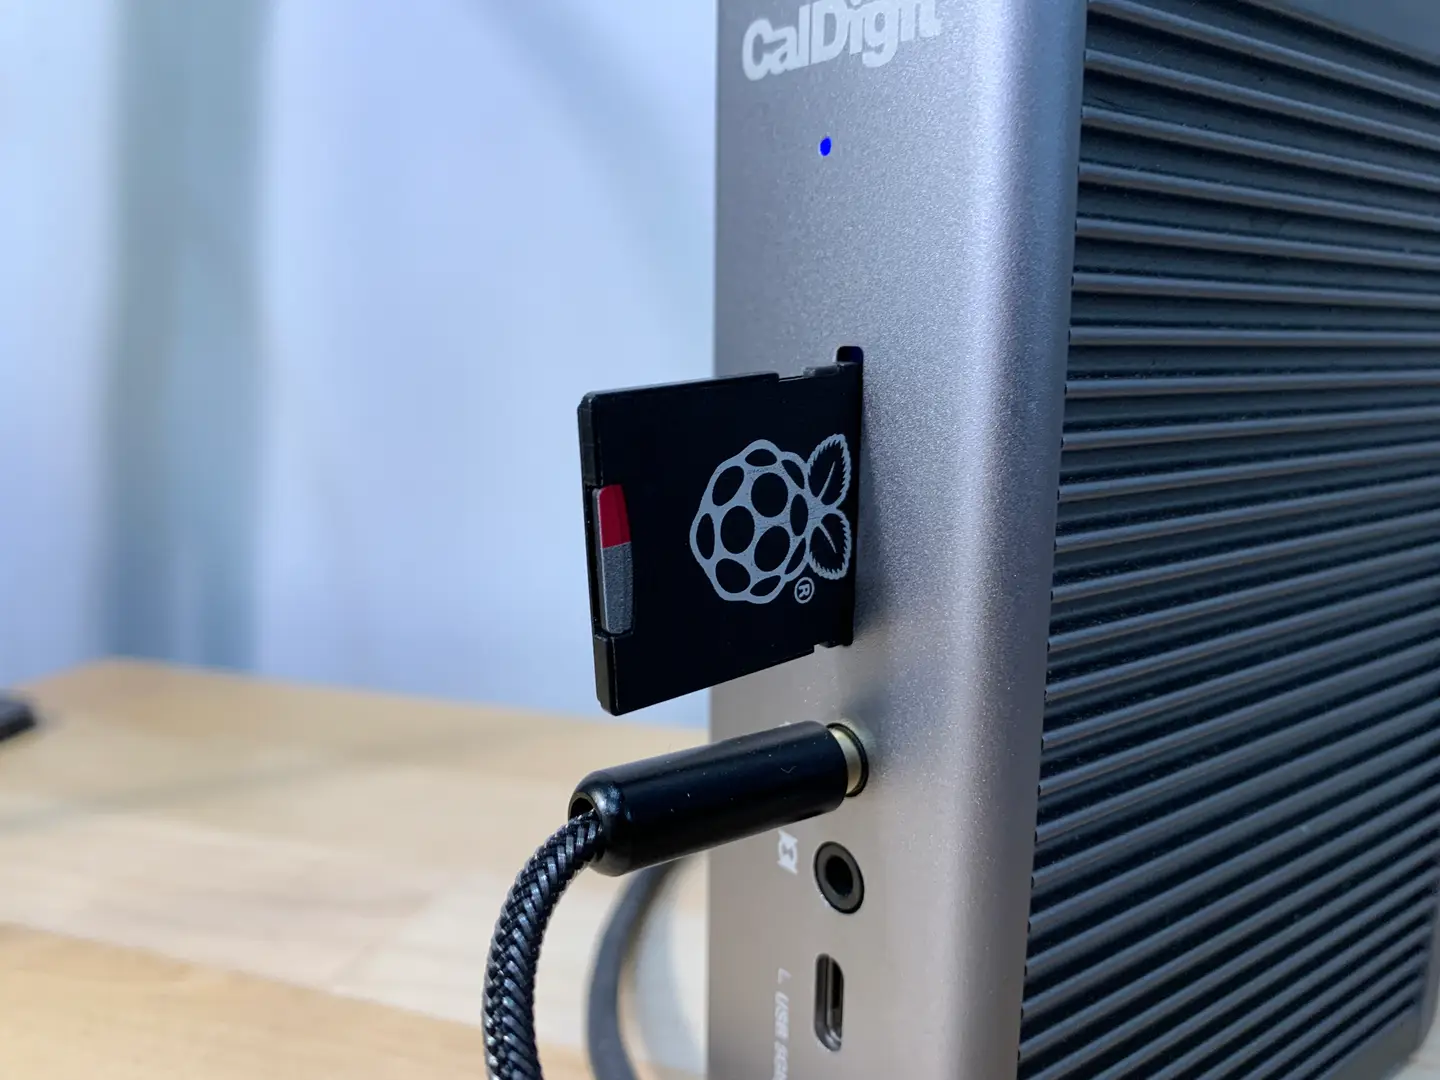
Safely eject the SD card and slide it into your Raspberry Pi.
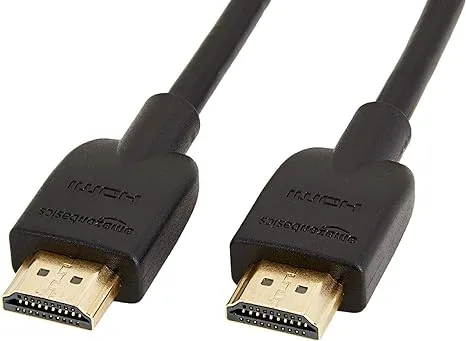
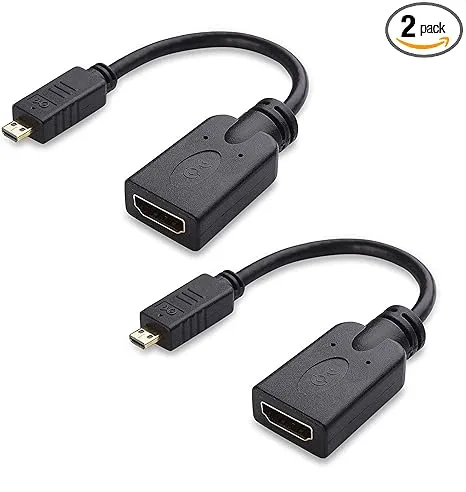
Next, connect your USB game controller and connect the HDMI cable to a monitor or TV. Finally, connect the MicroUSB power supply. Always connect the power supply after connecting your other peripherals so that your Pi will detect all of the peripherals properly on boot.
Your Pi will now boot!
| 🛈 If you have a USB keyboard, you can connect it now and use it for further configuration (more on this later). |
I recommend connecting your Pi to the Internet to more easily add game ROMs and access additional features such as game rating and description scraping. Also, connecting the Pi to your network will allow you to access it remotely via SSH to perform remaining configuration without needing a keyboard.
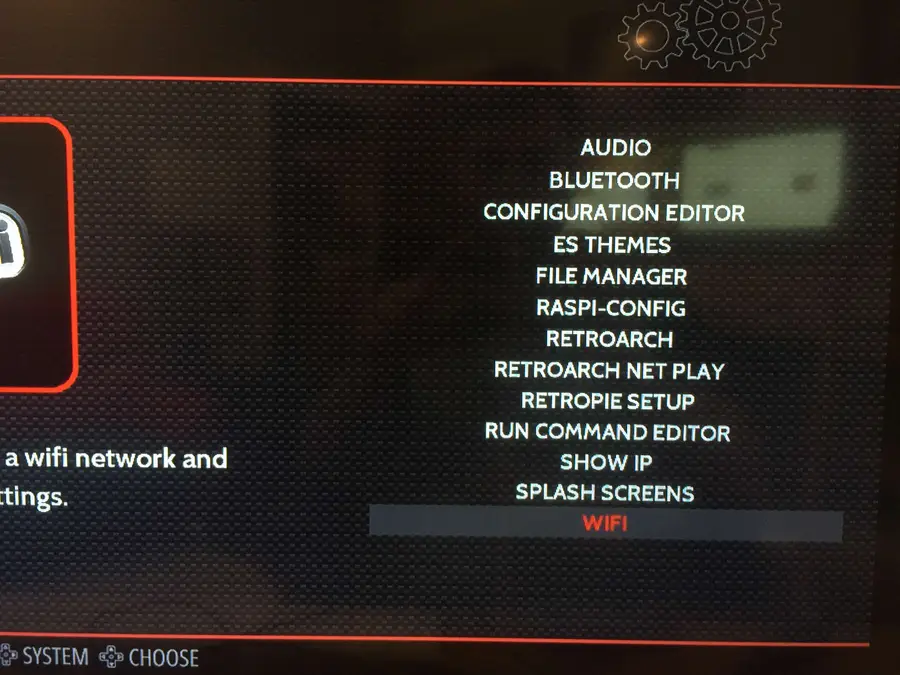
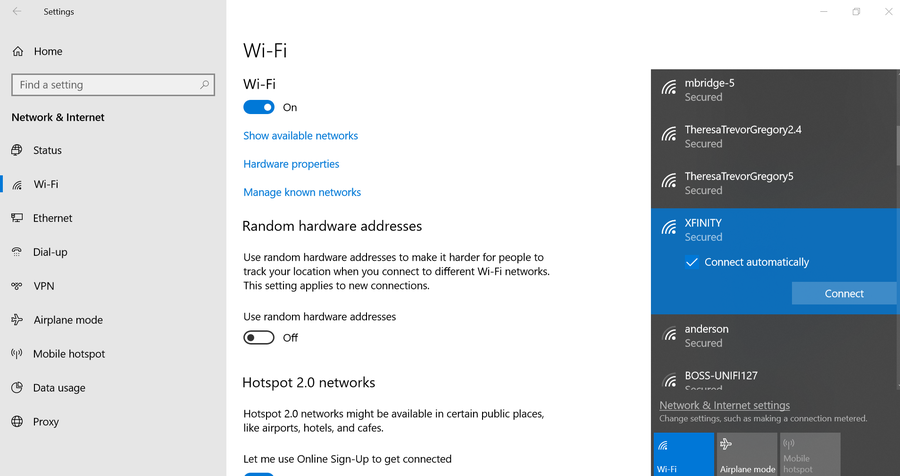
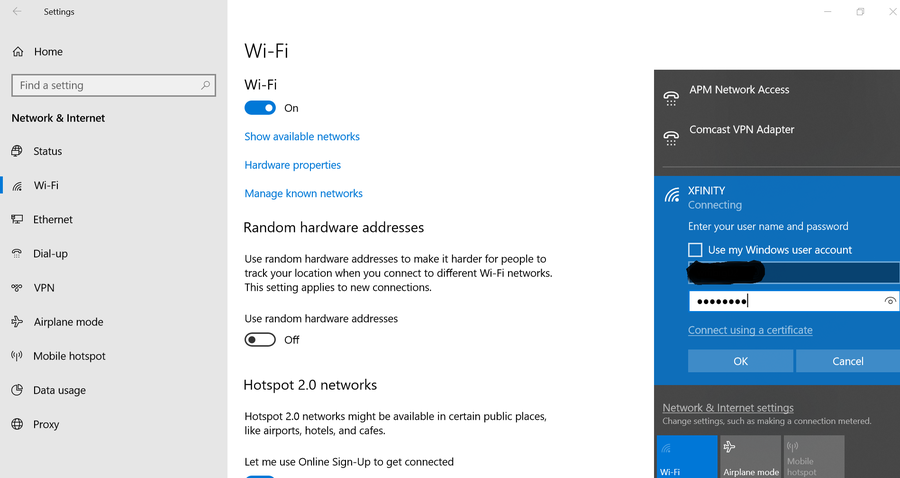
If you have a Raspberry Pi Zero W, 3, or 4, you have built-in Wi-Fi!
To connect, simply select the RetroPie menu icon and then select WIFI.
Then, connect to your Pi remotely via SSH by opening Terminal (Mac) or Command Prompt (Windows) and then running:

How to Connect to a Raspberry Pi Remotely via SSH
The preferred (and most common) method of connecting to your Pi to run commands.
ssh pi@retropie
# default password: raspberry
Note: If you’re using an older Pi or one without built-in Wi-Fi, you can still transfer ROMs via USB. But if you still want to add Internet functionality to one of these older Pis, simply connect an Ethernet cable or USB Wi-Fi dongle.
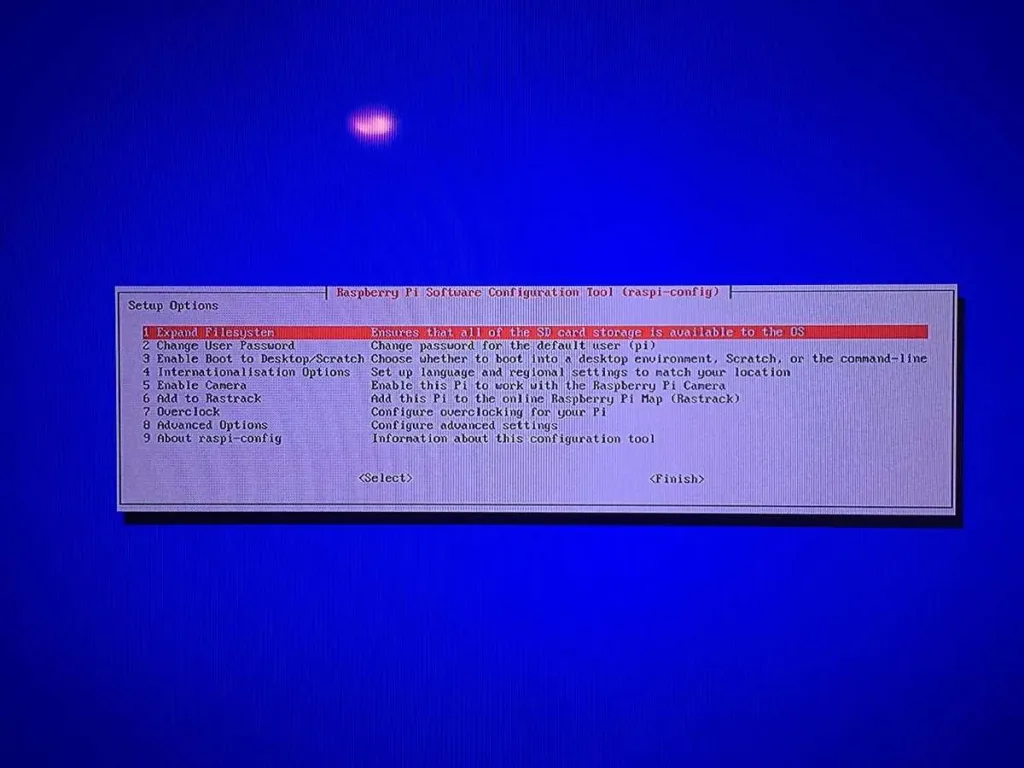
If your SD card is larger than 4GB, you must expand it before your Pi can use the remaining space. To do this, you’ll need to launch the Raspberry Pi configuration tool (raspi-config).
You can use the Retropie interface to do this. On the main screen, select the RetroPie menu icon and then select RASPI-CONFIG.
Then, choose either Expand Filesystem or expand_rootfs from the menu (this option will vary based on your Raspberry Pi model). You now need to restart your Pi. You may have noticed there’s no reset button (unless you’ve added one).
We now need to connect to your Raspberry Pi from your computer so that we can copy over game ROMs and easily edit configuration files.
Again, this step is optional as you can also transfer ROMs via USB and accessing your configuration and other additional features isn’t strictly required.
There are numerous ways to do this; my favorite method is via SSH/SFTP using an FTP client. As far as free FTP clients go, I recommend FileZilla since it’s very well documented and supported and is available for both Mac and Windows.
Download FileZilla from their downloads page and install it. I recommend you uncheck all the “additional components” that FileZilla will ask you to install, such as the Yahoo search page and toolbar crap.
**Note: As of the latest version of Raspberry Pi OS, SSH is disabled by default for security purposes; you will need to enable SSH on your Pi before proceeding. Thankfully, this process is super easy and painless.
Use the following credentials to connect to your Pi. The default Pi username and password are pi and raspberry, respectively.
Host: (see below)
Username: pi
Password: raspberry
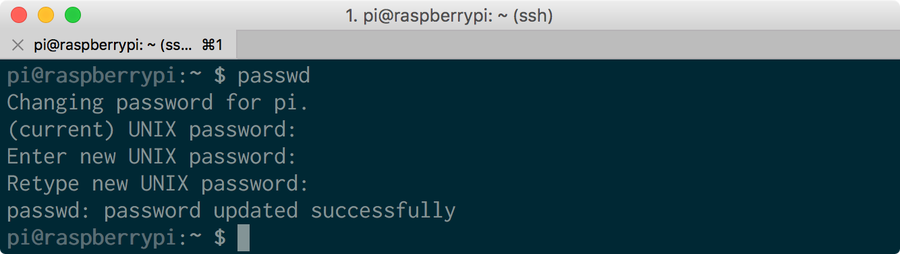
Port: 22For security purposes, I highly recommend you change the default Raspberry Pi password to something else. It only takes a minute.
To find your Pi’s IP, open Terminal (Mac) or Command Prompt (Windows) and enter the following command to ping your Pi and return its network IP:
ping retropieor, for older versions of RetroPie, use:
ping raspberrypiIt may take a few tries to get a response. If you see a “Request timeout” response when you run the ping command, then the command has failed. If you have a USB keyboard handy, you can boot up your Pi, press F4 to get to the shell, and run the following command:
ifconfigThis alternate method will list your Pi’s IP immediately after inet addr: under eth0.
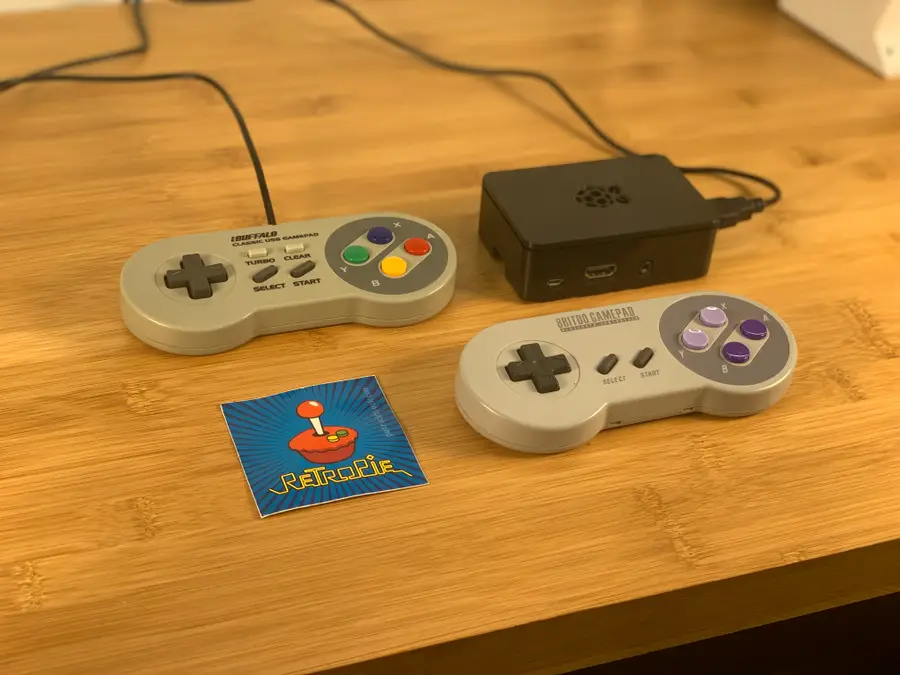
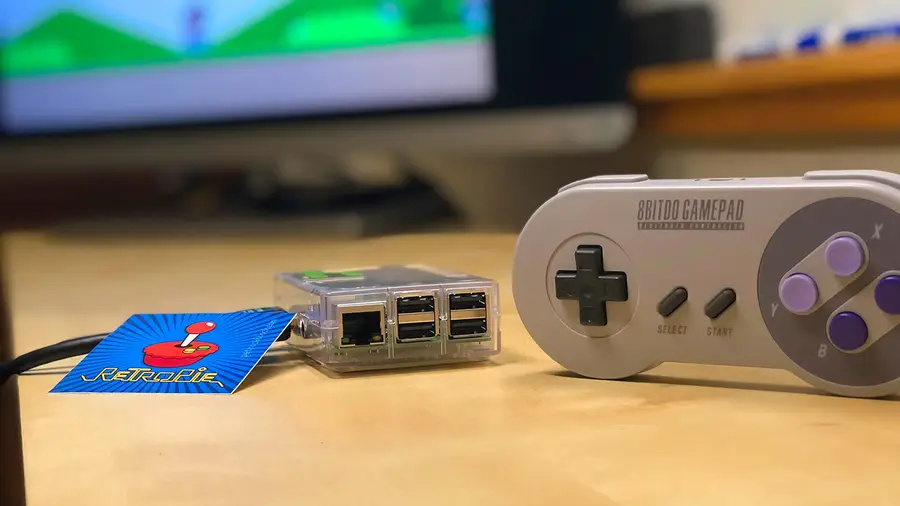
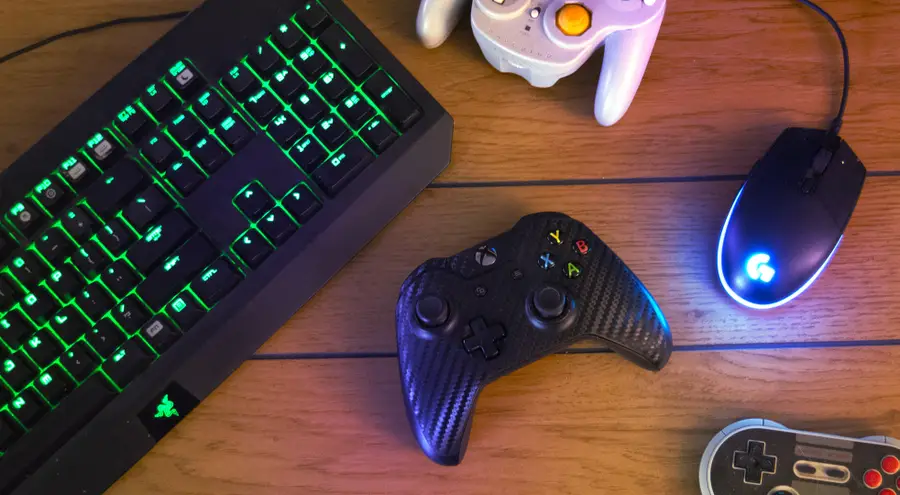
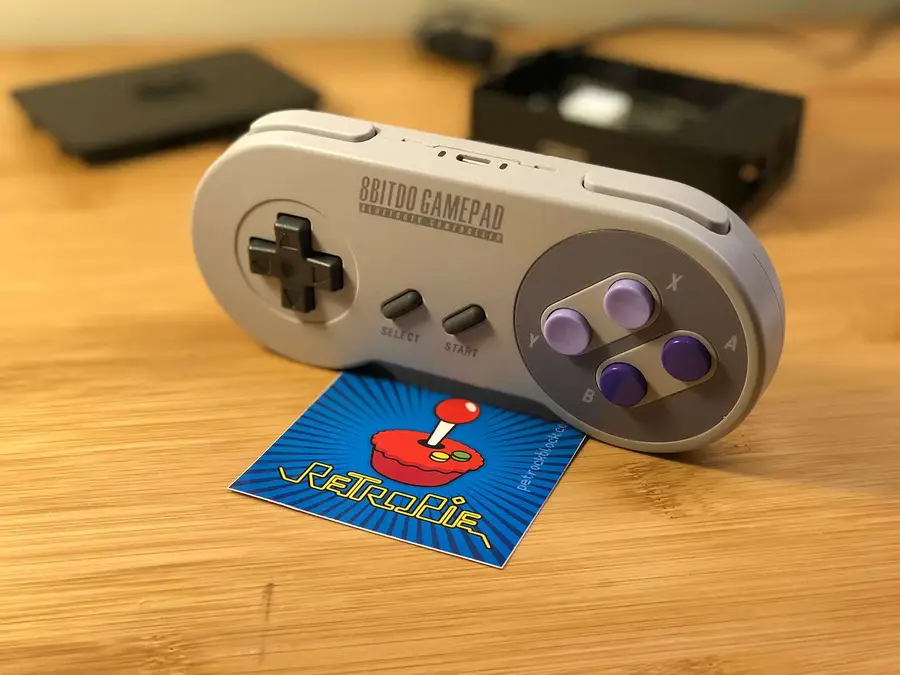
You’ll now want to configure your USB gamepad to work with your Pi. I recommend the Buffalo Classic USB Gamepad since it’s inexpensive, highly compatible with the Pi, and comes in sweet Japanese packaging. You can find an Amazon link to that USB controller at the top of this guide.
You can use any type of USB controller — including a USB NES controller, though your games are more limited since it has fewer buttons than most newer games use.
Be sure to check out our guide to the best RetroPie controllers!

The Best RetroPie Controllers – Top 10 (2023)
Don’t skimp on your RetroPie controller—get the best!
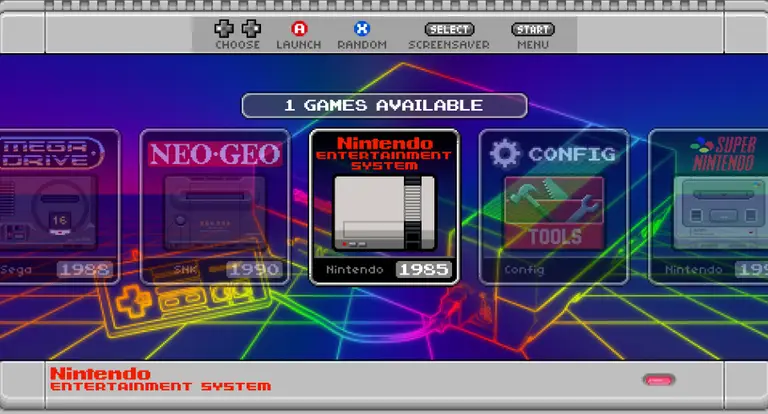
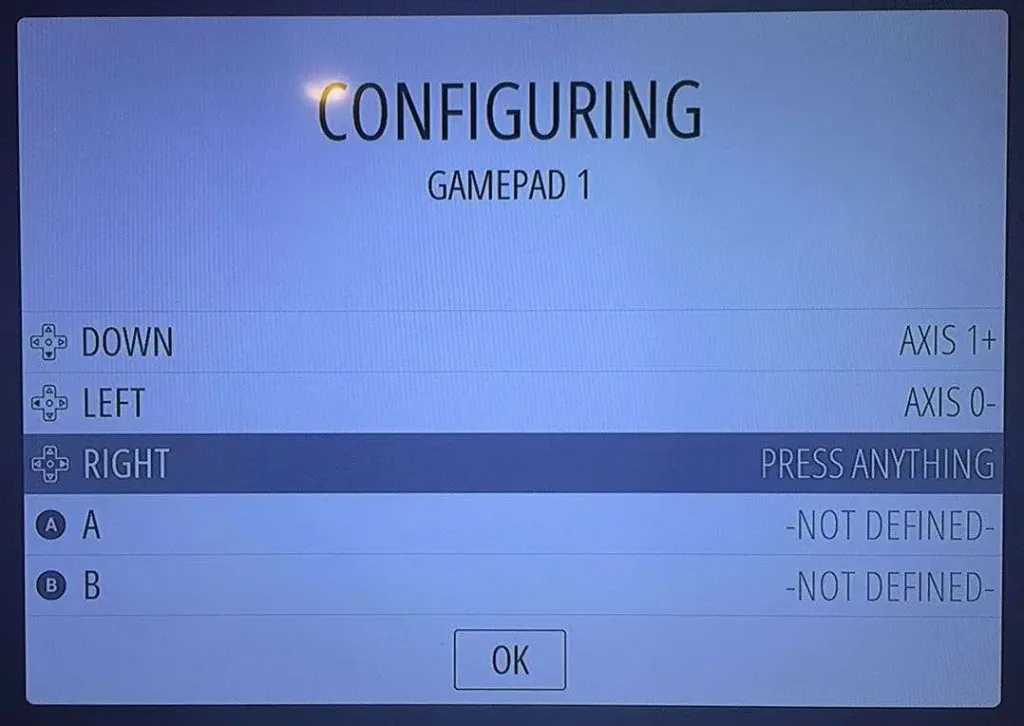
To configure your controller to work with the menu system and games, boot up your Pi. Your Pi will automatically launch the RetroPie UI where you will be prompted to configure the controller. If you mess up, don’t worry — you can access this configuration menu again later by pressing Start in the RetroPie UI.
| 🛈 Some games require additional in-game controller configuration. This can be done by going into a game’s menu system and mapping the controller there (though this isn’t necessary for most games). |

A ROM is an entire port of a particular video game. RetroPie contains a copy of EmulationStation, which both provides the user interface for your new retro gaming rig and interprets these ROM files appropriately. RetroPie comes with a few games preinstalled — such as Quake, Duke Nukem 3D, and Cave Story. These games are best played using a keyboard, however, since the gamepad doesn’t have enough keys to map the controls for some PC-ported games. You can emulate just about any console using the built-in RetroPie emulators.
Most retro games are owned by a company (yes, even the very old ones!) and are protected by copyright laws. Thus, unfortunately, downloading ROMs for those games constitutes piracy.
While you can find tons of RetroPie ROMs on any Torrent site, keep in mind that you should not download any copyrighted titles.
Where to Find and Download RetroPie ROMs (Free and Legally)
Let’s find something to play!
Luckily, there are some free ROMs out there that we can use for now! MAMEdev.org has a nice list of these free, legal ROMs. We’ll use these as examples and you can find more ROMs on your own.
Our list of the best of the video games from the year you were born contains links to some old arcade ROMs.
Let’s use Gridlee and Super Tank as examples. Download each ROM.
ROMs can be installed via SSH/SFTP (over your network) or by plugging a USB flash drive into your USB port. Additional methods for copying ROMs to RetroPie can be found on the RetroPie Wiki.
I wrote a separate guide on installing RetroPie ROMs using a USB drive. Or, if your Pi is connected to the internet, you can use the instructions below.
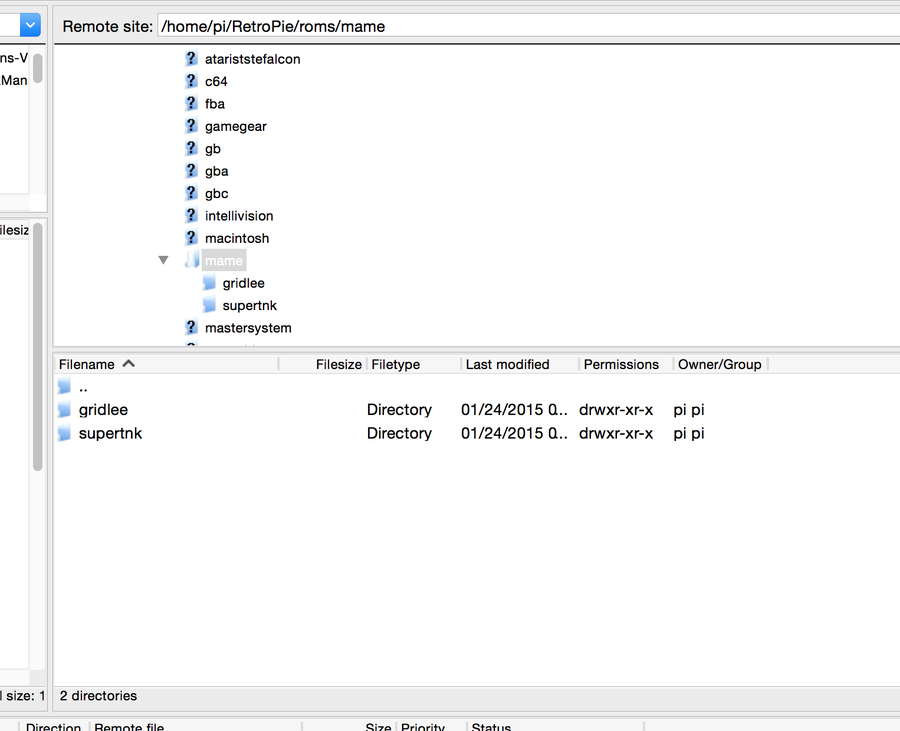
Reconnect FileZilla and browse to the following directory:
/home/pi/RetroPie/romsUnzip each game ROM and upload each game folder into its respective game system folder. For example, if you had a Super Mario Bros 3 ROM, you would upload the game’s folder into the “nes” directory.
Gridlee and Super Tank go in the “mame” directory since MAME handles the arcade emulation for most vintage arcade-style games that don’t belong to a specific home video game system such as the NES, SNES or Atari.
After you’ve copied these directories over, restart your Pi.

Your Pi will boot into RetroPie automatically. Bask in the glory of simple graphics, bolstered by highly addictive gameplay. Whether you’re playing on your couch or building a RetroPie arcade cabinet or bartop arcade, I hope this guide was helpful to you!
Want a great classic or contemporary controller to play those new RetroPie games? Check out our list of the best PC gaming controllers that will work with your new setup.
The 10 Best PC Gaming Controllers (2022)
Customize your PC gaming experience.
| 🛈 Cave Story is actually a pretty sweet game. |
To exit a game, press the START and SELECT buttons at the same time. This will bring you back to the RetroPie UI.
Check out my other guide on saving games in RetroPie to learn how to save and load saved games!
How to Save and Load Saved Games in RetroPie
No more marathons. Unless you want to.
Now that everything is configured and working splendidly, I recommend you back up your Raspberry Pi’s SD card image. This way, if you’re feeling adventurous and want to attempt some further Retropie customizations, you have a safe restore point.
I’ve written a short guide on how to back up your Raspberry Pi.
Post in the comments section below and I’ll be sure to help you out. Also, stay tuned for more guides on customizing your RetroPie installation.
Did you know you can play games on RetroPie with your friends? Check out our guide to learn how to set up multiplayer on RetroPie.


With summer right around the corner, it’s time to fire up the grill! But who will watch the grill while you’re beating the heat? This year, kick things up a notch with your own Raspberry Pi-powered HeaterMeter. Don’t just throw a BBQ, be a part of it. HeaterMeter lets you keep a close eye on
Share

Share
Comcast offers a router to all of its internet customers for a monthly fee. If your Comcast router isn’t working, there may be something you can do to fix it.
If you’re just looking to tweak a few settings—like the Comcast WiFi password or Comcast network name—you’ll need to log in to your router.
Visit our guide on how to log in to a Comcast router for more details.
If you suspect your Comcast router has malware or a virus, disconnect any connected devices from the router and contact Comcast for technical support. The support team will likely advise you to factory reset the router.
Check out our guide on how to factory reset a Comcast router.
If the Comcast router or modem won’t power on, try these steps first.
If the router still will not power on, contact Comcast to report the faulty device.
If your router loses connection to the internet, you can try these steps before reaching out to Comcast.
If you still have no internet connection, contact Comcast directly for support.
Occasionally, a router will malfunction by assigning IP addresses to some devices but not all of them. This is a somewhat common networking issue and can easily be fixed with a few steps.
If the router refuses to assign a new IP address, contact Comcast technical support.
If you’ve absolutely had it with your current device, you can always get a new one. Comcast can provide a replacement for your defective rental equipment. The rental fee is usually $5 each month for a modem and an additional $5 for a router. In many cases, it can be cost-effective to invest in a router of your own.
There are Comcast-compatible routers available on the market. In most cases, you can expect more control over your network with fewer hurdles from an ISP by owning your own router. If you’re not sure where to start, check out our recommended list of Comcast-compatible routers.

Best Comcast Xfinity-Compatible Routers and Modems
To Xfinity and beyond?
There are a few reasons you might want to update or reset your WiFi password: making your network more secure, and making your password easier to remember and type. Improved network security You can add an extra layer of security to your network by changing the WiFi password. As long as your new password is
Introducing Howchoo, an enigmatic author whose unique pen name reflects their boundless curiosity and limitless creativity. Mysterious and multifaceted, Howchoo has emerged as a captivating storyteller, leaving readers mesmerized by the uncharted realms they craft with their words. With an insatiable appetite for knowledge and a love for exploration, Howchoo’s writing transcends conventional genres, blurring the lines between fantasy, science fiction, and the surreal. Their narratives are a kaleidoscope of ideas, weaving together intricate plots, unforgettable characters, and thought-provoking themes that challenge the boundaries of imagination.
There are a few reasons you might want to update or reset your WiFi password: making your network mo
Clearing your browser cache is a great way to solve common internet issues. If a webpage isn’t
This guide will show you how to log into your Linksys router using the router’s IP address and
If you’re a Charter WiFi user, you need to keep your network secure. Changing your WiFi passwo
Changing your Wi-Fi network name has never been easier. From web interfaces to mobile support, Veriz
Most Xfinity routers use a default WiFi network name (SSID) that is hard to identify and remember. C

Most users will be looking to use the on-board Wi-Fi to connect a Raspberry Pi to existing wireless
If you’re a TP-Link customer, you need to access your router. This guide covers everything you

Most people don’t know that you can look up past “snapshots” of almost any website
Want to keep your home network safe? Knowing how to change your Wi-Fi password is network security 1
Share
Share


Share
Share
gem install command.
gem install, but if you add the -v flag, you can specify the version of the gem to install.
Using -v you can specify an exact version or use version comparators.
gem install mypackage -v 1.0.0gem install mypackage -v '>= 1.0.0'
# or
gem install mypackage -v '~> 1.0.0'Share

Share
This guide shows you how to modify the dock such that it will hide or show the instant you roll over it, rather than the annoying default delay.

If you haven’t already, enable autohide. Navigate to System Preferences > Dock & Menu Bar and select the Automatically hide and show the Dock option.

Navigate to Applications > Utilities > Terminal.
Paste the following command and press enter:
defaults write com.apple.Dock autohide-delay -float 0.0001; killall DockNote: Prior to MacOS Mojave, you may need to use this command instead:
defaults write com.apple.Dock autohide-delay -float 0; killall DockPaste the following command and press enter:
defaults delete com.apple.Dock autohide-delay; killall DockStarting with MacOS Sierra and High Sierra, your Mac will no longer play a “pop” sound when you adjust your volume. If you prefer to have this sound when you adjust volume up and down (as I do), this guide will teach you how to reenable it. 1 – Open Sound System Preferences Navigate to System
Introducing Howchoo, an enigmatic author whose unique pen name reflects their boundless curiosity and limitless creativity. Mysterious and multifaceted, Howchoo has emerged as a captivating storyteller, leaving readers mesmerized by the uncharted realms they craft with their words. With an insatiable appetite for knowledge and a love for exploration, Howchoo’s writing transcends conventional genres, blurring the lines between fantasy, science fiction, and the surreal. Their narratives are a kaleidoscope of ideas, weaving together intricate plots, unforgettable characters, and thought-provoking themes that challenge the boundaries of imagination.
Starting with MacOS Sierra and High Sierra, your Mac will no longer play a “pop” sound w

As a website designer, I work with a lot of files—and a lot of file types. Nothing’s worse t

Your Mac has a “feature” that will put time machine backups on your local disk if your p

Blender is one of the most popular open-source 3D creation suites today. It doesn’t cost a dim
In this guide, we’re going to use AppleScript and a tool called osascript to display

With the introduction of the new macOS, Big Sur, many things like even securely emptying your t

Blender has made a name for itself over the years as the go-to open source 3D modeling application.

As a big fan of Sublime Text, I was excited to find out that somebody made a port of the Monokai the
This guide will show you how to install SSHFS on various operating systems. 1 – On macOS Using
This short guide will show you how to create a backup image of your Raspberry Pi’s SD card on

Share
The world of e-ink devices is vast and confusing, with dozens of models from dozens of manufacturers.
Some people will only be familiar with Amazon’s Kindle or the Kobo series of e-readers, but these are actually really limited in terms of functionality! I’ve written about how much I love the Supernote e-ink device before, but I haven’t yet touched on what makes the Supernote superior to another big name in the e-ink world: reMarkable.
ReMarkable set itself up as the “paper replacement” of e-ink devices, going so far as to create a highly paperlike experience with a special screen and a pencil-like stylus nib that wears down through use.
But, what started looking like an outstanding idea with unbeatable software, quickly became a nightmare of venture capitalism as they locked features behind a paywall. Meanwhile, Supernote actively engaged with their user community, working with their users to build what is probably the best e-ink device in its price range.

This is the largest blow to the reMarkable because it’s never enjoyable to find a device’s features being locked behind a paywall.
ReMarkable hinted that they would be heading in this direction for some time, and they finally took the leap at the end of 2021, likely because they took tons of venture capital money and ended up desperate to make their backers happy ASAP.
Supernote has almost gone the opposite direction of reMarkable, if such a thing is possible. In a truly remarkable twist in today’s capitalist world, Supernote puts all their resources into improving existing devices instead of arbitrarily phasing out devices to make a profit, or opting for a subscription model like reMarkable.
People who purchased their reMarkable devices before October 12, 2021 got to keep a few of their so-called “premium” features for free, but all future updates that reMarkable makes won’t be included, and if you’re thinking of buying a reMarkable now…just don’t.
Here’s the thing: reMarkable bills itself as a paper notebook replacement, but as a side-by-side comparison shows, the features offered via any reMarkable plan simply don’t come anywhere close to the Supernote, and that includes things like writing feel and latency. How is this possible? Well, it all comes down to Supernote’s incredible roadmap.

Supernote has a public roadmap available with all their development plans. ReMarkable offers a blog with infrequent updates when major software changes take place.
This is a stark difference that highlights not only how great Supernote is with community engagement (and how much they care about creating an incredible product), but how the needs of the community have influenced the actual design of the device and the features that it offers.

’ll come right out with a hot take: for all that reMarkable does offer the writing feel of pencil on paper (it does, and, to be fair, it’s incredible how well it does this), it comes with the massive limitation of wear and tear.
Like a few other e-ink devices on the market, the reMarkable stylus wears out and, according to various reviews, wears out quite quickly. That’s a steep price for the feel of writing on paper.
The Supernote, meanwhile, approaches the experience of writing through their patented self-repairing screen film. This mimics the experience of writing with a pen on paper surprisingly well, and does so with a hard ceramic nibbed stylus that never wears out.
In fact, their Heart of Metal stylus is the best-looking and most impressive on the market, offering the feel of a high-quality pen.
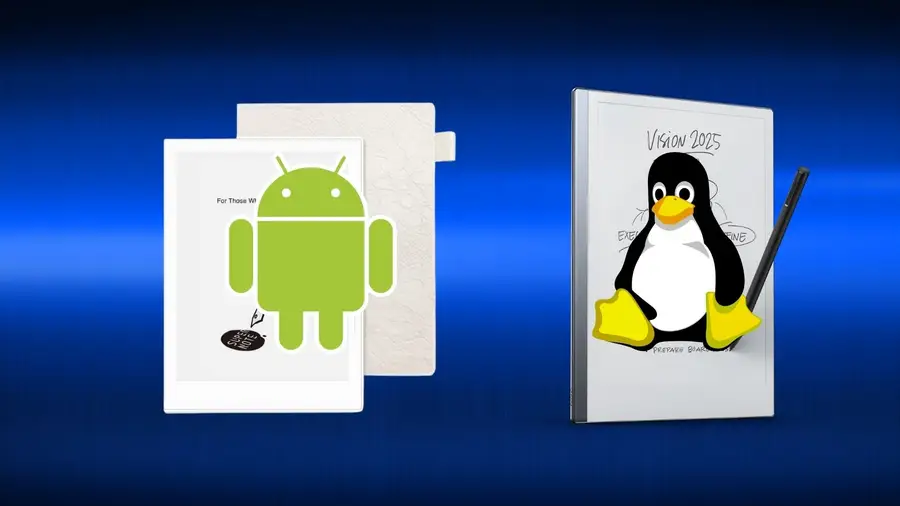
Beneath the hood, these devices are wildly different. The reMarkable uses custom software based on Linux, the open-source GNU operating system.
When I originally heard this, I immediately thought two things: that’s awesome, and, what about all the apps that people expect to be able to use with an e-ink device? Because the reMarkable can’t run anything from the Android app store.
That means: no Kindle, no Overdrive, no Dropbox; none of the integrations that have become a mainstay of the e-ink market. To get around this, reMarkable tried to double down on their claim of their device as a “paper journal replacement” designed to focus the user’s attention on nothing but their writing. No matter that this alienates a huge potential userbase.
Supernote has a Linux line of devices, their older A5 and A6 models (and these actually feature email integration, Supernote’s own generous cloud sync, and software that is still getting major improvement updates). But Supernote’s latest devices, their A5x and A6x line of tablets, feature a heavily modified Android OS that offers massive integration potential.
Currently, Supernote supports Kindle (and, through Kindle, Supernote also supports reading books borrowed from your local library which is wonderful), as well as email, calendar, and Dropbox integration.
Their team has stated that wider access to apps in the Android app store is on their radar, and that means that we will hopefully eventually be able to ditch Kindle altogether and use any apps we choose for our ebook pleasure.
They have also considered integration with various academic and knowledgework apps like Obsidian. Supernote even has default integration with Microsoft Word, in a major boon for writers everywhere who want to travel without their bulky laptop.

Ever since the original reMarkable came out, users have been complaining about issues with using that device as an e-reader. To be fair, reMarkable 2 has improved things immensely, and the size of the reMarkable 2 makes it handy for viewing PDFs and other large documents.
But the Supernote not only comes bundled with its own extremely powerful e-reading application, it can also use the Kindle app, one of the most widely used e-reader apps around.
For a long time, Supernote lagged (literally) when it came to handling very large or image-dense ebooks and PDFs. The December 2021 Supernote update changed all that.
The Supernote now absolutely matches the reMarkable in terms of speed, but provides a far more satisfactory reading experience, through multiple apps. That’s a big winner for me.

The reMarkable is excellent when it comes to writing and drawing, without a doubt. They corner the market on superb latency and pressure sensitivity…but that’s it. For a very high price, you’re getting something that’s ultimately less functional than a good art pad and stylus.
What first attracted me to Supernote was it’s Word Processor integration. You can open and create Word documents from within Supernote directly, link a bluetooth keyboard to your device, and get straight to work.
As a professional writer, this was groundbreaking. I do actually want to escape the distractions of tech while I work, and Supernote offers me the ability to get the best of both worlds. I can work in my Word documents without eyestrain and with insane battery life, all at a quarter of the weight of my laptop.
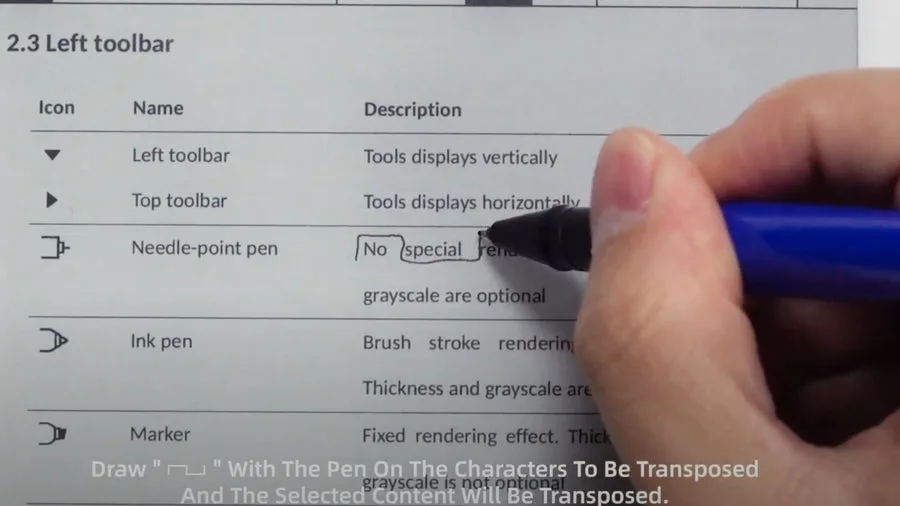
But then Supernote went even farther with their development of the perfect writer’s companion, and added proofreader mark support for Word documents. What does this mean?
That’s right. You can mark up your Word document using your stylus, deleting and inserting content with a strike of the pen.
And, since the massive update at the end of 2021, Supernote’s word recognition is fully functional. That means it’s possible to insert handwriting directly into a Word document—handwriting that is automatically converted to digital text.

This is a small one, but Supernote has an ingenious cover design that automatically wakes the device when the cover is flipped open.
It wakes to whatever document you last had open and feels beautifully intuitive. It really is just like using a paper journal. No buttons to press or anything.

The reMarkable has definitely seen some upset customers after cracked screen issues, but it’s not any more risky to own the reMarkable than any other glass tablet. Save, perhaps, that you can’t put an additional screen protector over it.
Still, if it’s snug in its folio, then nothing short of a drop or applied pressure needs to be a concern. But, so the consensus goes, don’t drop it, or it absolutely will break.
The Supernote A6X also uses a glass screen, but this is covered by Supernote’s special self-healing film (which gives the device it’s pen-like writing feel). This makes the device sturdier, and I’ve yet to run into any concerns with my own A6X.
Supernote’s A5X has a newer plastic screen that’s even sturdier, however, making it the ideal choice for those of us constantly on the run and more likely to be rough on our devices.
With the folio attached, both Supernote devices are pretty hard to damage. My A6X did eventually end up with some cosmetic damage after two years of rough use—the thin plastic lip at the bottom USB-C port split. It doesn’t affect the device in any way, however, and isn’t noticeable unless I’m looking right at it.

Build quality aside, the reMarkable is incredibly thin and well-designed for a futuristic sleek factor. In an age where we want all the power of technology without any of the baggage, it definitely has something to offer.
The Supernote beats it out again for me in this department, however. Yes, the Supernote is fractionally thicker, with a design that reminds me a little like a Moleskine notebook (once it’s in its folio), but that also gives it a weight and solidity I like.
It’s very easy to hold, but has the sort of density one would expect from a notebook. I enjoy reading on it more because of this as well.
But these two features really stand out for the Supernote: the instant-wake feature I mentioned earlier. It’s intuitive and lovely to have the device snap to life as soon as I open the cover. But there’s also Supernote’s unique hardware slide.
The right side of the Supenote features a sleek groove that provides two powerful functions. Slide your thumb up and the screen instantly refreshes. For anyone who has not yet used e-ink devices, a “ghosting” effect can sometimes occur, where subtle afterimages of previous content are displayed until the page is refreshed.
Supernote makes it incredibly easy to take care of this issue. And, swiping down brings to life the system control bar, providing physical access that once again feels really natural to use.

The big claim that reMarkable made early on was that the latency of its devices were equal to Apple’s 2nd Gen Pencil. That was a major breakthrough for e-ink devices that have historically struggled to match the writing experience of traditional devices like the iPad.
Initially, the Supernote’s writing latency was still perfectly serviceable (and, indeed, faster than a number of better-known e-ink devices), but it was double that of the reMarkable 2.
But then came the 2021 end of year update, and Supernote quietly changed the game. The Supernote now boasts a pen latency almost identical to that of the reMarkable 2 eliminating the lead that originally excited me so much about the reMarkable device.
As I’ve mentioned, the best thing about Supernote is its community engagement. Their entire business model seems to be based on building a deep and effective rapport with their customers, taking suggestions and critiques in good faith and using them to directly improve their device. Comments that I made when I first purchased my A6X in 2019 were put on the public roadmap and solved.
The engineers and marketing team are active on the company’s Reddit page, and even their managing director is both available and extremely friendly.
I honestly have not encountered a single other company that does half as much to connect with their customers and build a community of engagement and trust. And that community works out for them, too! User feedback has provided them with a huge testing base that has allowed them to improve their device continually since its release.
The reMarkable team has been less straightforward. They do have a Reddit channel, but little official activity seems to take place there. They do have an official blog, but only a few major updates are released on it.
They will respond to emails, but I haven’t seen a glowing review of their customer support process yet. And then there’s the big problem of their subscription model, which was kept veiled from the public and only became known early through some clever investigating by Voja over at My Deep Guide.
I wish I could like the reMarkable more…it’s a neat device with so much potential. But the terrible business model, horrible user support and connectivity, and unwillingness to meet the user where the user needs to be met make it a no-go for me. The Supernote, however, is the opposite in every way.
I have experienced nothing but good will and support from the Supernote community and official team, and their devices have become a part of my daily workload for everything from writing articles, to reading books I want to review, to planning my move into a new apartment. It just doesn’t get any better than that.

Synology is one of the most popular creators of Network Attached Storage devices on the market today, and for great reason — they’re really good at what they do. They consistently make devices that stand the test of time and feature top-notch software that makes the process of running a home server as easy as
Share
There are many reasons you might want to access your Comcast Xfinity router. For instance, you may want to change your wireless password or set up port forwarding for a project you are working on.
In any case, if you’re looking to log in to the Xfinity Wireless Gateway, then you’ll need the Comcast Xfinity router IP address in [the second step] to log into your router. If you have an Xfinity modem/router combo, this is also known as your modem login. If you’re using a business router, the process can be a little different. Check out this guide for steps on how to log into a Comcast business router.
If you need to login to your Comcast account, visit this guide.
This can be a wired or WiFi connection.
This is the router’s gateway. It will automatically bring up a log in screen.
Username: admin
Password: password
Now you’re logged in.
You can change your password by click “Change Password” at the top right of the admin panel.
Here’s the Xfinity page to help you find your username.
Here’s the Xfinity page to help you reset your password.
While the above steps are the easiest way to directly log in to your Comcast Xfinity router, here are some other options that may suit your needs, as well.
If you’re using an xFi gateway, then you can access xFi from your account pages in both the mobile Xfinity app and on the Xfinity website.
Then you’ll simply:
1. Log in to your Comcast Xfinity account.
2. Select your network name from the top of the page.
3. From here you can view your password and make changes to your WiFi.
We’ve written a few practical tips to show you how to speed up your wifi connection.

Make Wi-Fi Faster: How to Speed Up Your Wi-Fi Connection
Speed up your Internet connection in just a few minutes.
Looking to upgrade your Comcast router or modem? Get a faster connection and remove equipment rental fees from your bill by finding the best Comcast compatible routers.
Best Comcast Xfinity-Compatible Routers and Modems
To Xfinity and beyond?
If you’re a Charter WiFi user, you need to keep your network secure. Changing your WiFi password is a simple and effective way to add an additional layer of security to your network. This guide covers the best ways to manage your Charter Spectrum Network password. 1 – Change Wifi Password You can change the
Share
If you’re like me, you don’t always have a spare keyboard/monitor available to set up your Raspberry Pi. I rely heavily on SSH to set up my Pi, but in late 2016 Raspbian images started shipping with SSH disabled for security reasons. Fortunately, you can still enable SSH without a screen using the latest operating system, Raspberry Pi OS.
This guide assumes that you’ve already installed Raspberry Pi OS on your Pi. If not, go ahead and install it. Then put the SD card into your computer.

How to Install Raspberry Pi OS on Your Raspberry Pi
Get the new official Raspberry Pi OS on your Pi.
You’ll have to locate the boot directory, on my Mac it’s in /Volumes/boot.
If you’re on a Mac, open Terminal (Applications > Utilities > Terminal) and type:
cd /Volumes/bootOn Windows, you’ll need to use Command Prompt instead.
All you have to do is create an empty file called ssh.
touch sshIf this file exists, ssh will be enabled when the pi is booted.
Connect the Pi to a power source to power it on. As long as the Pi is connected via an Ethernet cable (or wifi), you should now be able to ssh in to the Pi.

How to Connect to a Raspberry Pi Remotely via SSH
The preferred (and most common) method of connecting to your Pi to run commands.
If you don’t have easy access to an ethernet connection, you can configure a WiFi connection similar to how we enabled SSH.

How to Set up WiFi on Your Raspberry Pi Without a Monitor (Headless)
No monitor, keyboard, or mouse? No problem.
With summer right around the corner, it’s time to fire up the grill! But who will watch the grill while you’re beating the heat? This year, kick things up a notch with your own Raspberry Pi-powered HeaterMeter. Don’t just throw a BBQ, be a part of it. HeaterMeter lets you keep a close eye on