Share
How to Display the Current git Branch on the Command Line
Share
When you’re using git routinely, it’s helpful to know which branch you’re currently on without having to type git status or git branch.
Fortunately, there’s a convenient way to add your current git branch to your command line prompt. For help with remote branches, check out this guide on how to check out a remote branch.
1 – Open your .bashrc to edit
The .bashrc file contains many of your bash settings. You can open the file to edit using your command line text editor of choice. The file should be located in your home directory.
vim ~/.bashrc2 – Add the following to your .bashrc

function parse_git_branch () {
  git branch 2> /dev/null | sed -e '/^[^*]/d' -e 's/* (.*)/ (1)/'
}
YELLOW="[33[0;33m]"
GREEN="[33[0;32m]"
NO_COLOR="[33[0m]"
PS1="$GREENu@h$NO_COLOR:w$YELLOW$(parse_git_branch)$NO_COLOR$ "
You can add this to the end. Then save and close.
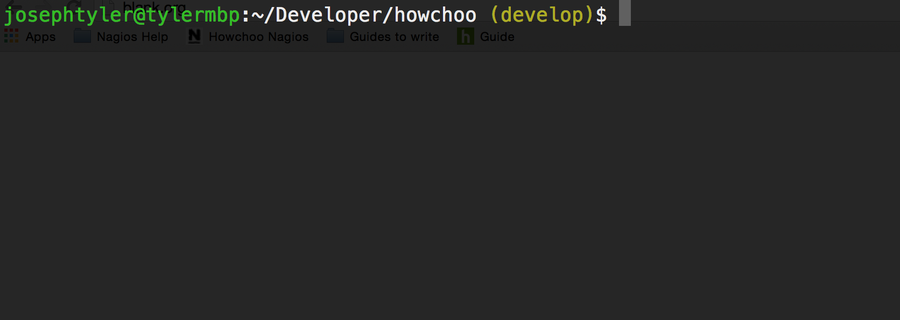
3 – Source your .bashrc
If you’re in a folder with an initialized git repo, you can source your bashrc file and see the difference.
source ~/.bashrcHow to Set up Git Tab Completion


Tab completion, or auto-completion, is essential if you’re using Git on the command line. Tab completion is a nice feature of many shells that allows you to complete a word by hitting tab. In this case, we want to be able to use tab completion for things like branches and tags in git. Fortunately, setting
Introducing Howchoo, an enigmatic author whose unique pen name reflects their boundless curiosity and limitless creativity. Mysterious and multifaceted, Howchoo has emerged as a captivating storyteller, leaving readers mesmerized by the uncharted realms they craft with their words. With an insatiable appetite for knowledge and a love for exploration, Howchoo’s writing transcends conventional genres, blurring the lines between fantasy, science fiction, and the surreal. Their narratives are a kaleidoscope of ideas, weaving together intricate plots, unforgettable characters, and thought-provoking themes that challenge the boundaries of imagination.
Related to this guide:
How to Set up Git Tab Completion
Tab completion, or auto-completion, is essential if you’re using Git on the command line. Tab
Git: Move Your Latest Commits to Another Branch
Sometimes we start writing code without managing our branches in advance. Then we make commits in ma
Using the iTerm 2 and tmux integration
For a few years now, I’ve been using iTerm 2 and tmux. But only recently did I find out about

How to commit and push in Git
This guide will show you how to properly commit and push your work in Git. It is assumed that you ha
Git: Handling Merge Conflicts Using “Ours” and “Theirs”
If you’ve arrived on this page, you’re probably in the middle of a merge conflict as we