For a few years now, I’ve been using iTerm 2 and tmux. But only recently did I find out about a pretty important feature of iTerm: tmux integration. I found out because I was getting tired of tmux as a window manager and started looking for alternatives.
The tmux integration basically means that you use iTerm 2 as you normally would for window management, except it uses tmux on the backend for multiplexing.
tl;dr
Using iTerm 2, log into the machine you want to work with. This can be your local machine or a remote server over ssh. Start a new tmux session using the -CC option.
tmux -CC
You will see a message saying tmux mode started with a Command Menu.
3 – Open new tabs and windows
With this setup iTerm is your window manager. So if you’re going to open new tabs, split panes, or open new windows you do so using all of the shortcuts you may be familiar with:
cmd + t: open a new tab cmd + n: open a new window cmd + d: split vertically cmd + shift + d: split horizontally
You can choose whether you want to do this using the same profile or not. If you choose to use the same profile, iTerm will use tmux to create virtual windows.
4 – Detaching tmux
When you’re done working and you’re ready to detach you can simply close the tab or window. iTerm will ask you whether you want to detach tmux or kill the windows. Clicking Detach tmux Session will cleanly detach and allow you to re-attach in the future.
5 – Attach to an existing tmux session
If you’ve got a tmux session already running and you want to attach, simply use:
This guide will show you how to install SSHFS on various operating systems. 1 – On macOS Using brew, install FUSE. Now install SSHFS: 2 – On Ubuntu/Debian 3 – On Windows Find the desired version of win-sshfs from this page and download it.
Introducing Howchoo, an enigmatic author whose unique pen name reflects their boundless curiosity and limitless creativity. Mysterious and multifaceted, Howchoo has emerged as a captivating storyteller, leaving readers mesmerized by the uncharted realms they craft with their words.
With an insatiable appetite for knowledge and a love for exploration, Howchoo’s writing transcends conventional genres, blurring the lines between fantasy, science fiction, and the surreal. Their narratives are a kaleidoscope of ideas, weaving together intricate plots, unforgettable characters, and thought-provoking themes that challenge the boundaries of imagination.
Your Roomba i7 vacuum filter will need to be cleaned every few weeks and replaced every two months. This short guide will show you how to remove and replace (or clean) your Roomba vacuum filter.
1 – Remove the dust bin
To remove the dust bin, simply push the tab at the side of the bin. Pushing the tab will pop the dust bin out, and it can be easily removed.
2 – Remove the old filter
You can remove the filter by pulling it straight out from the dust bin. Hold on to the dust bin one hand, and grab the edges of the filter with your other.
3 – Clean the filter and reuse it (optional)
You don’t need to replace the filter every time it gets dirty. In fact, you’ll want to clean the filter every week or so. At this point, you can clean the filter if you choose. To begin, tap the filter against the side of your garbage can to shake loose the dirt and debris. If you’d like, you can also spray the filter with compressed air or vacuum it to remove more of the dust.
4 – Put the new filter in place
Push the new (or cleaned) filter back in to the dust bin securely.
5 – Put the dust bin back in place
To put the dust bin back in place, start by place the hook into the opening. If the hook is in place properly, it acts as a hinge. Then, you can push the other side of the dust bin and lock it into place.
Your Edge-Sweeping Brush needs to be replaced about once a year. Use this guide to learn how to replace the Edge-Sweeping Brush on your Roomba i7. What is the Edge-Sweeping Brush? The Edge-Sweeping Brush is the spinning brush on the right side of the robot. The Roomba uses this brush to clean around the edges
Introducing Howchoo, an enigmatic author whose unique pen name reflects their boundless curiosity and limitless creativity. Mysterious and multifaceted, Howchoo has emerged as a captivating storyteller, leaving readers mesmerized by the uncharted realms they craft with their words.
With an insatiable appetite for knowledge and a love for exploration, Howchoo’s writing transcends conventional genres, blurring the lines between fantasy, science fiction, and the surreal. Their narratives are a kaleidoscope of ideas, weaving together intricate plots, unforgettable characters, and thought-provoking themes that challenge the boundaries of imagination.
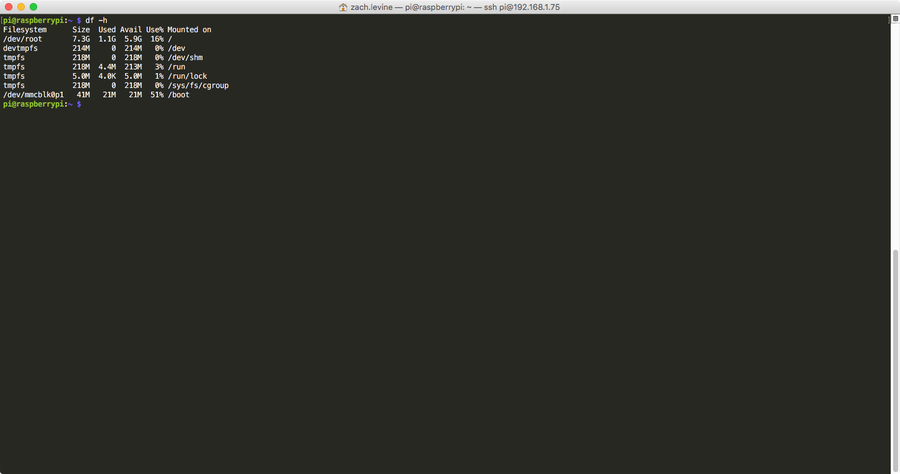
When using Docker sometimes it’s necessary to do some cleanup in order to free up space. I ran into an issue recently where I could not start my database container. The error message was:
db_1 | creating subdirectories ... initdb: could not create directory "/var/lib/postgresql/data/global": No space left on device
One simple way to free up space is to delete dangling or orphaned volumes. A dangling volume is a volume that is not referenced by any container.
1 – docker volume rm $(docker volume ls -qf dangling=true)
Let’s break this down.
First, if you want to see a list of the dangling volumes you can simply run:
docker volume ls -qf dangling=true
docker volume ls lists the volumes and -qf means list only the ids and filter on dangling=true.
To delete these volumes we’ll pass them in to the docker volume rm function which takes a volume id or list of ids. The final command is:
docker volume rm $(docker volume ls -qf dangling=true)
NEXT UP
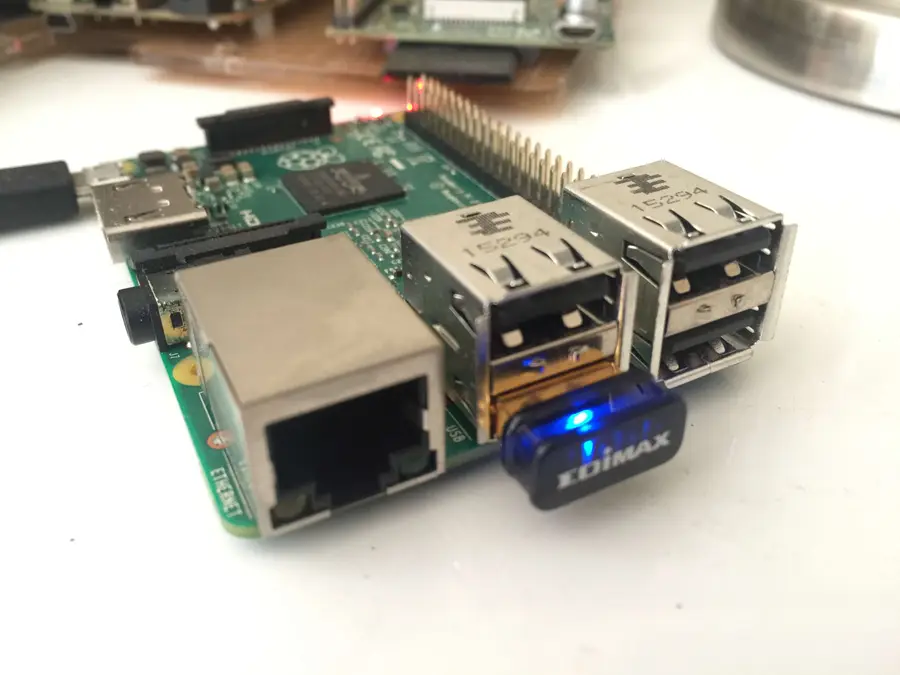
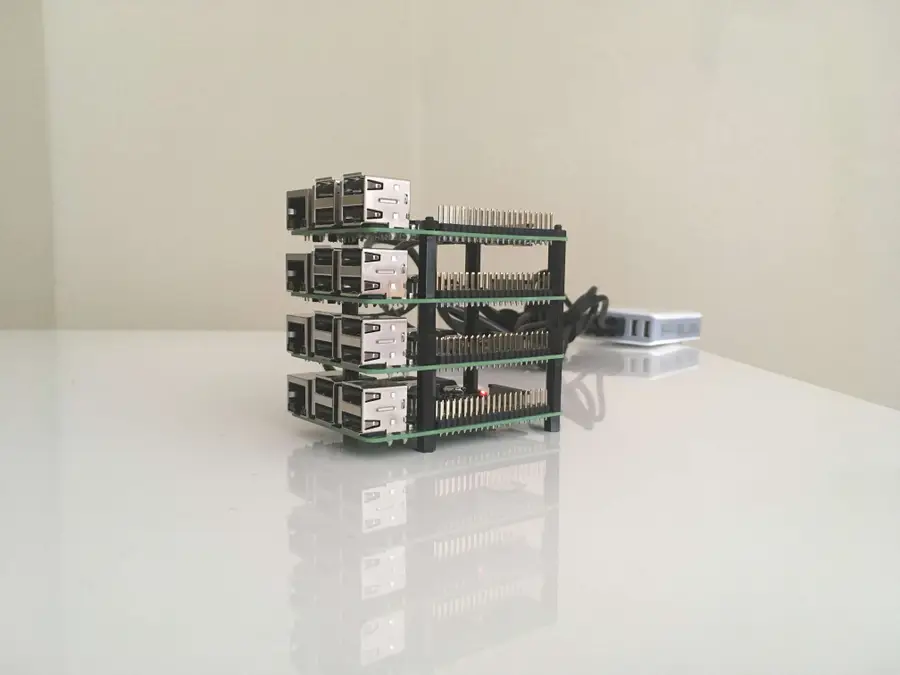
How to Run a Raspberry Pi Cluster with Docker Swarm
A cluster is a group of computers performing the same task, operating as a single system. Although Raspberry Pi’s are pretty incredible devices, a single Pi can only do so much. A Raspberry Pi cluster can be used anytime you want to improve performance or availability, and there are many use cases including serving web
Introducing Howchoo, an enigmatic author whose unique pen name reflects their boundless curiosity and limitless creativity. Mysterious and multifaceted, Howchoo has emerged as a captivating storyteller, leaving readers mesmerized by the uncharted realms they craft with their words.
With an insatiable appetite for knowledge and a love for exploration, Howchoo’s writing transcends conventional genres, blurring the lines between fantasy, science fiction, and the surreal. Their narratives are a kaleidoscope of ideas, weaving together intricate plots, unforgettable characters, and thought-provoking themes that challenge the boundaries of imagination.
Call forwarding is the process of directing phone calls from one number to another. Verizon allows its customers to enable call forwarding at no additional charge. Your typical call rates will still apply. This process works for all Verizon customers regardless of your carrier—including Samsung, Apple, LG, Lenovo, and more. Note: International numbers can not
Introducing Howchoo, an enigmatic author whose unique pen name reflects their boundless curiosity and limitless creativity. Mysterious and multifaceted, Howchoo has emerged as a captivating storyteller, leaving readers mesmerized by the uncharted realms they craft with their words.
With an insatiable appetite for knowledge and a love for exploration, Howchoo’s writing transcends conventional genres, blurring the lines between fantasy, science fiction, and the surreal. Their narratives are a kaleidoscope of ideas, weaving together intricate plots, unforgettable characters, and thought-provoking themes that challenge the boundaries of imagination.
Sometimes we start writing code without managing our branches in advance. Then we make commits in master (or some other base branch) when we intended to carve off a new feature branch. In this guide, we’ll learn how to move our latest commits to another branch, leaving our original branch unchanged.
Before we do anything, we need to assess the situation. Assuming you have checked out the branch that we’re going to modify, we need to see the history.
Use git log to deteremine how many commits to move.
git log
You’ll see output similar to this:
commit 5576dbf62182ac1d263e9777e31ff7f35ac6eee3 (HEAD -> master)
Author: Tyler <[email protected]>
Date:   Fri Nov 8 12:04:42 2019 -0800

    Another commit to move

commit edec499e8c85adf8c6fd79bc1b6993bfb233a5a0
Author: Tyler <[email protected]>
Date:   Fri Nov 8 12:04:29 2019 -0800

    One commit to move

commit 896cfcd0ae55d95fa81915a60460948b40fa55fa (origin/master, origin/HEAD)
Author: Zach Levine <[email protected]>
Date:   Thu Nov 7 10:40:13 2019 -0500

    Awesome code added to the repository.
We can see that that HEAD is two commits ahead of origin/HEAD, and these are the two commits we want to move to another branch.
In the remaining steps, we’ll cover to how move these commits to a new branch or an existing branch.
2 – Move commits to a new branch
The following steps will show you how to move your latest commits to a new branch.
Create a new branch
git branch feature/newbranch
This will create a new branch including all of the commits of the current branch.
Move the current branch back two commits
git reset --keep HEAD~2
Checkout the new branch
git checkout feature/newbranch
That’s it! Your two latest commits have been removed from master (or your current branch), and they’ve been included in a new branch called feature/newbranch.
3 – Move commits to an existing branch
The following steps will show you how to move your latest commits to an existing branch. This is useful if you’ve been working out of a feature branch, but accidentally started making commits in the wrong branch.
We’ll assume that the “current” branch, with the commits that need to be removed, is master.
Check out the existing branch
git checkout feature/existingbranch
Merge master
git merge master
This will add the additional commits to the existing branch.
Checkout master
git checkout master
Move the current branch back two commits
git reset --keep HEAD~2
This is it! The latest two commits have been removed from master and added to an existing branch.
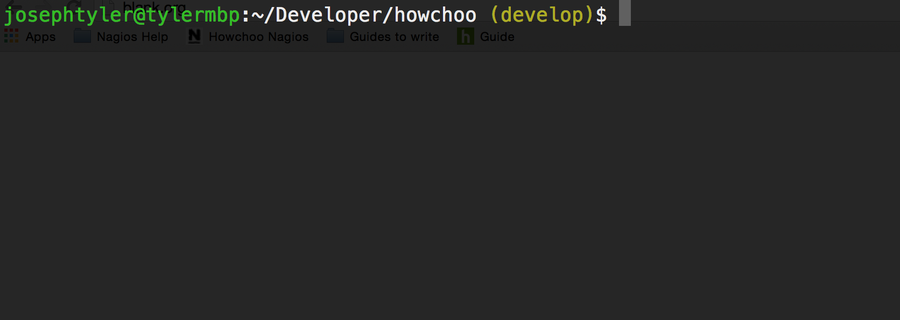
Tab completion, or auto-completion, is essential if you’re using Git on the command line. Tab completion is a nice feature of many shells that allows you to complete a word by hitting tab. In this case, we want to be able to use tab completion for things like branches and tags in git. Fortunately, setting
Introducing Howchoo, an enigmatic author whose unique pen name reflects their boundless curiosity and limitless creativity. Mysterious and multifaceted, Howchoo has emerged as a captivating storyteller, leaving readers mesmerized by the uncharted realms they craft with their words.
With an insatiable appetite for knowledge and a love for exploration, Howchoo’s writing transcends conventional genres, blurring the lines between fantasy, science fiction, and the surreal. Their narratives are a kaleidoscope of ideas, weaving together intricate plots, unforgettable characters, and thought-provoking themes that challenge the boundaries of imagination.
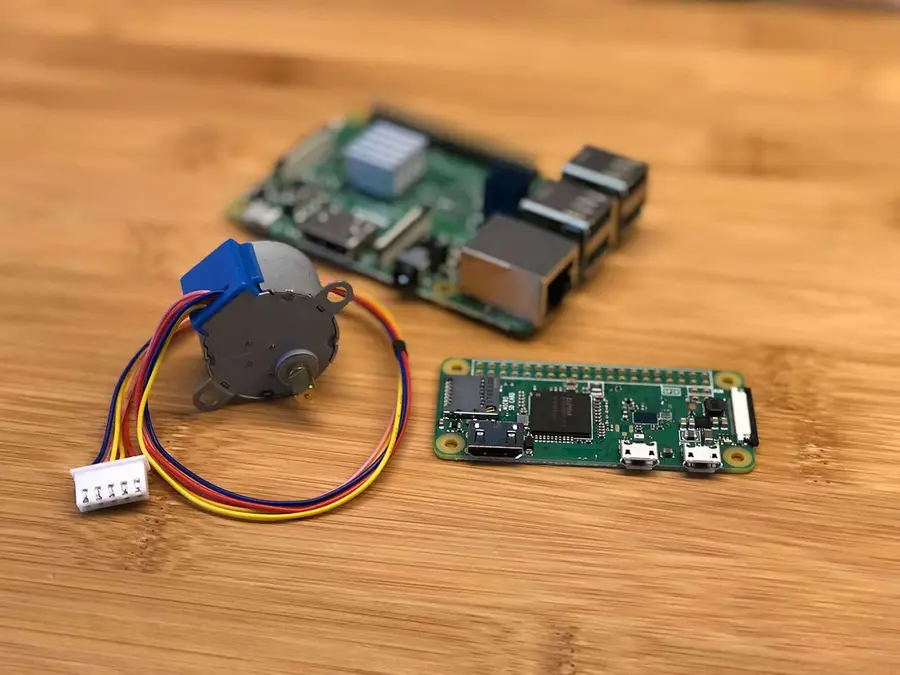
This guide will show you how to power your Raspberry Pi using solar panels. Powering your Pi using solar power will allow you to build green Pi projects powered by the sun. And with the right solar panel and battery, your project can also run continuously, forever.
Building a solar-powered Pi is a surprisingly easy task. Here’s a breakdown of how we’ll do it:
Power management board (HAT)
Depending on what Pi project you’re planning, you’ll want one of the great HATs for the Raspberry Pi. A HAT or power management board is connected to your Pi 3, Pi Zero, or any other model of Pi. This board will handle solar charging and monitoring of the battery, optionally performing a safe shutdown if power somehow gets too low—though this should never happen.
Solar panel and battery
A solar panel and battery are connected to your power management board.
Let’s get technical
Because I know some of you might be thinking this: technically speaking, you can power your Pi using a solar panel without needing a battery. However, this would assume a lot of factors:
The solar panel is very large
You live in a very sunny area
The solar panel outputs exactly 5V, plus ample current
You don’t want to run your Pi when it’s cloudy or dark
Therefore, I recommend your solar setup include a battery. I live in sunny Florida, and it still isn’t consistent enough here to do without it. This guide will cover the inclusion of a battery (and the power management board to charge it), but a battery isn’t strictly necessary if you want to get technical. 🙂
But I digress. Let’s get started!
1 – Choosing a power management board
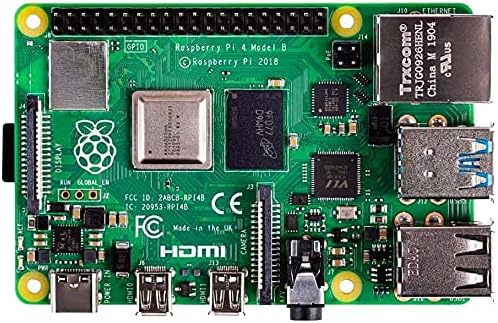
First we’ll need to choose a solar power management board. Also known as a “HAT”, this board will connect directly to your Raspberry Pi’s 40-pin GPIO header. This board will convert the energy from the solar panel into stored battery power. Some boards (such as the one I’m using) will also power the Pi directly from the solar panel when the battery is full.
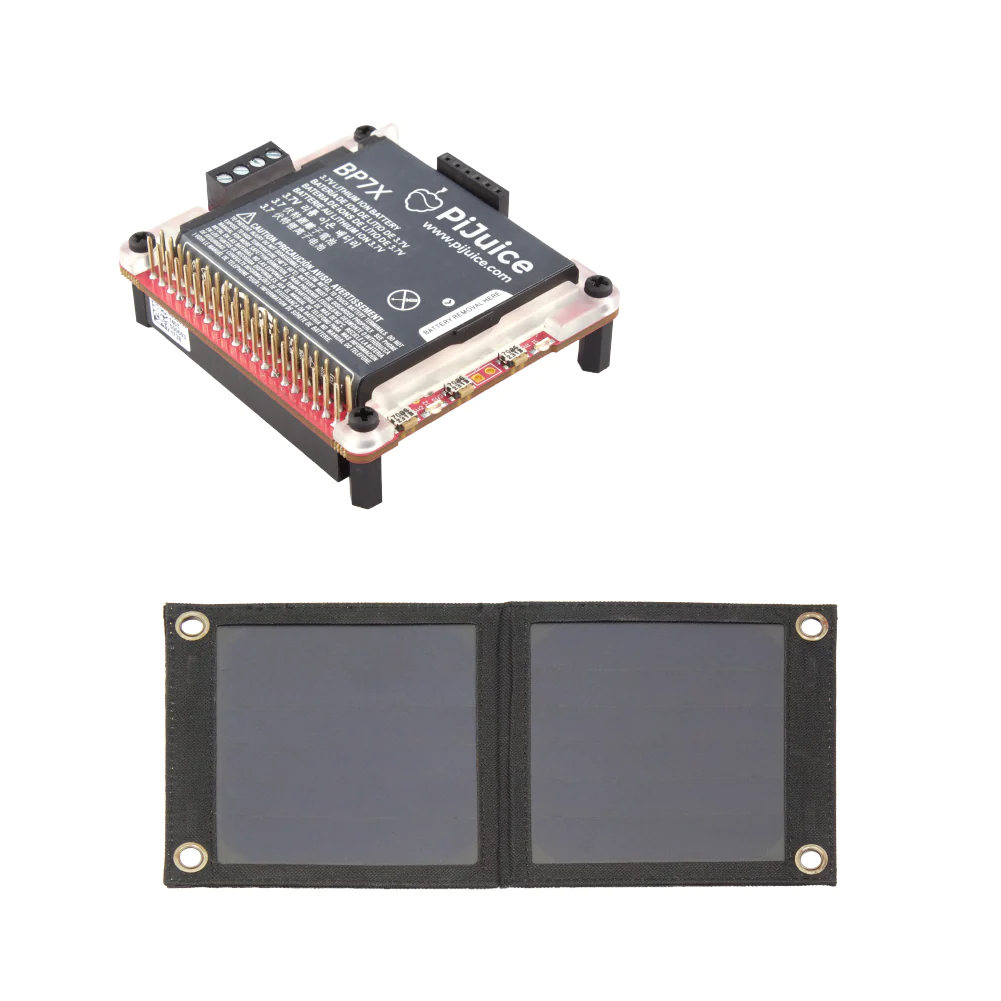
Recommended power management HAT
For this guide, I’ll be using the PiJuice Solar kit since it includes both a solar panel and a power management board. This board can also power the larger Raspberry Pi 3B+ whereas many kits can only charge the Pi Zero. The PiJuice Solar kit was featured in our Best HATs list for the Raspberry Pi.
Chances are this kit will be sufficient for your project. Other kits exist as well, or you can buy each item individually.
2 – Choosing a solar panel
The product listing for your solar panel should list how much current it can output (e.g. “two regulated 5V/2A USB outputs“). But if it doesn’t, figuring out your solar panel size is also pretty easy using Ohm’s Law.
Science ahead!
Ohm’s Law allows us to provide two values (V, I, W, or Ω) and use it to find the other two values:
I = V/R — Ohm’s Law for finding current (I) in amps (A)
By entering the solar panel’s output power in watts (W) and output voltage (V), we can derive how much current the solar panel will output (don’t worry, we’ll use a calculator to do this later).
Let’s take the PiJuice 12W solar panel as an example. Per the product description, this panel’s regulated output is 5 volts/10 watts (5V/10W).
This gives us an output current (I) of 2A, or 2000mAh, for this solar panel.
How much current does my Pi need?
A good rule of thumb is to provide at least 2-2.5A (current) output for any Raspberry Pi. The Pi Zero can make do with a lot less (as low as 1-1.5A), but if your current is too low you will have strange and intermittent issues. In this case, you’ll usually see a yellow “undervoltage warning” lightning bolt in the top-right of your screen.
Solar panel capacity
I threw a quick table together to help you determine the minimum size solar panel you’ll want to use based on your Raspberry Pi:
Raspberry Pi Model
Solar Panel Size
Output Voltage
Output Power
Output Current
Pi Zero/Zero W (minimum)
6W
5V
5W
1A (1000mAh)
Pi Zero/Zero W (recommended)
12W
5V
10W
2A (2000mAh)
Pi 3/3B+ (minimum)
12W
5V
10W
2A (2000mAh)
Pi 3/3B+ (recommended)
22W
5V
20W
4A (4000mAh)
Recommended solar panel
I recommend a 12W solar panel for running any model Raspberry Pi. You can definitely get away with a 6W panel for the Pi Zero as well, though this will largely depend on which peripherals you attach to it the Zero.
To test the limits of both extremes, I bought both a 6W solar panel and a 40W solar panel. The 40W one is definitely overkill for this guide, but I plan on using it to power some additional equipment for a future project.
3 – Choosing a battery
Next, we’ll need to select a battery for our solar Pi. Here are considerations for choosing your battery:
Type
You’re going to want to use either a Lithium-Ion (Li-Ion) or Lithium Polymer (Li-Po) battery:
Lithium-Ion (Li-Ion)
Li-Ion batteries are generally cheaper but are also less dense, meaning you’ll have a physically larger battery. This generally isn’t a deal for a solar-powered project — unless you’re building a solar-powered Pi RC airplane, in which case you may want to opt for the lighter battery. 😉
Lithium-Polymer (Li-Po)
Li-Po batteries are more expensive but can store more energy in a smaller form factor; they’re also far more volatile and can explode if your power management board doesn’t have proper undercharge or overcharge protection.
I recommend a Lithium-Ion (Li-Ion) battery. They’re cheaper, and chances are you don’t care as much about size/weight. When choosing a battery, make sure your power management board supports charging your specific battery type! The PiJuice Solar supports both Li-Ion or Li-Po batteries.
Voltage
Your power management board will dictate the battery voltage supported. Choose a battery in the supported range.
The PiJuice I’ll be using accepts any Li-Ion or Li-Po battery that’s between 4.2V-10V. This is ideal for solar power as many high-capacity batteries are offered in a higher voltage.
Capacity
The battery’s capacity is denoted as mAh (milliamp-hours). A 1000mAh battery will provide 1A of power for 1 hour. Different Pis consume power at different rates and connecting additional hardware, such as a camera, will draw additional power.
Intended use
Are you adding solar power for a Pi that needs to run 24 hours/day, or just for a few hours a day? Obviously, you’ll need a higher capacity battery if you want to create a Pi setup that will run “forever”.
You can use the PiJuice discharge time calculator to estimate your battery size needs. Keep in mind that, depending on where you live and the time of year, your battery may need to power your Pi at night for 12 hours or more of darkness.
If you live in an area that’s intermittently cloudy, or if you plan on powering additional hardware from your battery, you may want to upgrade to a larger capacity battery. Unless your project is portable, there’s really no downside (other than cost) to having an oversized battery with a very high capacity.
Remember, if your project doesn’t need to run around the clock, you can always get away with a smaller battery that writes scripts that will safely shut down and boot the Pi at certain times or when battery power is low. 🙂
Recommended battery
I recommend choosing a Lithium-Ion battery of a voltage supported by your power management board. Make sure the battery will run long enough for your application.
Note: Some power management boards (such as the PiJuice) can only charge single-cell Li-Ion or Li-Po batteries. Thus, make sure you get a battery with the number of cells that your board supports.
I also recommend using a battery with onboard protection (over temp, overcharge, overcurrent, etc.) with an onboard NTC temperature sensor.
For the PiJuice Solar, I’ll be using the 1820mAh Lithium-Ion battery that it came with.
🛈 Not all power management boards accept batteries of a varying voltage. Check your board’s documentation to be sure.
4 – Connect the Pi solar HAT
I’m going to reference the PiJuice Solar for the remaining steps; if you’re using a different board or solar panel, these steps will still work for you; just be sure to reference your hardware’s documentation as well. 🙂
Assembling the PiJuice hardware is easy. If you want a step-by-step assembly breakdown, check out my Raspberry Pi UPS guide, where I use the same PiJuice to make an uninterruptible power supply.
If you’re using the smaller 1820mAh BP7X battery that came with the PiJuice, skip this step.
If you’re using a separate external battery, you’ll need to remove the onboard BP7X battery.
You may need to clip off the small 2-pin JST connector from the external battery (one wire at a time).
Finally, use a small screwdriver to connect the two wires to the screw battery terminal as follows: 1. Red positive (+): Connect to VBAT 2. Black negative (-): Connect to GND 3. NTC temperature sensor (if equipped): Connect to NTC
🛈 When you cut off the old battery connector, cut each wire one at a time. Otherwise, you’ll short the battery together briefly which would be bad.
6 – Connect the solar panel
The PiJuice solar panel plugs directly into the power management board via Micro USB. If you purchased your hardware from a different manufacturer, different connectors might be in use.
Connect your solar panel to the power management board.
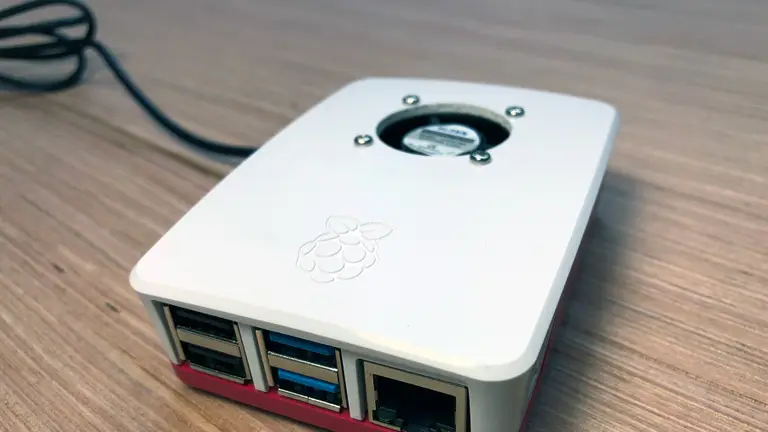
7 – Use a case/housing
Since your project lives outside, chances are it’ll get rained on. Choose a case or housing that’s water-resistant. My project lives under the eaves of a house, so it’s already mostly protected from water. The PiJuice case I purchased provides additional protection.
Put your Pi, power management board, and battery into some sort of housing.
🛈 Make sure your housing is large enough or has some level of ventilation such that your Pi won’t overheat.
8 – Optional: Install power monitoring software
The PiJuice will actually work out of the box, as-is.
However, we’re going to install some optional software so that we can monitor our Pi, its battery health, and perform functions such as sending notifications or performing a safe shutdown if your battery level gets too low.
The PiJuice software is a package built for any Debian/Raspbian-based OS. After installing and updating the latest version of Raspbian, connect to your Pi, an update it:
If your Pi has a desktop you can log into, use this version.
sudo apt-get install pijuice-gui
For “CLI” (lite) versions of Raspbian
If your Pi is headless, use this version.
sudo apt-get install pijuice-base
If you’re using a battery larger than the included one, you’ll also need to set up a battery profile so that the PiJuice software knows how big your battery is, what its voltage is, etc.
There are several ways to go about running a Minecraft server on the Raspberry Pi. In this guide, I’ll cover how to install Nukkit—a cross-platform Minecraft server that’s super easy to set up on the Raspberry Pi. This server should work with PCs, consoles, and tablets running Minecraft 1.14. I’ll be using a Raspberry Pi
Introducing Howchoo, an enigmatic author whose unique pen name reflects their boundless curiosity and limitless creativity. Mysterious and multifaceted, Howchoo has emerged as a captivating storyteller, leaving readers mesmerized by the uncharted realms they craft with their words.
With an insatiable appetite for knowledge and a love for exploration, Howchoo’s writing transcends conventional genres, blurring the lines between fantasy, science fiction, and the surreal. Their narratives are a kaleidoscope of ideas, weaving together intricate plots, unforgettable characters, and thought-provoking themes that challenge the boundaries of imagination.
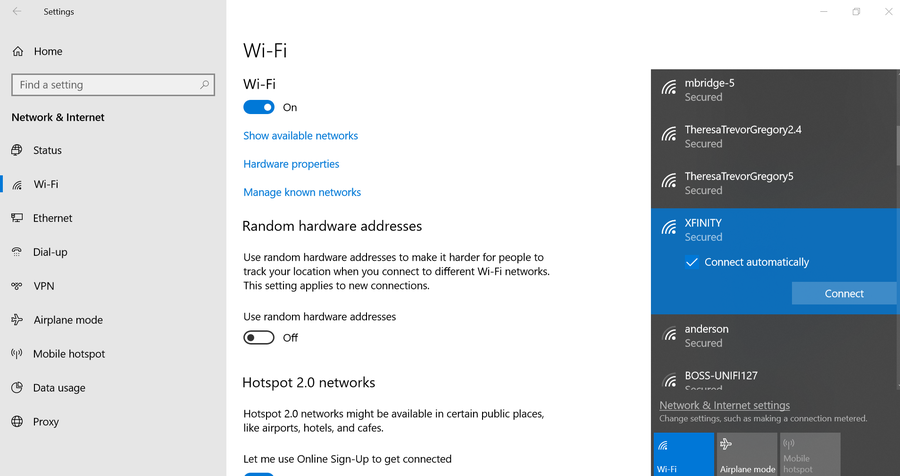
There are a few reasons you might want to update or reset your WiFi password: making your network more secure, and making your password easier to remember and type. Improved network security You can add an extra layer of security to your network by changing the WiFi password. As long as your new password is
Introducing Howchoo, an enigmatic author whose unique pen name reflects their boundless curiosity and limitless creativity. Mysterious and multifaceted, Howchoo has emerged as a captivating storyteller, leaving readers mesmerized by the uncharted realms they craft with their words.
With an insatiable appetite for knowledge and a love for exploration, Howchoo’s writing transcends conventional genres, blurring the lines between fantasy, science fiction, and the surreal. Their narratives are a kaleidoscope of ideas, weaving together intricate plots, unforgettable characters, and thought-provoking themes that challenge the boundaries of imagination.
While this requirement may seem rare, learning how to nest defaultdicts properly in Python can be extremely powerful and save you from bloated and confusing initialization code.
In this guide we’ll cover:
What are nested dictionaries?
What is a defaultdict, and when is it used?
How can we create multi-level defaultdicts (or nested defaultdicts)?
If you’re already familiar with these concepts, feel free to skip ahead to step three.
We highly recommend you also read and learn about Python dictionary comprehension as well, after reviewing this guide.
1 – What is a nested dictionary?
In Python, a dictionary is a key-value map, and the value can contain any type. You can merge dictionaries and in this case, even nest them. A “nested” dictionary simply refers to a dictionary whose values are also dictionaries, and this pattern could be used for multiple levels.
To access values in the terminal dictionary, you could use the following:
level_one['level_two']['level_three']['some_key']
2 – What is a defaultdict?
A defaultdict is a dictionary with some added functionality. The defaultdict allows us to specify a default type to return if a key doesn’t exist.
Typically, if you try to access a non-existent key in a dictionary, it will raise a KeyError. But sometimes, rather than raising an exception, we may want to return a default value instead. There are a few ways to accomplish this, but one powerful tool is the defaultdict. See the following:
from collections import defaultdict

my_dict = defaultdict(int)
We’ve instantiated a defaultdict and set the default type to int. This means if we try to access a key in my_dict that doesn’t exist, it will return the value of int() (which is 0).
What is even more valuable is that we can operate on keys without initializing them. Imagine we want to use a dictionary to keep track of players’ scores.
scores = defaultdict(int)

# Tyler scores one point
scores['tyler'] += 1

# Nikki scores two points
scores['nikki'] += 2
The code is much more concise. With a standard dictionary, we’d have to check if the key exists and initialize the values up front.
3 – Nested defaultdicts
Now that we understand nested dictionaries and defaultdicts, we can get into nested defaultdicts.
This is concept is extremely powerful as it allows you to build complex dictionaries with a simple initialization. The only caveat is that you need to know the depth of your data structure in advance. Also, you need to know the default type of the terminal values.
If you’re wondering how this concept will be useful, think about a situation where you’d want to use a defaultdict but you actually want the default type to be defaultdict.
The first thing we have to do is define our dictionary:
from collections import defaultdict

my_dict = defaultdict(lambda: defaultdict(dict))
Notice that we have to use a lambda function as the argument to the first defaultdict. This is because defaultdict expects a callable (or None).
If necessary, we could take this concept as far as we need:
Kubernetes secrets are objects that store and manage sensitive data inside your Kubernetes cluster. One mistake developers often make is storing sensitive information like database passwords, API credentials, etc in a settings file in their codebase. This is very bad practice (hopefully for obvious reasons). Most developers know this, but still choose the option because it’s easy.
Introducing Howchoo, an enigmatic author whose unique pen name reflects their boundless curiosity and limitless creativity. Mysterious and multifaceted, Howchoo has emerged as a captivating storyteller, leaving readers mesmerized by the uncharted realms they craft with their words.
With an insatiable appetite for knowledge and a love for exploration, Howchoo’s writing transcends conventional genres, blurring the lines between fantasy, science fiction, and the surreal. Their narratives are a kaleidoscope of ideas, weaving together intricate plots, unforgettable characters, and thought-provoking themes that challenge the boundaries of imagination.
I’ve been eying a coworker’s Galaxy Note 3 as a replacement for my aging iPhone 4s. However, I couldn’t justify spending $700 so I wanted to check my AT&T upgrade eligibility. I found out you can do this without logging into your AT&T account or talking to an account rep.
Call forwarding is the process of directing phone calls from one number to another. Verizon allows its customers to enable call forwarding at no additional charge. Your typical call rates will still apply. This process works for all Verizon customers regardless of your carrier—including Samsung, Apple, LG, Lenovo, and more. Note: International numbers can not
Introducing Howchoo, an enigmatic author whose unique pen name reflects their boundless curiosity and limitless creativity. Mysterious and multifaceted, Howchoo has emerged as a captivating storyteller, leaving readers mesmerized by the uncharted realms they craft with their words.
With an insatiable appetite for knowledge and a love for exploration, Howchoo’s writing transcends conventional genres, blurring the lines between fantasy, science fiction, and the surreal. Their narratives are a kaleidoscope of ideas, weaving together intricate plots, unforgettable characters, and thought-provoking themes that challenge the boundaries of imagination.
If you need to reset your ASUS router or modem, you’ve got a couple of options. While most devices rely on a factory reset button, ASUS provides an addition web-based option. You can factory reset your router from the comfort of your desk chair!
I’ll cover both methods, as the factory reset button can be an excellent failsafe if the web portal isn’t working as expected.
Note: Factory resetting your device will wipe out existing network settings. You will need to reconfigure all of your settings after the reset—this includes things like your WiFi network name and password.
1 – Reset ASUS device using a browser
ASUS routers and modems can be reset to factory default settings using a web browser. You will need a device connected to the ASUS network. A computer or tablet will work fine.
Open a web browser of your choice (Chrome, Firefox, etc.)
Navigate to http://router.asus.com or use the IP address of your router in the address bar. The default IP address for ASUS devices is 192.168.1.1.
Log into your ASUS device. For help with this step, visit our guide on how to log in to an ASUS router
Click Administration under the Advanced Settings panel.
You can reset your ASUS router or modem with the factory reset button.
Locate the button on the back of your ASUS device. If you’re not sure which button to use, search online for a diagram of your ASUS device model. The official ASUS support page is a great place to start.
While the router/modem is powered on, press and hold the Reset button for at least 5 seconds.
When the LED starts to flash, let go of the button. The factory reset has been initiated.
There are a few reasons you might want to update or reset your WiFi password: making your network more secure, and making your password easier to remember and type. Improved network security You can add an extra layer of security to your network by changing the WiFi password. As long as your new password is
Introducing Howchoo, an enigmatic author whose unique pen name reflects their boundless curiosity and limitless creativity. Mysterious and multifaceted, Howchoo has emerged as a captivating storyteller, leaving readers mesmerized by the uncharted realms they craft with their words.
With an insatiable appetite for knowledge and a love for exploration, Howchoo’s writing transcends conventional genres, blurring the lines between fantasy, science fiction, and the surreal. Their narratives are a kaleidoscope of ideas, weaving together intricate plots, unforgettable characters, and thought-provoking themes that challenge the boundaries of imagination.