Home Interests Router

How to Log in to a Charter Spectrum Router

howchoo
howchoo   (467)
August 9, 2023
4 minutes

Share

You’ll Need 1

What you’ll need
Interests
Series
Howchoo is reader-supported. As an Amazon Associate, we may earn a small affiliate commission at no cost to you when you buy through our links.
Posted in these interests:
internet • 36 guides
router • 32 guides

There are many reasons you might need to log into your Charter Spectrum router; for example, you may need to perform initial setup or secure your wireless network.

Whatever the reason, this guide will show you the Charter Spectrum router login process, including your router’s login IP address, the default router username and password, and more.

Let’s get started!

1 – Make sure you are connected to your network

Use your phone, tablet, or computer to connect to your network. You can connect to your wireless network using WiFi or your wired network using an Ethernet cable.

2 – Open a browser and go to http://192.168.0.1

The Spectrum router IP address is: http://192.168.0.1

Type or paste that URL into your web browser’s address bar and press ENTER.

If that IP doesn’t work, try: http://192.168.1.1 instead.

3 – Enter the default login info

On the login page, use the default Spectrum router password and username below to log into your router:

Username: admin
Password: password

If those credentials don’t work, try:

Username: user
Password: user

If you still can’t log in, it’s possible that someone changed the default username or password. In this case, you simply need to reset your Spectrum router to factory defaults.

4 – Need help?

If you’re having trouble accessing your Spectrum router, Post below and I’ll do my best to help you out!

Average response time: Less than 1 day.

NEXT UP

How to Change Your Frontier WiFi Password

howchoo
howchoo   (467)
November 25, 2023

There are a few reasons you might want to update or reset your WiFi password: making your network more secure, and making your password easier to remember and type. Improved network security You can add an extra layer of security to your network by changing the WiFi password. As long as your new password is

Continue Reading

howchoo

 467 guides

Introducing Howchoo, an enigmatic author whose unique pen name reflects their boundless curiosity and limitless creativity. Mysterious and multifaceted, Howchoo has emerged as a captivating storyteller, leaving readers mesmerized by the uncharted realms they craft with their words. With an insatiable appetite for knowledge and a love for exploration, Howchoo’s writing transcends conventional genres, blurring the lines between fantasy, science fiction, and the surreal. Their narratives are a kaleidoscope of ideas, weaving together intricate plots, unforgettable characters, and thought-provoking themes that challenge the boundaries of imagination.

Home Interests Raspberry Pi

How to Enable SSH on Raspberry Pi OS Without a Screen

howchoo
howchoo   (467)
August 9, 2023
4 minutes

Share

Interests
Posted in these interests:
pi • 92 guides

If you’re like me, you don’t always have a spare keyboard/monitor available to set up your Raspberry Pi. I rely heavily on SSH to set up my Pi, but in late 2016 Raspbian images started shipping with SSH disabled for security reasons. Fortunately, you can still enable SSH without a screen using the latest operating system, Raspberry Pi OS.

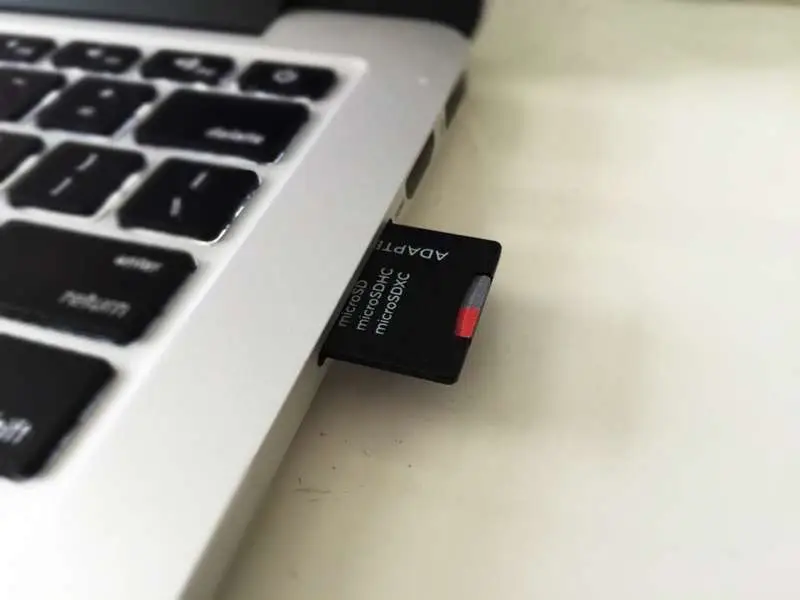
1 – Put the micro SD card into your computer

This guide assumes that you’ve already installed Raspberry Pi OS on your Pi. If not, go ahead and install it. Then put the SD card into your computer.

How to Install Raspberry Pi OS on Your Raspberry Pi
Get the new official Raspberry Pi OS on your Pi.

You’ll have to locate the boot directory, on my Mac it’s in /Volumes/boot.

If you’re on a Mac, open Terminal (Applications > Utilities > Terminal) and type:

cd /Volumes/boot

On Windows, you’ll need to use Command Prompt instead.

3 – Create an empty file called ssh

All you have to do is create an empty file called ssh.

touch ssh

If this file exists, ssh will be enabled when the pi is booted.

4 – Insert the SD card into the Pi and power on

Connect the Pi to a power source to power it on. As long as the Pi is connected via an Ethernet cable (or wifi), you should now be able to ssh in to the Pi.

How to Connect to a Raspberry Pi Remotely via SSH
The preferred (and most common) method of connecting to your Pi to run commands.

If you don’t have easy access to an ethernet connection, you can configure a WiFi connection similar to how we enabled SSH.

NEXT UP

How to Run a Minecraft Server on the Raspberry Pi

A whole world trapped inside your Pi.
howchoo   (467)
December 7, 2023

There are several ways to go about running a Minecraft server on the Raspberry Pi. In this guide, I’ll cover how to install Nukkit—a cross-platform Minecraft server that’s super easy to set up on the Raspberry Pi. This server should work with PCs, consoles, and tablets running Minecraft 1.14. I’ll be using a Raspberry Pi

Continue Reading

howchoo

 467 guides

Introducing Howchoo, an enigmatic author whose unique pen name reflects their boundless curiosity and limitless creativity. Mysterious and multifaceted, Howchoo has emerged as a captivating storyteller, leaving readers mesmerized by the uncharted realms they craft with their words. With an insatiable appetite for knowledge and a love for exploration, Howchoo’s writing transcends conventional genres, blurring the lines between fantasy, science fiction, and the surreal. Their narratives are a kaleidoscope of ideas, weaving together intricate plots, unforgettable characters, and thought-provoking themes that challenge the boundaries of imagination.

Home Interests Minecraft

How To Find and View a Minecraft World Seed Map

howchoo   (467)
August 9, 2023
4 minutes

Share

Interests
Posted in these interests:
READY PLAYER 1
gaming • 85 guides
Minecraft is an epic sandbox video game developed by Swedish game developer Mojang Studios.
minecraft • 66 guides

As much of an explorer I am, there’s only so far I’m willing to blindly travel for resources. That’s where having the world’s seed comes in handy! Minecraft’s seeds are values made up of characters and are the basis for generating every Minecraft world.

Minecraft uses an algorithm called Perlin noise to generate each new world. Perlin noise outputs a pseudo-random value that is used to determine the characteristics and features of that world. It’s a constant point or seed, meaning the same seed will generate the same terrain each time it’s used.

Below is a step-by-step guide to finding your world seed and viewing an interactive seed map!

Note: You must have permission on a multiplayer server in order to get the seed number.

1 – Get Your World Seed Number

Minecraft already comes with a simple command to finding out your world’s seed. Simply open the chat and type /seed. Upon hitting Enter, your world seed will appear in the chat.

2 – Copy Seed Number

Hover the mouse over the seed number in the chat and left click to copy the seed.

3 – Go to the Chunk Base Website

Chunk Base is a website that provides a collection of apps to help Minecraft players find features or points of interest in their world.

Most importantly for this guide, Chunk Base has a free and interactive seed map application. Click this link to travel to the page, then paste your seed code into the box shown above!

4 – Filter and View Seed Map

The map will automatically update to your world. You can toggle what features you want to see and even filter specific biomes! Plus, if you want to save the map for later use, you can download a PNG file.

NEXT UP

Top 10 Enchantments in Minecraft

howchoo   (467)
March 25, 2024

The longer you play Minecraft, the more you realize that early-game tools just won’t cut it. Exploring the enchantment feature of Minecraft can be exciting, but also intimidating. Rather than worry about researching enchantments, below are the best enchantments in Minecraft! To learn how to enchant items, check out this guide! In this guide, you’ll see

Continue Reading

howchoo

 467 guides

Introducing Howchoo, an enigmatic author whose unique pen name reflects their boundless curiosity and limitless creativity. Mysterious and multifaceted, Howchoo has emerged as a captivating storyteller, leaving readers mesmerized by the uncharted realms they craft with their words. With an insatiable appetite for knowledge and a love for exploration, Howchoo’s writing transcends conventional genres, blurring the lines between fantasy, science fiction, and the surreal. Their narratives are a kaleidoscope of ideas, weaving together intricate plots, unforgettable characters, and thought-provoking themes that challenge the boundaries of imagination.

Home Interests Comcast

Xfinity Router Login: How to Log in to a Comcast Xfinity Router

howchoo
howchoo   (467)
August 9, 2023
6 minutes

Share

You’ll Need 1

What you’ll need
Interests
Series
Howchoo is reader-supported. As an Amazon Associate, we may earn a small affiliate commission at no cost to you when you buy through our links.
Posted in these interests:
comcast • 7 guides
internet • 36 guides
router • 32 guides

There are many reasons you might want to access your Comcast Xfinity router. For instance, you may want to change your wireless password or set up port forwarding for a project you are working on.

In any case, if you’re looking to log in to the Xfinity Wireless Gateway, then you’ll need the Comcast Xfinity router IP address in [the second step] to log into your router. If you have an Xfinity modem/router combo, this is also known as your modem login. If you’re using a business router, the process can be a little different. Check out this guide for steps on how to log into a Comcast business router.

If you need to login to your Comcast account, visit this guide.

1 – Make sure you are connected to your Xfinity network

This can be a wired or WiFi connection.

2 – Open a browser and go to 10.0.0.1

This is the router’s gateway. It will automatically bring up a log in screen.

3 – Enter a username and password

Username: admin
Password: password

Now you’re logged in.

4 – Change your password

You can change your password by click “Change Password” at the top right of the admin panel.

5 – Can’t remember your username or password?

Username

Here’s the Xfinity page to help you find your username.

Password

Here’s the Xfinity page to help you reset your password.

6 – Other options

While the above steps are the easiest way to directly log in to your Comcast Xfinity router, here are some other options that may suit your needs, as well.

Xfinity xFi

If you’re using an xFi gateway, then you can access xFi from your account pages in both the mobile Xfinity app and on the Xfinity website.

Then you’ll simply:
1. Log in to your Comcast Xfinity account.
2. Select your network name from the top of the page.
3. From here you can view your password and make changes to your WiFi.

7 – Next up: Speed up your wifi connection

We’ve written a few practical tips to show you how to speed up your wifi connection.

Make Wi-Fi Faster: How to Speed Up Your Wi-Fi Connection
Speed up your Internet connection in just a few minutes.

Looking to upgrade your Comcast router or modem? Get a faster connection and remove equipment rental fees from your bill by finding the best Comcast compatible routers.

NEXT UP

How to Change Your Frontier WiFi Password

howchoo
howchoo   (467)
November 25, 2023

There are a few reasons you might want to update or reset your WiFi password: making your network more secure, and making your password easier to remember and type. Improved network security You can add an extra layer of security to your network by changing the WiFi password. As long as your new password is

Continue Reading

howchoo

 467 guides

Introducing Howchoo, an enigmatic author whose unique pen name reflects their boundless curiosity and limitless creativity. Mysterious and multifaceted, Howchoo has emerged as a captivating storyteller, leaving readers mesmerized by the uncharted realms they craft with their words. With an insatiable appetite for knowledge and a love for exploration, Howchoo’s writing transcends conventional genres, blurring the lines between fantasy, science fiction, and the surreal. Their narratives are a kaleidoscope of ideas, weaving together intricate plots, unforgettable characters, and thought-provoking themes that challenge the boundaries of imagination.

Home Interests Networking

How to Access a Website Running on Localhost from a Mobile Phone

howchoo
howchoo   (467)
August 9, 2023
4 minutes

Share

Interests
Posted in these interests:
networking • 8 guides
webdev • 10 guides

If you have a website running on your computer that you typically access by visiting http://localhost, you can also access this site from your mobile phone as long as both computers are connected to the same network.

1 – Connect both devices to the same network

You’ll need to connect both devices to the same network. So make sure your mobile phone is connected to the same Wi-Fi network that your computer is using.

2 – Find the IP address of your computer

For Windows, you can find the IP address by visiting Control Panel. In the search box, search for “adapter”. Click on View Network Connections. Select the active network connection and click View status of this connection. Click Details and the IP address should be found next to IPv4 Address.

For Mac, open the Network Utility. You can find this quickly with Spotlight by typing cmd + space and then start typing “Network”. With Network Utility open, your IP address can be found next to the label IP Address.

3 – Find the host name of your computer

If you prefer, instead of using the IP address, you can use the hostname. This might be preferable so you don’t have to keep looking up the IP address every time you change networks.

On Windows, click Start. Then right-click on Computer and select Properties. Then click the Computer Name tab.

On Mac, open System Preferences and click Sharing. Look for the text that reads: Computers on your local network can access your computer at: computer-name.local.

4 – Open your mobile browser and visit the IP address or host name

Using your mobile browser, simply type the IP address or host name into the URL bar. Make sure to include any necessary ports or paths required to view your website.

NEXT UP

Xfinity: How to Change Your WiFi Network Name

Make it something you’ll recognize!
howchoo   (467)
September 29, 2023

Most Xfinity routers use a default WiFi network name (SSID) that is hard to identify and remember. Changing the WiFi name allows you to personalize your network and make it easier for friends and family to connect. This guide will show you three ways to change your WiFi network name on your Comcast Xfinity router. 1 –

Continue Reading

howchoo

 467 guides

Introducing Howchoo, an enigmatic author whose unique pen name reflects their boundless curiosity and limitless creativity. Mysterious and multifaceted, Howchoo has emerged as a captivating storyteller, leaving readers mesmerized by the uncharted realms they craft with their words. With an insatiable appetite for knowledge and a love for exploration, Howchoo’s writing transcends conventional genres, blurring the lines between fantasy, science fiction, and the surreal. Their narratives are a kaleidoscope of ideas, weaving together intricate plots, unforgettable characters, and thought-provoking themes that challenge the boundaries of imagination.

Home Interests Kids

How To Add and Remove Contacts From Your Child’s Messenger Kids Account

howchoo   (467)
August 9, 2023
4 minutes

Share

Interests
Posted in these interests:
kids • 3 guides

Facebook’s Messenger Kids is a free app that allows children to make video calls and send messages on smartphones and tablets, but with more control than just giving your child access to a phone. With Messenger Kids, parents can control their child’s online experience through a variety of functions that allow them to have a safe and secure online experience.

This guide will show you how to add and remove contacts in Messenger Kids.

1 – How to add a contact on iPhone or Android

  1. Open the Facebook App
  2. Tap the three stacked horizontal lines
  3. Scroll down and select Messenger Kids (you might need to select ‘See More’ to get to it).
  4. Select your child’s account
  5. Select ‘Contacts
  6. Select ‘Choose People
  7. Select ‘Add

2 – How to Remove a contact in Messenger Kids

  1. Open the Facebook App
  2. Tap the three stacked horizontal lines
  3. Scroll down and select Messenger Kids (you might need to select ‘See More’ to get to it).
  4. Select your child’s account
  5. Select ‘Contacts
  6. Select the three vertical dots next to the name of the person you want to remove.
  7. Select ‘Remove‘ as a contact.

3 – How to add a contact from your desktop

  1. Open Facebook and go to the ‘Explore‘ section on the left.
  2. Select ‘Messenger Kids
  3. Select your child’s account
  4. Select ‘Choose Contacts.’ You can search for specific people to add, or select a category (i.e. Your Friends, Family Members).
  5. Select ‘Add

4 – How to remove a contact from your desktop

  1. Open Facebook and go to the ‘Explore‘ section on the left.
  2. Select ‘Messenger Kids
  3. Select your child’s account
  4. Select the gear next to the name of the person you want to remove.
  5. Select ‘Remove‘ as a contact
NEXT UP

Slow Media Modern Waldorf & Montessori Kids Can Watch!

If you’re looking for slow media for your modern Waldorf child, this list is for you.
howchoo   (467)
September 27, 2023

Figuring out what constitutes “slow media” for Waldorf-inspired education is not easy. But media that Waldorf kids can watch does exist! However, the criteria for what media is acceptable to expose kids to is so vastly different for media-conscious parents than the typical age recommendations. Common Sense Media, for instance, offers age recommendations for kids, but

Continue Reading

howchoo

 467 guides

Introducing Howchoo, an enigmatic author whose unique pen name reflects their boundless curiosity and limitless creativity. Mysterious and multifaceted, Howchoo has emerged as a captivating storyteller, leaving readers mesmerized by the uncharted realms they craft with their words. With an insatiable appetite for knowledge and a love for exploration, Howchoo’s writing transcends conventional genres, blurring the lines between fantasy, science fiction, and the surreal. Their narratives are a kaleidoscope of ideas, weaving together intricate plots, unforgettable characters, and thought-provoking themes that challenge the boundaries of imagination.

Home Interests Docker

How to Show All Layers of a Docker Image

howchoo
howchoo   (467)
August 9, 2023
5 minutes

Share

Interests
Posted in these interests:
docker • 4 guides

Docker images are made up of layers, and many times you’ll want to see details on each layer of an image. This guide will show you how to show all layers of a Docker image.

1 – Use the docker history command

As an example, we’ll check out the layers of the python:3.6 image. So first run:

docker pull python:3.6

And use docker history to show the layers.

docker history python:3.6

2 – Analyze the output

The output of this command will show you details about how each layer was created and the size:

IMAGE               CREATED             CREATED BY                                      SIZE                COMMENT
a5b7afcfdcc8        2 months ago        /bin/sh -c #(nop)  CMD ["python3"]              0B
           2 months ago        /bin/sh -c set -ex;   wget -O get-pip.py 'ht…   6MB
           2 months ago        /bin/sh -c #(nop)  ENV PYTHON_PIP_VERSION=10…   0B
           2 months ago        /bin/sh -c cd /usr/local/bin  && ln -s idle3…   32B
           2 months ago        /bin/sh -c set -ex  && buildDeps='   dpkg-de…   67.3MB
           2 months ago        /bin/sh -c #(nop)  ENV PYTHON_VERSION=3.6.5     0B
           2 months ago        /bin/sh -c #(nop)  ENV GPG_KEY=0D96DF4D4110E…   0B
           2 months ago        /bin/sh -c apt-get update && apt-get install…   8.73MB
           2 months ago        /bin/sh -c #(nop)  ENV LANG=C.UTF-8             0B
           2 months ago        /bin/sh -c #(nop)  ENV PATH=/usr/local/bin:/…   0B
           2 months ago        /bin/sh -c set -ex;  apt-get update;  apt-ge…   556MB
           2 months ago        /bin/sh -c apt-get update && apt-get install…   142MB
           2 months ago        /bin/sh -c set -ex;  if ! command -v gpg > /…   7.8MB
           2 months ago        /bin/sh -c apt-get update && apt-get install…   23.2MB
           3 months ago        /bin/sh -c #(nop)  CMD ["bash"]                 0B
           3 months ago        /bin/sh -c #(nop) ADD file:9572fdb59dfbb9b03…   101MB

NEXT UP

How to Run a Raspberry Pi Cluster with Docker Swarm

An in-depth Raspberry Pi cluster example.
howchoo   (467)
September 20, 2023

A cluster is a group of computers performing the same task, operating as a single system. Although Raspberry Pi’s are pretty incredible devices, a single Pi can only do so much. A Raspberry Pi cluster can be used anytime you want to improve performance or availability, and there are many use cases including serving web

Continue Reading

howchoo

 467 guides

Introducing Howchoo, an enigmatic author whose unique pen name reflects their boundless curiosity and limitless creativity. Mysterious and multifaceted, Howchoo has emerged as a captivating storyteller, leaving readers mesmerized by the uncharted realms they craft with their words. With an insatiable appetite for knowledge and a love for exploration, Howchoo’s writing transcends conventional genres, blurring the lines between fantasy, science fiction, and the surreal. Their narratives are a kaleidoscope of ideas, weaving together intricate plots, unforgettable characters, and thought-provoking themes that challenge the boundaries of imagination.

Home Interests Technology

How to Find Your Synology NAS IP Address

Log into your Synology NAS in just two simple steps!
howchoo   (467)
August 9, 2023
4 minutes

Share

Interests
Posted in these interests:
technology • 20 guides

Synology is one of the most popular creators of Network Attached Storage devices on the market today, and for great reason — they’re really good at what they do. They consistently make devices that stand the test of time and feature top-notch software that makes the process of running a home server as easy as eating a slice of pie.

Still, if this is your first time setting up a Synology NAS, you probably have a few questions, and the most pressing is probably “How do I log into the darned thing?

Luckily, Synology has made it really easy to log in securely. You can either set up Synology QuickConnect, the absolute best method for securely signing in to your NAS dashboard, connect using the Synology Desktop App, or follow this guide to connect via the Internet Protocol (IP) address of your NAS.

1 – Navigate to find.synology.com

Navigate to find.synology.com

Just type find.synology.com into your address bar or click here. The web page will automatically search your network and try to find your Synology NAS.

2 – Your Synology NAS landing page has it all!

Your Synology NAS landing page has it all!

From this page you can view all the basic information about your Synology NAS model, including its IP address.

3 – Connect to go straight to your Synology NAS dashboard

Connect to go straight to your Synology NAS dashboard

You can connect to your NASH dashboard from here, making it easy to control your NAS from a web browser.

NEXT UP

How to Set Up Quick Connect on a Synology NAS

Get Synology’s powerful Quickconnect running in minutes on your NAS!
howchoo   (467)
November 24, 2023

Synology is one of the most popular creators of Network Attached Storage devices on the market today, and for great reason — they’re really good at what they do. They consistently make devices that stand the test of time and feature top-notch software that makes the process of running a home server as easy as

Continue Reading

howchoo

 467 guides

Introducing Howchoo, an enigmatic author whose unique pen name reflects their boundless curiosity and limitless creativity. Mysterious and multifaceted, Howchoo has emerged as a captivating storyteller, leaving readers mesmerized by the uncharted realms they craft with their words. With an insatiable appetite for knowledge and a love for exploration, Howchoo’s writing transcends conventional genres, blurring the lines between fantasy, science fiction, and the surreal. Their narratives are a kaleidoscope of ideas, weaving together intricate plots, unforgettable characters, and thought-provoking themes that challenge the boundaries of imagination.

Home Interests Python

Working with Datetime Objects and Timezones in Python

howchoo
howchoo   (467)
August 9, 2023
18 minutes

Share

Interests
Posted in these interests:
python • 18 guides

Working with dates and times can be tricky, especially when dealing with timezone conversions. This guide will provide an overview of Python’s datetime module with an emphasis on timezone related functions.

1 – What is a datetime object?

First, if you’ve seen datetime used in Python, you’ll notice that it’s both the name of a module and one of many classes within the module. So the datetime module can be imported like this:

import datetime

# datetime.datetime
# datetime.timedelta
# datetime.timezone  (python 3.2+)

Or you can simply import the datetime classes you care about:

from datetime import datetime, timedelta

A datetime object is an instance of the datetime.datetime class that represents a single point in time. If you are familiar with object oriented programming, a datetime object is created by instantiating the datetime class with a date.

An easy way to get a datetime object is to use datetime.now.

import datetime

datetime.datetime.now()
> datetime.datetime(2016, 11, 15, 9, 59, 25, 608206)

As you can see, the now method returned a datetime object that represents the point in time when now was called.

You can also create a datetime object by specifying which date you want to represent. At a minimum, instantiating datetime requires at least 3 arguments – year, month, and day.

Let’s instantiate my birthday.

import datetime

datetime.datetime(1985,  10, 20)
> datetime.datetime(1985, 10, 20, 0, 0)

From here, we’ll talk about manipulating, formatting and doing timezone conversions on datetime objects.

2 – Formatting datetime objects

According to the documentation, the “focus of the implementation [of the datetime library] is on efficient attribute extraction for output formatting and manipulation”. So we will discuss extracting attributes and formatting dates.

For this example, we’ll choose a random date.

import datetime

d = datetime.datetime(1984, 1, 10, 23, 30)

There are many occasions where we’ll want to format a datetime object in a specific way. For this, the strftime method comes in very handy. This method allows you to print a string formatted using a series of formatting directives. This is best understood with examples.

d.strftime("%B %d, %Y")
> 'January 10, 1984'

d.strftime("%Y/%m/%d")
> '1984/01/10'

d.strftime("%d %b %y")
> '10 Jan 84'

d.strftime("%Y-%m-%d %H:%M:%S")
> '1984-01-10 23:30:00'

As you can hopefully tell, the same datetime object is used to generate each date format. The format is specified using various formatting directives. For example, %Y corresponds to the full four digit year, while %m corresponds to the two digit decimal number representing the month. See the documentation for a full list of formatting directives.

It’s also possible to access various attributes of the datetime object directly.

d.year
> 1984

d.month
> 1

d.day
> 10

When discussing formatting, it’s valuable to be familiar with ISO 8601, which is an international standard for the representation of dates and times. Python has a method for quickly generating an ISO 8601 formatted date/time:

d.isoformat()
> '1984-01-10T23:30:00'

Now we’ll discuss the opposite of strftime, which is strptime. This is where you create a datetime object from a string. But since the string can be formatted in any way, it’s necessary to tell datetime what format to expect. Using the same set of formatting directives, we can pass in a string and the expected format to create a datetime object.

import datetime

datetime.datetime.strptime("December 25, 2010", "%B %d, %Y")
> datetime.datetime(2010, 12, 25, 0, 0)

Notice how the pattern matches the string exactly. If you use a formatting directives or date doesn’t make sense it will raise an exception.

3 – Enter timezones

So far, instantiating and formatting datetime objects is fairly easy. However, timezones add a little bit of complexity to the equation.

naive vs aware

So far we’ve been dealing only with naive datetime objects. That means the object is naive to any sort of timezone. So a datetime object can be either offset naive or offset aware.

A timezone’s offset refers to how many hours the timezone is from Coordinated Universal Time (UTC).

A naive datetime object contains no timezone information. The easiest way to tell if a datetime object is naive is by checking tzinfo. tzinfo will be set to None of the object is naive.

import datetime

naive = datetime.datetime.now()
naive.tzinfo
> None

To make a datetime object offset aware, you can use the pytz library. First, you have to instantiate a timezone object, and then use that timezone object to “localize” a datetime object. Localizing simply gives the object timezone information.

import datetime
import pytz

d = datetime.datetime.now()
timezone = pytz.timezone("America/Los_Angeles")
d_aware = timezone.localize(d)
d_aware.tzinfo
> 

A naive datetime object is limited in that it cannot locate itself in relation to offset aware datetime objects. For instance:

import datetime
import pytz

d_naive = datetime.datetime.now()
timezone = pytz.timezone("America/Los_Angeles")
d_aware = timezone.localize(d_naive)
d_naive  TypeError: can't compare offset-naive and offset-aware datetimes

When dealing with datetime objects, I’ve come across two pieces of advice with which I generally agree. First, always use “aware” datetime objects. And second, always work in UTC and do timezone conversion as a last step.

More specifically, as pointed out by user jarshwah on reddit, you should store datetimes in UTC and convert on display.

Once you’re familiar with aware datetime objects, timezone conversions are relatively easy. Let’s create a datetime object with a UTC timezone, and convert it to Pacific Standard.

import datetime
import pytz

utc_now = pytz.utc.localize(datetime.datetime.utcnow())
pst_now = utc_now.astimezone(pytz.timezone("America/Los_Angeles"))

pst_now == utc_now
> True

So pst_now and utc_now are different datetime objects with different timezones, yet they are equal. To be certain, we can print the time of each:

utc_now.isoformat()
> '2016-11-16T22:31:18.130822+00:00'

pst_now.isoformat()
> '2016-11-16T14:31:18.130822-08:00'

4 – Measuring duration with timedelta

Often we’ll be working with multiple datetime objects, and we’ll want to compare them. The timedelta class is useful for finding the difference between two dates or times. While datetime objects represent a point in time, timedelta objects represents a duration, like 5 days or 10 seconds.

Suppose I want to know exactly how much older I am than my brother. I’ll create datetime object for each of us representing the day and time of our birth.

import datetime
import pytz

my_birthday = datetime.datetime(1985, 10, 20, 17, 55)
brothers_birthday = datetime.datetime(1992, 6, 25, 18, 30)

Since we like to work with offset aware objects, we’ll add timezone information.

indy = pytz.timezone("America/Indianapolis")
my_birthday = indy.localize(my_birthday)
brothers_birthday = indy.localize(brothers_birthday)

To see how much older I am than my brother, we can simply subtract the two datetime objects. And to see the answer in a human readable way, we can simple print the difference.

diff = brothers_birthday - my_birthday
print(diff)
> 2440 days, 0:35:00

The diff variable is actually a timedelta object that looks like this datetime.timedelta(2440, 2100).

Subtracting a datetime object from another yields a timedelta object, so as you might suspect, subtracting a timedelta object from a datetime object yields a datetime object.

datetime - datetime = timedelta
# and
datetime - timedelta = datetime

Of course the same is true for addition.

This is useful for answering questions like “what was the date 3 weeks ago from yesterday?” or “what day of the week is 90 days from today?”.

To answer the second question, we need to have two things – first, a datetime object representing today and second, a timedelta object representing 90 days.

import datetime

today = datetime.datetime.now()
ninety_days = datetime.timedelta(days=90)

Then we can simply do the calculation.

target_date = today + ninety_days

And since we want to know the day of the week, we can use strftime.

target_date.strftime("%A")
> 'Wednesday'

5 – Conclusion

Dates and times can be tricky, but Python’s datetime class should make things a little bit easier. Hopefully you found this guide to be useful. If you think there are any other essentially examples or topics related to datetime objects and timezones please comment below, and I will try to add them to the guide.

NEXT UP

Class Vs. Instance Variables in Python 3

howchoo
howchoo   (467)
November 22, 2023

When learning object oriented programming in Python, there can be a few gotchas when it comes to distinguishing between class and instance variables. In this guide I’ll explain the difference between class and instance variables and provide examples demonstrating various use cases. 1 – Class vs. instance variables First, a quick review if you’re new

Continue Reading

howchoo

 467 guides

Introducing Howchoo, an enigmatic author whose unique pen name reflects their boundless curiosity and limitless creativity. Mysterious and multifaceted, Howchoo has emerged as a captivating storyteller, leaving readers mesmerized by the uncharted realms they craft with their words. With an insatiable appetite for knowledge and a love for exploration, Howchoo’s writing transcends conventional genres, blurring the lines between fantasy, science fiction, and the surreal. Their narratives are a kaleidoscope of ideas, weaving together intricate plots, unforgettable characters, and thought-provoking themes that challenge the boundaries of imagination.

Home Interests Comcast

Xfinity Router Login: How to Log in to a Comcast Xfinity Router

howchoo
howchoo   (467)
August 9, 2023
6 minutes

Share

You’ll Need 1

What you’ll need
Interests
Series
Howchoo is reader-supported. As an Amazon Associate, we may earn a small affiliate commission at no cost to you when you buy through our links.
Posted in these interests:
comcast • 7 guides
internet • 36 guides
router • 32 guides

There are many reasons you might want to access your Comcast Xfinity router. For instance, you may want to change your wireless password or set up port forwarding for a project you are working on.

In any case, if you’re looking to log in to the Xfinity Wireless Gateway, then you’ll need the Comcast Xfinity router IP address in [the second step] to log into your router. If you have an Xfinity modem/router combo, this is also known as your modem login. If you’re using a business router, the process can be a little different. Check out this guide for steps on how to log into a Comcast business router.

If you need to login to your Comcast account, visit this guide.

1 – Make sure you are connected to your Xfinity network

This can be a wired or WiFi connection.

2 – Open a browser and go to 10.0.0.1

This is the router’s gateway. It will automatically bring up a log in screen.

3 – Enter a username and password

Username: admin
Password: password

Now you’re logged in.

4 – Change your password

You can change your password by click “Change Password” at the top right of the admin panel.

5 – Can’t remember your username or password?

Username

Here’s the Xfinity page to help you find your username.

Password

Here’s the Xfinity page to help you reset your password.

6 – Other options

While the above steps are the easiest way to directly log in to your Comcast Xfinity router, here are some other options that may suit your needs, as well.

Xfinity xFi

If you’re using an xFi gateway, then you can access xFi from your account pages in both the mobile Xfinity app and on the Xfinity website.

Then you’ll simply:
1. Log in to your Comcast Xfinity account.
2. Select your network name from the top of the page.
3. From here you can view your password and make changes to your WiFi.

7 – Next up: Speed up your wifi connection

We’ve written a few practical tips to show you how to speed up your wifi connection.

Make Wi-Fi Faster: How to Speed Up Your Wi-Fi Connection
Speed up your Internet connection in just a few minutes.

Looking to upgrade your Comcast router or modem? Get a faster connection and remove equipment rental fees from your bill by finding the best Comcast compatible routers.

NEXT UP

How to Change Your Frontier WiFi Password

howchoo
howchoo   (467)
November 25, 2023

There are a few reasons you might want to update or reset your WiFi password: making your network more secure, and making your password easier to remember and type. Improved network security You can add an extra layer of security to your network by changing the WiFi password. As long as your new password is

Continue Reading

howchoo

 467 guides

Introducing Howchoo, an enigmatic author whose unique pen name reflects their boundless curiosity and limitless creativity. Mysterious and multifaceted, Howchoo has emerged as a captivating storyteller, leaving readers mesmerized by the uncharted realms they craft with their words. With an insatiable appetite for knowledge and a love for exploration, Howchoo’s writing transcends conventional genres, blurring the lines between fantasy, science fiction, and the surreal. Their narratives are a kaleidoscope of ideas, weaving together intricate plots, unforgettable characters, and thought-provoking themes that challenge the boundaries of imagination.