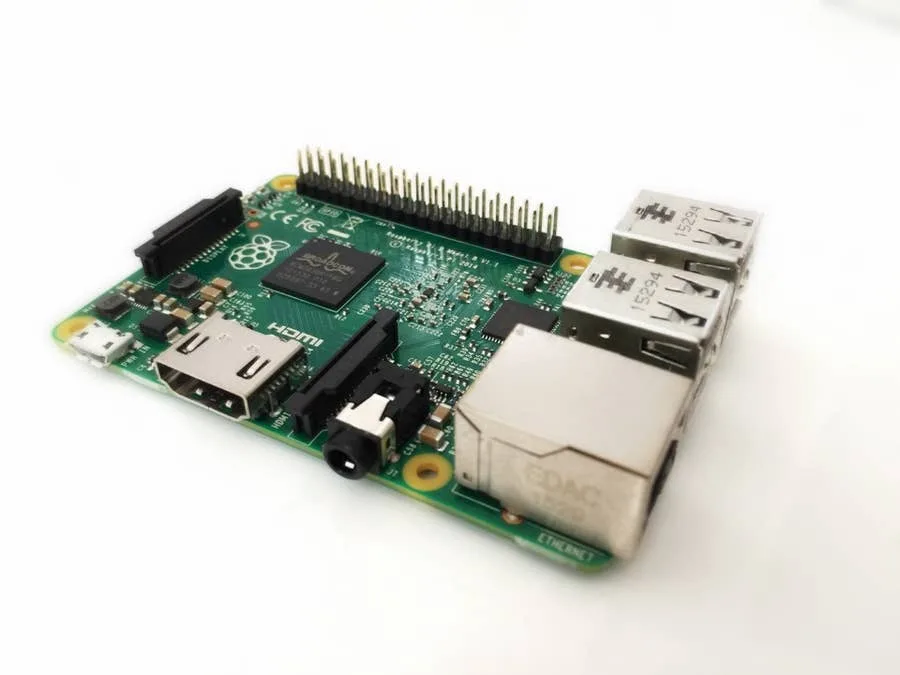
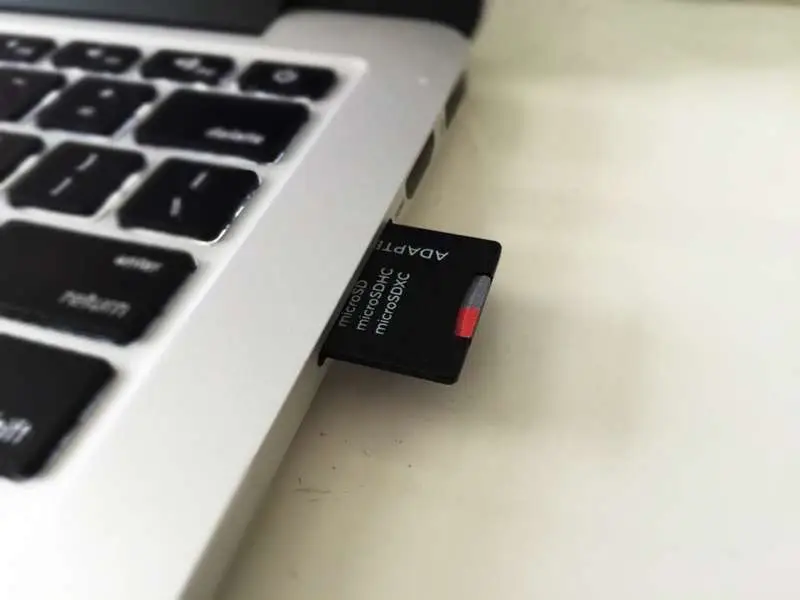
Some Pi operating systems come with specific instructions for transferring files—like RetroPie. However, I’ll assume your Pi is running Raspberry Pi OS (formerly Raspbian). It’s the most common operating system for the Raspberry Pi. Make sure your Pi is up to date by visiting our guide on how to update your Pi to the latest version of Raspberry Pi OS.
You will need a network connection. Be sure to connect an ethernet cable or log into your WiFi network.
1 – Transfer files to the Raspberry Pi using SCP
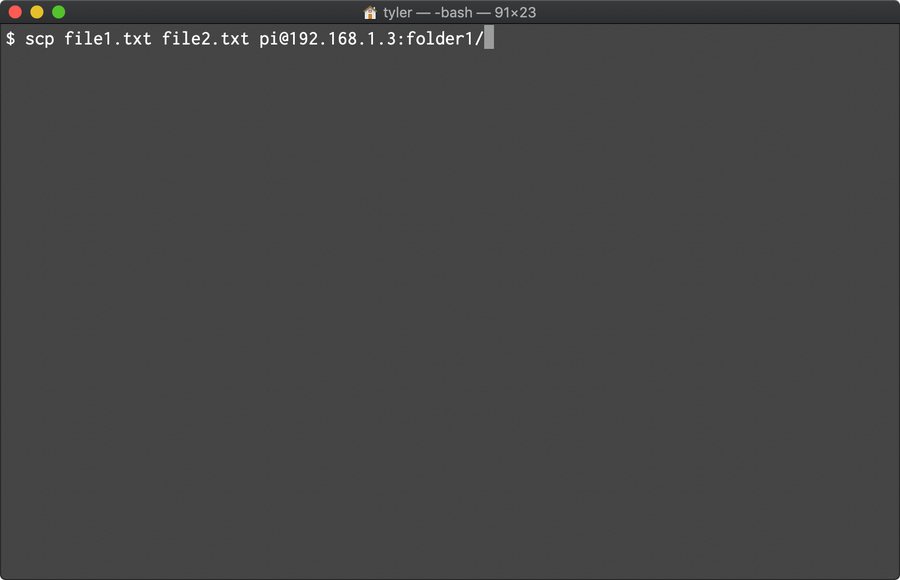
The fastest way to copy files to your Raspberry Pi is with SCP, which stands for “secure copy”. This method might be difficult at first for newer users, but it eliminates the overhead of a GUI application and is both fast and secure.
Enable SSH
Because SCP is based on the SSH protocol, you’ll need to enable SSH on your Pi before you can use this method.
This command will ask you for the password for the pi user, which by default is raspberry.
In this example file1.txt and file2.txt are transferred to folder1 in your home directory: /home/pi/folder1. You can also specify an absolute path, like this:
This will move the files to /code in the root directory of your Pi, assuming you have the correct permissions to access this directory.
2 – Transfer files to the Raspberry Pi using SFTP
SFTP is even easier to use than SCP. Once you establish an SFTP connection with your Pi, you can drag and drop files with the click of a button.
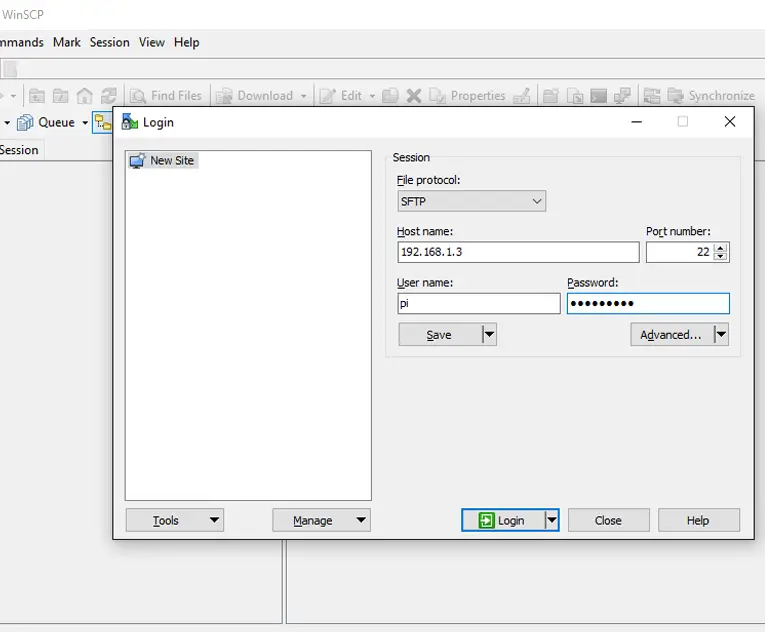
To log into the Raspberry Pi via SFTP, first grab the IP Address of your Raspberry Pi. Then open your SFTP client (see below), and use your IP address with the default credentials:
Windows users can use WinSCP for SFTP file transfers. This program is recommended by the Raspberry Pi Foundation.
SFTP client for macOS
Cyberduck is one of the best SFTP options for Mac users.
3 – Transfer files to the Raspberry Pi over Network using Samba
Samba makes it easy to access the Pi via shared network devices. This can be easier to manage than logging into the Pi for every file transfer.
Raspberry Pi OS does not come with Samba by default. However, it’s very easy to set up. The Rasberry Pi Foundation provides detailed instructions on how to install and set up Samba.
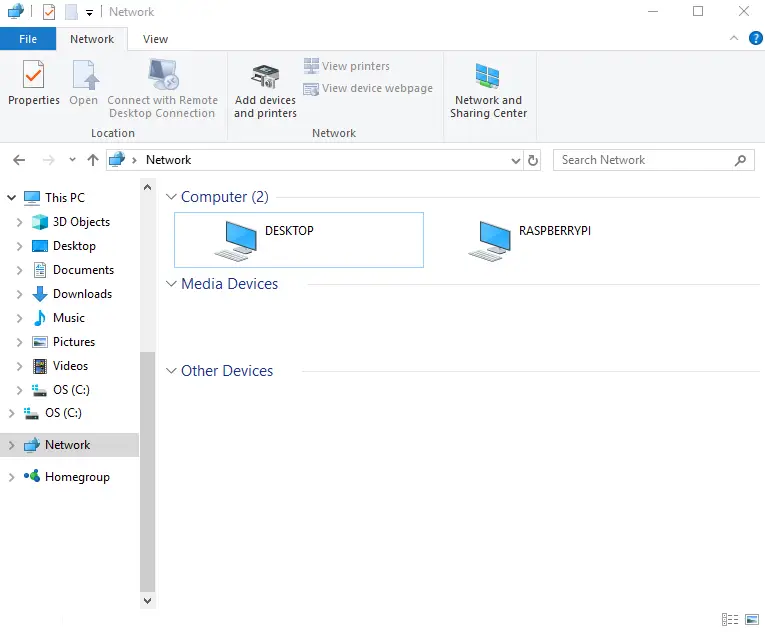
With network sharing enabled, you can access the Raspberry Pi by clicking on it from your list of available network devices. This makes it easy to move files over in a pinch.
There are several ways to go about running a Minecraft server on the Raspberry Pi. In this guide, I’ll cover how to install Nukkit—a cross-platform Minecraft server that’s super easy to set up on the Raspberry Pi. This server should work with PCs, consoles, and tablets running Minecraft 1.14. I’ll be using a Raspberry Pi
Introducing Howchoo, an enigmatic author whose unique pen name reflects their boundless curiosity and limitless creativity. Mysterious and multifaceted, Howchoo has emerged as a captivating storyteller, leaving readers mesmerized by the uncharted realms they craft with their words.
With an insatiable appetite for knowledge and a love for exploration, Howchoo’s writing transcends conventional genres, blurring the lines between fantasy, science fiction, and the surreal. Their narratives are a kaleidoscope of ideas, weaving together intricate plots, unforgettable characters, and thought-provoking themes that challenge the boundaries of imagination.
I use Slack reminders a lot. Reminders are a great way to remind yourself of common tasks without involving your calendar program.
Sometimes, it’s useful to see a complete list of reminders you’ve already set. This short guide will show you how to view a full list of existing Slack reminders.
1 – Launch Slack
Open Slack and navigate to any channel or direct message.
2 – Enter the Slack remind list command
Enter the following command and press enter:
/remind list
The /remind list command will return a list of all current reminders as well as past and incomplete reminders.
3 – Slack reminder list actions
There are several other actions you can also perform from this view, including:
Snooze Slack reminders by 15 minutes, 1 hour, or 1 day (to snooze them for a different time interval, simply delete the reminder and create a new one)
Delete individual Slack reminders
Mark Slack reminders as complete
I also recommend you click Delete all past reminders to remove old, obsolete ones.
Next, learn how to set up recurring Slack reminders to remind yourself to perform some task at a regular interval! I use this as a weekly reminder to check Howchoo’s site traffic (and if I’m busy at the moment, I simply snooze the notification).
This short guide will teach you how to set up recurring reminders in Slack, sending a notification to you or your team every week, month, 13th, or whatever interval you choose. 1 – Open the channel you’d like to post in Open the channel where you’d like the reminder to occur. You can post reminders
Introducing Howchoo, an enigmatic author whose unique pen name reflects their boundless curiosity and limitless creativity. Mysterious and multifaceted, Howchoo has emerged as a captivating storyteller, leaving readers mesmerized by the uncharted realms they craft with their words.
With an insatiable appetite for knowledge and a love for exploration, Howchoo’s writing transcends conventional genres, blurring the lines between fantasy, science fiction, and the surreal. Their narratives are a kaleidoscope of ideas, weaving together intricate plots, unforgettable characters, and thought-provoking themes that challenge the boundaries of imagination.
The Raspberry Pi Pico is a little board with a lot of room for creativity. But like your brain, the Pico needs the right juice to work properly! Makers have a few options when it comes to supplying the Pico with power ranging from portable batteries to hard-wired setups.
What is the Pico?
The Raspberry Pi Pico is a $4 microcontroller board from the Raspberry Pi Foundation. It uses the new RP2040 chip and is the first official microcontroller from the Raspberry Pi team.
1 – Powering the Pico overview
The Raspberry Pi Pico can accept a range of voltages between 1.8V and 5.5V. This makes it incredibly versatile when it comes to incorporating the Pico into projects where power demand can easily vary between modules.
There are two power input options on the Pico: the micro USB port and the VSYS GPIO pin, labeled as number 39 on official documentation. Any use of the VSYS pin will require a ground for the battery’s negative line.
2 – Power the Pico from a computer with USB
Powering the Pico via USB on a computer is the easiest method. Most makers will have the hardware necessary to power the Pico this way. This connection is also required to program the Pico.
The biggest drawback to this method is that it requires constant tethering to the machine. This is generally a temporary method of powering the Pico.
3 – Power the Pico via AC using USB
If you have an AC to USB adapter, you can use the micro USB cable to power the Pico in a more permanent configuration. In this setup, the Pico accepts power from the micro USB port with a cable connected directly to a wall outlet.
This method is ideal when your project requires constant power and with no demand for portability. Make sure your cable and adapter won’t deliver more than 5.5V to the Pico.
4 – Power the Pico using a battery
If you want to take your Pico on the go, you can always incorporate a battery into the project design. The type of battery you choose to use can be as big as a power bank or as small as a couple of AA batteriess. How much you’ll need depends on how long you need the Pico to be powered for and how much current it draws with any connected peripherals.
Portable battery packs with USB output will work just fine with the micro USB port on the Pico. If you want to use the micro USB port for something else, you may want to use the GPIO to connect the battery. This will free up the micro USB port while supplying power to the board.
5 – Power the Pico via GPIO
Powering the Pico using GPIO is easy, but has to be done with caution. Make sure you aren’t working with hot wires and unplug any cables you plan to solder.
Determine your power source – Determine what you will use to supply power to the Pico (battery, wall adapter, etc).
Connect the positive and ground wires – If your Pico has male headers soldered into place, you will need to connect the positive and negative ground wires to the Pico. Pin 39 is the VSYS pin capable of accepting power. Pin 38 is an adjacent ground pin, but any ground pin will do. If you don’t have any headers, you can solder the power connecting wires into place.
Test the connection – Double-check your wiring before implementing a test run. If everything looks good, connect your battery or plug your cable in.
If everything worked, your Raspberry Pi Pico should be full of power and ready to run!
There are several ways to go about running a Minecraft server on the Raspberry Pi. In this guide, I’ll cover how to install Nukkit—a cross-platform Minecraft server that’s super easy to set up on the Raspberry Pi. This server should work with PCs, consoles, and tablets running Minecraft 1.14. I’ll be using a Raspberry Pi
Introducing Howchoo, an enigmatic author whose unique pen name reflects their boundless curiosity and limitless creativity. Mysterious and multifaceted, Howchoo has emerged as a captivating storyteller, leaving readers mesmerized by the uncharted realms they craft with their words.
With an insatiable appetite for knowledge and a love for exploration, Howchoo’s writing transcends conventional genres, blurring the lines between fantasy, science fiction, and the surreal. Their narratives are a kaleidoscope of ideas, weaving together intricate plots, unforgettable characters, and thought-provoking themes that challenge the boundaries of imagination.
Starting with MacOS Sierra and High Sierra, your Mac will no longer play a “pop” sound when you adjust your volume. If you prefer to have this sound when you adjust volume up and down (as I do), this guide will teach you how to reenable it. 1 – Open Sound System Preferences Navigate to System
Introducing Howchoo, an enigmatic author whose unique pen name reflects their boundless curiosity and limitless creativity. Mysterious and multifaceted, Howchoo has emerged as a captivating storyteller, leaving readers mesmerized by the uncharted realms they craft with their words.
With an insatiable appetite for knowledge and a love for exploration, Howchoo’s writing transcends conventional genres, blurring the lines between fantasy, science fiction, and the surreal. Their narratives are a kaleidoscope of ideas, weaving together intricate plots, unforgettable characters, and thought-provoking themes that challenge the boundaries of imagination.
Installing gems is easy enough, but how do you install a specific version? Or a range of versions? In this guide, we’ll cover the basics of RubyGem’s gem install command.
Use `gem install -v`
You may already be familiar with gem install, but if you add the -v flag, you can specify the version of the gem to install.
Using -v you can specify an exact version or use version comparators.
Introducing Howchoo, an enigmatic author whose unique pen name reflects their boundless curiosity and limitless creativity. Mysterious and multifaceted, Howchoo has emerged as a captivating storyteller, leaving readers mesmerized by the uncharted realms they craft with their words.
With an insatiable appetite for knowledge and a love for exploration, Howchoo’s writing transcends conventional genres, blurring the lines between fantasy, science fiction, and the surreal. Their narratives are a kaleidoscope of ideas, weaving together intricate plots, unforgettable characters, and thought-provoking themes that challenge the boundaries of imagination.
In a long list, it can be frustrating to scroll through endless items to find duplicates in Google Sheets. We often use Google Sheets when recording ideas, but we don’t want to record the same idea twice. So we’ll need to highlight, and, in some cases, remove the duplicate data from a column or row.
In this guide, we’ll show you how to easily find duplicates in a Google spreadsheet, highlight them, and then remove them (if that’s your intention).
Deleting duplicate data in Google Sheets
If you know that you’ll be deleting duplicate data, then we recommend you skip ahead to that step (Step 3).
1 – Find duplicates in a column
To find duplicate data in a column of a Google Sheet:
Highlight the column by clicking on the corresponding letter above it.
Go to Format.
Select Conditional formatting.
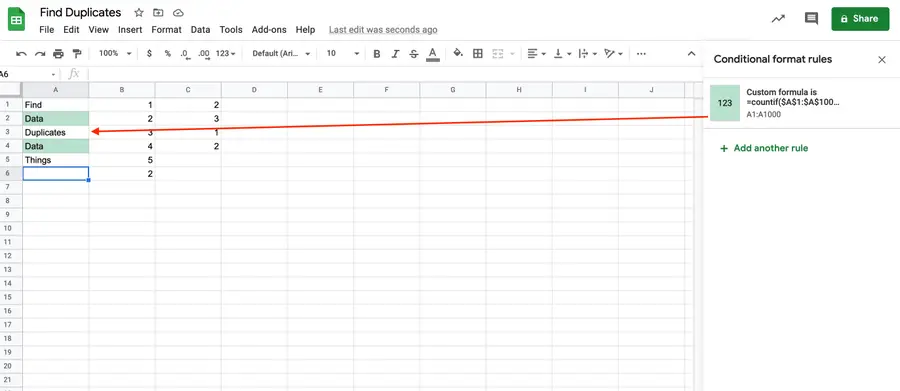
Under “Format rules,” select Custom formula is….
Input a version of the following formula, depending on the letter of the column you’ve highlighted. (In this formula, we selected column A.) You’ll need to change the letter if you’re using a different column.
=countif($A$1:$A$1000,A1)>1
Click Done.
You may also need to change the formula if your column starts at a different value.
2 – Find duplicates in a row
To find duplicate data in a row of a Google Sheet:
Highlight the row by clicking on the corresponding number next to it.
Go to Format.
Select Conditional formatting.
Under “Format rules,” select Custom formula is….
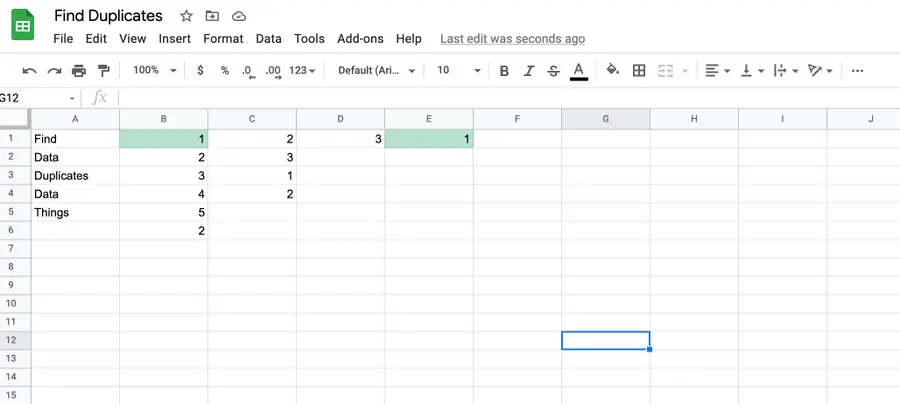
Input a version of the following formula, depending on the row you’ve highlighted. (In this formula, we selected row 1.) You’ll need to change both numbers that follow the letters if you’re using a different column.
=countif($A$1:$Z1,A1)>1
Click Done.
In the above, if you want to search row 2, for example, then your formula would be =countif($A$2:$Z2,A2)>1.
3 – Removing duplicates in Google Sheets
If all you need to do is remove duplicates from a column or row, then it’s even easier than finding and highlighting them.
Highlight the row or column.
Go to Data.
Select Remove duplicates.
Make sure that you’re selecting the right column(s) or row(s).
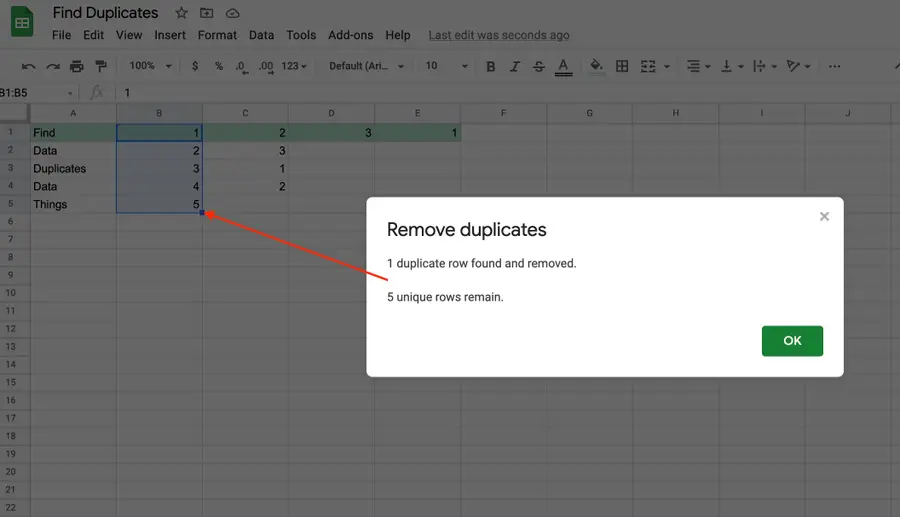
Click Remove duplicates.
You’ll be shown how many duplicates are removed. By default, duplicates are removed in Google Sheets, leaving the first instance of the data.
If you just need to search and find a single word or multiple words in Google Docs, press ⌘ + F. If you want to find and replace words in your Google Doc, then we’ll show you how to do that too! 1 – Press cmd + F To find a word (or words) in
Introducing Howchoo, an enigmatic author whose unique pen name reflects their boundless curiosity and limitless creativity. Mysterious and multifaceted, Howchoo has emerged as a captivating storyteller, leaving readers mesmerized by the uncharted realms they craft with their words.
With an insatiable appetite for knowledge and a love for exploration, Howchoo’s writing transcends conventional genres, blurring the lines between fantasy, science fiction, and the surreal. Their narratives are a kaleidoscope of ideas, weaving together intricate plots, unforgettable characters, and thought-provoking themes that challenge the boundaries of imagination.
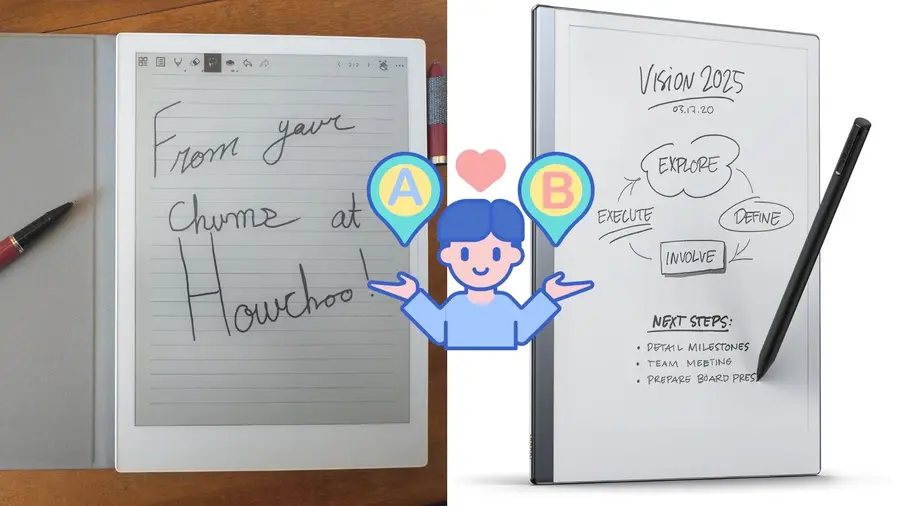
The world of e-ink devices is vast and confusing, with dozens of models from dozens of manufacturers.
Some people will only be familiar with Amazon’s Kindle or the Kobo series of e-readers, but these are actually really limited in terms of functionality!I’ve written about how much I love the Supernote e-ink device before, but I haven’t yet touched on what makes the Supernote superior to another big name in the e-ink world: reMarkable.
ReMarkable set itself up as the “paper replacement” of e-ink devices, going so far as to create a highly paperlike experience with a special screen and a pencil-like stylus nib that wears down through use.
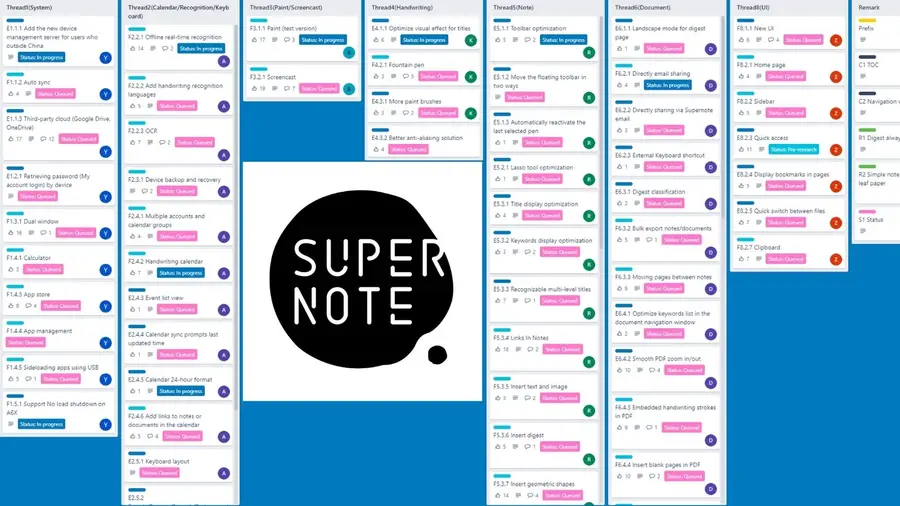
But, what started looking like an outstanding idea with unbeatable software, quickly became a nightmare of venture capitalism as they locked features behind a paywall. Meanwhile, Supernote actively engaged with their user community, working with their users to build what is probably the best e-ink device in its price range.
1 – reMarkable’s subscription plan
reMarkable’s subscription plan
This is the largest blow to the reMarkable because it’s never enjoyable to find a device’s features being locked behind a paywall.
ReMarkable hinted that they would be heading in this direction for some time, and they finally took the leap at the end of 2021, likely because they took tons of venture capital money and ended up desperate to make their backers happy ASAP.
Supernote has almost gone the opposite direction of reMarkable, if such a thing is possible. In a truly remarkable twist in today’s capitalist world, Supernote puts all their resources into improving existing devices instead of arbitrarily phasing out devices to make a profit, or opting for a subscription model like reMarkable.
People who purchased their reMarkable devices before October 12, 2021 got to keep a few of their so-called “premium” features for free, but all future updates that reMarkable makes won’t be included, and if you’re thinking of buying a reMarkable now…just don’t.
Here’s the thing: reMarkable bills itself as a paper notebook replacement, but as a side-by-side comparison shows, the features offered via any reMarkable plan simply don’t come anywhere close to the Supernote, and that includes things like writing feel and latency. How is this possible? Well, it all comes down to Supernote’s incredible roadmap.
This is a stark difference that highlights not only how great Supernote is with community engagement (and how much they care about creating an incredible product), but how the needs of the community have influenced the actual design of the device and the features that it offers.
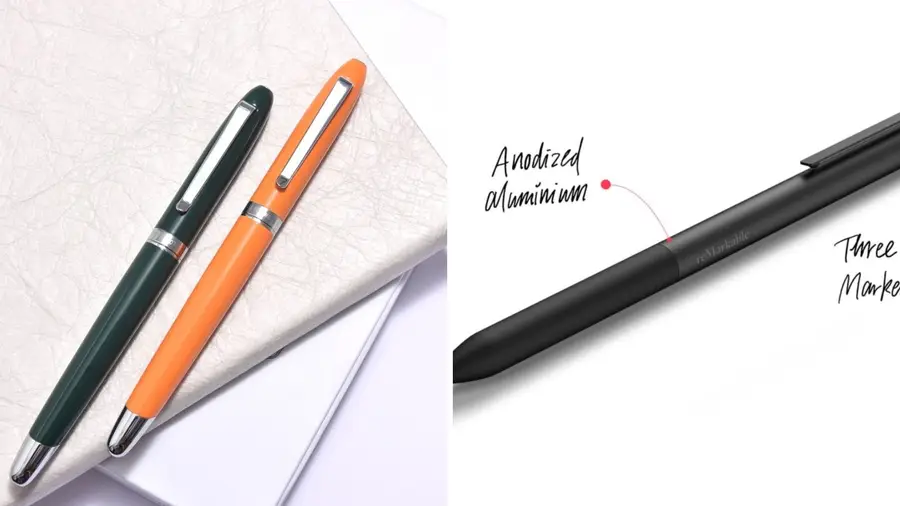
3 – Supernote stylus is better than reMarkable 2
Supernote stylus is better than reMarkable 2
’ll come right out with a hot take: for all that reMarkable does offer the writing feel of pencil on paper (it does, and, to be fair, it’s incredible how well it does this), it comes with the massive limitation of wear and tear.
Like a few other e-ink devices on the market, the reMarkable stylus wears out and, according to various reviews, wears out quite quickly. That’s a steep price for the feel of writing on paper.
The Supernote, meanwhile, approaches the experience of writing through their patented self-repairing screen film. This mimics the experience of writing with a pen on paper surprisingly well, and does so with a hard ceramic nibbed stylus that never wears out.
In fact, their Heart of Metal stylus is the best-looking and most impressive on the market, offering the feel of a high-quality pen.
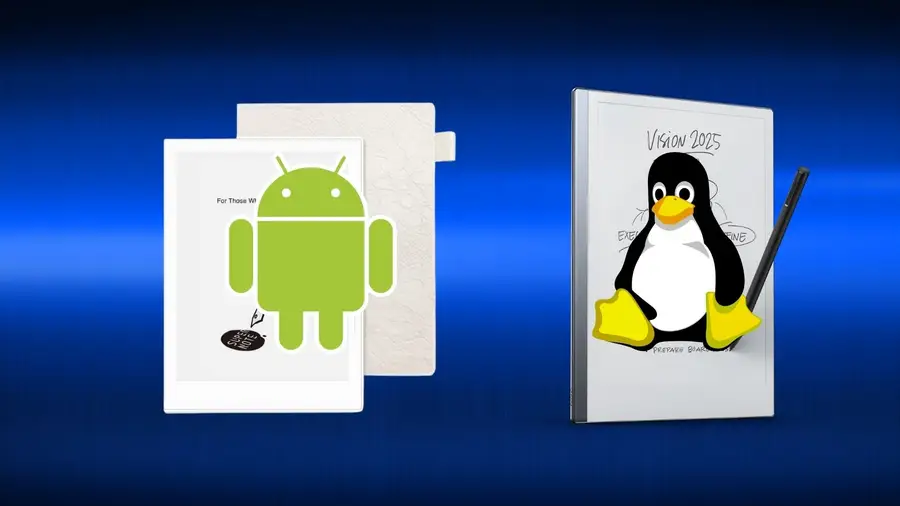
4 – Supernote’s Android OS vs reMarkable’s Linux OS
Supernote’s Android OS vs reMarkable’s Linux OS
Beneath the hood, these devices are wildly different. The reMarkable uses custom software based on Linux, the open-source GNU operating system.
When I originally heard this, I immediately thought two things: that’s awesome, and, what about all the apps that people expect to be able to use with an e-ink device? Because the reMarkable can’t run anything from the Android app store.
That means: no Kindle, no Overdrive, no Dropbox; none of the integrations that have become a mainstay of the e-ink market. To get around this, reMarkable tried to double down on their claim of their device as a “paper journal replacement” designed to focus the user’s attention on nothing but their writing. No matter that this alienates a huge potential userbase.
Supernote has a Linux line of devices, their older A5 and A6 models (and these actually feature email integration, Supernote’s own generous cloud sync, and software that is still getting major improvement updates). But Supernote’s latest devices, their A5x and A6x line of tablets, feature a heavily modified Android OS that offers massive integration potential.
Their team has stated that wider access to apps in the Android app store is on their radar, and that means that we will hopefully eventually be able to ditch Kindle altogether and use any apps we choose for our ebook pleasure.
They have also considered integration with various academic and knowledgework apps like Obsidian. Supernote even has default integration with Microsoft Word, in a major boon for writers everywhere who want to travel without their bulky laptop.
5 – Supernote beats reMarkable 2 as an e-reader
Supernote beats reMarkable 2 as an e-reader
Ever since the original reMarkable came out, users have been complaining about issues with using that device as an e-reader. To be fair, reMarkable 2 has improved things immensely, and the size of the reMarkable 2 makes it handy for viewing PDFs and other large documents.
For a long time, Supernote lagged (literally) when it came to handling very large or image-dense ebooks and PDFs. The December 2021 Supernote update changed all that.
The Supernote now absolutely matches the reMarkable in terms of speed, but provides a far more satisfactory reading experience, through multiple apps. That’s a big winner for me.
6 – Supernote has integrated Word processor and keyboard support
Supernote has integrated Word processor and keyboard support
The reMarkable is excellent when it comes to writing and drawing, without a doubt. They corner the market on superb latency and pressure sensitivity…but that’s it. For a very high price, you’re getting something that’s ultimately less functional than a good art pad and stylus.
What first attracted me to Supernote was it’s Word Processor integration. You can open and create Word documents from within Supernote directly, link a bluetooth keyboard to your device, and get straight to work.
As a professional writer, this was groundbreaking. I do actually want to escape the distractions of tech while I work, and Supernote offers me the ability to get the best of both worlds. I can work in my Word documents without eyestrain and with insane battery life, all at a quarter of the weight of my laptop.
Proofreader marks for Word in Supernote?
Supernote proofreader mark support
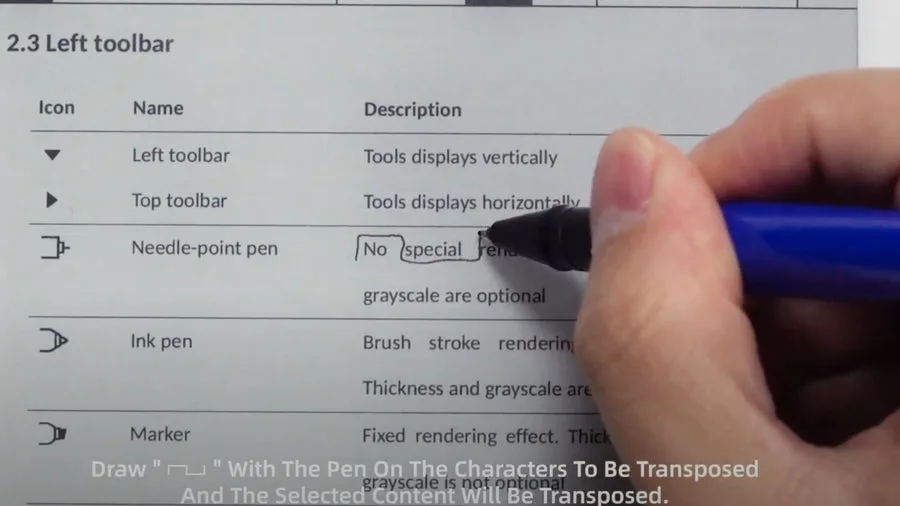
But then Supernote went even farther with their development of the perfect writer’s companion, and added proofreader mark support for Word documents. What does this mean?
That’s right. You can mark up your Word document using your stylus, deleting and inserting content with a strike of the pen.
And, since the massive update at the end of 2021, Supernote’s word recognition is fully functional. That means it’s possible to insert handwriting directly into a Word document—handwriting that is automatically converted to digital text.
7 – Supernote turns on when the cover opens!
Supernote turns on when the cover opens!
This is a small one, but Supernote has an ingenious cover design that automatically wakes the device when the cover is flipped open.
It wakes to whatever document you last had open and feels beautifully intuitive. It really is just like using a paper journal. No buttons to press or anything.
8 – Supernote vs reMarkable 2, which is sturdier?
Supernote vs reMarkable 2, which is sturdier?
The reMarkable has definitely seen some upset customers after cracked screen issues, but it’s not any more risky to own the reMarkable than any other glass tablet. Save, perhaps, that you can’t put an additional screen protector over it.
Still, if it’s snug in its folio, then nothing short of a drop or applied pressure needs to be a concern. But, so the consensus goes, don’t drop it, or it absolutely will break.
The Supernote A6X also uses a glass screen, but this is covered by Supernote’s special self-healing film (which gives the device it’s pen-like writing feel). This makes the device sturdier, and I’ve yet to run into any concerns with my own A6X.
Supernote’s A5X has a newer plastic screen that’s even sturdier, however, making it the ideal choice for those of us constantly on the run and more likely to be rough on our devices.
With the folio attached, both Supernote devices are pretty hard to damage. My A6X did eventually end up with some cosmetic damage after two years of rough use—the thin plastic lip at the bottom USB-C port split. It doesn’t affect the device in any way, however, and isn’t noticeable unless I’m looking right at it.
9 – Supernote vs reMarkable 2, which has the better design?
Supernote vs reMarkable 2, which has the better design?
Build quality aside, the reMarkable is incredibly thin and well-designed for a futuristic sleek factor. In an age where we want all the power of technology without any of the baggage, it definitely has something to offer.
The Supernote beats it out again for me in this department, however. Yes, the Supernote is fractionally thicker, with a design that reminds me a little like a Moleskine notebook (once it’s in its folio), but that also gives it a weight and solidity I like.
It’s very easy to hold, but has the sort of density one would expect from a notebook. I enjoy reading on it more because of this as well.
But these two features really stand out for the Supernote: the instant-wake feature I mentioned earlier. It’s intuitive and lovely to have the device snap to life as soon as I open the cover. But there’s also Supernote’s unique hardware slide.
The right side of the Supenote features a sleek groove that provides two powerful functions. Slide your thumb up and the screen instantly refreshes. For anyone who has not yet used e-ink devices, a “ghosting” effect can sometimes occur, where subtle afterimages of previous content are displayed until the page is refreshed.
Supernote makes it incredibly easy to take care of this issue. And, swiping down brings to life the system control bar, providing physical access that once again feels really natural to use.
10 – Supernote vs reMarkable 2, writing latency
Supernote vs reMarkable 2, writing latency
The big claim that reMarkable made early on was that the latency of its devices were equal to Apple’s 2nd Gen Pencil. That was a major breakthrough for e-ink devices that have historically struggled to match the writing experience of traditional devices like the iPad.
Initially, the Supernote’s writing latency was still perfectly serviceable (and, indeed, faster than a number of better-known e-ink devices), but it was double that of the reMarkable 2.
But then came the 2021 end of year update, and Supernote quietly changed the game. The Supernote now boasts a pen latency almost identical to that of the reMarkable 2 eliminating the lead that originally excited me so much about the reMarkable device.
11 – Supernote’s incredible community engagement
As I’ve mentioned, the best thing about Supernote is its community engagement. Their entire business model seems to be based on building a deep and effective rapport with their customers, taking suggestions and critiques in good faith and using them to directly improve their device. Comments that I made when I first purchased my A6X in 2019 were put on the public roadmap and solved.
The engineers and marketing team are active on the company’s Reddit page, and even their managing director is both available and extremely friendly.
I honestly have not encountered a single other company that does half as much to connect with their customers and build a community of engagement and trust. And that community works out for them, too! User feedback has provided them with a huge testing base that has allowed them to improve their device continually since its release.
The reMarkable team has been less straightforward. They do have a Reddit channel, but little official activity seems to take place there. They do have an official blog, but only a few major updates are released on it.
They will respond to emails, but I haven’t seen a glowing review of their customer support process yet. And then there’s the big problem of their subscription model, which was kept veiled from the public and only became known early through some clever investigating by Voja over at My Deep Guide.
I wish I could like the reMarkable more…it’s a neat device with so much potential. But the terrible business model, horrible user support and connectivity, and unwillingness to meet the user where the user needs to be met make it a no-go for me. The Supernote, however, is the opposite in every way.
I have experienced nothing but good will and support from the Supernote community and official team, and their devices have become a part of my daily workload for everything from writing articles, to reading books I want to review, to planning my move into a new apartment. It just doesn’t get any better than that.
NEXT UP
How to Set Up Quick Connect on a Synology NAS
Get Synology’s powerful Quickconnect running in minutes on your NAS!
Synology is one of the most popular creators of Network Attached Storage devices on the market today, and for great reason — they’re really good at what they do. They consistently make devices that stand the test of time and feature top-notch software that makes the process of running a home server as easy as
There are many reasons you might want to access your Comcast Xfinity router. For instance, you may want to change your wireless password or set up port forwarding for a project you are working on.
In any case, if you’re looking to log in to the Xfinity Wireless Gateway, then you’ll need the Comcast Xfinity router IP address in [the second step] to log into your router. If you have an Xfinity modem/router combo, this is also known as your modem login. If you’re using a business router, the process can be a little different. Check out this guide for steps on how to log into a Comcast business router.
While the above steps are the easiest way to directly log in to your Comcast Xfinity router, here are some other options that may suit your needs, as well.
Xfinity xFi
If you’re using an xFi gateway, then you can access xFi from your account pages in both the mobile Xfinity app and on the Xfinity website.
Then you’ll simply: 1. Log in to your Comcast Xfinity account. 2. Select your network name from the top of the page. 3. From here you can view your password and make changes to your WiFi.
7 – Next up: Speed up your wifi connection
We’ve written a few practical tips to show you how to speed up your wifi connection.
Make Wi-Fi Faster: How to Speed Up Your Wi-Fi Connection Speed up your Internet connection in just a few minutes.
Looking to upgrade your Comcast router or modem? Get a faster connection and remove equipment rental fees from your bill by finding the best Comcast compatible routers.
If you’re a Charter WiFi user, you need to keep your network secure. Changing your WiFi password is a simple and effective way to add an additional layer of security to your network. This guide covers the best ways to manage your Charter Spectrum Network password. 1 – Change Wifi Password You can change the
If you’re like me, you don’t always have a spare keyboard/monitor available to set up your Raspberry Pi. I rely heavily on SSH to set up my Pi, but in late 2016 Raspbian images started shipping with SSH disabled for security reasons. Fortunately, you can still enable SSH without a screen using the latest operating system, Raspberry Pi OS.
Table of Contents
1 – Put the micro SD card into your computer
This guide assumes that you’ve already installed Raspberry Pi OS on your Pi. If not, go ahead and install it. Then put the SD card into your computer.
You’ll have to locate the boot directory, on my Mac it’s in /Volumes/boot.
If you’re on a Mac, open Terminal (Applications > Utilities > Terminal) and type:
cd /Volumes/boot
On Windows, you’ll need to use Command Prompt instead.
3 – Create an empty file called ssh
All you have to do is create an empty file called ssh.
touch ssh
If this file exists, ssh will be enabled when the pi is booted.
4 – Insert the SD card into the Pi and power on
Connect the Pi to a power source to power it on. As long as the Pi is connected via an Ethernet cable (or wifi), you should now be able to ssh in to the Pi.
With summer right around the corner, it’s time to fire up the grill! But who will watch the grill while you’re beating the heat? This year, kick things up a notch with your own Raspberry Pi-powered HeaterMeter. Don’t just throw a BBQ, be a part of it. HeaterMeter lets you keep a close eye on
Working with dates and times can be tricky, especially when dealing with timezone conversions. This guide will provide an overview of Python’s datetime module with an emphasis on timezone related functions.
Table of Contents
1 – What is a datetime object?
First, if you’ve seen datetime used in Python, you’ll notice that it’s both the name of a module and one of many classes within the module. So the datetime module can be imported like this:
Or you can simply import the datetime classes you care about:
from datetime import datetime, timedelta
A datetime object is an instance of the datetime.datetime class that represents a single point in time. If you are familiar with object oriented programming, a datetime object is created by instantiating the datetime class with a date.
An easy way to get a datetime object is to use datetime.now.
As you can see, the now method returned a datetime object that represents the point in time when now was called.
You can also create a datetime object by specifying which date you want to represent. At a minimum, instantiating datetime requires at least 3 arguments – year, month, and day.
From here, we’ll talk about manipulating, formatting and doing timezone conversions on datetime objects.
2 – Formatting datetime objects
According to the documentation, the “focus of the implementation [of the datetime library] is on efficient attribute extraction for output formatting and manipulation”. So we will discuss extracting attributes and formatting dates.
For this example, we’ll choose a random date.
import datetime

d = datetime.datetime(1984, 1, 10, 23, 30)
There are many occasions where we’ll want to format a datetime object in a specific way. For this, the strftime method comes in very handy. This method allows you to print a string formatted using a series of formatting directives. This is best understood with examples.
As you can hopefully tell, the same datetime object is used to generate each date format. The format is specified using various formatting directives. For example, %Y corresponds to the full four digit year, while %m corresponds to the two digit decimal number representing the month. See the documentation for a full list of formatting directives.
It’s also possible to access various attributes of the datetime object directly.
d.year
> 1984

d.month
> 1

d.day
> 10
When discussing formatting, it’s valuable to be familiar with ISO 8601, which is an international standard for the representation of dates and times. Python has a method for quickly generating an ISO 8601 formatted date/time:
d.isoformat()
> '1984-01-10T23:30:00'
Now we’ll discuss the opposite of strftime, which is strptime. This is where you create a datetime object from a string. But since the string can be formatted in any way, it’s necessary to tell datetime what format to expect. Using the same set of formatting directives, we can pass in a string and the expected format to create a datetime object.
Notice how the pattern matches the string exactly. If you use a formatting directives or date doesn’t make sense it will raise an exception.
3 – Enter timezones
So far, instantiating and formatting datetime objects is fairly easy. However, timezones add a little bit of complexity to the equation.
naive vs aware
So far we’ve been dealing only with naive datetime objects. That means the object is naive to any sort of timezone. So a datetime object can be either offset naive or offset aware.
A timezone’s offset refers to how many hours the timezone is from Coordinated Universal Time (UTC).
A naive datetime object contains no timezone information. The easiest way to tell if a datetime object is naive is by checking tzinfo. tzinfo will be set to None of the object is naive.
To make a datetime object offset aware, you can use the pytz library. First, you have to instantiate a timezone object, and then use that timezone object to “localize” a datetime object. Localizing simply gives the object timezone information.
When dealing with datetime objects, I’ve come across two pieces of advice with which I generally agree. First, always use “aware” datetime objects. And second, always work in UTC and do timezone conversion as a last step.
More specifically, as pointed out by user jarshwah on reddit, you should store datetimes in UTC and convert on display.
Once you’re familiar with aware datetime objects, timezone conversions are relatively easy. Let’s create a datetime object with a UTC timezone, and convert it to Pacific Standard.
Often we’ll be working with multiple datetime objects, and we’ll want to compare them. The timedelta class is useful for finding the difference between two dates or times. While datetime objects represent a point in time, timedelta objects represents a duration, like 5 days or 10 seconds.
Suppose I want to know exactly how much older I am than my brother. I’ll create datetime object for each of us representing the day and time of our birth.
To see how much older I am than my brother, we can simply subtract the two datetime objects. And to see the answer in a human readable way, we can simple print the difference.
The diff variable is actually a timedelta object that looks like this datetime.timedelta(2440, 2100).
Subtracting a datetime object from another yields a timedelta object, so as you might suspect, subtracting a timedelta object from a datetime object yields a datetime object.
This is useful for answering questions like “what was the date 3 weeks ago from yesterday?” or “what day of the week is 90 days from today?”.
To answer the second question, we need to have two things – first, a datetime object representing today and second, a timedelta object representing 90 days.
And since we want to know the day of the week, we can use strftime.
target_date.strftime("%A")
> 'Wednesday'
5 – Conclusion
Dates and times can be tricky, but Python’s datetime class should make things a little bit easier. Hopefully you found this guide to be useful. If you think there are any other essentially examples or topics related to datetime objects and timezones please comment below, and I will try to add them to the guide.
When learning object oriented programming in Python, there can be a few gotchas when it comes to distinguishing between class and instance variables. In this guide I’ll explain the difference between class and instance variables and provide examples demonstrating various use cases. 1 – Class vs. instance variables First, a quick review if you’re new