Home Interests Ender 3

Ender 3 V2: Cura Machine Settings and Cura Profile
ender 3 v2
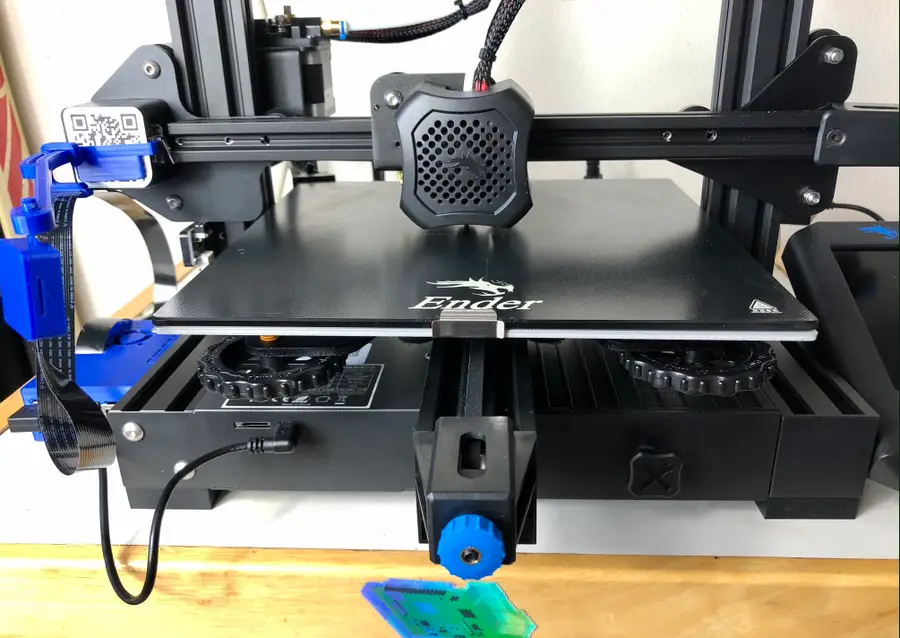
Here’s how to add the new Ender 3 V2 to Cura.
howchoo   (467)
August 15, 2023
9 minutes

Share

You’ll Need 1

What you’ll need
Interests
Series
Howchoo is reader-supported. As an Amazon Associate, we may earn a small affiliate commission at no cost to you when you buy through our links.
Posted in these interests:
3dprinting • 36 guides
cura • 1 guides
ender3 • 19 guides

Here’s how to add the new Ender 3 V2 to Cura.

Cura has yet to update its preset for the newly released Creality Ender 3 V2. While you can leave many of the presets the same when you “Add a Printer” and choose the Ender 3, you do need to update some machine settings before you layout your design in Cura.

In this guide, we’ll show you how to easily update the Ender 3 preset in Cura to work for your Ender 3 V2.

1 – Add the “Ender 3” printer

add the ender 3 printer
  • Open Cura
  • Navigate to Ultimaker Cura > Preferences > Printers > Add.
  • Select Add a non-networked printer.
  • Scroll down to click Creality3D.
  • Select the Ender 3.
  • Click Add.
  • Change “Printer name” to Creality Ender-3 V2.

Most of the settings from the Ender 3 carry over to the Ender 3 V2, so it makes the most sense to use that preset in Cura.

🛈 If you see “Creality Ender-3 V2” as a selectable option, it means Cura has been updated to include the V2 natively. In this case, select it instead and proceed to the next step to double-check that the settings are correct.

2 – Edit the placeholder machine settings

edit the placeholder machine settings
  • Navigate to Ultimaker Cura > Preferences > Printers.
  • Click Machine Settings to access the machine settings in Cura for your printer.

3 – Set the Ender 3 V2 Cura machine settings

set the machine settings

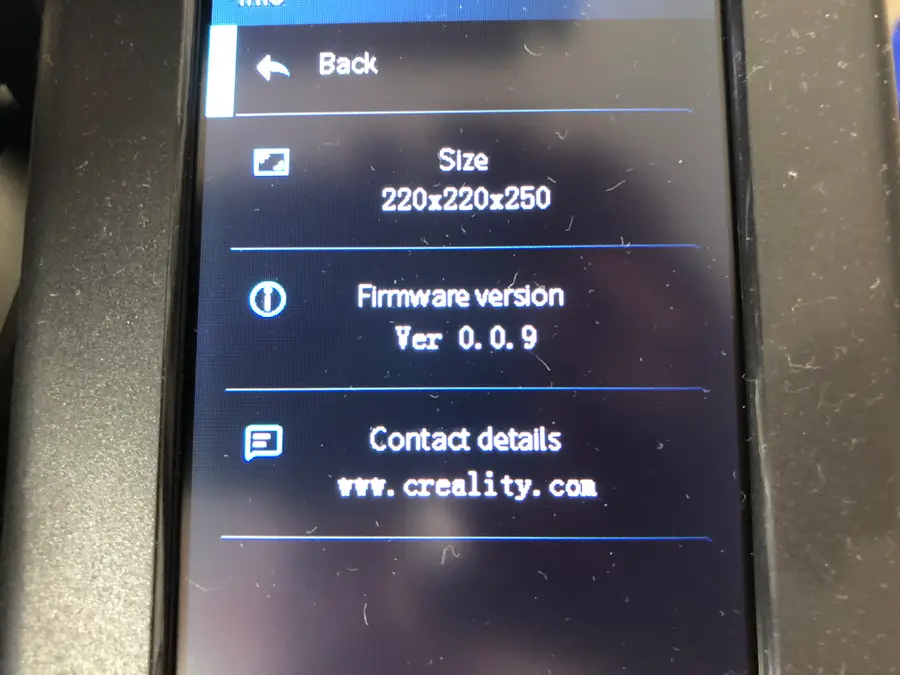
You’ll need to change the X and Y axis of your “Printer Settings” to 220mm. But just to make sure, your settings should match these:

Creality Ender 3 V2 Printer Settings

Printer Settings
X (Width)220mm
Y (Depth)220mm
Z (Height)250mm
Build plate shapeRectangular
Origin at centerNo (unchecked)
Heated bedYes (checked)
Heated bed volumeNo (unchecked)
G-code flavorMarlin

Creality Ender 3 V2 Printhead Settings

Printhead Settings
X min-26mm
Y min-32mm
X max32mm
Y max34mm
Gantry Height25mm
Number of Extruders1

Ender 3 V2 Start G-code

; Ender 3 Custom Start G-code
G92 E0 ; Reset Extruder
G28 ; Home all axes
G1 Z2.0 F3000 ; Move Z Axis up little to prevent scratching of Heat Bed
G1 X0.1 Y20 Z0.3 F5000.0 ; Move to start position
G1 X0.1 Y200.0 Z0.3 F1500.0 E15 ; Draw the first line
G1 X0.4 Y200.0 Z0.3 F5000.0 ; Move to side a little
G1 X0.4 Y20 Z0.3 F1500.0 E30 ; Draw the second line
G92 E0 ; Reset Extruder
G1 Z2.0 F3000 ; Move Z Axis up little to prevent scratching of Heat Bed
G1 X5 Y20 Z0.3 F5000.0 ; Move over to prevent blob squish

Ender 3 V2 End G-code

G91 ;Relative positioning
G1 E-2 F2700 ;Retract a bit
G1 E-2 Z0.2 F2400 ;Retract and raise Z
G1 X5 Y5 F3000 ;Wipe out
G1 Z10 ;Raise Z more
G90 ;Absolute positionning

G1 X0 Y{machine_depth} ;Present print
M106 S0 ;Turn-off fan
M104 S0 ;Turn-off hotend
M140 S0 ;Turn-off bed

M84 X Y E ;Disable all steppers but Z

When you’re finished, click Close to save.

BLTouch code

If you’re using BLTouch with your Ender 3 V2, then you’ll need to add one more bit of G-code right after G28.

G29 ; Auto bed-level (BL-Touch)
print settings in cura for ender 3 v2

Cura’s built-in print settings will certainly work for the Ender 3 V2, but there are better settings that can allow you to print faster, for example, or use less filament. Here are the recommended settings that you should change for you change in your Cura print settings for the Ender 3 V2.

Download the Ender 3 V2 Cura profile

You can find the full profile mirrored on our GitHub repo. Download those profiles and import them in Preferences > Profiles.

Navigate to Print Settings

In the top right of your Cura window, you’ll find the print settings. You’ll see the print profile displayed—something like “Standard Quality.”
1. Click on the print settings to expand.
2. Click Custom > to access the full print settings list.

Recommended print settings changes

Print Settings
Printing Temperature200°
Build Plate Temperature60°
Layer Height0.12 mm
Retraction Distance6 mm
Retraction Speed25 mm/s

For everything else, you should use the preset print settings for the Ender 3.

NEXT UP

How to Update Blender

Get the latest Blender has to offer.
howchoo   (467)
November 24, 2023

Blender is one of the most popular open-source 3D creation suites today. It doesn’t cost a dime to use and everything you create is yours to own for good. The community is robust and the dev team still releases new updates on the regular. If you want to get the latest version, you may have

Continue Reading

howchoo

 467 guides

Introducing Howchoo, an enigmatic author whose unique pen name reflects their boundless curiosity and limitless creativity. Mysterious and multifaceted, Howchoo has emerged as a captivating storyteller, leaving readers mesmerized by the uncharted realms they craft with their words. With an insatiable appetite for knowledge and a love for exploration, Howchoo’s writing transcends conventional genres, blurring the lines between fantasy, science fiction, and the surreal. Their narratives are a kaleidoscope of ideas, weaving together intricate plots, unforgettable characters, and thought-provoking themes that challenge the boundaries of imagination.

Home Interests Guides

Here’s Why Your iPhone Gets Hot While Charging (And What To Do About It)

why does my iphone get hot when charging
Read on to explore all possible reasons & how to fix the problem!
howchoo   (467)
August 15, 2023
19 minutes

Share

Interests
Posted in these interests:
guides • 10 guides

You’ve plugged your iPhone in. You feel the familiar buzz to alert you the charging has commenced. You try to go about your day, but the phone heats up in your hand. You wonder, what could be the problem?

When someone plugs an iPhone into an electrical socket, a few things happen. The wire sends a signal from the power source through the wire, telling the phone it is being charged; if the phone accepts the charge, the phone starts charging.

If the phone does not accept the charge, it won’t respond to the charge and it will remain either dead or not charging. So, if you’ve plugged in your phone and you’ve noticed it is overheating, is there anything you can do to change that?

Yes, there is.

1 – Why is My iPhone Overheating?

Have you ever seen a temperature warning pop up on a phone screen?

The icon shows a hot thermometer and reads, “Temperature, iPhone needs to cool down before you can use it”? This symbol indicates the software inside the phone reached too warm of a temperature to function safely. This happens for a few reasons.

  • You left your phone in a hot area, perhaps a car in the middle of summer. The sun warmed up the iPhone and heated up the software, which could affect the phone’s hardwiring in the long term.
  • You use your phone in too hot of temperatures. Maybe you’re trying to play Pokemon Go, texting a friend, and sending an email. If you scroll back and forth between all of these apps, the iPhone will try its best to respond to your needs, but if you do this in direct sunlight, the phone might quit working.
  • Running a lot of apps in general, especially when they require a lot of phone battery, can drain the battery and overheat the system.
  • A bad battery or a malfunctioning iPhone could have its wires crossed, causing the phone to overheat at inopportune moments.

2 – Why is My iPhone Overheating While Charging

overheating while charging

Now that we know some root reasons that cause iPhones to overheat, let’s take a look at some reasons an iPhone could overheat while charging.

If you plug your iPhone into the power source and notice its temperature’s continual rise, the device could be overheating for multiple reasons.

A bad charger

This is a common reason that iPhones overheat. If a charger does not work properly, it could send the wrong signals to your iPhone, tricking the hardware and causing the phone to overheat.

To avoid this issue, make sure the charger is intact and the port is free of dirt and dust. If the cord appears twisted or tangled, unplug it, untangle it, and try to reinsert the plug into the phone. If that doesn’t fix the issue, try to plug the cord into a different outlet. If the phone continues to overheat after all of these fixes, it is time to get a new charging cord.

Internal issues

This problem occurs when either the iPhone battery or the software inside the iPhone is compromised. To check what is wrong with the phone, you will need to seek out a specialist who can assess the inside of the device.

Apple stores or Apple support can point you in the right direction. Sometimes iPhone batteries go bad, and you need to replace them with the help of a technician.

Temperature is a hazard

When an iPhone is in the presence of extreme heat, it issues a temperature warning to its users. This occurs whether or not a phone is charging, but if a phone charges in a hot room, the heat could make the phone overheat.

To circumnavigate this issue, make sure your outlets and your phone always charge in a cool, dimly lit space without much direct sunlight.

The phone needs an update

Sometimes iPhones overheat because they can’t keep up with internal hardware. This occurs when an older phone has not been updated for a while.

To make sure your iPhone stays updated, visit the updates bar in settings and regularly check for new updates.

Charging and using the phone too much

If you charge the phone too much, the charge won’t work properly. The system will get overloaded, and thus the iPhone will overheat. The same goes if you keep apps and programs open on your phone at all times.

This will cause the service to lag and the phone to overheat. To avoid this specific issue, make sure to charge your phone when it needs it and to close out all apps when you are done using them.

3 – How Can I Stop My iPhone from Overheating While Charging?

stop iphone from overheating

Above, we mentioned some reasons that cause an iPhone to overheat while charging. Sometimes you cannot get to the root of the overheating, but you want to stop the phone from warming up. Here are some trusted methods to use to stop your iPhone from overheating.

Before you do anything, make sure to unplug your iPhone if you notice it overheating while charging. Leaving it plugged in can cause damage to the internal hardware of the phone and the battery in the long run.

Reset your phone

A great way to stop a phone from overheating is by resetting all of its data. To reset your iPhone, visit the settings icon on the home screen, click general, scroll down to the reset button near the bottom of the list, and click reset all settings.

This will take a few moments, and the phone might shut off during this process. If it does, turn the phone back on and monitor the heat and the speed of the phone. If it continues to overheat, you can try any of these other methods.

Giving the phone a restart

Sometimes, you can fix an issue by turning the phone off and on again. A hard restart turns the phone off in the middle of the activity and forces it to close all of the apps and shut off.

Track apps causing issues

Some apps available in the app store do not mesh well with the hardware of an iPhone. This means you need to figure out which app does not agree and delete the app. If you know that one of the apps on your phone is causing an issue, but you don’t know which one, you can figure that out in settings.

Click on settings, click on the icon with a blue and white hand that says privacy, and then click on analytics. This will bring you to a screen that shows your analytics data. Click on that and find the app causing the phone to crash, restart, overheat, or all three. Delete the app and see if the overheating continues.

Restore your iPhone

Restoring your iPhone is a great way to stop your phone from overheating. To do this, you’ll need to plug your iPhone into a device that has your Apple ID information stored. A Macbook or a desktop works perfectly. Also, make sure you have your information stored in the cloud because restoring a phone will delete data from your iPhone.

  • Open the finder app, the blue and white smiley face icon at the bottom of the computer.
  • You need to push the volume buttons as well as the power buttons until the iPhone shuts off completely.
  • Now hold the side button for a few moments, the high volume button with the side button, and the lower volume button with the power button for a few more moments.
  • After you’ve completed all of those tasks, a pop-up will arise on your computer. It will ask you if you want to restore your device.
  • Click Restore iPhone under iPhone Recovery Mode and wait until the restoration finalizes.
  • After that process, give the iPhone a bit to recuperate and then try to charge it again.

Update apps and iPhone

If you find your iPhone overheating while charging, you can update the software and the apps.

If a phone has several old apps and older software, it could cause the device to overheat. You’ll need to see which apps need to be updated by visiting the app store.

Apple Store

If all else fails, you can always visit an Apple Store and speak with someone at the Genius Bar.

4 – How To Tell a Phone is Overheating While Charging

how to tell a phone is overheating

If you don’t notice your phone getting hot, but you think it might be overheating, there are some other methods to prove the software is heating up. These include,

  • The software operates at a slower pace. You can’t access apps at a normal speed.
  • If the phone does not charge at all or charges at a super slow pace.
  • You try to take a picture, but the flash is unavailable.
  • The screen doesn’t light up as much as usual or it is black.
  • You get a temperature warning.
NEXT UP

How to Change the Windows 11 Start Menu and Button

howchoo   (467)
December 13, 2023

As with every update, Microsoft has changed Windows 11 to look different than its predecessors, and while the update looks modern and clean there are some interesting changes. Arguably the most jarring of all the changes is the one made to the Windows 11 Start Menu, which looks completely different. Instead of a clean, easy-to-navigate

Continue Reading

howchoo

 467 guides

Introducing Howchoo, an enigmatic author whose unique pen name reflects their boundless curiosity and limitless creativity. Mysterious and multifaceted, Howchoo has emerged as a captivating storyteller, leaving readers mesmerized by the uncharted realms they craft with their words. With an insatiable appetite for knowledge and a love for exploration, Howchoo’s writing transcends conventional genres, blurring the lines between fantasy, science fiction, and the surreal. Their narratives are a kaleidoscope of ideas, weaving together intricate plots, unforgettable characters, and thought-provoking themes that challenge the boundaries of imagination.

Home Interests Game Boy

How to Change Your Game Boy Cartridge Battery When Your Games Won’t Save

Game won’t save? No problem.
howchoo   (467)
August 15, 2023
7 minutes

Share

Interests
Series
Posted in these interests:

gameboy • 8 guides
nintendo • 13 guides
retrogaming • 29 guides

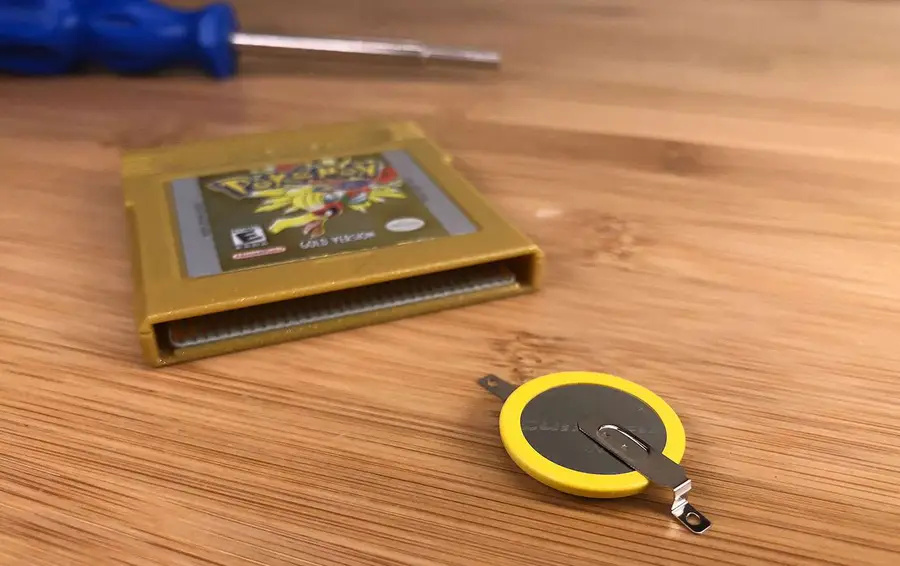
Nothing’s more frustrating than playing your old copy of Pokemon Gold, Silver, Red, or Blue for Game Boy and discovering that your game didn’t save.

Why won’t my Game Boy game save?

Most Game Boy cartridges that allow games to be saved contain a small internal battery to store your save states. Over time, this battery degrades and needs replacement.

See, back when these games were developed, flash memory was still super expensive. As a result volatile memory, powered by a small battery, was often used instead. NES, SNES and N64 cartridges also used such batteries for storing saved games.

This guide will show you how to replace the battery in your Nintendo Gameboy cartridge in about 10 minutes.

Watch the video, or continue below

I made a video tutorial that will walk you through the process. Or, if you prefer, you can continue reading the text and photo-based version of this guide below!

1 – The Game Boy game replacement battery

game replacement battery

For the replacement battery you’ll need a CR2025 battery with pre-soldered tabs. This is a direct replacement for your old battery.

🛈 Soldering directly to a battery will make it explode, so grab one with pre-soldered tabs.

2 – Open the Game Boy cartridge

open the game boy cartridge

Nintendo was serious about not letting people easily disassemble their hardware! To open your cartridge, you’ll need a 3.8mm security screwdriver. These are inexpensive and will let you access a wide variety of Nintendo games and systems.

Remove the single screw from the back of the cartridge and remove the circuit board from its plastic housing.

3 – Remove the old battery

remove the old battery

The Game Boy game battery is soldered to the circuit board via two tabs. Heat up each tab and then use your solder sucker to remove the old solder.

If you haven’t used a solder sucker before, it’s easy — just press the plunger down, heat up the solder with your soldering iron, and then press the button on the solder sucker and the plunger will suck up the melted solder.

If you don’t have a solder sucker, you can also use a slightly less expensive desoldering wick — but I find these much harder to use.

Using soldering “helping hands” can help to hold the circuit board but aren’t necessary.

🛈 Furiously chuck the old battery in the garbage. Or your local recycling center.

4 – Inspect the old battery

inspect the old battery

Mine was from 2003!

5 – Install the new battery

install-the-new-battery

Tab orientation matters here — see the attached photo as reference. Simply solder your new battery in place using a bit of fresh solder.

6 – Reassemble the cartridge

reassemble the cartridge

Use your special screwdriver to reattach the screw.

7 – Catch them all!

catch them all

You’re now ready to conquer your favorite video game, with breaks allowed — and another ten years of save states ahead of you.

8 – Ready to take it to the next level?

the next level

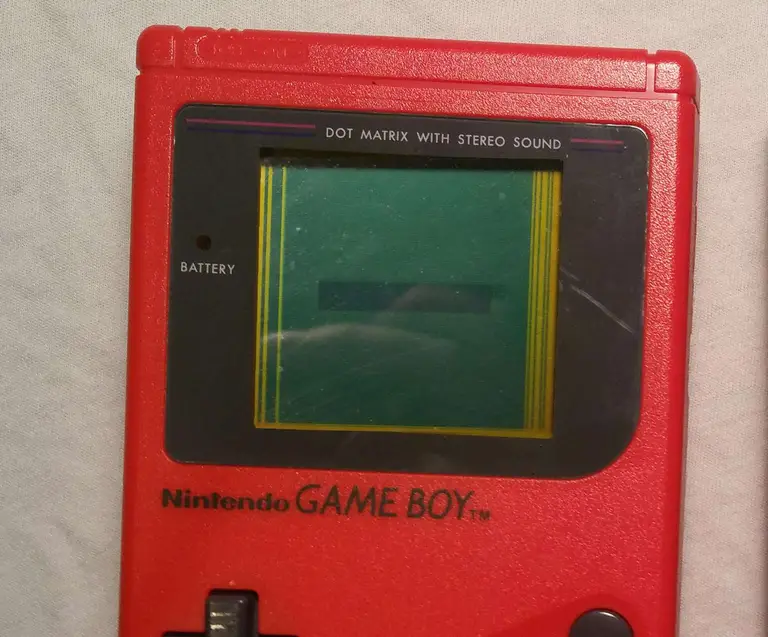
If your Game Boy has lines on the screen or is showing signs of age, check out our Game Boy repair guide.

The Ultimate Original Game Boy (DMG-01) Troubleshooting and Repair Guide
Something wrong with your Game Boy? Let’s fix it!

Or maybe you want to make your Game Boy backlit or add other mods — check out our ultimate Game Boy mod guide too!

The Ultimate Original Game Boy Modding Guide
Game Boys are awesome. Let’s make them even better!

NEXT UP

RetroPie scrapers: what they are and how to use them

Wait, which game is this?
howchoo   (467)
September 29, 2023

You’ve put so much work into setting up RetroPie or EmulationStation. You load it up with legally obtained ROMs only to find that custom theme you installed—you remember, the one from my RetroPie themes guide—has a big blank spot for box art! The Best RetroPie Themes (And How to Install Them)You deserve some personal flair! RetroPie: Build Your

Continue Reading

howchoo

 467 guides

Introducing Howchoo, an enigmatic author whose unique pen name reflects their boundless curiosity and limitless creativity. Mysterious and multifaceted, Howchoo has emerged as a captivating storyteller, leaving readers mesmerized by the uncharted realms they craft with their words. With an insatiable appetite for knowledge and a love for exploration, Howchoo’s writing transcends conventional genres, blurring the lines between fantasy, science fiction, and the surreal. Their narratives are a kaleidoscope of ideas, weaving together intricate plots, unforgettable characters, and thought-provoking themes that challenge the boundaries of imagination.

Home Interests Web Design

Use Chrome Developer Tools to Check Whether Resources Are Loading over SSL

howchoo   (467)
August 15, 2023
3 minutes

Share

Interests
Posted in these interests:
chrome • 7 guides
webdesign • 5 guides
webdev • 10 guides

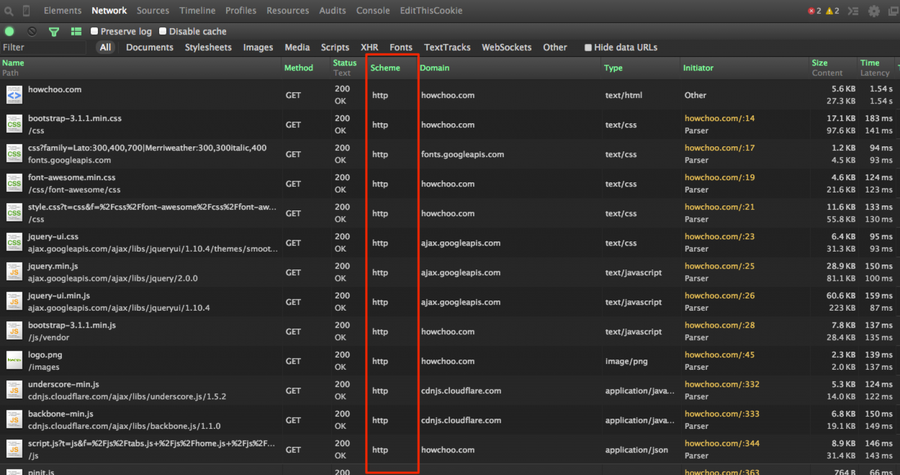
In the wake of Google’s announcement that it will start giving a ranking boost to full-SSL sites, many companies are converting their sites to be full-https. In wake of this, it’s useful to check whether the resources (scripts, images, etc.) on your page are being loaded over http or https in preparation for converting your site. While you could technically view the source of a file and use CMD-F (or CTRL-F) to search for http:// or https://, this is not a preferable solution since the page source is not the full rendered version of the file. For example, there may be CSS or JS files on the page which load non-secure images. Therefore, using the Chrome Developer Console is the best option.

1 – Navigate to the Network Tab

Open Chrome Developer Tools and open the Network tab.

2 – Enable the Scheme column

Right click any table heading (i.e. Name, Domain, Type, etc.) and check “Scheme”.

3 – Reload the page

Reload the page and you will now see a column for http/https. Keep in mind, any time you open the Network panel in Developer Tools, you will need to refresh the current page; the Network panel only displays files which are loaded while Chrome Developer Tools is open.

NEXT UP

How to Clear Your Browser Cache for Any Browser

Trouble loading web pages? Try clearing your cache!
howchoo   (467)
November 22, 2023

Clearing your browser cache is a great way to solve common internet issues. If a webpage isn’t loading properly, one of the first things you should try is clearing your browser cache. This guide includes steps for the most common internet browsers—Chrome, Firefox, Safari, Internet Explorer, and Edge. If your browser isn’t listed, visit the

Continue Reading

howchoo

 467 guides

Introducing Howchoo, an enigmatic author whose unique pen name reflects their boundless curiosity and limitless creativity. Mysterious and multifaceted, Howchoo has emerged as a captivating storyteller, leaving readers mesmerized by the uncharted realms they craft with their words. With an insatiable appetite for knowledge and a love for exploration, Howchoo’s writing transcends conventional genres, blurring the lines between fantasy, science fiction, and the surreal. Their narratives are a kaleidoscope of ideas, weaving together intricate plots, unforgettable characters, and thought-provoking themes that challenge the boundaries of imagination.

Home Interests Running

DIY Phone Armband for Running

The simplest guide to making an armband you’re likely to find!
howchoo   (467)
August 15, 2023
4 minutes

Share

You’ll Need 2

What you’ll need
Interests
Scissors x 1
Sock x 1
Howchoo is reader-supported. As an Amazon Associate, we may earn a small affiliate commission at no cost to you when you buy through our links.
Posted in these interests:

DIY

diy • 17 guides
fitness • 5 guides
running • 2 guides

Who doesn’t have an extra sock or two that’s missing a pair – lost forever to the black hole in the dryer! Grab that extra sock and a pair of scissors, and you have yourself a DIY armband for running!

Seriously, you’re going to be amazed about how easy this DIY Running Armband is to make and how comfortable it is to wear. You might even wonder why you doled out money for a fancy running armband!

The Top Ten Best Running Accessories (2022)
For some active self-improvement during the summer of social distancing!

1 – Grab your sock and scissors

Pretty much any trouser or knee-high sock will do. But why not go with one that has a little color!

I wouldn’t recommend a wool sock, as it might feel scratchy. And make sure the sock hasn’t lost so much of its elasticity that it won’t stay on your upper arm while running.

2 – Cut sock just above the heel

When you cut the sock in half, you’re generally looking to have a top half that’s about twice the length of your phone.

3 – Turn inside out

Take the top half of your sock (which is now your armband), and turn it inside out.

4 – Put on arm

I prefer to put the hemmed side on the top of my arm, but it doesn’t matter which way.

5 – Place phone over armband

Place your phone on your arm and over your armband, so that it’s about halfway up the band.

6 – Roll up bottom of armband

Bring up the bottom of the armband over the phone, so that it holds the phone snuggly. And that’s it! You have the best darn DIY armband for running out there!

Now get running!

NEXT UP

How to Clean Vibram Five Finger Toe Shoes Without Ruining Them

howchoo   (467)
November 22, 2023

Vibram Five Finger shoes are awesome pieces of running gear. But you can also use them for hiking and looking weird around town. Unfortunately, toe shoes start to smell if you don’t wear socks with them every time you wear them. While Vibram claims that the shoes are machine washable, you will ruin them if you wash

Continue Reading

howchoo

 467 guides

Introducing Howchoo, an enigmatic author whose unique pen name reflects their boundless curiosity and limitless creativity. Mysterious and multifaceted, Howchoo has emerged as a captivating storyteller, leaving readers mesmerized by the uncharted realms they craft with their words. With an insatiable appetite for knowledge and a love for exploration, Howchoo’s writing transcends conventional genres, blurring the lines between fantasy, science fiction, and the surreal. Their narratives are a kaleidoscope of ideas, weaving together intricate plots, unforgettable characters, and thought-provoking themes that challenge the boundaries of imagination.

Home Interests Router

How to Reset a Charter Spectrum Router or Modem

howchoo
howchoo   (434)
August 14, 2023
5 minutes

Share

You’ll Need 1

What you’ll need
Interests
Series
Howchoo is reader-supported. As an Amazon Associate, we may earn a small affiliate commission at no cost to you when you buy through our links.
Posted in these interests:
internet • 36 guides
router • 32 guides

If you’re having trouble with your Spectrum internet connection, it may be necessary to reset the router/modem combination or gateway to factory defaults. We’ll also show you how to reset a standalone Spectrum modem used with a separate router.

This is one of the most useful troubleshooting steps and definitely one of the first things you should try before contacting tech support.

1 – Reset gateway (modem/router combination)

If you have a modem/router combination device, also known as a gateway, you can easily reset it.

  1. Disconnect the modem from power. Unplug the power cords and remove any batteries from the device.
  2. Leave the gateway alone for at least 30 seconds.
  3. Reinsert the batteries and reconnect the power cord.
  4. Leave the device alone for at least 2 minutes. The lights will be solid for this step instead of blinking.
  5. Verify your network connection. You should be able to reach the internet.

If this doesn’t work, attempt to locate a small recessed button on the back of your modem. If this reset button exists, depress it with a pen for 30 seconds until the router reboots itself.

2 – Reset modem with a separate router

If you use two devices—a modem and router—you will need to follow this process to reset them both.

  1. Disconnect the modem from power by unplugging the power cord and taking out any batteries.
  2. Disconnect the power cord from the router.
  3. Leave both devices alone for at least 30 seconds.
  4. Plug the power cord back into the modem and put any removed batteries back in place.
  5. Leave the modem alone for 2 minutes, at a minimum. The lights on the modem will be solid instead of blinking.
  6. Plug the power cord back into the router.
  7. Leave the router alone for about 2 minutes while it comes back online.
  8. Verify your network connection. You should be able to reach the internet.

3 – More help

It’s possible that resetting the devices won’t resolve your issue. It may be necessary to factory reset the devices. For further assistance, Charter Spectrum recommends contacting their support team or using their Internet Troubleshooting Tool.

NEXT UP

How to Change Your Frontier WiFi Password

howchoo
howchoo   (434)
November 25, 2023

There are a few reasons you might want to update or reset your WiFi password: making your network more secure, and making your password easier to remember and type. Improved network security You can add an extra layer of security to your network by changing the WiFi password. As long as your new password is

Continue Reading
Home Interests Router

How to Change Your Arris WiFi Password

howchoo
howchoo   (436)
August 14, 2023
4 minutes

Share

You’ll Need 1

What you’ll need
Interests
Series
Howchoo is reader-supported. As an Amazon Associate, we may earn a small affiliate commission at no cost to you when you buy through our links.
Posted in these interests:
arris • 3 guides
internet • 36 guides
router • 32 guides

Changing your WiFi password is an easy way to add a little more security to your wireless network or change the random default password to something you can remember.

If you want to update the WiFi password on your Arris router, connect a computer to it directly with an ethernet cable.

1 – Log into your Arris router

Open a browser window, and log in to your Arris router. Visit our guide on how to log into an Arris router for specific details on this process.

You’ll need to find your network security key, if you don’t already have it.

2 – Locate Security Settings

Once you’ve logged into the web portal, look for security settings. You may need to scroll down or check the sidebar depending on the exact model of your router. The field we’re looking for is labeled “Pre-shared key”.

3 – Set your new WiFi password

Enter the new WiFi password in the “Pre-shared key” field. Making the password more complex will be safer than using a simple one. Consider using a few rules when creating a new password. For example:

  1. Avoid using dictionary words.
  2. Use numbers and special characters.
  3. Use uppercase and lowercase letters.

Enter the password again if asked to confirm the new key.

4 – Save the new changes

Click Save once the new password has been entered. Once the changes have saved, restart your Arris device, and test the new WiFi password.

NEXT UP

How to Change Your Frontier WiFi Password

howchoo
howchoo   (436)
November 25, 2023

There are a few reasons you might want to update or reset your WiFi password: making your network more secure, and making your password easier to remember and type. Improved network security You can add an extra layer of security to your network by changing the WiFi password. As long as your new password is

Continue Reading
Home Interests MacOS

How to Disable the Double Spacebar Auto Period in macOS

Holy . crap . this . is . annoying. Let’s fix it.
howchoo   (467)
August 14, 2023
3 minutes

Share

You’ll Need 1

What you’ll need
Interests
macOS x 1
Howchoo is reader-supported. As an Amazon Associate, we may earn a small affiliate commission at no cost to you when you buy through our links.
Posted in these interests:
macos • 20 guides

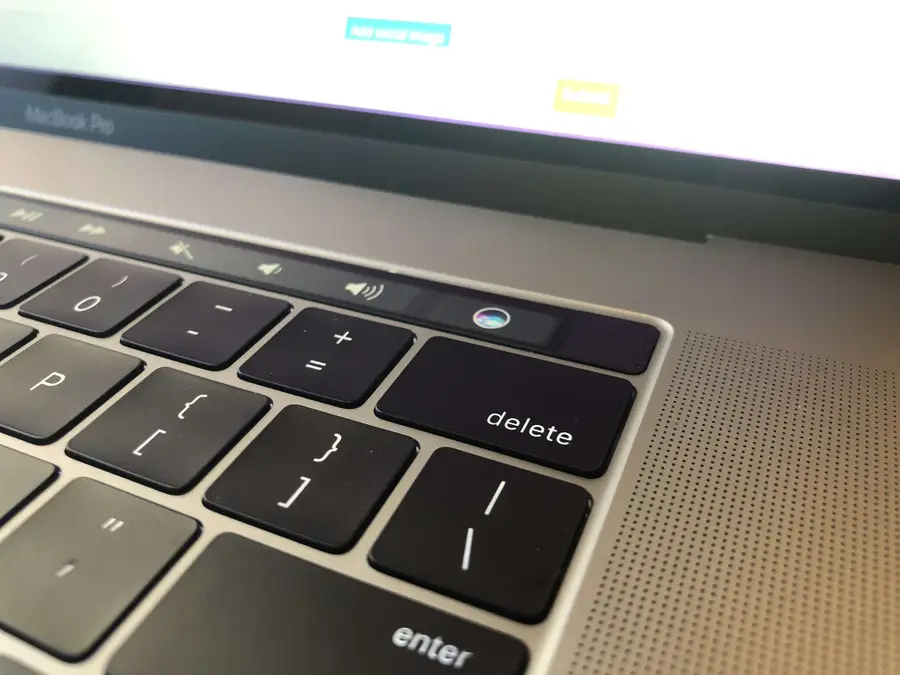
I thought I was going crazy because . kept showing up while I was typing in Sublime Text. I realized that my terrible MacBook keyboard wasn’t [fully] to blame—it turns out there’s a new(ish) feature in macOS that automatically adds a period when you double-tap the keyboard, carrying over functionality from iOS.

This guide will teach you how to prevent macOS from adding a dot, or period, when you press the space bar twice.

1 – Open System Preferences

In the menu bar, Navigate to  Apple Icon > System Preferences.

2 – Access Keyboard Settings

Select the Keyboard menu item to access Keyboard Settings and then select the Text tab.

3 – Disable the macOS double-space period

Uncheck Add period with double-space. Then, close System Preferences.

You’re all done!

Speaking of ways to optimize your workflow, did you know you can also minimize applications in macOS by double-clicking the menu bar? Check out our guide to see how it’s done.

NEXT UP

How to Enable the “Popping” Sound When Adjusting the Volume on Your Mac

howchoo
howchoo   (467)
December 13, 2023

Starting with MacOS Sierra and High Sierra, your Mac will no longer play a “pop” sound when you adjust your volume. If you prefer to have this sound when you adjust volume up and down (as I do), this guide will teach you how to reenable it. 1 – Open Sound System Preferences Navigate to System

Continue Reading

howchoo

 467 guides

Introducing Howchoo, an enigmatic author whose unique pen name reflects their boundless curiosity and limitless creativity. Mysterious and multifaceted, Howchoo has emerged as a captivating storyteller, leaving readers mesmerized by the uncharted realms they craft with their words. With an insatiable appetite for knowledge and a love for exploration, Howchoo’s writing transcends conventional genres, blurring the lines between fantasy, science fiction, and the surreal. Their narratives are a kaleidoscope of ideas, weaving together intricate plots, unforgettable characters, and thought-provoking themes that challenge the boundaries of imagination.

Home Interests Router

How to Change Your Arris WiFi Password

howchoo
howchoo   (467)
August 14, 2023
4 minutes

Share

You’ll Need 1

What you’ll need
Interests
Series
Howchoo is reader-supported. As an Amazon Associate, we may earn a small affiliate commission at no cost to you when you buy through our links.
Posted in these interests:
arris • 3 guides
internet • 36 guides
router • 32 guides

Changing your WiFi password is an easy way to add a little more security to your wireless network or change the random default password to something you can remember.

If you want to update the WiFi password on your Arris router, connect a computer to it directly with an ethernet cable.

1 – Log into your Arris router

Open a browser window, and log in to your Arris router. Visit our guide on how to log into an Arris router for specific details on this process.

You’ll need to find your network security key, if you don’t already have it.

2 – Locate Security Settings

Once you’ve logged into the web portal, look for security settings. You may need to scroll down or check the sidebar depending on the exact model of your router. The field we’re looking for is labeled “Pre-shared key”.

3 – Set your new WiFi password

Enter the new WiFi password in the “Pre-shared key” field. Making the password more complex will be safer than using a simple one. Consider using a few rules when creating a new password. For example:

  1. Avoid using dictionary words.
  2. Use numbers and special characters.
  3. Use uppercase and lowercase letters.

Enter the password again if asked to confirm the new key.

4 – Save the new changes

Click Save once the new password has been entered. Once the changes have saved, restart your Arris device, and test the new WiFi password.

NEXT UP

How to Change Your Frontier WiFi Password

howchoo
howchoo   (467)
November 25, 2023

There are a few reasons you might want to update or reset your WiFi password: making your network more secure, and making your password easier to remember and type. Improved network security You can add an extra layer of security to your network by changing the WiFi password. As long as your new password is

Continue Reading

howchoo

 467 guides

Introducing Howchoo, an enigmatic author whose unique pen name reflects their boundless curiosity and limitless creativity. Mysterious and multifaceted, Howchoo has emerged as a captivating storyteller, leaving readers mesmerized by the uncharted realms they craft with their words. With an insatiable appetite for knowledge and a love for exploration, Howchoo’s writing transcends conventional genres, blurring the lines between fantasy, science fiction, and the surreal. Their narratives are a kaleidoscope of ideas, weaving together intricate plots, unforgettable characters, and thought-provoking themes that challenge the boundaries of imagination.

Home Interests Code

How to check PHP syntax using the command line

howchoo   (467)
August 14, 2023
2 minutes

Share

You’ll Need 2

What you’ll need
Interests
shell x 1
PHP x 1
Howchoo is reader-supported. As an Amazon Associate, we may earn a small affiliate commission at no cost to you when you buy through our links.
Posted in these interests:
code • 11 guides

PHP

php • 1 guides
programming • 1 guides
webdev • 10 guides

If you’re using PHP for web development, you may often want to check the syntax of your file without opening it in a browser. Checking syntax is quite easy from the command line.

Visit this guide to learn how to check your PHP version.

1 – Open Terminal or any other unix shell

If you’re on a Mac you can open Terminal which is located in:

Applications/Utilities

You can navigate to your project folder by using the change directory or cd command followed by the directory. For me it is: cd /Users/josephtylerjones/Developer/scripts/

3 – Use the php command with the -l option

Now you can check the syntax of your script by running php -l followed by the file name. For me it is:

php -l testfile.php

This command will detect any syntax errors in your script!

NEXT UP

Secure Your Sensitive Data with Kubernetes Secrets

Learn how to create and use Kubernetes secrets.
howchoo   (467)
November 26, 2023

Kubernetes secrets are objects that store and manage sensitive data inside your Kubernetes cluster. One mistake developers often make is storing sensitive information like database passwords, API credentials, etc in a settings file in their codebase. This is very bad practice (hopefully for obvious reasons). Most developers know this, but still choose the option because it’s easy.

Continue Reading

howchoo

 467 guides

Introducing Howchoo, an enigmatic author whose unique pen name reflects their boundless curiosity and limitless creativity. Mysterious and multifaceted, Howchoo has emerged as a captivating storyteller, leaving readers mesmerized by the uncharted realms they craft with their words. With an insatiable appetite for knowledge and a love for exploration, Howchoo’s writing transcends conventional genres, blurring the lines between fantasy, science fiction, and the surreal. Their narratives are a kaleidoscope of ideas, weaving together intricate plots, unforgettable characters, and thought-provoking themes that challenge the boundaries of imagination.