Home Interests Ender 3

Ender 3 V2 Bed Spring Upgrade: A Necessary Mod for the V2

Choosing and installing new bed springs on the Ender 3 V2.
howchoo   (467)
September 22, 2023
7 minutes

Share

You’ll Need 2

What you’ll need
Interests
Series
Howchoo is reader-supported. As an Amazon Associate, we may earn a small affiliate commission at no cost to you when you buy through our links.
Posted in these interests:
3dprinting • 36 guides
ender3 • 19 guides

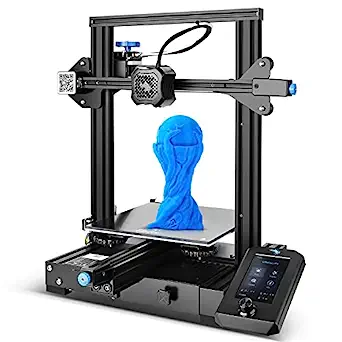
When I first received Creality’s new Ender 3 V2, fellow Howchooer and author of the previous Ender 3 and Ender 3 Pro springs upgrade guide, Zach, told me that the first thing I should probably do is upgrade the stock springs that come with the V2.

After about a month of using the Ender 3 V2’s stock springs, I wish I had heeded his advice and switched out the springs right away. The stock Ender 3 V2 springs are really bad. Since upgrading to the new springs, the bed stays much more level between prints. Even more importantly—the overall print quality is much better because the bed stays level during printing as well.

So now I’m asking you to heed my advice and upgrade your Ender 3 V2 springs ASAP. It’s inexpensive to get new springs and the upgrade itself only takes 5 minutes.

1 – Choosing springs

While we’ve done most of the work for you and selected an inexpensive, yet quality set of springs that you can choose, we’ll detail generally what’s being upgraded with the new Ender 3 V2 springs.

Length

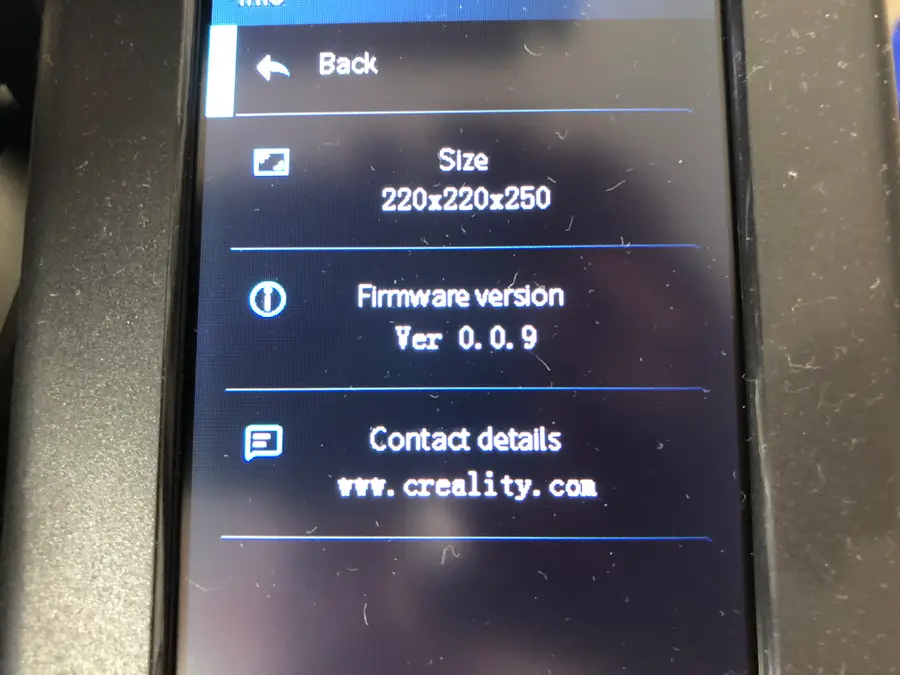
The upgraded springs should be the same length as your previous springs, so you do not need to adjust the Z-axis limiter switch after installing them. For the Ender 3 V2, they should be 20mm.

Rigidity

The upgraded springs need to be more rigid than the originals so that they reduce the vibration during printing and increase the overall consistency of your prints.

Shape

The shape of the springs makes a huge difference when it comes to shifting during printing and spring movement. The springs we selected have a flat top and bottom versus the stock Ender 3 V2 springs rounded top and bottom. This greatly reduces the springs’ movement during printing.

Our choice

Again, here are the springs we’ve tested and recommend for the Ender 3 V2.

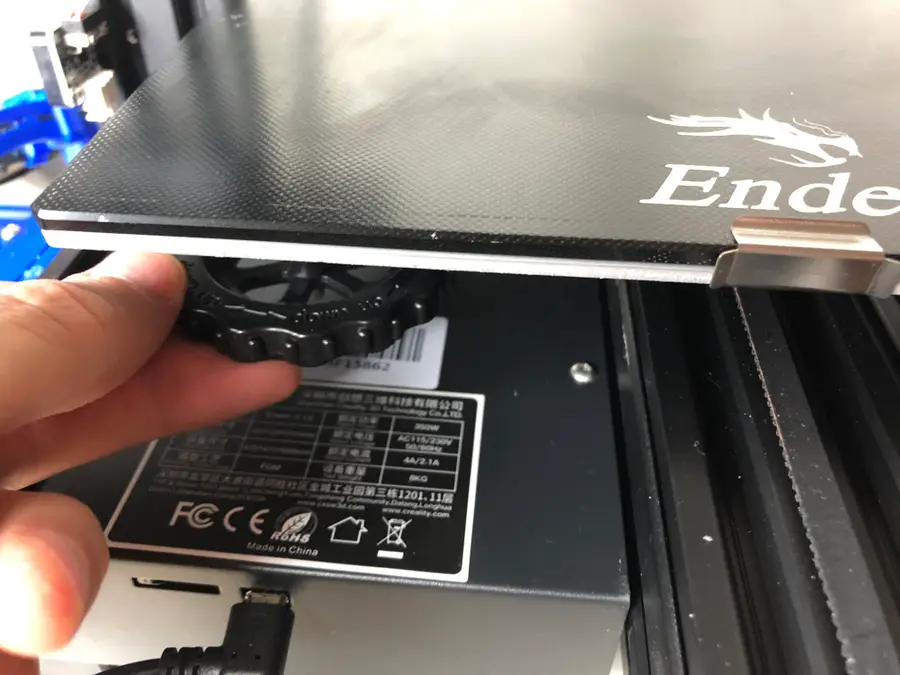
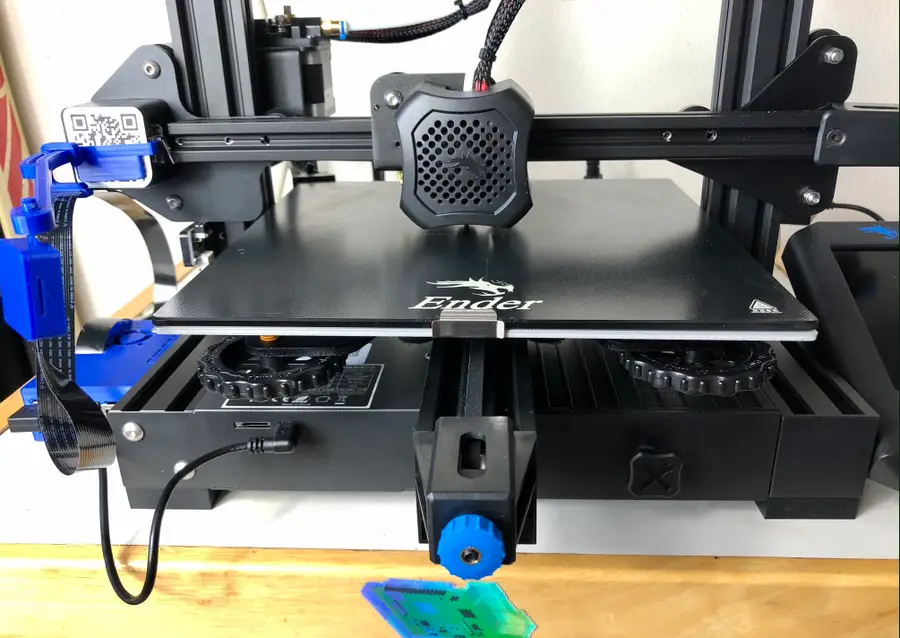
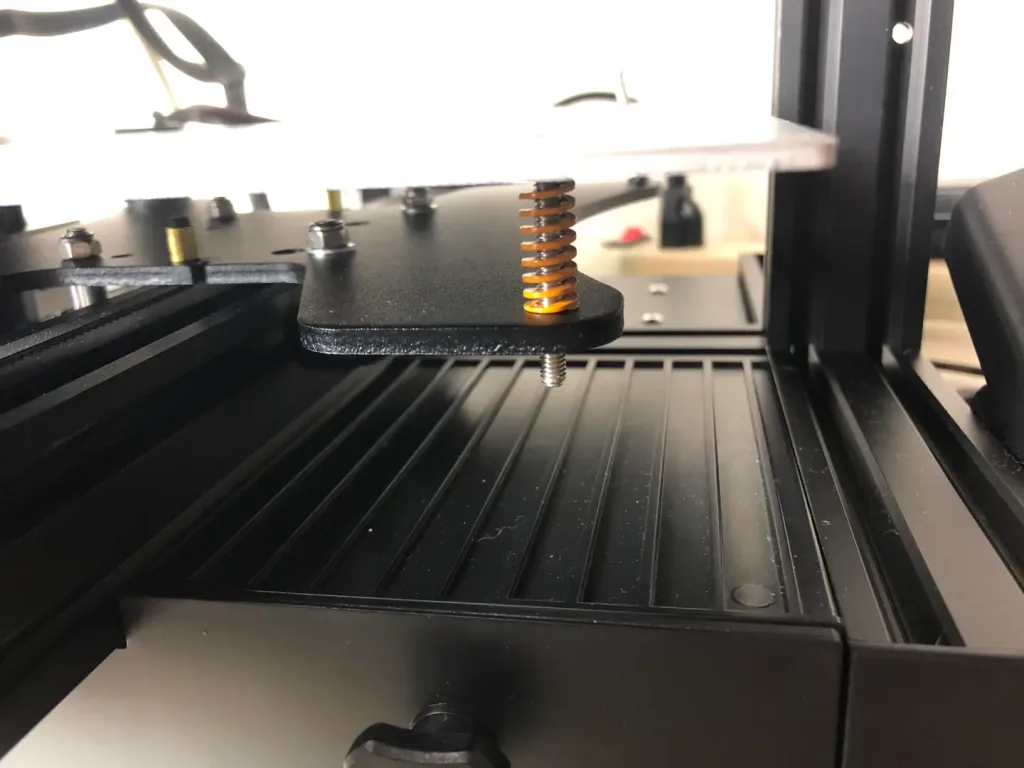
2 – Remove the old springs

Turn each bed adjustment wheel clockwise until they are fully removed. Set the wheels aside.

3 – Install the new springs

Do not remove the entire build plate so that you can avoid harming the heating element wiring at the back-left.

I recommend starting at the back-left for this.

Carefully, lift each corner enough to replace all four springs individually.

🛈 The back-left corner will prove tricky. Just take your time. Hold the new spring in place while re-inserting the bed screw.

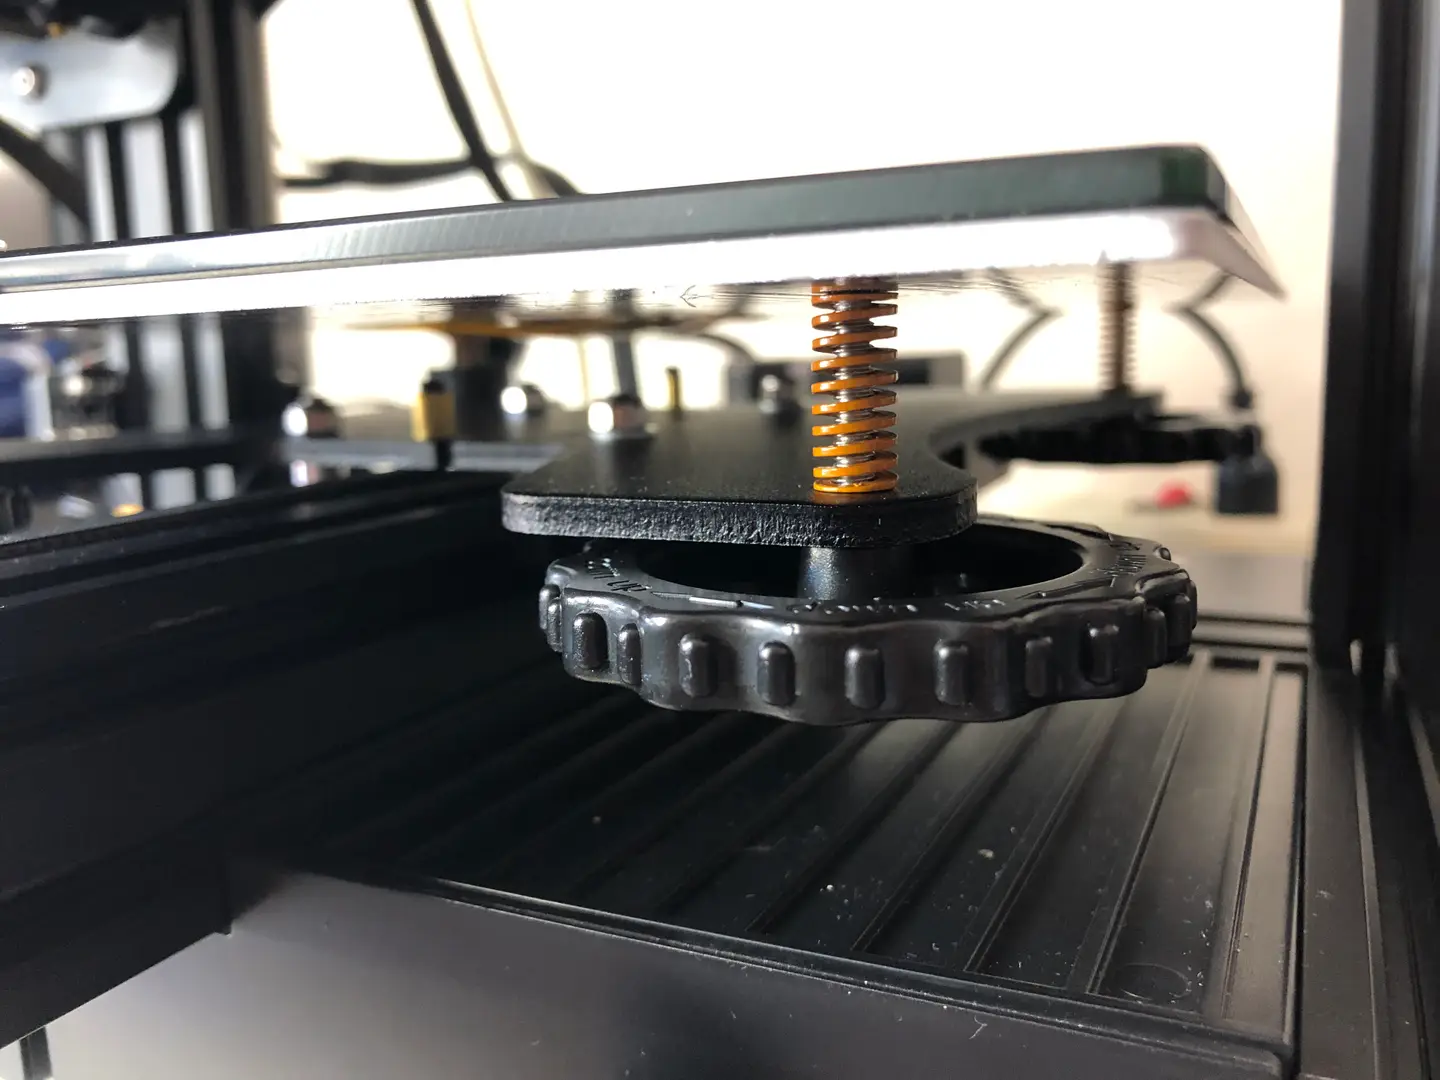
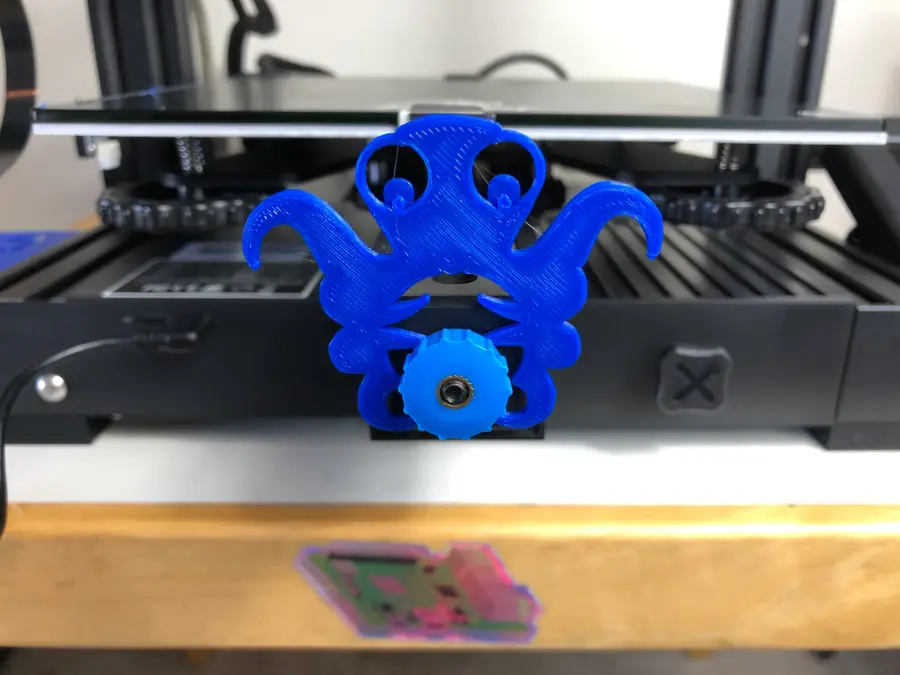
4 – Attach the knobs

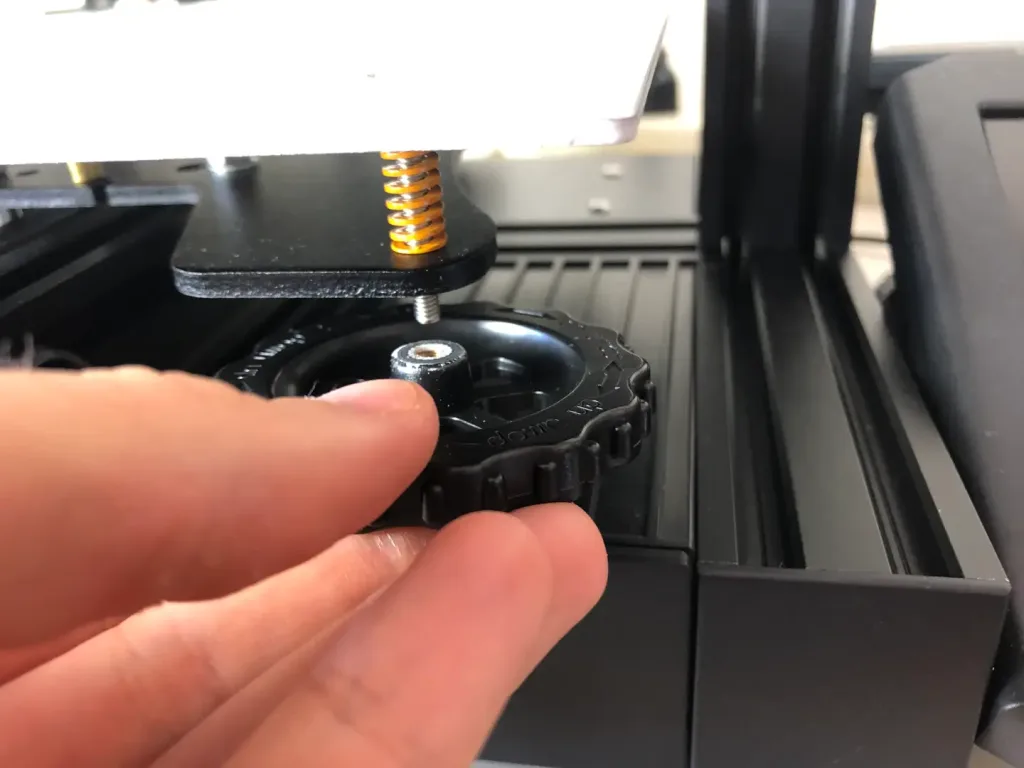
Only after you’ve replaced all 4 springs, should you reattach each knob to the bed screw. This time you will turn the knobs counter-clockwise to tighten them.

The new springs for your Ender 3 V2 will be much stiffer, which should be immediately noticeable upon tightening.
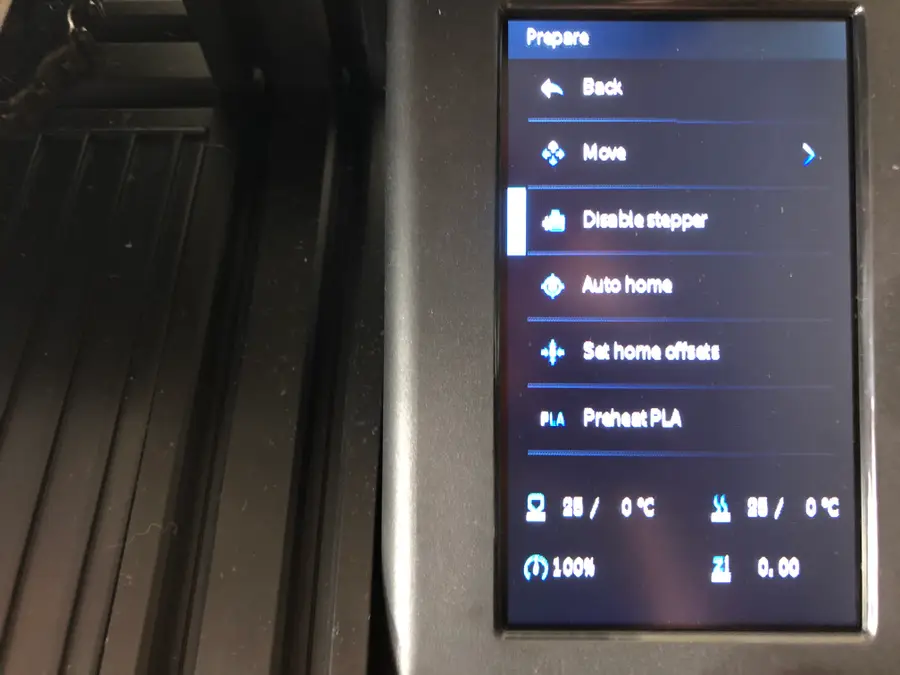
5 – Level the bed

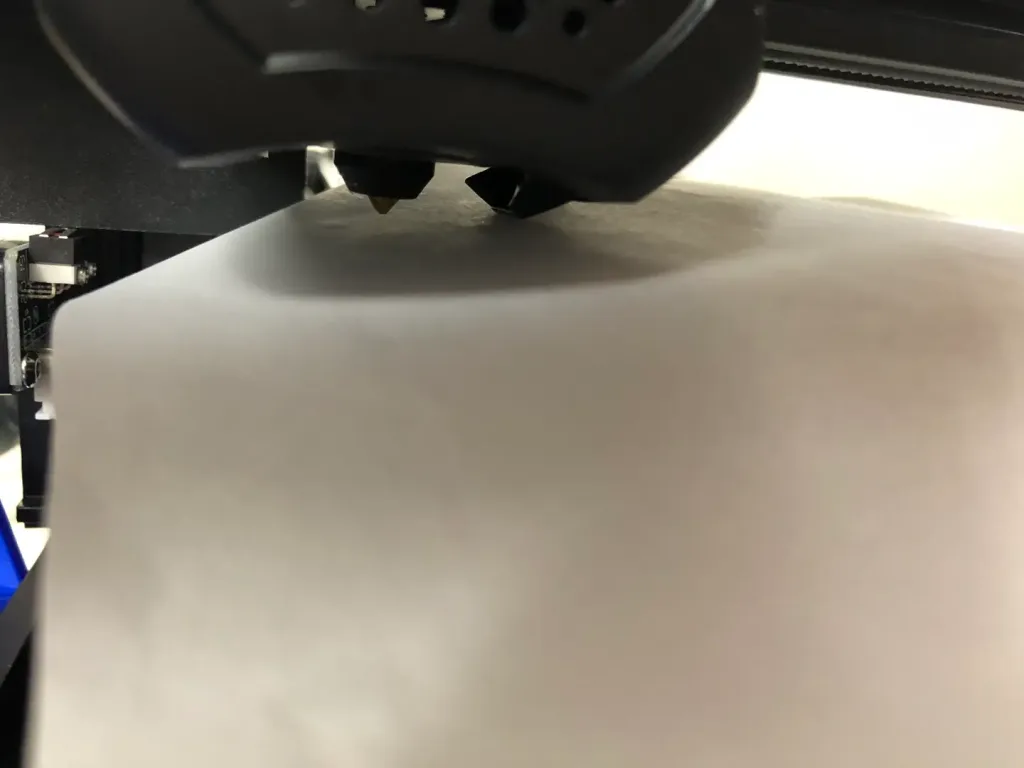
If you’ve been using the stock springs for any length of time, then you should know how to level your bed by now. Lucky for you, now you won’t need to level your bed between prints nearly as often!

Check out our guide on the best way to level the bed on the Ender 3 V2 if you’re relatively new to all of this!

How to Level the Bed on Your Ender 3 V2
The first thing you need to learn how to do is level the bed.

NEXT UP

How to Update Blender

Get the latest Blender has to offer.
howchoo   (467)
November 24, 2023

Blender is one of the most popular open-source 3D creation suites today. It doesn’t cost a dime to use and everything you create is yours to own for good. The community is robust and the dev team still releases new updates on the regular. If you want to get the latest version, you may have

Continue Reading

howchoo

 467 guides

Introducing Howchoo, an enigmatic author whose unique pen name reflects their boundless curiosity and limitless creativity. Mysterious and multifaceted, Howchoo has emerged as a captivating storyteller, leaving readers mesmerized by the uncharted realms they craft with their words. With an insatiable appetite for knowledge and a love for exploration, Howchoo’s writing transcends conventional genres, blurring the lines between fantasy, science fiction, and the surreal. Their narratives are a kaleidoscope of ideas, weaving together intricate plots, unforgettable characters, and thought-provoking themes that challenge the boundaries of imagination.

Home Interests Minecraft

Best Magic Mods for Minecraft (Fabric)

Fabric mods that add or improve magic in Minecraft!
howchoo   (467)
September 22, 2023
11 minutes

Share

Interests
Posted in these interests:
READY PLAYER 1
gaming • 85 guides
Minecraft is an epic sandbox video game developed by Swedish game developer Mojang Studios.
minecraft • 66 guides
minecraftfabric • 8 guides

In the base game, Minecraft has a variety of enchantments and potions to help the player along. However, sometimes you get bored with the same thing, or you crave something specific to help your playthrough. That’s where this list of Fabric magic mods come in!

This guide will go through mods available for Minecraft Fabric that adds more magic to Minecraft. While some add new magical mechanics or systems, others add in a ton of new enchantments. There’s even a mod that lets you turn into a mermaid upon touching water! So whether you’re hosting a survival multiplayer server or you’re playing alone, you’ll find a mod that opens up your world even more!

If you’re interested in more mods for Minecraft, check out the Minecraft Forge interest!

Note that at the game versions available may change since the time of publishing. Most photos were taken using BSL Shaders and Optifine in 1.16.5.

1 – Better Than Mending

By legobmw99

Game Versions: 1.12, 1.14, 1.15, 1.16

One of the most sought out enchantments in Minecraft is Mending. This mod makes it a little more rewarding and usable for players who finally acquire the enchantment on an item. It allows for the Mending item to repair itself with experience the player already has.

2 – Extra Alchemy

By zabi94

Game Versions: 1.12, 1.14, 1.15, 1.16, 1.17

If you’d like to expand potions and brewing, but don’t want to add a large magic mod, Extra Alchemy is a great alternative. While it does add a bunch of useful potions to the game, it also enables players to combine potion effects and durations together through crafting. There also are vials which make positions stackable and a potion bag to carry them around!

3 – Fabric Enchantments

By safrodev

Game Versions: 1.16, 1.17

As the name implies, Fabric Enchantments adds a load of new enchantments to Minecraft. One of the most impressive ones is Auto Smelting, which allows the player to receive the smelted version of any block they break!

4 – Mermod

You can even pick the tail color!

By ThatPreston

Game Version: 1.16

For those that want to live out their mermaid dreams in Minecraft, this mod makes it happen. By crafting a dyed necklace, the player will magically transform into a mermaid upon contact with water!

5 – Art of Alchemy: Memoriam

CurseForge

By wtoll1

Game Versions: 1.16, 1.17

As with any type of alchemy, the process is complicated and complex. This mod takes everything about alchemy and makes it work inside Minecraft. There is a lot to Art of Alchemy: Memoriam, but perhaps the most wonderful thing about it is that it was created in memoriam of SynthRose, the original mod creator who tragically passing away in 2020. Memoriam was a community project created together and in solidarity, with the goal to allow her memory to live on through a beloved mod.

6 – Lacrimis

CurseForge

By Stuin01

Game Versions: 1.16, 1.17

Have you ever looked at a block of crying obsidian and thought, “What’s the deal with that?” The Lacrimis mod gives you an answer! By allowing players to extract its magical power, they can create rune arrays that teleport blocks, defy death, and build invulnerable walls.

7 – Conjuring

CurseForge

By gliscowo

Game Versions: 1.16, 1.17

The goal of Conjuring is to allow players to create their own custom mob spawners. They can customize the amount of mobs spawned, required player distance, and even the attributes of mobs like speed.

8 – Totemic Overhaul

By Tacodude7729

Game Versions: 1.16, 1.17

One of the more useful, but rare, items in Minecraft are the Totems of Undying. Quite a pain to get, this mod allows players to customize and craft totems to make them more powerful and useful. Depending on what you prefer, you can gain extra health, jump boost, night vision, and more!

9 – Haema

CurseForge

By the_will_bl

Game Versions: 1.16, 1.17

For the True Blood or Vampire Diaries fans out there, we’ve got a mod for you to try. Haema allows players to become vampires and unlock a bunch of new abilities. As they play along they’ll gain better night vision, a dash ability, higher max health, and much more!

10 – Dark Enchanting

By ffrannny

Game Versions: 1.16, 1.17

There’s something to be said about mods that include the community in development. Dark Enchanting is certainly a mod-in-development, but it does have useful enchantments in place already. It’s obviously a passion of the developer, as they’ve asked the players for help writing the lore for it. The goal of this mod is to add new and more powerful enchantments to Minecraft and allow players to get the ones they want without having to reroll.

NEXT UP

Top 10 Enchantments in Minecraft

howchoo   (467)
March 25, 2024

The longer you play Minecraft, the more you realize that early-game tools just won’t cut it. Exploring the enchantment feature of Minecraft can be exciting, but also intimidating. Rather than worry about researching enchantments, below are the best enchantments in Minecraft! To learn how to enchant items, check out this guide! In this guide, you’ll see

Continue Reading

howchoo

 467 guides

Introducing Howchoo, an enigmatic author whose unique pen name reflects their boundless curiosity and limitless creativity. Mysterious and multifaceted, Howchoo has emerged as a captivating storyteller, leaving readers mesmerized by the uncharted realms they craft with their words. With an insatiable appetite for knowledge and a love for exploration, Howchoo’s writing transcends conventional genres, blurring the lines between fantasy, science fiction, and the surreal. Their narratives are a kaleidoscope of ideas, weaving together intricate plots, unforgettable characters, and thought-provoking themes that challenge the boundaries of imagination.

Home Interests RetroPie

RetroPie FAQ – Everything You’ve Ever Wanted to Know About RetroPie

Let’s get you playing.
howchoo   (467)
September 22, 2023
20 minutes

Share

You’ll Need 7

What you’ll need
Interests
Series
Howchoo is reader-supported. As an Amazon Associate, we may earn a small affiliate commission at no cost to you when you buy through our links.
Posted in these interests:
pi • 92 guides
retrogaming • 29 guides
retropie • 17 guides

We’ve compiled the most common RetroPie questions and answers into a clear and concise guide. This FAQ covers which RetroPie hardware you’ll need, initial setup, controller configuration, ROMS, consoles, and more.

So whether you’re just getting started with RetroPie or are a pro fine-tuning your retro gaming setup, we can help.

If you have a question that isn’t answered here, post in the comments section and we’ll respond to help you out.

1 – What is RetroPie?

RetroPie is a free software library that allows you to emulate video games on the tiny $35 Raspberry Pi computer. It packages open-source packages like Emulation Station and RetroArch into an easy-to-install gaming system. RetroPie is the most popular Raspberry Pi video game emulator.

Primarily used to emulate retro video games, RetroPie allows you to emulate popular video game consoles such as the Nintendo Entertainment System, (NES), Super Nintendo (SNES), Game Boy, Nintendo 64, Sega Genesis, and more. Games are loaded as individual ROM files which can then be read by each system in RetroPie.

Because the computer is called the “Raspberry Pi”, not “Raspberry Pie”, RetroPie is sometimes misspelled as RetroPi.

2 – How do I build a RetroPie gaming system?

To build your own RetroPie system, you’ll need a few things: a Raspberry Pi computer, a few accessories, and the RetroPie software itself. After assembling the hardware, simply download and install the RetroPie software, add game ROMs, and connect everything to your TV.

See our full RetroPie guide for a complete list of the hardware you’ll need (including links) and to learn about installation step by step.

Using a Raspberry Pi starter kit

You can also buy a Raspberry Pi starter kit to use as the base for your RetroPie build. See our video covering how to choose one (and our recommended kit):

How to Choose a Raspberry Pi Starter Kit (2022)
Also: Is it cheaper to buy everything separately?

3 – How do I install RetroPie?

RetroPie setup is an easy process. To install RetroPie, simply download the latest RetroPie SD card image from the RetroPie downloads page. Then, flash it onto your Raspberry Pi’s SD card using a tool such as Etcher. Finally, configure RetroPie and add your game ROMs.

If you’d like to build your own RetroPie, see our full RetroPie setup guide for step-by-step instructions. Even though you can install RetroPie on any Raspberry Pi model, I recommend installing RetroPie on the Raspberry Pi 4 as it is currently the most powerful Raspberry Pi version and thus can emulate more systems and games.

RetroPie: Build Your Own Raspberry Pi Retro Gaming Rig
How to install (and use) RetroPie!

4 – How do I add ROMs to RetroPie?

There are numerous ways to add games to RetroPie. You can add ROMs to RetroPie using a USB drive or transfer them over your network.

The USB approach is the recommended way to put ROMs on RetroPie due to transfer speed. You’ll also automatically have a backup of your ROMs as a result! After adding your ROMs, simply reboot the Raspberry Pi to start using them.

5 – Where do I get ROMs for RetroPie?

It’s easy to find ROMs for RetroPie. There are several different types of ROMs, including copyrighted, abandonware, public domain, and homebrew games.

While you can find game ROMs on any torrent site, you shouldn’t download any copyrighted titles as this may be illegal. You can also find a ton of free legal ROMs on MAME, Zophar, PDROMs, and other sites. For a complete listing of where to get ROMs for RetroPie and more information, see our guide to RetroPie ROMs.

6 – What is the best controller for RetroPie?

The best controller for RetroPie is the 8Bitdo SF30. Why? It’s a high-quality wireless bluetooth controller that features a large assortment of buttons — including two additional thumbsticks. Looking for others? Check out our guide on the best controllers for RetroPie.

The Best RetroPie Controllers – Top 10 (2023)
Don’t skimp on your RetroPie controller—get the best!

The more buttons your controller has, the wider the variety of games you can play with it. For example, if you tried to use a normal NES-style controller, it wouldn’t have enough buttons to play any games for the SNES, Genesis, MAME arcade, etc. As a bonus, the SF30 will even work with the Nintendo Switch for playing retro games on Nintendo Switch Online.

Learn more about using RetroPie bluetooth controllers and RetroPie controllers in general by checking out our in-depth guides on each.

The Ultimate RetroPie Controller Guide
Press A! Press A! No no no…not B!

7 – How do I update RetroPie?

Keeping RetroPie up to date is important so that you can get the latest security updates, features, and bug fixes.

To update RetroPie, launch it and navigate to Configuration Tools > RetroPie Setup. From the menu that appears, select the appropriate update option: for the latest version of RetroPie (4+), select either the Update or Update All Packages option. For RetroPie 3.X or earlier, select the Update RetroPie-Setup Script option. When it’s finished updating, restart your Pi.

For more information and important notes and warnings, see our RetroPie update guide.

How to Update RetroPie
Wait… how long ago did I set this thing up?

8 – How do I exit a game in RetroPie?

To exit games in RetroPie, press the START + SELECT together buttons at the same time. This will return you to the RetroPie main menu. It is also possible to change this button combination since this combination might not work for certain systems, emulators, or games.

9 – Can RetroPie play N64 games?

Yes, you can run N64 games on RetroPie. The reason people usually ask this is because there’s a misconception that the Raspberry Pi can’t handle Nintendo 64 games due to lag.

The origin of this assumption lies in older models of the Raspberry Pi that could not run N64 games, or in systems that are not properly configured or optimized.

To get N64 games to work in RetroPie and reduce lag, use the Raspberry Pi 4, the latest and most powerful version of the Raspberry Pi. Provide sufficient cooling in the form of ventilation, heat sinks, and/or fans.

In addition to other setup optimizations, configure your Raspberry Pi with the proper video scaling settings — for example, scaling the video up improperly on a massive TV will use too much of the Pi’s GPU, causing lag.

10 – What games come with RetroPie?

RetroPie does not include any games by default. It is only a software library, or a system for playing games. Therefore, you must find and install RetroPie ROMs on your own.

11 – Can RetroPie play GameCube games?

Yes and no. While RetroPie can technically emulate GameCube games, the newest Raspberry Pi model is not powerful enough to play GameCube games without significant lag.

12 – How do I save a game in RetroPie?

Saving games in RetroPie is not as simple as using the in-game menu. Fortunately, it is still easy! Some games save your progress automatically when they are closed. Other games can be saved by pressing SELECT+R1 together. For more information on saving and loading RetroPie games, see our RetroPie game saving guide.

How to Save and Load Saved Games in RetroPie
No more marathons. Unless you want to.

13 – Is RetroPie illegal?

No, the RetroPie software itself is completely legal. Calling it illegal is like calling a DVD player illegal because it can play illegally-burned DVDs.

What isn’t legal is downloading or selling copyrighted ROMs since this similar to software piracy. I recommend finding free, legal ROMs for RetroPie rather than downloading copyrighted titles from torrent sites.

14 – What emulators are in RetroPie?

When many people ask this question, they’re often asking which consoles, or systems, RetroPie can emulate — this is because RetroPie provides a different emulator for each console/system.

Here’s a list of the most popular retro video game consoles that RetroPie can emulate:

  • Atari 2600
  • Atari 7800
  • Atari Lynx
  • GCE Vectrex
  • NEC TurboGrafx-16
  • Nintendo 64
  • Nintendo Entertainment System
  • Nintendo Super NES
  • Nintendo Game Boy
  • Nintendo Game Boy Color
  • Nintendo Game Boy Advance
  • Nintendo Virtual Boy
  • Sega 32X
  • Sega CD
  • Sega Master System
  • Sega Genesis
  • Sega Game Gear
  • Sega Saturn
  • SNK Neo Geo
  • SNK Neo Geo Pocket Color
  • Sony PlayStation
  • Sony PSP

Note: This is not a complete list; additional supported consoles can be found on the RetroPie wiki. You can also emulate vintage computers using RetroPie.

These are all part of a common included emulation system called “RetroArch”. RetroArch packages emulators for the systems above into RetroPie; additional emulators are also available, though results for some are mixed.

15 – Can you play multiplayer games online?

You can play multiplayer games on RetroPie with your friends using Netplay—visit this guide to learn how to set up multiplayer on RetroPie.

NEXT UP

How to Run a Minecraft Server on the Raspberry Pi

A whole world trapped inside your Pi.
howchoo   (467)
December 7, 2023

There are several ways to go about running a Minecraft server on the Raspberry Pi. In this guide, I’ll cover how to install Nukkit—a cross-platform Minecraft server that’s super easy to set up on the Raspberry Pi. This server should work with PCs, consoles, and tablets running Minecraft 1.14. I’ll be using a Raspberry Pi

Continue Reading

howchoo

 467 guides

Introducing Howchoo, an enigmatic author whose unique pen name reflects their boundless curiosity and limitless creativity. Mysterious and multifaceted, Howchoo has emerged as a captivating storyteller, leaving readers mesmerized by the uncharted realms they craft with their words. With an insatiable appetite for knowledge and a love for exploration, Howchoo’s writing transcends conventional genres, blurring the lines between fantasy, science fiction, and the surreal. Their narratives are a kaleidoscope of ideas, weaving together intricate plots, unforgettable characters, and thought-provoking themes that challenge the boundaries of imagination.

Home Interests Raspberry Pi

How to Make Any Printer Wireless with a Raspberry Pi

Look ma! No Ethernet!
howchoo   (467)
September 22, 2023
10 minutes

Share

You’ll Need 1

What you’ll need
Interests
Howchoo is reader-supported. As an Amazon Associate, we may earn a small affiliate commission at no cost to you when you buy through our links.
Posted in these interests:
pi • 92 guides

With a Raspberry Pi and a free afternoon, you can make any printer a wireless network printer. You don’t even need a full-sized Pi model—this project will work easily with the Raspberry Pi Zero W.

We’ll be using CUPS to create a print server that can be managed with a web interface on the network. CUPS provides plenty of features like print job management, job cancellations, and the ability to adjust printer settings from your browser window.

1 – Install Raspberry Pi OS

This project is built on Raspberry Pi OS. Unless you plan on using a monitor or screen, you can get away with using the light version.

If you haven’t already, go ahead and install Raspberry Pi OS onto a microSD card. You will need access to the internet. Visit our guides on how to enable SSH and how to set up WiFi on a headless Raspberry Pi for help setting this up.

How to Enable SSH on Raspberry Pi OS Without a Screen
The SSH protocol is disabled by default.

2 – Install CUPS

It’s important to update Raspberry Pi OS before installing CUPS. If you’ve never done this before, check out our guide on how to update Raspberry Pi OS. You will need to access the Pi via SSH using a terminal.

How to Install Raspberry Pi OS on Your Raspberry Pi
Get the new official Raspberry Pi OS on your Pi.

Once the Pi has been updated, run the following command to install CUPS.

$ sudo apt-get install cups

3 – Set up the Printer

Connect your printer to the Raspberry Pi. The cable you need for this step may differ depending on the type of printer you’re connecting and what model of Pi you’re using.

In my case, I’m using a Canon MX922 and a Raspberry Pi Zero W. The Canon is connecting to the Pi Zero with a USB B to Micro USB setup. I had to use a USB A to Micro USB adapter. Again, your needs may not match what I’m using for this step.

When the printer is connected, turn it on.

4 – Start CUPS for the first time

Add your Raspberry Pi username to the CUPS system to create a profile. Replace pi with your username.

sudo usermod -aG lpadmin pi

Now we can start the CUPS software on the Raspberry Pi. In a terminal window, run the following command.

sudo /etc/init.d/cups start

5 – Set permissions

Permissions are necessary to access the web interface from any computer. Run the following command to apply the appropriate permission level and restart the application.

$ sudo cupsctl --remote-any
$ sudo /etc/init.d/cups restart

6 – Access CUPS

As an optional step, you can take this opportunity to set a static IP address on the Raspberry Pi.

How to Configure a Static IP Address on the Raspberry Pi
Making things a little less dynamic.

Access the CUPS web interface using either the hostname or IP address for the Raspberry Pi. Paste this address into your browser, replacing [YOUR_PI] with the IP or hostname.

https://[YOUR_PI]:631/admin
🛈  If you receive a login prompt, use your Raspberry Pi login credentials.

7 – Add a printer

When the web interface loads, go to the Administration tab and choose Add Printer.

Choose your printer from the list. Set a name, description, and location for your printer. The name field can’t have any spaces, slashes, or pound signs. You can use this screen to choose whether or not the device is shareable on the network. Click Continue.

Select a PPD for your printer model from the list or upload one from your machine. When a PPD file has been specified, click Add Printer. It should now appear under the Printers tab.

8 – Manage your printer

To manage your printer, select it under the Printers tab. Use the Jobs section to show a list of completed jobs or currently queued print jobs.

In the upper left are a couple of drop-down menus. The left menu has maintenance features like test pages and print job management. The right menu has administrative options like adding user permissions or removing the printer entirely. You can also use the Administration menu to change the default print settings for the printer under Set Default Options.

Great job! You’ve created a Raspberry Pi-powered print server. You should be able to discover and connect to printers on this Pi server like any other wireless printer.

NEXT UP

How to Run a Minecraft Server on the Raspberry Pi

A whole world trapped inside your Pi.
howchoo   (467)
December 7, 2023

There are several ways to go about running a Minecraft server on the Raspberry Pi. In this guide, I’ll cover how to install Nukkit—a cross-platform Minecraft server that’s super easy to set up on the Raspberry Pi. This server should work with PCs, consoles, and tablets running Minecraft 1.14. I’ll be using a Raspberry Pi

Continue Reading

howchoo

 467 guides

Introducing Howchoo, an enigmatic author whose unique pen name reflects their boundless curiosity and limitless creativity. Mysterious and multifaceted, Howchoo has emerged as a captivating storyteller, leaving readers mesmerized by the uncharted realms they craft with their words. With an insatiable appetite for knowledge and a love for exploration, Howchoo’s writing transcends conventional genres, blurring the lines between fantasy, science fiction, and the surreal. Their narratives are a kaleidoscope of ideas, weaving together intricate plots, unforgettable characters, and thought-provoking themes that challenge the boundaries of imagination.

Home Interests Shopify

How to Print Invoices and Receipts in Shopify

In 5 minutes you’ll be printing Shopify invoices—for free!
howchoo   (467)
September 21, 2023
6 minutes

Share

Interests
Posted in these interests:
shopify • 1 guides

Printing invoices and receipts for your customers should be a built-in Shopify feature, but it isn’t. Luckily, there’s a free Shopify app for generating and printing invoices and receipts called Order Printer.

The Order Printer app is 100% free, always, and is made by Shopify themselves!

1 – Install the Order Printer app

Install the completely free Order Printer app from the Shopify app listing by clicking the “Add app” button.

You’ll be prompted to log in to your store using your store admin URL. For example, howchoo.myshopify.com.

Finally, you’ll be prompted to grant access to the specific features that the app needs.

ðŸ›? If you don’t have correct user permissions to install apps, contact your Shopify store admin.

2 – Print an invoice in Shopify

Navigate to Apps > Order Printer. You’ll see a list of your most recent orders.

Select an order from the list. In the Templates section, check the Invoice checkbox. You can also print packing slips from this page if you so wish—though packing slips are already a built-in Shopify feature.

Click the Print button to print the invoice.

ðŸ›? Users have reported issues using this app in Safari. If you’re using Safari and the app does not work, try visiting the page in Chrome.

3 – Customize the Shopify invoice

To look more professional, I recommend customizing the invoice with your company logo—similar to what you probably already did for packing slips.

To do this, you’ll need to upload a logo for use in the template and then edit the invoice template to use it.

Upload your logo

From the Shopify admin, navigate to Settings > Files and upload an image. I recommend a .png file with a white or transparent background. After uploading, copy the file URL somewhere.

Use the logo in your invoices

Next, change the following line in your template:

{{ shop_name }}

To:


Of course, change https://cdn.shopify.com/s/files/1/2391/4483/files/logo-100.png?v=1506290081 to the file URL for your image, not ours.

Generally, invoices are the same things as receipts—and the customer is emailed a receipt upon purchasing. However, if for some reason you’d like to generate a different template for the receipt, click the Add template button, paste in the HTML from the Invoice template, and customize it as you wish. Then, name it “Receipt” and save it.

howchoo

 467 guides

Introducing Howchoo, an enigmatic author whose unique pen name reflects their boundless curiosity and limitless creativity. Mysterious and multifaceted, Howchoo has emerged as a captivating storyteller, leaving readers mesmerized by the uncharted realms they craft with their words. With an insatiable appetite for knowledge and a love for exploration, Howchoo’s writing transcends conventional genres, blurring the lines between fantasy, science fiction, and the surreal. Their narratives are a kaleidoscope of ideas, weaving together intricate plots, unforgettable characters, and thought-provoking themes that challenge the boundaries of imagination.

Home Interests Game Boy

How to fix vertical lines on an original Game Boy screen

You can’t play it like this!
howchoo   (467)
September 21, 2023
12 minutes

Share

You’ll Need 5

What you’ll need
Interests
Series
Howchoo is reader-supported. As an Amazon Associate, we may earn a small affiliate commission at no cost to you when you buy through our links.
Posted in these interests:
gameboy • 8 guides
nintendo • 13 guides
retrogaming • 29 guides

Finding your old Game Boy can produce a wave of nostalgia like no other. But nothing fades that feeling faster than finding vertical lines on the screen. Many retro consoles are prone to wear and tear and the Nintendo Game Boy from 1989 is no exception.

The Game Boy is comprised of two motherboards that connect with a ribbon cable. Over time, the wires in this cable can deteriorate causing vertical lines to appear on the display. In this guide, we’ll be repairing the vertical lines on a classic red Game Boy.

1 – Turn off and examine the Game Boy

Turn off the Game Boy, there’s no way we’re going to play it like this. It’s time for a thorough examination.

Look for any missing screws, there are six used to hold the shell together. Take note of the screw type used—many Game Boys are opened with a tri-wing screwdriver. However, a few early models are made with phillips screws.

Be careful of battery acid damage which may affect internal components but is often repairable.

If everything looks good, then it should be safe to proceed.

2 – Open the Game Boy

Using an appropriate screwdriver, remove all the screws from the back of the shell. You will need to remove the battery cover and batteries to reach the final screws. There are 6 total.

The Game Boy should open with ease, be mindful of the ribbon cable used to connect the boards.

3 – Unmount the front motherboard

Using a Phillips number 1 screwdriver, unscrew the front motherboard from its shell. There will be 10 screws total.

The motherboard can be removed without disconnecting the ribbon cable. This cable is fragile, even the act of disconnecting and reconnecting can cause damage to the display. Exercise extreme caution when handling this cable.

4 – Remove the front shell

Carefully pull the motherboard from the shell.

The front half of the Gameboy is responsible for many things, one of which is housing the buttons. As such, there will be a few components to account for during this step:

  • A Button
  • B Button
  • A/B Buttons Silicone Pad
  • D-Pad Button
  • D-Pad Button Silicone Pad
  • Start/Select Buttons (One Piece)

5 – Remove the black foam strip

Once the front shell is removed, you will need to locate a small black strip of foam under the screen. This strip covers wires from the ribbon cable and will need to be removed. The strip is held on with a thin layer of glue.

Using a flat head screwdriver or something equally flat, pry the foam piece from the Game Boy. Be sure there is no glue residue on the wires. It should peel from the hardware as one piece.

Set the strip aside.

6 – Heat the soldering iron

It’s time to whip out the power tools! Does a soldering iron count as a power tool?

If you haven’t already, heat up the soldering iron. We’ll be using the heat to reform the deteriorated connection in the ribbon wires.

7 – Turn on the Game Boy

With the soldering iron set aside and warming up, it’s time to prep the Game Boy. The screen will need to be on during the repair. This is to ensure each wire is properly fixed.

Insert four—preferably charged—AA batteries into the back of the Game Boy. Snap the battery cover in place and set the power switch to on. Adjust the contrast until the lines are easily visible.

8 – Apply heat to affected wires

Do not touch the soldering iron to the wires.

Wave the soldering iron over the wires that line up with the unwanted vertical lines. Do not hold the soldering iron in one place for long, it’s best to keep the soldering iron moving throughout the repair.

Be patient and carefully sweep over the wires until the vertical lines have disappeared. When finished, place the foam strip back into place.

9 – Turn off the Game Boy

When the vertical lines are completely gone, it’s time to turn off the Game Boy. Set the power switch to “off” in the upper left corner.

10 – Install the front components

The buttons should fit gently into the front shell. There will be a silicone pad to place behind the A/B buttons and D-pad. Each silicon pad is seated into place using a small notch.

To install the front board, fit the speaker into its slot. The speaker uses a small notch to guide it into place. The rest of the board should fall into place with a gentle push, no force should be necessary.

11 – Mount the front motherboard

Using a Phillips number 1 screwdriver, screw the motherboard into place. There will be 10 screws used during this step.

12 – Screw the shell together

Remove the battery cover and any batteries used earlier.

Place both halves of the shell together. Everything should fit together nicely with no force. If the shell doesn’t fit together, investigate the source to ensure the motherboards are flush and level.

Once both halves are aligned, screw the shell together. There will be 6 screws used during this step.

13 – Time for a test run

Congratulations! It’s time to install the batteries for a test run. Find a nice lamp, get comfortable, and enjoy the experience with a nice clean display.

NEXT UP

RetroPie scrapers: what they are and how to use them

Wait, which game is this?
howchoo   (467)
September 29, 2023

You’ve put so much work into setting up RetroPie or EmulationStation. You load it up with legally obtained ROMs only to find that custom theme you installed—you remember, the one from my RetroPie themes guide—has a big blank spot for box art! The Best RetroPie Themes (And How to Install Them)You deserve some personal flair! RetroPie: Build Your

Continue Reading

howchoo

 467 guides

Introducing Howchoo, an enigmatic author whose unique pen name reflects their boundless curiosity and limitless creativity. Mysterious and multifaceted, Howchoo has emerged as a captivating storyteller, leaving readers mesmerized by the uncharted realms they craft with their words. With an insatiable appetite for knowledge and a love for exploration, Howchoo’s writing transcends conventional genres, blurring the lines between fantasy, science fiction, and the surreal. Their narratives are a kaleidoscope of ideas, weaving together intricate plots, unforgettable characters, and thought-provoking themes that challenge the boundaries of imagination.

Home Interests Ender 3

How to Level the Bed on Your Ender 3 V2

The first thing you need to learn how to do is level the bed.
howchoo   (467)
September 21, 2023
9 minutes

Share

You’ll Need 2

What you’ll need
Interests
Series
Howchoo is reader-supported. As an Amazon Associate, we may earn a small affiliate commission at no cost to you when you buy through our links.
Posted in these interests:
3dprinting • 36 guides
ender3 • 19 guides

Ah…bed leveling. It’s the first thing you absolutely need to learn how to do with your Ender 3 V2. And don’t feel bad if you get this wrong at first. I did.

The directions for bed leveling that come with the Creality Ender 3 V2 instructional booklet are stupefyingly subpar and definitely will not make sense to those with little to no experience with 3D printers. And getting this wrong could not only mess up your 3D prints but also cause some damage to your beautiful new Ender 3 V2, which you definitely don’t want.

That’s why I’m here to make sure you don’t make the same mistakes that I did, and, say…scratch the printing surface. You haven’t done that already, have you?

Why you need to level the bed

Really what you’re doing when you’re leveling the bed is ensuring that—as the extruder nozzle moves along the x and y-axis of your printing bed—it’s neither too close nor too far away from the printing surface.

If it’s too close, it will either scratch your printing bed or stop the nozzle from extruding any filament.

If it’s too far away, the plastic filament will not stick to the bed and your 3D print will be—well—it won’t be.

Auto-bed leveling with the BLTouch

We highly recommend you install the BLTouch on your Ender 3 V2 to avoid having to repeat the process of manually leveling your bed. It’s an easy to install upgrade that’s going to make your life a million times easier.

How to Install BLTouch on the Creality Ender 3, Ender 3 V2, and Ender 3 Pro
This upgrade is going to level the playing field!

1 – Lower the bed slightly

Turn the bed adjustment wheel counter-clockwise a few times or until you’re sure that the nozzle will not hit the surface as it lowers.

🛈 If you’re unsure how low this is, then just lower it completely at first until you get a better sense of it.

2 – Run “Auto home”

On your Ender 3 V2 screen, go to Prepare > Auto home.

This will run an automatic program that will move the print bed until the nozzle aligns with the left corner.

3 – Disable stepper

On your Ender 3 V2 screen, select Disable stepper.

This will allow you to move the print bed freely while you level it.

4 – Use sheet of paper to find the right level

This is the trickiest part of bed leveling and certainly one that you’ll get better at with practice.

  • Slide a sheet of paper between the printing nozzle and the print bed.
  • Simultaneously raise the print bed toward the nozzle by rotating the wheel clockwise, while sliding the sheet of paper back and forth.
  • When you feel the slightest tension on the paper, stopIt feels almost like the paper is vibrating.

Repeat this process two times around, on each corner of the print bed, moving to the bottom-right, top-right, and top-left.

You’ll need to move the print bed to get the nozzle on the different corners of the printing surface. Make sure you’re not scratching the surface with the nozzle as you move the print bed.

Next: Upgrade those springs

Now, if you haven’t already, you’ll want to upgrade the springs on your Ender 3 V2, so you don’t have to level the bed endlessly!

Ender 3 V2 Bed Spring Upgrade: A Necessary Mod for the V2
Choosing and installing new bed springs on the Ender 3 V2.

5 – How did it go?

Did you manage to level the bed on your Ender 3 V2? Any suggestions or tips for others looking to level their beds? We’d love to hear more suggestions!

Troubleshooting tip: Z-offset

Many people are running into an issue with an improperly aligned Z-offset. This means that your extruder sits too close or too far away from the print bed when trying to level it.

We have a guide that shows you how to easily adjust the Z-offset on the Ender 3, Ender 3 V2, and Ender 3 Pro 3D printers to fix this issue!

How to Correct the Z-Offset on Your Ender 3, Ender 3 V2 and Ender 3 Pro
You’ll need to manually adjust the Z-offset to get this right.

NEXT UP

How to Update Blender

Get the latest Blender has to offer.
howchoo   (467)
November 24, 2023

Blender is one of the most popular open-source 3D creation suites today. It doesn’t cost a dime to use and everything you create is yours to own for good. The community is robust and the dev team still releases new updates on the regular. If you want to get the latest version, you may have

Continue Reading

howchoo

 467 guides

Introducing Howchoo, an enigmatic author whose unique pen name reflects their boundless curiosity and limitless creativity. Mysterious and multifaceted, Howchoo has emerged as a captivating storyteller, leaving readers mesmerized by the uncharted realms they craft with their words. With an insatiable appetite for knowledge and a love for exploration, Howchoo’s writing transcends conventional genres, blurring the lines between fantasy, science fiction, and the surreal. Their narratives are a kaleidoscope of ideas, weaving together intricate plots, unforgettable characters, and thought-provoking themes that challenge the boundaries of imagination.

Home Interests Raspberry Pi

How to Install Raspbian Stretch on the Raspberry Pi

howchoo   (467)
September 21, 2023
12 minutes

Share

Interests
Posted in these interests:
pi • 92 guides
raspbian • 5 guides

Important: Raspbian has been replaced by Raspberry Pi OS!

How to Install Raspberry Pi OS on Your Raspberry Pi
Get the new official Raspberry Pi OS on your Pi.

Raspbian is a free Debian-based operating system optimized for the Raspberry Pi, and Stretch is the development code name for Debian 9. In this guide, we’ll download and install Raspbian Stretch for use on the Raspberry Pi.

Note: A new version of Raspbian is available! Learn how to install Raspbian Buster

1 – Download the Stretch image

Since Stretch is no longer the latest version of Raspbian, it’s been removed from the Raspbian Downloads page. But you can still download Raspbian Stretch using our guide that contains links to the Raspbian Archive.

Download Raspbian Stretch
Need an older version of Raspbian? No problem.

Either full or lite will work for this guide, but the version you choose depends on your project.

Choose Raspbian Stretch with Desktop if you want to have access to the Raspbian GUI; in other words, if you want to log in and be able to access a desktop, icons, etc. like you would with Windows or MacOS.

Choose Raspbian Stretch Lite if you only need to boot to the command line. For simpler Raspberry Pi projects, this is often a good choice since the Lite version uses less power and fewer resources.

2 – Put your micro SD card into your computer

You’ll likely need to use an adapter if your computer has a full-sized SD card slot or no SD card slot.

3 – Use Etcher

The easiest way to flash Raspbian Stretch to your SD card is to download and install Etcher. After opening Etcher, select the Raspbian disk image, your SD card, and click Flash. After Etcher finishes running, you’re good to go!

If you prefer to install Raspbian manually and learn a bit more, read on for alternate methods!

4 – Using MacOS

If you’re using MacOS, use the following instructions. Windows instructions are located below.

5 – Open the Disk Utility and find your SD card

To open Disk Utility you can type cmd + space bar and search. Or you can use Finder to navigate to Applications > Utilities > Disk Utility.

6 – Format the SD card

You’ll need to format the SD card to FAT-32. To do so you’ll need to click on the “Apple SDXC Reader” (or the name of whatever adapter you used) in the left column of Disk Utility.

Click the “Erase” tab.

Choose a name for the card (something like “Stretch” will do). For the format, choose MS-DOS (FAT).

Click “Erase” when you’re finished.

7 – Determine the mount point

Using the df command we’re going to determine the mount point.

Type:

df -h

In the output, under the Mounted on column look for the name of your SD card. I named my STRETCH so I’m looking for /Volumes/STRETCH.

Then take note of the filesystem name in the first column. Mine is /dev/disk2s1. This is actually the partition name, but what we’re really concerned with is the device name which is disk2. Copy this device name.

8 – Unmount the volume

For this step you can use either Disk Utility or Finder. In either case look in the left column for the name of your SD card. In my case it’s STRETCH and click the eject symbol.

9 – Locate the disk image

Navigate to the Downloads folder and pen up the Terminal application and type:

cd ~/Downloads

To locate the img type:

ls -lha | grep -i stretch

You should see some output like this:

[Downloads]$ ls -lha | grep -i stretch
-rw-r--r--@   1 tyler  staff   346M Nov  8 14:51 2017-09-07-raspbian-stretch-lite.zip

Now unzip the image. Make sure to use the name of your file.

unzip 2017-09-07-raspbian-stretch-lite.zip

This will create the file 2017-09-07-raspbian-stretch-lite.img.

10 – Flash the disk image

Still in the Terminal, type:

sudo dd bs=1m if=DISK_IMAGE_NAME of=DEVICE_NAME

Make sure to replace the values for DISK_IMAGE_NAME and DEVICE_NAME. Mine looks like this:

sudo dd bs=1m if=2017-09-07-raspbian-stretch-lite.img of=/dev/rdisk2

Enter your password, wait until it finishes, and you’re done.

Note: You may have noticed that we’re using rdisk2 instead of disk2. You can actually use either, but rdisk2 is significantly faster.

11 – Using Windows

If you’re using Windows to format the Disk you can use the following steps.

12 – Format the SD card

Open Windows Explorer and find your SD card. Right click on the icon and click Format…. Make sure Fat 32 (default) is selected and hit enter.

13 – Download and launch the Win32 Disk Manager

Go here and download the app called Win32 Disk Imager. After downloading the program, click to uncompress the files, and then click Win32DiskImager.exe to launch.

14 – Flash the SD card

In the Win32 Disk Imager, click the blue folder icon and locate the Jessie image you downloaded. Then in the Device box make sure the drive letter for your SD card is selected.

Click the Write button to begin.

15 – Boot your Pi!

Safely eject the SD card from your computer and insert it into your Raspberry Pi. Then, connect your Pi’s power supply to boot it.

You’re good to go! Next, you’ll want to connect your Pi to WiFi and enable SSH so you can log into your Pi remotely.

How to Enable SSH on Raspberry Pi OS Without a Screen
The SSH protocol is disabled by default.

NEXT UP

How to Run a Minecraft Server on the Raspberry Pi

A whole world trapped inside your Pi.
howchoo   (467)
December 7, 2023

There are several ways to go about running a Minecraft server on the Raspberry Pi. In this guide, I’ll cover how to install Nukkit—a cross-platform Minecraft server that’s super easy to set up on the Raspberry Pi. This server should work with PCs, consoles, and tablets running Minecraft 1.14. I’ll be using a Raspberry Pi

Continue Reading

howchoo

 467 guides

Introducing Howchoo, an enigmatic author whose unique pen name reflects their boundless curiosity and limitless creativity. Mysterious and multifaceted, Howchoo has emerged as a captivating storyteller, leaving readers mesmerized by the uncharted realms they craft with their words. With an insatiable appetite for knowledge and a love for exploration, Howchoo’s writing transcends conventional genres, blurring the lines between fantasy, science fiction, and the surreal. Their narratives are a kaleidoscope of ideas, weaving together intricate plots, unforgettable characters, and thought-provoking themes that challenge the boundaries of imagination.

Home Interests Raspberry Pi

Make a Smart Alarm Clock With a Raspberry Pi

Everything you need to start your smart alarm clock project!
howchoo   (467)
September 21, 2023
15 minutes

Share

You’ll Need 4

What you’ll need
Interests
Speakers x 1
Howchoo is reader-supported. As an Amazon Associate, we may earn a small affiliate commission at no cost to you when you buy through our links.
Posted in these interests:
pi • 92 guides

If you don’t know what time it is—this is the project for you! In this guide, I’ll be covering all the basics you need to start your Raspberry Pi smart alarm clock project. We’ll go over the parts we need, how to connect them, and programming the alarm clock functions into the Raspberry Pi.

Which Raspberry Pi will work? This project will work with any Raspberry Pi, including the Raspberry Pi Zero. I have a Raspberry Pi 3 B+ handy, so I’ll be using it throughout this guide.

Note: This guide includes a few python scripts that can be found in this Github repository.

1 – Connect LCD to Raspberry Pi

PiLCD
SDASDA
SCLSCL
5VVCC
GNDGND
5VLED

Use the table above and diagram reference to connect your i2c LCD screen to the Raspberry Pi. Note: I’m using a backpack module to make the process a little easier. You can connect the LED to either the LCD itself or the Pi for custom control options.

2 – Install and update Raspberry Pi OS

We’ll be creating our Raspberry Pi alarm clock on top of Raspberry Pi OS (formerly Raspbian). Make sure Raspberry Pi OS is installed—visit our Raspberry Pi OS installation guide to get started.

How to Install Raspberry Pi OS on Your Raspberry Pi
Get the new official Raspberry Pi OS on your Pi.

3 – Enable I2C

To use our LCD screen, we’ll need to enable i2c. Access the Raspberry Pi configuration menu:

sudo raspi-config

Under Interfacing Options, select the option to enable I2C. Confirm the change and restart your Raspberry Pi.

4 – Download I2C tools package for LCD screen

We need to see which I2C address our LCD is using. To do this, we’ll be installing a package called I2C Tools. Run the following command:

sudo apt-get install i2c-tools

Install the following SMBUS Python library:

sudo apt-get install python-smbus

Restart the Pi and run this command to find the I2C address.

i2cdetect -y 1

This will return a table full of addresses. Jot down the number used by your LCD screen, mine happens to be 27. Update i2c_driver.py with the address number your screen is using on line 6.

5 – Install the Python i2c driver

Next we’ll need to install this Python i2c driver. On the GitHub repository for this project, we’ve added a driver that you can use! It’s basically just a refactor of a driver provided by DenisFromHR on GitHub.

Installing the driver is pretty simple. Just make sure you’re in your home directory and use wget.

cd ~
wget https://raw.githubusercontent.com/Howchoo/smart-alarm-clock/master/i2c_driver.py

6 – Install the RPLCD library

Now it’s time to set up the RPLCD library. Begin by installing PIP:

sudo apt-get install python-pip

Once complete, install the RPLCD library package. Run the following:

sudo pip install RPLCD

7 – Create a python script to display time

It’s time for the fun part! We need our LCD screen to give us some kind out output. The following script will display the time and date on our LCD screen. You can get creative with output settings.

display.py

#!/usr/bin/env python

import I2C_LCD_driver
import time


mylcd = I2C_LCD_driver.lcd()


while True:
    mylcd.lcd_display_string(time.strftime('%I:%M:%S %p'), 1)
    mylcd.lcd_display_string(time.strftime('%a %b %d, 20%y'), 2)

Save this python script to a file and drop it in /home/pi. I’ve named my file display.py.

Note: I’m from America so I prefer my date with the Month in front. However, you can use this opportunity to adjust the output however you like. Visit this Ubuntu page for more information on clock output customization.

8 – Set the timezone

In our display.py script, Python’s time module will output the current time in whatever timezone is set on the Raspberry Pi. So, in order to see the time in our local timezone, we’ll need to configure the timezone.

We’ve written a detailed guide showing you how to set the timezone on your Raspberry Pi (tl;dr sudo raspi-config).

9 – Test the display script

Test your script by running the following code:

sudo python display.py

Note: Replace display.py with the file name you chose for your python script.

10 – Install the alarm sound

Find a sound to use for your alarm clock. I’m using a file labeled alarm.wav. Drop it in the /home/pi folder.

11 – Create the alarm script

The alarm script requires a scheduler to work properly. Run the following script to install the scheduler:

pip install schedule

Create a python script to initiate our sound file at a specific time. Below is the script I used to schedule my alarm (for 7:00AM).

alarm.py

#!/usr/bin/env python

import schedule
import subprocess
import time


def job():
    subprocess.call(['aplay /home/pi/alarm.wav'], shell=True)


schedule.every().day.at('7:00').do(job)


while True:
    schedule.run_pending()
    time.sleep(1)

12 – Test the alarm script

Make sure the alarm script is running the alarm when scheduled. Plug in your speaker and run the following script. Replace alarm.py with the name of your alarm script file.

sudo python alarm.py

Note: If you have trouble when testing your alarm, try scheduling it for at least 5-10 minutes into the future. Sometimes the Pi needs a few minutes before will work.

13 – Setup scripts to launch at boot

Open the crontab file with the following command

crontab -e

At the end of the file, add the following two lines of code. Be sure to replace the ‘display.py’ and ‘alarm.py’ with your custom display and alarm scripts.

@reboot nohup python display.py &
@reboot nohup python alarm.py &

Save and close the file. Congratulations! Every time your Pi restarts, it’s going to tell you the time and schedule your custom alarm.

14 – Making a smart clock

Now let’s get to the good stuff. To make our alarm clock a smart alarm clock, we’ll be using AVS. Visit our guide here to learn how to set up AVS on the Raspberry Pi. Using Alexa, you can create commands and even trigger custom python scripts!

Build Your Own Raspberry Pi Amazon Echo
Hello, Alexa Voice Service.

Here are a few example ideas to get you started:

  • Set alarms using voice commands
  • Check the weather
  • Program reminders for future events

15 – The final product

If your Pi has an internet connection (see our guide on setting up WiFi on your Pi), the time should remain perfectly in sync. Where you take the project from here is up to you. Congratulations! Your Raspberry Pi is now a completely functional alarm clock.

If you want to get really creative, incorporate it with our awesome Vinyl Record Clock project.

NEXT UP

How to Run a Minecraft Server on the Raspberry Pi

A whole world trapped inside your Pi.
howchoo   (467)
December 7, 2023

There are several ways to go about running a Minecraft server on the Raspberry Pi. In this guide, I’ll cover how to install Nukkit—a cross-platform Minecraft server that’s super easy to set up on the Raspberry Pi. This server should work with PCs, consoles, and tablets running Minecraft 1.14. I’ll be using a Raspberry Pi

Continue Reading

howchoo

 467 guides

Introducing Howchoo, an enigmatic author whose unique pen name reflects their boundless curiosity and limitless creativity. Mysterious and multifaceted, Howchoo has emerged as a captivating storyteller, leaving readers mesmerized by the uncharted realms they craft with their words. With an insatiable appetite for knowledge and a love for exploration, Howchoo’s writing transcends conventional genres, blurring the lines between fantasy, science fiction, and the surreal. Their narratives are a kaleidoscope of ideas, weaving together intricate plots, unforgettable characters, and thought-provoking themes that challenge the boundaries of imagination.

Home Interests Privacy

The Best Smartwatches for Privacy and Security

Want a privacy-respecting and secure smartwatch? We’ve got you covered.
howchoo   (447)
September 20, 2023
22 minutes

Share

Interests
Posted in these interests:
privacy • 2 guides
security • 6 guides
technology • 20 guides

Options for smartwatches that are both secure and respect privacy are few and far between, but not impossible to find. Of course, going with a major brand like Apple is a good bet if you’re looking for the closest thing to standards that exist in the smartwatch market and, at least on paper, Withings offers good security practices for their technology and health data. But, if you want to take total control of your data, while still having all the great features we’ve come to expect from a smartwatch, some exciting options do exist.

Some of these watches are closer to Steve Wozniak’s DIY watch, the sort of thing you get if you love messing around with new technology, or prefer to have a highly individuated watch design. Others are a bit closer to what you’d find on the open market, however, and it seems likely that even better devices are just a short way down the road.

For those of you who already own a smartwatch, however, or for those looking to get something with a more polished set of features, don’t fret. There are some neat software projects out there that might be able to take an ordinary smartwatch and put you in total control over how your data is shared.

1 – Smartwatches designed for privacy and security

Smartwatches designed for privacy and security

There are not as many smartwatches designed for the privacy-conscious individual as there should be, which sadly drives more users toward the large commercial products. However, the last couple of years have seen a rise in open-source projects that seek to rectify this issue by bringing affordable and privacy-centered smartwatch technology to the public sphere.

When considering these smartwatches, you primarily need to figure out what features are indispensable for your needs. If you absolutely must have advanced blood pressure monitoring, only a few major brands will do. Likewise, if you want to be able to conduct payments through your smartwatch, the limitations quickly begin to stack up. If, however, you want a functional watch that contains fitness tracking and other core features, the sheer drop in price that some of these specialized smartwatches offer will likely be enough to encourage you to at least give them a run around the block (perhaps literally).

2 – The PineTime smartwatch by PINE64

The PineTime smartwatch by PINE64

PINE64 is a community platform, where the community drives the design and creation of new hardware and then works collectively to build advanced software for those devices. Working from the ground up, these Linux developers have come up with a vast array of exciting projects, all of which focus on privacy and security as native aspects of the design.

The PineTime features an Apple Watch style and all the basic features anyone could want, easily matching any sub-$100 watches on the market. Truthfully, though, since you have active support from a dedicated community, and software you can reliably trust not to be snooping on you (or simply horribly buggy), the PineTime is the main watch I’d recommend to anyone looking to get into the realm of smartwatches without breaking the bank.

The main downside of the PineTime is the lack of IP68 rating. Since it’s rated at IP67, the PineTime provides protection from water damage for 30 minutes and up to one meter, but that means it’s not going to work for those who use smartwatches to monitor swimming.

The PineTime is best, though, for people who like messing around with their electronics. You can totally use it out of the box, but the real advantages of any PINE64 product comes from interacting with the community and trying out the different community-developed apps.

3 – The Watchy by Squarofumi

The Watchy by Squarofumi

This is a geek’s happy project, an open-source, Arduino-powered smartwatch with a 1.54-inch e-paper screen. There’s also Wi-Fi, Bluetooth, a 3-axis accelerometer and four programmable buttons. The design of The Watchy is actually kinda sleek, even if some form of case is added (the Printed Circuit Board itself acts as a basic case). The catch? You’re going to be putting this together yourself, and, probably, coding it yourself as well.

While this is absolutely a project for DIYers out there, rather than something ready to go on the open market, it’s a lovely step forward in the realm of open-source smartwatch design. Hopefully, five years down the road, we start seeing these projects rival some of the established brands in terms of ease of use and features. Until then, what better way to teach your kids, or yourself, about the basics of hardware and software!

4 – The Open-SmartWatch by @pauls_3d_things

The Open-SmartWatch by @pauls_3d_things

This little beauty is another highly DIY project, though you can purchase a prebuilt model from MakerFabs. Created by “Paul’s 3D Things”, this little device has only the most basic smartwatch functions built in, but it actually looks pretty nifty. Besides, there is an updated version in the works, and its creator looks like the sort of guy who might take this project in some seriously cool directions.

5 – Bangle.js 2 smartwatch

Bangle.js 2 smartwatch

Aside from the PineTime, the Bangle.js 2 is the only open-source smartwatch that’s got the ability to appeal to a non-DIY audience. It’s a lot sleeker than the PineTime, however, and has a better feature-set out of the box. An active community provides support as well as all manner of new apps and, as with all of these projects, you can learn how to code this little beauty yourself (using JavaScript or a graphical programming language like Blockly).

I’d recommend this one over the PineTime in most cases, largely due to the excellent battery life of the Bangle. It is lacking PineTime’s Bluetooth 5, but hopefully, we see a new version before long that upgrades the hardware to a modern level. It would be nice if they offered models with some better preinstalled features and IP68 waterproofing (the Bangle only offers IP67), but the truth is that the Bangle still beats out a large swatch of similarly-priced smartwatches on the market (none of which will boast the ability to self-program or the privacy factors of the Bangle).

6 – Big name brand smartwatches good for privacy?

Big name brand smartwatches good for privacy?

But how do regular smartwatches stack up? With the deluge of smartwatches on the market these days, and the vast array of complicated differences between models, it can be hard to know which models are going to be the best for privacy and security.

Generally speaking, Apple does maintain a higher internal privacy standard than other companies at its level. That’s not to say that this internal standard is anywhere near as good as what we should have (standards imposed by an international regulatory body), but they do help set a basic benchmark for the industry. To that end, Apple’s watch is probably the best in terms of privacy and security, as long as you’ve already taken steps to secure your other Apple devices. Of course, Apple’s watch is useless without the rest of the Apple products to create the ecosystem, so you either need to have already bought in, or you’re looking at a pretty expensive switch.

Withings is another smartwatch maker to take note of, though there are some serious concerns that their company has failed to address. Mostly, Withings designs various “smart” medical devices such as thermometers, scales, and blood pressure sensors. Their watches are unique in the industry for looking great (like actual watches), having many of the same health features that the Apple Watch does (including advanced heart rate monitoring functions), and a month-long batter life. Their privacy policy and security information are a little hard to find, but they seem to have relatively good protections in place, conforming to GDPR and HIPAA standards. They don’t go out of their way to support customers in finding this information, however. Questions on their forums are unanswered, and there wasn’t any obvious notice that they never sell or provide your data to 3rd parties beyond those contractually obligated to use that data for specific functions. That’s a bit frustrating, and I hope Withings can offer greater insights in the future.

Finally, despite some recent severe data breaches, Garmin watches are a great choice because the user doesn’t need to connect their real information to the Garmin account, nor do they need to use the online connection between the Garmin app and the watch. Some users, with some models of Garmin watches, have even been able to use GadgetBridge to bypass Garmin’s app altogether, others just use a physical connection to a PC to transfer data when needed.

Whatever you do, avoid all watches “for kids” since these tend to be the worst offenders for tracking problems and security breaches. In the extremely unlikely case that your child needs a high-tech computer strapped to their wrist 24/7, get them one of the privacy-respecting models that offers limited features.

7 – AsteroidOS free and open source smartwatch software

AsteroidOS free and open source smartwatch software

One of the most promising projects in terms of open-source smartwatch software is AsteroidOS, the fully functional operating system designed for maximum privacy and security. It’s got a superb feature base, a dedicated community, and the benefit of not sharing your most personal biometric and locational data with your watch’s company. The main downside is how few watch models are supported by the OS.

8 – GadgetBridge

GadgetBridge

GadgetBridge is a powerful tool that allows you to use your Pebble, Mi Band, Amazfit Bip and HPlus device (as well as several others) without the vendor’s closed source application, and without transmitting any data to the vendor. With products like Amazfit (notoriously terrible at privacy) this is essential, it’s only a shame that GadgetBridge doesn’t support more popular products like the (truly terrible for privacy) FitBit.

NEXT UP

How to Set Up Quick Connect on a Synology NAS

Get Synology’s powerful Quickconnect running in minutes on your NAS!
howchoo   (447)
November 24, 2023

Synology is one of the most popular creators of Network Attached Storage devices on the market today, and for great reason — they’re really good at what they do. They consistently make devices that stand the test of time and feature top-notch software that makes the process of running a home server as easy as

Continue Reading