There are many reasons you may want to connect your Raspberry Pi to your computer, and there are a few methods of doing so. We’ll explore the various use cases for connecting your Pi to your computer.
Question
How do I connect my Raspberry Pi to my computer?
Answer
Connect using SSH
One of the more common ways of connecting to your Raspberry Pi is via SSH (Secure Shell). To connect to your Raspberry Pi using SSH, you’ll first need to enable SSH. Then with your Raspberry Pi connected to the same network as your computer, you can connect using the following command on your computer:
Using SSH is one of the most general-purpose methods for connecting to your Pi. The downside is that it requires some comfort with operating on the command line. But it’s powerful. Using SSH you can do just about anything you need to do on your Pi.
Connect using VNC
If you’re running a graphical (GUI) version of Raspberry Pi OS, you can access your Raspberry Pi Desktop from your computer using VNC. To do this, you’ll need to install a package called tightvncserver on your Raspberry Pi, then use a VNC client to connect.
This method is useful if you don’t have enough peripherals for your Pi (or too many Raspberry Pi’s). The only downside is that the VNC connection is often a little bit slower than a direct connection. For detailed instructions, refer to our guide on installing and configuring VNC on your Raspberry Pi.
A less common (but awesome) way to connect your computer to your Raspberry Pi is to enable gadget mode on your Pi and connect directly using USB. With gadget mode, you won’t even need a network connection or a power adapter. Just get a USB cable, connect your Pi to your computer, and log in using SSH. The computer provides the power and network connection.
This is one of the more complicated methods, but its especially useful if you’re intending to use your Pi as a USB gadget. To learn how to use this process, check out our guide on connecting to your Pi over USB using gadget mode.
There are several ways to go about running a Minecraft server on the Raspberry Pi. In this guide, I’ll cover how to install Nukkit—a cross-platform Minecraft server that’s super easy to set up on the Raspberry Pi. This server should work with PCs, consoles, and tablets running Minecraft 1.14. I’ll be using a Raspberry Pi
Introducing Howchoo, an enigmatic author whose unique pen name reflects their boundless curiosity and limitless creativity. Mysterious and multifaceted, Howchoo has emerged as a captivating storyteller, leaving readers mesmerized by the uncharted realms they craft with their words.
With an insatiable appetite for knowledge and a love for exploration, Howchoo’s writing transcends conventional genres, blurring the lines between fantasy, science fiction, and the surreal. Their narratives are a kaleidoscope of ideas, weaving together intricate plots, unforgettable characters, and thought-provoking themes that challenge the boundaries of imagination.
Most Xfinity routers use a default WiFi network name (SSID) that is hard to identify and remember. Changing the WiFi name allows you to personalize your network and make it easier for friends and family to connect.
This guide will show you three ways to change your WiFi network name on your Comcast Xfinity router.
Laptops, smartphones, tablets, even lightbulbs—an endless number of devices now have the ability to connect to your local network and the wider internet. Keeping an eye on network-capable devices is important, especially if you’re worried about network security or you’re trying to troubleshoot bandwidth issues. This is where a network monitor can prove useful. There
Introducing Howchoo, an enigmatic author whose unique pen name reflects their boundless curiosity and limitless creativity. Mysterious and multifaceted, Howchoo has emerged as a captivating storyteller, leaving readers mesmerized by the uncharted realms they craft with their words.
With an insatiable appetite for knowledge and a love for exploration, Howchoo’s writing transcends conventional genres, blurring the lines between fantasy, science fiction, and the surreal. Their narratives are a kaleidoscope of ideas, weaving together intricate plots, unforgettable characters, and thought-provoking themes that challenge the boundaries of imagination.
Home automation is growing in popularity, but one of the biggest hurdles is compatibility between devices. Many manufacturers insist on using a branded app to configure and control smart home tech, with patchy compatibility with voice-activated systems like Siri, Google Home, or Amazon Alexa.
Apple users are left behind, with Apple’s own automation system (Apple HomeKit) costing more and with more stringent requirements for hardware developers to consider implementing. With this in mind, enter Homebridge, an open-source, third-party solution for Apple HomeKit-friendly devices (as well as others), allowing you to control and operate them without another Apple device.
Combine Homebridge with the low-powered Raspberry Pi microcomputer and you’re free to build an Apple-friendly automated home at a fraction of the cost. If you want to set up Homebridge on a Raspberry Pi, here’s what you’ll need to do.
1 – Before you begin
What you’ll need
Raspberry Pi
Like all home automation setups, Homebridge needs to be ready to respond to queries and commands 24/7. A Raspberry Pi is perfect for the task, but we’d recommend using a Raspberry Pi 3 + or a Raspberry Pi 4 for the latest hardware.
While other Raspberry Pi models may work (including a Raspberry Pi Zero), this isn’t guaranteed, especially if you have many smart home devices in your home.
Optional: Monitor, keyboard, and mouse
You can run Homebridge headless (without a monitor, keyboard, or mouse connected), but make sure that SSH is enabled before you do this.
Raspberry Pi OS
It’s also recommended that you’re running the latest version of Raspberry Pi OS. The instructions below have been written with this in mind.
You’ll also need to open a terminal (or SSH connection) and run the following commands to ensure your Pi is up-to-date before you begin:
sudo apt update && sudo apt upgrade
Restart your Raspberry Pi once the update process is complete.
2 – Installing Node
Homebridge uses Node.js, a platform for running Javascript apps on a local machine, so you’ll need to install it before you can install Homebridge. We also need to install a few other development environments first, such as Python or C++, as additional Homebridge plugins may require these to work properly.
Installing Node
To start, open a terminal window (or an SSH connection) and run the following command to begin configuring your Pi for Node:
Once this process is complete, you can begin the Node installation by running the following command:
sudo apt install -y nodejs gcc g++ make python net-tools
Update Node Package Manager
Allowing the process to complete. Once it’s done, you’ll need to update npm (the Node Package Manager) by running the following:
sudo npm install -g npm
You can begin the Homebridge installation process once Node is installed and fully updated.
3 – Installing Homebridge
At this point, we’re ready for the main act. Homebridge itself is actually a daemon, a service that runs in the background. To be able to configure it after it’s installed, you’ll need to install a web-based user interface, allowing you to easily configure and handle it while it’s running.
To install Homebridge with the web interface components, run the following command from a terminal window or over SSH:
Using the Node Package Manager (npm), Homebridge (along with the web interface module) will be installed. This could take some time to complete, as npm will fetch and install several dependencies needed by the main packages. You may also see a few warnings about deprecated packages, but don’t let them scare you, as Homebridge should still work correctly (and upcoming Homebridge releases should hopefully resolve the issue for Pi users).
At some point, the installer will output a “thanks for installing” message. Don’t panic—the installation isn’t frozen at this point. You’ll need to wait a few more minutes to allow the Homebridge installation to finish.
Start Homebridge service
Once this is completed, you can start the Homebridge service. This takes a bit longer on Homebridge’s first run, as it needs to generate its initial configuration.
To do this, run the following command from a terminal or SSH window:
sudo hb-service install --user homebridge
Allow some time for this to complete. Once it’s done, you’ll see a list of IP addresses you can use to connect to the web interface, allowing you to add devices and configure them further. You’ll also see the default username and password (both admin) for use with the admin portal page.
4 – Configuring Homebridge and iOS
If Homebridge is installed and set up to run correctly, you can configure it using the IP address output in the terminal window at the final set up stage above.
Open the address given in the previous step (i.e. your Pi’s address on port 8581, by default) in your web browser, and sign in using admin for both the username and the password. A screen like this will welcome you.
While it isn’t necessary to change the default username and password at this stage, it is highly recommended that you do once you’ve finished configuring your Homebridge set up. Otherwise, you may leave your smart devices at risk.
Next, open the Home app on a suitable iPhone or iPad device.
In the top right, tap the + (plus) button, then choose Add Accessory from the available options.
You’ll be given options to add a device (including scanning a QR code or manually typing in a code), but your Bridge device (your Raspberry Pi) should also appear (assuming you’re on the same local network).
Tap Add to Home to add this to your HomeKit setup.
Apple will warn you that you’re trying to add an uncertified accessory, but tap Add Anyway to ignore this.
Select a location, then give it a name (for instance, Homebridge Pi) to distinguish it from other HomeKit devices.
Accessories usually appear on the Home front page but, if it doesn’t, you should be able to see your Pi by pressing the Home icon in the top-left, then selecting Home Settings. You’ll see the device listed under the Hubs & Bridges section, confirming that it’s connected and ready to use.
5 – Setting up accessories
From this point on, the configuration will vary depending on what devices you actually plan on using with your Homebridge Pi. Regardless of brand and devices, however, you’ll generally need to install an appropriate plugin first to allow Homebridge to interface and control it. In the HomeKit/Homebridge environment, a device is called an “accessory.”
Our test system uses Tuya-branded devices, but other well-known brands (such as TP-Link and Homebridge) are available. To add appropriate plugins for these platforms, open the Homebridge web interface in your web browser, then search for the brand (for instance, Tuya) in the Plugins tab.
Various Tuya plugins are available for us to install, but only one is marked as verified (meaning that it’s been certified by the Homebridge developers), so that’s the one we’ll select.
After providing our account data (and a quick restart) during the configuration process, our connected Tuya smart home devices will appear in the web app (under the Accessories tab) and should be listed in the Home app on an iPhone and iPad, too.
Additional configuration may also be necessary. depending on your setup. For instance, if you need to recreate rooms in the Home app, you can do this by long-tapping the device in Home, then tapping the gear icon. This will allow you to make further changes to the individual devices you’ve connected to your HomeKit set up using Homebridge.
6 – Adding Scenes
Once your accessories (devices) are set up, you can create Scenes inside the Home app.
What is a scene?
Scenes allow you to change the status of multiple accessories with a single Siri command. The more accessories you have, the more scenes become useful in automating your home.
Add a new scene
To add a new Scene, tap Add Scenes in the Home app, then follow the on-screen instructions.
Example of a scene
For instance, you may say “Hey Siri, I’m home” to instruct Siri to automatically turn up the thermostat, switch the TV on, and configure the lights to a pleasant combination of color and intensity.
Alternatively, you may decide you want to sleep, telling Siri “Hey Siri, let’s head to bed.” Doing this could switch the lights off and set the house alarm for you automatically.
7 – Using Homebridge on a Raspberry Pi
Setting up Homebridge on a Raspberry Pi may require some extra configuration, but if you’re looking to expand your home automation without paying for pricy Apple products, a Raspberry Pi running Homebridge is a great option.
Homebridge doesn’t replicate all HomeKit’s features, but it should allow you to connect devices to the HomeKit ecosystem (so long as they’re supported and have relevant plugins).
Some home automation ideas
Homebridge isn’t the only home automation project you can try out with your Raspberry Pi, though. For instance, you could build a Raspberry Pi garage door opener to secure your garage, or use a PIR motion sensor on a Raspberry Pi to create a DIY home-alarm system.
There are several ways to go about running a Minecraft server on the Raspberry Pi. In this guide, I’ll cover how to install Nukkit—a cross-platform Minecraft server that’s super easy to set up on the Raspberry Pi. This server should work with PCs, consoles, and tablets running Minecraft 1.14. I’ll be using a Raspberry Pi
Introducing Howchoo, an enigmatic author whose unique pen name reflects their boundless curiosity and limitless creativity. Mysterious and multifaceted, Howchoo has emerged as a captivating storyteller, leaving readers mesmerized by the uncharted realms they craft with their words.
With an insatiable appetite for knowledge and a love for exploration, Howchoo’s writing transcends conventional genres, blurring the lines between fantasy, science fiction, and the surreal. Their narratives are a kaleidoscope of ideas, weaving together intricate plots, unforgettable characters, and thought-provoking themes that challenge the boundaries of imagination.
Board games may not be the first thing on your mind when you think of collectibles, and yet there is a deep and not-so-hidden world of board game hoarding, collecting, and trading as complex as that found within any other area of interest — perhaps deeper! There is a huge range of wonderful old games out there, limited edition runs, classics, and hidden gems that are worth their weight in gold to the right collector.
There are many factors that make a board game especially sought-after by collectors, from how many copies of the game were first made, to how many are known to exist, and how unique or artistically superior the artwork and aesthetic happen to be. As with any other genre of collectibles, the condition of the board games is a major factor in terms of their financial worth, though this is certainly a secondary aspect of what makes a collection valuable for many collectors. After all, certain games might exist in such a small supply that even a poorer-quality copy is going to be highly sought after.
But don’t mistake me: recent games can become collectibles as well, not just those dusty with history. Any limited edition run, even the alpha builds of now-popular games, can become collectible items. This can also happen with games that have special editions released for some purpose (perhaps an anniversary edition, or an edition released to coincide with some historical event). The genre of game can also have a major impact, with war games being one of the classic categories that draw in collectors.
Plenty of collectors will even go so far as to purchase copies of games that they think might be collectibles in the future, and then store them, waiting to see if their hunch pans out a decade or two down the road.
Board game collecting terminology
Now, I’m not going to go too deep into the world of collectibles, but it’s important to know a couple of common terms before continuing forward.
OOP: Stands for “Out of Print”. Games that are OOP are generally considered collectible in their own right, since (at least for a time) new editions of the game are not being printed. Sometimes, as with the board game Dune, games will find a renewed life with fresh print runs years or decades after they originally went OOP, but even so, copies from the original runs are likely to be highly prized (if they’re in good condition).
P / UP (Punched or Unpunched): Traditionally used in reference to items being hung on retail pegs but for board games, it refers to whether or not the pieces of the game have been detached from their original cardboard sheets. This makes them valuable to both collectors and people looking to buy a used copy of the game who wish to ensure that all the original pieces are included (since it’s easy to see if there are any missing (“punched out”) from the sheets.
Mint: A bit more commonplace, this refers to games that are still shrink-wrapped. However, be aware that plenty of unscrupulous sellers exist. “Mint” alone is not enough to clarify the new and unopened state of the game, so look for clarifications. The abbreviations MISB (Mint in Sealed Box), or MIB/MIP (Mint in Box/Mint in Package) are better indicators for the condition.
NRFB (Never Removed From Box): this is a handy way for a seller to indicate that the item comes in original condition in all aspects save that it is no longer shrink-wrapped. It would have all its parts in their original unpunched condition, and all pieces in their original baggies or containers.
These are not by any means the only terms you’ll come across, but they are a couple of the more common as you begin your deep dive into the world of collectibles.
1 – Bloc by Bloc
Estimated market value: $75-$100
Designer: R. D. Lee, T.L. Simons
Artist: T.L. Simons
Publisher: Out of Order Games
A smashing Kickstarter success story, Bloc by Bloc: The Insurrection Game is a semi-cooperative game of social unrest and resistance inspired by the real-world uprisings of the Occupy and post-Occupy era. This one is actually looking at its 3rd edition release planned for spring of 2022, so it’s certainly not a discontinued or impossible to find game. But the limited run nature of the first edition definitely qualifies this one as a collector’s item, with a low enough price tag to appeal to novice collectors.
Bloc by Bloc also happens to be a really fun game, where the principal mechanic is area control: players try to hold back the riot cops and take control of the city by occupying specific sections of the city before the military arrives and quashes the rebellion. This one is a total favorite for me, with the historical linkage to real modern events, but without a specific tie to any single historical event — it explores the nature of rebellion in a really interesting way, and the frankly adorable artwork does a great job of creating a unified aesthetic.
Artist: Peter Dennis, Paul Kidby, Ian Mitchell, Bernard Pearson
Publisher: Treefrog Games
If you are not yet aware of the sheer and incalculable brilliance that is Terry Pratchett’s Discworld series, stop reading this review right now, go down to your local bookstore or library, and grab yourself every darned book in the series.
No. Seriously. Do it.
Discworld is easily one of my top-five book series ever, and for a good gosh-darned reason: Sir Terry Pratchett’s genius at storytelling was only rivaled by his genius at wit. The satirical humor of his books has had me cracking up more times than I could ever count, and so I naturally gravitated toward other avenues of connecting with this most beloved universe. Enter Discworld: Ankh-Morpork which, most sadly, is OOP now and rather difficult to find.
This is one game that I would happily shell out the $200 for simply because the design itself is drop-dead gorgeous. The artwork throughout the game is so totally and perfectly Discworld that it feels like it’s got a line straight to my imagination. But the fact that there will likely never be another run of this incredible game is a tough pill to swallow.
The game concentrates on the city of Ankh-Morpork where the city’s ruler, Lord Vetinari, has vanished. In his absence, the players take on the roles of the various factions vying for control. It’s a simple enough card-based game with rules that just about anyone can pick up in no time at all, so it’s just a matter of actually finding a copy and shelling out those hard-earned Morpork dollars to add it to the collection.
3 – Chaos in The Old World (2009)
Estimated market value: $200
Designer: Eric M. Lang
Artist: Tim Arney-O’Neil, Kevin Childress, Andrew Navaro, Brian Schomburg, WiL Springer
Publisher: Fantasy Flight Games
Chaos game players had three ways to reshape the world to suit their twisted visions as they vied for dominance as one of the four gods from the Realm of Chaos. Players could kill, infest, change, and seduce their way to victory, unleashing hoards of demons and defending against not just the machinations of their fellow chaos gods, but also against those mortal denizens of the old world intent on forever banishing them back to the Realm of Chaos.
Okay, so this made a lot of waves in its early days but it eventually fell out of favor and many of the mechanics that were experimented with in Chaos were perfected later in other games such as Blood Rage. All that said, it’s still worth playing, but if a good playing experience is all you’re looking for there are other options around. No, what you want this game for is collecting purposes.
As a collectible, Chaos is not an impossible find, but getting a good quality copy (that isn’t in German) can be.
4 – Dark Tower (1981)
Estimated market value: $450
Designer: Roger Burten, Alan Coleman, Vincent A. A. J. Erato
Artist: Bob Pepper
Publisher: Milton Bradley
Easily one of the most delightfully ’80s games imaginable, Dark Tower combined “cutting edge” computer technology and a really nifty game design to provide players with a superb adventuring experience. Taking on the role of a knight, players led groups of warriors on an attack against the evil Dark Tower, moving and gathering gold, hiring troops, finding special items, and recruiting special characters along the way (while also encountering random events and enemy troops).
The Dark Tower itself sat in the middle of the game board and, via a digital number screen and several rotating slides, created the gaming experience. Players would push different button combinations on the tower to program the different moves they were making and to see what they would encounter along the way. There were a whole host of possible outcomes, each of which was accompanied by a uniquely ’80s special effect.
The game is one of those clear classics that just cannot be underestimated. Not only fun but innovative, combining early simple computing effects with an excellent aesthetic design. It’s a blast to play (luckily, you can find emulators that recreate the various conditions of the game without actually owning the original tower itself). As expected of something this unique and also fun, it’s extremely rare, with complete copies (opened and used, mind) going for nearly $500.
5 – Fireball Island (1986)
Estimated market value: $250
Designer: Chuck Kennedy, Bruce Lund
Artist: N/A
Publisher: Milton Bradley
I had a copy of this as a kid and by golly, I wish I’d held onto it. Alas, one move too many occurred and it vanished into the nether world (and probably the private collection of some overjoyed collector).
For such a simple game, Fireball Island was a massive amount of fun. The premise of reaching the top of the island, grabbing the ruby, and getting away to your waiting escape boat felt like being literally inside an Indiana Jones film.
Comprised of an awesome and massive 3D board game, where the outcome of the game got decided by the actual spewing of lava-centered fireballs! Or, well, red marbles anyway. Players worked their way up the sides of a 3D island map, ducking into caves, searching for shortcuts, and hoping not to have their explorer figurine dashed asunder by the sudden and unexpected release of one of the marbles from Vul-Kar’s maw.
There is a 2018 re-release of this game that’s apparently a blast to play, so anyone who’s excited by this doesn’t have to miss out. But if you have an old copy hanging around, especially one that still has all its parts, be aware that you’re holding one heck of a sought-after gem (and we’re not talking about Vul-Kar’s jewel).
6 – Trafalgar (1973)
Estimated market value: $200
Designer: Tom Waterman
Artist: Auguste Étienne François Mayer
Publisher: Action Games and Toys Ltd
An action war games classic, Trafalgar features exciting naval combat with a huge range (ha!) of tactical maneuvering that can take place between the opposing fleets that fought in the actual battle of Trafalgar in 1805. You could do everything with this game, including simulate hits to your ship’s masts by removing the functional mast from the ship model!
There are newer editions, and prettier editions, than the original, so there’s no reason why modern players who find themselves interested in this can’t go out and get some great naval combat on, but for the collector, this is the one to grab. Of course, it’s in notoriously short supply. It’s not in as high demand as some other collectible games, so it might be possible to find a copy under $100, but usually, the price hangs out at around double that (assuming a copy is available at all).
7 – Capes & Cowls: The Superhero Board Game (2006)
Estimated market value: $230
Designer: Robin Spriggs
Artist: Kelly O’Neal, Robin Spriggs
Publisher: Wyrd House
Robin Spriggs is a fascinating guy, an actor and writer of horror-themed short fiction, and Kelly O’Neal, also an actor did some amazing work on this game. The design of the game is superb, providing a silver-age comic feel. This was an indie game but the design and production quality were extraordinarily high-quality, and the game features an entire mythos and in-game world experience. The scenarios and rulebook are both designed like comics, and the characters themselves all feel extremely unique.
Gameplay-wise, Capes & Cowls concentrates on tactical combat, doing away with much of the random factor often inherent in such games by highlighting the importance of placement on the game board. Different squares on the board provide different bonuses representing terrain differences, there are line-of-sight rules, and the various special abilities that the super-powered characters have creates dramatically unique play experiences.
8 – Star Wars: The Queen’s Gambit (2000)
Estimated market value: $600
Designer: Rob Daviau, Alan Roach, Craig Van Ness
Artist: Clark Mitchell (I)
Publisher: Avalon Hill Games, Inc., Hasbro
Whether you like or hate The Phantom Menace there were some undoubtedly epic scenes in that film, like the final chapter featuring the huge battles in space and on land, and the epic final light-saber battle between Qui-Gon Jinn, Obi-Wan Kenobi, and Darth Maul (some great choreography there). And that’s the part of the film that The Queen’s Gambit attempts to recreate. The goal for the light-side folks is to capture the Viceroys, destroy all the battle droids, and kill Maul.
But to understand this game you really have to see how massive it is — it even recreates the palace of Theed in an epic three-story construct. With over a hundred and fifty plastic miniature, this game is not kidding around about giving you an epic Star Wars battle experience.
Artist: Charles Kibler, George I. Parrish, Jr., Regina De Simone
Publisher: The Avalon Hill Game Co
Twenty-five years ago an absolutely brilliant little space game called Merchant of Venus, an epic space economy control game where players compete as space traders for total economic superiority in the galaxy by delivering cargo and discovering new worlds open to trade.
The basic move mechanic is pretty simple, but the complication comes from which items can be traded and purchased in different systems and what sort of upgrades can be made to the player’s ship. It reminds me a bit of the Firefly board game in this regard, actually, though the mechanics in Merchant of Venus are more complex.
Now, there was a 2012 2nd edition that featured almost an identical system of play, and I would love to be able to send excited players off to buy it… but, sadly, it too appears to be OOP, and nearly as expensive as the original in the few places I could find online. I guess this one really has become a permanent collector’s item!
10 – Advanced Civilization (1991)
Estimated market value: $300
Designer: Lauren Banerd, Jim Eliason, Jeff Groteboer, Bruce Harper
Artist: Rodger B. MacGowan
Publisher: The Avalon Hill Game Co
An expansion for the original 1980 game Civilization, Advanced Civilizations provides players of the original game with a large number of enhancements for furthering play, like expanding the technology tree and a few convenient rule changes including some major alterations to victory conditions.
The whole point of the Civilization game is to develop an ancient culture from around 8000 B.C.E. to the middle of the 3rd century B.C.E., vying with other players to carve out a permanent niche for your unique ancient world culture. Still considered one of the best games of this type, the base game is actually still pretty easy to find at cheap prices and mostly intact. The expansion, however, of Advanced Civilization is a very different matter with the limited-run making this a very difficult and expensive game to find.
11 – Dune (1979)
Estimated market value: $200
Designer: Bill Eberle, Jack Kittredge, Peter Olotka
Artist: Jean Baer, Linda Bound, Fabrice Lamy, Mick Uhl
Publisher: The Avalon Hill Game Co.
So this is a bit like the great grandfather of the strategy game world. It is EPIC, and I really do mean that, but it’s also utterly unforgiving and incredibly intense. Players take control of one of the Great Houses of the Dune universe and attempt to exploit the heck out of Arrakis, with the Emperor presiding over everything but only gaining power from the acquiescence of the whole… I mean, there are just so many delightful and potent mechanics at work, building up a massively complex political network and an intense military mechanic where a military campaign can be made or broken by a sandstorm.
But this one is a bit of a doozy because, due to the forthcoming Dune film franchise reboot, there’s a whole new release of the game. That makes it great for people who want to just play it and have a great time, but really, really lousy for people who want to try and sift through to find a collectible copy (especially if you’re newer at the collecting game, or aren’t interesting in collecting for its own sake but just really want some collectible Dune memorabilia).
12 – Titan (1980)
Estimated market value: $150-$900
Designer: Jason B. McAllister, David A. Trampier
Artist: Mike Doyle (I), Kurt Miller, Kenn Nishiuye, David A. Trampier, Chris White (I)
Publisher: The Avalon Hill Game Co
Titan is an absolute treat and happens to be such a great game, with so much dynamic range in the tactical approaches possible, that it maintains a dedicated player base even today, over forty years after its release.
More of a wargame than a fantasy adventuring game, Titan is all about… Titans. Players control a mythical Titan, recruit armies, and send those armies into battle against other players and their Titan avatars. The last Titan left standing (and, boy, are they hard to kill), is the winner.
There are a bunch of elements to Titan that I really love, like how players who have fewer points than others can win — because it’s last Titan standing rather than a score-based victory condition. The way the game is played, too, spread between two different map types (the master board and the battle boards) is excellent, and the battle boards vary depending on the location a fight begins on the master board, creating some great tactical range.
There was actually a re-release of the game by Valley Games in 2008, but it is now also an OOP collectible. Expect versions of the 1980 version to go from anywhere between $400-$900 depending on condition, while the 2008 version can be found in okay condition to MIB for $100-$250. Anyone who wants to play the game for fun and owns an iPad, however, can grab Titan from the iPad app store.
Artist: Mike Atkinson, Jared Blando, Charles Kibler, James Talbot, Mark Zug
Publisher: The Avalon Hill Game Co
Take on the role of the villains of capitalist America’s 1800s in 1830, where the goal is to amass the greatest fortune by buying and selling the stocks of 19th-century companies in the Eastern United States. Maximize profits through private railways and vie for the greatest hoard while risking bankruptcy every step of the way.
An important entrant in the 18XX series of games, Railways & Robber Barons is still one of the most beloved games from the line, made especially interesting for its chanceless mechanics which, like with a game of chess, offers the same outcome for any move during any game — meaning that playing the same moves across different games will result in the same outcomes.
There have been a few different editions of this game, all of which now appear to be OOP, and all of which are worth a fair penny — depending on condition and edition.
14 – Up Front (1983)
Estimated market value: $200
Designer: Courtney F. Allen
Artist: Charles Kibler, Rodger B. MacGowan
Publisher: The Avalon Hill Game Co
One of the most famous and playable wargames around, Up Front offered an innovative card-based gaming mechanic that completely eschewed the use of a game mat in favor of “terrain cards” which provided the sense of being in the world, and “range chits” which did an incredible job of creative relative ranges between opposing sides without a single hexagon in sight.
I’m not often a fan of straight-up wargames on the tabletop, largely because of the massive amount of set-up time they can take and the relatively slow rate of play. Board games with wargame components, sure, but I’m more likely to go for Twilight Imperium than I am some of the others (TI being a game where trying to go the full military route isn’t likely to end well).
But Up Front changed all of that. The card system is ingenious, allowing set-up and play to take place in about the space of a lunch hour, but with campaigns and scenarios that can extend gameplay out to as much as a week. There’s even an international league of Up Front players that hold tournaments.
There have been a few different editions, but the Avalon Hill Game Co edition from 1983 will run a collector anywhere from $150-$250 depending on the condition.
15 – Here I Stand (2006)
Estimated market value: $100
Designer: Ed Beach
Artist: Rodger B. MacGowan, Mark Simonitch
Publisher: GMT Games
The game designers went out of their way on this one to create a system that could capture all the political intrigue and backstabbing machinations of the 16th century during the period of the Protestant Reformation… and they did a really fine job.
A point-to-point game, Here I Stand utilizes point values on cards to undertake actions, and various events provide a sense of narrative progression through the time period. It’s complex enough to give even hard-core players a run for their money, but the underlying mechanic is simple enough to allow for deep and engaging play once that initial learning curve has been overcome.
This is one of the games that integrate some classical wargame components with a truly detailed historical setting, placing diplomacy, finance, and political maneuvering just as high (if not higher) on the list than the ability to field troops.
There are a bunch of different editions floating around but the first edition of Here I Stand will look good on any collector’s shelf.
Princes of the Renaissance (2003)
Estimated market value: $75
Designer: Martin Wallace
Artist: Michael Christopher, Peter Dennis, Richard Hanuschek
Publisher: Warfrog Games, Mercury Games
The Renaissance provides a great thematic background for game designers, given its inherent elements of war, intrigue, and economic and political upheaval. Players in Princes of the Renaissance enter this world as one of several rival condottieres (leaders) who are fighting to control the most stakes in a number of Italian cities and dominate the world.
The game is heavily biased toward the auction mechanic, and both money and influence are used to bid for different outcomes in the game. This combines with the intrigue mechanics to make for some great elements of political maneuvering.
There have been a couple of re-releases since the game’s initial 2003 release, so it’s possible to pick up a copy to play for fun relatively easily, but copies of the first edition are absolutely a collector’s item now. The price is low enough on both editions to make this a great introductory purchase for a collector just looking to start out.
17 – Robert the Bruce (1978)
Estimated market value: $150
Designer: Kenneth Clark
Artist: N/A
Publisher: Fusilier Games
A hex-grid-based wargame, Robert the Bruce is thematically centered in the late middle ages during the Scots Wars of Independence. A seriously classic game that drove straight at its battle-mechanics point, Robert the Bruce offered straightforward rules, quick and deadly combat, and some neat extras along for the ride like “The Fuzileer” an in-box accompanying magazine that provided additional historical information on the period.
It’s not easy to find copies of this little beauty around anymore, and there is no information on how many were produced in the first place. That said, used and even unpunched copies do emerge from time to time, always drifting back and forth between collectors (or at estate sales).
There are better wargames to play from modern designers that feature the same theme, so go elsewhere if you’re looking just for gameplay, but if you love the historical material or are a true collector then this is a good find.
18 – The Longest Day (1979)
Estimated market value: $$200-$400
Designer: Randall C. Reed
Artist: Rodger B. MacGowan, Randall C. Reed
Publisher: The Avalon Hill Game Co
Here is another war game for our list, and an absolutely massive one at that. The Longest Day depicts the first three months of the invasion of Normandy and provides two modes of play: a set of scenarios that are partially intended as primers to the rules and gameplay, and a campaign mode that can literally take months to play.
This is probably one of the largest games and most complex games ever produced by Avalon Hill, and it did a great job of capturing the total feel of the Normandy invasion and the slog that the allies had to grind through. It’s not the rarest of games, but copies in high condition can fetch a really solid price. However, considering that it has over 2,600 game pieces, finding a copy in good condition is probably not the easiest thing.
Risk is one of the first games I played seriously as a kid and easily one of my favorites to this day, providing players with an immensely satisfying strategic war game experience simplified down to the bare basics. I remember being so totally addicted to this one that I’m certain I annoyed the heck out of all my friends with repeated arguments for spending the whole day playing it (while they were more interested in playing Battlefront II).
The game itself didn’t change for this one: the 40th edition of Risk is simply a special collector’s edition release, made intentionally in limited number and accompanied with a certificate of authenticity. You could certainly play with one of these sets, and considering the incredible quality of the redrawn board and the die-cast minis, it would be easy to want to, but for the price of just one of these you could probably buy ten copies of a more basic version.
20 – Case Blue (2007)
Estimated market value: $600
Designer: Dean Essig
Artist: Nicolás Eskubi, Dean Essig
Publisher: The Gamers, Multi-Man Publishing
Wargamers tend to think of this one as one of the big blockbusters of the genre, with enough complexity to be considered almost a simulation game more than a wargame. The content here is seriously massive and the basic rules are… well… complex and equally as massive as the game itself. We’re talking a combined rule book of over 60 pages, over a hundred pages of scenario booklets, and well over 3,000 counters.
The sort of game that gets set up in the basement (I mean… “command center”) and can last players many months, Case Blue takes the Nazi invasion of Russia to a whole new level of intricacy, allowing players to simulate the strategic level of the historical events to an unprecedented degree.
You can find copies of this game floating around, sure, but it was already expensive when released. Grabbing a full copy for anything less than $500 is a total miracle.
21 – Age of Renaissance (1996)
Estimated market value: $100
Designer: Don Greenwood, Jared Scarborough
Artist: Stephen Langmead, Kurt Miller
Publisher: The Avalon Hill Game Co, Descartes Editeur
Age of Renaissance follows the same compelling concept as the Civilization game, with lots of trading, research, and territory control. Players encounter events, leaders, and various reward cards in a deck of cards, and the order of draw determines a massive amount of how the game plays.
One of the main reasons why the game likely never took off in the more mainstream range of play is due to the tracking complexity of the various component elements of gameplay. It’s not as easy a game to pick up and play as Civilization in other words, even if it does run off of some of the same themes.
Despite all that, it does have a dedicated following and there are certainly still plenty of playable copies in circulation. Copies that are in MIB condition, especially if still shrink-wrapped, can fetch a higher price, however, and it seems likely that picking one up now will lead to a real collector’s item in a couple of decades once fewer remaining copies are floating around.
22 – On to Richmond! (1998)
Estimated market value: $250
Designer: Joseph M. Balkoski, Ed Beach
Artist: Charles Kibler, Keith Rocco
Publisher: The Avalon Hill Game Co
An operational war game, On to Richmond! covers the 1862 Peninsular Campaign from the American Civil War. It’s the 6th in the Great Campaigns of the American Civil War series, each of which concentrates on a different important operation from the Civil War.
The game does try to simulate the historical conflict accurately, while still allowing players to make new decisions and tackle the scenarios in innovative ways. This is pretty common with war games, where players are often looking for simulation-level material from real-world conflicts, but the Great Campaigns series overall does a good job of it.
It’s very possible to still find copies of this game that run only around $150, so it’s worthwhile even just for players who are looking for something from the era to play. But it’s also drifting into solid collectibles territory now as well.
23 – Operation Typhoon: The German Assault on Moscow, 1941 (1978)
Yet another war game, this time one simulating a specific action from WWII — the Nazi attempt to take Moscow in 1941. There’s a lot of game to unpack here, and it’s rightly considered a “monster” game due to its sheer physical size, and it also happens to be the first game using this system to include variable unit strength based on size, moral, and fog of war.
This one never seemed to make it into the high-demand arena of some of the other war games from the late 1970s, but that makes it a good buy for collectors who love war games, or for anyone who really just wants to play a war game using this system since relatively intact copies aren’t liable to run out the wallet.
Do note that there’s a 2009 game of the same name floating around as well, and that one is absolutely not the same game (though it’s also OOP, so maybe not a bad purchase either).
A monster wargame, War in Europe is now firmly in the realm of collectibles, unlike a fair few other similar games. This is partly because updated versions exist (many of which are themselves collectibles) and that other games concentrating on the same time period and concept have been designed. Still, this one could absorb players for days at a time as they dived deep into the initial conflict of the Second World War.
Finding the game in really good condition will run a collector around $200, with a mostly unheard of MIB copy possibly going for double that.
25 – Union Pacific (1999)
Estimated market value: $50
Designer: Alan R. Moon
Artist: Franz Vohwinkel
Publisher: AMIGO
I like trains and I’ve written a bit before about why trains are so cool, it’s likely not a surprise to anyone who reads my work that I’m also a fan of a board game centered on trains. There’s also a reason why the later version of this game (which ran essentially the same rules and re-implemented the theme as airlines did little to arouse my attention).
Union Pacific is a very simple money collection game, where players attempt to increase stock market shares in their train company and the winner is the one with the most money at the end of the game.
Decidedly OOP but with plenty of copies still floating around, UP is a great game for someone who likes train-related games and wants to find a copy to play, or for the discerning collector with an eye toward the future when fewer of these little gems are still intact and on the market.
26 – Abtei der wandernden Bücher (1993)
Estimated market value: $1000-$2000
Designer: Thomas Fackler
Artist: Thomas Fackler
Publisher: Thomas Fackler
What a game, boy-howdy! Not an ordinary game by any means, Abtei der wandernden Bücher is a work of brilliant art, designed and personally created by the German visual artist Thomas Fackler. The premise of the game, where the abbot of a monastery hides the pieces of a word throughout many books, and the other players (the monks) have to hunt down the books and figure out the complete word. If they can’t, the player playing the abbot wins the game.
I love the idea of a word game married with a logistics enterprise. The books the players need to read can be blocked by the abbot, or only accessed at specific points in the game day, and there are additional elements that further complicate the game. This is one I’d personally love to own since the art is absolutely incredible, but auctions for it are very rare and the price is no poor man’s entry.
27 – HeroQuest (1989)
Estimated market value: $100-$800
Designer: Stephen Baker
Artist: Gary Chalk, Max Dunbar, Les Edwards
Publisher: Games Workshop Ltd., Milton Bradley
This has to be one of the most elementally classic board games around, taking the Dungeons and Dragons experience and implementing it on the board in a delightfully iconic and fun way. I love RPG games and games that are heavily themed, so this one is an absolute favorite of mine. I also contend that it remains highly playable despite all the modern alternatives, and since I’m also a sucker for nostalgia I think this wins out on some of its more modern and complex inheritors.
Now, this is a good example of a collectible game that can confuse early collectors, largely because there are so many different expansions and the difference between an open and used copy and one that’s MIB is pretty huge in terms of price.
It’s absolutely possible to pick up a copy in relatively good condition with all the parts for around $100, maybe even cheaper if you’re thrifting. An NRFB copy will run somewhere around $250 from what I’ve seen, and a MIB copy could run for double that. Start adding the expansion in and the price will just keep climbing.
28 – Hotel Life (1989)
Estimated market value: $100
Designer: Urs Hostettler, Hermann Wieland
Artist: N/A
Publisher: Fata Morgana Spiele, Schweizer Hotelier-Verein
Hotel Life has become something of a cult game among collectors. It’s a funny game, a surprising game, and a well-crafted game, though, so it makes sense that it would endear itself to players.
In the game, players take on the operation of different hotels, trying to sate the needs of their guests while dealing with increasingly complex interrelationships between those guests and the ever-present danger of a war breaking out someplace and creating cause for the army to billet its troops in your hotel rooms. Players need to maintain amenities and guest satisfaction in several ways.
Wonderfully complex, Hotel Life is a series of extended chain reactions set off by the arrival of new guests and can be a bit of a long play, but it remains a very fun and surprising game as well with both a theme and a quality of gameplay that a really surprisingly wide range of player personality types are sure to enjoy.
29 – Big Boss (1994)
Estimated market value: $200
Designer: Wolfgang Kramer
Artist: Wolfgang Kramer, Franz Vohwinkel
Publisher: KOSMOS
A game of financial oneupmanship, Big Boss is all about investing and building – literally – a corporate dominion. One of the coolest aspects of the game is that, as a player invests more and more into their company, the skyline literally grows upward on the three-dimensional board, making the experience of winning a decidedly visceral one.
Big Boss is really easy to learn and play (players who aren’t as fast with maths as others can use a calculator when the deep game emerges), but the game also unfolds in a very similar way each play-through despite the limited randomization factors built in. Because of that and the fact that it’s hard to pick up a copy with all the pieces for a non-collector price, this one is pretty firmly in the collectibles-only category.
I have seen people do some pretty cool things though, like create their own boards and pieces, so if you’re really excited by the premise and have a 3D printer handy maybe Big Boss isn’t out of your reach.
30 – War of the Ring: Collector’s Edition (2010)
Estimated market value: $1,500
Designer: Roberto Di Meglio, Marco Maggi, Francesco Nepitello
Artist: Paolo Ciurli, John Howe, Matteo Macchi, Fabio Maiorana, Bob Naismith
Publisher: Nexus Editrice
A different take on the classic wargame, War of the Ring offers players the opportunity to take part in the grand and sprawling battlefield challenges presented by the Lord of the Rings canon… and it does this very, very well. War of the Ring is probably one of the best-known fantasy wargames for a reason: it excels at recreating the strategic experience that every Lord of the Rings fan has imagined.
That said, the game itself can be picked up for around $100 and is still in print (and the $100 is pretty good considering the literally massive size of the game). Here we are considering the special Collector’s Edition of the game, which ups the presentation and quality of the game to a really lovely artistic level.
Really this just highlights how the artificial scarcity of something works: you don’t need this edition to have blast playing War of the Ring so it only makes sense to keep an eye out for this if you are a massive collector who just totally loves Lord of the Rings. Otherwise, go pick it up from your local gaming store and make the store’s owner very happy with their daily sales goals.
NEXT UP
The 30 Best Card Games of All Time
Old classics and new giants collide in this list of 30 of the best card games!
I grew up playing games like Cribbage with my dad. Despite a dive into D&D in his 20s, he never really went deep with the variety of board games that would eventually become such a passion for me, but his love of the classics was strong. My Mom, too, loved card games, and I have
Introducing Howchoo, an enigmatic author whose unique pen name reflects their boundless curiosity and limitless creativity. Mysterious and multifaceted, Howchoo has emerged as a captivating storyteller, leaving readers mesmerized by the uncharted realms they craft with their words.
With an insatiable appetite for knowledge and a love for exploration, Howchoo’s writing transcends conventional genres, blurring the lines between fantasy, science fiction, and the surreal. Their narratives are a kaleidoscope of ideas, weaving together intricate plots, unforgettable characters, and thought-provoking themes that challenge the boundaries of imagination.
Recently, I had a loved one who needed to stay in the hospital for an indeterminate amount of time, and I really wanted to make that hospital stay as enjoyable as possible with a unique gift. While flowers can be a great way to add a little color and life to a hospital room stay, they don’t really ease the burden of boredom that comes with long stays in the hospital.
So I made a list of all the unique gifts for someone in the hospital that I could come up with. These gifts are meant to both make someone’s hospital stay more enjoyable and help occupy their time to alleviate the boredom of the many nights in the hospital.
But before you begin selecting the perfect gift for someone in the hospital, there are a few things you’ll want to consider that will determine the kind of gift you should buy.
Think about mobility
Does the person in the hospital have complete mobility? Can they get up and walk around? Or are they bed-bound and can only interact with things right in front of them. This may seem obvious, but understanding the limitations and accessibility issues of the person in the hospital will definitely save you from an embarrassing gift that they can’t use.
Space issues
How big is the room? Your loved one in the hospital might not want it cluttered with lots of big boxes or other projects, particularly if they are in a small room. In this instance, you’ll want some unique gift that doesn’t take up a lot of space.
Hospital rules
If you’re asking yourself, “I wonder if they allow this in the hospital room?” then you’ll definitely want to check in with one of the hospital nurses about what they allow. Often, they don’t allow something because it restricts their ability to help the patient in the hospital room or to get to them in an emergency. So for safety, check with the hospital staff.
What they enjoy to do with free time
So everyone decided to buy the loved one a book. Now they have about 10 books stacked next to their hospital bed, and they don’t even really like to read all that much. Give them the kind of gift that they enjoy—not one you’d necessarily enjoy while in the hospital.
Ask
When in doubt, see if there is anything they need, before getting something else. They’ll appreciate a necessity way more than a game or balloon.
Even if your loved one in the hospital doesn’t normally paint or draw, this can be a great occasion for them to try something new. And just think of all the time they’ll kill learning the basics of watercolor painting. Just make sure they have the mobility to do this and have lots of paper towels handy!
Art as therapy
It’s well known that making art is a great form of therapy for patients in the hospital. It allows them to express themselves and deal with some of the anxiety and grief they may be experiencing.
2 – Custom blanket
Get the whole family in on a custom blanket that includes a portrait of the various family members wishing their loved one to get well. It serves so many purposes:
It will show the support of the entire family.
It will be something they can use to keep warm in the hospital.
It will remind them how loved they are and encourage them to get better.
It may take a little time for the blanket to get made and shipped, so this would be great for someone who will have a prolonged stay in the hospital or who just got out.
There isn’t one person I’ve known who didn’t request socks when they were staying in the hospital. The thin socks that the hospital provides just aren’t very warm or comfortable. And often patients have to walk around on the cold hospital floor to get to the bathroom or move about.
Just make sure you get socks with some tread on the bottom, such as the ones I’ve included here, to prevent your loved one from slipping while walking in the socks.
Bonus: you could also consider a pair of slippers for them to wear!
This is a great hospital gift for a young person or even an older one who still enjoys games. While many people play games on their phones, a handheld gaming device or retrogaming device can be a great way for them to put the phone down and kill some time. And if they’re old enough, then a retro gaming device will allow the patient to play some of the older games that they remember fondly.
We live in our phones, and there are tons of great games and apps for someone in the hospital to download to pass the time. Getting a gift card from Apple (if they have an Apple phone or iPad) or from Google Play (for other devices) gives them the option to choose what they want to try.
This one is a no brainer, and can even be sent via email. Sending the gift card via email allows them to use it right away.
This is the exact puzzle that took days of my life a few years ago. They’re frustrating in the best way, particularly when you need to kill time. And that’s really the best thing you can do for someone in the hospital—help them to pass the time with something engaging.
I guarantee that a tavern puzzle will be a hit, and they’ll be thanking you (and cursing you) for this one.
7 – Video of family sending wishes
Finally, a gift that costs nothing except for the logistics of producing the video. Get the family together and shoot a short video of everyone sending their best get-well wishes to your loved one.
This is a great option when it’s not possible to actually visit the person in the hospital too.
Note: be sure to keep it short, in case your loved one’s phone can not handle a long video that is a large file size.
Nurses generally don’t like the patients to play anything loud, so as not to disturb the other patients on that particular floor. (That’s why the remotes have those terrible, little speakers built-in.)
A good pair of headphones allows someone to watch movies at a good volume or listen to their favorite songs without disturbing anyone else on the floor. (And the sound quality will be better than the speaker in the room.)
It’s a great time to get some Bluetooth headphones, too, for that special someone. They’ll likely be on the phone a lot with family and friends, so not having to hold the phone up to the ear will be nice. These Apple AirPods Pro are a luxury gift for sure, but there are cheaper options available too.
If you’ve ever tasted hospital food, then you know what I mean. Food from home tastes so much better!
Of course, you could bring any of your homemade cookies to your loved one—or try one of our easy ones, like our 3 ingredient Nutella cookies or our 3 ingredient peanut butter cookies.
3 Ingredient Peanut Butter Cookies The easiest peanut butter cookie recipe you’ll find.
But if you really want to make them smile, get this DIY Fortune Cookie set and personalize it with get-well messages from the entire family!
Depending on the situation, someone in the hospital might not be able to take a shower regularly or easily. That’s where a good dry shampoo can help them wash their hair and feel as clean as possible. Most people I’ve talked to swear by Batiste as a solid dry shampoo that actually works.
Just make sure that they’re allowed to use it in the hospital.
There’s no better time to learn the craft of knitting!
A knitting kit will keep the person in the hospital occupied while they watch TV or just relax. I recommend a kit like this one that comes with instructions if you’re buying this for a knitting beginner. Learning how to knit will definitely pass the time.
They may even leave the hospital with a new knit hat or pair of socks that they can use!
You know the kind of person that would appreciate something like this. It adds a little decoration to their room and provides some comfort and hope for them as they recover. Best of all, they can keep the figurine after they get well and return home.
Just be sure they won’t mind having to pack this up when they leave the hospital.
When selecting a board game for someone in the hospital, think about the space constraints and mobility issues that they may have. You’ll also want to consider who will be there to play with them and whether they are well enough to really play a board game.
My suggestion would be to keep it simple. Large, complicated games will likely be tiring for them to really engage in. One of my all-time favorites for quick, simple gameplay is Boggle. As a writer, of course, this makes sense!
What I like about Boggle, too, is that it’s small and easy enough to leave in the hospital room for return visits.
If you can’t visit
If you can’t visit them in the hospital, then consider playing an online game remotely, like Jack Box Party Pack. We even have a guide on how to play Jack Box Party Pack via Zoom, in case you’d like to try it.
Of course, you can always buy your someone books to read while they are in the hospital or bring them magazines.
I’ve found, however, that the act of reading can actually be tiresome when you’re not feeling well. It’s much easier to play an audiobook from your phone and just sit back and relax. This gift card from Audible lets someone in the hospital choose their next read and have it read by a professional actor (sometimes really famous ones)!
If you want a recommendation, I recently finished listening to Margaret Atwood’s The Testaments, which was read by the same actresses from the show The Handmaiden’s Tale. It was excellent.
Expression is an innate healing tool. A writing journal allows someone in the hospital to record their thoughts and feelings during that trying time. It can be the start of a new diary that may continue well after they recover and come home from the hospital. Or maybe they use it as a sketch pad to draw doodles of the nurses! (Just make sure they keep it hidden!)
Either way, they can look back on the time they spent there later and reflect based on what’s inside their writing journal.
When you’re in the hospital, often you don’t have the luxury of a regular sleep schedule. You might be woken up in the middle of the night by noises or nurses coming in to check on you. And you’ll find you really want a nap during the day.
A sleep mask blocks the light that comes through the curtains or from the hallway. It will help someone in the hospital stay asleep even when someone comes into the room. Combine this with the earplugs, and you’ve got a thankful, rested loved one.
There are so many noises in the hospital room, and many of them are coming from the machines meant to monitor your vitals. There’s the sound of beeping, the sound of nurses coming and going, and a whole host of other distractions.
Earplugs like these will help block out the sounds of the hospital, so they can get a good sleep. This material also happens to be very comfortable to wear.
18 – Easy-to-assemble model airplane (or other project)
Don’t go out and buy one of those model airplanes that require lots of glue and tools to put together. It’s likely that whoever is in the hospital will not have the mobility or want to smell the fumes from those kinds of models.
This one, however, requires no tools and can be constructed by hand. A project like this can help pass the time and can be therapeutic to help someone who is recovering from an ailment.
Other ideas: we put together a list of projects for the Raspberry Pi, some of which would be great for someone who loves computers and is stuck in the hospital.
The holiday season has to be the worst time to be stuck in the hospital. You don’t get to experience all the joys that come with the time of the year, like lights, family, and of course the tree.
Try to bring some of that joy to their room. One way is with this mini Christmas tree that fits easily on a windowsill or table.
Bonus project gift: if your special someone in the hospital likes tech-related things or doing projects, then this cute 3D Raspberry Pi Christmas tree is perfect! It would be a simple project for them to complete while in the hospital and bring some circuit board-style cheer to the room!
Exploring the Raspberry Pi 3D Xmas Tree Kit from The Pi Hut Let’s get blinky.
Combine necessity with a treat, and get that special someone in the hospital a nice personal care set that they can use while they’re there. If they will be in the hospital for a period of time, it’s likely they’ll want to keep clean and make sure they don’t neglect their personal hygiene.
This Burt’s Bees set has a nice mix of necessities and niceties that will make them feel good and allow them to pamper themselves a bit.
Introducing Howchoo, an enigmatic author whose unique pen name reflects their boundless curiosity and limitless creativity. Mysterious and multifaceted, Howchoo has emerged as a captivating storyteller, leaving readers mesmerized by the uncharted realms they craft with their words.
With an insatiable appetite for knowledge and a love for exploration, Howchoo’s writing transcends conventional genres, blurring the lines between fantasy, science fiction, and the surreal. Their narratives are a kaleidoscope of ideas, weaving together intricate plots, unforgettable characters, and thought-provoking themes that challenge the boundaries of imagination.
This guide will show you how to use your Anycubic Photon or Photon S. I’ll walk you through the process of slicing, preparing, printing, and cleaning.
How the Photon works
Whether or not you’re new to 3D printing, printing on the Photon is different than most 3D printers on the market today. This is because the Photon is an SLA (Stereolithography Apparatus) printer, whereas most 3D printers are FDM (Fused Deposition Modeling).
SLA printers use a focused or UV light on a resin vat to “cure” each layer of your print, whereas FDM printers melt a spool of plastic filament to generate each layer. In other words, each layer is basically a “photo” projected using a projector. This fundamental difference means that you can’t use “normal” slicing programs such as Cura to generate files for printing, nor can you use OctoPrint.
Before each print, ensure your bed is level. I wrote a separate guide on Anycubic Photon bed leveling.
How to Level the Bed on the Anycubic Photon or Photon S
A quick and reliable method for leveling your Photon or Photon S.
Use that guide to level your bed; in a nutshell, you’ll adjust the print head angle [once], and then use a sheet of paper to set the stop for the Z-axis.
2 – Download the slicing software
As stated previously, you can’t use Cura or any other standard slicing software to prepare prints for the Photon or Photon S. This is because the printer doesn’t use standard .gcode files. Instead, it uses a proprietary .photons file, which essentially contains a photo of each layer to be projected and cured.
SLA software options
There are basically two pieces of software that you can use: ChiTuBox or Photon Workshop. Photon Workshop can be found on the USB drive that came with your printer or downloaded from the Anycubic website.
I’m going to use ChiTuBox since it’s the industry standard for SLA/DLP/LCD 3D printing. It’s basically the “Cura” of SLA printing.
Download and install the free version from the ChiTuBox downloads page.
🛈 If you’re using a Mac, you may need to navigate to “System Preferences > Security & Privacy > Open Anyway” after attempting to launch ChiTuBox for the first time.
3 – Configure your machine
The first time you use ChiTuBox, you’ll need to configure your machine. To do this, launch ChiTuBox and click Add New Printer. Select AnyCubic Photon or AnyCubic Photon-s from the drop-down menu. Then, close the Settings panel.
4 – Configure your resin
You’ll need to configure the optimal settings for your specific resin, similar to how you must configure an FDM printer’s settings for different types of filament.
To find the settings for your resin, consult this awesome crowd-sourced list of Anycubic Photon resin settings. I’m using the green Anycubic resin that came with the printer. These are the settings from that spreadsheet for printing with a 0.04mm layer height:
Layer height
Exposure time
Off time
Bottom exposure
Bottom layers
0.04
12
3
80
5
You can set these in Settings > Print. For Light-off Delay and Bottom Light-off Delay, use the Off time value from the table.
🛈 A layer height of 0.02 is overkill for most prints; I just want to see what this thing can do at super fine detail.
5 – Choose and import your model
I’ll be printing these SLA test models, which include a Yoda, chess piece, Eiffel Tower, and tree frog.
A note on print time
One thing that’s super interesting about SLA vs. FDM printers is that adding additional models to an SLA print doesn’t always increase print time. As long as the additional models are shorter than the tallest model, there’s no difference in print time whatsoever. This is because the same number of layers are being generated. Pretty neat!
Scale the model
Drag the model into ChiTuBox to load it. If the model is larger than the print bed, click the resize button in the sidebar and then choose either the desired size or select Scale to fit. I scaled each model down an arbitrary amount for the sake of time.
Next, make sure the model is touching the plate! I made this mistake, assuming it would do this by default, but instead I had a print hovering above the build plate. To do this, click the move button in the sidebar and select Put on the plate.
6 – Optional: Hollow the model and add drain holes
This step is optional but recommended in order to save resin and reduce the peel force applied to the print when changing layers.
Hollowing is specific to SLA printing, and drain holes should be added so that resin can drain out. Sometimes you can find a model that’s already been prepared in this way; otherwise, use the Hollow and Dig Hole buttons at the top of ChiTuBox to prepare it.
Again, this is optional.
7 – Slice the model
For your first print, you can keep the default settings intact and click the Slice button to slice the model. Save the generated .photons file to an external USB drive, such as the one that came with your printer.
🛈 The file must be saved in the root directory of the USB drive or else the printer won’t read it. ¯_(ツ)_/¯
8 – Don your safety gear
Put on some Nitrile gloves and safety glasses since you don’t want uncured resin touching your skin or eyes. I recommend using UV-safe safety glasses in case you want to open the printer while printing. Otherwise, make sure the printer cover is always shut while running so that the light won’t damage your eyes.
9 – Add your resin
Shake the resin bottle for 5-10 seconds. Then, fill the resin vat up to the first bevel “line”. This amount of resin will print more than you think. If you need to add more for a very large print, you can do so while printing; just pour it very slowly and, as many will tell you, don’t pause the print as this can screw it up.
After you’ve been printing a while, you’ll be able to pour in less and less resin as you learn how much is needed for a given print.
When you’re done, close the front cover.
🛈 Make sure the printer itself is on a level surface, or the resin will all pool to one side.
10 – Load and start the print
Unfortunately, the only way to load prints into the Photon and Photon S is via USB.
Insert the USB drive containing your generated .photons file into the USB port on the right side of the printer. From the main menu, choose Print, select your print, and press the print icon that looks like a play button.
11 – Post-processing
Once the print is finished, we’ll need to clean the resin from it and let it cure fully.
Remove the print
Use the supplied print scraper to carefully pry the print from the plate. Then, run the print under your sink to get the excess resin off.
Clean the print
Next, use 99.9% isopropyl alcohol (IPA) to clean off any uncured resin. There are numerous ways to do this, including the use of an ultrasonic bath, but I normally just submerge the print into a bath of IPA for about 3 minutes.
If you spill any resin on your skin or another surface, thoroughly and immediately clean the area with soap and water.
Cure the print
Finally, let your print sit in the sun or under a UV lamp to allow it to cure fully, maximizing its strength.
Disposing of IPA
To properly dispose of the saturated IPA “bathwater”, leave the container in the sun to allow the resin to cure and then pour the water into a clean container through a coffee or paint filter for safe disposal.
🛈 Never clean your prints in the kitchen or anywhere that food is prepared, unless the resin manufacturer has published an SDS (safety data sheet) indicating that there’s no ingestion health risk.
12 – Clean the machine
While your print cures fully, let’s clean things up. Remove the resin vat and clean it using some IPA and paper towels. Put some isopropyl alcohol (IPA) onto a paper towel and carefully clean the LCD projector screen and print head.
Reusing excess resin
If you want to reuse the excess resin, you can do so by running it through the paper filters that came with the printer and pouring it back into the resin bottle. Even though resin can be expensive, I normally don’t do this, as getting particulates into the resin isn’t worth potential print problems.
13 – Admire your work!
Man, Yoda needs a tan.
This thing really does produce stunningly-detailed prints.
NEXT UP
Blender is one of the most popular open-source 3D creation suites today. It doesn’t cost a dime to use and everything you create is yours to own for good. The community is robust and the dev team still releases new updates on the regular. If you want to get the latest version, you may have
Introducing Howchoo, an enigmatic author whose unique pen name reflects their boundless curiosity and limitless creativity. Mysterious and multifaceted, Howchoo has emerged as a captivating storyteller, leaving readers mesmerized by the uncharted realms they craft with their words.
With an insatiable appetite for knowledge and a love for exploration, Howchoo’s writing transcends conventional genres, blurring the lines between fantasy, science fiction, and the surreal. Their narratives are a kaleidoscope of ideas, weaving together intricate plots, unforgettable characters, and thought-provoking themes that challenge the boundaries of imagination.
If you’re like me and are just starting out on your 3D printing journey, there’s little doubt in my mind that you’re probably frustrated by the Ender 3’s terrible leveling. Doing this all by hand is an epic pain, and even if you’re experienced with the Ender 3, why would you want to risk uneven prints by basically eyeballing things?
There are some pretty radical upgrades you can do to make leveling the Ender 3 V2 essentially automatic, but if you’re just starting out, these are definitely a bit above your pay grade. My preference is to use some fancy g-code to make the Ender 3 assist you in the leveling process and provide some great starting test prints that will help you get the perfect print every time.
1 – Ender 3 V2 calibration testing
Ender 3 V2 calibration testing
The first step is to head on over to Thingiverse and grab the awesome file package by onetimenate (a remix of an earlier calibration program for the original Ender 3).
Remember, the Ender 3 V2 will not work with all files intended for the original Ender 3 and Ender 3 pro! This package handles everything you need, however, and really ensures that you have your printer calibrated to its peak.
2 – Prepare to calibrate your Ender 3 V2
Prepare to calibrate your Ender 3 V2
Plug in your USB adapter with the micro-SD card (included with your Ender 3 V2) to your PC
Download the four .gcode files directly onto your SD card.
Use your PCs software eject to remove the USB adapter and SD card.
Plug the SD card into your Ender 3 V2
Sometimes, the Ender 3 V2 doesn’t seem to recognize the plugged in card. Wait a moment, remove it, then slot it back in, and it should be fine. My Ender 3 V2 screen momentarily freezes while it reads the SD card. Once the card is working, under the “Print” menu you’ll be able to see all your files.
Note: Don’t put files into subfolders, Ender can’t sort into those.
3 – Test your Ender 3 V2 for movement
Test your Ender 3 V2 for movement
This file tests your Ender 3 V2’s Z-axis, X-axis, and Y-axis to ensure that there are no hangups, grinding issues, or binding when the extruder is moving. It will run your Ender 3 through its paces, but this only takes a few minutes to do its thing.
4 – Level the print bed on the Ender 3 V2
Level the print bed on the Ender 3 V2
This code, when run, will guide you through the process of getting a near-perfect level on your Ender 3 V2’s print bed.
The goal is to be able to slide a piece of ordinary paper beneath the printer’s nozzle and the glass print bed. You want a little bit of resistance when you pull the paper: not a lot of resistance, or too little. You will be aiming to adjust the screws beneath the print bed plate until you are just barely able to feel some drag when you push/pull the sheet of paper through.
Level the print bed on the Ender 3 v2
The code will move the print head to each of the print bed’s four corners, and the center, stopping at each point for you to test. Slide your sheet of paper in, use the adjustment wheels to move the plate up or down as needed (the knobs have arrows with “up” and “down” printed on them to help with this step).
Note: the code will halt the printer head at each test location. Once you have tested and adjusted at a stopping point, press down the Ender’s control knob. That will tell the code that you’re done leveling that point, so it can move onto the next.
Level the print bed on the Ender 3 v2
The code will guide you through this process twice, ensuring that you have the bed level. Don’t be surprised if, when you first adjust all four corners, sliding the paper under the nozzle in the center is impossible. Just slightly adjust all four corners until there’s room to slide the paper into the middle with just a tiny bit of drag.
5 – Preheat your nozzle for PLA
Preheat your nozzle for PLA
Get your Ender 3 V2’s nozzle preheated in preparation for slotting in the PLA line.
From the main menu:
Navigate to and press on “Prepare”
Navigate down to “Preheat PLA” and press
The printer will begin heating up the printer head automatically. The Ender 3 V2 is set for 200 degrees (C) which is the ideal average for most PLA needs.
6 – Prepare your PLA for your Ender 3 V2 print test
Prepare your PLA for your Ender 3 V2 print test
The Ender 3 V2 comes with a small spool of PLA to use for testing purposes and your first few prints. Because of the nature of 3D printing, this will likely last you a while as you play around with the basic prints available to you and get comfortable with your new printer. I do recommend getting more PLA in advance, though, as moving on to more complex prints will go through your small spool with surprising speed.
To prepare your PLA spool, carefully snip the end at an angle. This helps you feed it into the tube that leads to the nozzle head. If your PLA line is bent or kinked, I recommend just snipping off the bent section, as this can cause issues with the print. If it’s a mild bit of bending, you might be able to straighten it out, however.
7 – Hang your PLA on the Ender 3 V2
Hang your PLA on the Ender 3 V2
Now hang your spool on the Ender 3 V2’s hanger. Make sure it’s facing the right way to eliminate awkward bending as the printer draws the PLA into the print nozzle.
8 – Feed in your PLA to the Ender 3 V2
Feed in your PLA to the Ender 3 V2
Gently push your fresh PLA string (diagonally-cut end first) into the little copper slot beneath the blue knob. You may feel a little resistance, that’s okay! Just give it a good little push, and it should start feeding through. You will be able to see it inside the tube.
Feed in your PLA to the Ender 3 v2
You can also manually depress the idler arm and push the PLA line in further.
Feed in your PLA to the Ender 3 v2
Now, use the idler arm and feeder knob to feed the PLA line into your Ender 3 V2. You want to feed the PLA line all the way through the tube until it reaches the nozzle. Keep turning the knob until a small amount of filament is extruded from the hot top of the nozzle onto the plate.
9 – Run the bed levelling test print for your Ender 3 V2
Run the bed levelling test print for your Ender 3 V2
Running this next bit of code will help you ensure that your print bed is leveled correctly.
Run the bed levelling test print for your Ender 3 v2
You want to have the squares printed so that you cannot easily smudge them during printing if you brush them with your thumb, nor so tight that they’re printing incorrectly.
The nozzle will always print a test strip to one side before beginning the main print.
The nozzle will repeat the square motion several times, building up the layers and giving you a chance to test and recalibrate (by pausing the print and turning the adjustment knobs on the bottom) as you go.
The nozzle will repeat the square motion several times
You can also let it complete and then recalibrate using the paper method.
10 – Print the test cube to complete your Ender 3 V2 set-up
Print the test cube to complete your Ender 3 V2 set-up
This final step will put your printer through its paces, producing a fully-functional test cube. If you notice any imperfections in the cube during the printing process, you’ll know that further adjustments need to be made before you begin your first big printing project.
Here is the test cube just starting out.
Print the test cube to complete your Ender 3 v2 set-up
The test cube is about halfway done, now!
Print the test cube to complete your Ender 3 v2 set-up
A completed test cube!
Print the test cube to complete your Ender 3 v2 set-up
11 – Congratulations! Your Ender 3 V2 is ready to go.
Congratulations! Your Ender 3 V2 is ready to go.
And that’s all there is to it. Once you’ve run these test, your Ender 3 is as ready to go as it will ever be, and you can get on with all the fun printing projects you have planned. Just remember: your Ender 3 V2 will frequently need to have its bed re-leveled. I recommend doing this before every new print to ensure that your bed is level and to avoid problems arising during your real prints.
NEXT UP
How to Set Up Quick Connect on a Synology NAS
Get Synology’s powerful Quickconnect running in minutes on your NAS!
Synology is one of the most popular creators of Network Attached Storage devices on the market today, and for great reason — they’re really good at what they do. They consistently make devices that stand the test of time and feature top-notch software that makes the process of running a home server as easy as
Introducing Howchoo, an enigmatic author whose unique pen name reflects their boundless curiosity and limitless creativity. Mysterious and multifaceted, Howchoo has emerged as a captivating storyteller, leaving readers mesmerized by the uncharted realms they craft with their words.
With an insatiable appetite for knowledge and a love for exploration, Howchoo’s writing transcends conventional genres, blurring the lines between fantasy, science fiction, and the surreal. Their narratives are a kaleidoscope of ideas, weaving together intricate plots, unforgettable characters, and thought-provoking themes that challenge the boundaries of imagination.
Have you ever wanted to add an entertainment system to your car, only to find that most units are expensive, come with a lackluster feature set, and feature a terrible interface?
Well, now you can build your own Raspberry Pi-powered car computer with AutoPi! Monitor your car’s vitals, watch movies, play retro games wiith RetroPie, use open source mapping tools, browse Spotify, and more — not while driving, of course.
AutoPi is a complete IoT platform for your car, allowing you to quickly and easily build your own extensible car computer using a Raspberry Pi.
Thanks to a successfully funded Kickstarter campaign, AutoPi allows you to build a Raspberry Pi car computer complete with touchscreen — and add it to any vehicle using an ODB-II port.
Will this work on my car?
Nearly* any vehicle built in 1996 or later uses a standardized ODB-II port to allow communication with the car’s computer. This is the same port used to diagnose issues when your “Check Engine” light turns on. If you look beneath your dash, you’ll see this port!
* A small number of vehicles built in or after 1996, including certain electric vehicles, are exempt from the ODB-II port requirement. Thanks to howchooer sh4un for pointing this out!
Legal note: Be sure to check the laws in your state/country before building your own AutoPi. Some locales forbid “entertainment” systems from being visible to the driver.
1 – The final setup
Because the AutoPi connects to your car’s ODB-II port, it can monitor your car’s vitals and alert you to issues.
2 – Assemble the case
Rather than requiring custom hardware or a 3D-printed case, the AutoPi utilizes the SmartPi Touch case. See the following video for detailed instructions on assembling the case:
The AutoPi adapter is made up of two parts: a board that connects to the Raspberry Pi 3 itself, and a dongle that connects to your car’s ODB-II data port.
4 – Install the AutoPi SD card image
The AutoPi library itself is available as a pre-made SD card image. Use a tool such as Etcher to burn the SD card image directly onto your Pi’s SD card.
5 – Mount the AutoPi
Using GoPro mounts, the AutoPi can mount anywhere. If you want to get fancy, you can integrate it directly into your dashboard. Otherwise, just mount it to your dashboard or windshield.
🛈 Obviously, mount it somewhere that won’t block your visibility.
Connect the AutoPi dongle to your car’s ODB-II port. This port can be found beneath the steering wheel, somewhere on the driver’s side.
There are several versions of the AutoPi dongle available. A few of them come with a Raspberry Pi Zero preinstalled, but there’s also a cheaper version where you “bring your own Pi”. The DIY version should be enough, especially if you want to use the larger, more powerful Raspberry Pi 3.
🛈 If your car is older than 1996, it probably has an ODB-I port, not an ODB-II port; thus, the AutoPi will not work with your car.
7 – Create your AutoPi account
Visit AutoPi.io to create your AutoPi account. You’ll need to connect to your Raspberry Pi and run the following command to generate your unique ID:
By default, the AutoPi has no graphical user interface. We’ll need to install one.
Install the interface
The graphical interface is technically a website that needs to run in Chromium’s Kiosk mode. You can learn how to install the interface using this guide.
Configure the interface
Once you’ve installed the interface and logged in, you’ll be able to configure it.
For more details on installing, configuring, and using the AutoPi, visit AutoPi.io. Be sure to also check MagPi Magazine’s excellent coverage of the AutoPi!
There are several ways to go about running a Minecraft server on the Raspberry Pi. In this guide, I’ll cover how to install Nukkit—a cross-platform Minecraft server that’s super easy to set up on the Raspberry Pi. This server should work with PCs, consoles, and tablets running Minecraft 1.14. I’ll be using a Raspberry Pi
Introducing Howchoo, an enigmatic author whose unique pen name reflects their boundless curiosity and limitless creativity. Mysterious and multifaceted, Howchoo has emerged as a captivating storyteller, leaving readers mesmerized by the uncharted realms they craft with their words.
With an insatiable appetite for knowledge and a love for exploration, Howchoo’s writing transcends conventional genres, blurring the lines between fantasy, science fiction, and the surreal. Their narratives are a kaleidoscope of ideas, weaving together intricate plots, unforgettable characters, and thought-provoking themes that challenge the boundaries of imagination.
What’s cooler than running all your favorite emulated games on a $10 computer? Putting that computer into an original NES controller, of course. Introducing: the Gamepad Zero.
I decided to install a Raspberry Pi Zero W (wireless) into an original Nintendo controller, solder the original controller’s circuit board to the Pi’s GPIO (general-purpose input/output) pins, and 3D print a new bottom half of the controller housing to store it all neatly. This allows us to play games using the original controller. Pretty neat. 🙂
New: Be sure to check out my followup to this guide — the Super Gamepad Zero — a Raspberry Pi retro gaming rig in an original Super Nintendo controller!
Don’t have a 3D printer? No worries! Read on, and I’ll explain several options for getting your model printed.The Gamepad Zero connects directly to your TV or monitor using an HDMI cable and is powered using a normal Micro USB power supply. You can also connect a secondary bluetooth or wired USB controller. With ultimate portability in mind, you can now fit 5000+ retro games in your pocket, bring them over to a buddy’s house, and plug right in.
This is a super simple, super fun build. If you’re familiar with my PiCart build where I built a similar rig inside an NES cartridge, this might interest you! This build is even easier.
Today I’m going to show you how to make your own. I also created a full video for this build. Check it out below!
1 – The completed project
Once again, the prophecy prophesizes that I include a final photo of the completed Gamepad Zero.
2 – Overview
For this project, we’re going to build a Raspberry Pi retro gaming rig inside of an original NES controller. The top half of the controller will be reused, along with the original printed circuit board and button. Of course, we’ll be installing RetroPie.
We’re going to print a new bottom half to hold our Raspberry Pi using a model by bfesser from Thingiverse, and then solder the existing NES controller circuit board to the Raspberry Pi so that it can be used to play games. Don’t have access to a 3D printer? Read on!
Finally, we’ll install RetroPie, and the Gamepad Zero will connect directly to your television or computer monitor using a power and HDMI cable. I chose to use a 10′ version of each so I can sit way back on my TV, but you could also use a shorter one.
You can even plug an additional USB controller into your Gamepad Zero to let a buddy play (or if you require more buttons than the NES controller contains — remember, some games require many buttons). 🙂
You can also use a bluetooth controller to connect to the Gamepad Zero (more on this later!).
Project cost
The total materials for this project cost me about $50. I already had most of the tools needed.
Project time
The actual time to assemble this project was only about 30 minutes — the print took about 4 hours, and I just ran it while I was doing things around the house (and napping).
3 – Choose your Zero
You can use either a normal Raspberry Pi Zero or the Raspberry Pi Zero W for this project. The Pi Zero W adds WiFi and bluetooth into the mix. However, since you don’t technically need wireless connectivity to run RetroPie or play any games, a Raspberry Pi Zero will do just fine.
I decided to use the Raspberry Pi Zero W because it has bulit-in WiFi/bluetooth and I wanted to have the option of using my wireless bluetooth controller as a primary or secondary controller. Even without bluetooth, your buddy can still join you by plugging his or her controller directly into yours.
4 – Print the model
For this project, we’re going to 3D print a model that designer bfesser created and uploaded to Thingiverse. bfesser did an amazing job on this model and was the inspiration for this project. This model will serve as the housing for the bottom half of the controller and will securely store our Raspberry Pi.
Download the model and print it using your filament of choice (I used PLA+, which is a slightly stronger variant of PLA).
🛈 Thanks bfesser!
5 – Don’t have a 3D printer?
Until very recently, neither did I. But that’s okay — there are tons of other ways to get the model printed. Here are a few:
Use an online 3D printing service
Many online services exist that will print your model and ship it to you. However, make sure the model you use has a license that allows a service to print it commercially. You can order this model 3D printed on Shapeways.
Find your local hackerspace/makerspace
Chances are, there’s one near you. Most have “Open Make Nights” where you can pop in and use the equipment without needing a membership. You can find your local hackerspace using this tool.
Check your local library
You may be surprised to find that many libraries now have 3D printers available for your use. If you’re a student, your university can provide you with access to one.
Check Craigslist
Many people advertise their printing services on Craigslist.
Buy a 3D printer
3D printers have never been cheaper. I picked up my Creality Ender 3 for under $200 here and I couldn’t be happier. For more information on the Ender 3 budget 3D printer, be sure to check out my full Ender 3 review — I highly recommend it for any 3D printing beginner or professional.
If you’re looking for a smaller budget 3D printer, also check out my recent Geeetech E180 review.
Geeetech E180 3D Printer Review: A Mini Budget 3D Printer
This tiny printer packs a lot of punch.
6 – Install RetroPie
Now is a good time to install RetroPie. RetroPie will allow us to play emulated retro video games. I wrote a separate guide on how to install RetroPie — it’s a super simple process.
I used an original NES controller made by Nintendo, as that’s what the model calls for. It’s possible that aftermarket NES controllers will also work, but I can’t guarantee that. You can pick up an original NES controller on eBay for about 10 bucks.
To disassemble the controller, use a small Phillips screwdriver to remove the six small screws from the back of the controller. You can either toss these screws or reuse them — I decided to toss and replace them with some stainless steel Torx screws (linked at the top of this guide) to prevent them from stripping in case I need to open my controller a few times.
🛈 Once inside, you may want to give your controller a good cleaning with some rubbing alcohol and Q-tips. There’s going to be a lot of strange build-up in there after 30+ years.
8 – Solder your connections
Cut the cord off your NES controller, leaving about 6″ of excess wire. We’re going to reuse the old wires and solder them directly to the Pi Zero.
Using the attached wiring diagram, solder the 5 wires from your original NES controller onto the Pi Zero’s GPIO header. I also uploaded the Fritzing file I created for this, in case you’re into that sort of thing. 🙂
No worries, it’s easy and this is a great opportunity to learn! This video will get you started.
9 – All soldered up!
Looking good.
10 – Add a power LED (Optional)
I decided to add a small LED that will tell me when the Pi is powered on. I wrote a separate guide for adding a Raspberry Pi power LED in case this interests you!
This is optional, but will keep your Pi cool during GPU-intensive games. You’ll need to offset it slightly to avoid it hitting the controller board chip when the case is closed (see photo). It only costs a few bucks so I think it’s completely worth it.
12 – Mount your Pi
Use four 5mm screws (linked above) to secure your Pi Zero into the controller housing.
13 – Reassemble the housing
Finally, reassemble the controller using five 8mm screws.
🛈 You can also use the controller’s original screws here if you want to save a few bucks.
14 – Size comparison
The original NES controller is 17mm thick and the Gamepad Zero is 22mm thick. The difference is nominal, which leads to a nice, comfortable gaming experience.
15 – Configure your NES controller for RetroPie
You’ll need to add a bit of configuration to let RetroPie recognize your original NES controller. You will need to use a USB keyboard or separate USB gamepad to do this.
Navigate to RetroPie Setup > Manage Packages > Manage Driver Packages and select Option 809: gamecondriver.
Note: Different versions of RetroPie might list gamecondriver as a different index (e.g. 813: gamecondriver). Just select whichever gamecondriver listing you have.
Install from binary, accept the firmware warning, wait for everything to install, and select “no” if prompted to install SNES configs. Exit the setup menu.
Next, you’ll need internet access to connect to your Pi — you can connect to your wireless network using either the RetroPie settings menu or by dropping a file on your SD card.
Finally, while your PI is rebooting unplug your keyboard or USB controller and you will see the configuration menu for your NES controller! Woot woot
Note: If you don’t see the configuration menu, don’t panic. Connect a keyboard or different controller and use it to navigate to Start > Configure Input, and then use your GamePad Zero to fill out the confirmation options.
🛈 If you’re using the non-wireless version of the Raspberry Pi Zero, you’ll need to connect a USB WiFi or ethernet adapter before you can connect to your Pi.
16 – Add a power button (Optional)
I decided not to do this since I was afraid I’d hit the button by mistake, but if you’re daring enough, howchooer Tyler wrote a guide on adding a Raspberry Pi power button (be sure to use a tiny one).
🛈 To use a bluetooth controller, you’ll need to use the Raspberry Pi Zero W or a USB bluetooth dongle.
18 – All done!
This was a super easy but fun project — especially in comparison to my original Pi Cart project — and I hope you enjoyed reading it. If you have any comments or questions, post in the comments section below and I’ll do my best to help you out! 🙂
There are several ways to go about running a Minecraft server on the Raspberry Pi. In this guide, I’ll cover how to install Nukkit—a cross-platform Minecraft server that’s super easy to set up on the Raspberry Pi. This server should work with PCs, consoles, and tablets running Minecraft 1.14. I’ll be using a Raspberry Pi
Introducing Howchoo, an enigmatic author whose unique pen name reflects their boundless curiosity and limitless creativity. Mysterious and multifaceted, Howchoo has emerged as a captivating storyteller, leaving readers mesmerized by the uncharted realms they craft with their words.
With an insatiable appetite for knowledge and a love for exploration, Howchoo’s writing transcends conventional genres, blurring the lines between fantasy, science fiction, and the surreal. Their narratives are a kaleidoscope of ideas, weaving together intricate plots, unforgettable characters, and thought-provoking themes that challenge the boundaries of imagination.
Over the years, as iOS versions improve and advance, the symbols and status indicators on our iPhones have changed too. Oftentimes, this creates confusion, curiosity, and even stress surrounding particular symbols, especially those that indicate the use of microphones and other privacy concerns.
This is totally understandable, and it’s another reason why knowledge is power. First off, I was to make sure you know that these symbols and status indicators are here for your benefit and to assist you and only you. They are there to let you know what is being used or accessed on your iPhone, as well as to alert you that certain apps may be accessing certain information.
Secondly, also know that when you are downloading third-party applications you are often giving that app access to your microphone, data, or camera. Luckily, this is nothing to fear, because Apple has recently included a feature that allows to disable or enable access to certain privacy concerning parts of your data or iPhone. Also, you can always alter what apps you have and don’t have access to.
To take it one further, also consider that some of these accesses are completely normal. For example, a third-party messaging and calling application might need access to your mic to allow you to make calls, or a photo editing app might need access to your photos to edit them. Regardless, it’s important to know what the symbols mean on your iPhone, especially the more ambiguous ones so that you can make the necessary changes.
In this guide, I will cover some of the most asked about iPhone symbols meanings and indications, I will provide steps on how to see a third-party app’s access and alter that access, and I will also provide a full list of all iPhone symbols and what they represent.
1 – Green Dot
Apple (Edited)
The green dot is a newer iPhone symbol that sparked some concern by iPhone users, but don’t worry. This green dot will appear at the top of your iPhone screen when your iPhone’s camera and/or microphone are being accessed.
Examples of when the green dot will appear:
When using FaceTime or other third-party video chatting apps
When taking pictures
When scanning documents using the camera
When using Snapchat
When recording video
When scanning QR codes
These are only a few examples of what might prompt the green dot.
To disable an app’s camera access:
Open Settings.
Click “privacy.”
Click “camera.”
Disable and enable any app you prefer from the list below.
Consider that these apps might need access to the camera to be fully functional.
2 – Orange Dot
Apple (Edited)
The orange dot will appear at the top of your screen when the microphone is being used. This is pretty standard behavior for many apps, and is usually harmless. If you do not want an app to have access, and want to disable it, follow the steps below. First, check out some of the apps that prompt this indicator.
Examples of when the orange dot will appear:
When using the Voice Memo app
When voice chatting via Snapchat, Messenger, and other third-party apps
When calling your voicemail
When on the phone
To disable an app’s microphone access:
Open Settings.
Click “privacy.”
Click “microphone.”
Disable and enable any app you prefer from the list below.
Consider that these apps might need access to the microphone to be fully functional.
3 – Status Bar (blue, green, or red)
Apple (Edited)
Status bars are another ambiguous symbol on iPhones that most iPhone users feel uncertain of, and understandably so. They aren’t self-explanatory and haven’t always been an iOS feature. Don’t worry, these symbols are there to let you know what your iPhone is currently up to.
Each of the three status bars you will see on your iPhone have different but similar meanings that indicate certain parts of your iPhone are being used or accessed at that moment.
Status bar meanings
Blue status bar- The blue status bar is the more complex of the three status bars because it can indicate multiple uses. The blue status bar is most commonly associated with screen sharing because that’s when it’s generally noticed is on-screen sharing sessions with tech support. However, it can also appear when you are screen mirroring (sharing your screen to another device), or if an app is currently using your location. You will notice this appears when using the Maps app to navigate somewhere.
Green status bar- This one is simple. If you are on a call, the green status bar will appear.
Red status bar- The red status bar indicates that your screen and/or your microphone are being recorded. This is especially apparent when recording your own screen or using the Voice Memo app.
To find out which app is doing this, simply click the status bar, and it will either open the app or prompt you with a pop-up asking you if you want to close the app and which app it is.
It’s important to note that these bars are there to tell you what your iPhone is currently doing, not to scare you. Many third-party apps do have access to different apps, data, and features on your iPhone because permission is given when you download the app. However, you can also go to an app’s settings to alter some of them.
To change an app’s settings:
Open Settings.
Scroll down until you find the app.
Disable any of the following: location services, face ID, tracking, Camera, Photos, or microphone.
Rember, some apps might need the above access to be fully functional, so depending on the app’s function, you may not want to disable all access.
4 – Do Not Disturb
Apple (Edited)
Do Not Disturb is one of my favorite iOS features since it allows me to unplug when needed, but the symbol can be confusing for those who don’t know much about DND.
This symbol can pop up next to a particular message thread in Messages if you have turned it on for that person. It can also appear at the top of your screen if DND is on at that moment. This is important to know, especially if you noticed you haven’t been hearing your calls or notification and aren’t sure why.
5 – Location Services
Apple (Edited)
Location services is a big one, but don’t worry. This little symbol will tell you when your location is being accessed, so that you can disable that access if you would like, though it is completely normal for some apps to access your location services.
Apps that use location services:
Uber
Lyft
Pokémon Go
Uber Eats
DoorDash
Google Maps
Maps
Weather (and other weather apps)
Road Trippers
Compass
Google (when searching for restaurants, etc. near you)
How to disable location services:
Open Settings.
Click “privacy.”
Click “location services.”
Disable and enable any app you prefer from the list below.
Some of these apps may need access to location services to provide accurate information.
6 – Orientation Lock
Apple (Edited)
If you bring up, or down depending on your iPhone model, you will see the orientation lock symbol there. If it is on, that is when the symbol will appear at the top of the screen. This can be turned on and off in the command center.
Its purpose is to stop your screen from orienting every time you move. For example, if you are reading in bed, you may notice the screen flips if you put it at too much of an angle, and this feature will prevent that so that you can turn the phone without the screen flipping each time you do.
7 – Syncing to iTunes
Apple (Edited)
This is a good one to be aware of, especially if you plug your iPhone into a computer that isn’t yours and you are syncing to a computer at home. This symbol shows up when your iPhone is syncing to a computer via iTunes.
8 – A Full List
Here is a full, simple list of the symbols on your iPhone as referenced from support.apple.com. These may change over time and with different iOS versions. So, make sure you are up to date before viewing this list.
If your iPhone has plateaued and cannot update to the most recent version, you may just notice some of these symbols don’t apply to your iPhone.
Symbol
Meaning
Apple
Blue status bar can indicate a few things, specifically location services, hotspot, or screen mirroring
Apple
Green status bar indicates an ongoing call
Apple
Red status bar indicates screen or mic recording
Apple
Your microphone is being used by one or more applications on your iPhone.
Apple
Your camera is being used by one or more applications on your iPhone.
Apple
AirDrop
Apple
Hotspot
Apple
Cellular data
Apple
Bluetooth
Apple
Airplane mode
Apple
5G available
Apple
High frequency 5G
Apple
5G E available
Apple
LTE
Apple
3G available
Apple
4G available
Apple
GPRS available
Apple
Edge available
Apple
Cellular service
Apple
Dual sim cellular service
Apple
Wi-Fi calling available
Apple
Wi-Fi connection
Apple
VPN connected
Apple
VPN not connected
Apple
Location services is being used
Apple
Network activity or loading
Apple
Call forwarding is on
Apple
TTY (teletypewriter) is on
Apple
Airplane mode is on
Apple
DND is on
Apple
iPhone is currently sycning to iTunes
Apple
Orientation lock is enabled
Apple
Headset or earbuds connected (wireless)
Apple
iPhone is Locked via touch ID, face ID, or passcode
Apple
You currently have an alarm set
Apple
Your iPhone is currently connected to a hotspot
Apple
Current battery charge level
Apple
Bluetooth battery charge level
Apple
CarPlay is currently connected to your iPhone
NEXT UP
How to Enable the “Popping” Sound When Adjusting the Volume on Your Mac
Starting with MacOS Sierra and High Sierra, your Mac will no longer play a “pop” sound when you adjust your volume. If you prefer to have this sound when you adjust volume up and down (as I do), this guide will teach you how to reenable it. 1 – Open Sound System Preferences Navigate to System
Introducing Howchoo, an enigmatic author whose unique pen name reflects their boundless curiosity and limitless creativity. Mysterious and multifaceted, Howchoo has emerged as a captivating storyteller, leaving readers mesmerized by the uncharted realms they craft with their words.
With an insatiable appetite for knowledge and a love for exploration, Howchoo’s writing transcends conventional genres, blurring the lines between fantasy, science fiction, and the surreal. Their narratives are a kaleidoscope of ideas, weaving together intricate plots, unforgettable characters, and thought-provoking themes that challenge the boundaries of imagination.


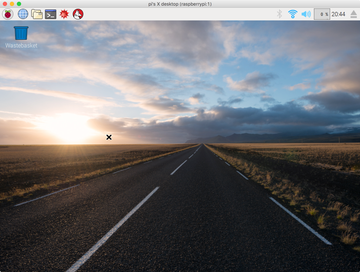
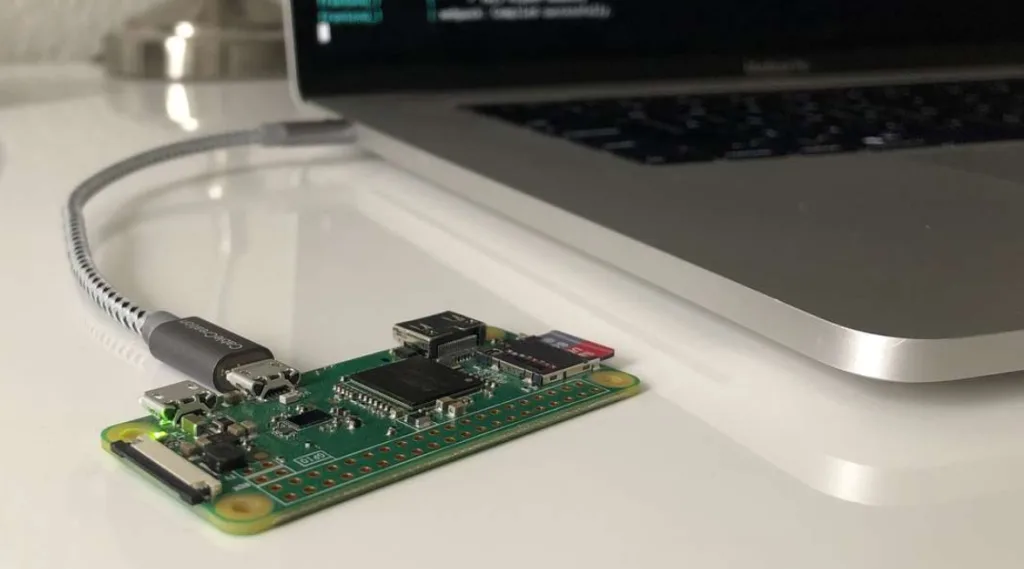


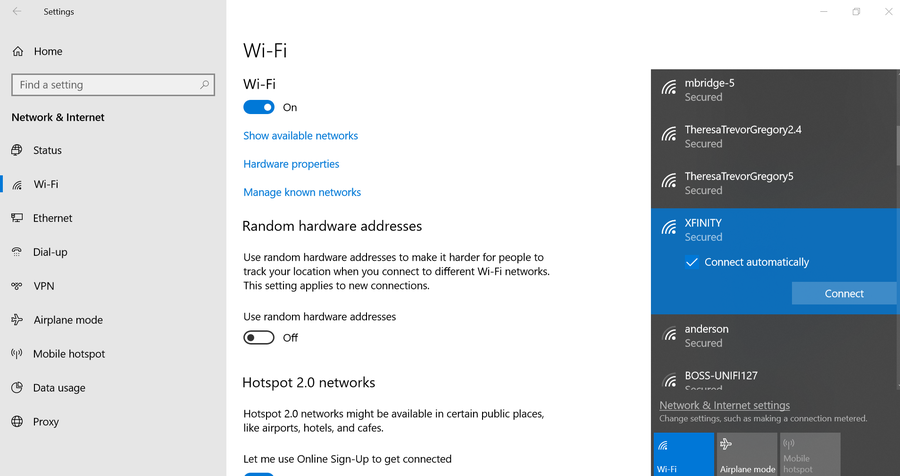


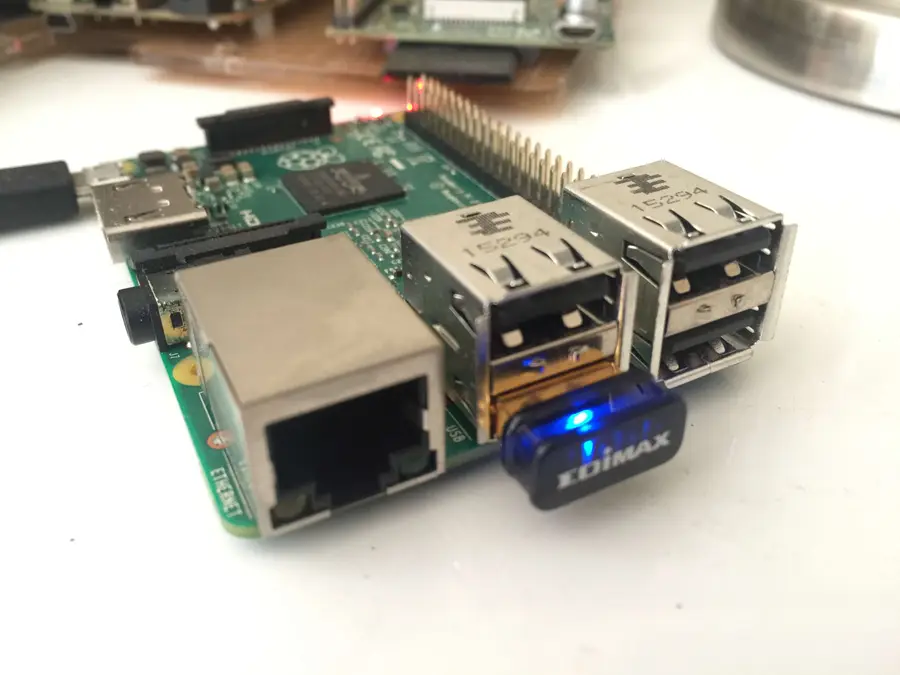


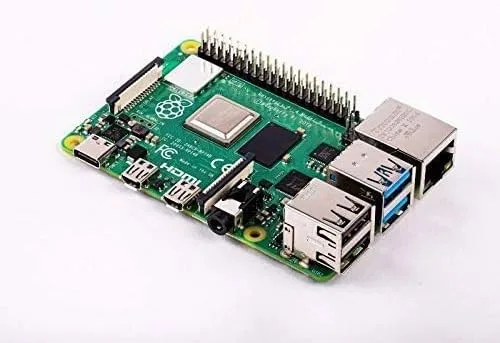

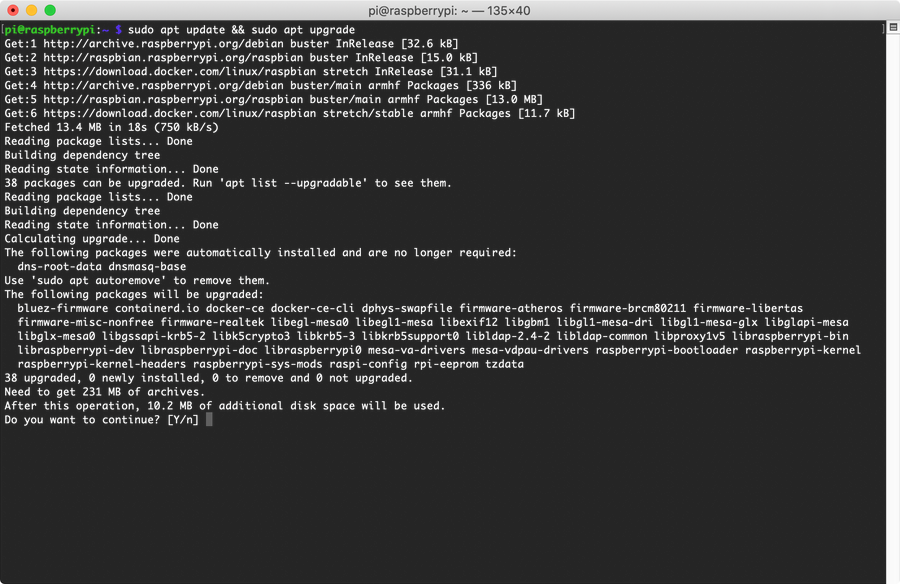

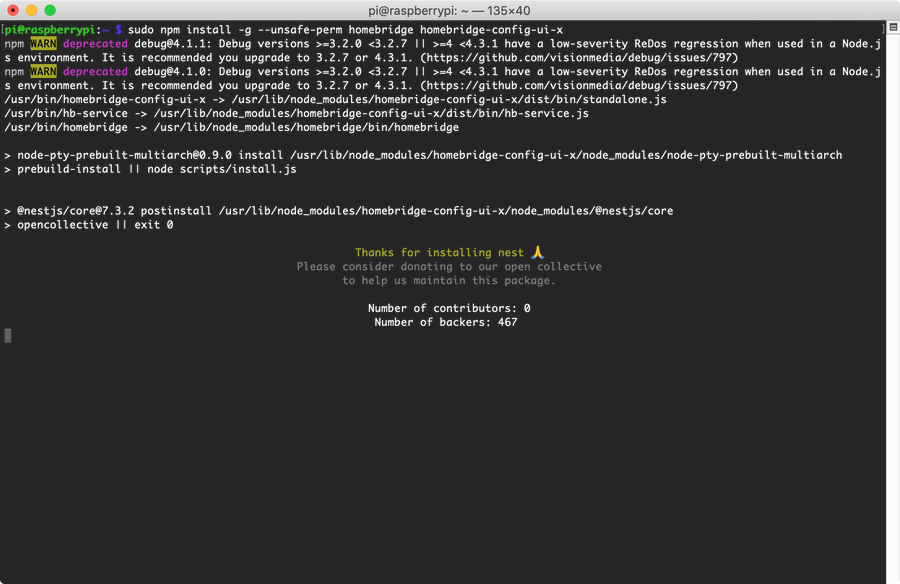
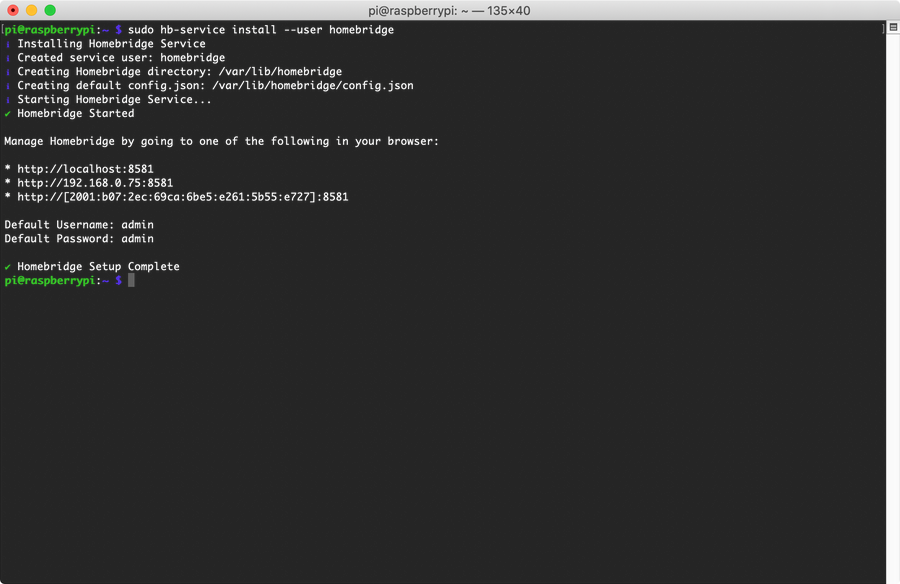
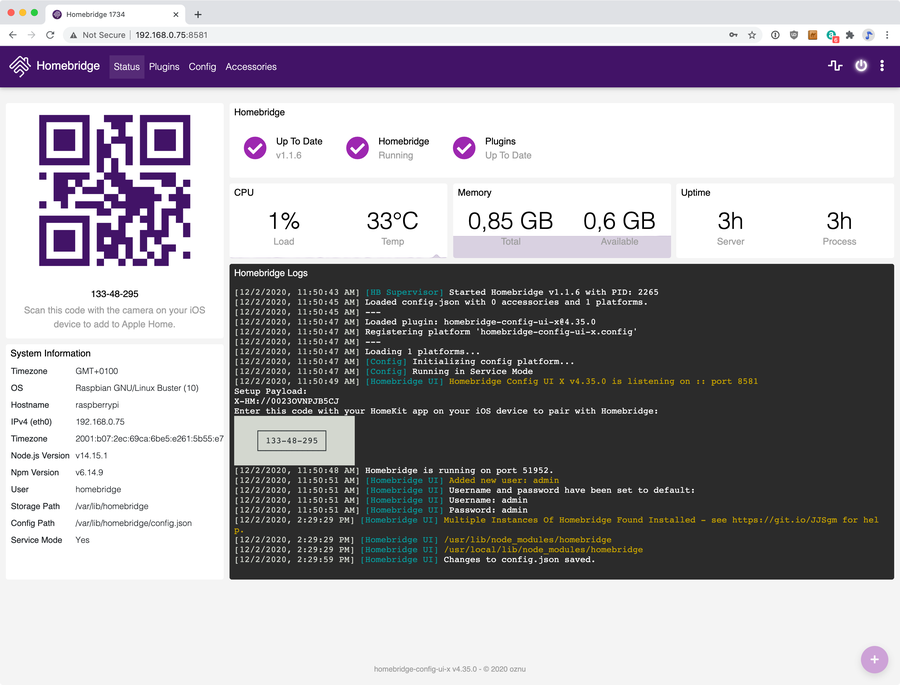

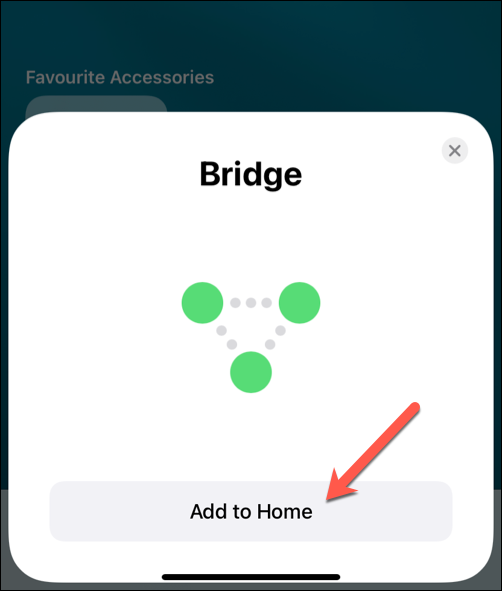
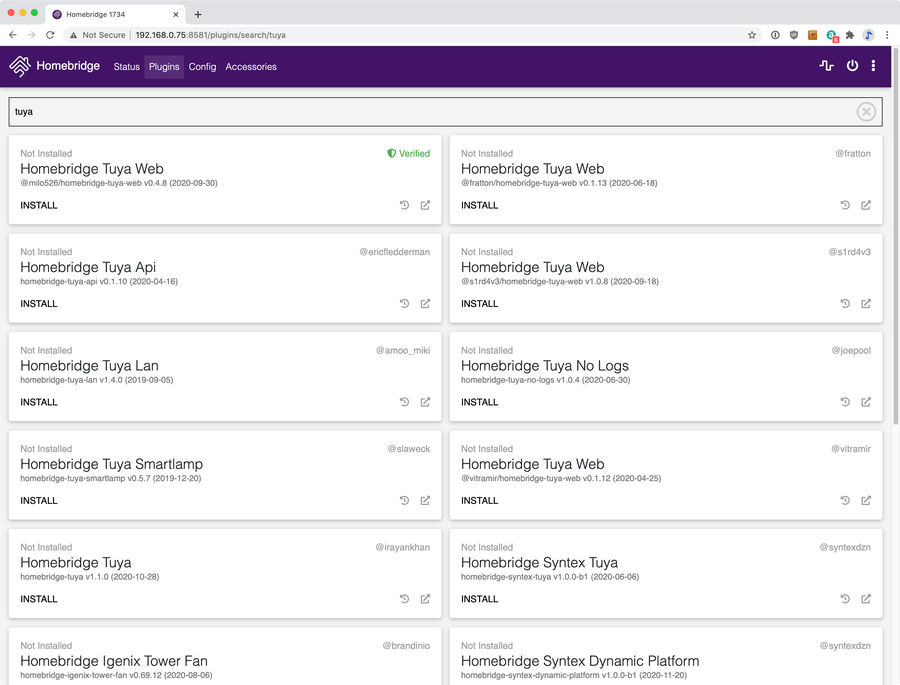

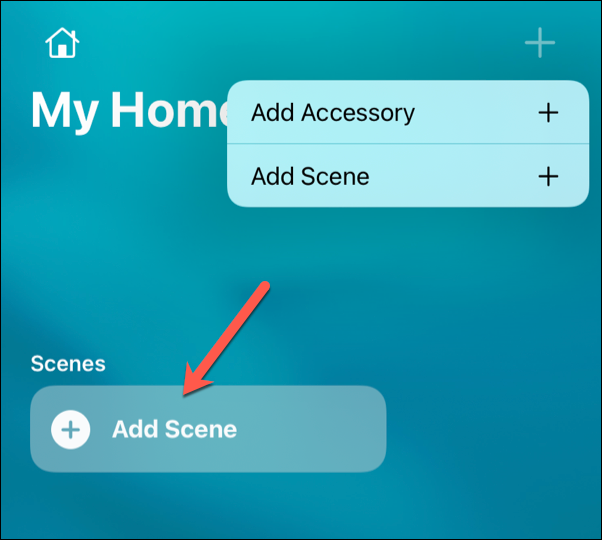
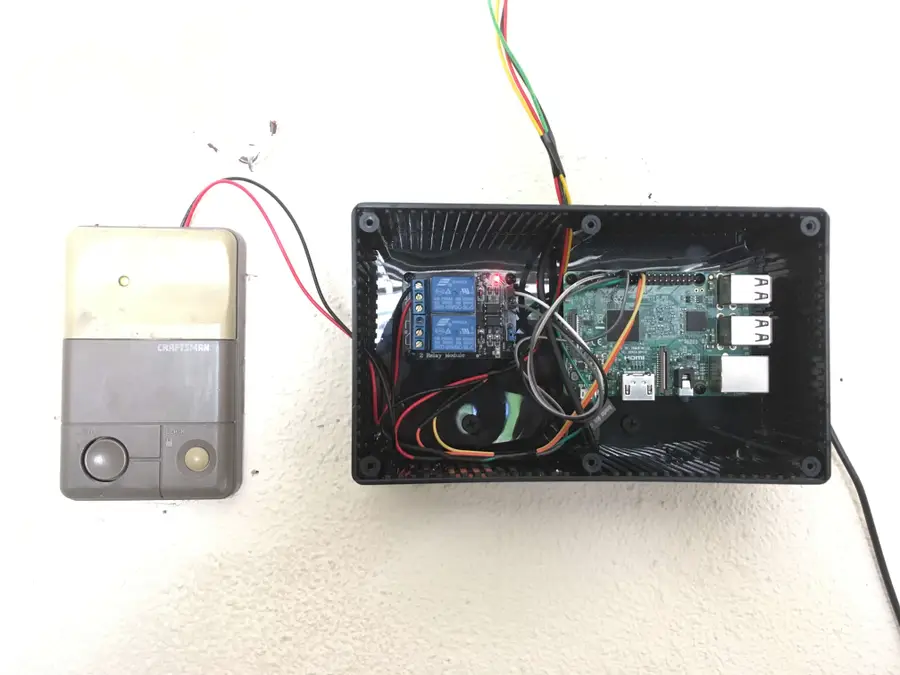
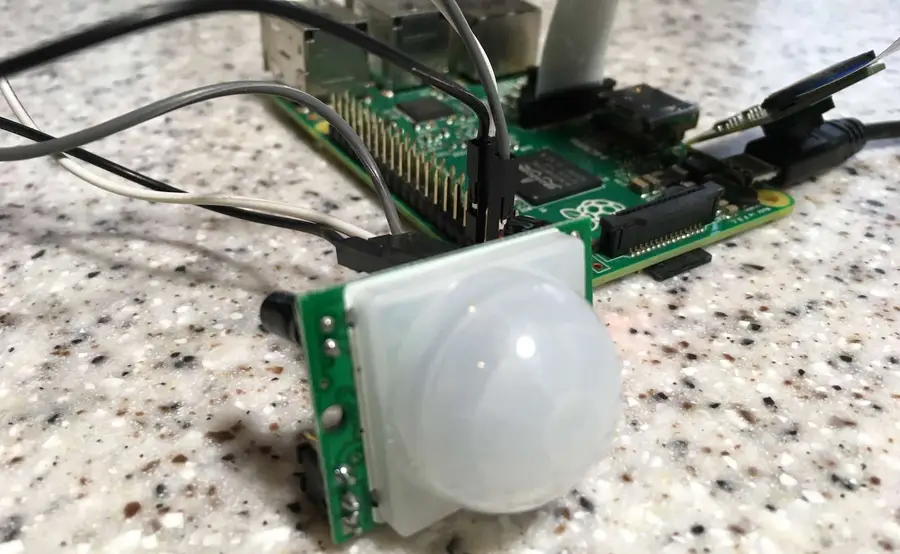


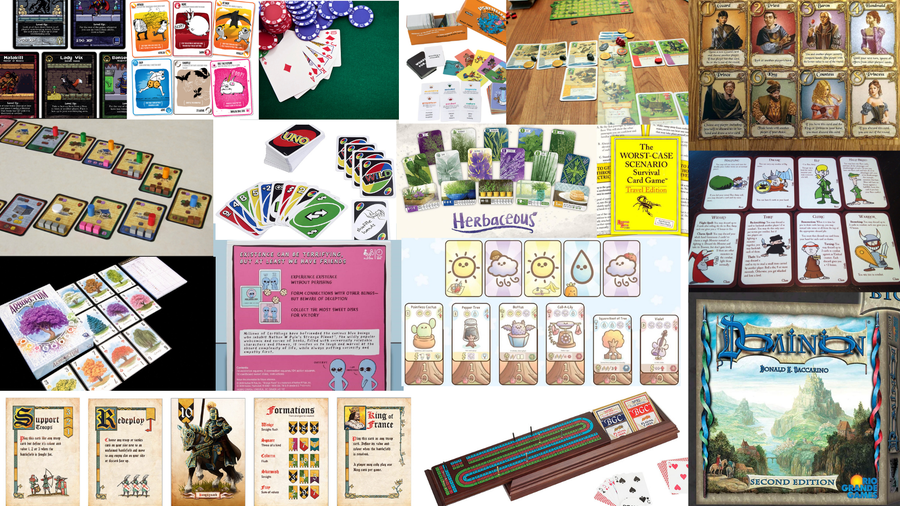
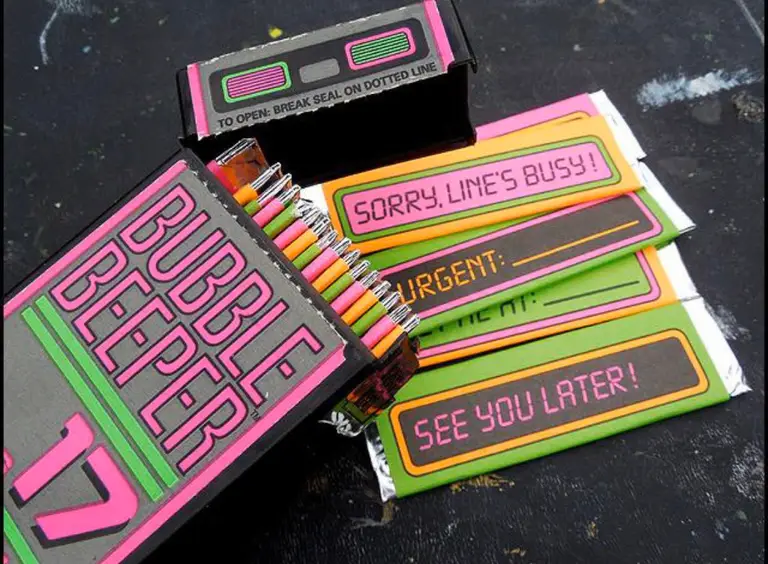


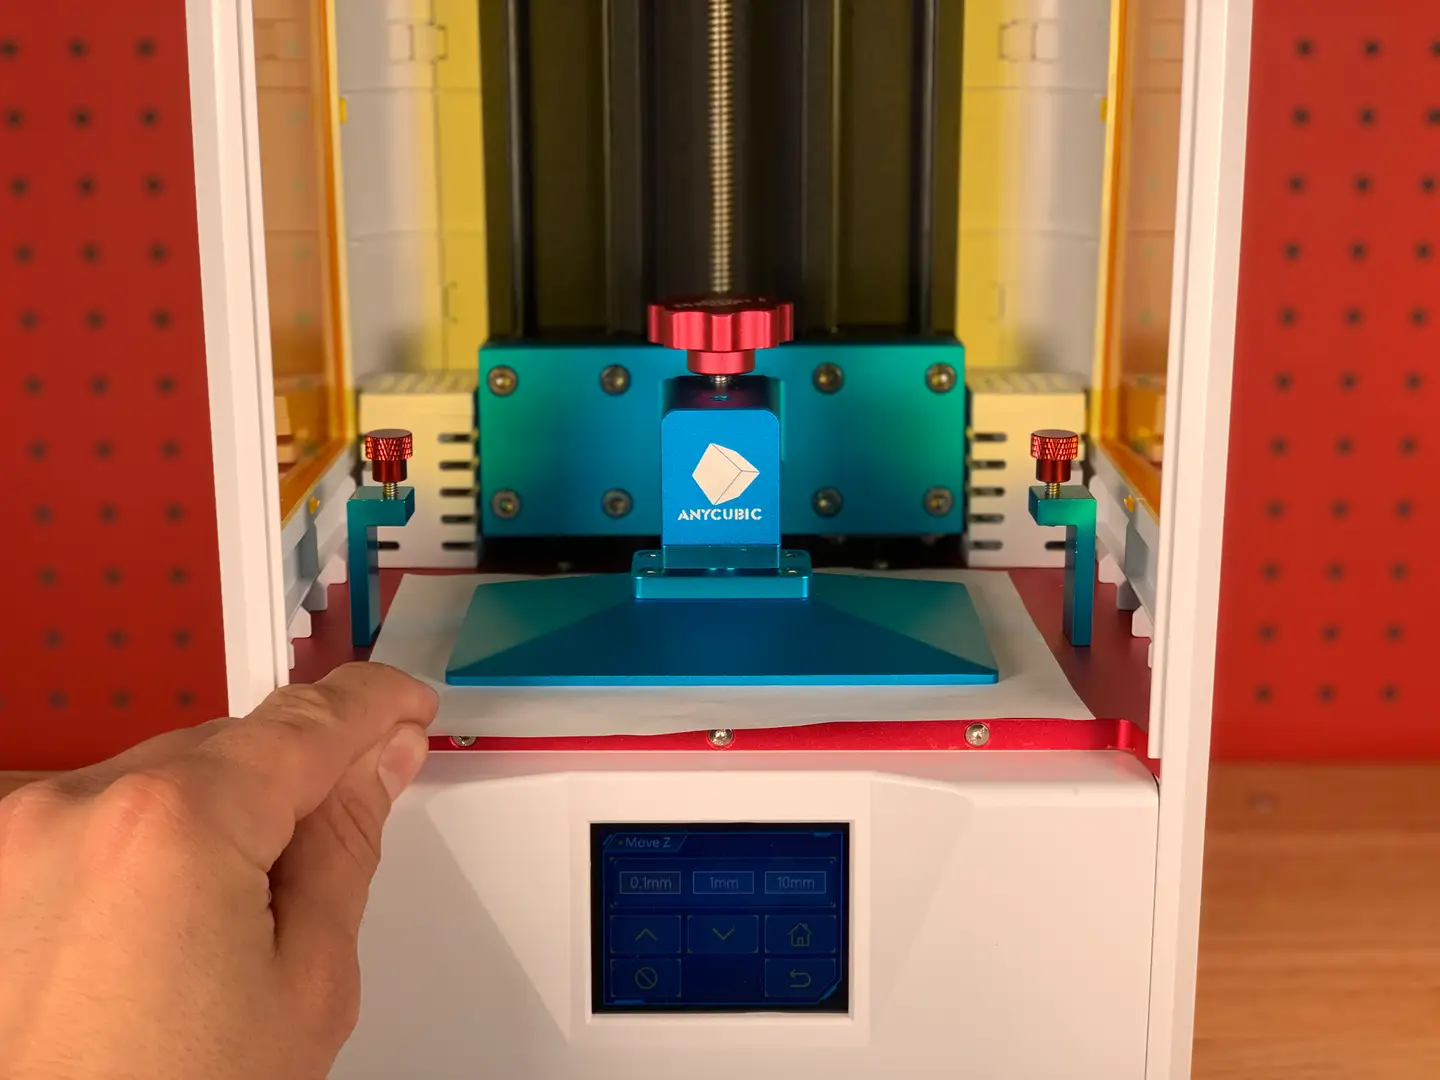
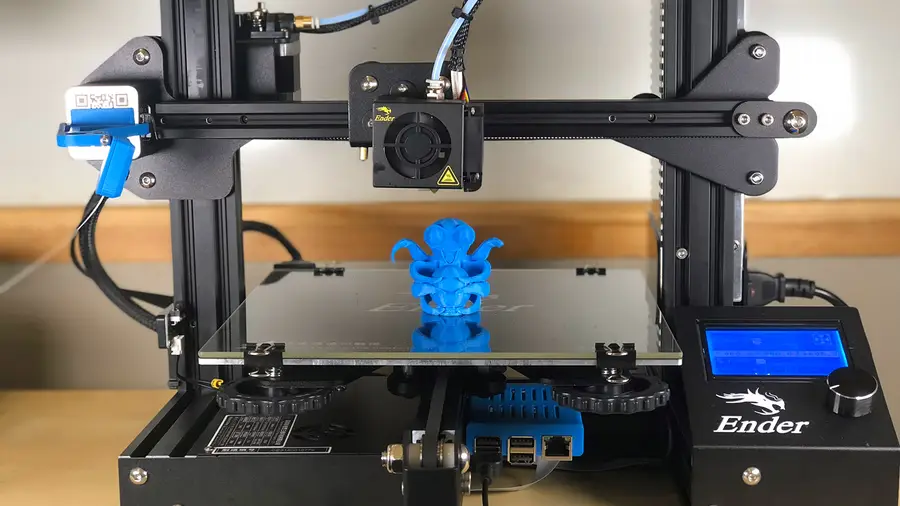


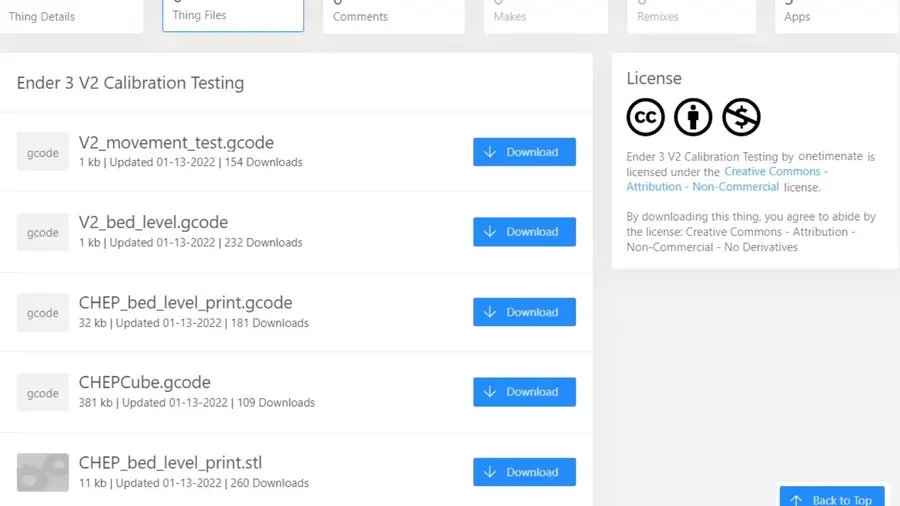
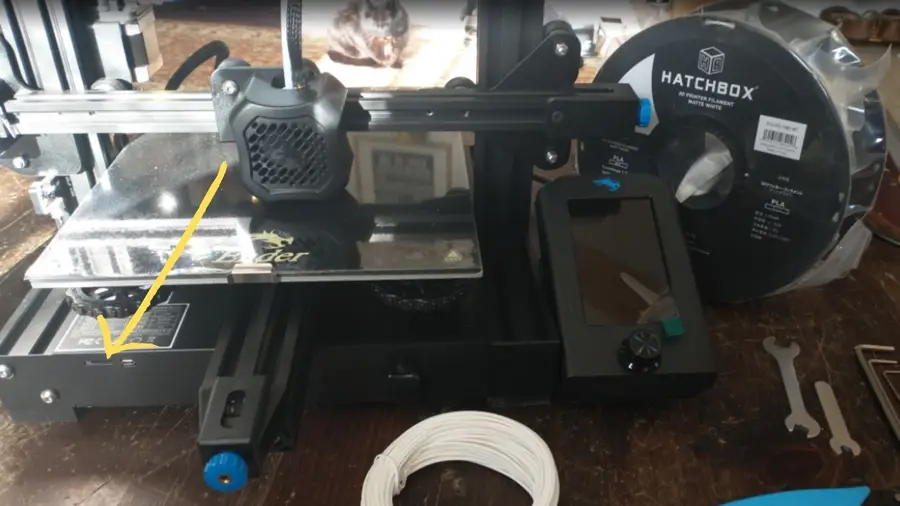
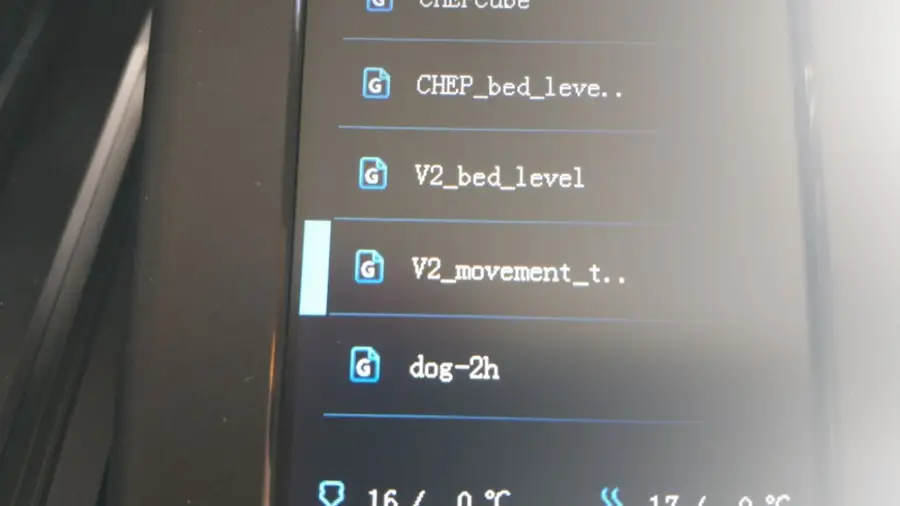

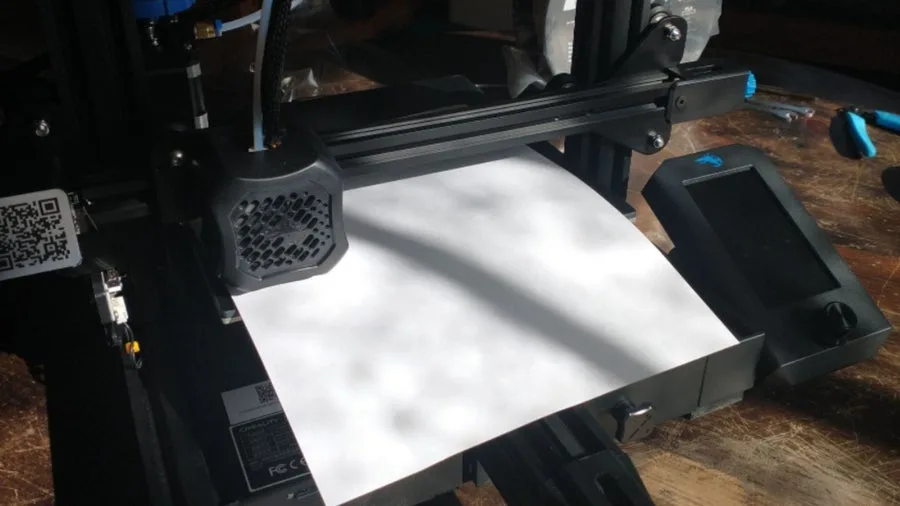


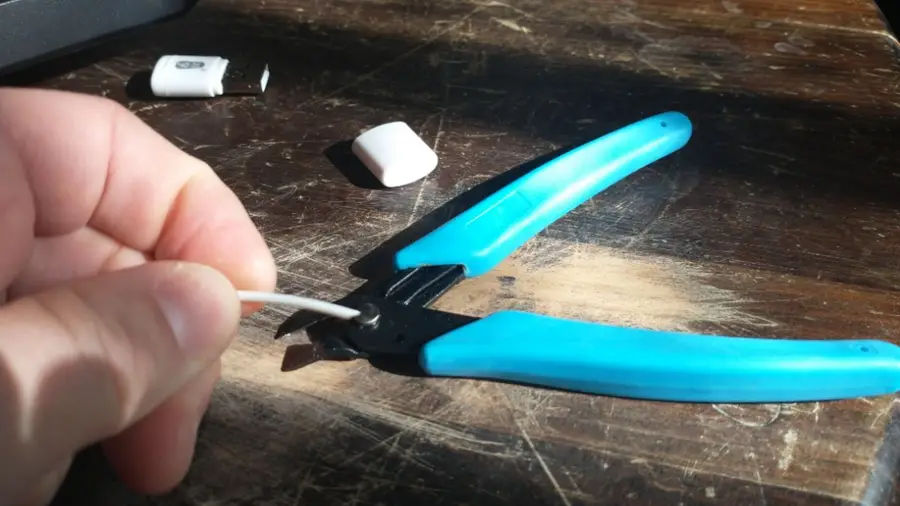

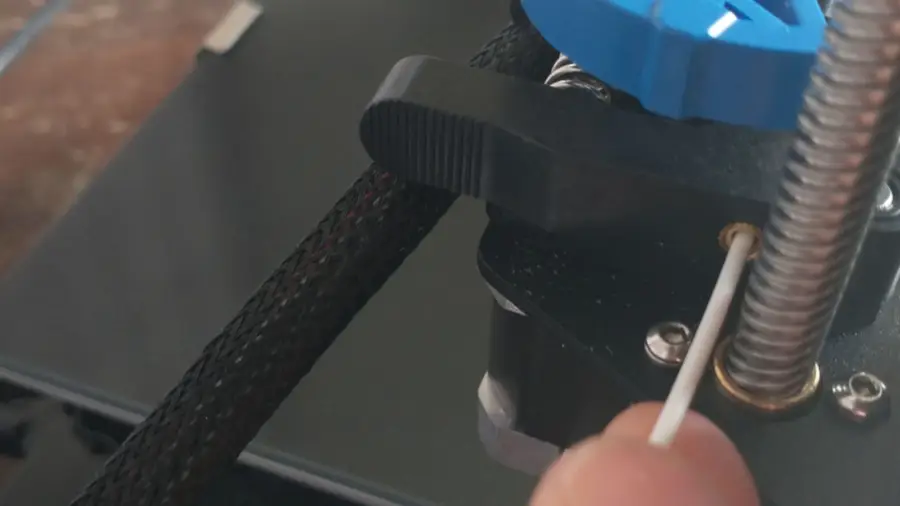

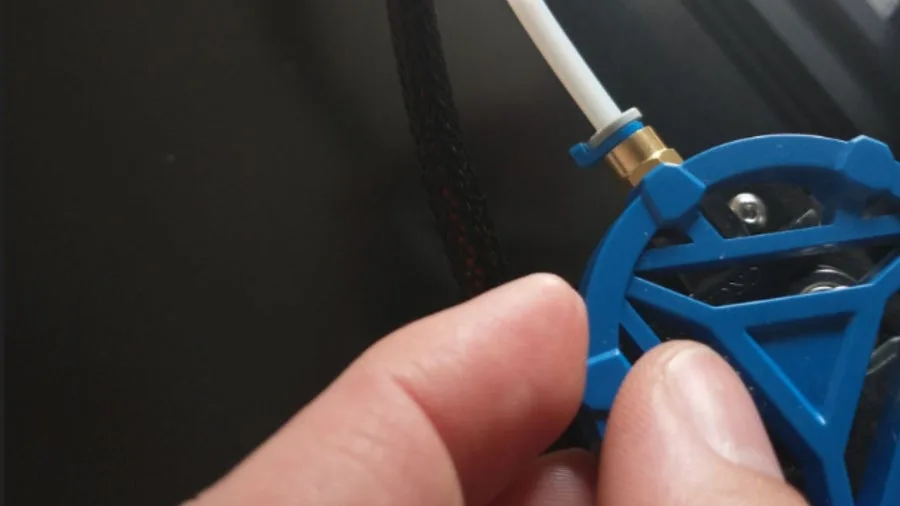
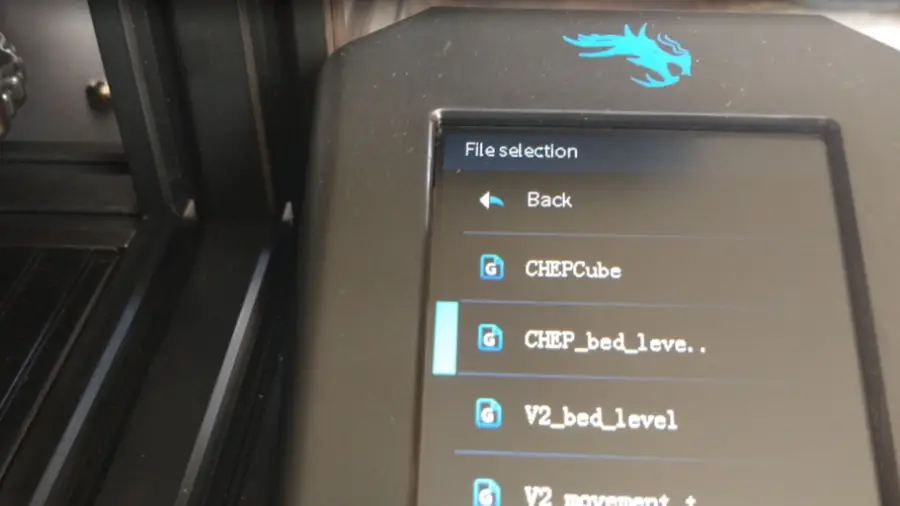


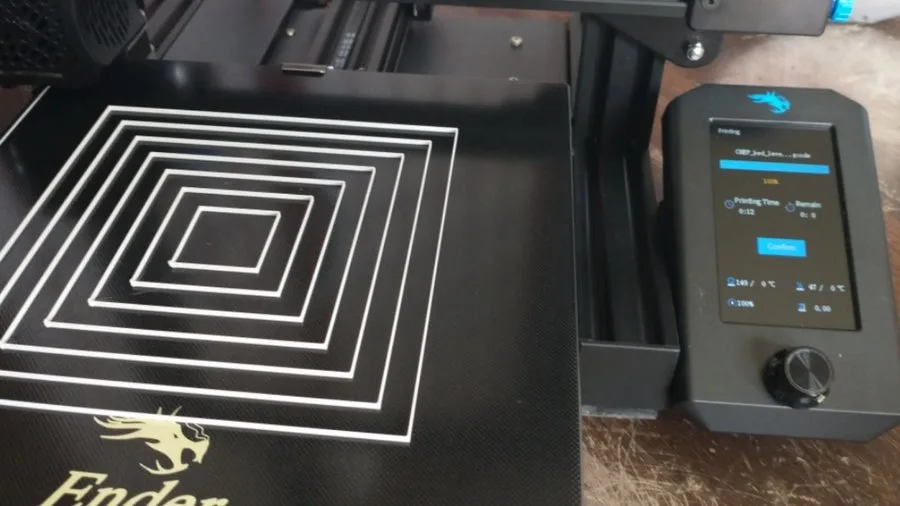


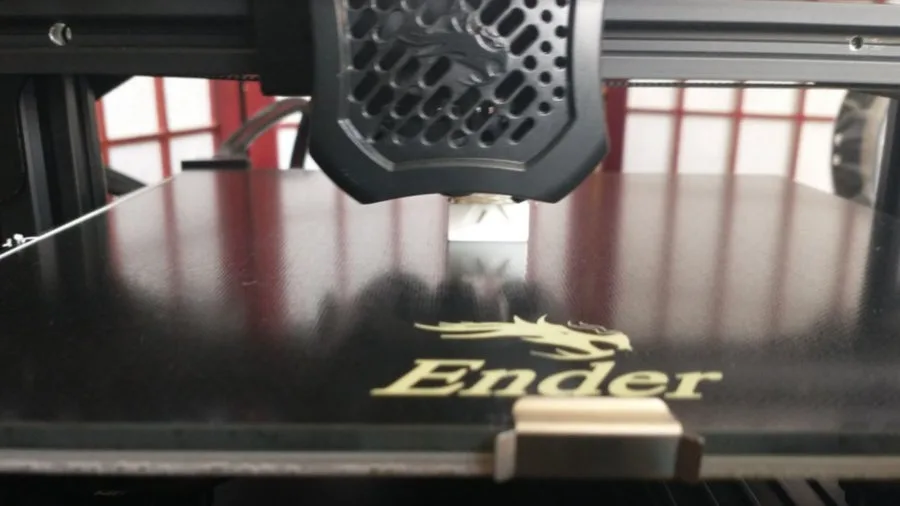
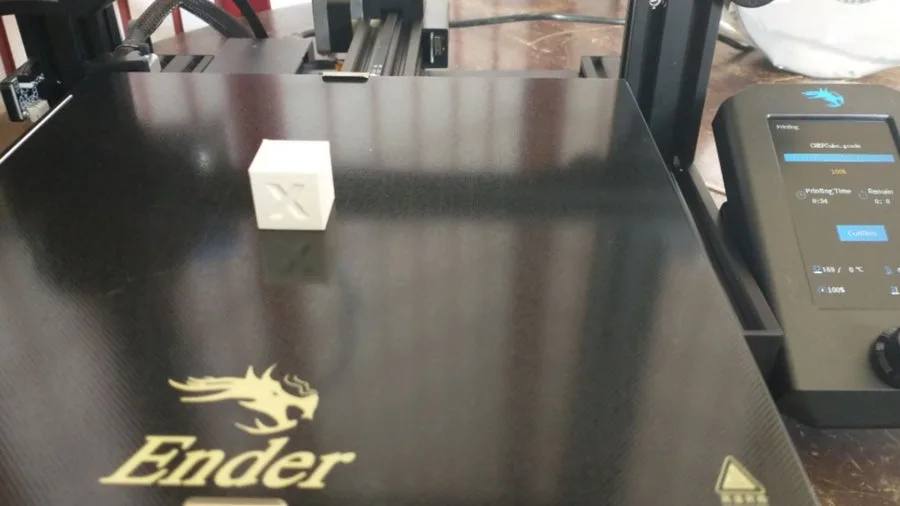


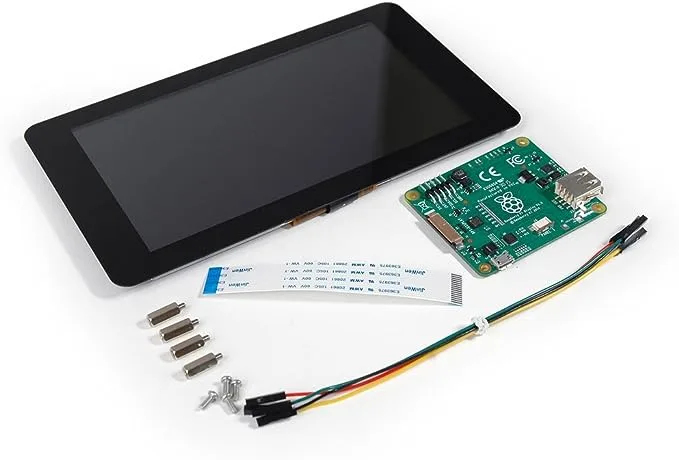


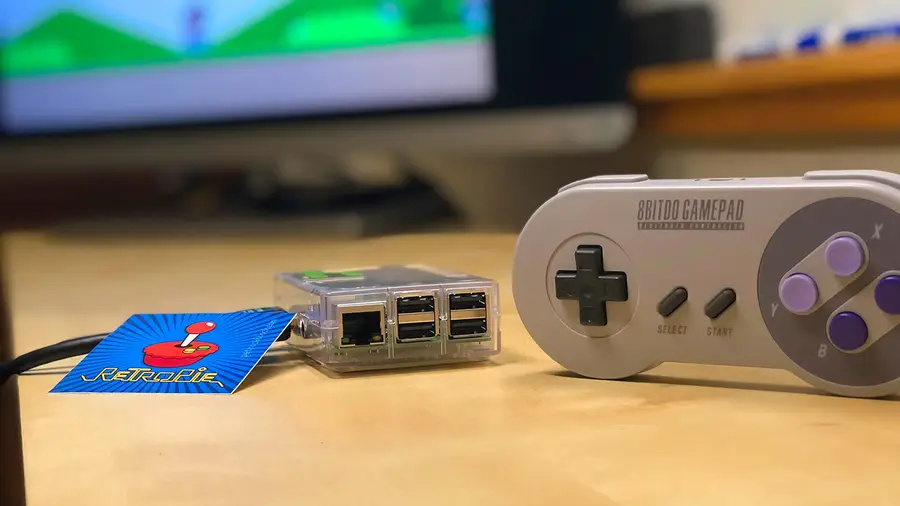

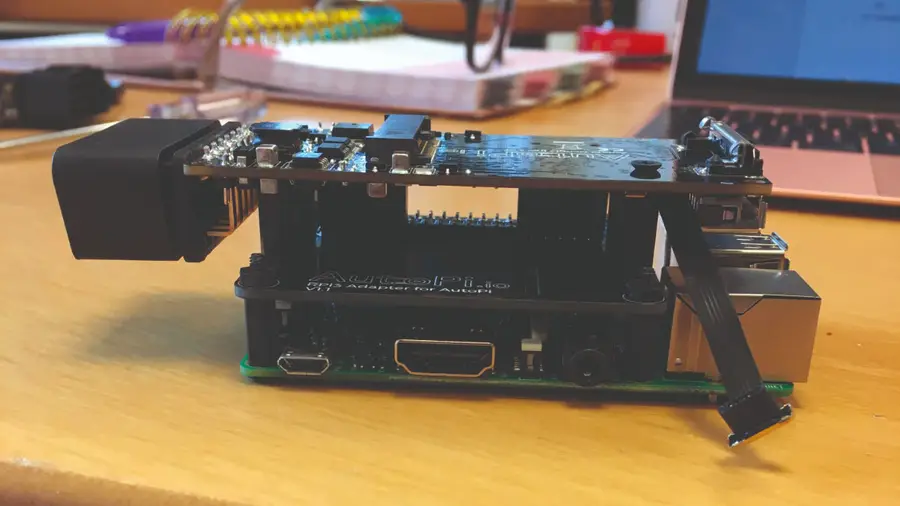


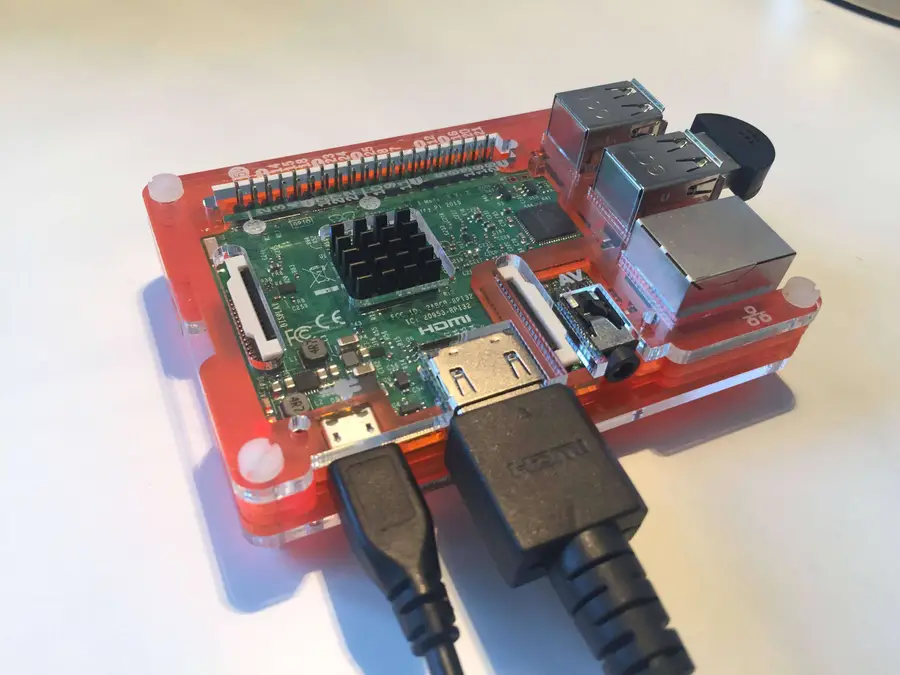


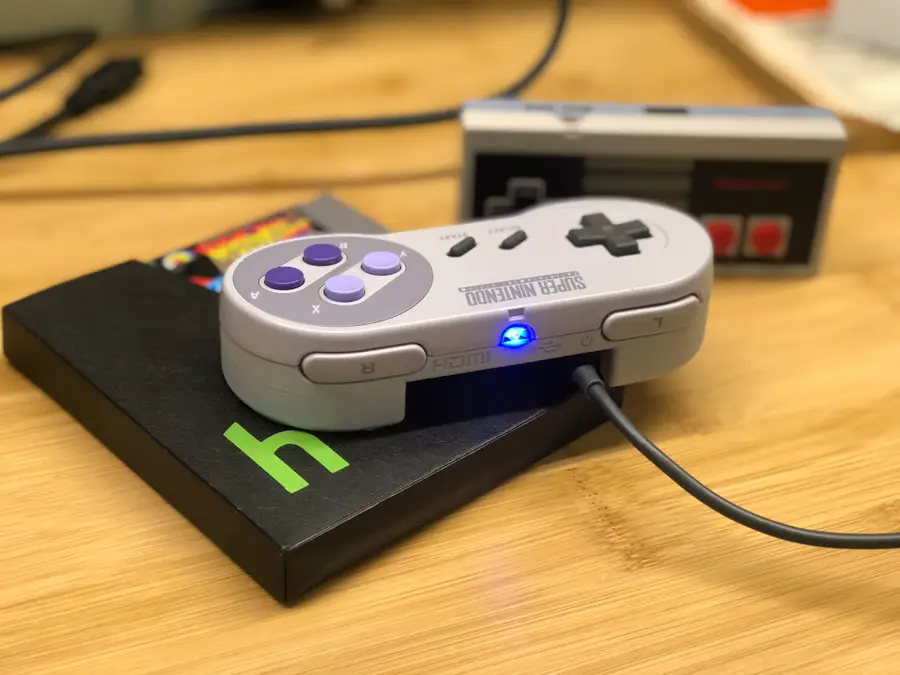
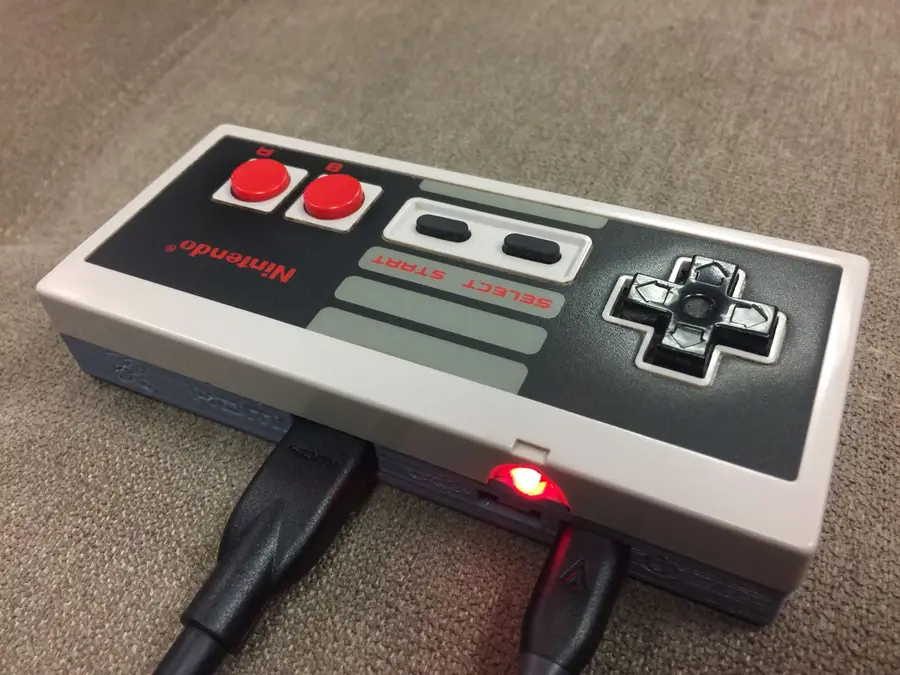
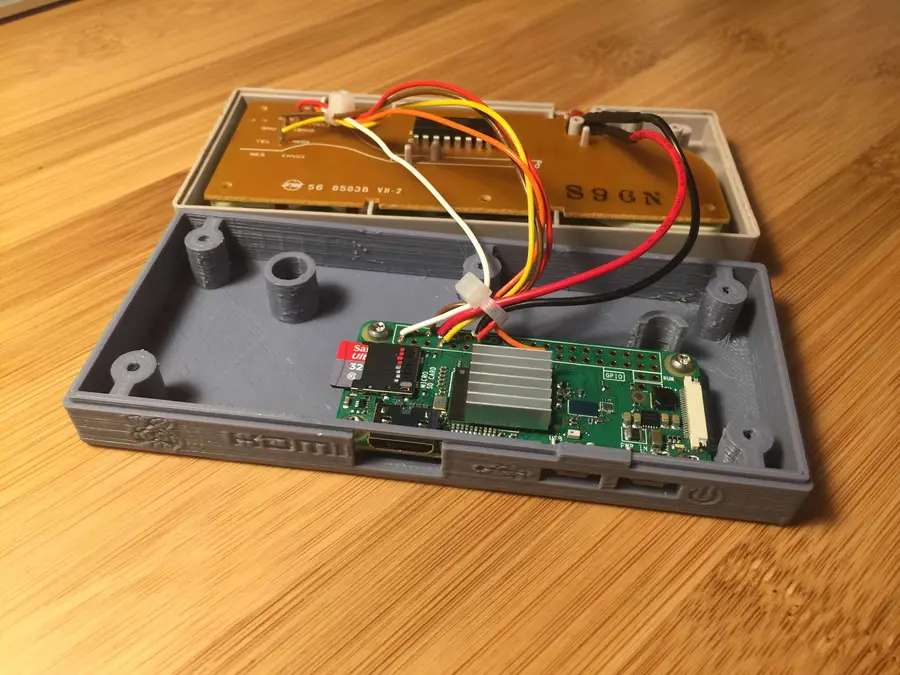
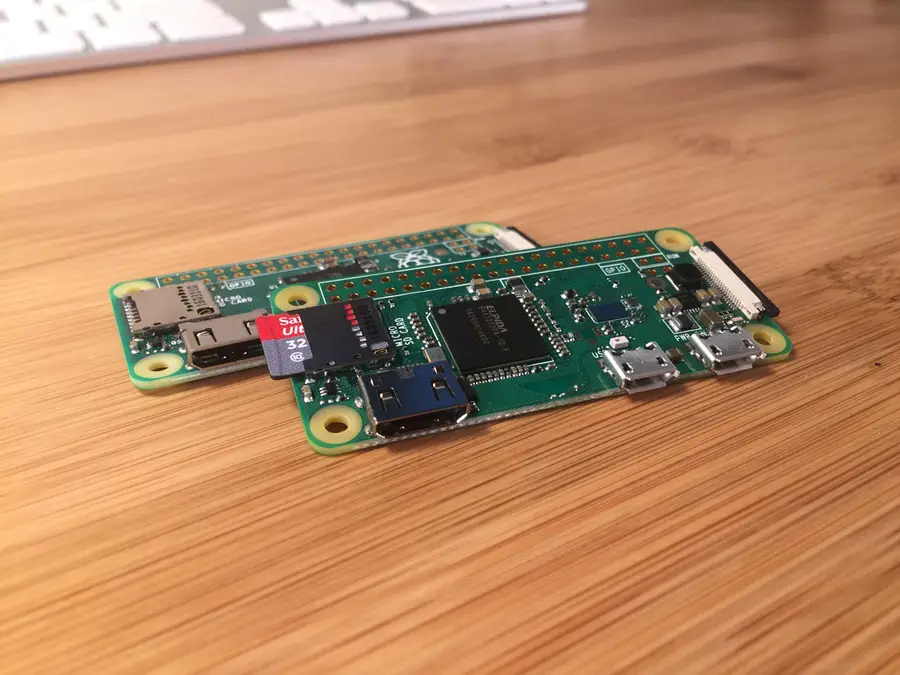
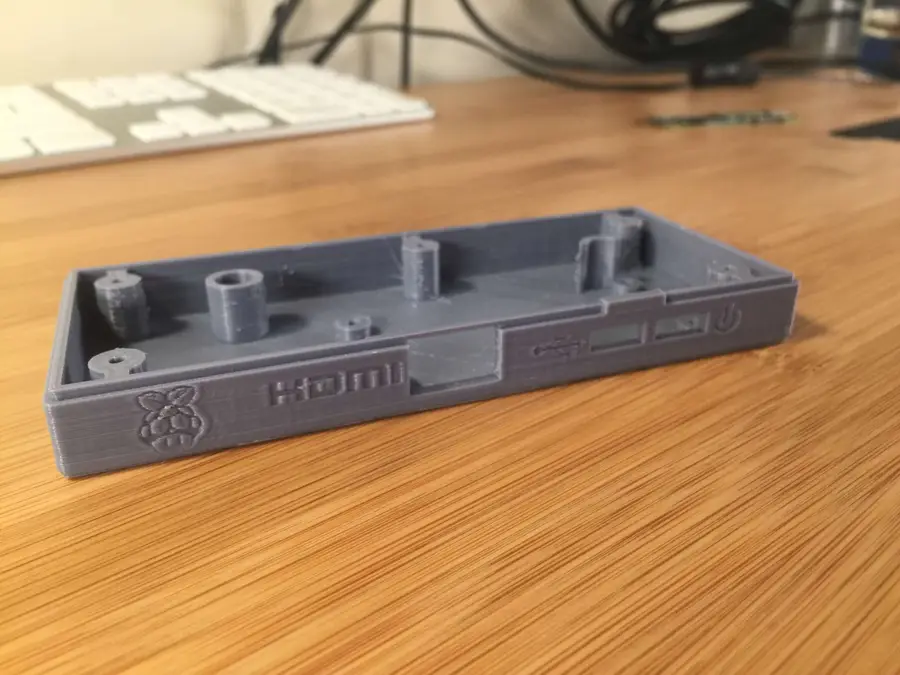
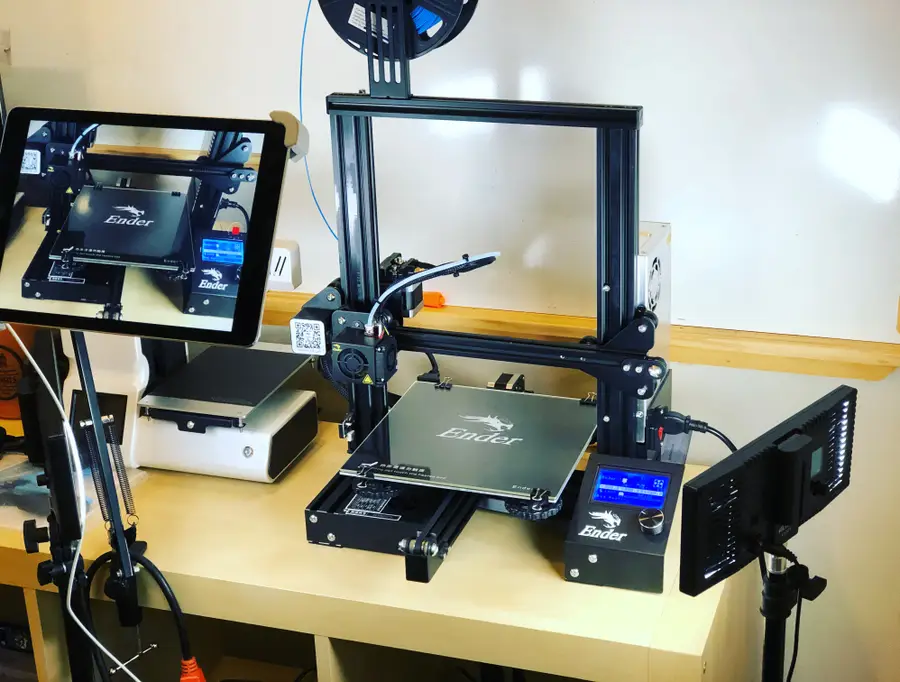
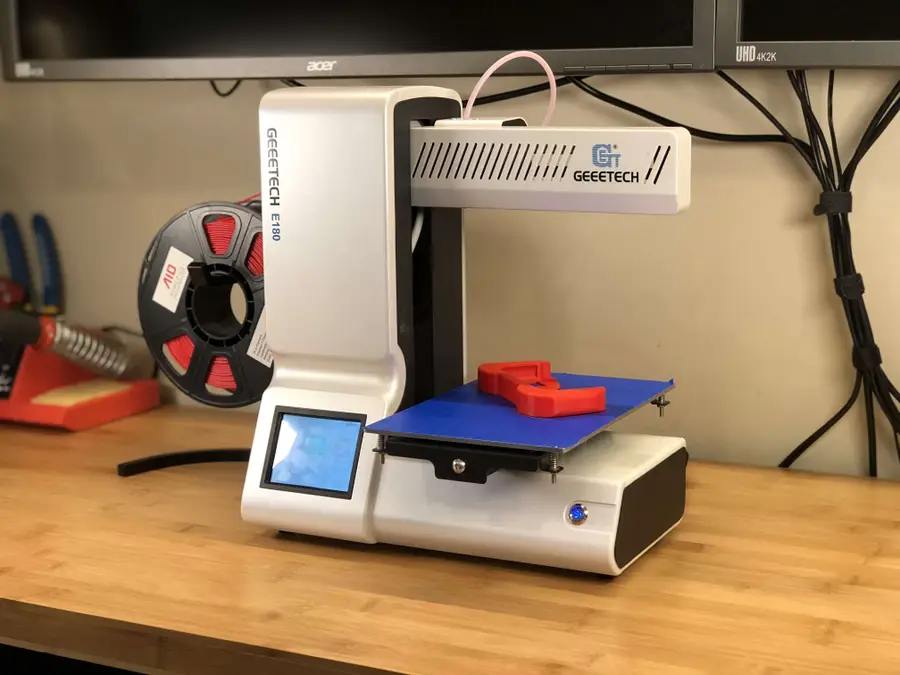


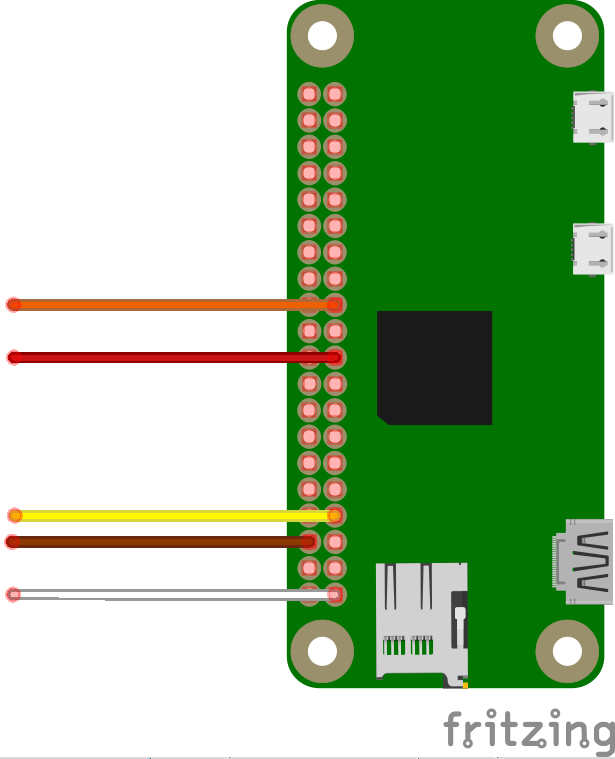
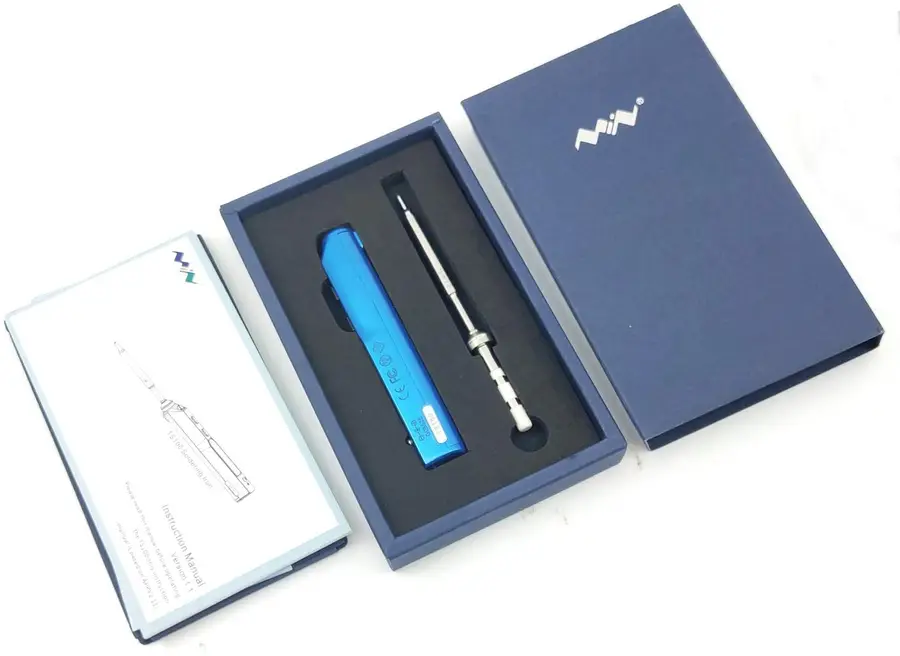
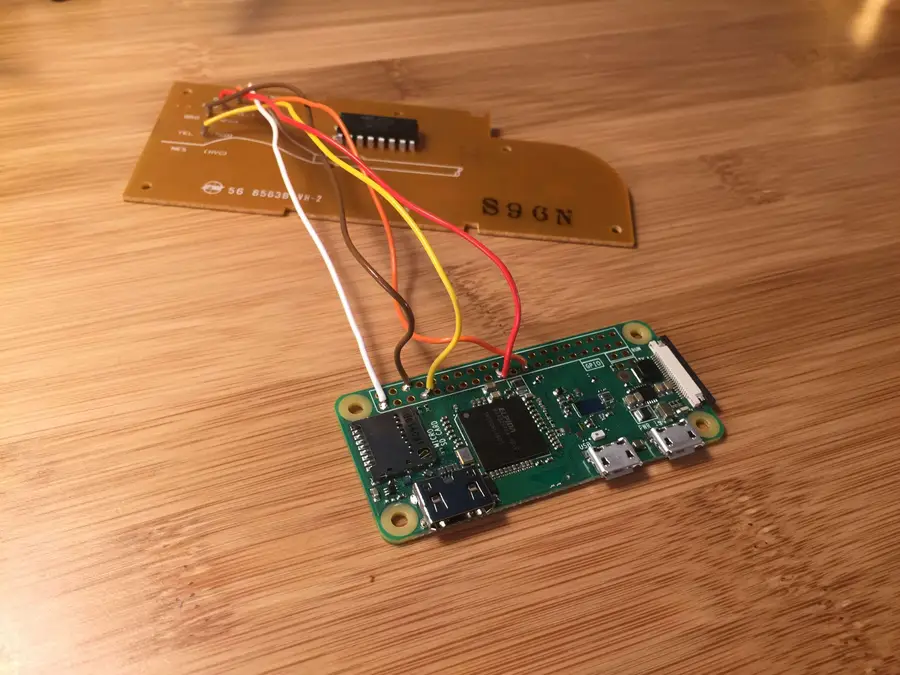
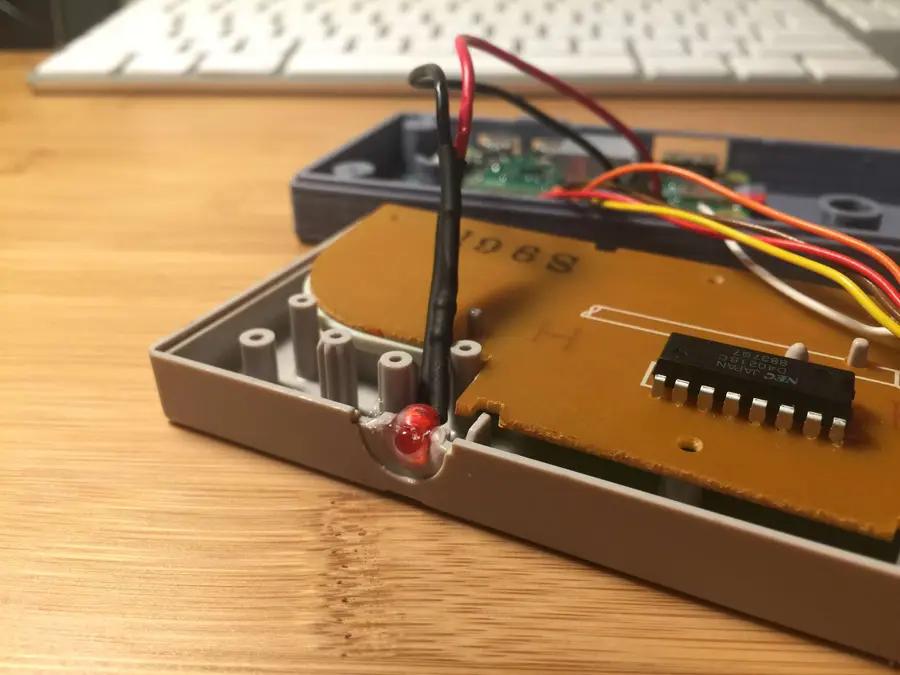
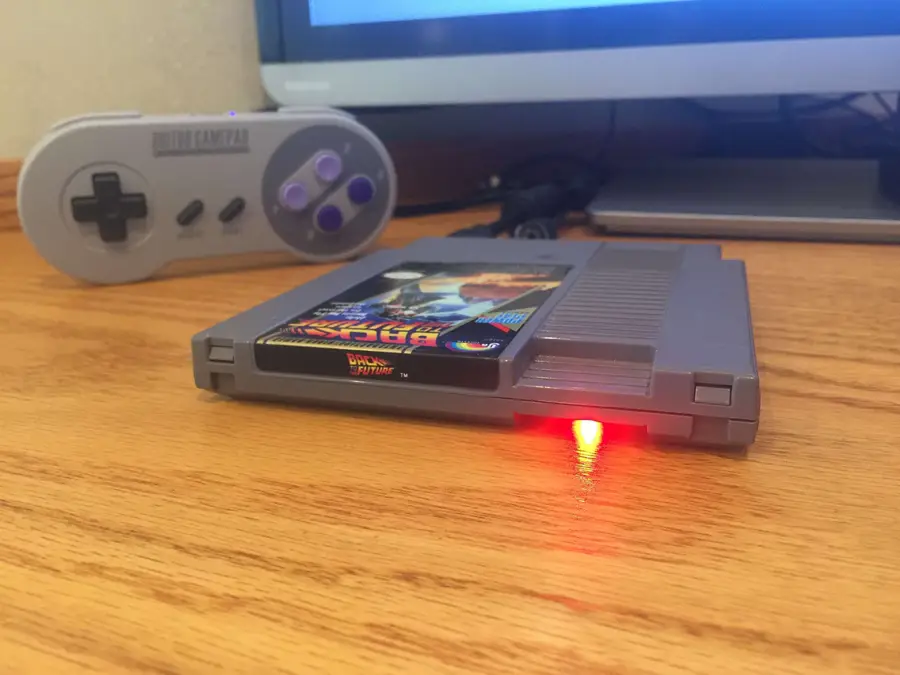
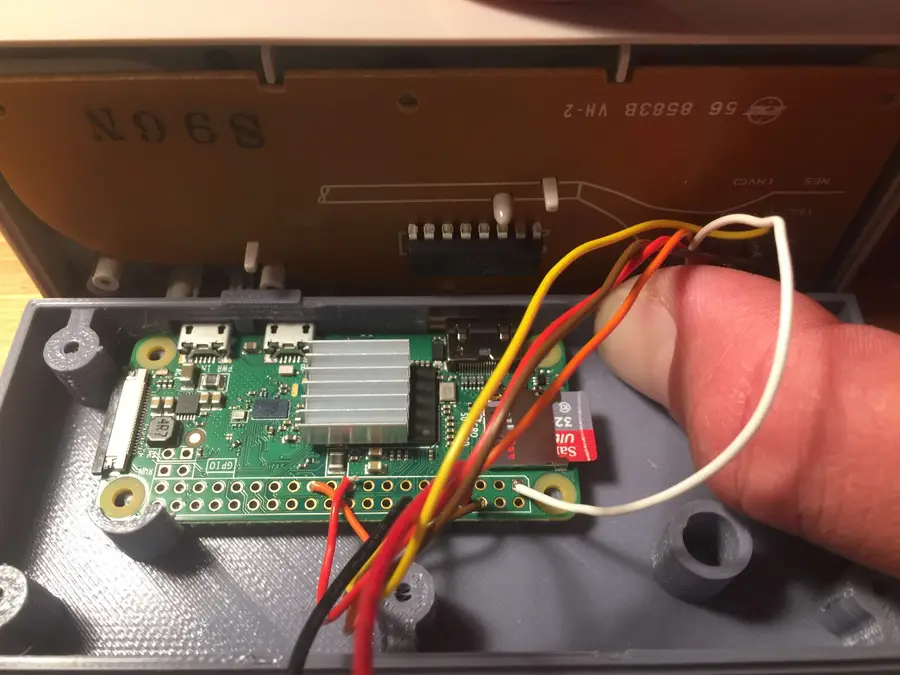

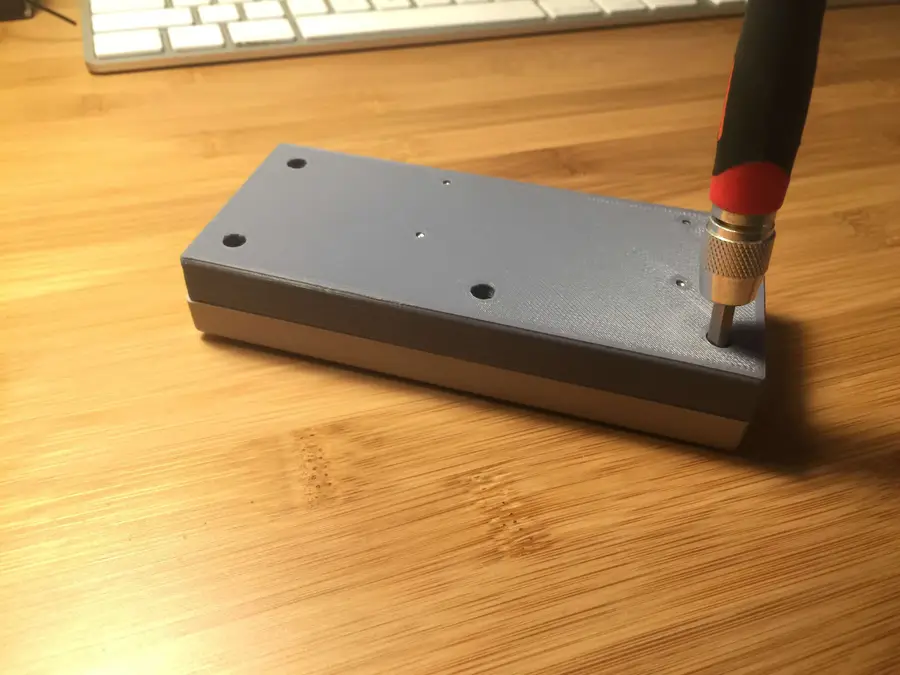
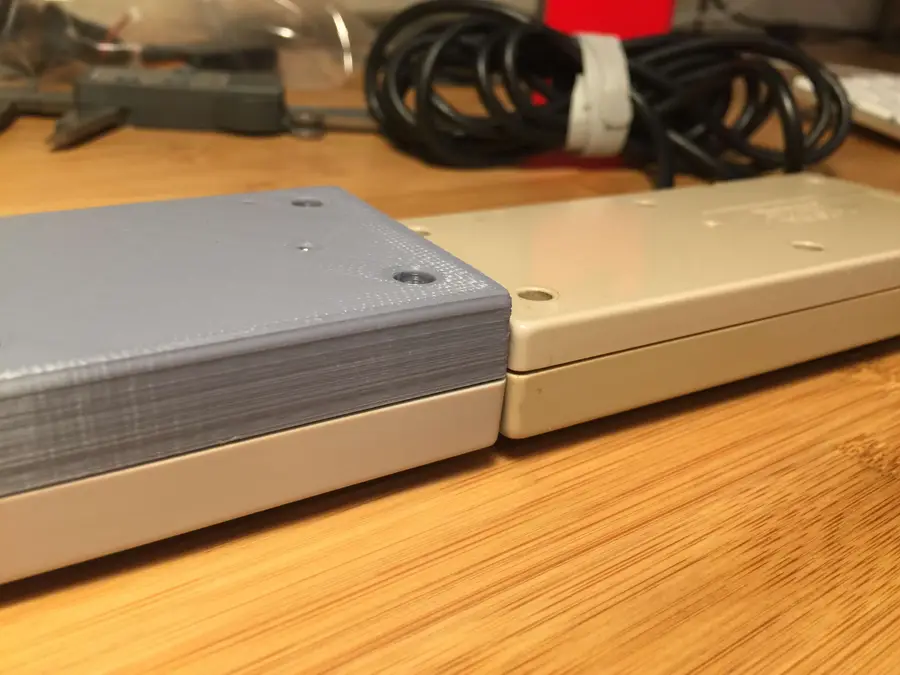
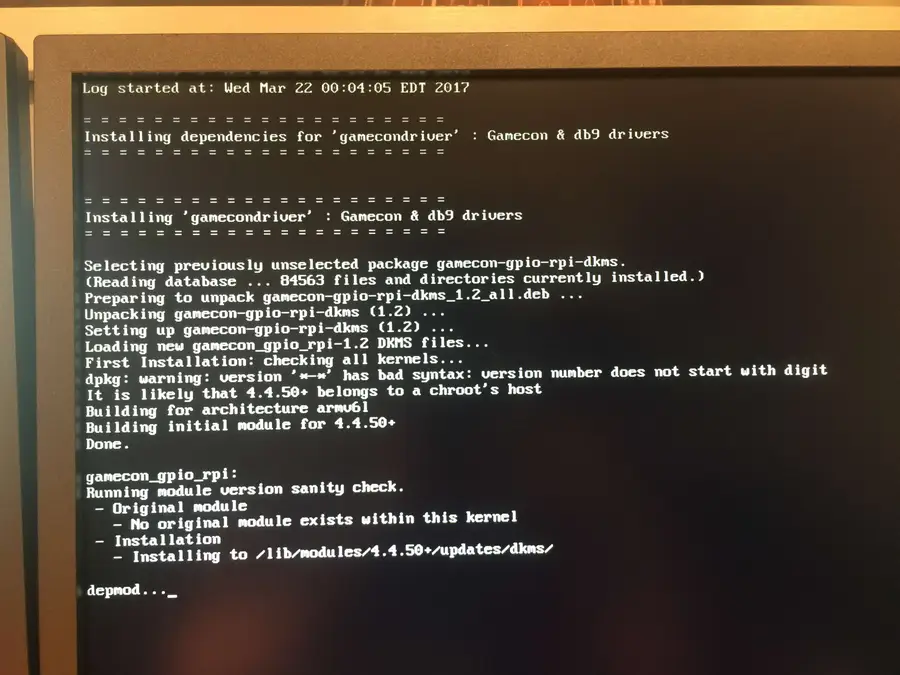
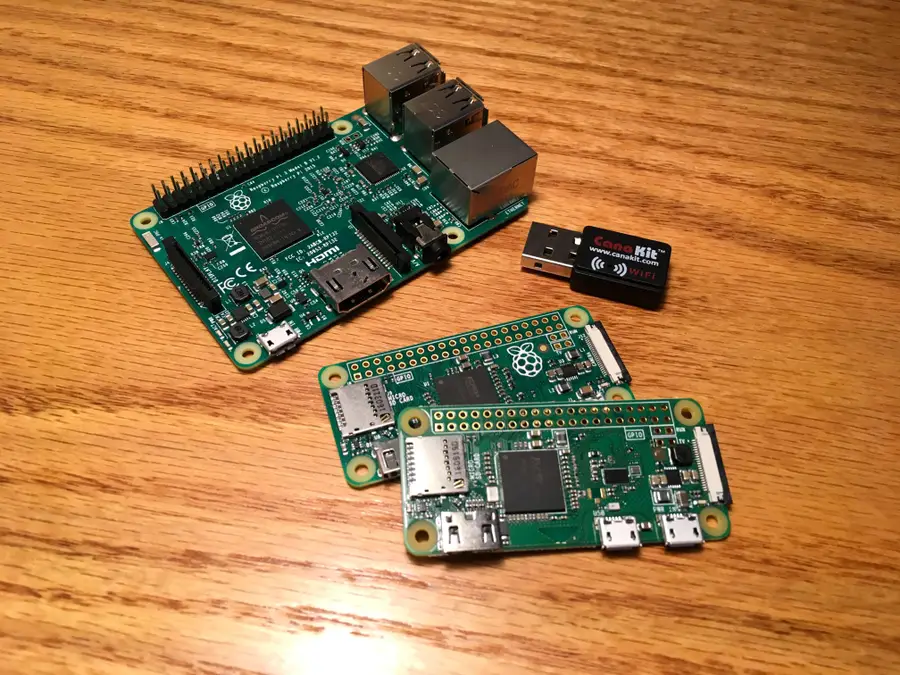
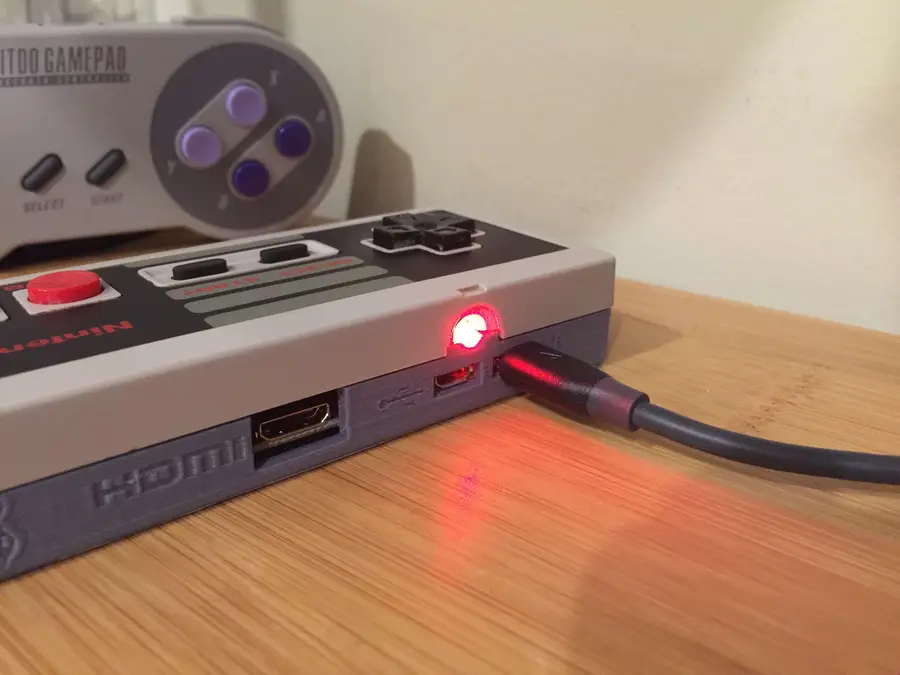
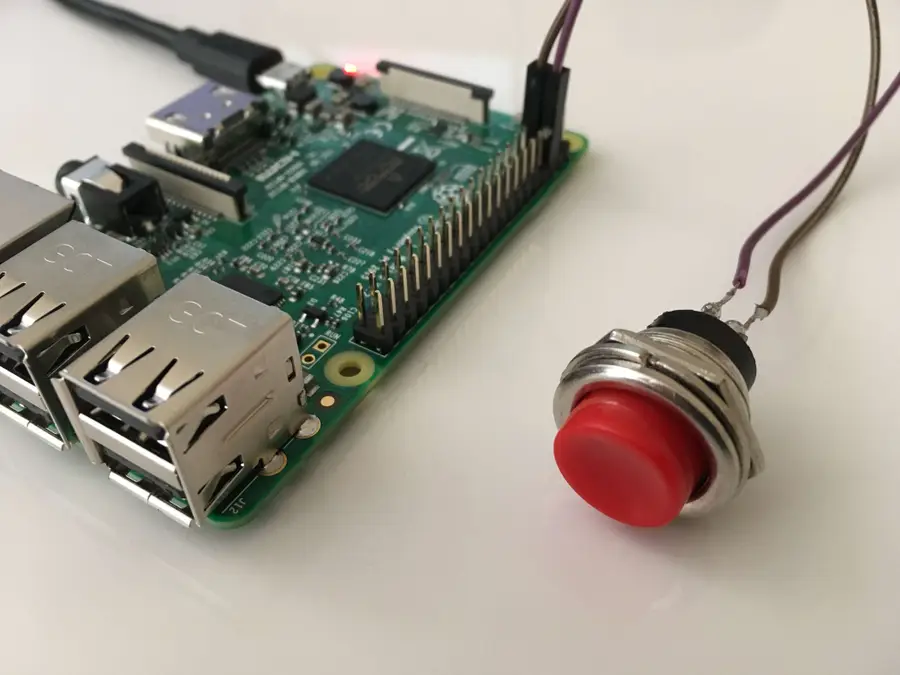
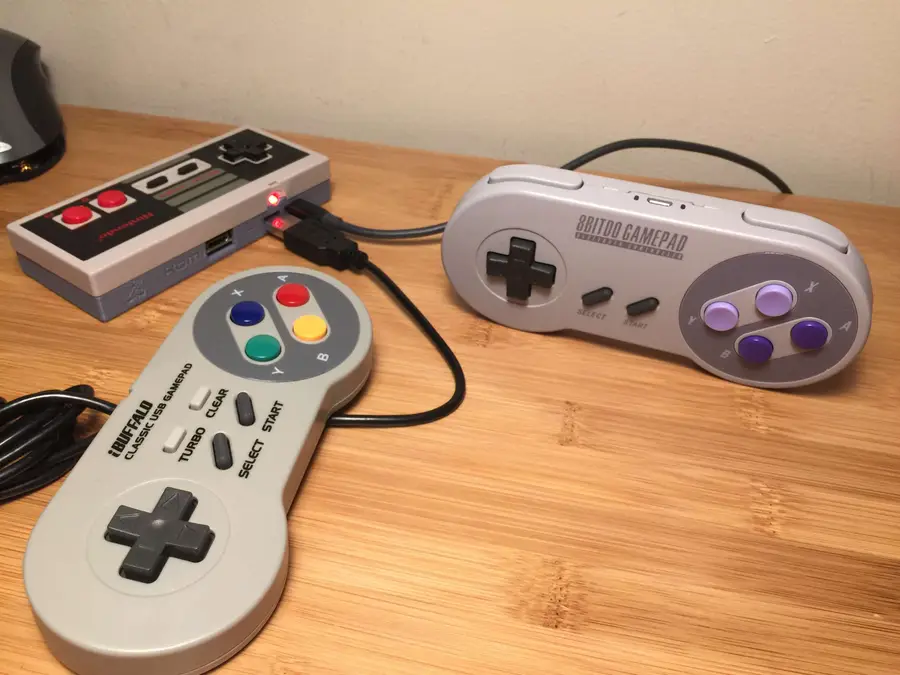

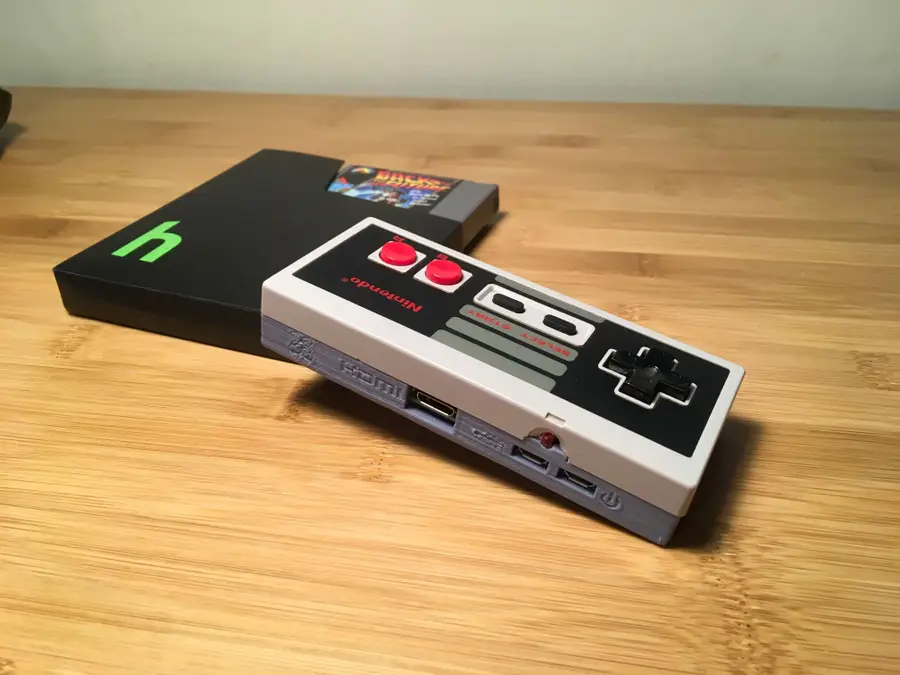
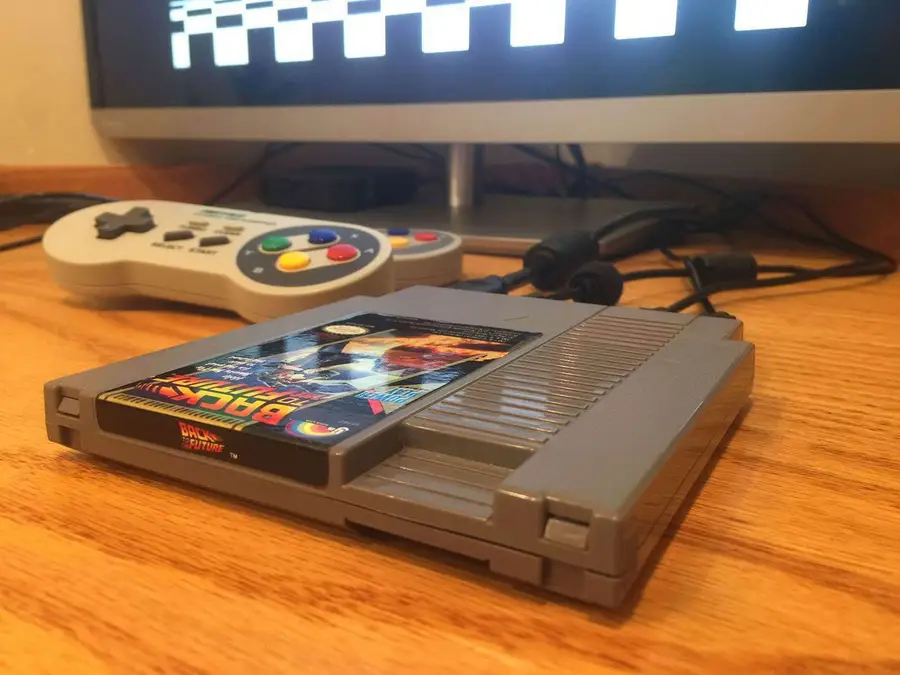


 Apple
Apple Apple
Apple Apple
Apple Apple
Apple Apple
Apple Apple
Apple Apple
Apple Apple
Apple