Share
Best Server Utility Mods for Minecraft (Forge)
Share
Interests
Posted in these interests:


The variety of mods available for Minecraft is just as vast as the worlds within the game itself. Most likely, any mod you could want or dream of has already been developed. As an avid Minecraft player, I’ve recently become obsessed with Forge Minecraft mods and run a survival multiplayer server (SMP)!
This guide will go through mods available for Forge Minecraft multiplayer servers that add tools for server management or improves performance. The following list includes not just one type of mod, but a large variety. So whether you’re hosting a server that’s PVP or casual, you’ll find something for any type of Minecraft player!
Note that at the game versions available may change since the time of publishing. Most photos were taken using BSL Shaders and Optifine in 1.16.5.
1 – Fast Leaf Decay
By olafskiii
Game Versions: 1.12, 1.14, 1.15, 1.16
One of the more annoying aspects of Minecraft are the floating leave blocks that sit in the air after you’ve chopped down a tree. The Fast Leaf Decay mod speeds up leaf decay, so you can get your loot and airspace back in under five seconds!
2 – Feed the Best Mods
I’ve bundled all the Feed the Beast (FTB) mods together because they’re great as a package and tend to rely on one another for full functionality. They’re what I currently use for a modded Minecraft server! My main complaint, however, is the lack of accurate documentation for some mods. Just something to keep in mind for consideration.
FTB Backups
Game Versions: 1.12, 1.14, 1.15, 1.16
Provides a configurable backup system for servers and creates them only when players are online to save space from clutter!
FTB Quests
Game Versions: 1.12, 1.15, 1.16
For those that want a server with quests, this is a great mod to have. It makes it easy to create custom quests for players.
FTB Chunks
Game Versions: 1.15, 1.16
This mod comes with its own world map and minimap. More importantly, it allows for players to claim chunks. Only those the player allies with will be able to interact or affect blocks in the claimed area. I highly recommend using in conjunction with FTB Teams for full functionality.
FTB Teams
Game Versions: 1.15, 1.16
This mod adds the ability for teams to be made. On its own, it’s not very impressive, but matched with FTB Chunks and FTB Quests, servers run smoothly.
FTB Ultimine
Game Versions: 1.12, 1.15, 1.16
This is a great VeinMeiner alternative for newer game versions. With a configurable key, players can harvest multiple blocks at once. You can also configure a whitelist of blocks for the server!
FTB Essentials
Game Version: 1.16
This mod adds utility commands that are essential to running and maintaining a server. It allows players to teleport to one another, change nicknames, set homes, and more!
FTB Ranks
Game Versions: 1.15, 1.16
This is essential if you want to enable permissions on a server. Completely configurable, you can set ranks for new players, moderators, and any other type that give specific access to mod commands.
3 – Xaero’s Minimap and World Map
By xaero96
Game Versions: 1.12, 1.14, 1.15, 1.16, 1.17
These are two mods I’ve grouped together for obvious reasons. This is an easy to use, completely customizable minimap that also benefits from the larger World Map mod, but doesn’t require it. It has an infinite amount of waypoints and integrates with the Waystones mod. It also displays dots for various items or entities on the map. I highly recommend these mods and use them frequently in my own playthrough.
4 – AI Improvements
Game Versions: 1.12, 1.14, 1.15, 1.16
This mod helps the base game deal with heavily modded worlds and take away the stress of a modded ecosystem. AI Improvements can be customized so it only affects certain AI functions, but overall does help improve server performance for older versions of the game.
5 – NetherPortalFix

By BlayTheNinth
Game Versions: 1.12, 1.14, 1.15, 1.16
A common problem that can occur on multiplayer servers is that Nether portals will sometimes cross paths. This means that players can go through their own portal to the Nether, but end up at a neighbor’s on their way back home. This mod keeps track of which portals a player went through to make sure they go back through it properly.
6 – Morpheus
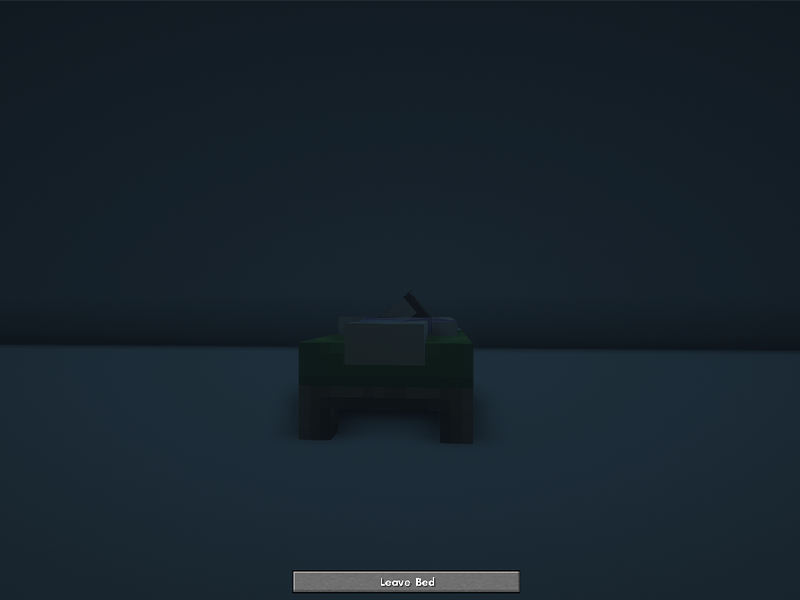
By Quetzi
Game Versions: 1.12, 1.14, 1.15, 1.16
This is a server-side mod that enables for nighttime to be passed based on a pre-configured percentage. By default, it’s set to 50% of players need to be in bed in order to skip the night. You can also customize the messages that are shown in the morning.
7 – Clumps
By Jaredlll08
Game Versions: 1.16, 1.17
When running a server, you need to find ways to reduce lag everywhere. Experience orbs are one of the most forgotten aspects, which is why Clumps is a perfect mod for servers. It groups together XP orbs into one entity and makes the player collect them once they’re touched to help reduce lag.
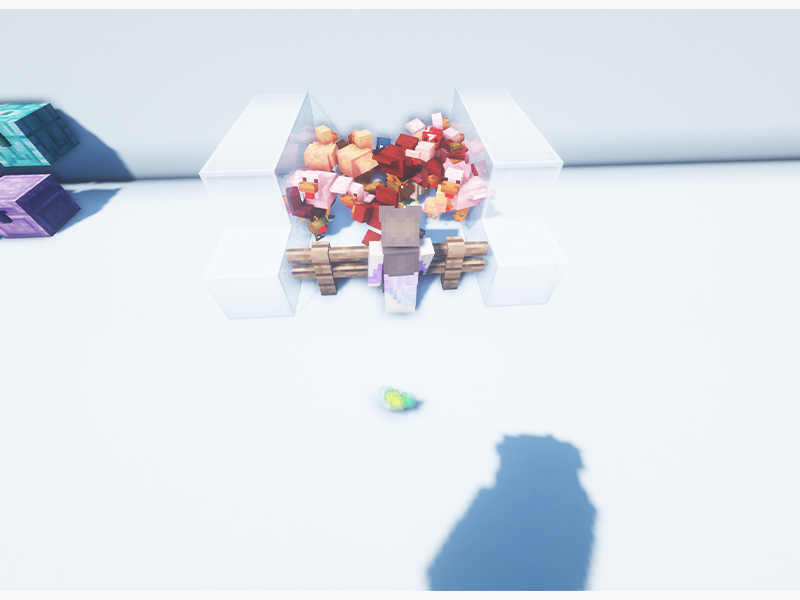
8 – In Control!
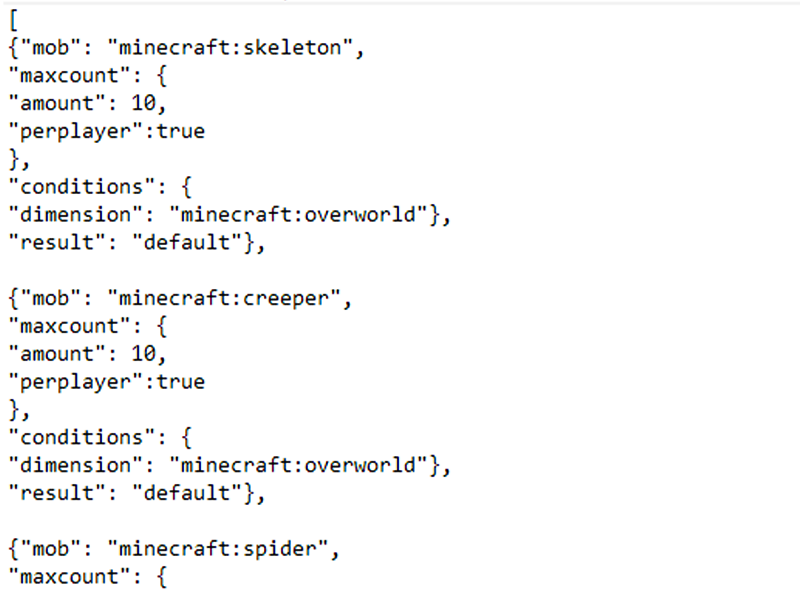
By McJty
Game Versions: 1.12, 1.15, 1.16
When I first started running a modded server, the biggest problem was the amount of mobs spawning around players. Even on normal mode, it was out of control. The In Control! mod makes customizing the world easy. Using the included wiki and configuration files, server owners or single players can set conditions for mob spawns and even the experience or loot dropped by mobs.
9 – Corail Tombstone

By Corail_31
Game Versions: 1.12, 1.14, 1.15, 1.16
Most servers have a lot of in-game deaths and a lack of a solution for holding items at a player’s death point. Corail Tombstone has more than just graves that hold player items and experience orbs. It also comes with a perk and magic system called Knowledge of Death. You can also customize your grave or craft graves of your own to place around your area.
10 – WorldEdit

By sk89q
Game Versions: 1.12, 1.14, 1.15, 1.16, 1.17
If there’s ever a mod that server admins need to learn, it’s WorldEdit. My entire gameplay and building has changed since learning to just the basics of WorldEdit. This is the best Minecraft map editor mod out there. Change the landscape, copy or paste blocks, import schematics, and so much more. It’s the best mod to use when wanting to build a world spawn area in a server.
11 – PackMenu
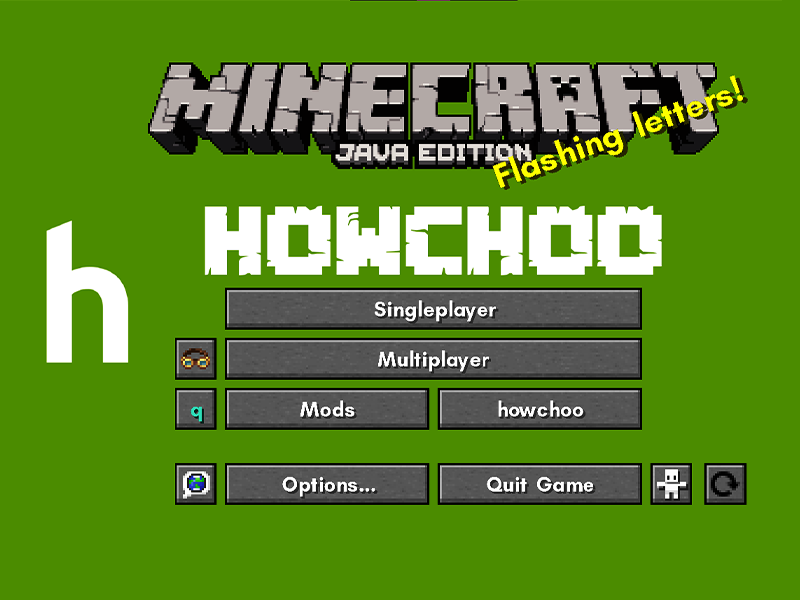
Game Versions: 1.14, 1.15, 1.16
This mod is mostly for client-side, but I really wanted to include it in the list, as it enables players to change the main menu to however they see fit. For server admins, you can customize the main menu to match your server’s branding and import it into your modpack as a resource pack, so all players have the same menu!
12 – FPS Reducer

By bre2el
Game Versions: 1.12, 1.14, 1.15, 1.16
This mod helps your computer while you run Minecraft! It reduces FPS if there’s no user activity for a certain amount of time or if the game window is inactive or minimized. It also suppresses sound volume if you move to another active window and displays the current FPS on the screen for you to monitor.
13 – Blur
By tterrag1098
Game Versions: 1.12, 1.14, 1.15, 1.16
This is a UI improvement mod that I personally love. Sometimes you just need to focus in on your inventory or want a less distracting look to your recorded Minecraft content. The Blur mod adds a Gaussian blur to the background of all GUIs, plus it’s configurable to your personal preference!
14 – Simple Voice Chat
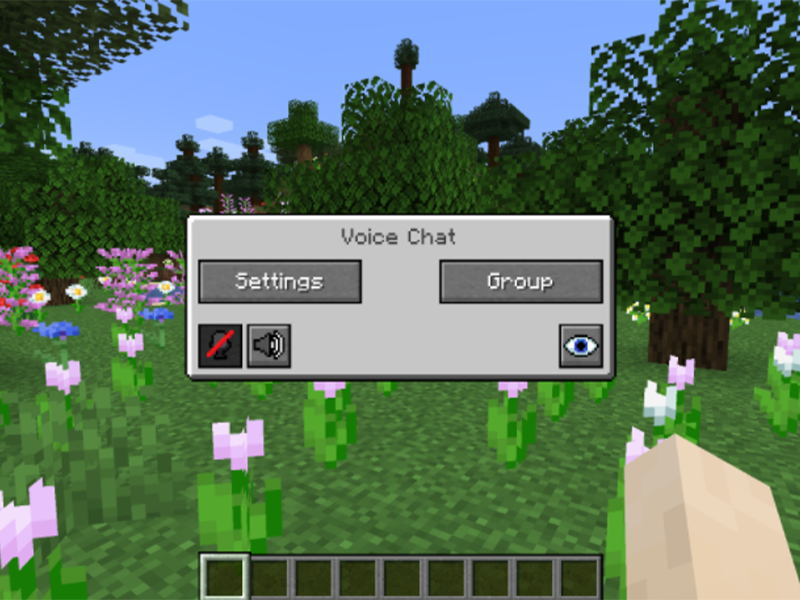
By henkelmax
Game Versions: 1.15, 1.16, 1.17
This is a must-have for servers that want to foster community as well as exploration. This adds proximity chat to the server, which can be set for push to talk or voice activation. It’s completely configurable for volume control, and you can even test your microphone with a playback feature to make sure the quality is good.
15 – Origins
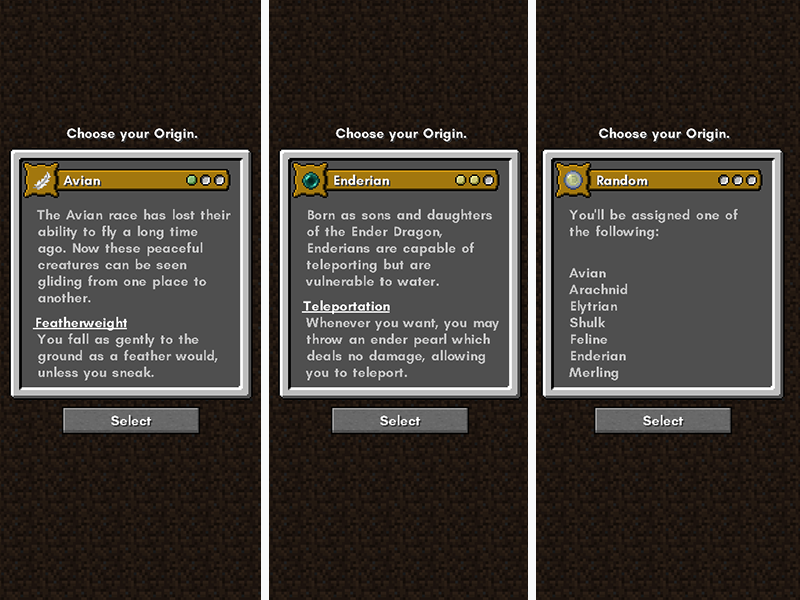
Game Version: 1.16
Origins enables players to choose a present origin type that have unique abilities and weaknesses that add challenge to a Minecraft playthrough. While the Forge version doesn’t have as many add-ons as the Fabric one, it’s still worth giving a try if you’re new to running an Origins SMP server.
16 – Lootr
By Noobanidus
Game Version: 1.16
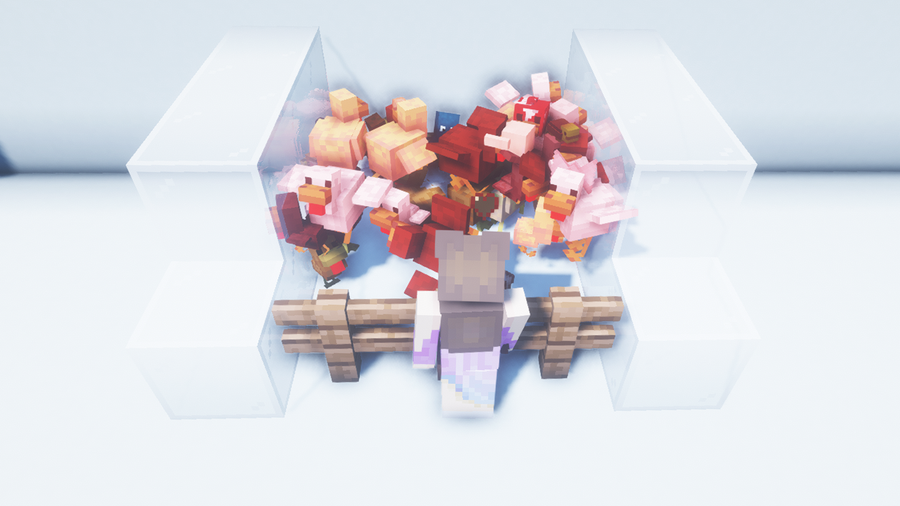
Lootr is another essential server mod. One of the more common problems in a Minecraft server is when players find a chest only to discover it’s already been looted. This mod turns each chest into a loot chest with unique inventories for every player! No more excursions that lag the server with chunk generation or disappointment when searching for resources!
17 – Chat Heads

By dzwdz
Game Version: 1.16
This is a mod for clients that makes chat just a little more developed. It adds the player head beside their messages, which makes it much easier to tell people apart in a larger sized server.
18 – Just Player Heads

By Serilum
Game Versions: 1.12, 1.14, 1.15, 1.16
This could be a bit macabre, but this mod allows for players’ heads to drop upon death or a specified command. It’s a light mod to make things a little more interesting on a server!
19 – Just Mob Heads

By Serilum
Game Versions: 1.12, 1.14, 1.15, 1.16
Just like the one above, this mod adds a configurable chance for mobs to drop their heads upon death. This is great for survival servers where players can feel accomplished by their actions.
20 – Waystones

By BlayTheNinth
Game Versions: 1.12, 1.15, 1.16
This mod is essential for multiplayer servers where players spread out and claim areas for themselves. Waystones adds blocks for the player to return to once they’re activated. There’s also Warp Scrolls and Warp Stones, which players can have on hand to use to hop to a waystone they’ve already found. It’s very customizable for server administrators to set the cost and permissions.
Top 10 Enchantments in Minecraft


The longer you play Minecraft, the more you realize that early-game tools just won’t cut it. Exploring the enchantment feature of Minecraft can be exciting, but also intimidating. Rather than worry about researching enchantments, below are the best enchantments in Minecraft! To learn how to enchant items, check out this guide! In this guide, you’ll see
In these interests
Gaming gaming • 85 guides
Minecraft minecraft • 66 guides
Minecraft Forge minecraftforge • 5 guides
Introducing Howchoo, an enigmatic author whose unique pen name reflects their boundless curiosity and limitless creativity. Mysterious and multifaceted, Howchoo has emerged as a captivating storyteller, leaving readers mesmerized by the uncharted realms they craft with their words. With an insatiable appetite for knowledge and a love for exploration, Howchoo’s writing transcends conventional genres, blurring the lines between fantasy, science fiction, and the surreal. Their narratives are a kaleidoscope of ideas, weaving together intricate plots, unforgettable characters, and thought-provoking themes that challenge the boundaries of imagination.
Related to this guide:
Top 10 Enchantments in Minecraft
The longer you play Minecraft, the more you realize that early-game tools just won’t cut it. Explo

How To Breed Horses in Minecraft
Traveling long distances in Minecraft can be tiresome (both in real life and the game). Thankfully

How To Install a Snapshot Version of Minecraft
Did you know that Minecraft actually lets you play pre-release versions of the game? That�

How To Find Screenshots in Minecraft
Sometimes you want to share your Minecraft builds or moments with others, while other times you want

How To Craft a Recovery Compass in Minecraft
With the Wild Update, game version 1.19, new items and blocks were added to Minecraft and the reco

How To Make Concrete in Minecraft Java Edition
One of the most versatile blocks in Minecraft to build with is concrete. However, if your entire bui

How To Enchant Items in Minecraft
You’ve done so much to acquire a full set of diamond (or even netherite) armor and tools. You’re

How To Make Bricks in Minecraft
Bricks are a staple block in Minecraft for building. Whether it’s the main feature or an accent bl

How to Install a Resource Pack in Minecraft
While shaders make Minecraft look pleasing, resource packs are an additional way to change a theme o

How To Breed Frogs in Minecraft
While you can’t tame frogs, you can breed them, lead them, and put tadpoles into buckets. Frogs cr