Xbox Game Pass lets you access over 100 popular titles on both the Xbox One console and PC. It works just like a movie streaming platform, but with video games. Members pay a monthly subscription fee in exchange for access to the game library.
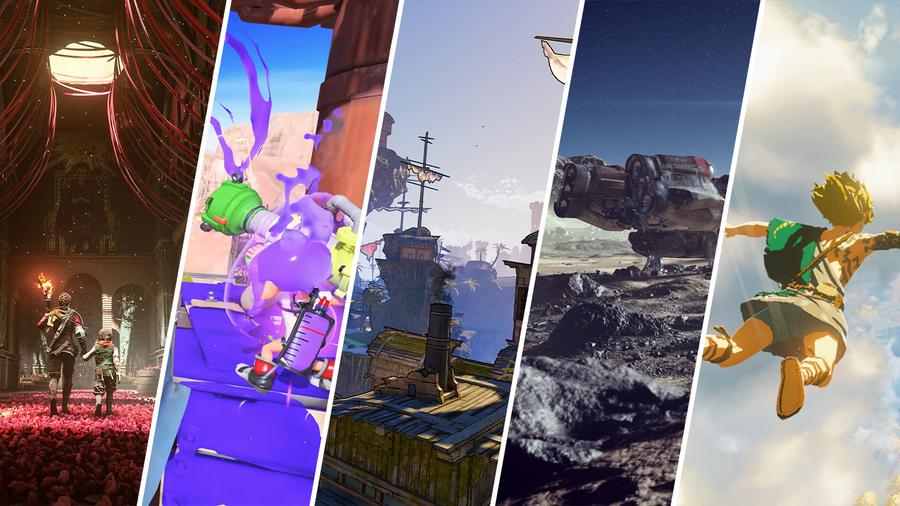
Most Anticipated Video Games of 2022
Get your wishlist ready for these games!
If you’re looking for totally unlimited access to Xbox Game Pass—I’m afraid you’re out of luck. The only way to get a free subscription is to take advantage of trials. There are also special bundles that offer Game Pass access at a discounted rate. These deals can save you some serious money, so be sure to check them all out.
[Updated for 2022]
1 – 1$ Xbox Game Pass 14-day trial
The easiest way to get nearly free access to Xbox Game Pass is to sign up as a new customer. The first two weeks of Xbox Game Pass are only $1. You can always cancel before the trial is over to avoid incurring any further charges.
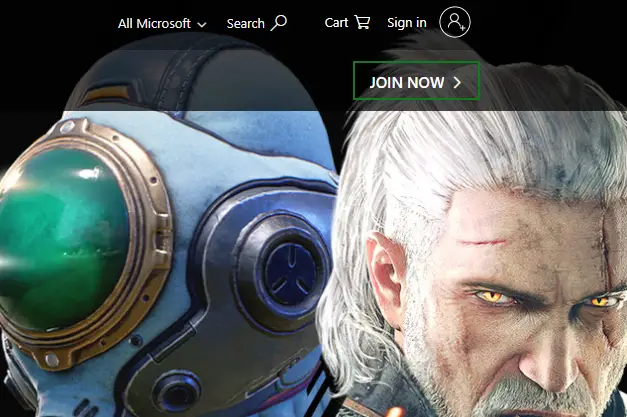
How to get a $1, 14-day trial
1. Visit the Xbox Game Pass website.
2. Click Join Now.
3. Follow the prompts to select a plan and create an account.
You will be prompted for payment information. You’ll only be charged the initial dollar, however, if you cancel the trial in time.
How to Cancel Xbox Game Pass
Ending your membership with Microsoft.
2 – Get Free Xbox Game Pass with Microsoft Rewards
Microsoft Rewards is a free program users can sign up for to complete tasks in exchange for points. These points can be exchanged for a variety of reward options, one of which includes an Xbox Game Pass.
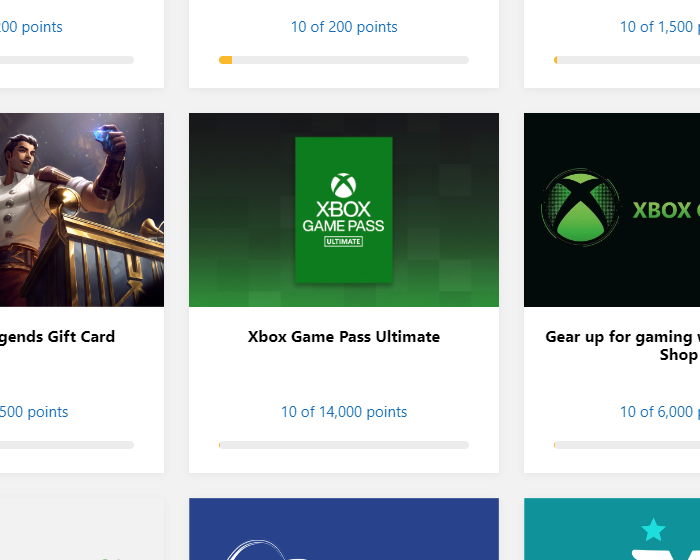
How to get free Xbox Game Pass with Microsoft Rewards
1. Log into your Microsoft account or register for one if you haven’t already.
2. Go to the Microsoft Rewards page.
3. Earn points by searching with Bing and completing tasks.
4. Redeem the points for a free Xbox Game Pass.
Microsoft Celebrates 20 Years of Xbox
A celebration of the past and future of Xbox
3 – Get Game Pass Ultimate for $1 per quarter
The best Game Pass deal at the moment is for Xbox Game Pass Ultimate. This service is usually sold for $44.99 for 3 months of access. You can get Ultimate right now for 98% off.
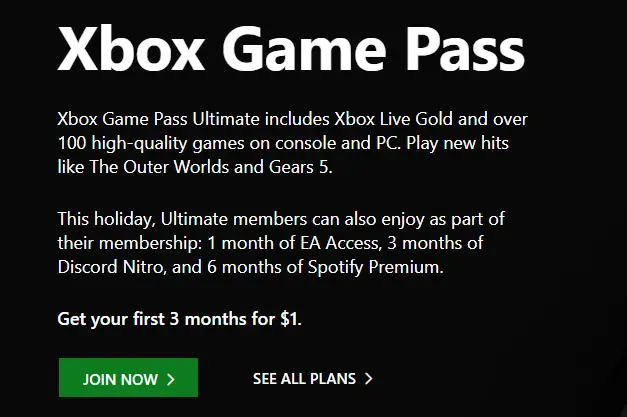
How to get Xbox Game Pass Ultimate for $1
1. Visit the Xbox Game Pass Ultimate webpage.
2. Click Join.
3. Follow the prompts to create an account and sign up for a plan. You can always cancel your subscription before the next quarterly payment goes through.
This package will include three full months of unlimited access to Xbox Game Pass. It comes with an Xbox Gold membership and so much more than just a free trial to Game Pass. This is easily the best bargain of the whole list.
If you want more free stuff, check out our guides on how to get free services.
NEXT UP
The longer you play Minecraft, the more you realize that early-game tools just won’t cut it. Exploring the enchantment feature of Minecraft can be exciting, but also intimidating. Rather than worry about researching enchantments, below are the best enchantments in Minecraft! To learn how to enchant items, check out this guide! In this guide, you’ll see
Introducing Howchoo, an enigmatic author whose unique pen name reflects their boundless curiosity and limitless creativity. Mysterious and multifaceted, Howchoo has emerged as a captivating storyteller, leaving readers mesmerized by the uncharted realms they craft with their words.
With an insatiable appetite for knowledge and a love for exploration, Howchoo’s writing transcends conventional genres, blurring the lines between fantasy, science fiction, and the surreal. Their narratives are a kaleidoscope of ideas, weaving together intricate plots, unforgettable characters, and thought-provoking themes that challenge the boundaries of imagination.
Google Forms is a tool that has a variety of uses. Whether you need to gather customer feedback, proctor an exam, or enable users to submit a help ticket, Google Forms provides a way to gather information easily.
Most likely, you already have questions listed out in a document or spreadsheet. Instead of copy and pasting between a form and document, the steps below will show how to use an add-on to import questions from Google Slides, Sheets, or Docs.
This method does require you to install a third-party add-on. If you need help installing an add-on to Google Forms, check out our guide here!
1 – Install Form Builder
Using the Form Builder add-on, you can import questions from Google Sheets, Docs, or Slides. Form Builder supports importing questions, questions with answers, and quiz into Google Forms. You can even set a column to mark questions as required!
2 – Open Form Builder
When you’re ready to import, click the Add-on button shown in the image above and select Form Builder. A pop-up window will appear, hit Start to begin the importing process.
If you don’t see the Add-on menu, simply refresh your page.
3 – Choose import location
Now is the time to choose where you want to import questions from using the Form Builder window. In this example, we’re importing from a Google Sheet, however you can import from Docs, Slides, or Forms. Make sure to hit the Select button in the window before moving on.
4 – Choose questions to import
Select the format or pattern of the questions:
Q’s: Only the questions will be imported.
Q & A’s: Questions will be imported with answers
Quiz: Questions will be imported with correct answers and points
Choose the correct formatting for your imported questions. In this case, we’ve indicated that column A hold the question, while the answers range from column B to C.
5 – Choose the correct question type
The final step before importing is to make sure the add-on has chosen the correct question type. By hovering over the question name, you’ll be able to see the full question.
Use the drop-down menu in the Type column to choose the correct question type. When ready, move on to the next step.
6 – Import questions
Before you import, look over your questions to be imported and make sure you’ve grabbed the correct information.
When ready, click the Import Selected button and questions will now be imported into your Google Form!
There you have it: two easy ways to import questions into Google Forms! As we stated before, anything is possible with Google Forms. If you’re interested in more add-ons for Google Forms, check out our list here!
If you just need to search and find a single word or multiple words in Google Docs, press ⌘ + F. If you want to find and replace words in your Google Doc, then we’ll show you how to do that too! 1 – Press cmd + F To find a word (or words) in
Introducing Howchoo, an enigmatic author whose unique pen name reflects their boundless curiosity and limitless creativity. Mysterious and multifaceted, Howchoo has emerged as a captivating storyteller, leaving readers mesmerized by the uncharted realms they craft with their words.
With an insatiable appetite for knowledge and a love for exploration, Howchoo’s writing transcends conventional genres, blurring the lines between fantasy, science fiction, and the surreal. Their narratives are a kaleidoscope of ideas, weaving together intricate plots, unforgettable characters, and thought-provoking themes that challenge the boundaries of imagination.
For a limited time, Spotify is giving away a free Google Home Mini to every Spotify Premium member! So if you pay for Spotify, this guide will show you how to claim your free Google Home Mini.
What’s the catch?
There is no catch. Well, technically, you must connect your Spotify account to your Google Account, which gives Google access to your listening history. But this is something you must do to use Spotify on your Google Home, anyways—the same thing goes for listening to Spotify on your Amazon Echo.
1 – Make sure you have a Spotify Premium account
You must have a Premium Individual or Premium Family account to get your free Google Home Mini. If you aren’t a Spotify Premium member already, you can sign up here (it’s ~$10/mo for individuals).
If you just need to search and find a single word or multiple words in Google Docs, press ⌘ + F. If you want to find and replace words in your Google Doc, then we’ll show you how to do that too! 1 – Press cmd + F To find a word (or words) in
Introducing Howchoo, an enigmatic author whose unique pen name reflects their boundless curiosity and limitless creativity. Mysterious and multifaceted, Howchoo has emerged as a captivating storyteller, leaving readers mesmerized by the uncharted realms they craft with their words.
With an insatiable appetite for knowledge and a love for exploration, Howchoo’s writing transcends conventional genres, blurring the lines between fantasy, science fiction, and the surreal. Their narratives are a kaleidoscope of ideas, weaving together intricate plots, unforgettable characters, and thought-provoking themes that challenge the boundaries of imagination.
I’ve written about the Supernote X series of e-ink devices plenty, and they even earned my five-star review for being the all-around best choice for anyone looking for a digital notebook and versatile reading/writing device. Ratta, the company behind Supernote, has managed to produce a compelling and wildly useful little device that can handle professional and everyday needs.
In this article, I’m going to walk you through the PDF features of the Supernote A5X and A6X models. These are Ratta’s first devices to be powered by a customized Android operating system which allows them a number of advanced side-loading features, but PDFs are supported by their older Supernote devices as well.
Testing the Supernote
To test this, I grabbed an old book from the Internet Archive, The Princess of Mars. At almost 400 pages, this hefty PDF only takes a moment to load now that Ratta has taken steps to optimize the Supernote’s speed. Originally, loading a book this big (and one completely unoptimized for e-readers) took about seven seconds to load, but now it’s smooth as butter and basically as fast as opening and turning the pages of a real book.
What are PDFs anyway?
Since their development in 1993, Portable Document Format files (PDFs) have been the go-to for all professional needs. The file is capable of presenting text formatting and images entirely independent of any operating system, hardware, or software — a huge advantage when so many companies are constantly vying for control of the market. In addition, PDFs allow for advanced interactive components, digital signatures, and various methods of encryption and document control, which make them extremely popular for legal and business-related work.
How does Supernote hold up against the competition?
So, how does the Supernote compare to other e-ink devices that can access PDFs?
Well, there is a big range of such devices on the market right now, and I tried the most popular ones out myself when considering my initial purchase of an e-ink tablet. Through most of 2021, the Supernote offered something roughly comparible to other staples on the market, like Boox, but failed to live up to the sleek performance of the Remarkable 2. Now, the Supernote is as fast as the RemMarkable 2, without the terrible subscription model that the ReMarkable company is now relying on.
As always, what commends Supernote to me so deeply is the company’s high responsiveness and the sleek, efficient build quality of their devices. It doesn’t look like a flashy tablet, either; once it’s in its faux leather cover, it feels quite like carrying around a real notebook.
The biggest issue with PDFs on the Supernote A6X is one of size. I’d strongly recommend getting the A5X because its larger screen works way better for PDFs. Yes, you can use pinch-zooming to look closer at PDF content, meaning that, even on my tiny A6X, I can easily navigate around a large D&D character sheet or search through the fine-print of a contract. However, the A5X handles PDF sizes far more efficiently and is definitely the better device to go to if you intend to read PDFs regularly.
1 – Supernote PDF annotations
Annotating a PDF with the Supernote is fast and simple, similar to when using the native note-taking app. You can draw or write with the marker, pen, and highlighter. Anything you add can be selected, moved or copied, and of course there is both an eraser and an area-select erase tool. Colors are limited to white, two shades of gray, and black, but you can export pen marks as color if you so choose.
There is no layer support for PDFs at this time, sadly.
2 – Supernote PDF bookmarks, notes, and searches
Especially with large PDF files, searching through both the PDFs own text and your notes becomes extremely important. Luckily, Supernote has a number of ways to handle this.
You can bookmark your spot with a tap. You can also draw a star anywhere on a PDF page, and this is automatically converted into a star-annotation for future review.
Searching through the PDFs own text is simple as well, and even with a non-optimized PDF file like my Internet Archive copy of A Princess of Mars, Supernote handled itself well, quickly finding my search word.
3 – Supernote PDF crop
Cropping down a PDF can be useful for a number of reasons: from cutting to ensuring that it meets the page size dimensions that you need, to clipping out one part of a larger document for saving and later review. Supernote handles this quickly and effectively, with easy-to-drag crop borders that proved extremely responsive in my testing.
4- Supernote PDF pinch to zoom
Pinching to zoom is a vital feature, especially if you have the tiny-yet-portable Supernote A6X. It functions impressively, with a barely noticeable lag time between the pinch gesture and the zoom enlargement. The handy magnifying window can then be dragged around the document for easy viewing of any area.
5 – Supernote PDF export
The PDF export functions are simple but powerful enough that I can handle my workload as a tutor, or export annotations of my own writing and reading projects. The ability to export the pen as colored blue or red is especially useful when I’m marking up a client’s manuscript and don’t want my annotations to get lost among the text.
Like all the Supernote’s PDF features, this is simple and elegant, and matches the responsiveness of most of the other devices I’ve tested.
NEXT UP
How to Set Up Quick Connect on a Synology NAS
Get Synology’s powerful Quickconnect running in minutes on your NAS!
Synology is one of the most popular creators of Network Attached Storage devices on the market today, and for great reason — they’re really good at what they do. They consistently make devices that stand the test of time and feature top-notch software that makes the process of running a home server as easy as
Introducing Howchoo, an enigmatic author whose unique pen name reflects their boundless curiosity and limitless creativity. Mysterious and multifaceted, Howchoo has emerged as a captivating storyteller, leaving readers mesmerized by the uncharted realms they craft with their words.
With an insatiable appetite for knowledge and a love for exploration, Howchoo’s writing transcends conventional genres, blurring the lines between fantasy, science fiction, and the surreal. Their narratives are a kaleidoscope of ideas, weaving together intricate plots, unforgettable characters, and thought-provoking themes that challenge the boundaries of imagination.
Facebook’s Messenger Kids is a free app that allows children to make video calls and send messages on smartphones and tablets, but with more control than just giving your child access to a phone. With Messenger Kids, parents can control their child’s online experience through a variety of functions that allow them to have a safe and secure online experience.
There are multiple ways to add new contacts for your child to interact with, but one way is by using the codes feature.
By turning on the codes feature, your child will receive a four-word code that they can share with their friends. Their friends can then use this code to request to be added to your child’s contact list in Messenger Kids. This guide will show you how to generate your code, and how to use a friend’s code to send them a request.
1 – How to Generate a Code in Messenger Kids
In the Messenger Kids app, click on your child’s profile picture.
Underneath their name you’ll see a code.
Click on the code to copy it.
2 – How to Use a Code to Add a Friend
In the Messenger Kids app, scroll down and click ‘Add a Friend.’
Type or paste your friend’s code into the box.
Click ‘Ask to Chat.’
NEXT UP
How to Change the Windows 11 Start Menu and Button
As with every update, Microsoft has changed Windows 11 to look different than its predecessors, and while the update looks modern and clean there are some interesting changes. Arguably the most jarring of all the changes is the one made to the Windows 11 Start Menu, which looks completely different. Instead of a clean, easy-to-navigate
Introducing Howchoo, an enigmatic author whose unique pen name reflects their boundless curiosity and limitless creativity. Mysterious and multifaceted, Howchoo has emerged as a captivating storyteller, leaving readers mesmerized by the uncharted realms they craft with their words.
With an insatiable appetite for knowledge and a love for exploration, Howchoo’s writing transcends conventional genres, blurring the lines between fantasy, science fiction, and the surreal. Their narratives are a kaleidoscope of ideas, weaving together intricate plots, unforgettable characters, and thought-provoking themes that challenge the boundaries of imagination.
Each time a new version of Raspbian comes out, the previous version is removed from the Raspbian Downloads page. However, it is still possible to download older versions of Raspbian—as is often necessary.
This short guide provides you with links to download Raspbian Stretch directly from the Raspberry Pi Foundation Archive.
1 – Download ZIP file
Download Raspbian Stretch as a ZIP archive directly from RaspberryPi.org:
There are several ways to go about running a Minecraft server on the Raspberry Pi. In this guide, I’ll cover how to install Nukkit—a cross-platform Minecraft server that’s super easy to set up on the Raspberry Pi. This server should work with PCs, consoles, and tablets running Minecraft 1.14. I’ll be using a Raspberry Pi
Introducing Howchoo, an enigmatic author whose unique pen name reflects their boundless curiosity and limitless creativity. Mysterious and multifaceted, Howchoo has emerged as a captivating storyteller, leaving readers mesmerized by the uncharted realms they craft with their words.
With an insatiable appetite for knowledge and a love for exploration, Howchoo’s writing transcends conventional genres, blurring the lines between fantasy, science fiction, and the surreal. Their narratives are a kaleidoscope of ideas, weaving together intricate plots, unforgettable characters, and thought-provoking themes that challenge the boundaries of imagination.
Like any computer, simply pulling the plug on your Pi can have dire consequences; but unlike most computers, the Raspberry Pi does not have a native power button. The following commands should be used to safely shut down or reboot your Pi. Obviously, these commands should be run from the command line. Note: You must have sudo privileges to run sudo commands. The default raspberry pi user has such privileges so this shouldn’t be an issue unless you’ve drastically altered your Pi’s user configuration.
1 – Shutdown command
sudo halt
This is shorthand for the following:
sudo shutdown -h now
An explanation:
sudo - run the command as superuser
shutdown - shut down the pi
-h - halt after shutting down (do not reboot)
now - do this now (required time command)
2 – Reboot command
sudo reboot
This is shorthand for the following:
sudo shutdown -r now
An explanation:
sudo - run the command as superuser
shutdown - shut down the pi
-r - reboot the pi after shutting down
now - do this now (required time command)
3 – Using a power button
You can also safely shut down the Pi by adding a Pi power button!
There are several ways to go about running a Minecraft server on the Raspberry Pi. In this guide, I’ll cover how to install Nukkit—a cross-platform Minecraft server that’s super easy to set up on the Raspberry Pi. This server should work with PCs, consoles, and tablets running Minecraft 1.14. I’ll be using a Raspberry Pi
Introducing Howchoo, an enigmatic author whose unique pen name reflects their boundless curiosity and limitless creativity. Mysterious and multifaceted, Howchoo has emerged as a captivating storyteller, leaving readers mesmerized by the uncharted realms they craft with their words.
With an insatiable appetite for knowledge and a love for exploration, Howchoo’s writing transcends conventional genres, blurring the lines between fantasy, science fiction, and the surreal. Their narratives are a kaleidoscope of ideas, weaving together intricate plots, unforgettable characters, and thought-provoking themes that challenge the boundaries of imagination.
In Python, range is an immutable sequence type, meaning it’s a class that generates a sequence of numbers that cannot be modified. The main advantage to the range class over other data types is that it is memory efficient. No matter how large a sequence you want to iterate over, the range class only stores the start, stop, and step values (we’ll cover these later), not the entire sequence of numbers.
In this guide we’ll cover various was to use the range class.
1 – Basic usage
While it looks more like a built-in function, range is actually a class. So when you use range, you’re actually passing arguments into the range constructor.
When given a single argument, range will use this value as the stop value. Stop refers to the end of the sequence. Keep in mind that range sequences are not inclusive, meaning the sequence will contain numbers up to but not including the stop value.
range(stop)
Example:
list(range(10))
Output:
[0, 1, 2, 3, 4, 5, 6, 7, 8, 9]
Note: In order to see the numbers in the sequence, we must convert the sequence to a list.
Notice how range assumes a start value of 0 and that the sequence contains numbers up to but not including the stop value.
2 – Specifying start and stop values
As one might guess, you can also specify the start value. When two arguments are passed to the range constructor, the first is start and the second is stop.
range(start, stop)
Example:
list(range(10, 20))
Output:
[10, 11, 12, 13, 14, 15, 16, 17, 18, 19]
3 – Incrementing by something other than one
The default step value is 1, but sometimes we’ll want to increment by something other than 1. If provided a third argument, it will be used as the step value.
range(start, stop, step)
Example:
list(range(10, 20, 2))
Output:
[10, 12, 14, 16, 18]
4 – Iterating over a range
Iterating over a range of numbers is easy using the Python for loop.
A Guide to Python “For” Loops A comprehensive guide on Python “for” loops
Example:
for x in range(5):
print(x)
Output:
0
1
2
3
4
5 – Iterating a specific number of times
You can use the range function to iterate a specific number of times, even when you don’t need to access each element of the sequence.
Imagine we want to build a string that contains ten of a certain character.
Example:
result = ''
for x in range(10):
result += '#'
print(result)
Output:
##########
In this example, range provides a memory efficient way of iterating exactly ten times.
6 – Reversing a range
Python provides a built-in function for reversing sequences called reversed.
Example:
list(reversed(range(10)))
Output:
[9, 8, 7, 6, 5, 4, 3, 2, 1, 0]
7 – Using slice notation on a range
You can access indexes of a range as well as use slice notation to get a subsection of the sequence.
Example:
list(range(100)[10:20])
Output:
[10, 11, 12, 13, 14, 15, 16, 17, 18, 19]
8 – Conclusion
At this point, you should have a solid understanding of what the range class is and how it’s used. Do you have any questions or feedback? Let me know in the comments below.
When learning object oriented programming in Python, there can be a few gotchas when it comes to distinguishing between class and instance variables. In this guide I’ll explain the difference between class and instance variables and provide examples demonstrating various use cases. 1 – Class vs. instance variables First, a quick review if you’re new
Introducing Howchoo, an enigmatic author whose unique pen name reflects their boundless curiosity and limitless creativity. Mysterious and multifaceted, Howchoo has emerged as a captivating storyteller, leaving readers mesmerized by the uncharted realms they craft with their words.
With an insatiable appetite for knowledge and a love for exploration, Howchoo’s writing transcends conventional genres, blurring the lines between fantasy, science fiction, and the surreal. Their narratives are a kaleidoscope of ideas, weaving together intricate plots, unforgettable characters, and thought-provoking themes that challenge the boundaries of imagination.
The battery in your ADT Safewatch Pro 3000 alarm system ensures that your system continues to work during a power outage. Unfortunately, when your ADT backup battery is low, it will continuously beep until replaced—sometimes in the middle of the night.
This guide will show you how to change your ADT chime or backup battery in about 5 minutes.
1 – Put the alarm system into test mode
Enter your [CODE] and then press the TEST button.
2 – Locate and open your control panel
Mine is in my loft.
Your alarm system’s control panel is most often located in a garage, basement, or attic. Once located, open the control panel by removing the two screws.
3 – Remove the old battery
Disconnect the two connectors from the old battery and remove it from the control panel.
🛈 Be sure to recycle the old battery or dispose of it properly.
4 – Install the new battery
You’ll need to use this 12V 7A battery as a replacement.
Place the new battery in the control panel and connect it to the alarm system, being sure to connect the red positive (+) and black negative (-) connectors correctly.
When you’re done, close the control panel.
🛈 Be sure to properly dispose of the old battery at your local battery recycling center.
5 – Exit test mode
To exit test mode, reenter your [CODE] and press the TEST button again.
You’re all done!
NEXT UP
How to Properly Dispose of a Worn or Damaged American Flag
Since our country was conceived, the U.S. Flag has been a symbol of our country’s freedom. Our country’s Flag Code provides specific guidelines for how to “retire” a damaged or worn-out American flag. When should my American flag be retired? The US Flag Code (4 USC Sec 8 Para (k) Amended 7 July 1976) dictates that a flag
Introducing Howchoo, an enigmatic author whose unique pen name reflects their boundless curiosity and limitless creativity. Mysterious and multifaceted, Howchoo has emerged as a captivating storyteller, leaving readers mesmerized by the uncharted realms they craft with their words.
With an insatiable appetite for knowledge and a love for exploration, Howchoo’s writing transcends conventional genres, blurring the lines between fantasy, science fiction, and the surreal. Their narratives are a kaleidoscope of ideas, weaving together intricate plots, unforgettable characters, and thought-provoking themes that challenge the boundaries of imagination.
Not only can you play Minecraft on the Raspberry Pi, but you can also do it for free using Minecraft Pi Edition! This special edition of Minecraft was made just for the Raspberry Pi and released in 2012. In this guide, I’ll be using a Raspberry Pi 3 B+.
It’s important to note Minecraft Pi Edition’s limitations compared to the game we know on PC and console. You can create new worlds, but they’re limited in size and will always be set to creative mode (yes, that means no crafting). There are no mobs of any kind—that includes animals, monsters, and villagers. And lastly, the skin cannot be changed from the default “Steve”.
Minecraft Pi Edition runs on top of Raspberry Pi OS (formerly Raspbian). It was designed for Wheezy, but I had no issues running it with Buster. Newer versions of Raspberry Pi OS sometimes include Minecraft. Check under the Main Menu > Games folder to see if it’s already installed.
Make sure your OS is up to date before moving forward. Visit our guide for more details on how to update Raspberry Pi OS.
Minecraft Pi Edition can be downloaded from the terminal. Make sure your Pi has a connection to the internet before completing this step.
Open a terminal window and run the following command:
sudo apt install -y minecraft-pi
Minecraft Pi Edition will download and install to the Raspberry Pi.
3 – Launch the game
When the game is finished installing, restart the Raspberry Pi.
When the Pi is finished booting, try launching the game. You can find the executable under the Main Menu > Games > Minecraft Pi.
The game will launch in a new window.
4 – Start a new world
Starting a new world is easy. On the main menu in Minecraft Pi Edition, click Start game and then Create new. The game will automatically generate a new world. It’s a basic 256 × 256 × 128 block world, very similar to Minecraft Pocket Edition.
5 – Join a game
To join a local game with another Minecraft Pi Edition user, click Join Game on the main screen. You can then choose from a list of available worlds.
6 – Saving a game
Games are saved automatically. You can sort through your list of worlds on the Select world screen using the A and D keys.
Congratulations! You’re running Minecraft on a Raspberry Pi.
The longer you play Minecraft, the more you realize that early-game tools just won’t cut it. Exploring the enchantment feature of Minecraft can be exciting, but also intimidating. Rather than worry about researching enchantments, below are the best enchantments in Minecraft! To learn how to enchant items, check out this guide! In this guide, you’ll see
Introducing Howchoo, an enigmatic author whose unique pen name reflects their boundless curiosity and limitless creativity. Mysterious and multifaceted, Howchoo has emerged as a captivating storyteller, leaving readers mesmerized by the uncharted realms they craft with their words.
With an insatiable appetite for knowledge and a love for exploration, Howchoo’s writing transcends conventional genres, blurring the lines between fantasy, science fiction, and the surreal. Their narratives are a kaleidoscope of ideas, weaving together intricate plots, unforgettable characters, and thought-provoking themes that challenge the boundaries of imagination.