The aluminum moka pot can become oxidized over time and need a deep cleaning. For normal cleaning, soap and water is fine, but you’ll want to get a little more aggressive when it gets more nasty.
If you need to clean more than just your moka pot, check out this guide on how to make doing the dishes easier.
1 – Clean thoroughly with soap
Scrub as best as you can with a non metal abrasive. Stay away from steel wool as it will lead to corrosion down the road.
2 – Soak in a vinegar solution
Use 50% vinegar and 50% warm water. Soak for about 30 minutes.
3 – Scrub again
You won’t see 100% of the oxidation removed but close to it. Keep in mind, the oxidation is totally safe and will not impart any bad flavors but its still nice to remove most or all of it.
NEXT UP
How to adjust and calibrate Nespresso Inissia cup size/volume
By default, the Nespresso Inissia dispenses only a small amount of coffee. If you read the manual rather than throwing it away, it states that you’re meant to calibrate the cup size yourself to match your individual taste. This short guide will show you how to program the volume of coffee that your Nespresso machine
Introducing Howchoo, an enigmatic author whose unique pen name reflects their boundless curiosity and limitless creativity. Mysterious and multifaceted, Howchoo has emerged as a captivating storyteller, leaving readers mesmerized by the uncharted realms they craft with their words.
With an insatiable appetite for knowledge and a love for exploration, Howchoo’s writing transcends conventional genres, blurring the lines between fantasy, science fiction, and the surreal. Their narratives are a kaleidoscope of ideas, weaving together intricate plots, unforgettable characters, and thought-provoking themes that challenge the boundaries of imagination.
I dig the Anycubic line of Kobra printers in large part because of how many ease-of-use features they incorporate, from automatic leveling, to filament sensors (in some of their models). And that ease of use extends all the way to the humblest of tasks: loading filament.
The Kobra Go is a kit 3D printer that offers high quality in a DIY package that saves you a considerable wad of cash and lands you with a high-quality entry-level printer. As one would expect, it can handle all the common filament types, and loading them into the printer is a breeze.
Anycubic’s Kobra Go 3D Printer Hands-On Review
A detailed review on the Anycubic Kobra Go DIY 3D printer
1 – Turn the knob to Menu
Turn the knob to Menu
On the main screen, turn the knob to “Menu” and depress the button to select.
2 – Select “Prepare” from the menu
Select “Prepare” from the menu
From the list of control options, select “Prepare”.
3 – Scroll down and select “Load Filament”
Scroll down and select “Load Filament”
Since we want to load new filament, we’ll select this option.
4 – Select the checkmark to continue
Select the checkmark to continue
The Kobra Go will notify you that the nozzle is too cold to load new filament, so select the checkmark and allow the printer to bring itself to temperature.
5 – The Nozzle will bring itself to temperature automatically
The Nozzle will bring itself to temperature automatically
Just let the printer do its thing, this should only take a couple of minutes.
6 – When ready, load filament
When ready, load filament
The screen will notify you when it’s time to load the filament.
7 – Press the filament into the short Teflon tube
Press the filament into the short Teflon tube
The tube acts as a handy guide. make sure that you use your wire cutters to snip the filament at a sharp angle, this makes it easier to slide it in. A little bit of pressure will be needed—you can depress the button on the side of the loader to allow the filament to more easily slide into place.
You’ll know you’re finished when the machine catches the filament, and it starts moving without you pressing it.
8 – Once the filament is loaded, insert your memory card.
Once the filament is loaded, insert your memory card.
Insert your memory card that came with the Kobra Go.
9 – Select Menu and then scroll to “Print from SD Card”
Select Menu and then scroll to “Print from SD Card”
The card comes preloaded with an owl model to test things out on.
10 – If necessary, correct the Z offset
If necessary, correct the Z offset
As the print begins, you can use the knob to select the Z offset control (depress the button to select and turn to either side to move the nozzle up or down). It’s easy to ensure that your nozzle is the perfect height from the printer bed.
11 – Enjoy your new print!
Enjoy your new print!
The Anycubic Kobra Go does a great job turning out models with all the most common filament types. Try it yourself now!
NEXT UP
How to Set Up Quick Connect on a Synology NAS
Get Synology’s powerful Quickconnect running in minutes on your NAS!
Synology is one of the most popular creators of Network Attached Storage devices on the market today, and for great reason — they’re really good at what they do. They consistently make devices that stand the test of time and feature top-notch software that makes the process of running a home server as easy as
Introducing Howchoo, an enigmatic author whose unique pen name reflects their boundless curiosity and limitless creativity. Mysterious and multifaceted, Howchoo has emerged as a captivating storyteller, leaving readers mesmerized by the uncharted realms they craft with their words.
With an insatiable appetite for knowledge and a love for exploration, Howchoo’s writing transcends conventional genres, blurring the lines between fantasy, science fiction, and the surreal. Their narratives are a kaleidoscope of ideas, weaving together intricate plots, unforgettable characters, and thought-provoking themes that challenge the boundaries of imagination.
Need to change the case of characters to all caps or all lowercase? This is easily done using Vim. This guide will show you how to change the case of characters in Vim.
tl;dr
Toggle “Hello” to “hELLO” with g~. Uppercase “Hello” to “HELLO” with gU. Lowercase “Hello” to “hello” with gu.
1 – Select the text you’re interested in
Before changing case, you’ll need to select the text you’re interest in.
To do this, start on the first character you want to toggle, then enter visual mode by typing v. Use the directional keys (h, j, k, l) to select the rest of the text you want to change.
2 – Toggle case
To toggle the case type g~.
3 – All uppercase
If you want to make the text all uppercase use gU.
4 – All lowercase
If you want to make the text all lowercase use gu.
NEXT UP
How to install Vim plugins without a plugin manager
Vundle, Pathogen, Vim-plug, VAM, and the others can be great time savers but sometimes you just have to do something yourself so you can understand what exactly the time saving software is doing for you in the background. For myself, I got sick of not understanding what these were doing to my system. I realized
Introducing Howchoo, an enigmatic author whose unique pen name reflects their boundless curiosity and limitless creativity. Mysterious and multifaceted, Howchoo has emerged as a captivating storyteller, leaving readers mesmerized by the uncharted realms they craft with their words.
With an insatiable appetite for knowledge and a love for exploration, Howchoo’s writing transcends conventional genres, blurring the lines between fantasy, science fiction, and the surreal. Their narratives are a kaleidoscope of ideas, weaving together intricate plots, unforgettable characters, and thought-provoking themes that challenge the boundaries of imagination.
A relay is an electrically-operated switch. These switches can be extremely useful for a variety of Raspberry Pi projects (think turning on a light or opening your garage door. Watch the video below to learn how to drive a relay using your Raspberry Pi.
The following video will show you how to wire up the relay to your Raspberry Pi.
2 – The test script
Here’s a copy of the test script used in the video:
#!/usr/bin/env python

import time

import RPi.GPIO as GPIO


GPIO.setmode(GPIO.BCM)
GPIO.setup(17, GPIO.OUT)
GPIO.output(17, GPIO.LOW)

time.sleep(0.25)

GPIO.output(17, GPIO.HIGH)
GPIO.cleanup()
To run the script, simply copy the code above to a file on your Raspberry Pi called test-relay.py (or whatever you want). And then run the script using:
There are several ways to go about running a Minecraft server on the Raspberry Pi. In this guide, I’ll cover how to install Nukkit—a cross-platform Minecraft server that’s super easy to set up on the Raspberry Pi. This server should work with PCs, consoles, and tablets running Minecraft 1.14. I’ll be using a Raspberry Pi
Introducing Howchoo, an enigmatic author whose unique pen name reflects their boundless curiosity and limitless creativity. Mysterious and multifaceted, Howchoo has emerged as a captivating storyteller, leaving readers mesmerized by the uncharted realms they craft with their words.
With an insatiable appetite for knowledge and a love for exploration, Howchoo’s writing transcends conventional genres, blurring the lines between fantasy, science fiction, and the surreal. Their narratives are a kaleidoscope of ideas, weaving together intricate plots, unforgettable characters, and thought-provoking themes that challenge the boundaries of imagination.
Your Verizon voicemail is easy to set up and even easier to use. It’s not only accessible from your Verizon phone but also from any phone. That freedom of access doesn’t come without property security measures—your voicemail is protected with a unique password/PIN.
1 – Set up voicemail
Voicemail can be set up using a Verizon cell phone. Make sure the phone has a signal before setting up your Verizon voicemail.
Open the Phone app.
Dial *86.
Press the Call button.
The recorded message will prompt you to choose a language and press #.
When asked, enter a 4-7 digit password for your voicemail and press #. Your password/PIN can’t use repeating or consecutive numbers.
Verizon will ask you to record your name. State your name when prompted and press #. You may have to press # again to confirm the name.
The last prompt will be for a voicemail greeting. After recording your greeting, press #. Press # again to confirm the recording.
2 – Check voicemail
You can easily check your voicemail if you have your Verizon phone with you.
Open the Phone app.
Dial *86.
Press the Call button.
You will be asked to enter your password/PIN. Enter it using your keypad.
Press #.
Follow the instructions to navigate through your voicemail messages.
3 – Check voicemail from another phone
If you don’t have your Verizon phone with you, it’s still possible to check your voicemail.
Using any phone, dial your 10-digit Verizon phone number.
When you hear your voicemail greeting, interrupt it with the # key.
Enter your password/PIN when prompted.
Press #.
Follow the prompts to navigate through your messages.
4 – Reset voicemail password
If you lose or forget your Verizon voicemail password, you can request a reset.
Open the Phone app on your Verizon phone.
Dial *611.
The phone recording will ask you to state a reason for calling. You can say “Reset voicemail password.”
The system will likely ask you to confirm information for security verification.
You will then be prompted to create a new voicemail password.
You’re finished! Next, learn how to enable Verizon call forwarding.
How to Enable Verizon Call Forwarding
Direct your calls elsewhere.
Call forwarding is the process of directing phone calls from one number to another. Verizon allows its customers to enable call forwarding at no additional charge. Your typical call rates will still apply. This process works for all Verizon customers regardless of your carrier—including Samsung, Apple, LG, Lenovo, and more. Note: International numbers can not
Introducing Howchoo, an enigmatic author whose unique pen name reflects their boundless curiosity and limitless creativity. Mysterious and multifaceted, Howchoo has emerged as a captivating storyteller, leaving readers mesmerized by the uncharted realms they craft with their words.
With an insatiable appetite for knowledge and a love for exploration, Howchoo’s writing transcends conventional genres, blurring the lines between fantasy, science fiction, and the surreal. Their narratives are a kaleidoscope of ideas, weaving together intricate plots, unforgettable characters, and thought-provoking themes that challenge the boundaries of imagination.
Most people don’t know that you can look up past “snapshots” of almost any website. Archive.org is a 501(c)(3) nonprofit organization that was formed to build an expansive Internet library. Since 1996, the organization has been archiving digital content to preserve the legacy and history of the Internet and the World Wide Web.
2 – Enter the website you’d like to view and click Browse History
I decided to check out Amazon’s humble roots since I’ve been reading the Jeff Bezos biography One Click.
3 – Select a year
The Archive.org meta crawler visits popular sites more often. Each blue circular bubble indicates that a snapshot exists. In my case I searched for Amazon, the 7th most popular site on the web; this explains the blue blur that you see below.
You might notice by the “annual” snapshot bar graphs that overall snapshots have increased over the years — this is due to hard drive space becoming less expensive, resulting in more crawls being possible. After all, each snapshot isn’t just a mere image — it’s an explorable version of the site.
From here, you can either select a blue bubble to view the relevant snapshot or choose a different year to view. Let’s go deeper. Select an older year.
🛈 Many of the older snapshots don’t have all page elements recorded; in other words, you might visit eBay’s 1997 site and find that most of the images are missing. This was largely due to storage space restrictions of the time.
4 – Select a snapshot
After you’ve selected the year, find the specific date you’d like to explore. Explorable dates are denoted by the blue bubble. A larger bubble means that multiple snapshots exist for that date. Click on a date bubble.
5 – Bask in the glory of old design
It’s interesting to see not only how web design has changed but also how far we’ve come in such a short period of time.
There are a few reasons you might want to update or reset your WiFi password: making your network more secure, and making your password easier to remember and type. Improved network security You can add an extra layer of security to your network by changing the WiFi password. As long as your new password is
Introducing Howchoo, an enigmatic author whose unique pen name reflects their boundless curiosity and limitless creativity. Mysterious and multifaceted, Howchoo has emerged as a captivating storyteller, leaving readers mesmerized by the uncharted realms they craft with their words.
With an insatiable appetite for knowledge and a love for exploration, Howchoo’s writing transcends conventional genres, blurring the lines between fantasy, science fiction, and the surreal. Their narratives are a kaleidoscope of ideas, weaving together intricate plots, unforgettable characters, and thought-provoking themes that challenge the boundaries of imagination.
If you grew up watching cartoons, odds are you’ve come across an anime series or two. While anime is huge in Japan, it took a little while for the art to reach viewers across the world. Today, anime franchises are worth billions of dollars and many of them are household names.
In the spirit of all things ambitious, and the hundreds of journeys we’ve taken in watching these stories, we decided to gather a list of the most highest-grossing anime franchises of all time. These are the top dogs of anime—guaranteed to inspire at least 20 cosplayers at a local convention near you.
20 – Demon Slayer: Kimetsu no Yaiba – $2.6 Billion
Perhaps one of the most impressive entries on this list is Demon Slayer: Kimetsu no Yaiba. It’s only brought in $2.8 billion but that’s after having just debuted in 2016, making the rate of growth one of the fastest we’ve come across.
The story follows Tanjiro Kamodo, a wannabe demon slayer, motivated to fight after his sister is turned into a demon herself. It was created by Koyoharu Gotouge who has published over 20 volumes as of writing.
Demon Slayer: Kimetsu no Yaiba stats
Total Revenue: 2.6 Billion
Initial Release: 2016
Most recent release: 2021
Studio / Production Team: Ufotable
Created by: Koyoharu Gotouge
19 – Hamtaro – $3 Billion
I am genuinely surprised to share with you Hamtaro as one of the highest-grossing anime of all time. The series was created by Ritsuko Kawai in 1997 and by 1999 was developed into an anime series.
The story follows Hamtaro, a hamster who goes on wild adventures while his owner is at school. The series is well-received by viewers both inside and outside of its target demographic, lending to the total gross of $3 billion for the franchise.
Hamtaro stats
Total Revenue: 3 Billion
Initial Release: 1997
Most recent release: 2013
Studio / Production Team: TMS Entertainment
Created by: Ritsuko Kawa
18 – Astro Boy – $3.13 Billion
Astro Boy is the oldest and one of the most iconic entries on this list. He first appeared in 1952 and was seen as recently as 2009 in a modern movie adaptation. Astro Boy, known in Japan as Mighty Atom, was created by manga legend Osamu Tezuka.
Astro Boy is a robotic child created by Dr. Tenma. For those unfamiliar, it sounds like an innocent children’s tale. However, there are serious undertones to the story that aren’t apparent at first glance. Dr. Tenma created Astro Boy in response to the death of his son, even going as far as adopting Astro Boy as his own son. The superior writing and artwork have rightfully earned Astro Boy great reverence over the years.
Astro Boy stats
Total Revenue: 3.13 Billion
Initial Release: 1952
Most recent release: 2009
Studio / Production Team: Mushi Production
Created by: Osamu Tezuka
17 – Beyblade – $4.6 Billion
This anime franchise started as a competitive top game developed by Takara. Assuming Battle Tops wasn’t cool enough, it was released in 1999 under the name Beyblade. While Beyblade definitely sounds like a vicious right of passage from some mysterious land in the far East, it was essentially competitive tops.
The anime was released in 2001 and lasted for 51 episodes. Players got a first-hand look at a new world centered entirely around Beyblades and that fascination helped build a huge franchise—big enough to land a spot on this list at $4.6 billion.
Beyblade stats
Total Revenue: 4.6 Billion
Initial Release: 1999
Most recent release: 2021
Studio / Production Team: Madhouse / Nippon Animation
Created by: Takao Aoki
16 – Digimon – $6 Billion
If you remember Tamagotchi, you might remember Digimon. This anime actually began as a small, pocket-sized game in which players care for various digital monsters. To promote the Digimon game, a one-time movie was produced.
Reception was so high, this eventually spun into a full-blown anime series. Digimon was nothing like Pokemon despite the frequent comparisons. Well, they were sort of alike but this wasn’t a Pepsi vs Coca-Cola relationship, this was more like RC Cola vs Coca-Cola. Digimon were digital and Pokemon went in your pocket. Seriously, how did parents mix this one up? The Digimon franchise has ultimately grossed over $6 billion since the initial debut.
Digimon stats
Total Revenue: 6 Billion
Initial Release: 1997
Most recent release: 2020
Studio / Production Team: Toei
Created by: Akiyoshi Hongo
15 – Bleach – $7.24 Billion
Bleach is an action fantasy series written and illustrated by Tite Kubo in the early 2000s. By 2004, his original manga took the honorable step from Shounen Jump feature to fully serialized anime. This anime lasted for 366 episodes and inspired a few video games, as well.
The story follows Ichigo, a 15-year-old who just became a Soul Reaper—trust me when I say that’s no small deal. He learns to bridle his new strength while meeting new friends along the way. The anime was produced by Studio Pierrot and lasted until 2012. All of the manga, anime, and merch sales have grossed a total of over $7.4 billion for the franchise.
Bleach stats
Total Revenue: 7.24 Billion
Initial Release: 2001
Most recent release: 2012
Studio / Production Team: Pierrot
Created by: Noriyuki Abe
14 – Doraemon – $7.29 Billion
Doraemon first appeared in 1969. It was written and illustrated by Fujiko Fujio, the pen name of creative duo Motoo Abiko and Hiroshi Fujimoto. An attempt to serialize the manga into an anime was first made in 1973 but it was Shin-Ei Animation who oversaw the largest running Doraemon anime which featured over 1700 episodes and lasted until 2005.
Doraemon is a robotic cat with no ears sent from the future to help protagonist Nobita Nobi. Games, merchandise, toys, and more have kept the franchise afloat for decades. Since its inception, the Doraemon franchise has grossed over $7.2 billion.
Doraemon stats
Total Revenue: 7.29 Billion
Initial Release: 1969
Most recent release: 2020
Studio / Production Team: Shin-Ei Animation
Created by: Fujiko Fujio
13 – Pretty Cure – $7.59 Billion
The Pretty Cure franchise is a magical girl fest created by Izumi Todo. It’s filled with cute protagonists, lots of fights, and hundreds of episodes to indulge in. This series was inspired by magical girl shows like Sailor Moon, but it certainly wasn’t the first. Pretty Cure first appeared in 2004.
The latest series is known as Tropical-Rouge! Pretty Cure with episodes released as recently as April 2021, hampered only by production delays caused by coronavirus lockdowns. Fans can buy books, toys, apparel, and even video games to satiate their taste for Pretty Cure.
Pretty Cure stats
Total Revenue: 7.59 Billion
Initial Release: 2004
Most recent release: 2021
Studio / Production Team: Asahi Broadcasting Corporation / Asatsu-DK / Toei
Created by: Izumi Todo
12 – JoJo’s Bizarre Adventure – $9.8 Billion
JoJo’s Bizarre Adventure was first released in 1987 by creator Hirohiko Araki. It follows eight separate stories, each featuring a protagonist nicknamed JoJo. Multiple attempts have been made to serialize the manga into an anime, but each release is typically limited to a single story from the series.
JoJo is still going strong with new episodes having been produced within the last few years. The recent interest has sparked the release of new merch, helping reach the rank of one of the highest-grossing anime of all time at $9.8 billion.
JoJo’s Bizarre Adventure stats
Total Revenue: 9.8 Billion
Initial Release: 1987
Most recent release: 2014
Studio / Production Team: A.P.P.P.
Created by: Hirohiko Araki
11 – Naruto – $10.3 Billion
Masashi Kishimoto is the mastermind behind the Naruto franchise. The series follows the story of Naruto Uzumaki, a ninja-in-training from the leaf village. His ultimate goal is to become the next village leader, known as the Hokage.
This series inspired a few sequel shows and even a selection of video games. When it first debuted, fans could find merch from online stores, malls, and of course conventions. Figurines, costumes, posters, and more can still be found to this day featuring the plucky, orange-clad protagonist. The Naruto franchise has grossed more than $10 billion since its creation.
Naruto stats
Total Revenue: 10.3 Billion
Initial Release: 1999
Most recent release: 2017
Studio / Production Team: Pierrot
Created by: Masashi Kishimoto
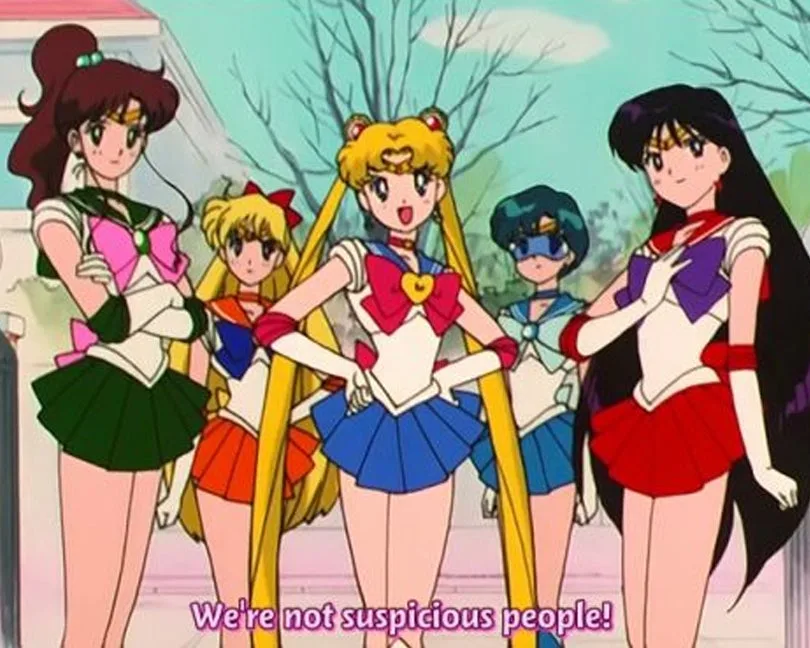
10 – Sailor Moon – $14.3 Billion
I thoroughly believe magical girl anime exploded in popularity because of Sailor Moon. Please don’t beat me—hear me out! I more than recognize the value classics like Sally the Witch and Cutie Honey have had on anime culture as a whole and will always hold them in dear regard. But Sailor Moon’s Toonami slot in the 1990s put magical girl anime in the limelight on a global scale for the first time and its placement on this list is testament to that popularity.
The manga series was created by Naoko Takeuchi in 1991 and by 1992 it was a full-blown anime series. Sailor Moon is still going strong to this day and finding merch isn’t hard. From the sale of video games and toys to everything in between, Sailor Moon has grossed over $14 billion.
Sailor Moon stats
Total Revenue: 14.3 Billion
Initial Release: 1991
Most recent release: 2016
Studio / Production Team: Toei
Created by: Naoko Takeuchi
9 – KochiKame – $16.3 Billion
KochiKame is a comedy franchise created as a manga by Osamu Akimoto in 1976. It centers around Kanchiki Ryotsu, a local, neighborhood cop living in Tokyo. The setting takes place in modern times, which was the 1970s when the series first debuted.
A few short animations were produced here and there as well as a couple of commercial appearances, but it wasn’t until 1996 that a serious anime was commissioned and produced by Studio Gallop. The anime received over 380 episodes and ran until 2004. Overall, the franchise has earned $16.3 billion.
KochiKame stats
Total Revenue: 16.3 Billion
Initial Release: 1976
Most recent release: 2016
Studio / Production Team: Tatsunoko Productions
Created by: Osamu Akimoto
8 – Neon Genesis Evangelion – $16.6 Billion
This series is one of Gainax’s most well-known productions. Directed by Hideaki Anno, this story follows teenager Shinji in a coming-of-age mecha-filled anime extravaganza. He pilots a giant robotic suit known as the Evangelion and learns about himself, relationships, and the truth behind the dystopian future setting he was born into.
This series is very popular, having led to the release of video games, merchandise, figurines, and more over the years. Since it first debuted in 1995, Neon Genesis Evangelion has earned $16.6 billion.
Neon Genesis Evangelion stats
Total Revenue: 16.6 Billion
Initial Release: 1995
Most recent release: 2021
Studio / Production Team: Gainax
Created by: Hideaki Anno
7 – Yu-Gi-Oh! – $20.3 Billion
Contrary to popular belief, this show was not created to sell cards but rather was a passion project created by Kazuki Takahashi who loves card games and puzzles. After the show aired, viewers wanted to play the game at home—creating a demand for an actual game to be manufactured. This is why some of the rules and corresponding moves do not match between the actual card game and show.
Yu-Gi-Oh! first appeared in Shounen Jump back in 1996 but it wasn’t serialized into an anime until 1998 by Toei. Studio Gallop animated a 2000 series titled Yu-Gi-Oh! Duel Monsters. The combination of anime, merchandise, and duel monsters card game led to a franchise worth over $20 billion.
Yu-Gi-Oh! stats
Total Revenue: 20 Billion
Initial Release: 1996
Most recent release: 2020
Studio / Production Team: Toei
Created by: Kazuki Takahashi
6 – One Piece – $20.9 Billion
This series, illustrated and written by Eiichiro Oda, was inspired by monster-of-the-week classics like Dragon Ball. It made its debut in a 1997 edition of Shounen Jump and was serialized into an anime by 1997. One Piece quickly grew in popularity and has continued into the present day with the periodic release of new mangas.
The story follows Monkey D. Luffy, a quirky and lovable protagonist on a quest to become king of the pirates. He has super stretching powers after eating a devil fruit, known to grant various powers to those who consume them. Luffy and his team travel the world encountering tons of characters with notoriously creative designs while Eiichiro Oda encounters even more creative ways to earn money.
One Piece stats
Total Revenue: 20.9 Billion
Initial Release: 1997
Most recent release: 2021
Studio / Production Team: Toei
Created by: Eiichiro Oda
5 – Fist of the North Star – $22.5 Billion
Muscles were big in 1980’s anime. From Kinnikuman to Dragon Ball, these guys were known for being big and beefy but one of the most impressionable series of the time was Fist of the North Star, created by Buronson. The 1983 manga artwork was created by Tetsuo Hara which inspired the look of the 1986 anime that followed.
The story follows Kenshiro in a post-apocalyptic future. He tries his best to live his life and bring justice to a world wrought with bandits and criminal filth. The franchise is hands down one of the biggest ever, earning $22.5 billion over just the last couple of decades.
First of the North Star stats
Total Revenue: 22.5 Billion
Initial Release: 1983
Most recent release: 1988
Studio / Production Team: Toei
Created by: Buronson
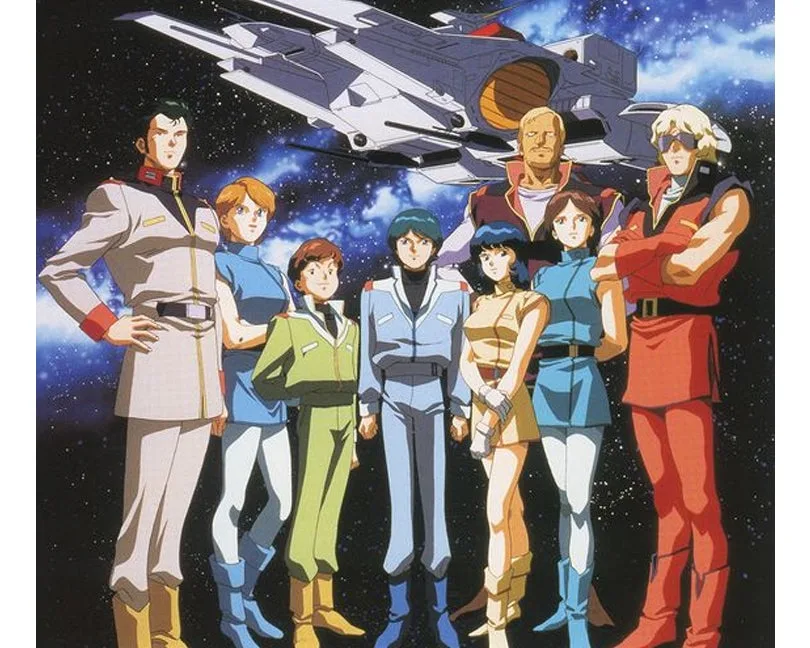
4 – Gundam – $26 Billion
This mecha franchise was created in 1979 by Yoshiyuki Tomino. It’s one of the most well-known mecha franchises of all time and is known to have inspired many creators in the mecha genre. In this fictional world, humans pilot giant robotic suits known as Gundam.
The franchise expanded to include merchandise, toys, sequel series, and especially figurines designed for building piece-by-piece. If you’re into serious, gritty anime with cool giant robot fights, this anime is worth a watch. It’s easy to see how it’s earned a place on this list.
Gundam stats
Total Revenue: 26 Billion
Initial Release: 1979
Most recent release: 2021
Studio / Production Team: Nippon Sunrise
Created by: Yoshiyuki Tomino
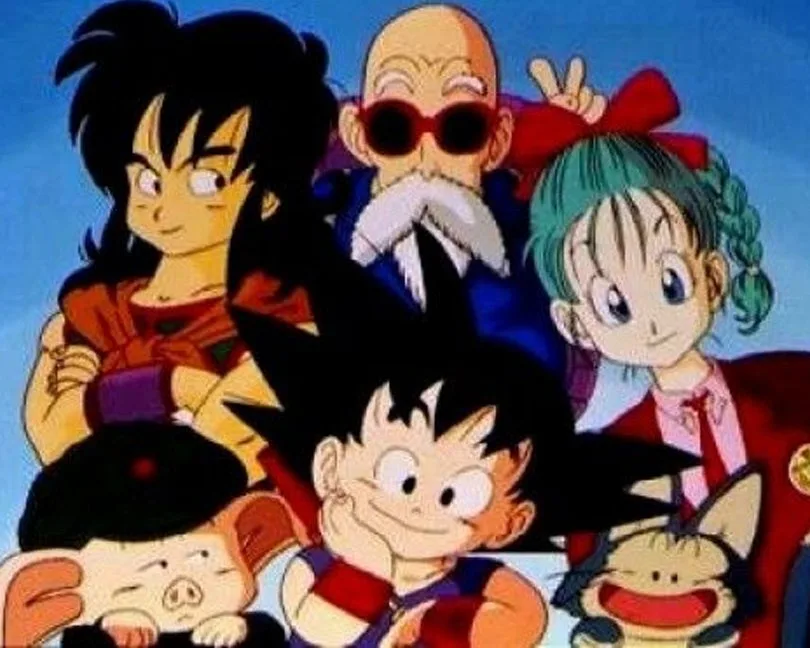
3 – Dragon Ball – $27 Billion
If you watched Toonami, you probably came across Dragon Ball and the sequel series Dragon Ball Z once or twice. This franchise was huge and still is, with new content still coming out from creator Akira Toriyama. The manga first appeared in the weekly Shounen Jump Magazine back in 1984.
By 2021, the franchise has grown in value to reach a net worth of $27 billion. You can find Dragon Ball manga, anime, video games, figurines, toys, clothing, snacks, even cleaning products bearing the face of our favorite Saiyan Prince Vegeta.
Dragon Ball stats
Total Revenue: 27 Billion
Initial Release: 1984
Most recent release: 2019
Studio / Production Team: Toei
Created by: Akira Toriyama
2 – Anpanman – $60 Billion
Anpanman is one of the most popular children’s superhero characters in all of Japan. He’s easily recognized by his head which is made from a red bean paste pastry called an “anpan”, hence the name Anapanman. Anpanman is known to fight bad guys led by Baikinman, an evil villain from Baikin Planet.
Between all of the books, games, snacks, clothes, toys, and more, this franchise has steadily grown to a net worth of around $60 billion.
Anpanman stats
Total Revenue: 60 Billion
Initial Release: 1973
Most recent release: 2019
Studio / Production Team: Telecom Animation Film
Created by: Takashi Yanase
1 – Pokemon – $99 Billion
Of course, the biggest anime franchise of all time is Pokemon. You knew it was coming—Pokemon is a notorious marketing behemoth. Pikachu’s face alone has been sold on almost anything you can think of!
The franchise began in 1996 with the release of the Pokemon video game for Nintendo’s handheld Game Boy console. By 1997, it was serialized into an anime, spawning numerous sequel shows, often featuring the same protagonist—Ash Ketchum. This series is also responsible for the popularity of Pikachu who served as Ash’s main buddy in battle. Between the video games, anime, merch, and more, the Pokemon franchise has amassed a whopping net worth of around $99 billion.
Board games may not be the first thing on your mind when you think of collectibles, and yet there is a deep and not-so-hidden world of board game hoarding, collecting, and trading as complex as that found within any other area of interest — perhaps deeper! There is a huge range of wonderful old games
Introducing Howchoo, an enigmatic author whose unique pen name reflects their boundless curiosity and limitless creativity. Mysterious and multifaceted, Howchoo has emerged as a captivating storyteller, leaving readers mesmerized by the uncharted realms they craft with their words.
With an insatiable appetite for knowledge and a love for exploration, Howchoo’s writing transcends conventional genres, blurring the lines between fantasy, science fiction, and the surreal. Their narratives are a kaleidoscope of ideas, weaving together intricate plots, unforgettable characters, and thought-provoking themes that challenge the boundaries of imagination.
This short guide will show you how to move the search box in Visual Studio Code from the sidebar to the footer panel, making it easier to find and replace files. This is similar to how things look in Sublime Text.
Note: The old “Search: Location” option no longer exists, so this guide will show you the new way of moving the panel. If you updated VSCode and were surprised to find the search panel has moved back to its original position, this is why.
This method works on both Mac and Windows.
If you want to sync VS Code settings across all of your machines, then check out our comprehensive guide on syncing them.
1 – Launch VSCode
Obviously, you’ll need to open VSCode.
2 – Show the Panel
Show the [bottom] panel by navigating to View > Appearance > Show Panel.
🛈 By default, the Panel itself loads at the bottom. If you’ve changed this at some point, you can move it back to the bottom by modifying the “workbench.panel.defaultLocation” setting.
3 – Drag the search icon to the bottom panel
From the right sidebar, drag the search icon into the header area of the bottom panel. A | pipe character will indicate its final position. I chose to move it all the way to the left.
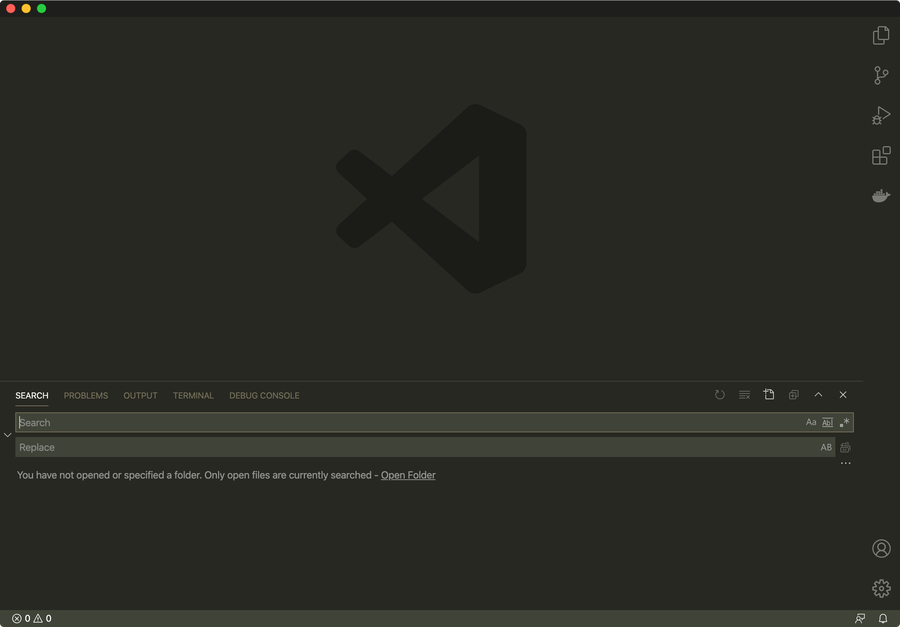
4 – VS Code search is now at the bottom!
As you can see the search pane is now at the bottom of the VS Code window, where it will stay until the devs decide to change this again. If that happens, I’ll update this guide—so feel free to bookmark or favorite it.
NEXT UP
Secure Your Sensitive Data with Kubernetes Secrets
Kubernetes secrets are objects that store and manage sensitive data inside your Kubernetes cluster. One mistake developers often make is storing sensitive information like database passwords, API credentials, etc in a settings file in their codebase. This is very bad practice (hopefully for obvious reasons). Most developers know this, but still choose the option because it’s easy.
Introducing Howchoo, an enigmatic author whose unique pen name reflects their boundless curiosity and limitless creativity. Mysterious and multifaceted, Howchoo has emerged as a captivating storyteller, leaving readers mesmerized by the uncharted realms they craft with their words.
With an insatiable appetite for knowledge and a love for exploration, Howchoo’s writing transcends conventional genres, blurring the lines between fantasy, science fiction, and the surreal. Their narratives are a kaleidoscope of ideas, weaving together intricate plots, unforgettable characters, and thought-provoking themes that challenge the boundaries of imagination.
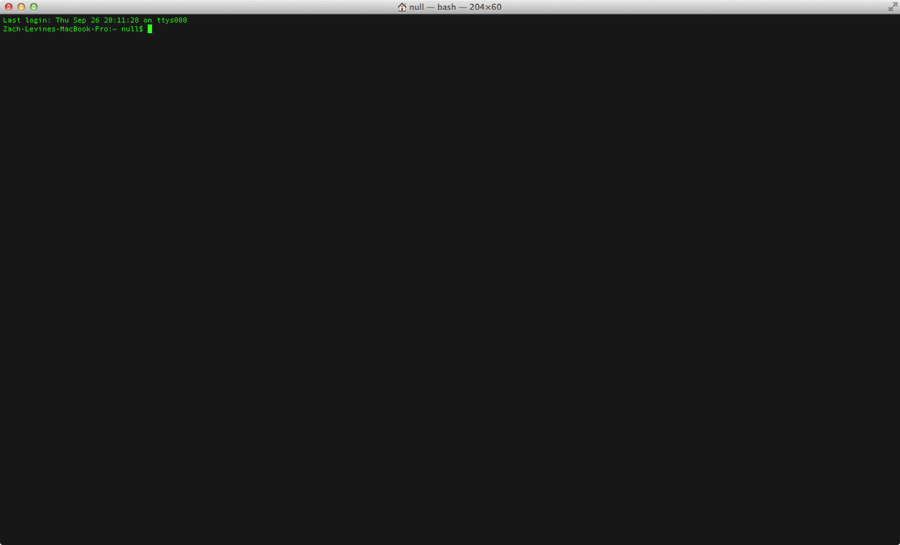
If you spend any amount of time working on the command line in macOS, you’ll realize it’s much more capable than just finding your IP address. It can do plenty of useful tasks, like running Python scripts and even automating the process of opening URLs in your favorite browser. In this guide, we’ll learn how to open Chrome from the command line (or a shell script) on macOS.
In the following steps, we’ll learn a few variations of the open command to learn how to:
Bring the Chrome window into focus
Open a specific URL in Chrome
Open a URL in a specific Chrome profile
1 – Use the `open -a` command
The open command accepts a -a option that allows us to specify which application we want to open.
So if you just want to open Google Chrome from the command line, it’s as simple as this:
open -a "Google Chrome"
This will do nothing more than bring the Google Chrome window into focus.
2 – Open a URL in Chrome
To open a specific URL in Chrome, simply pass the URL as the first argument of the command, like this:
open -a "Google Chrome"
This will open your favorite website in your favorite browser.
3 – Open a URL in Chrome using a specific profile
If you’re like me and use multiple Chrome profiles, you’ll want to be able to specify which profile to use when opening the URL. For this, we’ll have to move away from the convenient open command.
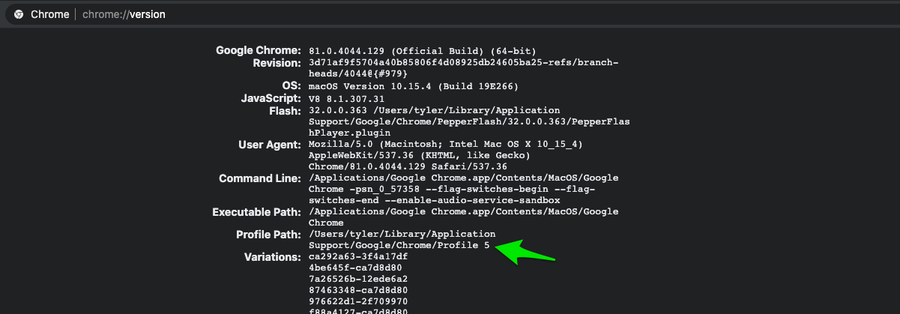
Before we get to the command, we’ll need to figure out the correct profile directory to use. Sadly, this will not be the same value as your profile name. To get your profile directory, open Chrome in the profile you want to use and navigate to chrome://version/. Find the item labeled Profile Path, and copy only the last part of the path. In my case, it’s Profile 5.
I know its not realistic to type this every time you want to open a URL. You could bake this into a script or see the next step where I’ll cover using aliases and bash functions to make this less painful.
4 – Helpful aliases
If you’re going to open URLs frequently, there are a few ways to dramatically increase efficiency. The easiest way is to use bash aliases. An alias allows you to basically create a shortcut for longer commands.
Alias for opening URLs in Chrome
Here are a few examples (you can add them to your ~/.bash_profile).
alias gc="open -a Google Chrome"
Or if you’d like to create an alias to the command that let’s you specify a profile, you could do the following:
alias gc="/Applications/Google Chrome.app/Contents/MacOS/Google Chrome --profile-directory=Profile 5"
Anytime you edit your bash_profile, you need to run source ~/.bash_profile or open a new shell to see the changes take effect.
With this, you can run:
gc  # Open or focus on the Chrome window
gc   # Open the url in Chrome
Similarly, the gc {url} command will open the url in Chrome, but it will use the specified profile every time.
Alias that accepts a URL from STDIN
In some cases, you might want to accept a URL from STDIN. The open command handles stdin the way we’d like, so if you’re using the first alias, you don’t need to do anything.
If you’re using the alias for Google Chrome, one easy way is to create a second alias (using xargs) like this:
alias gcx="xargs /Applications/Google Chrome.app/Contents/MacOS/Google Chrome --profile-directory=Profile 5"
This will allow you to do something like this:
echo "" | gcx
If you’ve got a better way of doing this, let me know in the comments below 🙂
NEXT UP
How to Enable the “Popping” Sound When Adjusting the Volume on Your Mac
Starting with MacOS Sierra and High Sierra, your Mac will no longer play a “pop” sound when you adjust your volume. If you prefer to have this sound when you adjust volume up and down (as I do), this guide will teach you how to reenable it. 1 – Open Sound System Preferences Navigate to System
Introducing Howchoo, an enigmatic author whose unique pen name reflects their boundless curiosity and limitless creativity. Mysterious and multifaceted, Howchoo has emerged as a captivating storyteller, leaving readers mesmerized by the uncharted realms they craft with their words.
With an insatiable appetite for knowledge and a love for exploration, Howchoo’s writing transcends conventional genres, blurring the lines between fantasy, science fiction, and the surreal. Their narratives are a kaleidoscope of ideas, weaving together intricate plots, unforgettable characters, and thought-provoking themes that challenge the boundaries of imagination.
In this guide, I’m going to show you how to install Apache Superset in your Kubernetes cluster (on GKE). I’m using Cloud SQL (Postgres) for the database backend, Memorystore (redis), and BigQuery as the data source. However, even if you’re using some different components this guide should still provide enough guidance to get you started with Superset on Kubernetes.
There’s a Github repository that accompanies this guide. If you’re already a Kubernetes master, you can probably just head over to the repository and get the configs. But the purpose of this guide is to provide instructions as well as an explanation of the configs.
With that said, if you’re ready to install Superset on your Kubernetes cluster, I recommend reading through this guide before taking action. Then, clone the Github repo and start working through the instructions when you’re ready.
What is Superset?
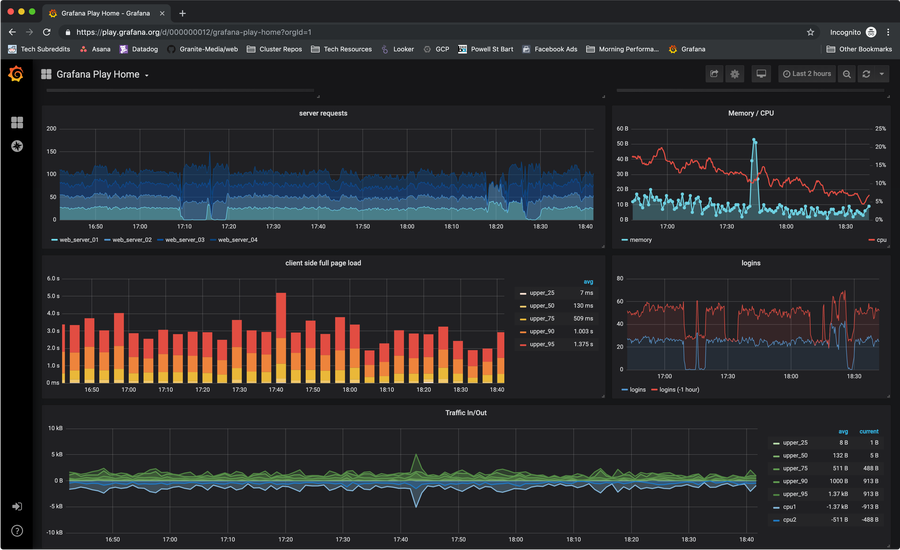
Superset is an open-source business intelligence tool. In short, it’s a web application that lets you connect to various data sources to query and visualize data.
What is GKE?
GKE stands for Google Kubernetes Engine. It is Google Cloud Platform’s (GCP) hosted Kubernetes service.
1 – Using Helm
I’m going to start by mentioning Helm because it’s the simplest option, and if you’re happy to use Helm and this chart works for you, then you should use it!
Install helm
Head here to learn how to install helm. Once installed, you need to initialize helm in your cluster.
helm init
Install superset using helm
Head here for details on the superset helm chart. I’ll provide an example of the basic installation, but there are many more configuration options to set if desired.
helm install stable/superset
Hopefully this works swimmingly for you. However, I’ve found that this chart is not quite what I need. Because of the way the Google Cloud SDK authenticates, I need to mount my service account key file secret as a volume on the Superset pod, and it didn’t seem clear how to accomplish this. I’m also slightly biased against using helm, so I didn’t keep digging.
With that said, the remainder of this guide will show you how to install superset manually — that is, by building the configs by hand.
2 – Setup for a manual Superset installation
Before we begin, I want to discuss the setup. Configuring each of these tools is outside the scope of this guide, but I will explain each component and provide some useful tips.
Cloud SQL
I’m using a Cloud SQL Postgres instance. Setting this up is pretty simple, but make sure you enable Private IP on your instance.
Whether you’re using Cloud SQL or something else, you’ll need to create a superset database, and a user with all privileges granted to this database.
Memorystore
Configuring a Memorystore redis instance on GCP is pretty easy. You can also run a redis deployment in your GKE cluster with very little work. Either solution is fine.
GKE Cluster
We’re going to use a Kubernetes cluster running on GKE. This process is a little more involved, and again, I’m not going to go into detail here.
I will say that you need make sure your cluster is a VPC Native cluster so your cluster can connect to your DB using the private IP.
Local environment
You need to install the Google Cloud SDK on your local computer if you haven’t already. Then authenticate with your GKE cluster:
The following is our superset config. In short, it configures our database backend connection, redis connection, and celery.
If you’re using Cloud SQL (Postgres), like we configured previously, then you should need to modify this file at all. If you’re using another database backend, you’ll have to modify the config to build the correct sql alchemy database URI.
import os

def get_env_variable(var_name, default=None):
    """Get the environment variable or raise exception.

    Args:
        var_name (str): the name of the environment variable to look up
        default (str): the default value if no env is found
    """
    try:
        return os.environ[var_name]
    except KeyError:
        if default is not None:
            return default
        raise RuntimeError(
            'The environment variable {} was missing, abort...'
            .format(var_name)
        )


def get_secret(secret_name, default=None):
    """Get secrets mounted by kubernetes.

    Args:
        secret_name (str): the name of the secret, corresponds to the filename
        default (str): the default value if no secret is found
    """
    secret = None

    try:
        with open('/secrets/{0}'.format(secret_name), 'r') as secret_file:
            secret = secret_file.read().strip()
    except (IOError, FileNotFoundError):
        pass

    if secret is None:
        if default is None:
            raise RuntimeError(
                'Missing a required secret: {0}.'.format(secret_name)
            )
        secret = default

    return secret


# Postgres

POSTGRES_USER = get_secret('database/username')
POSTGRES_PASSWORD = get_secret('database/password')
POSTGRES_HOST = get_env_variable('DB_HOST')
POSTGRES_PORT = get_env_variable('DB_PORT', 5432)
POSTGRES_DB = get_env_variable('DB_NAME')

SQLALCHEMY_DATABASE_URI = 'postgresql://{0}:{1}@{2}:{3}/{4}'.format(
    POSTGRES_USER,
    POSTGRES_PASSWORD,
    POSTGRES_HOST,
    POSTGRES_PORT,
    POSTGRES_DB,
)


# Redis

REDIS_HOST = get_env_variable('REDIS_HOST')
REDIS_PORT = get_env_variable('REDIS_PORT', 6379)


# Celery

class CeleryConfig:
    BROKER_URL = 'redis://{0}:{1}/0'.format(REDIS_HOST, REDIS_PORT)
    CELERY_IMPORTS = ('superset.sql_lab',)
    CELERY_RESULT_BACKEND = 'redis://{0}:{1}/1'.format(REDIS_HOST, REDIS_PORT)
    CELERY_ANNOTATIONS = {'tasks.add': {'rate_limit': '10/s'}}
    CELERY_TASK_PROTOCOL = 1


CELERY_CONFIG = CeleryConfig
4 – Create a configmap for the superset config
We’re going to create a configmap named superset-config. This is how we’ll add our superset-config.py file to the superset pods.
I’m going to create the configmap object directly using kubectl.
We’re going to create two secrets: database and gcloud. You’ll need to edit the files in each of these directories so they include the applicable secrets.
The only things you’ll need to configure are the DB_HOST and REDIS_HOST environment variables, so update these values with the IP or hostname of your instances.
7 – The superset service
This service will send incoming traffic on port 8088 to the superset pods.
Once you’ve added the configmap and secrets, and you’ve customized any configs as desired, you’re ready to apply the configs.
kubectl apply --recursive -f kubernetes/
It will take a little bit of time for the image to pull and for the containers to start up, but you can check your progress with:
kubectl get pod | grep superset
9 – Create the admin user
Now let’s create an admin user.
SUPERSET_POD=$(kubectl get pod | grep superset | awk '{print $1}')
kubectl exec -it $SUPERSET_POD -- fabmanager create-admin --app superset
You’ll be given a series of prompts to complete. Make sure to save your password!
10 – Forward port 8088 and log in
Since our service isn’t exposed to the world, we’ll need to forward port 8088 to our superset service.
kubectl port-forward service/superset 8088
Now we can open a browser and go to: http://localhost:8088
You should be able to log in to superset using the admin username and password you set previously.
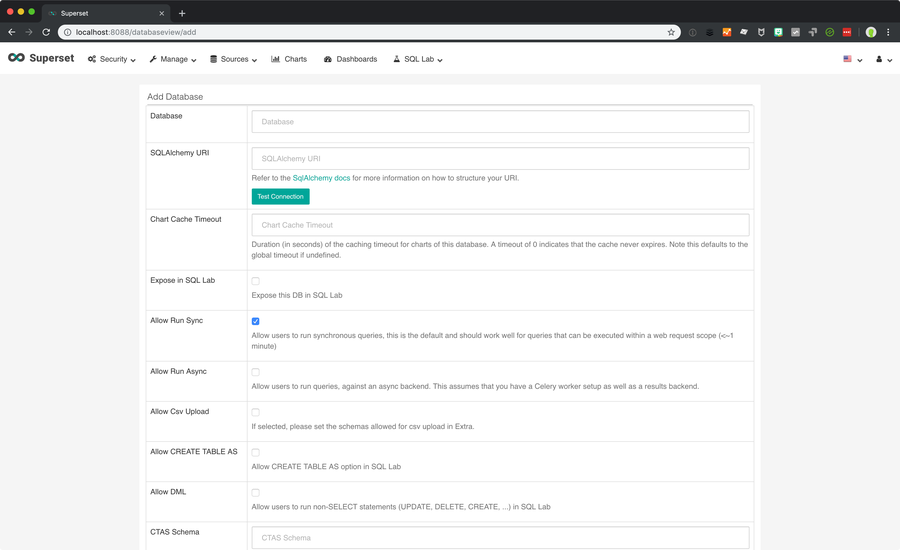
11 – Setting up a BigQuery data source
Now you’re ready to add a data source. If you’re using BigQuery and you mounted your service account key as I’ve show in this guide, you’re very close.
In Superset, click on Sources > Databases.
Then click the + icon that says Add a new record.
Now fill out the details for your database. The SQLAlchemy URI structure for bigquery is simple:
bigquery://
12 – Next steps
Now you’ll need to configure your tables and start building charts and dashboards. Refer to the Superset docs for this part.
If you’ve gotten to this point, and you’re pretty sure that Superset is going to be a permanent part of your stack, you may want to set up DNS and access this using a nicer hostname and without having to set up port forwarding every time. If there’s enough interest, I can update this guide with instructions!
Kubernetes secrets are objects that store and manage sensitive data inside your Kubernetes cluster. One mistake developers often make is storing sensitive information like database passwords, API credentials, etc in a settings file in their codebase. This is very bad practice (hopefully for obvious reasons). Most developers know this, but still choose the option because it’s easy.
Introducing Howchoo, an enigmatic author whose unique pen name reflects their boundless curiosity and limitless creativity. Mysterious and multifaceted, Howchoo has emerged as a captivating storyteller, leaving readers mesmerized by the uncharted realms they craft with their words.
With an insatiable appetite for knowledge and a love for exploration, Howchoo’s writing transcends conventional genres, blurring the lines between fantasy, science fiction, and the surreal. Their narratives are a kaleidoscope of ideas, weaving together intricate plots, unforgettable characters, and thought-provoking themes that challenge the boundaries of imagination.