Home Interests Retrogaming

How to Use a GameCube Controller on PC

Nothing beats the original GameCube controller.
howchoo   (467)
September 20, 2023
10 minutes

Share

You’ll Need 2

What you’ll need
Interests
Howchoo is reader-supported. As an Amazon Associate, we may earn a small affiliate commission at no cost to you when you buy through our links.
Posted in these interests:
READY PLAYER 1
gaming • 85 guides

PC

pc • 3 guides
retrogaming • 29 guides

If you’re a fan of the original Nintendo GameCube, you’re not alone. But sometimes emulating GameCube games just isn’t the same if the controller doesn’t hit right. And by that we mean—you need the original hardware to make the experience. If you want to use the original GameCube controller on a PC, all you need is the right adapter and a few settings to get the classic experience you crave.

In this guide, we’ll not only cover how to connect an original GameCube controller to a PC but also how to get the hardware you need to complete the setup. If you already have a GameCube controller and PC adapter, you can skip to step 3.

If you’re interested, you should also check out our guides on how to connect a GameCube controller to a Wii, or to a Nintendo Switch!

Looking for other retro controller ideas for PC gaming?

Check out our list of the best PC gaming controllers for some inspiration!

1 – Acquire a GameCube controller

If you want to use a GameCube controller on the PC, you’ll need a GameCube controller. Some people might have an old controller from the console’s heyday while others may need to find one online.

You can find similar third-party facsimiles online, like a GameCube controller by Fiotok, as well as used versions of the actual controller. If you want new hardware, you may want to go with a third-party option. If you want an actual GameCube controller, you’ll likely have to settle for a used device.

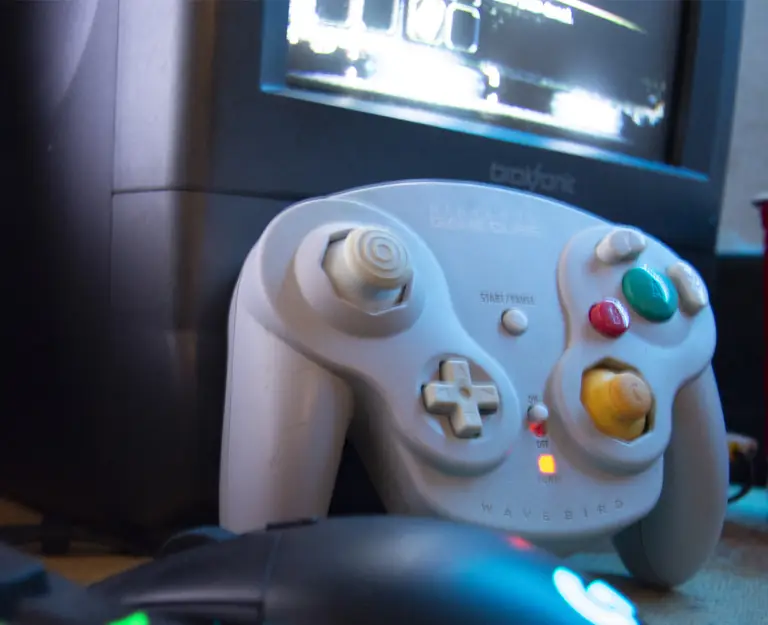
It’s also worth mentioning that you aren’t limited to the wired edition. The original wireless WaveBird controller will absolutely work. I personally guarantee it—I’ve used mine on the PC for years.

2 – Find a compatible GameCube to PC adapter

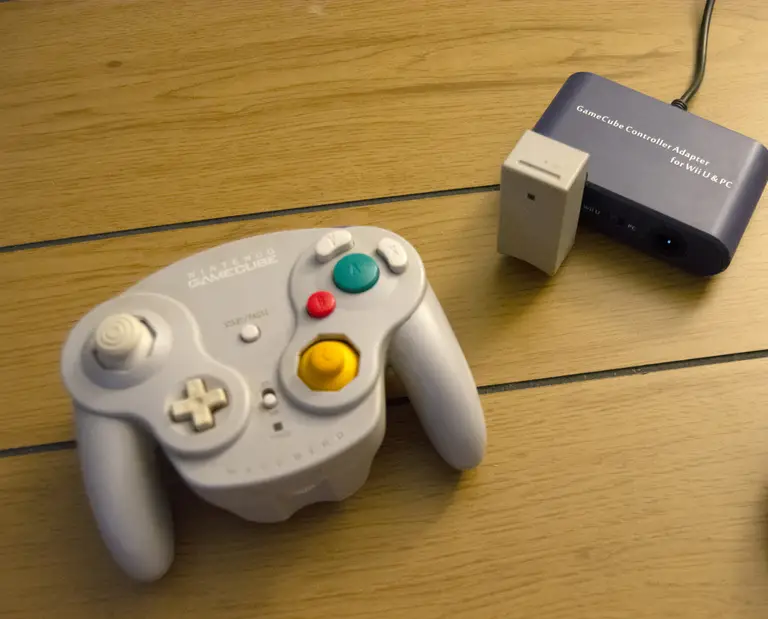
In order for your PC to establish a connection to the GameCube controller, you’ll need GameCube controller to PC adapter. You’ll notice the GameCube controller interface is proprietary and your PC does not have a slot for the plug to fit into (if you see one that looks close, don’t even try it—we promise that’s not it).

You will need a GameCube controller to PC adapter. There are a few available online with newer editions offering compatibility with the Nintendo Switch. The older adapters are designed to work with both the Wii U and PC. These are often a little bit cheaper due to their age and are ideal for anyone who intends to mainly connect the controller to a PC rather than a console. If you plan on using the controller with a Switch, you may want to shell out the extra money for the newer version.

3 – Set up the GameCube to PC adapter

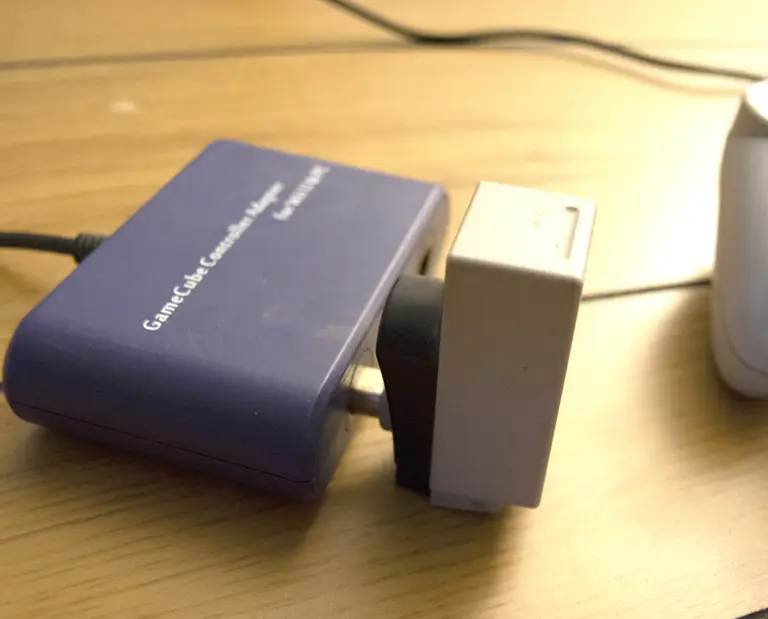
  • Plug the adapter into an open USB port on your computer. Drivers will automatically install.
  • Connect the GameCube controller to the adapter by plugging it into one of the ports.

In most cases, the left port is designated as Port 1 while the right port is recognized as Port 2. Keep this in mind when connecting your controller as you may need this information when configuring your controller in an emulator.

4 – Configure the GameCube controller in the OS

You may want to make sure your computer is recognizing the controller before using it in an emulator. Open the controller settings for your operating system and look for the GameCube controller. It will likely be named by the product name for the adapter you’re using. Once you confirm the adapter is recognized as a controller, you can move on to setting it up in an emulator like Dolphin.

5 – Connect the GameCube Controller to Dolphin

At this point, you can configure your controller with any emulator of your choosing. We definitely recommend using Dolphin for your GameCube emulation needs. Check out our guide on how to set up and install Dolphin for details on how to get started.

Once you have Dolphin installed, you can point the controller settings to the GameCube and PC adapter. It should appear under the devices list when configuring your controller settings. If you’re not using Dolphin, the same should generally apply. These adapters convert the GameCube input into what’s recognized by the PC as a USB controller.

Note: If your adapter isn’t working in Dolphin, you may need to install a third-party driver called Zadig. You can read more about resolving this problem on the official Dolphin website.

NEXT UP

Top 10 Enchantments in Minecraft

howchoo   (467)
March 25, 2024

The longer you play Minecraft, the more you realize that early-game tools just won’t cut it. Exploring the enchantment feature of Minecraft can be exciting, but also intimidating. Rather than worry about researching enchantments, below are the best enchantments in Minecraft! To learn how to enchant items, check out this guide! In this guide, you’ll see

Continue Reading

howchoo

 467 guides

Introducing Howchoo, an enigmatic author whose unique pen name reflects their boundless curiosity and limitless creativity. Mysterious and multifaceted, Howchoo has emerged as a captivating storyteller, leaving readers mesmerized by the uncharted realms they craft with their words. With an insatiable appetite for knowledge and a love for exploration, Howchoo’s writing transcends conventional genres, blurring the lines between fantasy, science fiction, and the surreal. Their narratives are a kaleidoscope of ideas, weaving together intricate plots, unforgettable characters, and thought-provoking themes that challenge the boundaries of imagination.

Home Interests RetroPie

How to Add ROMs to RetroPie

You gotta put ’em somewhere!
howchoo   (467)
September 20, 2023
13 minutes

Share

You’ll Need 1

What you’ll need
Interests
Series
Howchoo is reader-supported. As an Amazon Associate, we may earn a small affiliate commission at no cost to you when you buy through our links.
Posted in these interests:
pi • 92 guides
retrogaming • 29 guides
retropie • 17 guides

Ready to play? You’ll need some ROMs first! Today we’re going over the many different ways you can transfer ROMs to RetroPie on the Raspberry Pi. If you’re not sure where to start, one of these methods is guaranteed to put you on the right path.

What is RetroPie?

RetroPie is an open-source emulation platform. In simple terms, it’s for emulating retro video games! RetroPie is built on top of RetroArch and runs perfectly on the Raspberry Pi. You can use RetroPie to emulate both consoles and computer systems. Visit our guide to learn how to set up RetroPie on a Raspberry Pi.

RetroPie: Build Your Own Raspberry Pi Retro Gaming Rig
How to install (and use) RetroPie!

1 – Transfer ROMs via Network share on Windows

Using Samba—a software suite built into RetroPie—you can send files to RetroPie over a network. First, make sure that your Raspberry Pi and computer with ROMs are on the same network.

On the same computer that has your ROMs, hold down the Windows key and press R. In the Run dialogue, enter the following:

\RETROPIE

Alternatively, you can replace \RETROPIE with an IP address like this:

\127.0.0.1

Press Enter or click OK. This will open a window with folders you can move content into and out of.

ROMs need to go in the ~/RetroPie/roms/ folder. You will need to sort them by console/OS for RetroPie to launch them properly. For example, SNES games would go in the ~/RetroPie/roms/SNES folder.

2 – Transfer ROMs via Network share on Mac

Samba is built into RetroPie, it lets us add and remove content for RetroPie over the network. Make sure your Pi and computer with ROMs are on the same network.

Access the computer with your ROMs and open the Finder tool on macOS.

Browse to Network > retropie > roms

This will open the RetroPie ROMs directory on your Pi. Now you can drag and drop files directly to RetroPie. You will need to sort ROMs by console and OS. For example, you should put NES games in the ~/RetroPie/roms/NES folder.

3 – Transfer ROMs via USB

It’s also possible to transfer ROMs using a USB flash drive. Make sure it’s formatted to FAT32 to work with RetroPie.

First, connect the flash drive to your computer and create a folder named retropie on the drive.

Unplug the flash drive from your computer and connect it to the Raspberry Pi. The Pi needs to be on for this step. You will see a flashing light on the drive when it’s connected.

When the flash drive LED stops blinking, remove it from the Raspberry Pi and connect it to your computer again. Now you can add ROMs to the flash drive. Sort the ROMs into the appropriate folder for each console or system.

After the ROMs have been loaded, plug the flash drive back into the Pi. Wait for the LED to stop blinking and remove the flash drive from the Pi. You may need to relaunch RetroPie or reboot the Pi altogether to locate the new ROMs.

4 – Transfer ROMs via FTP (SFTP) on Windows

It’s really easy to transfer ROMs to RetroPie directly using an FTP setup.

First, we need to enable SSH. Visit our guide on how to enable SSH on the Raspberry Pi and come right back.

How to Enable SSH on Raspberry Pi OS Without a Screen
The SSH protocol is disabled by default.

There are many FTP programs available for Windows 10. My personal favorite is WinSCP. It has everything we need and also comes recommended by the RetroPie devs on Github.

Open WinSCP (or your FTP client of choice) and enter the IP address of your Raspberry Pi. You can choose SFTP or enter port 22 if needed. The default username and password is:

Username: pi
Password: raspberry

WinSCP will load the complete directory for your Raspberry Pi. From here, navigate to the appropriate folder for each console or system you want to add ROMs to. You can typically find this under a path similar to ~/RetroPie/roms/*[console folder]*.

Drag and drop your ROM files directly to the Pi.

5 – Transfer ROMs via FTP (SFTP) on Mac

ROMs can be transferred to RetroPie directly using FTP.

First things first—we need to enable SSH. Check out our guide on how to enable SSH on the Raspberry Pi real quick. I’ll wait.

How to Enable SSH on Raspberry Pi OS Without a Screen
The SSH protocol is disabled by default.

There are many different FTP applications supported by macOS. Cyberduck is officially recommended by the Github devs and will work perfectly for us.

Launch Cyberduck (or your preferred FTP client) and enter the IP address for your Pi. You can specify port 22, if necessary. The default username and password is:

Username: pi
Password: raspberry

Once logged in, you can navigate the Raspberry Pi directory from your computer. We’re looking for a specific folder to load our ROMs into. It’s usually similar to this path: ~/RetroPie/roms/*[console folder]*

From here, you can drag and drop ROMs directly to RetroPie! Be sure to sort the ROMs into the correct console or system folder.

6 – Where to find more ROMs

Looking for more ROMs? I don’t blame you. There’s tons of great content out in the world, why not build up a collection?

We have a dedicated list of free and legal ROMs for emulators on RetroPie. Check out our RetroPie ROMs guide to work on your game library!

Did you know you can play multiplayer games on RetroPie with your friends using Netplay? Check out this guide to set up multiplayer on RetroPie.

NEXT UP

How to Run a Minecraft Server on the Raspberry Pi

A whole world trapped inside your Pi.
howchoo   (467)
December 7, 2023

There are several ways to go about running a Minecraft server on the Raspberry Pi. In this guide, I’ll cover how to install Nukkit—a cross-platform Minecraft server that’s super easy to set up on the Raspberry Pi. This server should work with PCs, consoles, and tablets running Minecraft 1.14. I’ll be using a Raspberry Pi

Continue Reading

howchoo

 467 guides

Introducing Howchoo, an enigmatic author whose unique pen name reflects their boundless curiosity and limitless creativity. Mysterious and multifaceted, Howchoo has emerged as a captivating storyteller, leaving readers mesmerized by the uncharted realms they craft with their words. With an insatiable appetite for knowledge and a love for exploration, Howchoo’s writing transcends conventional genres, blurring the lines between fantasy, science fiction, and the surreal. Their narratives are a kaleidoscope of ideas, weaving together intricate plots, unforgettable characters, and thought-provoking themes that challenge the boundaries of imagination.

Home Interests InDesign

How to Change Pixels to Inches in InDesign

From Picas to Pixels to Inches and more. This guide will show you how.
howchoo   (467)
September 20, 2023
2 minutes

Share

You’ll Need 1

What you’ll need
Interests
Howchoo is reader-supported. As an Amazon Associate, we may earn a small affiliate commission at no cost to you when you buy through our links.
Posted in these interests:
 
adobe • 7 guides
design • 4 guides
indesign • 4 guides

InDesign uses “picas” as its default measurement for new documents. Many graphic designers will need to switch to “pixels” for projects. While publishers may want to use “inches” for laying out a book.

This guide will show you how to easily switch between the various measurement types in InDesign.

1 – Open “Units & Increments”

Click InDesign in the top toolbar.

Go to Preferences and click Units & Increments….

2 – Change to inches (or desired measurement)

Using the drop-down arrows for the Horizontal and Vertical measurements, choose the type of measurement you would like to use in the document.

Click Okay.

NEXT UP

How to Resize an Image in InDesign

There are two options for resizing in InDesign: the easy way and the precise way.
howchoo   (467)
December 7, 2023

You might think that resizing an image would be as simple as dragging the corner of the frame. Well, it is, and it isn’t! Remember that when resizing an image in InDesign, you’re essentially resizing the image’s frame. For more information, on inserting an image in InDesign and frames, check our guide. How to Insert an Image

Continue Reading

howchoo

 467 guides

Introducing Howchoo, an enigmatic author whose unique pen name reflects their boundless curiosity and limitless creativity. Mysterious and multifaceted, Howchoo has emerged as a captivating storyteller, leaving readers mesmerized by the uncharted realms they craft with their words. With an insatiable appetite for knowledge and a love for exploration, Howchoo’s writing transcends conventional genres, blurring the lines between fantasy, science fiction, and the surreal. Their narratives are a kaleidoscope of ideas, weaving together intricate plots, unforgettable characters, and thought-provoking themes that challenge the boundaries of imagination.

Home Interests RetroPie

Where to Find and Download RetroPie ROMs (Free and Legally)

Let’s find something to play!
howchoo   (467)
September 20, 2023
7 minutes

Share

You’ll Need 1

What you’ll need
Interests
Series
Howchoo is reader-supported. As an Amazon Associate, we may earn a small affiliate commission at no cost to you when you buy through our links.
Posted in these interests:
READY PLAYER 1
gaming • 85 guides
pi • 92 guides
retropie • 17 guides

You’ve just set up your Raspberry Pi with RetroPie, it’s plugged into the TV, you’ve got a controller in your hand when—GASP! You don’t have any games to play.

RetroPie: Build Your Own Raspberry Pi Retro Gaming Rig
How to install (and use) RetroPie!

If you’re looking for a place to get free games legally, we’ve got you covered! This guide includes everything you need to download ROMs (game files) for the most popular RetroPie consoles.

Once you’ve got something to play, don’t forget to visit our guide on how to add ROMs to RetroPie.

1 – Types of ROMs

RetroPie ROMs come in many different file formats and varieties. Not only do they vary between consoles, but they often fall into different legal territories. The most common types of ROMs include copyrighted, abandonware, public domain, and homebrew.

Copyrighted

ROMs are owned and licensed by existing businesses or people. In many countries, downloading these ROMs is considered a crime. Some countries allow citizens to maintain a backup copy of games or titles they already own. It’s best to research applicable legal regulations before pursuing any of these titles.

While you can also find ROMs in a RetroPie ROMs pack on any torrent site, you should not download any copyrighted titles as this may be illegal.

Abandonware

includes content in a sort of legal “gray area”. The businesses or people responsible for the copyright are either unavailable or no longer pursuing their licensing rights.

Public domain

ROMs are legally available to the public. These ROMs can be downloaded for personal use.

Homebrew

ROMs are created by individuals or small teams. Most of these ROMs were created recently, long after the prime of the respective console. For example, Little Sound DJ was released in 2001 to help musicians create chiptune music using original GameBoys (for more examples of modern GameBoy tech, check out our official list of GameBoy mods). However, it’s important to remember that just because something is homebrew doesn’t mean it’s free or legal to download without purchasing.

The Ultimate Original Game Boy Modding Guide
Game Boys are awesome. Let’s make them even better!

In this guide, we’ll only cover public domain material and homebrew content with no copyright restrictions for personal use. When you’re done, be sure to check out our other Raspberry Pi projects!

Raspberry Pi Projects
Find amazing Pi projects for any skill level!

2 – List of public domain ROMs

This list includes a selection of ROMs available in the public domain space. We’ve highlighted major consoles, but more can be found on the website sources provided.

Sources: MAME and Zophar

ConsoleROMs
Arcade / MAMEAvailable ROMs
Gameboy / Gameboy ColorAvailable ROMs
NESAvailable ROMs
DreamcastAvailable ROMs
GenesisAvailable ROMs
SNESAvailable ROMs

Finally, our list of the best video games from each year contains some links to old arcade ROMs.

What’s the Best Video Game From the Year You Were Born?
There were some close calls when making this list!

3 – List of homebrew ROMs

This list is comprised of free homebrew ROMs that are a-ok to download and play! Major consoles are listed in the table, but more are available on the provided website sources.

Sources: PDRoms

ConsoleROMs
Arcade / MAMEAvailable ROMs
Gameboy / Gameboy ColorAvailable ROMs
NESAvailable ROMs
DreamcastAvailable ROMs
GenesisAvailable ROMs
SNESAvailable ROMs
NEXT UP

Top 10 Enchantments in Minecraft

howchoo   (467)
March 25, 2024

The longer you play Minecraft, the more you realize that early-game tools just won’t cut it. Exploring the enchantment feature of Minecraft can be exciting, but also intimidating. Rather than worry about researching enchantments, below are the best enchantments in Minecraft! To learn how to enchant items, check out this guide! In this guide, you’ll see

Continue Reading

howchoo

 467 guides

Introducing Howchoo, an enigmatic author whose unique pen name reflects their boundless curiosity and limitless creativity. Mysterious and multifaceted, Howchoo has emerged as a captivating storyteller, leaving readers mesmerized by the uncharted realms they craft with their words. With an insatiable appetite for knowledge and a love for exploration, Howchoo’s writing transcends conventional genres, blurring the lines between fantasy, science fiction, and the surreal. Their narratives are a kaleidoscope of ideas, weaving together intricate plots, unforgettable characters, and thought-provoking themes that challenge the boundaries of imagination.

Home Interests Docker

How to Run a Raspberry Pi Cluster with Docker Swarm

An in-depth Raspberry Pi cluster example.
howchoo   (467)
September 20, 2023
22 minutes

Share

You’ll Need 5

What you’ll need
Interests
Howchoo is reader-supported. As an Amazon Associate, we may earn a small affiliate commission at no cost to you when you buy through our links.
Posted in these interests:
docker • 4 guides
pi • 92 guides

A cluster is a group of computers performing the same task, operating as a single system. Although Raspberry Pi’s are pretty incredible devices, a single Pi can only do so much.

A Raspberry Pi cluster can be used anytime you want to improve performance or availability, and there are many use cases including serving web content, mining cryptocurrency, processing large amounts of data (using tools like hadoop), and much more. This guide will show you how to run a Raspberry Pi cluster using Docker Swarm.

1 – Build your tower

This is fun part.

You don’t actually need a tower, but you might as well build one. Using a tower like this makes everything more organized and easier to work with.

2 – Install Raspbian Jessie on all four SD cards

We’ve written a detailed guide that will walk you through the process of installing Jessie on your Raspberry Pi. Since we’re dealing with multiple Pi’s, you’ll have to do this for each one.

Note: For each Pi we’re going to do some configuration while the SD card is in your computer. So read the next step to see what to do after installing Raspbian on each SD card.

3 – Configure Raspbian from the SD card

After installing Jessie, and while the SD card is still in your computer, we’re going make a few changes to the configuration. Follow the links in this step for detailed instructions on each change.

First, go ahead and enable SSH.

How to Enable SSH on Raspberry Pi OS Without a Screen
The SSH protocol is disabled by default.

Then set up WiFi for the Pi.

Once you’ve installed and configured each SD card, insert one into each Raspberry Pi.

*Protip: Once you’ve configured one SD card, you can use a utility such as ApplePi Baker to clone it onto the other SD cards.

4 – Power up and test

Connect your Raspberry Pi’s to their power supplies, and make sure they boot properly. Near the USB connector, you should see a solid red LED. This indicates that the Pi has power. Then you should see a green flashing LED, which indicates there is SD card activity.

5 – Find the IP address of each node

We’ve written a guide that shows you how to find the IP address of your Raspberry Pi. So follow this guide if you need more detailed instructions, but we’re going to use nmap.

sudo nmap -sn 192.168.1.0/24

Note: You might need to use a different subnet range. Follow the guide for more information on finding the correct subnet.

This will list all of the devices connected to the network, so we should see all four of our Raspberry Pi’s. When you spot them, take note of the IP address for each. Here is my output:

Starting Nmap 7.40 ( https://nmap.org ) at 2017-03-21 15:52 PDT
Nmap scan report for Chromecast.attlocal.net (192.168.1.78)
Host is up (0.063s latency).
MAC Address: 54:60:09:06:76:0A (Google)
Nmap scan report for unknownc24b2b235d18.attlocal.net (192.168.1.178)
Host is up (0.0059s latency).
MAC Address: C2:4B:2B:23:5D:18 (Unknown)
Nmap scan report for raspberrypi.attlocal.net (192.168.1.181)
Host is up (0.29s latency).
MAC Address: B8:27:EB:79:49:F2 (Raspberry Pi Foundation)
Nmap scan report for raspberrypi.attlocal.net (192.168.1.183)
Host is up (0.17s latency).
MAC Address: B8:27:EB:95:6D:7A (Raspberry Pi Foundation)
Nmap scan report for raspberrypi.attlocal.net (192.168.1.184)
Host is up (0.22s latency).
MAC Address: B8:27:EB:6E:DE:EF (Raspberry Pi Foundation)
Nmap scan report for raspberrypi.attlocal.net (192.168.1.185)
Host is up (0.22s latency).
MAC Address: B8:27:EB:B6:4A:6E (Raspberry Pi Foundation)

So the IP addresses for all four of my Raspberry Pi’s are:

192.168.1.181 192.168.1.183 192.168.1.184 192.168.1.185

6 – Change the hostname for each node

For each Raspberry Pi (node) in our cluster, I’m going to change the hostname so it’s easier to access. Since I’ve got four nodes I’m going to name them docker1, docker2, docker3, and docker 4.

Follow this guide to learn how to change the hostname of your Raspberry Pi.

You’ll also want to add an entry in your local /etc/hosts file that maps the new hostname to the IP address for each Pi. The end of my /etc/hosts now looks like this:

192.168.1.181         docker1
192.168.1.183         docker2
192.168.1.184         docker3
192.168.1.185         docker4

7 – Copy SSH keys to each node

This step is optional, but it will allow us to easily SSH into each node without using a password. I’ll use the ssh-copy-id command to copy my public key to the remote server.

If you don’t have a key generated already, you can do so with:

ssh-keygen -t rsa

Hit enter twice and leave the passphrase empty (unless you really want to use a passphrase).

Then copy the key to each node with:

ssh-copy-id pi@docker1

You’ll have to enter your password to copy the key. Do this for each node.

8 – Install Docker on each node

You can use this simple bash one-liner to install docker on each node.

for host in docker1 docker2 docker3 docker4; do ssh pi@$host curl -sSL https://get.docker.com | sh; done

Of course, you’ll have to use your own hostnames, but this should loop through each host and install docker. For more detailed instructions on how to install Docker on your Raspberry Pi see this guide.

9 – Create the swarm

Now that Docker is installed we need to create our swarm. We only need to do this on one of the nodes. So the order of operations will be: 1. create swarm on a single node (this node will be a manager node), 2. join one more node as a manager, and 3. join two more nodes as workers. So we’ll have a total of 2 managers and 2 workers in our swarm.

So in this step, I’ll create the swarm on docker1.

To do this, we’ll first have to get the IP address of the node. If you’re following this guide step by step, we already have the IP address in our local /etc/hosts file. If not, you can use this guide as a reference.

For me, the address of docker1 is 192.168.1.181. So I’ll use this command to create the swarm:

ssh pi@docker1
sudo docker swarm init --advertise-addr 192.168.1.181

You’ll notice that this outputs a command that can be used to join other nodes to the swarm as a worker. The command looks something like this:

docker swarm join 
        --token SWMTKN-1-49nj1cmql0jkz5s954yi3oex3nedyz0fb0xx14ie39trti4wxv-8vxv8rssmk743ojnwacrr2e7c 
       192.168.1.181:2377

Keep track of this command. Although you can regenerate a token if necessary, we’re going to use this in the next step.

Now we’ve got our swarm with one manager node. You can confirm by typing:

sudo docker node ls

10 – Add the rest of the nodes to the swarm

Now we’ve got to add the rest of the nodes to the swarm. As I mentioned in the previous step, we’re going to add one more manager and two more workers.

Let’s start by adding our next manager node on docker2. To do this, we’ll have to generate a manager token. While still logged into docker1, type:

sudo docker swarm join-token manager

This will generate another join command like the one from the previous step. So we’ll grab this command, ssh into docker2 (from our local machine), and use the manager join command.

ssh pi@docker2
sudo docker swarm join --token SWMTKN-abc...manager...xyz 192.168.1.181:2377

Keep in mind that the two swarm join commands look similar, so we’ll have to keep track of which is which. We just joined docker2 to the swarm as a manager, so now we’ll use the other token and join docker3 and docker4 as workers.

ssh pi@docker3
sudo docker swarm join --token SWMTKN-abc...worker...xyz 192.168.1.181:2377

And again from your local machine:

ssh pi@docker4
sudo docker swarm join --token SWMTKN-abc...worker...xyz 192.168.1.181:2377

Now all of our nodes have joined the swarm. Let’s run our node ls command again to confirm.

ssh pi@docker1
sudo docker node ls

And you should see all of the nodes listed:

7x52m1rsps550g89n1zngqqw2    docker4   Ready   Active
nck7h1z5ka7q5x05ek73iw3p2    docker3   Ready   Active
q0p4wnzs9wg58yj8m10fk41t3 *  docker1   Ready   Active        Reachable
tunc46ypfdl9uhvin4g4ofddz    docker2   Ready   Active        Leader

11 – Run our first service

At this point we’ve accomplished the purpose of the guide, but we might as well run a service to demonstrate how to use the swarm. Our swarm can run any number of services and they can be scaled and distributed across the nodes in our cluster according to our preferences. To begin, we can run a visualizer service that will provide a web interface to visualize how the containers are distributed across the swarm.

This service is built from an image called “visualizer” originally created by Github user ManoMarks. But we’ll have to use a version of this image that was built to work on the Raspberry Pi and other ARM devices.

So let’s log on to docker1 and create our visualizer service:

ssh pi@docker1
sudo docker service create 
        --name viz 
        --publish 8080:8080/tcp 
        --constraint node.role==manager 
        --mount type=bind,src=/var/run/docker.sock,dst=/var/run/docker.sock 
        alexellis2/visualizer-arm:latest

This will probably take a few minutes to spin up because it has to download the image. We can check the status by typing:

sudo docker service ls

Until the service is ready, you’ll see the REPLICAS value as 0/1.

lqejzqrv0le8  viz   replicated  0/1       alexellis2/visualizer-arm:latest

It will say 1/1 when it’s ready.

Once it’s ready, you can visit http://192.168.1.181:8080 (the IP of docker1 and port 8080). This will show you a nice visualization of the swarm and which containers are running on which nodes.

Of course, for your purpose you’ll be creating at least one other service. There is a lot of pertinent information about docker that won’t (and can’t) be covered in this guide, but check out the official docker documentation for more information and of course check out the Docker interest on howchoo.

NEXT UP

How to Run a Minecraft Server on the Raspberry Pi

A whole world trapped inside your Pi.
howchoo   (467)
December 7, 2023

There are several ways to go about running a Minecraft server on the Raspberry Pi. In this guide, I’ll cover how to install Nukkit—a cross-platform Minecraft server that’s super easy to set up on the Raspberry Pi. This server should work with PCs, consoles, and tablets running Minecraft 1.14. I’ll be using a Raspberry Pi

Continue Reading

howchoo

 467 guides

Introducing Howchoo, an enigmatic author whose unique pen name reflects their boundless curiosity and limitless creativity. Mysterious and multifaceted, Howchoo has emerged as a captivating storyteller, leaving readers mesmerized by the uncharted realms they craft with their words. With an insatiable appetite for knowledge and a love for exploration, Howchoo’s writing transcends conventional genres, blurring the lines between fantasy, science fiction, and the surreal. Their narratives are a kaleidoscope of ideas, weaving together intricate plots, unforgettable characters, and thought-provoking themes that challenge the boundaries of imagination.

Home Interests Raspberry Pi

How to Connect to a Raspberry Pi Remotely via SSH

The preferred (and most common) method of connecting to your Pi to run commands.
howchoo   (467)
September 20, 2023
7 minutes

Share

You’ll Need 1

What you’ll need
Interests
Series
Howchoo is reader-supported. As an Amazon Associate, we may earn a small affiliate commission at no cost to you when you buy through our links.
Posted in these interests:
linux • 12 guides
pi • 92 guides

This guide will show you how to connect to your Raspberry Pi remotely via SSH from your laptop or desktop computer.

How to SSH into Raspberry Pi

SSH (Secure SHell) is the best method of connecting to your Raspberry Pi. Therefore, this is the method we’ll be using to log in.

1 – Open a command line

Connect your Pi to your WiFi (or wired) network. Then, open a new command line:

For Mac:

Open Terminal by navigating to Applications > Utilities > Terminal.

For Windows 10+:

Open Command Prompt by right-clicking the Start button and selecting Command Prompt.

Note: For Windows, you’ll need to install Putty and follow these instructions before proceeding.

🛈 For other versions of windows, simply search your computer for the Command Prompt application.

2 – Enable SSH

Older versions of Raspberry Pi OS like Raspbian Jessie, Raspbian Stretch, and Raspbian Buster have SSH disabled by default for security reasons. If you’re using an up-to-date version of Raspberry Pi OS (as you should!), you’ll need to enable SSH on your Raspberry Pi before proceeding.

How to Enable SSH on Raspberry Pi OS Without a Screen
The SSH protocol is disabled by default.

3 – Get the username and password

The default username and password for the Raspberry Pi is:

username: pi
password: raspberry

Of course, if you’ve changed the password you’ll need to use the updated password.

4 – Use the SSH command

The default hostname for the Pi is raspberrypi, so in your command line app, enter the following and press enter:

ssh pi@raspberrypi

Note: Certain distributions (like RetroPie) change the hostname by default — for example, the default hostname for RetroPie is retropie, so you’d connect using that in place of raspberrypi. You can quickly check whether your Pi uses a certain hostname by pinging it and trying each hostname:

ping raspberrypi

You can also connect using your Raspberry Pi’s IP address:

ssh [email protected]

.. where 192.168.X.X is your Pi’s IP address. You can obtain your Pi’s IP address using the ping command above.

Type the password when you see the password prompt. For security purposes you won’t see the password as you type.

You might encounter a host verification warning that ends with something like this:

The authenticity of host 'abc (abc)' can't be established.
RSA key fingerprint is 3f:1b:f4:bd:c5:aa:c1:1f:bf:4e:2e:cf:53:fa:d8:59.
Are you sure you want to continue connecting (yes/no)? 

Just type “yes” and hit enter. This is a security measure to let you know you’re trying to connect to a host for the first time. After connecting, the host will be added to the known_hosts file, and you won’t see this warning again.

🛈 Make sure your computer is on the same network as your Pi.
NEXT UP

How to Run a Minecraft Server on the Raspberry Pi

A whole world trapped inside your Pi.
howchoo   (467)
December 7, 2023

There are several ways to go about running a Minecraft server on the Raspberry Pi. In this guide, I’ll cover how to install Nukkit—a cross-platform Minecraft server that’s super easy to set up on the Raspberry Pi. This server should work with PCs, consoles, and tablets running Minecraft 1.14. I’ll be using a Raspberry Pi

Continue Reading

howchoo

 467 guides

Introducing Howchoo, an enigmatic author whose unique pen name reflects their boundless curiosity and limitless creativity. Mysterious and multifaceted, Howchoo has emerged as a captivating storyteller, leaving readers mesmerized by the uncharted realms they craft with their words. With an insatiable appetite for knowledge and a love for exploration, Howchoo’s writing transcends conventional genres, blurring the lines between fantasy, science fiction, and the surreal. Their narratives are a kaleidoscope of ideas, weaving together intricate plots, unforgettable characters, and thought-provoking themes that challenge the boundaries of imagination.

Home Interests Raspberry Pi

How to Install Magic Mirror on Your Raspberry Pi

howchoo
howchoo   (467)
September 20, 2023
21 minutes

Share

You’ll Need 7

What you’ll need
Interests
USB Mouse x 1
Howchoo is reader-supported. As an Amazon Associate, we may earn a small affiliate commission at no cost to you when you buy through our links.
Posted in these interests:
magicmirror • 1 guides
pi • 92 guides

Magic Mirror is essentially a webpage that runs on a web server housed inside your Raspberry Pi. It displays tons of cool information and can even be used to create your very own smart mirror!

Build Your Own Google Home-Enabled Smart Mirror in About Two Hours
Magic mirror, on the wall, turn off the lights.

Note: I recommend using either the Raspberry Pi 4 or 3 to complete this project, but the Raspberry 2/Zero/Zero W will also work.

1 – Install Raspberry Pi OS

First, you’ll need to install the latest version of Raspberry Pi OS (formerly Raspbian), the official Raspberry Pi operating system (based on Debian Linux). Check out our guide for Raspberry Pi OS installation instructions.

How to Install Raspberry Pi OS on Your Raspberry Pi
Get the new official Raspberry Pi OS on your Pi.


2 – Boot up your Pi

Unmount the SD card from your computer and insert it into your Pi. Connect your keyboard, mouse, HDMI cable and, lastly, the Pi’s power cable. You will now see the Raspberry Pi OS desktop (GUI).

3 – Connect to your wireless network

Our Magic Mirror needs to be wifi-enabled so that it can connect to the internet and so that we can access it remotely to set things up.

In the top right of your screen, click on the network icon (two computers with an X). Select your network, enter your wifi password, and click OK.

The Raspberry Pi 3 and Raspberry Pi Zero W have built-in wifi, older Pis (and the normal Pi Zero) do not. If you’re using a Pi without built-in wifi, you’ll need to connect a wifi dongle to your Raspberry Pi.

4 – Find your Pi’s IP

We’ll need our Pi’s IP so that we can connect to it from our regular computer and complete the rest of the installation from there.

On your Pi, navigate to Menu > Accessories > Terminal. Type the following and press enter:

ifconfig

Your Pi’s IP will be located next to inet addr.

Alternatively, you can also ping your Pi from your computer to obtain the IP address; I wrote a short guide on pinging the Raspberry Pi.

5 – Connect to your Pi from your computer

On newer versions of Raspberry Pi OS, SSH is disabled by default. You can either enable SSH using the SD card or, on your Pi, navigate to Preferences > Raspberry Pi Configuration > Interfaces and enable it there.

How to Enable SSH on Raspberry Pi OS Without a Screen
The SSH protocol is disabled by default.

After enabling SSH, open Terminal (Mac) or Command Prompt (Windows). Type the following command and press enter:

ssh pi@your-pis-ip-address

When prompted for your password, use the default Raspberry Pi passwordraspberry. If you see an authenticity of host warning, type yes and press enter.

6 – Configure Raspberry Pi OS

Change the default password For better security, I recommend you change you Pi’s default password to something else. Type the following, press enter, and follow the prompts:

passwd

Expand your Pi’s filesystem to utilize all available space, and also to boot into the GUI Type the following and press enter:

sudo raspi-config

Select Expand Filesystem and press enter. Then, reboot your Pi:

sudo reboot

Update your Pi

sudo apt-get update
sudo apt-get upgrade --yes
🛈 Updating may take some time.

7 – Install the interface

There are a number of great Magic Mirror dashboards available — I went with one created by Michael Teeuw since it’s beautiful and he’s a bit of a Magic Mirror pioneer. More information for the MagicMirror dashboard can be found on its Github repo.

We’re going to use the automatic installer to save us some time. To do this, run the following command:

bash -c "$(curl -sL https://raw.githubusercontent.com/sdetweil/MagicMirror_scripts/master/raspberry.sh)"

Note: The automatic installer officially supports the Pi 2, 3, and 4. If you want to run MagicMirror on a Pi 1 or Pi Zero, you’ll need to use the server-only version and install a full-screen browser manually. Save yourself some time and just use a Pi 3. 🙂

When prompted whether you want to use pm2 for auto starting of your MagicMirror, select “yes” by typing y and pressing enter.

MagicMirror should start automatically! If it doesn’t, run:

cd ~/MagicMirror && DISPLAY=:0 npm start
🛈 The installer could take anywhere from 10-25 minutes to run.

8 – Start MagicMirror on system boot

Now we’ll tell MagicMirror to start on system boot. While connected to your Pi, run the following command:

pm2 startup

That command will output another command for you to run. Run that command. It may vary for your system, but for me it was:

sudo env PATH=$PATH:/usr/bin /usr/lib/node_modules/pm2/bin/pm2 startup systemd -u pi --hp /home/pi

Next, create a startup shell script:

cd ~
nano mm.sh

Add the following to that file, save, and exit:

cd ~/MagicMirror
DISPLAY=:0 npm start

Make sure the script is executable:

chmod +x mm.sh

Next, start MagicMirror and force it to start on boot:

pm2 start mm.sh

Finally, reboot your Pi:

sudo reboot

9 – Change magic mirror orientation

If your magic mirror needs to be in portrait mode (as mine is), you’ll need to rotate your Raspberry Pi display:

sudo nano /boot/config.txt

Add the following lines:

# rotate the screen
display_rotate=1 # use lcd_rotate=3 to rotate in the other direction
🛈 If you’re using a touchscreen for your magic mirror, use lcd_rotate instead of display_rotate.

10 – Keep your Pi screen from sleeping

To keep your Pi from going into sleep mode (which defeats the purpose of the magic mirror), run the following:

sudo nano ~/.config/lxsession/LXDE-pi/autostart

Add the following, save, exit, and reboot:

@xset s 0 0
@xset s noblank
@xset s noexpose
@xset dpms 0 0 0

If you’d like to save electricity, you can also add a PIR sensor to your Raspberry Pi and install the MagicMirror PIR module to wake your mirror when it senses motion. 🙂

11 – Customize the interface

Time to configure the interface for your location and needs!

cd ~/MagicMirror
nano config/config.js

Configure weather Change both the “currentweather” and “weatherforecast” weather module settings to your location.

Change the JavaScript config object to add your city’s name, location ID, and free OpenWeatherMap API key:

config: {
    location: "Tampa",
    locationID: "4174757",
    appid: "YOUR_OPENWEATHER_API_KEY",
    units: "imperial" // Use Fahrenheit instead of Celsius
}

Configure compliments MagicMirror spins through an array of complements based on the time of day. If you’d like, you can change these compliments to something different — famous quotes, perhaps?

Configure your calendar By default, MagicMirror shows a calendar containing US holidays. You can change these by pasting a calendar’s public URL here.

For now, I decided to remove both and instead subscribe to the Tampa Bay Rays schedule and a Google Calendar containing a list of national holidays. These calendar URLs normally end in .ics, and you can Google the one you’re looking for.

Down the road, I’ll add authentication so I can link up my Google Calendar. You can also change the icon that’s loaded by changing the value of calendar.urls.symbol; this value should be from the list of FontAwesome icons found here, with the “fa-” portion removed. For example, ‘fa-bullhorn’ becomes just ‘bullhorn’.

When you’re finished configuring, save and exit.

12 – Explore other modules

There are tons of other fun and useful MagicMirror modules you can play around with. Find a really great one? Post in the comments section below and I’ll include it here!

13 – Back up your SD card (optional)

Now that your MagicMirror setup is working, I highly recommend you create a backup of your SD card image. This is totally optional, but if something gets messed up when installing Jasper it will be easy to revert. I wrote a guide on how to back up your SD card for Mac or, if you have Windows, Lifehacker wrote a great guide as well.

How to Back Up and Restore Your Raspberry Pi SD Card on Mac
Easily backup, restore, or clone your SD card!

14 – Optional: Install Google Home

Make your magic mirror voice-enabled by installing Google Assistant. Be sure to check out my Google Home-enabled magic mirror guide to learn how to do this.

Build Your Own Google Home-Enabled Smart Mirror in About Two Hours
Magic mirror, on the wall, turn off the lights.

15 – Optional: Install Jasper

Jasper is an open-source text-to-speech and speech-to-text processing platform, allowing you to speak commands to your Raspberry Pi such as to play a Spotify playlist, add things to your Google Calendar, or integrate with openHAB to control your entire house. Jasper is definitely a cool feature to add to your mirror — if you’re up for the task!

I wrote an exhaustive guide on how to install Jasper on your Pi. You can also see my completed Magic Mirror build here, which is a great read if you’re also into woodworking.

16 – Questions? Problems?

The Raspberry Pi can be a complicated beast. Post below and I’ll do my best to help you out!

NEXT UP

How to Run a Minecraft Server on the Raspberry Pi

A whole world trapped inside your Pi.
howchoo   (467)
December 7, 2023

There are several ways to go about running a Minecraft server on the Raspberry Pi. In this guide, I’ll cover how to install Nukkit—a cross-platform Minecraft server that’s super easy to set up on the Raspberry Pi. This server should work with PCs, consoles, and tablets running Minecraft 1.14. I’ll be using a Raspberry Pi

Continue Reading

howchoo

 467 guides

Introducing Howchoo, an enigmatic author whose unique pen name reflects their boundless curiosity and limitless creativity. Mysterious and multifaceted, Howchoo has emerged as a captivating storyteller, leaving readers mesmerized by the uncharted realms they craft with their words. With an insatiable appetite for knowledge and a love for exploration, Howchoo’s writing transcends conventional genres, blurring the lines between fantasy, science fiction, and the surreal. Their narratives are a kaleidoscope of ideas, weaving together intricate plots, unforgettable characters, and thought-provoking themes that challenge the boundaries of imagination.

Home Interests Ender 3

Ender 3: How to Install a Bootloader and Update Marlin Firmware

Update your 3D printer’s firmware and add thermal runaway protection.
howchoo (467)
September 20, 2023
16 minutes

Share

You’ll Need 4
What you’ll need
Interests
Series
Howchoo is reader-supported. As an Amazon Associate, we may earn a small affiliate commission at no cost to you when you buy through our links.
Posted in these interests:
3dprinting • 36 guides
arduino • 2 guides
ender3 • 19 guides
This guide will show you how to install a bootloader and update the Marlin firmware on your Ender 3 or Ender 3 Pro. If you’re using an Ender 3 V2, then there’s a different guide for updating firmware on the Ender 3 V2.

Why update your Ender 3’s firmware?

Most Ender 3s ship with a customized, outdated Marlin firmware version that lacks thermal runaway protection and other safety features. If you use OctoPrint, you may even have seen the following error message: “Warning! Your printer’s firmware is known to lack mandatory safety features (e.g. thermal runaway protection). This is a fire risk.” Many 3D printer fires happen as a result of thermal runaway.

What is thermal runaway?

In a nutshell, your printer contains both a temperature sensor, or “thermocouple”, and a heating element. When you start a print, your heating element reads data from the thermocouple and continues to heat until reaching the predefined print temperature. Thermal runaway is a condition that exists when the thermocouple becomes dislodged or damaged and your printer continues heating, forever, until something like this happens (read: 🔥🔥🔥):

What is thermal runaway protection?

Thermal runaway protection is a feature of most modern firmware that shuts down the heating element if the thermocouple isn’t responding properly. To get technical, it generally polls for a temperature change every N seconds and expects an increase. No increase? Shut it down.

Guide overview

Before updating the Creality Ender 3 firmware, we’ll load a custom bootloader onto the Ender 3 using a cheap Arduino Uno or Arduino Uno clone. You can pick an Uno up for about $15 on Amazon.

What’s a bootloader?

A bootloader is a program that loads an operating system when a computer (in this case, the printer) is turned on. Because the Ender 3 doesn’t come with a bootloader, we’ll need to install one. This will allow the printer to boot using a newer version of the Marlin firmware. After installing the bootloader, we’ll be able to easily update the firmware in the future, too. This guide will work for Mac, Windows, and Linux! Let’s get started!

1 – Download and install the Arduino IDE

Files in Arduino are called “sketches”. The Arduino IDE will open to a blank sketch.
Download and install the Arduino IDE for Mac, Windows, or Linux.

2 – Add the U8glib library

In the main menu, navigate to File > Examples or Example Sketches and select Arduino ISP. Then, navigate to Manage Libraries and install the U8glib library.

3 – Install the Sanguino board

Next, we’ll need to install the Sanguino board. Open Arduino Preferences and paste the following under Additional Boards Manager URLs:
https://raw.githubusercontent.com/Lauszus/Sanguino/master/package_lauszus_sanguino_index.json
Then, navigate to the Boards Manager and install Sanguino.

4 – Upload the sketch to your Arduino Uno

Connect your Arduino Uno (or Arduino Uno clone) to your computer using a USB cable. Under Tools, select Arduino Uno as the board. Then, select either Arduino Uno or COM as the port, depending on your computer. Finally, click Upload to upload the Arduino ISP sketch. After uploading, keep the Uno connected to your computer.
🛈  The Arduino will need to remain connected to your computer for the entire process. Therefore, you’ll need to move your computer to wherever your printer is (or vice-versa).

5 – Connect the Arduino to your Ender 3

This pinout diagram identifies the Ender 3 and Arduino Uno pins needed to make your connections.
Turn your printer OFF. Then, use the small hex key that came with your printer to remove the 3 screws from the Ender 3 control box—this is the box located beneath your bed. Finally, use your “Dupont” jumper wires to connect your Arduino to your printer as follows:

Arduino Ender 3 bootloader connections

Ender 3 Pin Arduino Uno Pin
MISO MISO
5V 5V
SCK SCK
MOSI MOSI
RESET ~10
GND GND

Matching up the pins

You may have noticed these pins aren’t labeled on either the Ender 3 or Arduino Uno. No worries—you might also have noticed there’s an identical small 2×3 header (2 rows of 3 pins in each row) on both the Arduino and Ender 3. We basically want to “match up” the two headers, with the exception of the RESET pin. Use the attached Ender 3 Arduino wiring diagram to connect the two headers properly.
🛈 Your Ender 3’s screen will light up as you connect things and it begins to draw power from your USB port.

6 – Burn the bootloader

Select the Sanguino board from the Tools menu. Then, change the Programmer from AVRISP mkII to Arduino as ISP. Finally, click Burn bootloader. When the process is finished, you’ll see a message stating “Output bootloader burned successfully”.

Troubleshooting

If you run into issues, try the following:
  • Double-check your settings and connections
  • Swap out your jumper wires in case yours are defective
  • Make sure you downloaded the Arduino IDE directly from the Arduino website (not the Windows store)
  • If you see an error such as the one below (especially if you’re running macOS), try installing the TH3D United Firmware Package and running the included preconfigured Arduino IDE instead of the normal Arduino IDE. Then, select Sanguino (1284P Boards) as the board. If you’re using a Mac, don’t forget to follow the Mac setup instructions for the TH3D Arduino IDE.
avrdude: stk500_getparm(): (a) protocol error, expect=0x14, resp=0x14

avrdude: stk500_getparm(): (a) protocol error, expect=0x14, resp=0x01
avrdude: stk500_initialize(): (a) protocol error, expect=0x14, resp=0x10
avrdude: initialization failed, rc=-1
         Double check connections and try again, or use -F to override
         this check.

avrdude: stk500_disable(): unknown response=0x12
Error while burning bootloader.
When the bootloader is done burning, carefully disconnect the jumper wires from your Ender 3, secure the control box cover, and unplug the Arduino from your computer.

7 – Download and prepare the latest Marlin firmware

Download the latest Marlin release to your computer and unzip it. Then, navigate to Marlin/example_configurations/Creality/Ender-3 and copy all those files into the Marlin directory, replacing all files when prompted.

8 – Connect and transfer the firmware

Connect a mini USB to USB cable between your computer and the Ender 3’s front USB port. If you’re already using OctoPrint with the Ender 3, simply move the USB cable from the Raspberry Pi to your computer. 🙂 Back in the Arduino IDE, select File > Open and locate the Marlin.ino file from the Marlin directory you unzipped early. Then, make sure the port is still selected as Sanguino or Sanguino (1284P Boards), the programmer is Arduino as ISP, and the proper serial port is selected. Finally, click the Upload button. The firmware transfer process should take about a minute.

9 – Wrapping up

Disconnect your computer and power on your printer. Your printer will take a bit longer than normal to start up. You should now see a different boot screen since your firmware has been updated.

Up next

Next, set up OctoPrint on your Ender 3 and improve your printing experience!
NEXT UP

How to Update Blender

Get the latest Blender has to offer.
howchoo (467)
November 24, 2023
Blender is one of the most popular open-source 3D creation suites today. It doesn’t cost a dime to use and everything you create is yours to own for good. The community is robust and the dev team still releases new updates on the regular. If you want to get the latest version, you may have
Continue Reading

howchoo

 467 guides
Introducing Howchoo, an enigmatic author whose unique pen name reflects their boundless curiosity and limitless creativity. Mysterious and multifaceted, Howchoo has emerged as a captivating storyteller, leaving readers mesmerized by the uncharted realms they craft with their words. With an insatiable appetite for knowledge and a love for exploration, Howchoo’s writing transcends conventional genres, blurring the lines between fantasy, science fiction, and the surreal. Their narratives are a kaleidoscope of ideas, weaving together intricate plots, unforgettable characters, and thought-provoking themes that challenge the boundaries of imagination.
Home Interests Raspberry Pi

How to Install Dropbox on a Raspberry Pi

Install Dropbox on Raspberry Pi in seven simple steps!
howchoo   (435)
September 19, 2023
22 minutes

Share

You’ll Need 1

What you’ll need
Interests
Howchoo is reader-supported. As an Amazon Associate, we may earn a small affiliate commission at no cost to you when you buy through our links.
Posted in these interests:
pi • 91 guides
technology • 20 guides

If you’re trying to keep your important files and folders synced across all of your devices, one of the best methods is to use a cloud storage provider like Dropbox. Dropbox allows you to sync your files across all kinds of devices and platforms, from PCs to smartphones, with a copy of the files stored on Dropbox’s own servers.

When it comes to using Dropbox on a Raspberry Pi, however, there are two main issues you’ll face:

  1. Raspberry Pis use ARM processors, which Dropbox doesn’t officially support.
  2. Dropbox is typically used in a web browser or using the Dropbox client, but many people use Raspberry Pis in “headless” mode without a screen or keyboard, making it impossible to do this.

To get around these issues, you’ll need to use a workaround to install Dropbox on a Raspberry Pi and sync your files. This guide will walk you through what you’ll need to do to install Dropbox.

1 – What you’ll need

For this example, we’re using a Raspberry Pi 3 running the latest version of Raspberry Pi OS in headless mode to install Dropbox.

However, the model of Raspberry Pi you personally use doesn’t matter, as these steps should work for all Raspberry Pi models. If you prefer to use a graphical interface for your machine, simply open up a new Terminal window to get started. Otherwise, you’ll need to connect remotely using SSH to run the necessary commands instead.

On the software side, you’ll need to use an open-source program called rclone. Often described as “The Swiss army knife of cloud storage”, rclone acts as a third-party interface to over 40 different cloud storage products and protocols.

This means you can use rclone to access any files or folders stored on Dropbox using your Raspberry Pi, even without official Dropbox support.

2 – Installing rclone

Before you begin installing rclone, you’ll need to make sure your Raspberry Pi is up-to-date. To this, open your terminal window or SSH connection and run the following commands:

sudo apt update && sudo apt upgrade.

To be sure that everything is in order after it finishes, go ahead and reboot the system with sudo reboot.

Once you’ve updated your system, your next step is to install rclone, but you won’t be using apt to do this. This is because the version currently available in Raspbian’s repository is pretty old, while rclone itself is updated more often.

Instead, type and run curl https://rclone.org/install.sh | sudo bash in the terminal or SSH window.

This runs an automated installation script for rclone and runs it as the superuser. If you’re worried about running an unknown script from the internet, you can download the script first by typing https://rclone.org/install.sh > install.sh followed by cat install.sh or nano install.sh to view the script contents locally.

The script is completely safe to run, but it’s always best to be cautious.

3 – Configuring rclone

Rclone refers to any cloud service that it connects to as a remote. As such, you’ll need to configure your own Dropbox account as a new remote.

Run rclone config in the terminal or SSH window and type n to add a new remote. It will ask for a name to identify it in the system, so type in dropbox or another suitable name. If you’re running a more complex setup (with multiple Dropbox accounts, for instance), you can use a different descriptive name instead.

After choosing a name, rclone shows a list of supported services. Note that the specific list will depend on the version of rclone in use, so don’t worry if your list doesn’t match the screenshots below. In this example, Dropbox appears as number 10, so typing 10 will select Dropbox.

When asked for client_id and client_secret, leave those fields blanks and hit the Enter key instead, as the advanced configuration isn’t required.

At this point, if your Pi has a screen and you’re using the graphical interface, you can let it use the auto configuration method to authorize rclone and provide it with access to your Dropbox account.

If your Pi is running headless, however, you will need to install rclone on your main desktop machine in order to authorize Dropbox and not use auto config. This is because the authorization is based on oAuth2, a protocol that needs to “talk back” to Dropbox using an open web browser (something a headless Raspberry Pi doesn’t have).

Installing rclone on a different machine is beyond the scope of this guide, but on Mac or Linux, you should be able to use the same command as above. A Windows binary file can be found on rclone’s download page and should work in a similar way.

Once you have rclone on your main computer, run rclone authorize "dropbox" on it (not on the Pi!), replacing dropbox with the remote name you used in the previous step. The quote marks in this case make no difference since the name contains no spaces, but it doesn’t hurt to include them. You’ll need to provide them if you use a remote name that uses spaces, however.

A browser window should open on your main computer with a Dropbox login page. If not, rclone will provide a link to copy and paste, but note that it will only work on that same computer.

After logging in and authorizing the app in the browser, the terminal window will display an access token. Select this (excluding the lines with the arrows) and paste it back into the Pi’s terminal.

Confirm the setup process by answering y when it asks if your configuration is okay, and then type q to quit the configuration.

4 – Installing rclonesync

Since rclone by default does not allow for bidirectional sync to allow you to make changes back and forth between your Dropbox storage and your local devices (as Dropbox should support), you’ll need to use an additional script called rclonesync to enable support for it.

Type the following two commands in the terminal window or via SSH to download rclonesync and set it up on your Raspberry Pi:

sudo curl https://raw.githubusercontent.com/cjnaz/rclonesync-V2/master/rclonesync --output /usr/local/bin/rclonesync && sudo chmod +x /usr/local/bin/rclonesync

mkdir ~/.rclonesyncwd

As before, the files will download a script to run from the internet. If you’re unsure about this, type the following command in your terminal or SSH window first:

sudo curl https://raw.githubusercontent.com/cjnaz/rclonesync-V2/master/rclonesync --output /usr/local/bin/rclonesync

This will download the file to your /usr/local/bin directory, allowing you to view the file before you run it using cat or nano.

5 – Configuring rclonesync

For this example, rclone will synchronize a folder named MyStuff located in Dropbox with a local folder called dropbox in the Raspberry Pi’s home directory. You can replace these example directory names with your own in the commands below.

First, create the local folder by typing mkdir ~/dropbox into the terminal or SSH window (with ~ referring to the Pi’s home directory).

You’ll then need to set up rclonesync by running rclonesync --first-sync dropbox:/Mystuff ~/dropbox in the terminal or via SSH. Note that the dropbox before the colon is the remote name used earlier (so replace this if you used something else), while the other folder is the local folder.

After that, you can trigger a sync with Dropbox’s servers by running the same command without the –first-sync parameter:

rclonesync dropbox:/Mystuff ~/dropbox

You can test this by creating an empty file in the local sync folder with touch ~/dropbox/testfile.txt or by removing a file on Dropbox using your web browser or another computer. You can then run the command again, possibly with the –verbose option to see more information:

rclonesync --verbose dropbox:/Mystuff ~/dropbox,

If the connection is working, new files should appear or deleted files should disappear, depending on the action you performed.

6 – Automating the sync process

Manually running the rclonesync command every time you want to sync your files isn’t the best solution. To automate the sync process with Dropbox, you’ll need to use the Cron tool.

Cron allows us to run specific commands on a schedule, while Crontab allows us to configure this schedule.

In the terminal or SSH window, type crontab -e to begin changing your Crontab schedule. If it asks you to choose an editor, select nano.

At the bottom of the file, add the following statement, making sure to replace the directories named with the correct directories on your Raspberry Pi and Dropbox storage:

* * * * * /usr/local/bin/rclonesync dropbox:/MyStuff/ ~/dropbox/

Save and exit Crontab by typing Ctrl + XY and Enter in sequence.

At this point, the system will run the rclonesync command every single minute (that’s what the asterisks mean). To test that it works, try making a change on Dropbox, give it a minute (literally) and see the file appear on your Raspberry Pi, or vice versa.

7 – Next Steps

Once you’ve set up rclonesync, you should be able to sync your files using Dropbox to your Raspberry Pi (and back again). If you need to change the sync schedule or the folders that you sync, just repeat the steps above to change your Crontab schedule and alter the rclonesync command.

Installing Dropbox on a Raspberry Pi is a great way to keep your important files backed up, but it isn’t the only thing you can do with your Pi. There are plenty of Raspberry Pi projects you can try, from building your own RetroPie retro gaming rig to building a Raspberry Pi DIY NAS solution for all your important files.

Do you use Dropbox on your Pi, or do you prefer a different cloud storage solution? Let us know how you use your Pi for storage in the comments below.

NEXT UP

HeaterMeter: Control your Grill Using a Raspberry Pi!

Fire up the summer with a new Pi project.
howchoo   (435)
November 28, 2023

With summer right around the corner, it’s time to fire up the grill! But who will watch the grill while you’re beating the heat? This year, kick things up a notch with your own Raspberry Pi-powered HeaterMeter. Don’t just throw a BBQ, be a part of it. HeaterMeter lets you keep a close eye on

Continue Reading

howchoo

 435 guides

Introducing Howchoo, an enigmatic author whose unique pen name reflects their boundless curiosity and limitless creativity. Mysterious and multifaceted, Howchoo has emerged as a captivating storyteller, leaving readers mesmerized by the uncharted realms they craft with their words. With an insatiable appetite for knowledge and a love for exploration, Howchoo’s writing transcends conventional genres, blurring the lines between fantasy, science fiction, and the surreal. Their narratives are a kaleidoscope of ideas, weaving together intricate plots, unforgettable characters, and thought-provoking themes that challenge the boundaries of imagination.

Home Interests Nintendo

NES battery replacement for games that stopped saving

Extend the life of your favorite NES game.
howchoo   (467)
September 19, 2023
8 minutes

Share

You’ll Need 7

What you’ll need
Interests
Solder x 1
Flux x 1
Howchoo is reader-supported. As an Amazon Associate, we may earn a small affiliate commission at no cost to you when you buy through our links.
Posted in these interests:
READY PLAYER 1
gaming • 85 guides
nintendo • 13 guides
retrogaming • 29 guides

It’s been a while since NES games first hit the shelves. Yet it’s not uncommon to find a selection of NES titles at your local game store. But after so many years, some of these NES cartridges are struggling to save or won’t save data at all.

This issue is typically caused by an old battery. You can extend the life of your NES game by replacing it with a new one. Adding a new battery can extend your ability to save for years. You only need a few tools to get started.

Removing the current battery will cause all of the current save data to permanently erase. Proceed with caution!

Which NES games use a battery?

Not every NES cartridge uses a battery. The primary purpose of the battery was for storing save data. They were common with RPGs and various titles that used unlockable features. You can find a complete list of NES games that use a battery on DKoldies.

Note: This guide is only for NES games, visit this guide to change a SNES cartridge battery.

1 – Unscrew the NES cartridge shell

You will need a special screwdriver to access the inside of an NES cartridge. Using a 3.8mm NES security bit, unscrew the screws holding the cartridge together. There will be 3 total.

2 – Remove the board from the shell

The board is resting inside of the cartridge shell—there are no tabs to hold it in place. Remove the board by lifting it from the shell.

3 – Desolder the old battery

Flip the board over so the battery is facing down. Using a soldering iron, melt the existing solder that holds the battery in place. Suck up the additional solder with a solder sucker. When enough solder is removed, the battery can be wiggled loose.

4 – Fit the new battery into the old slot

You need this CR2032 battery with pre-soldered tabs to replace the old battery.

Put the new battery into place on the board. Be sure to have the positive and negative ends line up. You can use the pictures in this guide for reference.

I’m using a leftover CR2025 from replacing a Game Boy cartridge battery; it will work, except the tabs are slightly different and thus need to be clipped. Be sure to pick up a CR2032.

🛈 You cannot use just any CR2032. It must have pre-soldered tabs. Soldering to a battery can cause it to explode.

5 – Solder the new battery into place

Solder the new battery into place. I always use a little bit of flux when making new connections.

6 – Screw the NES cartridge shell together

Put the board back inside the shell and screw the cartridge together. You will need the 3.8mm NES security bit to close the cartridge. There are three screws used during this step.

7 – Test the finished product

It’s time to boot up the NES and play some Tecmo Super Bowl (or whatever game you have)!

Play enough to warrant a save on the cartridge. The goal here is to create new save data. Once you’ve created a new save file, reboot the NES and load the same save data. Congratulations! You’ve given new life to your old NES game.

NEXT UP

Top 10 Enchantments in Minecraft

howchoo   (467)
March 25, 2024

The longer you play Minecraft, the more you realize that early-game tools just won’t cut it. Exploring the enchantment feature of Minecraft can be exciting, but also intimidating. Rather than worry about researching enchantments, below are the best enchantments in Minecraft! To learn how to enchant items, check out this guide! In this guide, you’ll see

Continue Reading

howchoo

 467 guides

Introducing Howchoo, an enigmatic author whose unique pen name reflects their boundless curiosity and limitless creativity. Mysterious and multifaceted, Howchoo has emerged as a captivating storyteller, leaving readers mesmerized by the uncharted realms they craft with their words. With an insatiable appetite for knowledge and a love for exploration, Howchoo’s writing transcends conventional genres, blurring the lines between fantasy, science fiction, and the surreal. Their narratives are a kaleidoscope of ideas, weaving together intricate plots, unforgettable characters, and thought-provoking themes that challenge the boundaries of imagination.