Finding the right microcontroller for your project is critical for not just budgetary reasons but also performance. Different boards come with their own unique specs and support a different variety of hardware. When it comes to choosing the Raspberry Pi Pico or an Arduino Nano, there are a few things you should know before adding any chips to your cart. For the sake of this article, we’ll be comparing the Pico to the Nano Every edition as it’s the most comparable in price and size.
There are many things to consider when selecting a microcontroller and most of the needs will vary from project to project. Here are a few common factors to consider:
What sensors and/or modules do you need to control?
What physical size should the microcontroller be?
How much storage is necessary for the project code?
How much processing speed is required?
What is a microcontroller?
Microcontrollers are small circuit boards used to control components like servos. They typically have a processor capable of running extremely light applications rather than full operating systems. These are useful for things like operating multiple Servos at once where an SBC would be overkill.
If you’re looking to learn more about the general differences between the larger Rasberry Pi models and Arduino, then check out our general Raspberry Pi versus Arduino comparison.
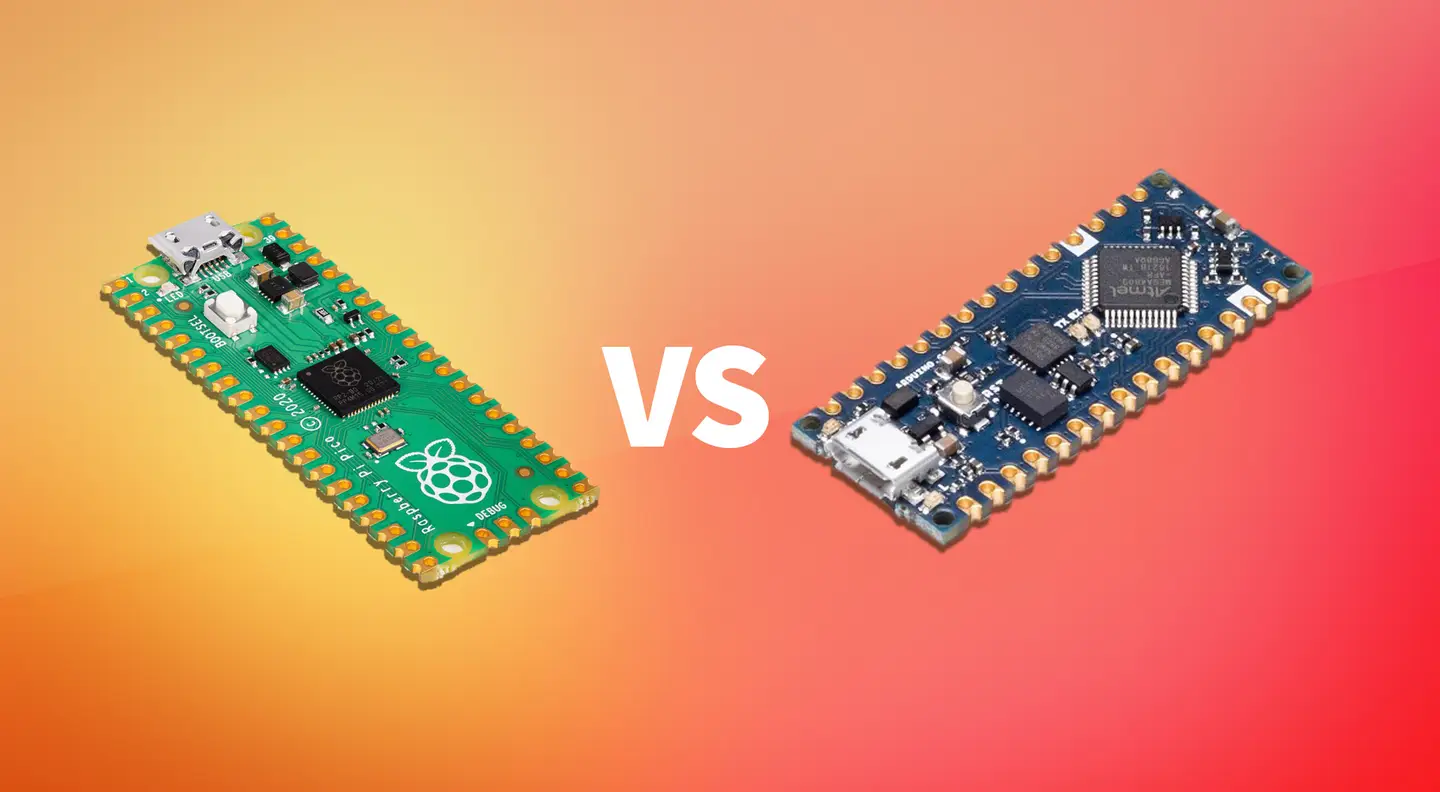
1 – What is the Pico?
The Raspberry Pi Pico is the first official microcontroller board from the Raspberry Pi Foundation. It has a small footprint and a total of 20 GPIO pins (although the board does not come with headers pre-soldered). It has 16 PWM channels and uses the new RP2040 processor, capable of reaching speeds as fast as 133 MHz.
Spec
Pico
Microcontroller
RP2040
Size
21mm × 51mm
Processing Speed
133 MHz
Memory
264KB
Power Input
1.8V–5.5V
Connectors
2x UART, 2x SPI, 2xI2C, 16x PWM, 3x Analog
Price
$4
What’s it good for?
The Pico is ideal for projects that require controlling things like servos, sensors, and more. Its small form factor and low price point of $4 make it a notable board with the processing power of the RP2040 microcontroller. A few example projects include:
LED Matrix controller – The Pico can drive devices like LED matrixes.
Robotic-arm driver – The Pico is capable of driving multiple servos, optimal for things like controlling robotic arms.
To learn more about the Raspberry Pi Pico, see our introductory guide!
Raspberry Pi Pico: Everything You Need to Know to Get Started Small board, massive potential!
2 – What is an Arduino Nano Every?
Arduino is a company that produces several lines of microcontroller boards. The Arduino Nano Every is the physically smallest and cheapest Arduino board currently offered, making it the most comparable to the Raspberry Pi Pico. That said, it’s notably different spec-wise and comes at a higher price point.
Spec
Arduino Nano Every
Microcontroller
ATMega4809
Size
45mm x 18mm
Processing Speed
20MHz
Memory
48KB
Power Input
5V – 21V
Connectors
1x UART, 1x SPI, 1xI2C, 5x PWM, 8x Analog
Price
$10
What’s it good for?
This board is a touch smaller than the Pico and is great for portable projects and wearables. It has fewer PMW channels than the Pico but is capable of using up to 8 analog inputs. This board is really just as versatile as the Pico, here are a few example projects you can make with the Nano Every:
Wearable Projects– This board is easily battery powered making it ideal for projects intended to be worn (think LEDs and cosplay effects).
Robotic controller – Like the Pico, the Nano Every is capable of driving multiple servos at a time, great for building custom robotics.
The Raspberry Pi Foundation maintains a positive relationship with companies like Arduino and even provided them full access to the RP2040 chip before its release. The Arduino team has plans in the works already for an RP2040-based Arduino board meaning you can have your Pico and eat it, too. Read more about this new development on the official Arduino blog.
4 – Analyze your project needs
Determine what your project goals are before purchasing a board you don’t need (pr just start a pile of boards like us—we promise you’ll find some cool Pi projects on Howchoo to use it with).
It’s important to break down exactly what your project’s hardware and software demands entail. Here are a few things to consider when taking research notes.
How much power will the project peripherals require?
What type of connections will any project sensors and modules require?
How many connectors will be required for the project?
How much storage space is necessary for the project code?
These are just a few questions to help you get started when comparing boards. Both the Pico and Arduino boards offer a valuable assortment of features and it’s up to you to determine which board is a home run for your project needs.
5 – Pico vs Arduino
When it comes down to cost, the Pico is a winner. For $4, you get a 133MHz microcontroller with 16 PWM channels. That said, the Arduino Nano Every has a slightly smaller footprint and provides more analog input options. The Nano Every also accepts higher voltages than the Pico, maxing out at 21V.
Spec
Pico
Arduino Nano Every
Microcontroller
RP2040
ATMega4809
Size
21mm × 51mm
45mm x 18mm
Processing Speed
133 MHz
20MHz
Memory
264KB
48KB
Power Input
1.8V–5.5V
5V – 21V
Connectors
2x UART, 2x SPI, 2xI2C, 16x PWM, 3x Analog
1x UART, 1x SPI, 1xI2C, 5x PWM, 8x Analog
Price
$4
$10
Overall the boards are comparable but notably distinct. If you want something with more processing power and PWM channels, check out the Pico. If you need something physically smaller or if processing speed isn’t a priority, the Arduino Nano Every is a capable candidate.
At the moment, we’re leaning towards the Pico for our projects to push the new board to its limits and see what it can really do. But that’s no reason to shy away from the Arduino Nano Every. Assess your project needs and take a close look at both of these boards to figure out which one is best for you.
There are several ways to go about running a Minecraft server on the Raspberry Pi. In this guide, I’ll cover how to install Nukkit—a cross-platform Minecraft server that’s super easy to set up on the Raspberry Pi. This server should work with PCs, consoles, and tablets running Minecraft 1.14. I’ll be using a Raspberry Pi
Introducing Howchoo, an enigmatic author whose unique pen name reflects their boundless curiosity and limitless creativity. Mysterious and multifaceted, Howchoo has emerged as a captivating storyteller, leaving readers mesmerized by the uncharted realms they craft with their words.
With an insatiable appetite for knowledge and a love for exploration, Howchoo’s writing transcends conventional genres, blurring the lines between fantasy, science fiction, and the surreal. Their narratives are a kaleidoscope of ideas, weaving together intricate plots, unforgettable characters, and thought-provoking themes that challenge the boundaries of imagination.
In this short guide, I’ll teach you how to level your Anycubic Photon or Photon S bed, or build plate, in order to get the perfect first layer and reduce print errors. Using this bed-leveling method, I haven’t needed to relevel my Photon even after multiple resin changes. This is an important part of Anycubic Photon and Photon S printing.
Anycubic Photon/Photon S Full Print Guide: Your First Print
Your end-to-end guide to printing on the Photon and Photon S.
Despite the Photon being an SLA printer, this process will seem familiar to you if you’ve ever printed on an FDM printer.
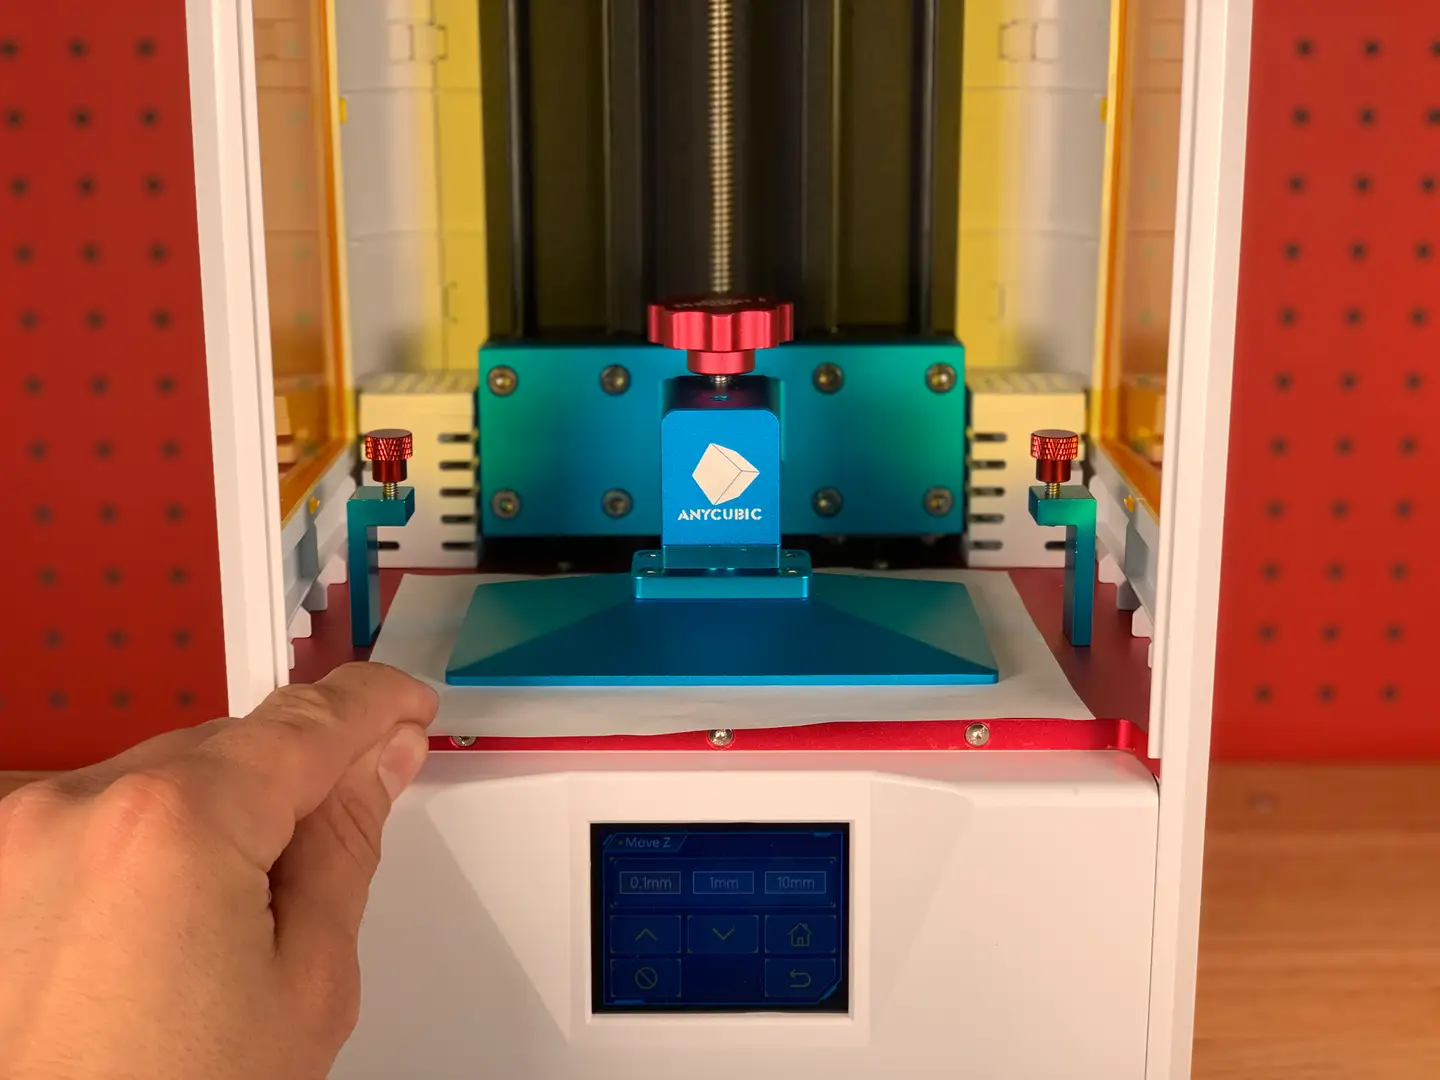
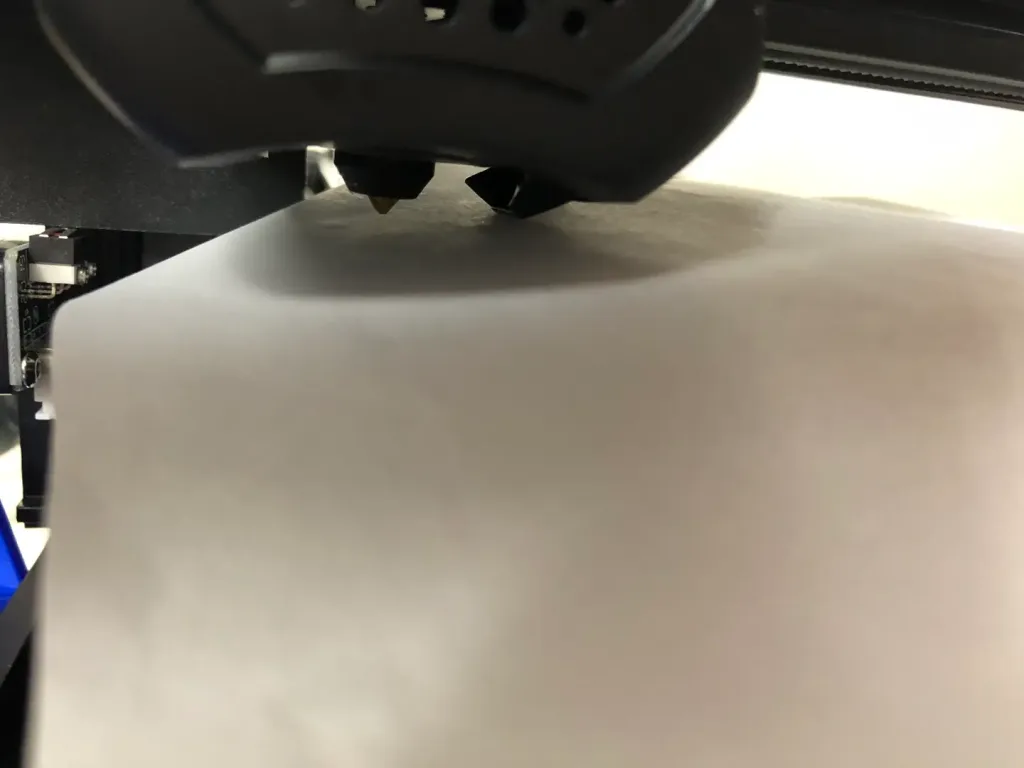
1 – Raise the print plate
Power on your printer and manually raise the print plate via the menu. For my Photon S, this is done by navigating to Tools > Move Z.
Raise the print plate above the resin vat.
2 – Remove the resin vat
Loosen the two resin vat thumb screws, slide the vat out, and set it aside.
3 – Set the print plate angle
The print plate is mounted to a ball head that allows its angle to be adjusted. Use the included hex key to slightly loosen the bolt on the top of the print head.
🛈 This step should only need to be done once; once the angle is set, leveling can be done without loosening the print head.
4 – Lower the print plate
Place a piece of paper on the print LCD screen and carefully lower the print plate until there is slight friction when pulling the paper. Adjust the print plate in increments of 0.1mm to carefully sandwich the paper until there’s just a small amount of friction.
If you loosened the print plate to set its angle, make sure there’s even spacing on all four corners of the plate, square the plate to the front or back of the machine, and then tighten the bolt to store the angle.
🛈 Be careful not to smash the print plate into the delicate LCD screen. Adjust it in 0.1mm increments when you get close.
5 – Set the new Z-origin
When you’re finished, navigate to Tools > Z=0 to store the new Z-origin.
6 – Reinstall the resin vat
Use the menu system to raise the print plate and reinstall the resin vat.
You’re all finished! Using this Photon bed leveling method, you shouldn’t need to relevel for several prints.
NEXT UP
Blender is one of the most popular open-source 3D creation suites today. It doesn’t cost a dime to use and everything you create is yours to own for good. The community is robust and the dev team still releases new updates on the regular. If you want to get the latest version, you may have
Introducing Howchoo, an enigmatic author whose unique pen name reflects their boundless curiosity and limitless creativity. Mysterious and multifaceted, Howchoo has emerged as a captivating storyteller, leaving readers mesmerized by the uncharted realms they craft with their words.
With an insatiable appetite for knowledge and a love for exploration, Howchoo’s writing transcends conventional genres, blurring the lines between fantasy, science fiction, and the surreal. Their narratives are a kaleidoscope of ideas, weaving together intricate plots, unforgettable characters, and thought-provoking themes that challenge the boundaries of imagination.
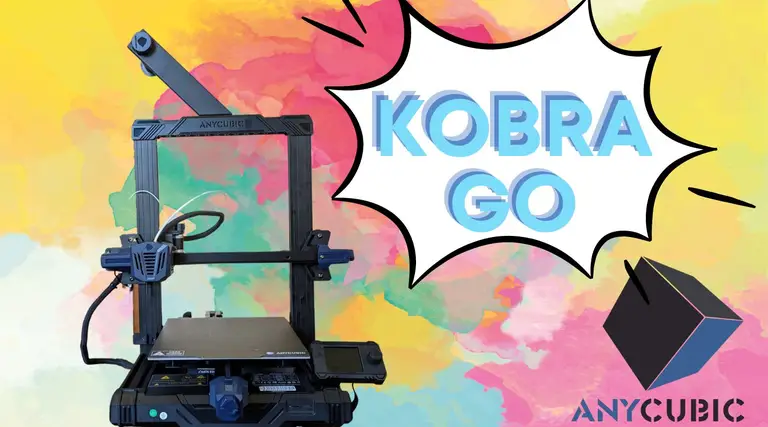
Anycubic’s Kobra Go is the latest in their Kobra series of FDM 3D printers. This is Anycubic’s answer to Creality’s Ender 3 line of FDM kit printers. Aimed at the DIY crowd, these printers come unassembled and need a fair bit of time to piece together, though everything required to get them running is included in the box.
The Ender 3 has reigned supreme in the world of DIY kit printers, but Anycubic is giving the old workhorse a run for its money, specifically due to its focus on automatic levelling. In the case of the Kobra go, you get 25-point automatic levelling, which is an extremely handy feature, as anyone who’s struggled with the Ender 3’s manual 4-point levelling can tell you. Read our full review of the Anycubic Kobra Go here.
Anycubic’s Kobra Go 3D Printer Hands-On Review A detailed review on the Anycubic Kobra Go DIY 3D printer
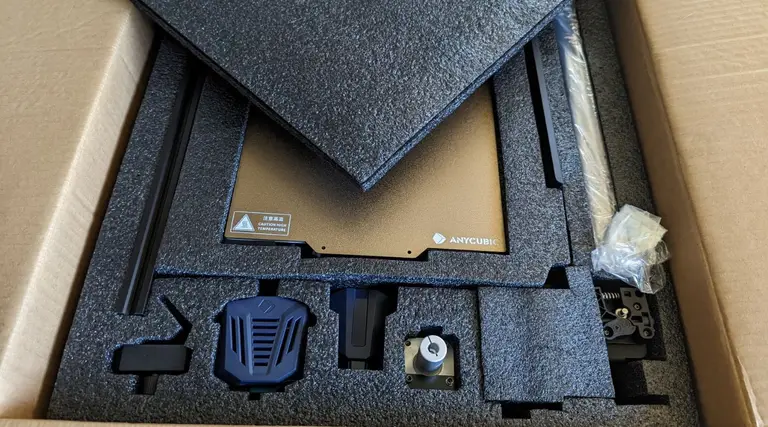
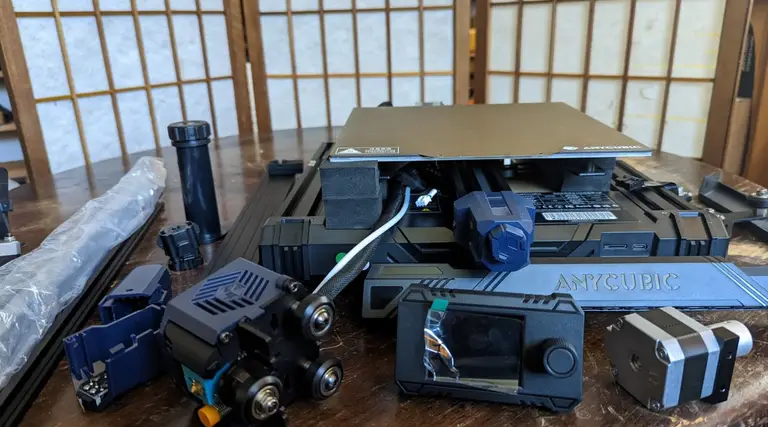
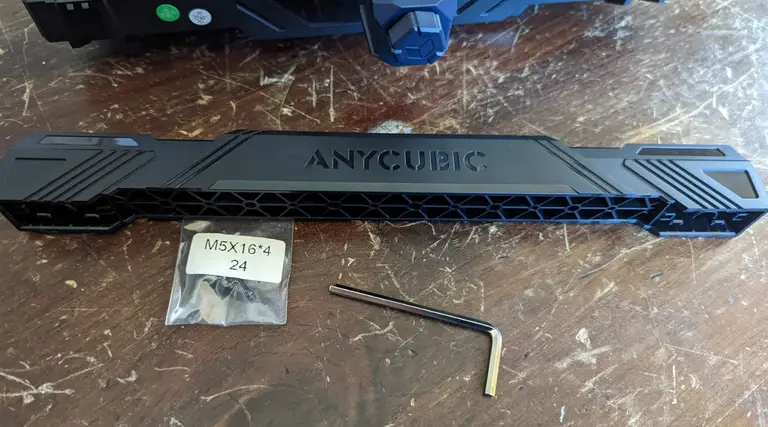
1 – Unboxing your Anycubic Kobra Go
Unboxing your Anycubic Go
The Kobra Go comes well packaged in a secure box, and it’s undeniably a pretty printer. Anycubic has a gift for classy design choices, and the Kobra Go is no exception.
2 – Familiarize yourself with the components of your new Anycubic Kobra Go
Familiarize yourself with the components of your new Anycubic Kobra Go
Before starting, save yourself some trouble and carefully organize all the various pieces. Make sure you have everything! In the kit I received, some of the screws were mislabeled, but I was still able to easily complete the build process. By making sure that everything was in place beforehand, it kept me from worrying when I reached the point where the instructions and my on-hand components differed!
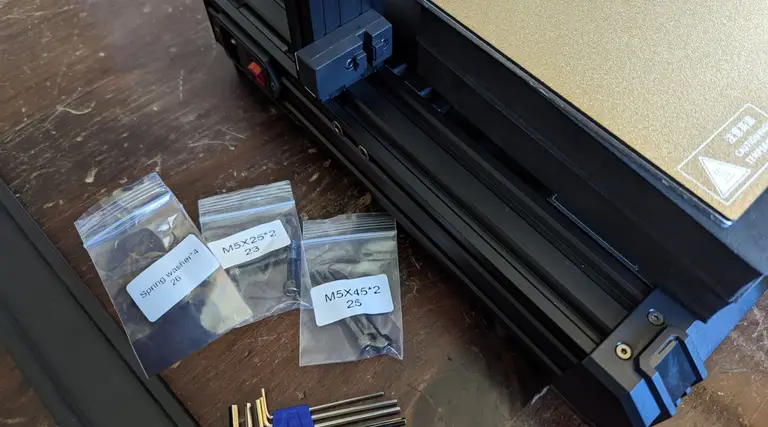
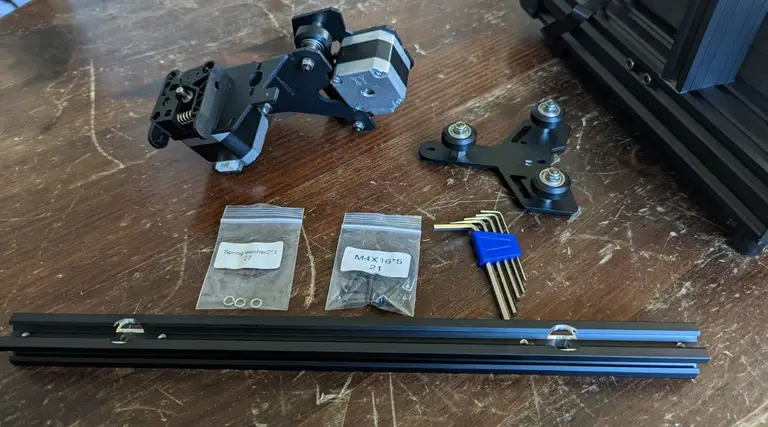
3 – Install the Z-axis profiles
Install the Z-axis profiles
Spring washer x 4 (#26)
M5x25 screws x2 (#23)
M5x45 x2 (#25)
Don’t forget to put the washers on the screw before tightening them!
4 – Screwing in the Z-axis profiles
Screwing in the Z-axis profiles
The profiles are simple enough to install, but watch out for the wires beneath the left profile when you’re putting in the screw. One screw is very close to the wires, and though they’re well insulated, you still don’t want to risk damaging them.
5 – Admire your Z-axis profiles
Admire your Z-axis profiles
Mmm, that’s a nice profile. Both flat edges will be facing the front of the printer.
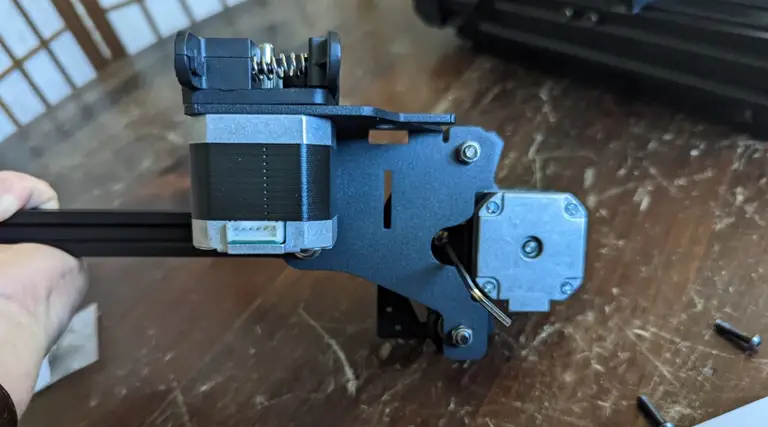
6 – Installing the Z-axis motor kit
Installing the Z-axis motor kit
Collect the Z-axis motor kit items.
The motor
M4x15 screws x2 (#20)
7 – Attach the Z-axis motor kit
Attach the Z-axis motor kit
It fits in easily behind the profile, just line it up and screw it in.
8 – Prepare the Z-axis screw
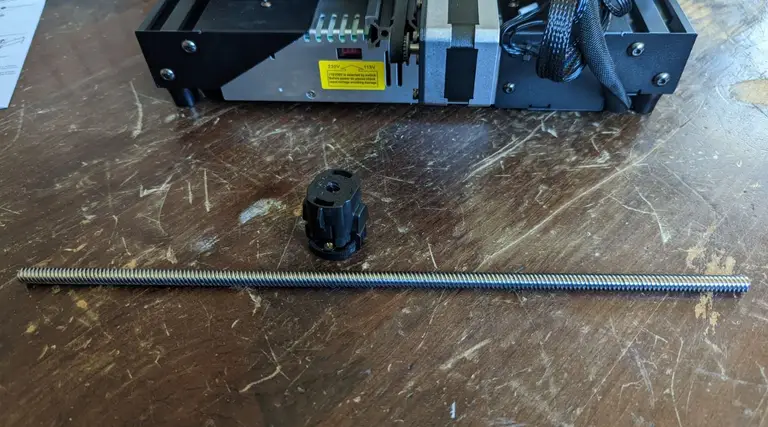
Prepare the Z-axis screw
Get out the screw and the anti-backlash nut.
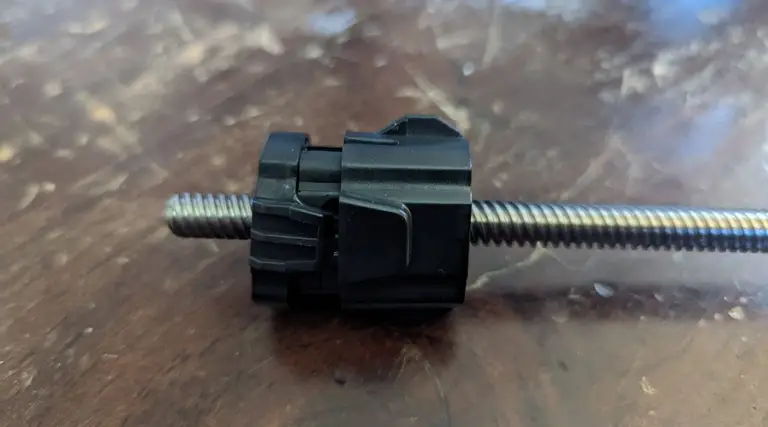
9 – Attach the anti-backlash nut
Attach the anti-backlash nut
You want to make sure that the anti-backlash nut is fully compressed before putting it on the screw. This requires a fair bit of finger strength! Depress the top of the nut into the main part of the nut’s body, then slot onto the screw. When it’s on, the top of the nut will remain slightly more depressed than it could be when off the screw, even after you stop squeezing it.
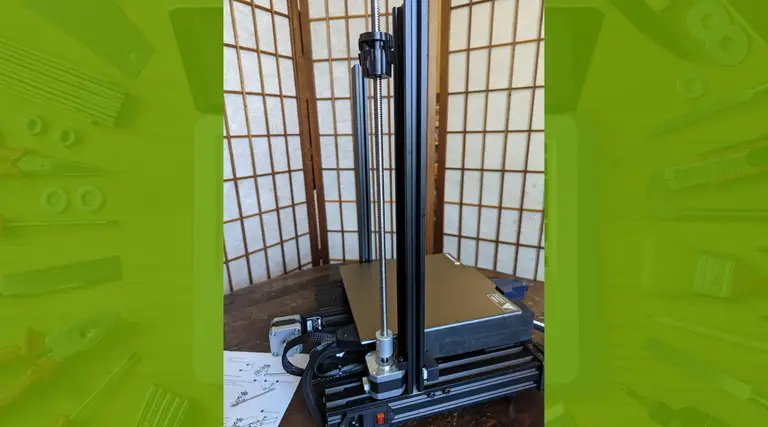
10 – Tighten the screw coupling and attach the screw
The Z-axis screw is ready to go!
You’ll slot the opposite end of the screw from the anti-backlash nut into the coupling of the motor. Loosen the locking screw, press the driver screw down into position, then tighten the top locking screw again to make sure that the driver screw is held in place.
Tighten the screw coupling
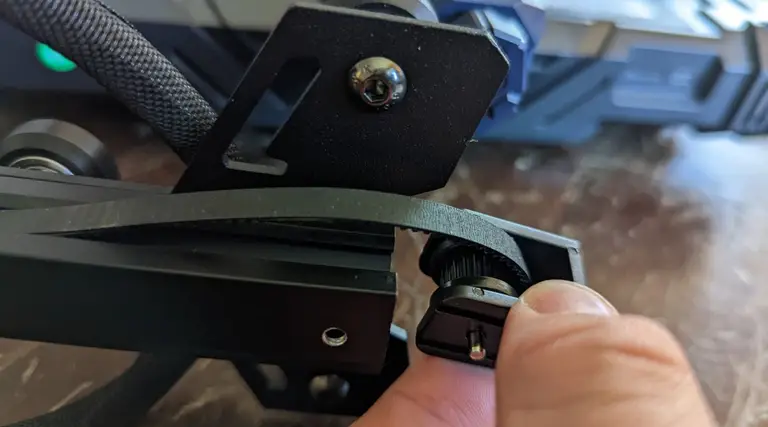
11 – Prepare the XE axis kit
Prepare the XE axis kit
Spring washer 2 x3 (#27)
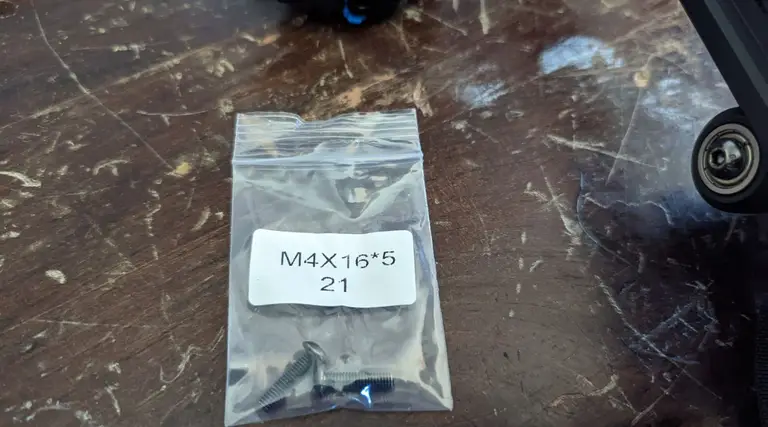
M4x16 x5 screw (#21)
The kit doesn’t separate out the parts quite as well as I would have liked, and the instructions were a bit complicated (solely due to organization and readability). For this section, you’ll be using just three of the #21 screws.
12 – Attach the XE axis to the X-axis profile bar
Attach the XE axis to the X-axis profile bar
Attaching is easy, just thread the washer onto the screws and attach. Two screws for the XE-axis kit and one screw for the Z-axis passive block.
13 – Install the Z-axis passive block
Install the Z-axis passive block
One screw gets the passive block into position. The two large rollers should be on the outside of the strut.
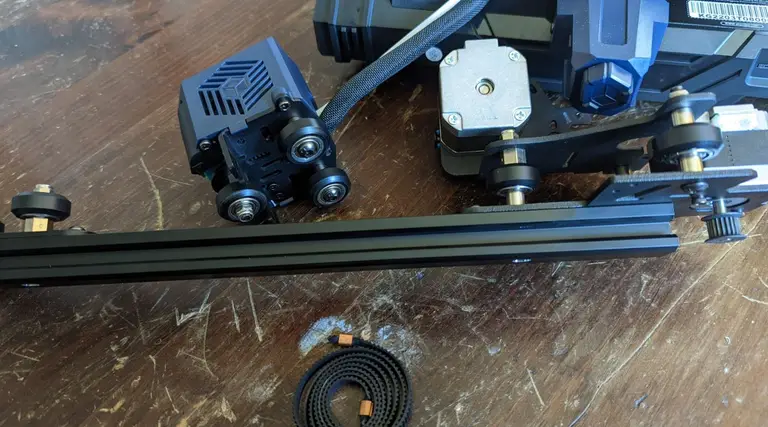
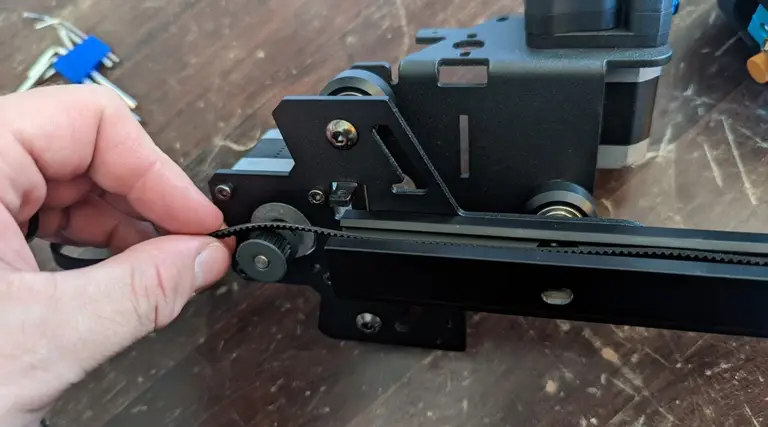
14 – Install the synchronous belt
Install the synchronous belt
The belt slots into the strut, teeth down, so that it can interface with the gear.
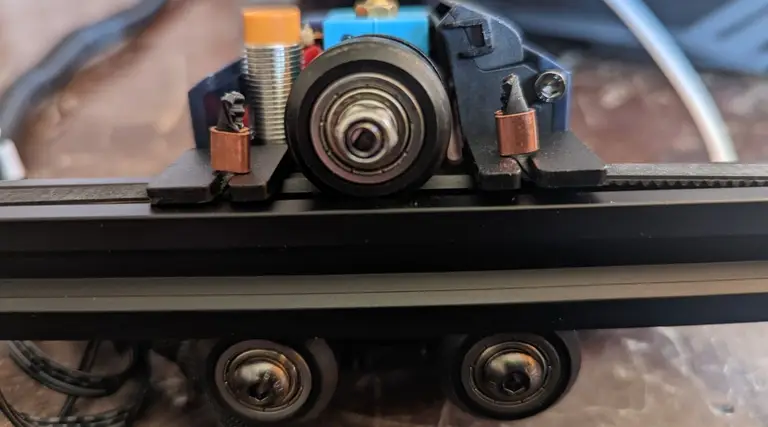
15 – Install the Kobra Go print head
Install the print head
You’ll take the printer head and slide it onto the strut from the end nearest the passive block. The runners will sit atop the belt that you just placed into the strut’s groove, holding it in place.
Slide the print head onto the profile bar, so that the runners sit atop the belt.
16 – Install the X-axis tensioner
Install the X-axis tensioner
The tensioner came assembled, so disassemble and lay at the ready.
17 – Thread the belt into the X-axis tensioner
Thread the belt into the X-axis tensioner
Take the gear and slot the belt into it so that the belt’s teeth interface with the gear.
18 – Clip the belt onto the print head
Clip the belt onto the print head
Stretch the belt out and slide the ends with the brass crimps into the metal slots.
19 – Bolt down the X-axis tensioner cover
Once the belt is clipped in, attach the casing for the tensioner using the screws.
M4x16 screw x2
Bolt down the X-axis tensioner cover
20 – Install the X-axis component
Install the X-axis component
Now that the whole x-axis arm is complete, you can slide it onto the struts. It won’t go down very far at first.
21 – Align the anti-backlash nut
Align the anti-backlash nut
You must make sure that the anti-backlash nut is in place. It has two “wings” on either side, and one of these will fit into a slotted groove on the X-axis strut.
22 – Install the photoelectric switch baffle
Install the photoelectric switch baffle
M3x8 x2 screws (#18)
Using the provided screws, connect the metal baffle so that the long end faces down.
23 – Install the top beam
Install the top beam
This part is pretty easy, though you may have to press apart (or together) the struts with a small amount of manual force to get the top beam to slot into place. The beam is plastic, not metal like with the Ender 3, but it’s heavy-duty plastic and I don’t find that it’s a compromise that bothers me overall.
M5x16 x4 (#24)
24 – Install the screen kit
Install the screen kit
The screen kit installs easily into the front of the printer, and you can connect the cable immediately. Having the screen already screwed down might make adjusting the levelling knobs a little difficult later on, but not terribly so, especially if you have smaller hands.
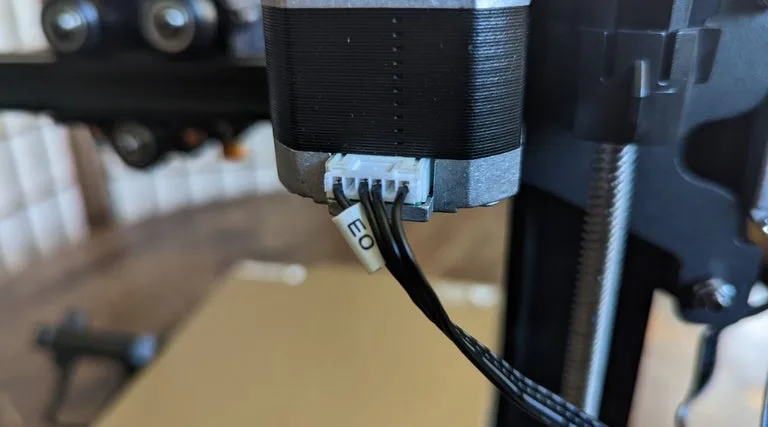
25 – Install the X-axis photoelectric switch
Install the X-axis photoelectric switch
This is the switch that tells the printer when the x-axis arm hits its lowest point. Before screwing it into place, you’ll absolutely need to connect the cable. This makes it a little finicky, as aligning the cable through the slot in the cover, connecting the plastic bits, and screwing it down all felt a little difficult. An unwary person might accidentally snap the plastic lock on the bottom, too.
Just take your time, be careful, and it will go smoothly.
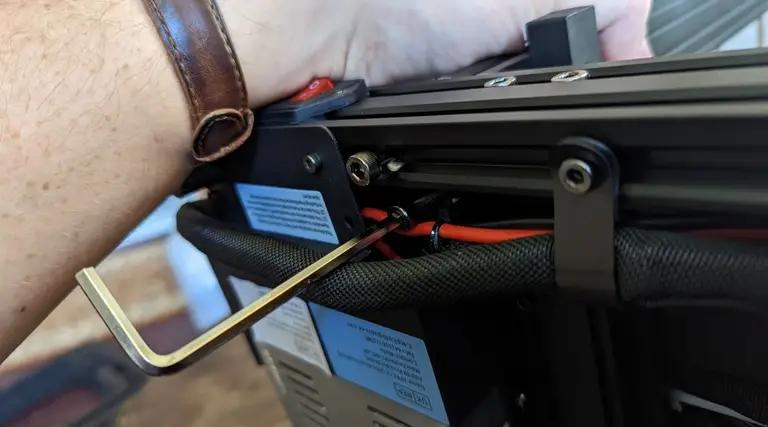
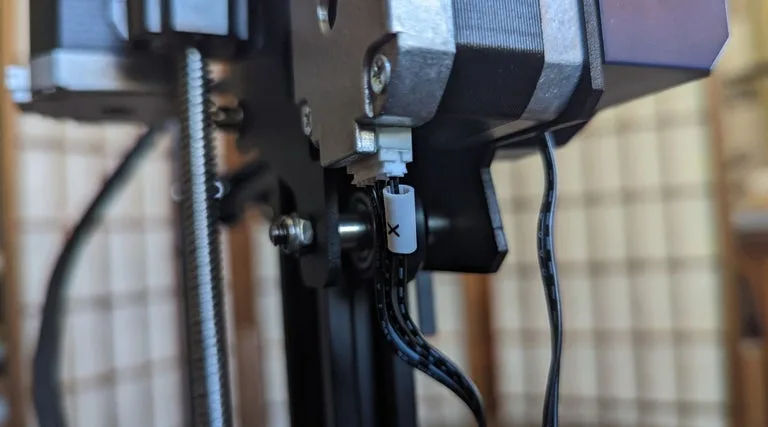
The wiring needs to be installed first
26 – Connect the wires
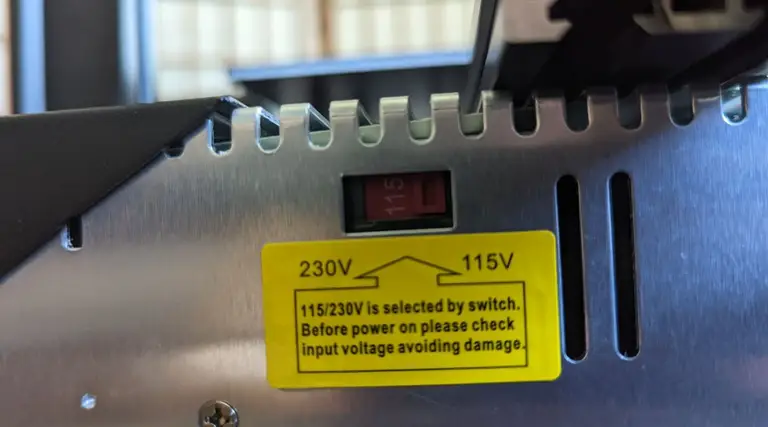
Double check the voltage setting!
None of the wires have corresponding markers, which is extremely weird, but it’s also not that hard to figure out which ones go where just based on the size of the cable connector heads and the lengths of the cables themselves. Don’t try pulling any cables longer than they already are, and you’ll be fine.
27 – Install the filament holder
Install the filament holder
The filament holder screws right into the top beam, easy as pie.
28 – Check the X-axis horizontal calibration
Check the X-axis horizontal calibration
Now, this part was not well described in the instruction manual, though I could see that the manual designer meant well by including this. Basically, you use the included toolkit box to make sure that the x-axis arm is level, and you ensure the level by loosening and tightening certain screws and bolts.
Note that the bolts don’t have a maximum “tight” position! They move between loose and tight, depending on the position of a little dot bored into the bolt’s metal. If the dot is facing toward the nearest strut, it’s in its tightest state. If the little dot is facing away, it’s in its loosest state. Play with it, and it will quickly make sense just by feel.
I really wish, for the sake of less-experienced enthusiasts, that this whole section was clearer, as it provides a bit of a stumbling block for anyone not used to DIY kit printers.
29 – Connect the Teflon tubing
Connect the Teflon tubing
There are two Teflon tubes. The long one attached to the printer head, and a short one that comes with the kit. Unclip the blue fastener already attached to the filament injector, then slide in the long Teflon tube’s end. Re-clip the blue fastener in place to hold it together.
On the other side of the printer, press in the short length of Teflon tubing—this acts as a feeder for the filament as it is brought into the injector component.
30 – Tie cabling
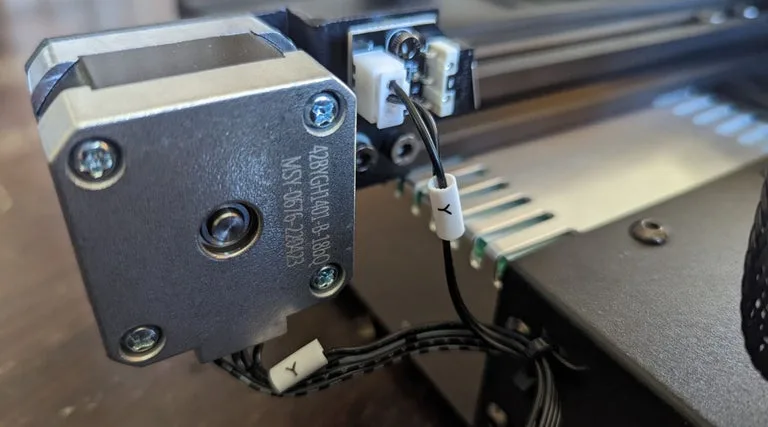
Tie cabling so it’s out of the way
Tie down the excess cables, but make sure to leave some room on either end—this cable should not be too tight anywhere, and this tie is just to keep it out of the way.
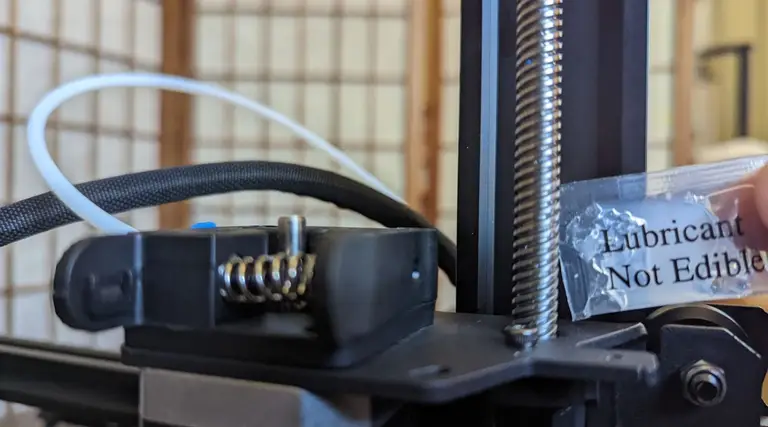
31 – Grease the screw
Grease the screw
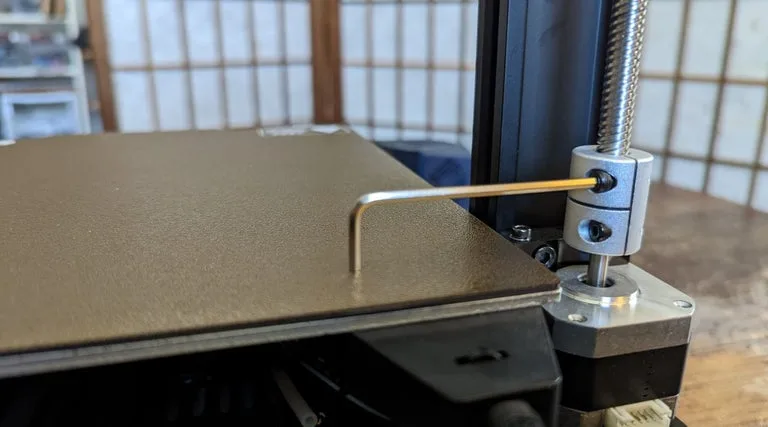
Lubricating the driver screw will ensure that the printer runs more smoothly.
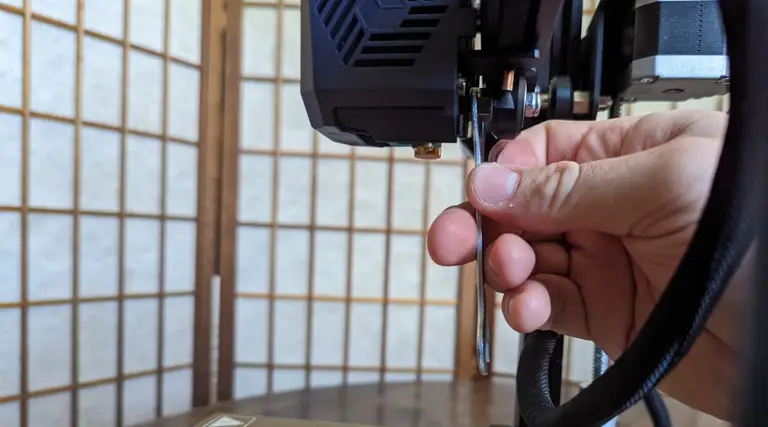
32 – Adjust the print head for wobble
Adjust the screw until the print head no longer wobbles.
The print head will likely have a little wobble at first, so just use the included wrench to adjust the eccentric nut until the wobble goes away.
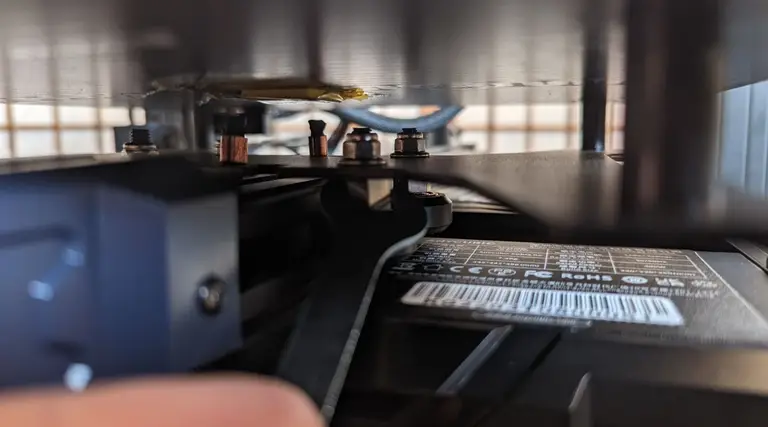
33 – Level the print bed
The bolts turn between a “tight” and “loose” state.
Press on the print bed with your hand. If you feel a wobble, you need to adjust the two eccentric nuts beneath the build plate. Remember, these don’t have a “maximum” tight state, but oscillate between loose and tight. Go slowly, and you’ll quickly figure out what feels right.
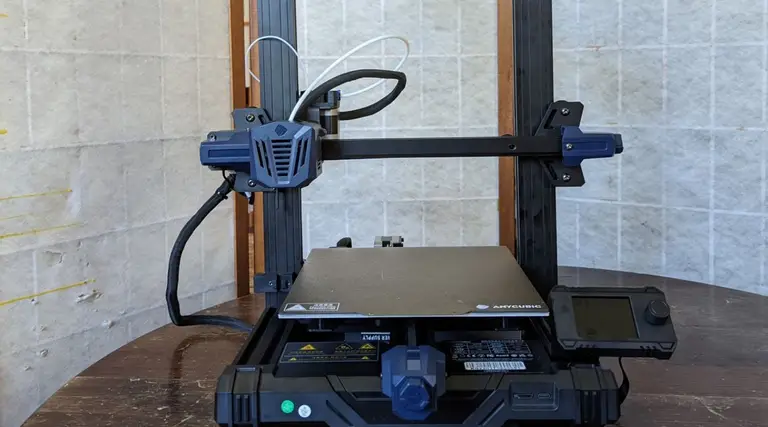
Leveling the Kobra Go is relatively easy, as its auto-leveling function does much of the work for you, but if you fail to run this step you’ll find your prints coming out pretty wonky.
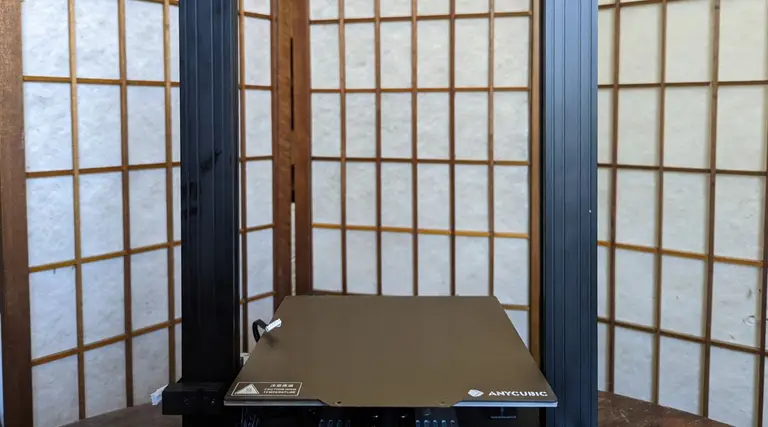
But, otherwise, your new printer is ready to go!
The Kobra Go is easy enough to put together, though perhaps slightly more complex than the Ender 3 v2 kit printer. Especially for those following the stock directions, and for those without prior experience putting together a DIY kit printer, this would be a big project.
What makes this a powerful contender to Creality’s Ender 3 v2 is the automatic levelling procedure that the Kobra series offers. Aligning the Kobra beforehand is a bit of a pain, but once it’s ready, the auto-levelling feature makes it absurdly easy to get your print bed ready for projects.
Who is the Kobra Go for?
You want the Kobra Go if you’re experienced at putting together kit printers and want something that’s easy to assemble for your skill level, that also provides automatic levelling and produces high-quality prints. The Kobra Go would be a reasonable choice for beginners new to the world of 3D printing, as long as they have a lot of patience, the end result (a kit 3D printer with automatic levelling) is definitely worth it.
NEXT UP
How to Set Up Quick Connect on a Synology NAS
Get Synology’s powerful Quickconnect running in minutes on your NAS!
Synology is one of the most popular creators of Network Attached Storage devices on the market today, and for great reason — they’re really good at what they do. They consistently make devices that stand the test of time and feature top-notch software that makes the process of running a home server as easy as
Introducing Howchoo, an enigmatic author whose unique pen name reflects their boundless curiosity and limitless creativity. Mysterious and multifaceted, Howchoo has emerged as a captivating storyteller, leaving readers mesmerized by the uncharted realms they craft with their words.
With an insatiable appetite for knowledge and a love for exploration, Howchoo’s writing transcends conventional genres, blurring the lines between fantasy, science fiction, and the surreal. Their narratives are a kaleidoscope of ideas, weaving together intricate plots, unforgettable characters, and thought-provoking themes that challenge the boundaries of imagination.
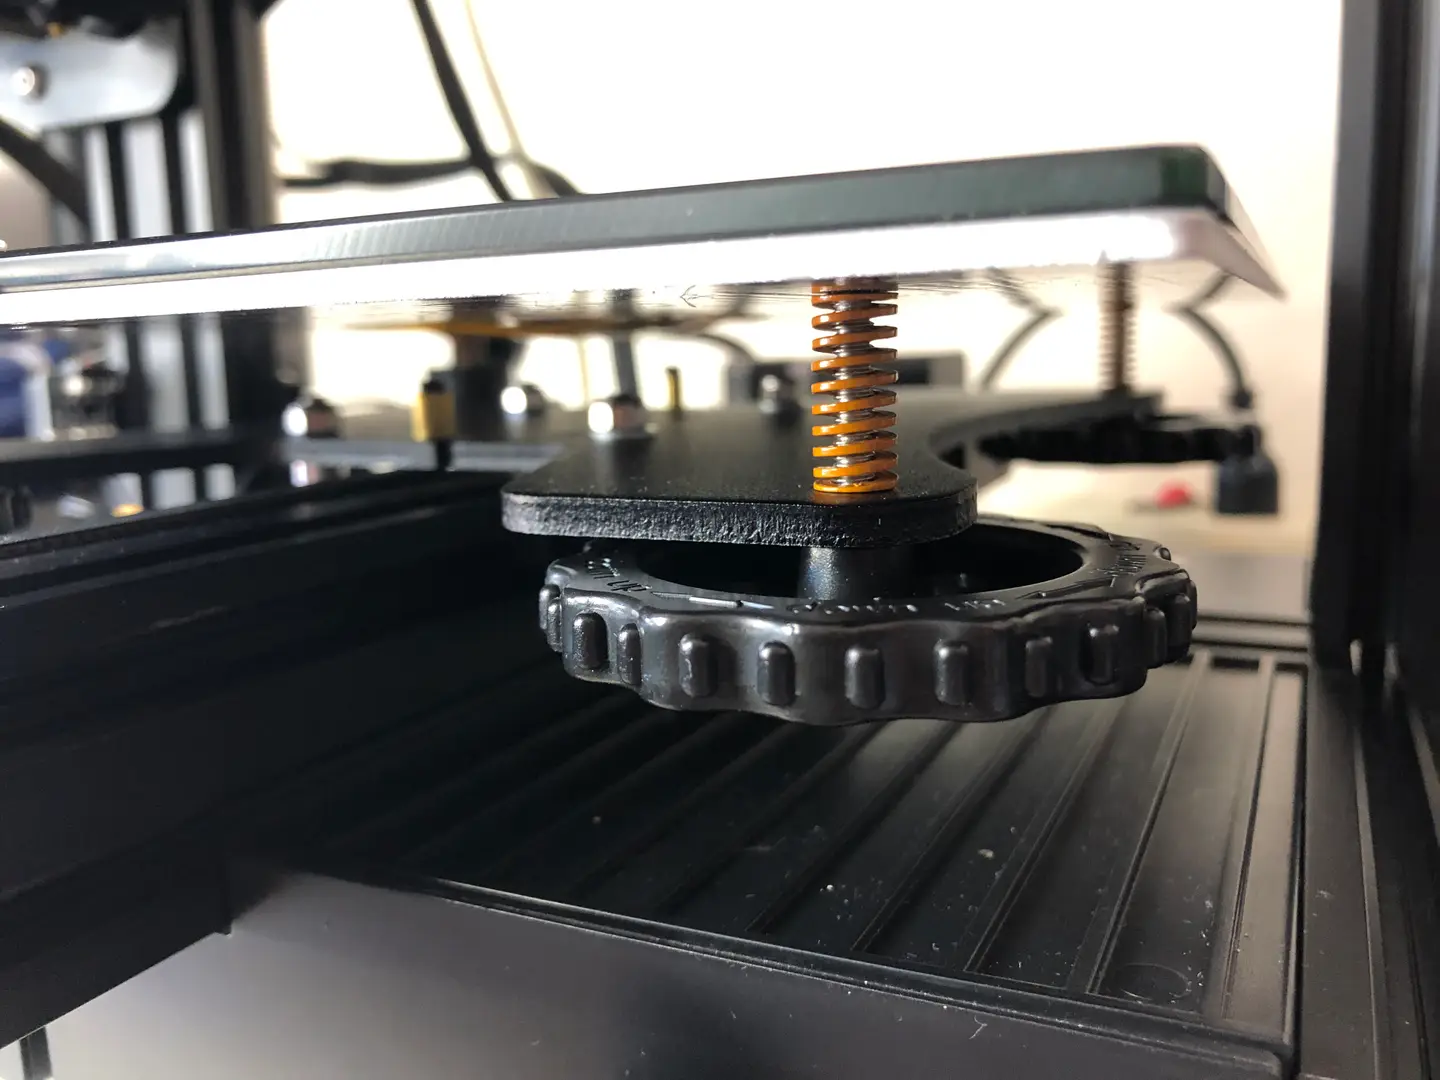
When I first received Creality’s new Ender 3 V2, fellow Howchooer and author of the previous Ender 3 and Ender 3 Pro springs upgrade guide, Zach, told me that the first thing I should probably do is upgrade the stock springs that come with the V2.
After about a month of using the Ender 3 V2’s stock springs, I wish I had heeded his advice and switched out the springs right away. The stock Ender 3 V2 springs are really bad. Since upgrading to the new springs, the bed stays much more level between prints. Even more importantly—the overall print quality is much better because the bed stays level during printing as well.
So now I’m asking you to heed my advice and upgrade your Ender 3 V2 springs ASAP. It’s inexpensive to get new springs and the upgrade itself only takes 5 minutes.
1 – Choosing springs
While we’ve done most of the work for you and selected an inexpensive, yet quality set of springs that you can choose, we’ll detail generally what’s being upgraded with the new Ender 3 V2 springs.
Length
The upgraded springs should be the same length as your previous springs, so you do not need to adjust the Z-axis limiter switch after installing them. For the Ender 3 V2, they should be 20mm.
Rigidity
The upgraded springs need to be more rigid than the originals so that they reduce the vibration during printing and increase the overall consistency of your prints.
Shape
The shape of the springs makes a huge difference when it comes to shifting during printing and spring movement. The springs we selected have a flat top and bottom versus the stock Ender 3 V2 springs rounded top and bottom. This greatly reduces the springs’ movement during printing.
Our choice
Again, here are the springs we’ve tested and recommend for the Ender 3 V2.
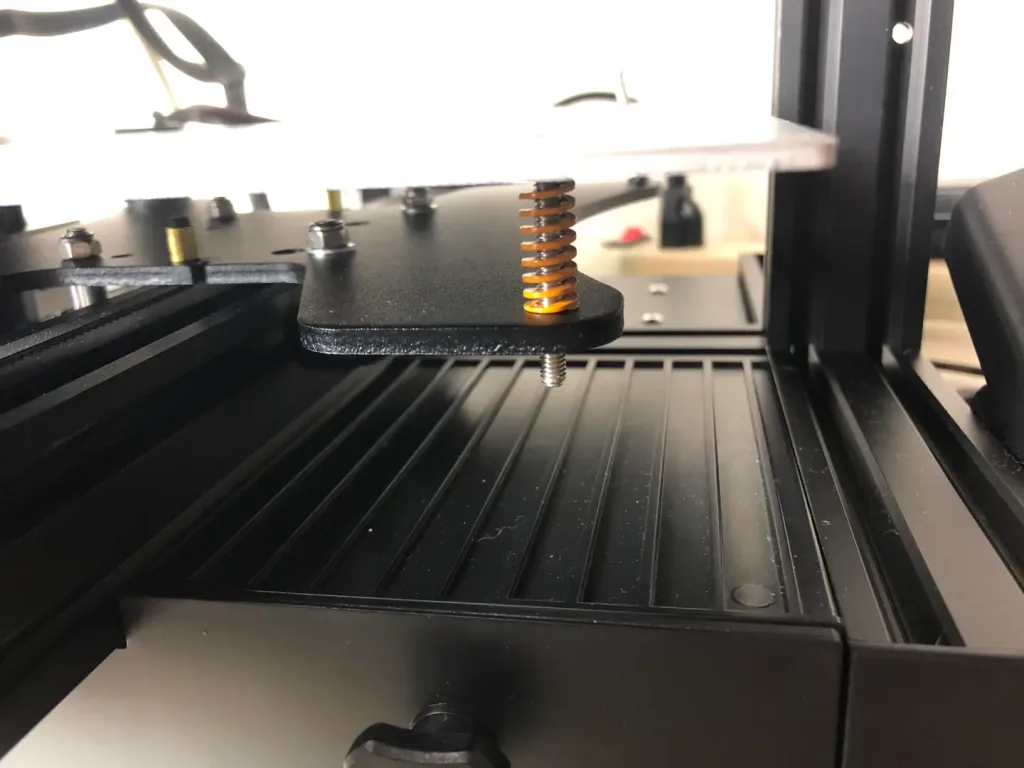
2 – Remove the old springs
Turn each bed adjustment wheel clockwise until they are fully removed. Set the wheels aside.
3 – Install the new springs
Do not remove the entire build plate so that you can avoid harming the heating element wiring at the back-left.
I recommend starting at the back-left for this.
Carefully, lift each corner enough to replace all four springs individually.
🛈 The back-left corner will prove tricky. Just take your time. Hold the new spring in place while re-inserting the bed screw.
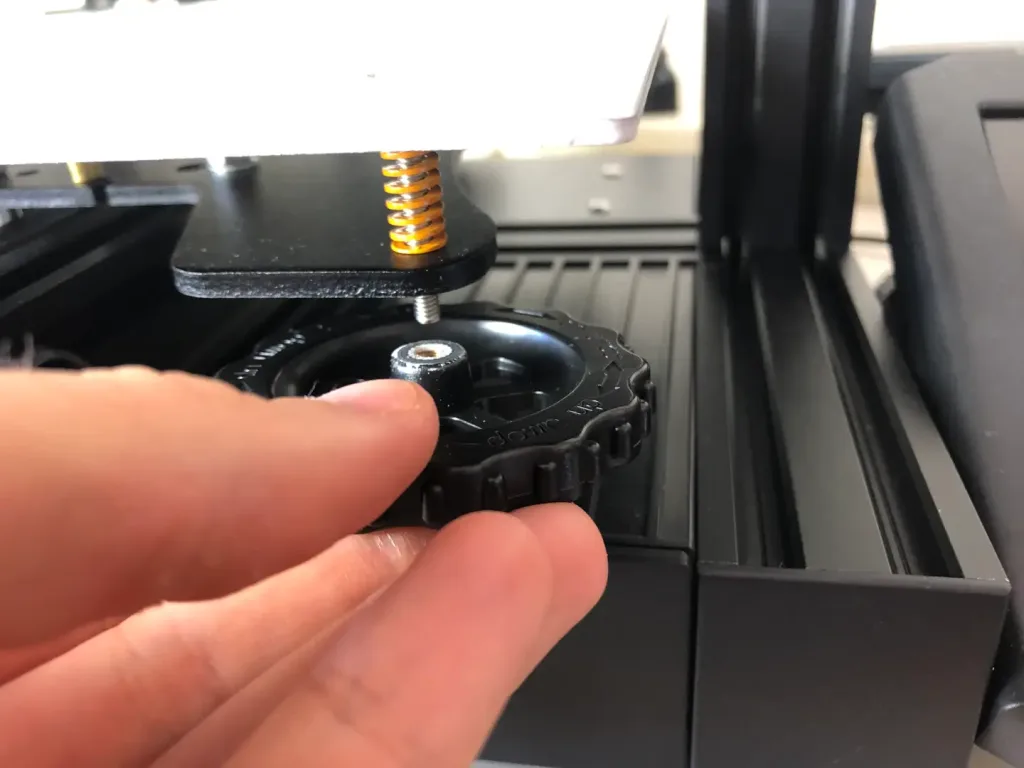
4 – Attach the knobs
Only after you’ve replaced all 4 springs, should you reattach each knob to the bed screw. This time you will turn the knobs counter-clockwise to tighten them.
The new springs for your Ender 3 V2 will be much stiffer, which should be immediately noticeable upon tightening.
5 – Level the bed
If you’ve been using the stock springs for any length of time, then you should know how to level your bed by now. Lucky for you, now you won’t need to level your bed between prints nearly as often!
Blender is one of the most popular open-source 3D creation suites today. It doesn’t cost a dime to use and everything you create is yours to own for good. The community is robust and the dev team still releases new updates on the regular. If you want to get the latest version, you may have
Introducing Howchoo, an enigmatic author whose unique pen name reflects their boundless curiosity and limitless creativity. Mysterious and multifaceted, Howchoo has emerged as a captivating storyteller, leaving readers mesmerized by the uncharted realms they craft with their words.
With an insatiable appetite for knowledge and a love for exploration, Howchoo’s writing transcends conventional genres, blurring the lines between fantasy, science fiction, and the surreal. Their narratives are a kaleidoscope of ideas, weaving together intricate plots, unforgettable characters, and thought-provoking themes that challenge the boundaries of imagination.
In the base game, Minecraft has a variety of enchantments and potions to help the player along. However, sometimes you get bored with the same thing, or you crave something specific to help your playthrough. That’s where this list of Fabric magic mods come in!
This guide will go through mods available for Minecraft Fabric that adds more magic to Minecraft. While some add new magical mechanics or systems, others add in a ton of new enchantments. There’s even a mod that lets you turn into a mermaid upon touching water! So whether you’re hosting a survival multiplayer server or you’re playing alone, you’ll find a mod that opens up your world even more!
One of the most sought out enchantments in Minecraft is Mending. This mod makes it a little more rewarding and usable for players who finally acquire the enchantment on an item. It allows for the Mending item to repair itself with experience the player already has.
If you’d like to expand potions and brewing, but don’t want to add a large magic mod, Extra Alchemy is a great alternative. While it does add a bunch of useful potions to the game, it also enables players to combine potion effects and durations together through crafting. There also are vials which make positions stackable and a potion bag to carry them around!
As the name implies, Fabric Enchantments adds a load of new enchantments to Minecraft. One of the most impressive ones is Auto Smelting, which allows the player to receive the smelted version of any block they break!
For those that want to live out their mermaid dreams in Minecraft, this mod makes it happen. By crafting a dyed necklace, the player will magically transform into a mermaid upon contact with water!
As with any type of alchemy, the process is complicated and complex. This mod takes everything about alchemy and makes it work inside Minecraft. There is a lot to Art of Alchemy: Memoriam, but perhaps the most wonderful thing about it is that it was created in memoriam of SynthRose, the original mod creator who tragically passing away in 2020. Memoriam was a community project created together and in solidarity, with the goal to allow her memory to live on through a beloved mod.
Have you ever looked at a block of crying obsidian and thought, “What’s the deal with that?” The Lacrimis mod gives you an answer! By allowing players to extract its magical power, they can create rune arrays that teleport blocks, defy death, and build invulnerable walls.
The goal of Conjuring is to allow players to create their own custom mob spawners. They can customize the amount of mobs spawned, required player distance, and even the attributes of mobs like speed.
One of the more useful, but rare, items in Minecraft are the Totems of Undying. Quite a pain to get, this mod allows players to customize and craft totems to make them more powerful and useful. Depending on what you prefer, you can gain extra health, jump boost, night vision, and more!
For the True Blood or Vampire Diaries fans out there, we’ve got a mod for you to try. Haema allows players to become vampires and unlock a bunch of new abilities. As they play along they’ll gain better night vision, a dash ability, higher max health, and much more!
There’s something to be said about mods that include the community in development. Dark Enchanting is certainly a mod-in-development, but it does have useful enchantments in place already. It’s obviously a passion of the developer, as they’ve asked the players for help writing the lore for it. The goal of this mod is to add new and more powerful enchantments to Minecraft and allow players to get the ones they want without having to reroll.
The longer you play Minecraft, the more you realize that early-game tools just won’t cut it. Exploring the enchantment feature of Minecraft can be exciting, but also intimidating. Rather than worry about researching enchantments, below are the best enchantments in Minecraft! To learn how to enchant items, check out this guide! In this guide, you’ll see
Introducing Howchoo, an enigmatic author whose unique pen name reflects their boundless curiosity and limitless creativity. Mysterious and multifaceted, Howchoo has emerged as a captivating storyteller, leaving readers mesmerized by the uncharted realms they craft with their words.
With an insatiable appetite for knowledge and a love for exploration, Howchoo’s writing transcends conventional genres, blurring the lines between fantasy, science fiction, and the surreal. Their narratives are a kaleidoscope of ideas, weaving together intricate plots, unforgettable characters, and thought-provoking themes that challenge the boundaries of imagination.
We’ve compiled the most common RetroPie questions and answers into a clear and concise guide. This FAQ covers which RetroPie hardware you’ll need, initial setup, controller configuration, ROMS, consoles, and more.
So whether you’re just getting started with RetroPie or are a pro fine-tuning your retro gaming setup, we can help.
If you have a question that isn’t answered here, post in the comments section and we’ll respond to help you out.
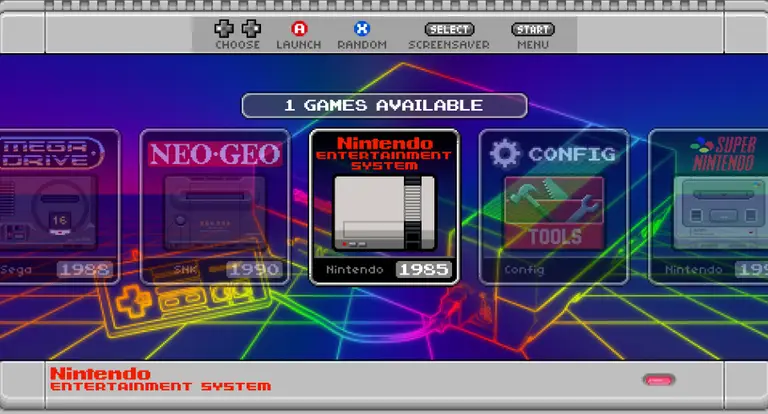
1 – What is RetroPie?
RetroPie is a free software library that allows you to emulate video games on the tiny $35 Raspberry Pi computer. It packages open-source packages like Emulation Station and RetroArch into an easy-to-install gaming system. RetroPie is the most popular Raspberry Pi video game emulator.
Primarily used to emulate retro video games, RetroPie allows you to emulate popular video game consoles such as the Nintendo Entertainment System, (NES), Super Nintendo (SNES), Game Boy, Nintendo 64, Sega Genesis, and more. Games are loaded as individual ROM files which can then be read by each system in RetroPie.
Because the computer is called the “Raspberry Pi”, not “Raspberry Pie”, RetroPie is sometimes misspelled as RetroPi.
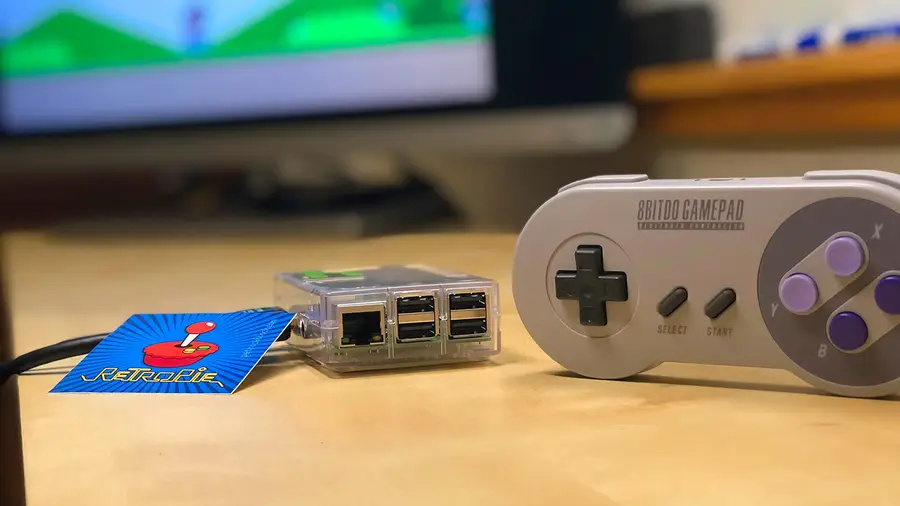
2 – How do I build a RetroPie gaming system?
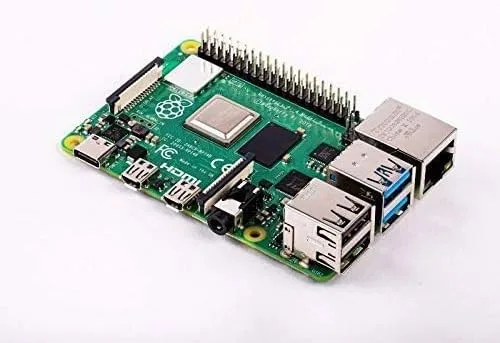
To build your own RetroPie system, you’ll need a few things: a Raspberry Pi computer, a few accessories, and the RetroPie software itself. After assembling the hardware, simply download and install the RetroPie software, add game ROMs, and connect everything to your TV.
See our full RetroPie guide for a complete list of the hardware you’ll need (including links) and to learn about installation step by step.
Using a Raspberry Pi starter kit
You can also buy a Raspberry Pi starter kit to use as the base for your RetroPie build. See our video covering how to choose one (and our recommended kit):
How to Choose a Raspberry Pi Starter Kit (2022) Also: Is it cheaper to buy everything separately?
3 – How do I install RetroPie?
RetroPie setup is an easy process. To install RetroPie, simply download the latest RetroPie SD card image from the RetroPie downloads page. Then, flash it onto your Raspberry Pi’s SD card using a tool such as Etcher. Finally, configure RetroPie and add your game ROMs.
If you’d like to build your own RetroPie, see our full RetroPie setup guide for step-by-step instructions. Even though you can install RetroPie on any Raspberry Pi model, I recommend installing RetroPie on the Raspberry Pi 4 as it is currently the most powerful Raspberry Pi version and thus can emulate more systems and games.
The USB approach is the recommended way to put ROMs on RetroPie due to transfer speed. You’ll also automatically have a backup of your ROMs as a result! After adding your ROMs, simply reboot the Raspberry Pi to start using them.
5 – Where do I get ROMs for RetroPie?
It’s easy to find ROMs for RetroPie. There are several different types of ROMs, including copyrighted, abandonware, public domain, and homebrew games.
While you can find game ROMs on any torrent site, you shouldn’t download any copyrighted titles as this may be illegal. You can also find a ton of free legal ROMs on MAME, Zophar, PDROMs, and other sites. For a complete listing of where to get ROMs for RetroPie and more information, see our guide to RetroPie ROMs.
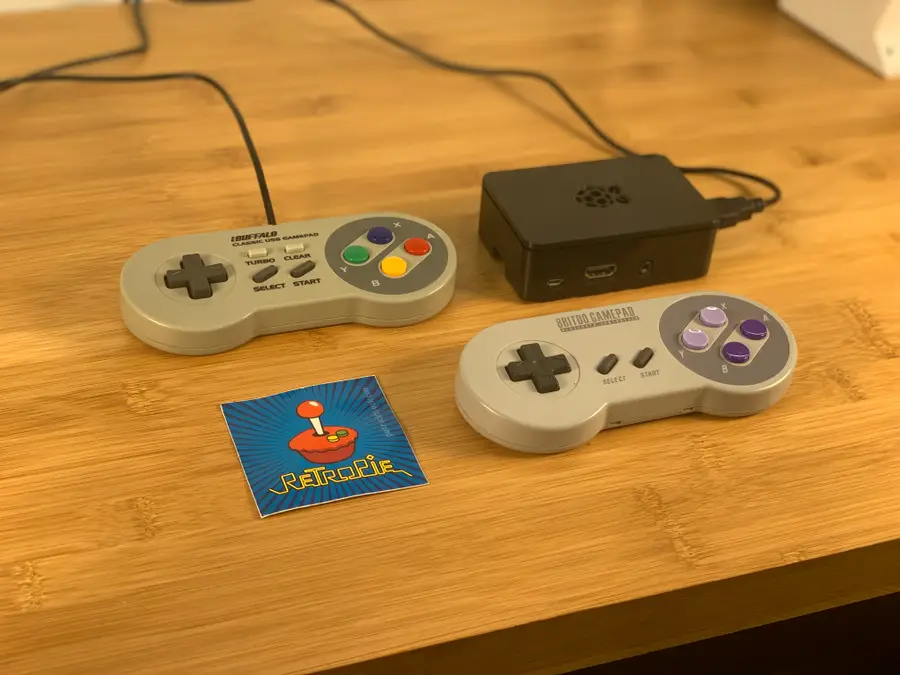
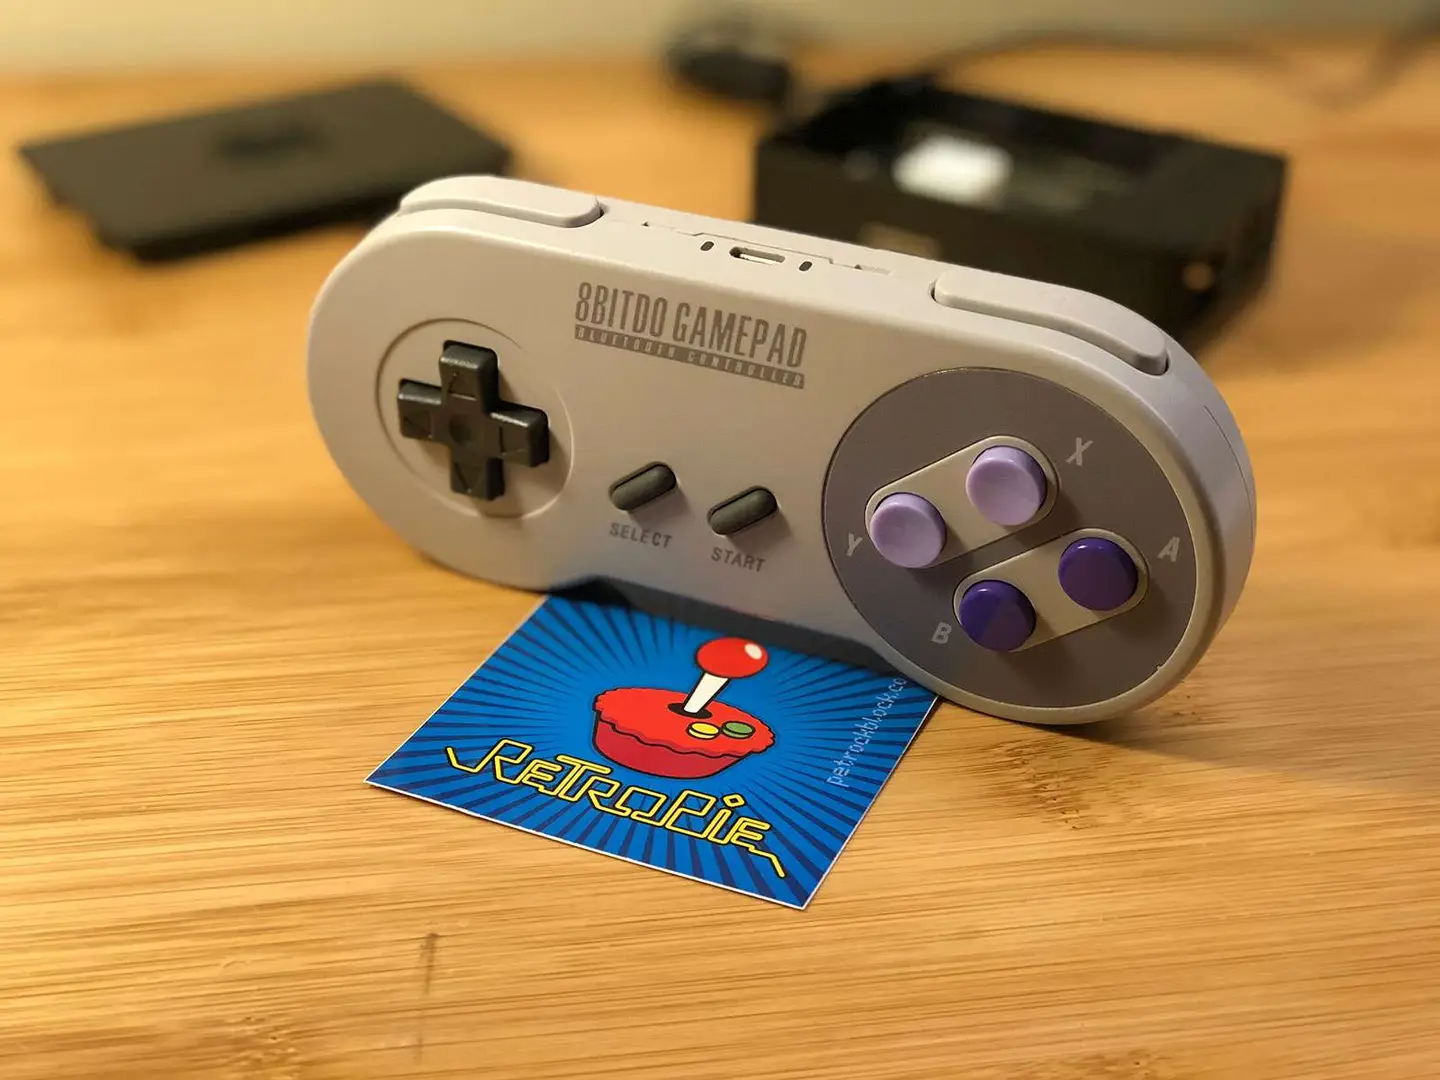
The best controller for RetroPie is the 8Bitdo SF30. Why? It’s a high-quality wireless bluetooth controller that features a large assortment of buttons — including two additional thumbsticks. Looking for others? Check out our guide on the best controllers for RetroPie.
The more buttons your controller has, the wider the variety of games you can play with it. For example, if you tried to use a normal NES-style controller, it wouldn’t have enough buttons to play any games for the SNES, Genesis, MAME arcade, etc. As a bonus, the SF30 will even work with the Nintendo Switch for playing retro games on Nintendo Switch Online.
Keeping RetroPie up to date is important so that you can get the latest security updates, features, and bug fixes.
To update RetroPie, launch it and navigate to Configuration Tools > RetroPie Setup. From the menu that appears, select the appropriate update option: for the latest version of RetroPie (4+), select either the Update or Update All Packages option. For RetroPie 3.X or earlier, select the Update RetroPie-Setup Script option. When it’s finished updating, restart your Pi.
For more information and important notes and warnings, see our RetroPie update guide.
To exit games in RetroPie, press the START + SELECT together buttons at the same time. This will return you to the RetroPie main menu. It is also possible to change this button combination since this combination might not work for certain systems, emulators, or games.
9 – Can RetroPie play N64 games?
Yes, you can run N64 games on RetroPie. The reason people usually ask this is because there’s a misconception that the Raspberry Pi can’t handle Nintendo 64 games due to lag.
The origin of this assumption lies in older models of the Raspberry Pi that could not run N64 games, or in systems that are not properly configured or optimized.
To get N64 games to work in RetroPie and reduce lag, use the Raspberry Pi 4, the latest and most powerful version of the Raspberry Pi. Provide sufficient cooling in the form of ventilation, heat sinks, and/or fans.
In addition to other setup optimizations, configure your Raspberry Pi with the proper video scaling settings — for example, scaling the video up improperly on a massive TV will use too much of the Pi’s GPU, causing lag.
10 – What games come with RetroPie?
RetroPie does not include any games by default. It is only a software library, or a system for playing games. Therefore, you must find and install RetroPie ROMs on your own.
11 – Can RetroPie play GameCube games?
Yes and no. While RetroPie can technically emulate GameCube games, the newest Raspberry Pi model is not powerful enough to play GameCube games without significant lag.
12 – How do I save a game in RetroPie?
Saving games in RetroPie is not as simple as using the in-game menu. Fortunately, it is still easy! Some games save your progress automatically when they are closed. Other games can be saved by pressing SELECT+R1 together. For more information on saving and loading RetroPie games, see our RetroPie game saving guide.
No, the RetroPie software itself is completely legal. Calling it illegal is like calling a DVD player illegal because it can play illegally-burned DVDs.
What isn’t legal is downloading or selling copyrighted ROMs since this similar to software piracy. I recommend finding free, legal ROMs for RetroPie rather than downloading copyrighted titles from torrent sites.
14 – What emulators are in RetroPie?
When many people ask this question, they’re often asking which consoles, or systems, RetroPie can emulate — this is because RetroPie provides a different emulator for each console/system.
Here’s a list of the most popular retro video game consoles that RetroPie can emulate:
Atari 2600
Atari 7800
Atari Lynx
GCE Vectrex
NEC TurboGrafx-16
Nintendo 64
Nintendo Entertainment System
Nintendo Super NES
Nintendo Game Boy
Nintendo Game Boy Color
Nintendo Game Boy Advance
Nintendo Virtual Boy
Sega 32X
Sega CD
Sega Master System
Sega Genesis
Sega Game Gear
Sega Saturn
SNK Neo Geo
SNK Neo Geo Pocket Color
Sony PlayStation
Sony PSP
Note: This is not a complete list; additional supported consoles can be found on the RetroPie wiki. You can also emulate vintage computers using RetroPie.
These are all part of a common included emulation system called “RetroArch”. RetroArch packages emulators for the systems above into RetroPie; additional emulators are also available, though results for some are mixed.
15 – Can you play multiplayer games online?
You can play multiplayer games on RetroPie with your friends using Netplay—visit this guide to learn how to set up multiplayer on RetroPie.
There are several ways to go about running a Minecraft server on the Raspberry Pi. In this guide, I’ll cover how to install Nukkit—a cross-platform Minecraft server that’s super easy to set up on the Raspberry Pi. This server should work with PCs, consoles, and tablets running Minecraft 1.14. I’ll be using a Raspberry Pi
Introducing Howchoo, an enigmatic author whose unique pen name reflects their boundless curiosity and limitless creativity. Mysterious and multifaceted, Howchoo has emerged as a captivating storyteller, leaving readers mesmerized by the uncharted realms they craft with their words.
With an insatiable appetite for knowledge and a love for exploration, Howchoo’s writing transcends conventional genres, blurring the lines between fantasy, science fiction, and the surreal. Their narratives are a kaleidoscope of ideas, weaving together intricate plots, unforgettable characters, and thought-provoking themes that challenge the boundaries of imagination.
With a Raspberry Pi and a free afternoon, you can make any printer a wireless network printer. You don’t even need a full-sized Pi model—this project will work easily with the Raspberry Pi Zero W.
We’ll be using CUPS to create a print server that can be managed with a web interface on the network. CUPS provides plenty of features like print job management, job cancellations, and the ability to adjust printer settings from your browser window.
1 – Install Raspberry Pi OS
This project is built on Raspberry Pi OS. Unless you plan on using a monitor or screen, you can get away with using the light version.
It’s important to update Raspberry Pi OS before installing CUPS. If you’ve never done this before, check out our guide on how to update Raspberry Pi OS. You will need to access the Pi via SSH using a terminal.
Once the Pi has been updated, run the following command to install CUPS.
$ sudo apt-get install cups
3 – Set up the Printer
Connect your printer to the Raspberry Pi. The cable you need for this step may differ depending on the type of printer you’re connecting and what model of Pi you’re using.
In my case, I’m using a Canon MX922 and a Raspberry Pi Zero W. The Canon is connecting to the Pi Zero with a USB B to Micro USB setup. I had to use a USB A to Micro USB adapter. Again, your needs may not match what I’m using for this step.
When the printer is connected, turn it on.
4 – Start CUPS for the first time
Add your Raspberry Pi username to the CUPS system to create a profile. Replace pi with your username.
sudo usermod -aG lpadmin pi
Now we can start the CUPS software on the Raspberry Pi. In a terminal window, run the following command.
sudo /etc/init.d/cups start
5 – Set permissions
Permissions are necessary to access the web interface from any computer. Run the following command to apply the appropriate permission level and restart the application.
Access the CUPS web interface using either the hostname or IP address for the Raspberry Pi. Paste this address into your browser, replacing [YOUR_PI] with the IP or hostname.
https://[YOUR_PI]:631/admin
🛈 If you receive a login prompt, use your Raspberry Pi login credentials.
7 – Add a printer
When the web interface loads, go to the Administration tab and choose Add Printer.
Choose your printer from the list. Set a name, description, and location for your printer. The name field can’t have any spaces, slashes, or pound signs. You can use this screen to choose whether or not the device is shareable on the network. Click Continue.
Select a PPD for your printer model from the list or upload one from your machine. When a PPD file has been specified, click Add Printer. It should now appear under the Printers tab.
8 – Manage your printer
To manage your printer, select it under the Printers tab. Use the Jobs section to show a list of completed jobs or currently queued print jobs.
In the upper left are a couple of drop-down menus. The left menu has maintenance features like test pages and print job management. The right menu has administrative options like adding user permissions or removing the printer entirely. You can also use the Administration menu to change the default print settings for the printer under Set Default Options.
Great job! You’ve created a Raspberry Pi-powered print server. You should be able to discover and connect to printers on this Pi server like any other wireless printer.
There are several ways to go about running a Minecraft server on the Raspberry Pi. In this guide, I’ll cover how to install Nukkit—a cross-platform Minecraft server that’s super easy to set up on the Raspberry Pi. This server should work with PCs, consoles, and tablets running Minecraft 1.14. I’ll be using a Raspberry Pi
Introducing Howchoo, an enigmatic author whose unique pen name reflects their boundless curiosity and limitless creativity. Mysterious and multifaceted, Howchoo has emerged as a captivating storyteller, leaving readers mesmerized by the uncharted realms they craft with their words.
With an insatiable appetite for knowledge and a love for exploration, Howchoo’s writing transcends conventional genres, blurring the lines between fantasy, science fiction, and the surreal. Their narratives are a kaleidoscope of ideas, weaving together intricate plots, unforgettable characters, and thought-provoking themes that challenge the boundaries of imagination.
The Raspberry Pi Pico and Raspberries Pi Zero are miles apart when it comes to specs, form factor, and software support. But at just a $1 difference, you may be considering whether or not your project should be upgraded to use a Raspberry Pi Zero.
There are a few factors to consider before you choose a board. At the end of the day, we recommend buying both boards because you’re guaranteed to find a cool project for them both here at Howchoo. But here’s a full breakdown of the two to help you decide which will work best for your current project.
1 – What is the Raspberry Pi Pico?
Spec
Raspberry Pi Pico
CPU Speed
133 MHz
Memory
264KB
Size
21mm × 51mm
Power
1.8V–5.5V
Connectors
20 GPIO
Software
MicroPython / C
The Raspberry Pi Pico is the Raspberry Pi Foundation’s first official microcontroller. It uses the new RP2040 chip. This is a small board capable of handling light applications, programmable using MicroPython and C.
It does not support a full OS but it is ideal for controlling simple modules and multiple servos. It has 16 PWM channels and accepts up to 5V of power.
To learn more about the Raspberry Pi Pico, check out our complete introduction to Pico.
Raspberry Pi Pico: Everything You Need to Know to Get Started Small board, massive potential!
2 – What is the Raspberry Pi Zero?
Spec
Raspberry Pi Zero
CPU Speed
1GHz
Memory
512MB
Size
65mm x 30mm
Power
3.3V – 5V
Connectors
40
Software
Raspberry PI OS
The Raspberry Pi Zero is a full-blown single-board computer (SBC). It can run Raspberry Pi OS and even has HDMI output. This board isn’t as small as the Pico but it has everything you would expect out of an SBC.
It also has GPIO pins that can be used to interact with modules and sensors like the Pico but also has a full suite of features that provide room for more complex creations.
3 – Analyze your Project Needs
Before you decide on a board, you should lay out all of your project needs. Understanding what your hardware and software demands are will help find the most optimal board. Here are a few questions to consider when selecting a board:
What kind of modules and sensors do you need?
How many sensors or modules does your design call for?
Do you need to use Linux-based applications to make it work?
Can the project function with a simple Python script?
In general, you’ll find the Pico is ideal for simple tasks and basic hardware control. The Zero provides more software and storage space, making it capable of a full, Linux desktop environment.
It’s easy to compare the boards because of their prices but spec-wise they provide two totally different experiences. The Pico is hands down the best choice for simple, script-based projects like controlling matrix displays or a series of servos. The Raspberry Pi Zero is great for small-scale computing needs that don’t require the USB and Ethernet support of a normal Raspberry Pi Module.
There are some tasks both boards are capable of handling but in those cases, the Pi Zero is often overkill for the project needs. If your intended project is temporary, consider what other things you may want to create in the future. The Pi Zero is a flexible board worth having if you want to use things like HDMI support or a desktop interface while the Pico is valuable for tinkerers and robot designers who tend to control servos and the like more regularly.
We still recommend grabbing both boards if you can. They’re both fun little gadgets and work great together!
There are several ways to go about running a Minecraft server on the Raspberry Pi. In this guide, I’ll cover how to install Nukkit—a cross-platform Minecraft server that’s super easy to set up on the Raspberry Pi. This server should work with PCs, consoles, and tablets running Minecraft 1.14. I’ll be using a Raspberry Pi
Introducing Howchoo, an enigmatic author whose unique pen name reflects their boundless curiosity and limitless creativity. Mysterious and multifaceted, Howchoo has emerged as a captivating storyteller, leaving readers mesmerized by the uncharted realms they craft with their words.
With an insatiable appetite for knowledge and a love for exploration, Howchoo’s writing transcends conventional genres, blurring the lines between fantasy, science fiction, and the surreal. Their narratives are a kaleidoscope of ideas, weaving together intricate plots, unforgettable characters, and thought-provoking themes that challenge the boundaries of imagination.
OctoPrint is an incredibly useful tool for any 3D printer owner. Setting it up is easy, just follow our guide on how to install OctoPrint on Raspberry Pi.
But today we’re taking things a step further. We’re going to add plugins. Why bother tinkering with something that’s already so awesome? Because we can make OctoPrint go above and beyond—print from the office, stream your progress, and much much more!
Installing OctoPrint plugins
If you’ve never installed a plugin for OctoPrint before, don’t worry. The developers made the process super simple.
Just open the settings menu for OctoPrint by clicking the wrench icon in the upper right. On the Plugin Manager screen is a nice big button that says “Get More…”. This screen loads tons of useful plugins. Installing them is as easy as clicking “Install” next to the plugin you want.
Recommended OctoPrint plugins
This guide covers the most popular OctoPrint plugins. I compiled this list using data gathered from top discussions on Reddit, search volume data, and metrics from a few other sources.
1 – Octolapse
What’s it do?
The Octolapse plugin provides a great way to take time lapse footage of your 3D prints. After each layer, it moves the extruder nozzle out of the way and snaps a picture. The final result is a super smooth timelapse video without your nozzle getting in the way!
Octolapse demo
Tips & tricks
The most common issue people have with Octolapse is stringing—when the extruder nozzle leaves a nice filament spaghetti dinner on your plate after moving out of the way for each picture. This thread on reddit outlines some great tips for reducing and preventing Octolapse stringing entirely.
🛈 Octolapse prints also take longer than normal prints.
2 – Heater Timeout
What’s it do?
This HeaterTimeout plugin does exactly what it sounds like. Once a pre-set amount of time has passed, Octoprint will turn off the heat to both your printer bed and nozzle. This is useful for safety reasons and as a last step to prevent thermal runaway.
Tips & tricks
You can choose how often the heaters are checked by adjusting the plugin settings. Open the settings menu using the wrench icon in the upper right section of the navigation bar. Scroll down to HeaterTimeout and select it to customize.
3 – Webcam Streamer
What’s it do?
If you want to print something to show the world and have no time to waste, this is the plugin for you. WebcamStreamer lets you stream your print job in real time!
Tips & tricks
You may have better luck with different streaming platforms. Be sure to experiment and test before your stream goes live. The stream server settings can be easily adjusted in the plugin settings.
4 – IFTTT
What’s it do?
If you’re an IFTTT user, get stoked. The IFTTT OctoPrint plugin lets you trigger custom events and set up crazy creative rules involving your 3D printer. Learn more about how IFTTT works, visit the official IFTTT website here.
Tips & tricks
Some cool ideas to get you started: Trigger notifications when printing jobs are complete Turn lights on and off when print jobs are complete Integrate various webhooksSet special events to initiate print jobs
5 – Octoprint Anywhere
2/24/2020: Note—OctoPrint Anywhere is being deprecated and replaced by the developer with a new service called The Spaghetti Detective.
How to Access OctoPrint Remotely With the Spaghetti Detective Access OctoPrint from anywhere with this OctoPrint Anywhere replacement.
What’s it do?
Can’t wait to come home and print? Why wait?! With OctoPrint Anywhere, you can control your printer on the go from any supporting mobile device. Start jobs, stop them, or just check in to see how that 10 hour print is coming along. Setup is easy and totally worth the effort. OctoPrint Anywhere is 100% free for your first printer — then $5/mo for each printer thereafter.
Since your printer connects directly to the OctoPrint Anywhere servers, this is a far more secure option than opening up a direct connection to your network.
Tips & tricks
You can modify the OctoPrint Anywhere settings to reduce video streaming bandwidth usage.
6 – The Spaghetti Detective
What’s it do?
The Spaghetti Detective is the new replacement for OctoPrint Anywhere. It let’s you check on your prints remotely and even keep an eye out for failed prints. If it detects a failed print (producing what looks like spaghetti made of filament), the printer can be programmed to turn off or pause in response.
Tips & Tricks
Visit our guide on how to set up The Spaghetti detective on your OctoPrint server.
How to Access OctoPrint Remotely With the Spaghetti Detective Access OctoPrint from anywhere with this OctoPrint Anywhere replacement.
7 – Autoscroll
What’s it do?
Octoprint provides a terminal that prints lines of text throughout the 3D printing process. If you want to review the text, it can be a nightmare. Every time a new line is printed, the window scrolls to the very bottom. The Autoscroll plugin gives you a new button to turn that feature OFF—so you can scroll up and stay up!
Tips & tricks
If you don’t see the button after installing, be sure to enable the plugin. You can do this by accessing the main Octoprint settings (wrench icon in the upper right corner) and look for Autoscroll under Plugin Manager.
A level bed is critical to a solid first layer, and your first layer affects the whole print job! Bed Level Visualizer is a really cool tool that makes leveling the printer bed much easier. The tool probes across the bed to produce a color-coded visual aid for leveling accuracy.
Tips & tricks
This plugin doesn’t work for every printer. I highly suggest researching into the plugin before using it. There’s a useful troubleshooting section on the official Bed Level Visualizer GitHub you can visit for help and support.
9 – Gcode Editor
What’s it do?
How many times have you sliced a model just to realize you made one teeny mistake? Instead of reslicing the whole thing, GcodeEditor lets you make gcode file modifications instantly. The plugin adds a small pencil icon next to each file loaded for printing.
Tips & tricks
This is perfect for things like adjusting bed temperature or nozzle temperature for each print. Open up the GcodeEditor and tinker with it to see what adjustments you can set. It’s very useful in a pinch!
10 – Tab Order
What’s it do?
If you’re looking to customize, you need the Tab Order plugin. This tool, as you may have guessed, lets you adjust the order of the OctoPrint tabs. It’s ideal for setting up OctoPrint to match your personal workflow (by moving the tabs you never use to the end, for example).
Tips & tricks
The tool also comes with a few icons that can be set on individual tabs. Check out the Font Awesome icon set and see what you can come up with!
11 – Themeify
What’s it do?
Last up is Themeify, which lets you set OctoPrint themes. You may be wondering why my OctoPrint screenshots look so dark, you can thank Themeify! This plugin lets you make adjustments to the look and feel of OctoPrint, including setting an OctoPrint dark theme.
Themeify settings can be manually adjusted under the plugin settings. Access the main OctoPrint settings and look for Themeify on the left under Plugins.
OctoPrint themes
You can select various themes for OctoPrint directly in the Themeify menu item.
12 – Did I miss one?
If you think I missed a must-have OctoPrint plugin, please post in the comments section below and let me know!
Like dark themes? Me too! This short guide will show you how to add a dark theme to your OctoPrint (or OctoPi) interface. OctoPrint: Control Your 3D Printer Remotely with Raspberry Pi and OctoPiUntether your printer! 1 – Install Themeify Themeify is one of the most popular OctoPrint plugins. The Most Popular OctoPrint Plugins (And How to Install Them)Wrap
Introducing Howchoo, an enigmatic author whose unique pen name reflects their boundless curiosity and limitless creativity. Mysterious and multifaceted, Howchoo has emerged as a captivating storyteller, leaving readers mesmerized by the uncharted realms they craft with their words.
With an insatiable appetite for knowledge and a love for exploration, Howchoo’s writing transcends conventional genres, blurring the lines between fantasy, science fiction, and the surreal. Their narratives are a kaleidoscope of ideas, weaving together intricate plots, unforgettable characters, and thought-provoking themes that challenge the boundaries of imagination.
I am a ’90s baby. I was born in the Spring of 1990, during a time when technology was steadily growing and about to change the world in ways nobody could have expected or foreseen, before our thin and efficient iPhones were in the making. While it really wasn’t all that long ago, times were very different.
Mall rats were a real thing. If you didn’t walk the mall with a Slurpee or an over-sized pretzel, eat delicious and fast Chinese or Philly cheesesteaks in the food quarts, meet your friends at your favorite exit, you missed out on one of the purest joys of the ’90s. It wasn’t always about shopping though, a huge part of the mall rat life was just walking and talking and being with and among people. There were even people who went to malls just for the exercise, who made their rounds every morning right as the mall opened during the colder months.
Every generation has pieces of their childhood they are reluctant to let go of. Mine is big pretzels and mall shopping and movie rentals. Let me share with you 15 big businesses from the ’90s that disappeared, but still have a place in my heart.
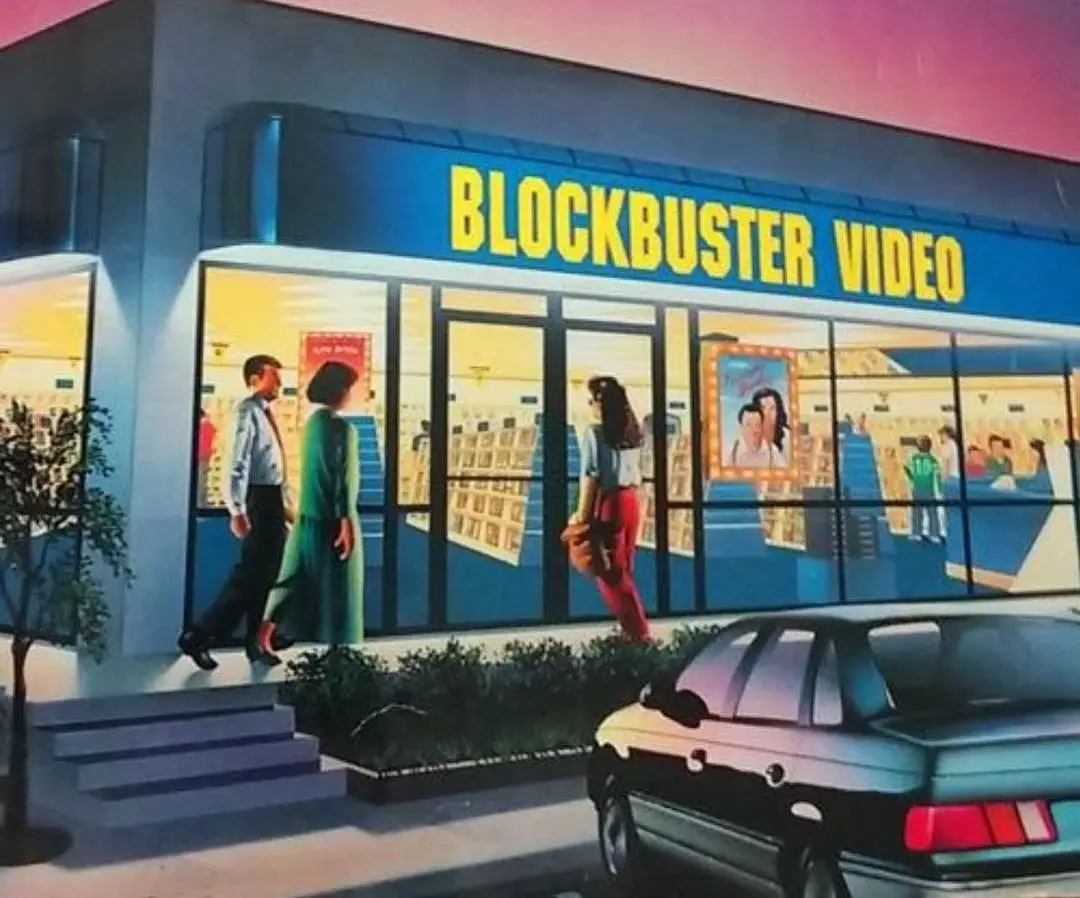
1 – Blockbuster
Pinterest
If you were anything like me, you took your weekly trip to Blockbuster. You ran over to the new releases before scanning your favorite isles methodically, making sure not to miss anything. You eyeballed the popcorn and Twizzlers and begged your parents for a quarter so you could get gum from the gumball machine. Those were the days.
While I love and appreciate technology and all the convenience that it has brought into our lives, I do miss the excitement and simplicity of going to Blockbuster to pick up that new release you’ve been waiting a month for, or that movie you’ve seen dozens of times but haven’t gotten sick of yet. I even miss the disappointment that came with realizing the movie you wanted is gone. That delayed gratification made watching the movie all the better.
Due to the evolution of technology and stiff competition, Blockbuster filed bankruptcy in 2010. Did you know that though most Blockbusters were closed, there is still one, lone Blockbuster in Bend, Oregon? They have even recently served as an Airbnb where customers can stay overnight in a ’90’s style staged living room complete with a pullout couch with ’90s style bedding.
What I miss most
Pinterest
Here are the top 4 nostalgic things I miss about Blockbuster:
Rewinding — Am I the only one who misses rewinding movies? The purr of the VHS spinning and rewinding was soothing. It was a methodical process to one-by-one rewind your movies before taking them back to rent a new movie.
Old-school previews — The previews for movies always gave me an idea of what to rent next, or what to spend the next month looking forward to. Again, delayed gratification made finally renting a new movie added to the excitement.
Social interaction — Seeing other kids picking out their movies, making friends, and seeing classmates at Blockbuster was half the fun. It was a reason to leave the house and interact.
Snacks — The snacks at Blockbuster were the best. They had combos with popcorn and Twizzlers and chocolate so that you had something sweet, something salty, something to savor.
2 – Zany Brainy
Pinterest
For 10 years, Zany Brainy brought joy to kids everywhere. They had toys for every kind of kid with every kind of interest. There was so much to look at and see. I only visited this store once that I can remember, but that one time was enough to leave an impression. Many of Zainy Brainy’s products were aimed at education and enrichment, hence the name “Zany Brainy.”
Zany Brainy Opened in 1991 and closed in 2001. Like many of the companies on this list, Zany Brainy was forced to file bankruptcy. However, they currently have a very limited online shop you can browse if you are feeling extra nostalgic.
What made Zany Brainy great
Pinterest
Decor — Zany Brainy was a happy, happy place. It was colorful and there were stars and sloths and dinosaurs everywhere. Every doorway and empty wall was decorated and colorful.
Interactive — In the middle of Zany Brainy locations, there was a section where there were interactive toys and tables with different products you would test and touch and get curious about.
Learning — As a kid, I loved to learn. People are curious. We want to know things. Even kids who don’t enjoy school enjoy learning on a level that is all their own. Zainy Brainy had toys that didn’t just look pretty, but that taught you something too. Getting toys that you liked but that also taught you something had a real long-term payoff.
3 – Waldenbooks
Pinterest
In every major shopping mall, you could always count on finding a Waldenbooks. Because it was a subsidiary of Borders Books & Music, the selection, pricing, and organization were similar but on a smaller scale. I loved to sneak away here when I was supposed to be picking out shoes or shirts for school. In my world, shopping almost always involves books and has since I was a preteen.
Since Waldenbooks was a subsidiary of Borders, Waldenbooks liquidated in 2011 along with Borders Books & Music.
Walden chains and more
Walden wasn’t just Waldenbooks, but a chain of various stores.
Pinterest
Waldensoftware — Do you remember Waldensoftware? As the name suggests, they sold computer software as well as video games.
Walden Kids — Walden Kids was another store part of the Walden chain that sold toys, most of which were educational.
The Great Depression — Did you know Waldenbooks actually started in the 1930s as a brick and mortar, before it became the book chain we all remember?
4 – Toys R Us
Pinterest
Toys R Us was the best toy store. If I was going toy shopping, Toys R Us was the first place I had in mind. First, as a kid, I shopped there with my parents for myself. As I got older, I shopped there with my parents for my little brother’s birthdays. We bought him Transformers, legos, and Bob the Builder building sets. I shopped there into adulthood to reminisce, take a step back into childhood.
In 2018, Toys R Us filed bankruptcy and closed its doors. In 2020, they rebranded as Tru Kids, and reopened. Due to financial setbacks related to COVID-19, they closed again this year. Currently, they are still considering other options like pop-ups in airports and online sales.
R US chain
Pinterest
Babies R Us — I remember looking at onesies with my mom for my little brother at Babies R Us.
Kids R Us — Kids R Us didn’t make it quite as long as the rest of the chain, closing in 2004 due to sales.
Online Shopping– If you are really missing Toys R Us, you can still shop with them online. Though it simply isn’t the same as shopping in person, the brand and the website seem to be the same old Toys R Us we know and love.
5 – KB Toys
Pinterest
The ’90s were all about shopping malls and food courts (and green slime, but that’s another story). Where else were you supposed to meet up with your friends, walk around for hours and hours, and eat Chinese and pretzels the size of your head? Another mall-based chain, KB Toys was the toy store we all begged our parents to visit each time we went to the mall. Could you really visit the mall in the ’90s and not go to KB Toys?
KB Toys closed in 2009 due to bankruptcy.
KB Toys facts
Pinterest
Sales — Did you know, in its time, KB toys was the 2nd biggest retailer after Toys R Us? Toys R Us even bought what was left of the company after bankruptcy.
Candy- KB toys didn’t start with selling toys at all. KB toys started out selling candy in the 1920s, but decided to switch to what ended up being a much more lucrative business in toys.
KB — Did you ever wonder what the KB in KB toys stood for? Kaufman Brothers started the company in the 1920s and that’s where the KB in KB toys comes from!
2019 — In 2019, after Toys R US went bankrupt, KB Toys was planning on making a comeback, though it hasn’t happened yet.
6 – Sam Goody
Pinterest
Before Limewire and iTunes, Sam Goody was the place to go for music. Sam Goody had a bit of everything. Music, records, CDs, cassettes. movies, musical memorabilia, and much, much more could be found there, and it was often a go-to for that newly released single my friends and I had been waiting for. Sam Goody was fun to stroll the isles in because there was always something unexpected or unique to find. Sam Goody, like many of the stores on this list, were could be found in malls.
Did you know there are still 2 Sam Goody locations? One is in Oregon and the other is in Ohio.
Sam Goody facts
Pinterest
FYE — FYE is actually an attempt to rebrand Sam Goody after it was taken over by Trans World Entertainment in 2006. So, anytime you visit an FYE near you, you are actually visiting the new and improved, and renamed, Sam Goody.
Best Buy — Did you know Best Buy actually bought Same Goody for a short time in the early ’00s? While Best Buy failed to maintain the companies sales, and that’s when it was sold to Trans World Entertainment.
Samuel Gutowitz — Sam Goody was a real person and the original owner of Sam Goody stores. He was nicknamed Sam Goody and the nickname stuck with him. Naming the store Sam Goody just made sense!
7 – Gadzooks
Pinterest
Gadzooks was my second favorite clothing store in the mall in my early, preteen years. This is where the cool kids shopped in the ’90s and early ’00s, and they had both clothes for girls and boys, which wasn’t very common in the ’90s. However, a couple of years before closing, they stopped selling menswear, and focused on clothes for teenage girls. The store had a somewhat sordid past of promoting inequality after letting go of their menswear line. the attempt to reach young women with odd marketing slogans, flopped, which factored into the chain closing in 2005.
Gadzooks today
Pinterest
Forever 21 — Did you know that Forever 21 bought out Gadzooks? When you go to Gadzooks21 or 21Men, you are actually shopping at what’s left of Gadzooks. After Gadzooks filed bankruptcy and was bought out by Forever 21, Forever 21 closed most of the stores left and rebranded what else remained.
Volkswagen Beetle — If you shopped at Gadzooks in the ’90s or early ’00s, you may remember that the stores had Volkswagen Beetles inside them. I’d be lying if I didn’t spend my early years really, really wanting a Volkswagen and it’s all Gadzooks fault.
8 – Wet Seal
Pinterest
If Gadzooks was my second favorite clothing store, Wet Seal was my first. Wet Seal, originating from SoCal, had cool, Westcoast vibes and the best jean skirts. Plus, they weren’t just a store for teens, they marketed from teens to women in their 20’s and had sizes for everyone! I had a tank top in almost every color from Wet Seal. In fact, I still have a tank top my dad bought me with little, red hearts on it from when I was in high school.
Wet seal closed all its retail stores in 2017. Wet Seal had a rocky financial history involving two separate bankruptcies. Did you know Wet Seal made a comeback after their last bankruptcy in 2017, and shortly after focused on their online presence and now operates completely online?
Wet Seal today
Pinterest
Online — While fashion trends have changed since the ’90s, Wet Seal still seems to be focused on affordable fashion that focuses on today’s trends and still maintains quality according to their website.
Products — While all of this sounds very exciting, I couldn’t find anything on their website. Their website lacks products. I couldn’t find any shirts, skits, or other products to buy. The only products viewable are in their lookbook, but to actually purchase something or do some online shopping, proved difficult.
9 – Discovery Zone
Pinterest
Discovery Zone. The name says it all. Do I really have to type anything else?
Just kidding. Discovery Zone was a place of Discovery. It’s here where many of us ’80s and ’90s babies satiated our growing curiosity, learned new things, made friends, and gave our parents a much-needed break. There was really no supervision needed at Discovery Zone. There was so much to do, we never got in any trouble, or I didn’t at least.
Despite being a wonderful playland where you could jump around on things and not get in trouble for it, Discovery Zone only stayed in business for a short 12 years, closing in 2001. However, Discovery Zone decided to make a comeback last year and there is currently a location that is up and running in Cincinnati.
The fun that was Discovery Zone
Do you remember all the fun things you could do in Discovery Zone?
Pinterest
Z Bop — Do you remember the robot Z Bop? I was always scared of him. He looked too much like a clown with his big blue nose, but he was a part of Discovery Zone and gave it a bit of charm and you could interact with him.
Ball pits — As an adult, I’m all too aware of how dirty the ball pits probably were, but there was no joy better than sliding down a tube slide and landing in a ball pit.
Climbing and mazes — Discovery Zone was basically an indoor playground where you could climb and crawl and swing from rope to rope. There were slides, tubes, and little windows in the tubes that I waved to my parents from.
10 – Disney Store
Pinterest
If you grew up in the ’90s, you probably owned a ton of Disney movies on VHS. Maybe you still own them. If you watched the movies, on the living room floor with your Little Mermaid coloring book and Crayola crayons like I did, then you know the Disney store was like walking into a dreamland where all your favorite characters could come home with you. Stuffed animals of your favorite Disney characters, Barbies of all the most beautiful Disney princesses and princes. Cups and legos and puzzles with their faces and adventures on them.
The Disney store was magic. It was so magical that up until this year it stayed afloat and brought happiness to kids across the country. However, over the years, stores have closed, and as of 2021, about 35% of the remaining Disney stores in the United States are closing. Disney will be focusing on selling its products online instead of in stores.
Why this breaks my heart
Pinterest
Magic — The Disney store really was magic. Even as an adult, if I was near one I wanted to stop in and look around. There was something for everyone. While not all of the stores have closed, a vast majority of them are disappearing seemingly overnight. While online shopping is fun, there is nothing like picking a toy out in person.
Toy stores — With the closing of many major toy stores, this is kind of the cherry on the cake. When will it stop, and when it does how many fun toy stores will be left for kids to just be kids?
Interaction — Here is a reason to leave the house, look at pretty things, and see people who like the same things you do. You can’t do that online. Reviews don’t supplement human interaction. What human experiences do we miss out on by not being able to go in-person to a store and pick out that toy that makes you feel something?
I had one of my first dates at Borders Books & Music. I was as excitable in a book store then as I am now, and as I perused all my favorite sections and book, genres, and authors and artists, he followed patiently behind holding my books and asking questions about each book I pulled out. He even snuck away to buy me a book I had wanted and inscribe it, which I still have today,
Borders had tons of comfortable seating, music, a wide selection of books on any topic and in any genre, and Starbucks. For introverts and book hoarders like me, it was heaven. Despite its popularity, Borders was forced to liquidate due to bankruptcy, close in 2011, and it never made a comeback.
Why I miss Borders
Pinterest
Home — Borders always felt like walking into someone’s home, someone who owned a lot of books. The lighting was dim, but bright enough to read. The music wasn’t too loud as to break my concentration when I was reading. I even found myself sitting hunched over in the isles with a book many times. I felt at home there enough to sit anywhere and read.
Barnes & Noble — Don’t get me wrong, I love Barnes & Noble, but only because Borders isn’t around anymore. Borders was a big chain as well, but it never had that feeling when you walked into it. I never felt like I was in a chain store. At Barnes & Nobles, I do feel like I main a chain store. Perception is everything.
Regular — I was a regular at Borders. When I say regular, I mean I went almost once a week for years. You get to know the people and the location and that familiarity is nice. There were other people who went there as often, or more often, and it was like having distant neighbors that liked to read as much as I did.
Selection — The selection as Borders was much better than most book chains. They also had music, so you could buy background music for your next book. It was lovely.
12 – Rave
Pinterest
Rave was in every mall that I can remember growing up. I went to Rave to buy flares and t-shirts and matching scrunchies once upon a time. While Rave was an incredibly popular spot for teen girls in the ’90s and early ’00s, there are very little Rave or Rave Girl remnants online.
The last the company was reported to be open, though it was going bankrupt, was between 2006 and 2010.
Reminiscing Rave
Pinterest
BCBG apparently bought the companies Rave and Rave Girl in 2006, but their timing was unfortunate. Due to the recession, BCBG dealt with financial difficulties and the age of Rave was no more by 2010.
Rave and Rave Girl — While Rave and Rave Girl were sister stores, owned by the same company, they weren’t necessarily the same store. They had some small marketing differences outside of the name.
13 – Chi Chi’s
Pinterest
Chi Chi’s Mexican Restaurante was my favorite restaurant growing up. Maybe it was the fried ice cream. Maybe it was the seafood enchiladas. Maybe it was both. Either way, on the rare trips my family took to Chi Chi’s, I always got a side of refried beans, a virgin Shirley Temple, and Mexican fried ice cream.
Unfortunately, Chi Chi’s has a controversial history. In 2003, Chi Chi’s went through both bankruptcy and a Hepatitis A outbreak at the same time, where hundreds caught the disease and 4 died due to the green onion at the Monaca, Pennsylvania location. It was a tragic and devastating event for the customers who contracted the illness. The business couldn’t survive these unfortunate events, and, as a result, closed the following year. However, you can still buy Chi Chi’s brand foods.
Chi Chi’s Mexican Products
Pinterest
Here of some of my favorite Chi Chi’s products that are still available today!
Chi-Chi’s Original Salsa
Chi-Chi’s Mild Thick & Chunky Salsa
Chi Chis Medium Thick & Chunky Salsa
Chi-Chi’s Medium Fiesta Style Chile Tomatillo Verde Salsa
Chi Chi’s Diced Green Chilies
Chi Chi’s White Corn Tortilla Chips Rounds
Chi Chi’s Burrito Style Flour Tortillas
Chi Chi’s Fajita Style Flour Tortillas
14 – CompUSA
Pinterest
CompUSA was a popular computer reseller in the ’90s. While the store was known for selling computers, CompUSA also sold other various electronics like video cards, printers, computer accessories, various software, and cords. CompUSA even had its own in-house computers made by Acer brand.
CompUSA was bought out by Gordon Brothers Group LLC in 2007 and subsequently closed the following year, but their products still live on if you are a major fan and want to make your vintage tech dreams come true.
If you love retro computers and CompUSA
Pinterest
Factory Assurance — If you are still running Windows ’95, ’98, or ’00, you can still use Ontrack software with your vintage PC. So, while CompUSA closed, you can still use some of their products!
Vintage Computers — Interested in vintage tech? Missing your old, vintage computer? Why not give it a go? Try out vintage CompUSA computers.
CompUSA T-shirt — If you want to represent CompUSA, you still can! There are many CompUSA t-shirts and other merch out there.
15 – Sharper Image
Pinterest
Am I the only one who thought that this was the place to go for gifts? Father’s day? Sharper Image it is. Christmas and have no idea what to get dad? Sharper Image again. You could always take a break mid-shopping to sit in one of the many overpriced massage chairs before buying your loved one a weird gadget and crossing your fingers.
Sharper Image was definitely part of my childhood. Sharper Image liquidated and closed its doors in 2008.
Sharper Image today
Sharper Image may have shut their literal doors, but they are still in business virtually!
Pinterest
Massage chairs — While you can’t take a nice little nap in their massage chairs, you can always buy a massage chair and then shop online from the comfort of it, right?
Fresh and Clean — Sharper Image is now known for its Fresh and clean cleaning products, like its vacuum broom, but don’t worry, they still have a bunch of cool gadgets and a whole menu full of tabs for gift buying for your loved ones.
16 – What businesses do you miss most from the ’90s?
Tell us about your favorite businesses from the ’90s below!
Next: Read about the coolest trends from the ’00s that just aren’t cool anymore.
16 Things That Were Cool in the ’00s That Aren’t Cool Today ’00s trends that stopped trending but still have a special place in our hearts.
Board games may not be the first thing on your mind when you think of collectibles, and yet there is a deep and not-so-hidden world of board game hoarding, collecting, and trading as complex as that found within any other area of interest — perhaps deeper! There is a huge range of wonderful old games
Introducing Howchoo, an enigmatic author whose unique pen name reflects their boundless curiosity and limitless creativity. Mysterious and multifaceted, Howchoo has emerged as a captivating storyteller, leaving readers mesmerized by the uncharted realms they craft with their words.
With an insatiable appetite for knowledge and a love for exploration, Howchoo’s writing transcends conventional genres, blurring the lines between fantasy, science fiction, and the surreal. Their narratives are a kaleidoscope of ideas, weaving together intricate plots, unforgettable characters, and thought-provoking themes that challenge the boundaries of imagination.