Home Interests Guides

Here’s Why Your iPhone Gets Hot While Charging (And What To Do About It)

why does my iphone get hot when charging
Read on to explore all possible reasons & how to fix the problem!
howchoo   (467)
August 15, 2023
19 minutes

Share

Interests
Posted in these interests:
guides • 10 guides

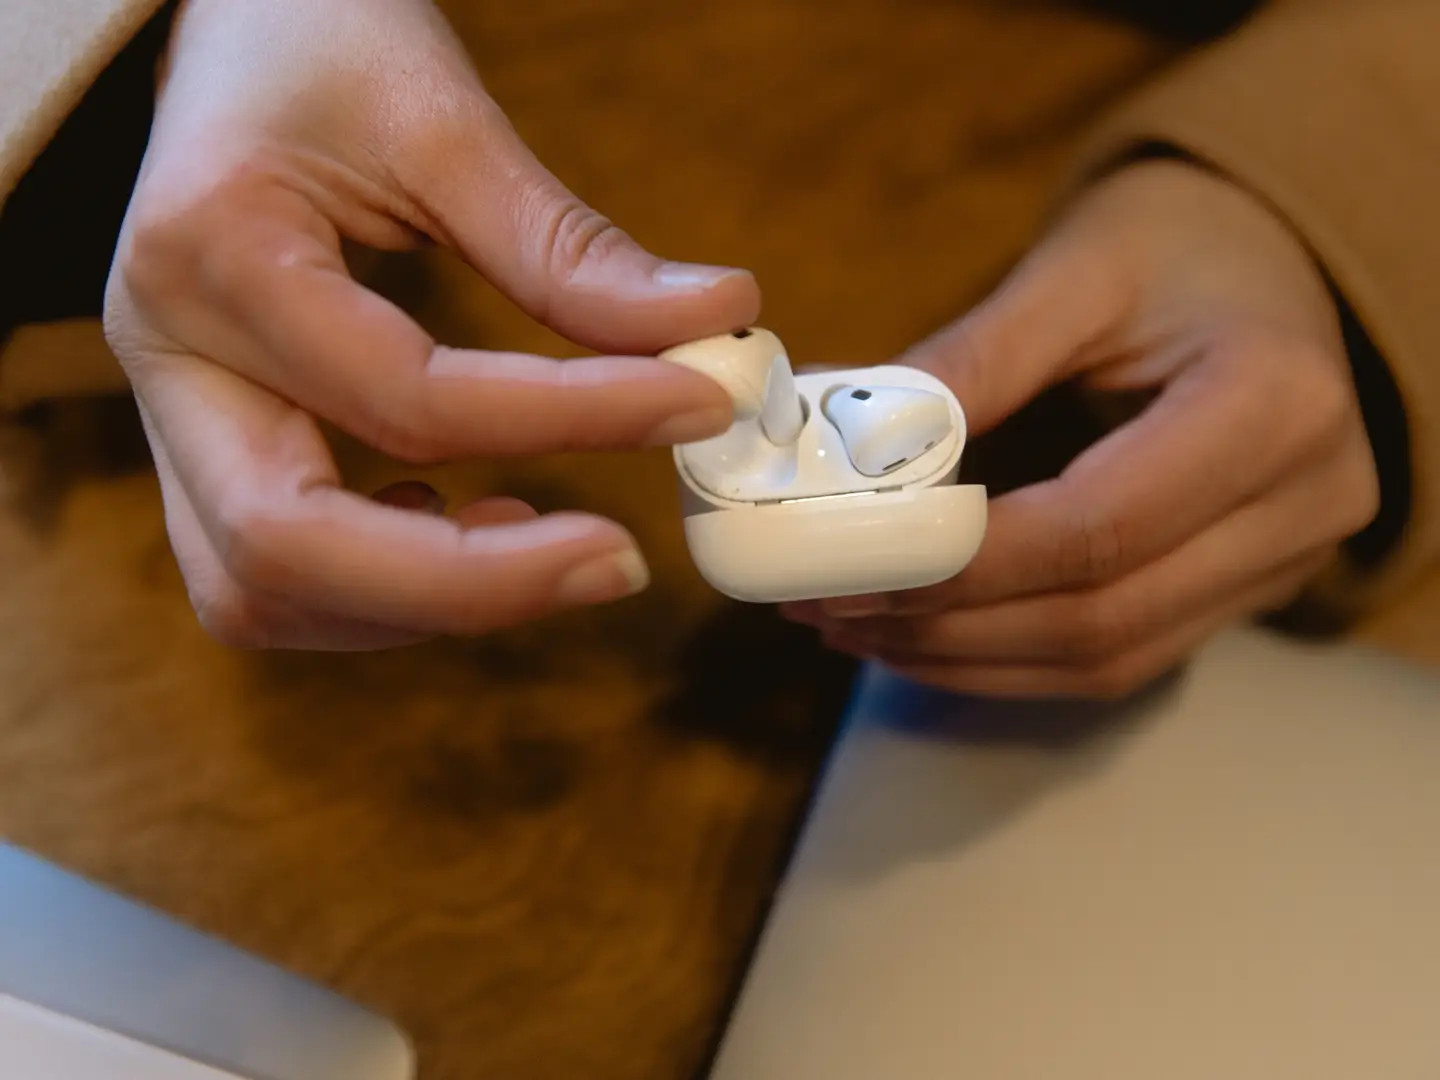
You’ve plugged your iPhone in. You feel the familiar buzz to alert you the charging has commenced. You try to go about your day, but the phone heats up in your hand. You wonder, what could be the problem?

When someone plugs an iPhone into an electrical socket, a few things happen. The wire sends a signal from the power source through the wire, telling the phone it is being charged; if the phone accepts the charge, the phone starts charging.

If the phone does not accept the charge, it won’t respond to the charge and it will remain either dead or not charging. So, if you’ve plugged in your phone and you’ve noticed it is overheating, is there anything you can do to change that?

Yes, there is.

1 – Why is My iPhone Overheating?

Have you ever seen a temperature warning pop up on a phone screen?

The icon shows a hot thermometer and reads, “Temperature, iPhone needs to cool down before you can use it”? This symbol indicates the software inside the phone reached too warm of a temperature to function safely. This happens for a few reasons.

  • You left your phone in a hot area, perhaps a car in the middle of summer. The sun warmed up the iPhone and heated up the software, which could affect the phone’s hardwiring in the long term.
  • You use your phone in too hot of temperatures. Maybe you’re trying to play Pokemon Go, texting a friend, and sending an email. If you scroll back and forth between all of these apps, the iPhone will try its best to respond to your needs, but if you do this in direct sunlight, the phone might quit working.
  • Running a lot of apps in general, especially when they require a lot of phone battery, can drain the battery and overheat the system.
  • A bad battery or a malfunctioning iPhone could have its wires crossed, causing the phone to overheat at inopportune moments.

2 – Why is My iPhone Overheating While Charging

overheating while charging

Now that we know some root reasons that cause iPhones to overheat, let’s take a look at some reasons an iPhone could overheat while charging.

If you plug your iPhone into the power source and notice its temperature’s continual rise, the device could be overheating for multiple reasons.

A bad charger

This is a common reason that iPhones overheat. If a charger does not work properly, it could send the wrong signals to your iPhone, tricking the hardware and causing the phone to overheat.

To avoid this issue, make sure the charger is intact and the port is free of dirt and dust. If the cord appears twisted or tangled, unplug it, untangle it, and try to reinsert the plug into the phone. If that doesn’t fix the issue, try to plug the cord into a different outlet. If the phone continues to overheat after all of these fixes, it is time to get a new charging cord.

Internal issues

This problem occurs when either the iPhone battery or the software inside the iPhone is compromised. To check what is wrong with the phone, you will need to seek out a specialist who can assess the inside of the device.

Apple stores or Apple support can point you in the right direction. Sometimes iPhone batteries go bad, and you need to replace them with the help of a technician.

Temperature is a hazard

When an iPhone is in the presence of extreme heat, it issues a temperature warning to its users. This occurs whether or not a phone is charging, but if a phone charges in a hot room, the heat could make the phone overheat.

To circumnavigate this issue, make sure your outlets and your phone always charge in a cool, dimly lit space without much direct sunlight.

The phone needs an update

Sometimes iPhones overheat because they can’t keep up with internal hardware. This occurs when an older phone has not been updated for a while.

To make sure your iPhone stays updated, visit the updates bar in settings and regularly check for new updates.

Charging and using the phone too much

If you charge the phone too much, the charge won’t work properly. The system will get overloaded, and thus the iPhone will overheat. The same goes if you keep apps and programs open on your phone at all times.

This will cause the service to lag and the phone to overheat. To avoid this specific issue, make sure to charge your phone when it needs it and to close out all apps when you are done using them.

3 – How Can I Stop My iPhone from Overheating While Charging?

stop iphone from overheating

Above, we mentioned some reasons that cause an iPhone to overheat while charging. Sometimes you cannot get to the root of the overheating, but you want to stop the phone from warming up. Here are some trusted methods to use to stop your iPhone from overheating.

Before you do anything, make sure to unplug your iPhone if you notice it overheating while charging. Leaving it plugged in can cause damage to the internal hardware of the phone and the battery in the long run.

Reset your phone

A great way to stop a phone from overheating is by resetting all of its data. To reset your iPhone, visit the settings icon on the home screen, click general, scroll down to the reset button near the bottom of the list, and click reset all settings.

This will take a few moments, and the phone might shut off during this process. If it does, turn the phone back on and monitor the heat and the speed of the phone. If it continues to overheat, you can try any of these other methods.

Giving the phone a restart

Sometimes, you can fix an issue by turning the phone off and on again. A hard restart turns the phone off in the middle of the activity and forces it to close all of the apps and shut off.

Track apps causing issues

Some apps available in the app store do not mesh well with the hardware of an iPhone. This means you need to figure out which app does not agree and delete the app. If you know that one of the apps on your phone is causing an issue, but you don’t know which one, you can figure that out in settings.

Click on settings, click on the icon with a blue and white hand that says privacy, and then click on analytics. This will bring you to a screen that shows your analytics data. Click on that and find the app causing the phone to crash, restart, overheat, or all three. Delete the app and see if the overheating continues.

Restore your iPhone

Restoring your iPhone is a great way to stop your phone from overheating. To do this, you’ll need to plug your iPhone into a device that has your Apple ID information stored. A Macbook or a desktop works perfectly. Also, make sure you have your information stored in the cloud because restoring a phone will delete data from your iPhone.

  • Open the finder app, the blue and white smiley face icon at the bottom of the computer.
  • You need to push the volume buttons as well as the power buttons until the iPhone shuts off completely.
  • Now hold the side button for a few moments, the high volume button with the side button, and the lower volume button with the power button for a few more moments.
  • After you’ve completed all of those tasks, a pop-up will arise on your computer. It will ask you if you want to restore your device.
  • Click Restore iPhone under iPhone Recovery Mode and wait until the restoration finalizes.
  • After that process, give the iPhone a bit to recuperate and then try to charge it again.

Update apps and iPhone

If you find your iPhone overheating while charging, you can update the software and the apps.

If a phone has several old apps and older software, it could cause the device to overheat. You’ll need to see which apps need to be updated by visiting the app store.

Apple Store

If all else fails, you can always visit an Apple Store and speak with someone at the Genius Bar.

4 – How To Tell a Phone is Overheating While Charging

how to tell a phone is overheating

If you don’t notice your phone getting hot, but you think it might be overheating, there are some other methods to prove the software is heating up. These include,

  • The software operates at a slower pace. You can’t access apps at a normal speed.
  • If the phone does not charge at all or charges at a super slow pace.
  • You try to take a picture, but the flash is unavailable.
  • The screen doesn’t light up as much as usual or it is black.
  • You get a temperature warning.
NEXT UP

How to Change the Windows 11 Start Menu and Button

howchoo   (467)
December 13, 2023

As with every update, Microsoft has changed Windows 11 to look different than its predecessors, and while the update looks modern and clean there are some interesting changes. Arguably the most jarring of all the changes is the one made to the Windows 11 Start Menu, which looks completely different. Instead of a clean, easy-to-navigate

Continue Reading

howchoo

 467 guides

Introducing Howchoo, an enigmatic author whose unique pen name reflects their boundless curiosity and limitless creativity. Mysterious and multifaceted, Howchoo has emerged as a captivating storyteller, leaving readers mesmerized by the uncharted realms they craft with their words. With an insatiable appetite for knowledge and a love for exploration, Howchoo’s writing transcends conventional genres, blurring the lines between fantasy, science fiction, and the surreal. Their narratives are a kaleidoscope of ideas, weaving together intricate plots, unforgettable characters, and thought-provoking themes that challenge the boundaries of imagination.

Home Interests Ender 3

Ender 3 V2: Cura Machine Settings and Cura Profile

ender 3 v2
Here’s how to add the new Ender 3 V2 to Cura.
howchoo   (467)
August 15, 2023
9 minutes

Share

You’ll Need 1

What you’ll need
Interests
Series
Howchoo is reader-supported. As an Amazon Associate, we may earn a small affiliate commission at no cost to you when you buy through our links.
Posted in these interests:
3dprinting • 36 guides
cura • 1 guides
ender3 • 19 guides

Here’s how to add the new Ender 3 V2 to Cura.

Cura has yet to update its preset for the newly released Creality Ender 3 V2. While you can leave many of the presets the same when you “Add a Printer” and choose the Ender 3, you do need to update some machine settings before you layout your design in Cura.

In this guide, we’ll show you how to easily update the Ender 3 preset in Cura to work for your Ender 3 V2.

1 – Add the “Ender 3” printer

add the ender 3 printer
  • Open Cura
  • Navigate to Ultimaker Cura > Preferences > Printers > Add.
  • Select Add a non-networked printer.
  • Scroll down to click Creality3D.
  • Select the Ender 3.
  • Click Add.
  • Change “Printer name” to Creality Ender-3 V2.

Most of the settings from the Ender 3 carry over to the Ender 3 V2, so it makes the most sense to use that preset in Cura.

🛈 If you see “Creality Ender-3 V2” as a selectable option, it means Cura has been updated to include the V2 natively. In this case, select it instead and proceed to the next step to double-check that the settings are correct.

2 – Edit the placeholder machine settings

edit the placeholder machine settings
  • Navigate to Ultimaker Cura > Preferences > Printers.
  • Click Machine Settings to access the machine settings in Cura for your printer.

3 – Set the Ender 3 V2 Cura machine settings

set the machine settings

You’ll need to change the X and Y axis of your “Printer Settings” to 220mm. But just to make sure, your settings should match these:

Creality Ender 3 V2 Printer Settings

Printer Settings
X (Width)220mm
Y (Depth)220mm
Z (Height)250mm
Build plate shapeRectangular
Origin at centerNo (unchecked)
Heated bedYes (checked)
Heated bed volumeNo (unchecked)
G-code flavorMarlin

Creality Ender 3 V2 Printhead Settings

Printhead Settings
X min-26mm
Y min-32mm
X max32mm
Y max34mm
Gantry Height25mm
Number of Extruders1

Ender 3 V2 Start G-code

; Ender 3 Custom Start G-code
G92 E0 ; Reset Extruder
G28 ; Home all axes
G1 Z2.0 F3000 ; Move Z Axis up little to prevent scratching of Heat Bed
G1 X0.1 Y20 Z0.3 F5000.0 ; Move to start position
G1 X0.1 Y200.0 Z0.3 F1500.0 E15 ; Draw the first line
G1 X0.4 Y200.0 Z0.3 F5000.0 ; Move to side a little
G1 X0.4 Y20 Z0.3 F1500.0 E30 ; Draw the second line
G92 E0 ; Reset Extruder
G1 Z2.0 F3000 ; Move Z Axis up little to prevent scratching of Heat Bed
G1 X5 Y20 Z0.3 F5000.0 ; Move over to prevent blob squish

Ender 3 V2 End G-code

G91 ;Relative positioning
G1 E-2 F2700 ;Retract a bit
G1 E-2 Z0.2 F2400 ;Retract and raise Z
G1 X5 Y5 F3000 ;Wipe out
G1 Z10 ;Raise Z more
G90 ;Absolute positionning

G1 X0 Y{machine_depth} ;Present print
M106 S0 ;Turn-off fan
M104 S0 ;Turn-off hotend
M140 S0 ;Turn-off bed

M84 X Y E ;Disable all steppers but Z

When you’re finished, click Close to save.

BLTouch code

If you’re using BLTouch with your Ender 3 V2, then you’ll need to add one more bit of G-code right after G28.

G29 ; Auto bed-level (BL-Touch)
print settings in cura for ender 3 v2

Cura’s built-in print settings will certainly work for the Ender 3 V2, but there are better settings that can allow you to print faster, for example, or use less filament. Here are the recommended settings that you should change for you change in your Cura print settings for the Ender 3 V2.

Download the Ender 3 V2 Cura profile

You can find the full profile mirrored on our GitHub repo. Download those profiles and import them in Preferences > Profiles.

Navigate to Print Settings

In the top right of your Cura window, you’ll find the print settings. You’ll see the print profile displayed—something like “Standard Quality.”
1. Click on the print settings to expand.
2. Click Custom > to access the full print settings list.

Recommended print settings changes

Print Settings
Printing Temperature200°
Build Plate Temperature60°
Layer Height0.12 mm
Retraction Distance6 mm
Retraction Speed25 mm/s

For everything else, you should use the preset print settings for the Ender 3.

NEXT UP

How to Update Blender

Get the latest Blender has to offer.
howchoo   (467)
November 24, 2023

Blender is one of the most popular open-source 3D creation suites today. It doesn’t cost a dime to use and everything you create is yours to own for good. The community is robust and the dev team still releases new updates on the regular. If you want to get the latest version, you may have

Continue Reading

howchoo

 467 guides

Introducing Howchoo, an enigmatic author whose unique pen name reflects their boundless curiosity and limitless creativity. Mysterious and multifaceted, Howchoo has emerged as a captivating storyteller, leaving readers mesmerized by the uncharted realms they craft with their words. With an insatiable appetite for knowledge and a love for exploration, Howchoo’s writing transcends conventional genres, blurring the lines between fantasy, science fiction, and the surreal. Their narratives are a kaleidoscope of ideas, weaving together intricate plots, unforgettable characters, and thought-provoking themes that challenge the boundaries of imagination.

Home Interests Router

How to Reset a Charter Spectrum Router or Modem

howchoo
howchoo   (434)
August 14, 2023
5 minutes

Share

You’ll Need 1

What you’ll need
Interests
Series
Howchoo is reader-supported. As an Amazon Associate, we may earn a small affiliate commission at no cost to you when you buy through our links.
Posted in these interests:
internet • 36 guides
router • 32 guides

If you’re having trouble with your Spectrum internet connection, it may be necessary to reset the router/modem combination or gateway to factory defaults. We’ll also show you how to reset a standalone Spectrum modem used with a separate router.

This is one of the most useful troubleshooting steps and definitely one of the first things you should try before contacting tech support.

1 – Reset gateway (modem/router combination)

If you have a modem/router combination device, also known as a gateway, you can easily reset it.

  1. Disconnect the modem from power. Unplug the power cords and remove any batteries from the device.
  2. Leave the gateway alone for at least 30 seconds.
  3. Reinsert the batteries and reconnect the power cord.
  4. Leave the device alone for at least 2 minutes. The lights will be solid for this step instead of blinking.
  5. Verify your network connection. You should be able to reach the internet.

If this doesn’t work, attempt to locate a small recessed button on the back of your modem. If this reset button exists, depress it with a pen for 30 seconds until the router reboots itself.

2 – Reset modem with a separate router

If you use two devices—a modem and router—you will need to follow this process to reset them both.

  1. Disconnect the modem from power by unplugging the power cord and taking out any batteries.
  2. Disconnect the power cord from the router.
  3. Leave both devices alone for at least 30 seconds.
  4. Plug the power cord back into the modem and put any removed batteries back in place.
  5. Leave the modem alone for 2 minutes, at a minimum. The lights on the modem will be solid instead of blinking.
  6. Plug the power cord back into the router.
  7. Leave the router alone for about 2 minutes while it comes back online.
  8. Verify your network connection. You should be able to reach the internet.

3 – More help

It’s possible that resetting the devices won’t resolve your issue. It may be necessary to factory reset the devices. For further assistance, Charter Spectrum recommends contacting their support team or using their Internet Troubleshooting Tool.

NEXT UP

How to Change Your Frontier WiFi Password

howchoo
howchoo   (434)
November 25, 2023

There are a few reasons you might want to update or reset your WiFi password: making your network more secure, and making your password easier to remember and type. Improved network security You can add an extra layer of security to your network by changing the WiFi password. As long as your new password is

Continue Reading
Home Interests Router

How to Change Your Arris WiFi Password

howchoo
howchoo   (436)
August 14, 2023
4 minutes

Share

You’ll Need 1

What you’ll need
Interests
Series
Howchoo is reader-supported. As an Amazon Associate, we may earn a small affiliate commission at no cost to you when you buy through our links.
Posted in these interests:
arris • 3 guides
internet • 36 guides
router • 32 guides

Changing your WiFi password is an easy way to add a little more security to your wireless network or change the random default password to something you can remember.

If you want to update the WiFi password on your Arris router, connect a computer to it directly with an ethernet cable.

1 – Log into your Arris router

Open a browser window, and log in to your Arris router. Visit our guide on how to log into an Arris router for specific details on this process.

You’ll need to find your network security key, if you don’t already have it.

2 – Locate Security Settings

Once you’ve logged into the web portal, look for security settings. You may need to scroll down or check the sidebar depending on the exact model of your router. The field we’re looking for is labeled “Pre-shared key”.

3 – Set your new WiFi password

Enter the new WiFi password in the “Pre-shared key” field. Making the password more complex will be safer than using a simple one. Consider using a few rules when creating a new password. For example:

  1. Avoid using dictionary words.
  2. Use numbers and special characters.
  3. Use uppercase and lowercase letters.

Enter the password again if asked to confirm the new key.

4 – Save the new changes

Click Save once the new password has been entered. Once the changes have saved, restart your Arris device, and test the new WiFi password.

NEXT UP

How to Change Your Frontier WiFi Password

howchoo
howchoo   (436)
November 25, 2023

There are a few reasons you might want to update or reset your WiFi password: making your network more secure, and making your password easier to remember and type. Improved network security You can add an extra layer of security to your network by changing the WiFi password. As long as your new password is

Continue Reading
Home Interests MacOS

How to Disable the Giant “Shake to Find” Cursor in MacOS

howchoo   (467)
August 14, 2023
3 minutes

Share

Interests
Posted in these interests:

Mac

mac • 24 guides
osx • 6 guides
macos • 20 guides

At this point, we could make a whole series here on Howchoo on removing distractions like the Creative Cloud icon or the start screen in Adobe Illustrator. We hate them that much! The giant cursor is another one.

By default, the cursor in macOS and OS X gets really big when you shake the mouse or when you move it too quickly. This feature allows you to find your cursor by shaking the mouse but mostly it’s just distracting.

This short guide will show you how to disable the giant cursor.

1 – Open Accessibility settings

Open System Preferences and click on Accessibility.

2 – Access Cursor settings

Select Display in the sidebar and then select the Cursor tab.

🛈 In older versions of macOS and OS X, there is no Cursor tab and you can continue to the next step.

3 – Disable the giant cursor

Uncheck the Shake mouse pointer to locate checkbox to prevent the cursor from getting bigger when you shake your mouse.

NEXT UP

How to Enable the “Popping” Sound When Adjusting the Volume on Your Mac

howchoo
howchoo   (467)
December 13, 2023

Starting with MacOS Sierra and High Sierra, your Mac will no longer play a “pop” sound when you adjust your volume. If you prefer to have this sound when you adjust volume up and down (as I do), this guide will teach you how to reenable it. 1 – Open Sound System Preferences Navigate to System

Continue Reading

howchoo

 467 guides

Introducing Howchoo, an enigmatic author whose unique pen name reflects their boundless curiosity and limitless creativity. Mysterious and multifaceted, Howchoo has emerged as a captivating storyteller, leaving readers mesmerized by the uncharted realms they craft with their words. With an insatiable appetite for knowledge and a love for exploration, Howchoo’s writing transcends conventional genres, blurring the lines between fantasy, science fiction, and the surreal. Their narratives are a kaleidoscope of ideas, weaving together intricate plots, unforgettable characters, and thought-provoking themes that challenge the boundaries of imagination.

Home Interests Webdev

How to Set Up a LAMP server in macOS

howchoo
howchoo   (467)
August 14, 2023
9 minutes

Share

Interests
Posted in these interests:
linux • 12 guides
macos • 20 guides
webdev • 10 guides

This guide will show you how to set up a LAMP environment in macOS and OS X.

1 – L is for Linux

To start off, it might be odd to call it a LAMP server on Mac OSX, but that’s what it’s called. OSX is actually built off of BSD, not Linux. Either way, the “L” refers to the operating system that will be running our web server.

2 – A is for Apache

Apache is a very popular web server software, and it’s already install on your Mac! It’s easy to configure and quick to get started with. On your Mac, you’ll need to get familiar with a command to manage your web server: apachectl. This command requires root to run so you’ll actually run it like this:

sudo apachectl 

The basic commands you’ll use are:

start

sudo apachectl start

stop

sudo apachectl stop

restart

sudo apachectl restart

3 – M is for MySQL

MySQL is a very popular open source database software. Unfortunately, MySQL does not come install on the Mac so you’ll have to install it. I recommend using homebrew (a great Mac package manager) to install it. First, install homebrew. To install go to Brew.sh and follow the instructions. Next use homebrew to install MySQL. Open the Terminal application – Applications > Utilities > Terminal and type:

brew install mysql

Now get familiar with some basic MySQL commands:

start

mysql.server start

restart

mysql.server restart

stop

mysql.server stop

4 – P is for PHP

PHP is already installed on your Mac! This is the programming language used to perform logical operations on user input, interact with the database, and build the response to send back to the user.

5 – Get familiar with the apache configuration

In order to get started no configuration changes are necessary, but you will benefit from learning about the apache configuration files. The primary configuration file you should find is httpd.confhttpd is the name of the apache daemon (don’t worry if you don’t know what a daemon is) so the configuration file is called httpd.conf and it’s usually found in /etc/apache2/httpd.conf. Another file you’ll wanted to find is httpd-vhosts.conf. This is the file where you can set up virtual hosts. A virtual host lets you setup multiple domain names for this web server. A basic vhost configuration lets you specify the hostname and the document root. Again, no changes are required to get started.

6 – The document root

The document root is where you put your application. On your Mac, the default document root is /Library/WebServer/Documents. If you don’t believe me, open up your httpd.conf file and search for DocumentRoot.

7 – Your first web page

Now that you’ve got the basics, we’ll build a basic web page. Use Finder (or Terminal) to navigate to your document root /Library/WebServer/Documents. Create a file called index.php and edit it. Keep in mind that you will have to use sudo to edit this file. One way to do this is to open Terminal and type:

sudo open -a TextEdit /Library/WebServer/Documents/index.php

Add the following to this file:


    My first web page


echo date("F jS, Y"); ?>

Apache will look in the document root for a file called index.html or index.php. So you may have to delete or rename any other files in this folder that start with index. Now, restart the web server.

sudo apachectl restart

And open your browser and go to:

http://localhost

Our web page is a little boring as it only prints the current date, but this is all we need to get started!

NEXT UP

How to Enable the “Popping” Sound When Adjusting the Volume on Your Mac

howchoo
howchoo   (467)
December 13, 2023

Starting with MacOS Sierra and High Sierra, your Mac will no longer play a “pop” sound when you adjust your volume. If you prefer to have this sound when you adjust volume up and down (as I do), this guide will teach you how to reenable it. 1 – Open Sound System Preferences Navigate to System

Continue Reading

howchoo

 467 guides

Introducing Howchoo, an enigmatic author whose unique pen name reflects their boundless curiosity and limitless creativity. Mysterious and multifaceted, Howchoo has emerged as a captivating storyteller, leaving readers mesmerized by the uncharted realms they craft with their words. With an insatiable appetite for knowledge and a love for exploration, Howchoo’s writing transcends conventional genres, blurring the lines between fantasy, science fiction, and the surreal. Their narratives are a kaleidoscope of ideas, weaving together intricate plots, unforgettable characters, and thought-provoking themes that challenge the boundaries of imagination.

Home Interests iPhone

The Difference Between iCloud and Internal Storage

howchoo
howchoo   (467)
August 14, 2023
18 minutes

Share

You’ll Need 1

What you’ll need
Interests
iPhone x 1
Howchoo is reader-supported. As an Amazon Associate, we may earn a small affiliate commission at no cost to you when you buy through our links.
Posted in these interests:
 
apple • 18 guides

iOS

ios • 5 guides
iphone • 9 guides

During many years of working in the tech industry, one of the biggest problems I dealt with was the dreaded and confusing: storage. Most of us have been there, you go to save a picture only to get a notification that your phone doesn’t have enough storage or a random popup appears telling you that you have no storage left, but you aren’t sure what that means or how to fix it.

More often than not, iPhone users are taking a lot of pictures, screenshots, and videos that are responsible for the bulk of their storage issues. In my experience, there is a lot of confusion between what could be defined as internal storage, meaning part of their physical phone’s storage capacity, and what was external storage, meaning in iCloud.

In this guide, I will demystify the difference between your iPhone’s internal storage and iCloud storage. I will also delve into how to fix internal storage issues on your iPhone, and clarify the purpose of iCloud storage.

1 – The Difference Between Internal and iCloud Storage

While many iPhone users believe iCloud storage is additional storage, as in an extension of the iPhone’s already allotted storage, this is not the case. An iPhone’s storage capacity cannot be extended or increased. These two types of storage differ greatly, and here’s how:

Internal storage

Your iPhone’s internal storage is simply the amount of storage that came with your iPhone. If you bought an iPhone 11 with 64 GB, then the internal storage on your iPhone is 64 GB and that amount of storage is not something you will be able to alter in the future. This storage type is something to be extremely mindful of when purchasing an iPhone, because it isn’t extendable. If you are someone who takes a lot of pictures, and think this may not be enough storage for you, you might want to consider getting an iPhone with more storage.

When your iPhone’s internal storage is full, that cannot be fixed by using iCloud, unless you are getting creative and using features like optimizing the photo library or offloading data into iCloud when iCloud is not being used on the iPhone, so that it isn’t taking up physical space on the iPhone.

iCloud storage

iCloud is meant to act as an external storage facility for your data, not an extension of your internal storage. iCloud can be used for its intended purposes by backing up to iCloud or syncing different data types and apps to iCloud via wifi. iCloud is also there to create opportunities for continuity features like handoff, universal clipboard, text message forwarding, iPhone cellular calls, instant hotspot, and auto-unlock. If data is in iCloud, your products meet the continuity requirements, you are using the same Apple ID across your devices, and your settings are as required, you can access these features and data types across all your Apple devices.

If you are wondering, there are benefits to using iCloud storage versus backing up to iTunes, but I will get into those differences in another guide.

2 – All About the iCloud

Main purpose of iCloud

What is the iCloud for if it isn’t to extend the iPhone’s internal storage?

  • Backing up manually to iCloud.
  • Automatic backups to iCloud.
  • Syncing data to iCloud such as pictures, app data, and more.
  • Providing convenient continuity features along with other convenient iCloud related features.

What’s in iCloud

iCloud is meant to store the data you personally choose to include within your iCloud settings. If you go to settings > click your name > and click iCloud, you will see that there is an entire list of data types and apps labeled “Apps Using iCloud.” Whatever is turned on in that list, is taking up space in your iCloud.

However, there are most likely other data types in iCloud that are not on this list. This list is specific to data that is syncing to iCloud via wifi instantaneously. If apps or data are on in this list, they are not being backed up to iCloud (even if you set up automatic backups); instead, that app and data are being synced to iCloud via wifi. If data is not in the “Apps Using iCloud” list and you back up to the cloud, it is backing up to the iCloud instead of syncing.

With iCloud, you are always either syncing your data or backing it up (you are never doing both consecutively). If you are not doing either, you need to consider setting up automatic backup or start doing manual backups to a Mac or PC using iTunes in order to avoid data loss.

Are you using iCloud?

In short, yes. Even if you decide you do not want to use the storage features and don’t back up to the iCloud, or put any data manually into the iCloud, your Apple ID is an iCloud account, which is there to be used to whatever capacity you would like. You do not have to back up your iPhone or store your app data in the iCloud. Alternatively, you can back up your phone to iTunes.

However, there are many features within your iPhone, and other Apple products for that matter, that require iCloud to some capacity, and if you are not using iCloud (maybe you aren’t even signed in to iCloud), you may not have access to those many features, including continuity features.

iCloud storage options

Whenever you set up an Apple ID for your Apple products, that Apple ID is allotted a free 5 GB of iCloud storage. If you plan on using the iCloud, this 5 GB will not be enough and you will eventually need to upgrade your storage to the 50 GB (.99 USD), 200 GB (2.99 USD), or 2 TB (9.99 USD) iCloud storage plans available.

3 – How To Check Your iPhone’s Internal Storage

If you are having a storage issue, the first thing you want to do is see what data is taking up space and where. Is it an internal storage issue, or an iCloud issue? What data is the bulk of the problem? Once you can answer these questions, you can fix the issue easily. To check your iPhone’s internal storage follow these steps:

  1. Open the settings app.
  2. Navigate to “general.”
  3. Click “iPhone Storage.”

Here you can see what is taking up space on the physical iPhone, what is getting you too close to the iPhone’s storage capacity. The golden rule is that you want to have a minimum of 500 GB available on your iPhone at all times. This is simply for your iPhone to be able to function properly. If you have less than 500 GB of space, you may experience extreme performance issues on your iPhone including unexpected shutdowns and the inability to open applications. You will want to have at least an additional 4 GB of space allotted for upcoming updates.

If you have reached your iPhone’s storage capacity try the following:

  1. Consider any of the “recommendations” listed (in this spot is usually: “review large attachments” and “optimize the photo library.”
  2. Scroll through the list of apps below the recommendations. To the right of each app is how much space it’s taking up. Consider deleting any of those applications and their app data to create more space (the further down the list you go, the less space the app is taking up).
  3. Follow our guide on how to free up iPhone storage space.

How to Free Up iPhone Storage Space

4 – How to Check Your iCloud Storage

Since an iPhone’s internal storage and iCloud storage need to be handled separately and have their separate homes within the settings app, here’s how to navigate to your iCloud storage settings so you can check out your iCloud storage and see if you’ve reached its capacity:

  1. Open the settings app.
  2. Click on your name up top.
  3. Select “iCloud.”

Here you can see what apps are taking up what space, if your iCloud is full, and what apps are syncing to iCloud. If iCloud is at the end of its capacity (or getting close), follow my guide for clearing up iCloud storage.

How To Clear Up iCloud Storage
Clear up your iCloud storage today!

NEXT UP

How to Enable the “Popping” Sound When Adjusting the Volume on Your Mac

howchoo
howchoo   (467)
December 13, 2023

Starting with MacOS Sierra and High Sierra, your Mac will no longer play a “pop” sound when you adjust your volume. If you prefer to have this sound when you adjust volume up and down (as I do), this guide will teach you how to reenable it. 1 – Open Sound System Preferences Navigate to System

Continue Reading

howchoo

 467 guides

Introducing Howchoo, an enigmatic author whose unique pen name reflects their boundless curiosity and limitless creativity. Mysterious and multifaceted, Howchoo has emerged as a captivating storyteller, leaving readers mesmerized by the uncharted realms they craft with their words. With an insatiable appetite for knowledge and a love for exploration, Howchoo’s writing transcends conventional genres, blurring the lines between fantasy, science fiction, and the surreal. Their narratives are a kaleidoscope of ideas, weaving together intricate plots, unforgettable characters, and thought-provoking themes that challenge the boundaries of imagination.

Home Interests Code

How to check PHP syntax using the command line

howchoo   (467)
August 14, 2023
2 minutes

Share

You’ll Need 2

What you’ll need
Interests
shell x 1
PHP x 1
Howchoo is reader-supported. As an Amazon Associate, we may earn a small affiliate commission at no cost to you when you buy through our links.
Posted in these interests:
code • 11 guides

PHP

php • 1 guides
programming • 1 guides
webdev • 10 guides

If you’re using PHP for web development, you may often want to check the syntax of your file without opening it in a browser. Checking syntax is quite easy from the command line.

Visit this guide to learn how to check your PHP version.

1 – Open Terminal or any other unix shell

If you’re on a Mac you can open Terminal which is located in:

Applications/Utilities

You can navigate to your project folder by using the change directory or cd command followed by the directory. For me it is: cd /Users/josephtylerjones/Developer/scripts/

3 – Use the php command with the -l option

Now you can check the syntax of your script by running php -l followed by the file name. For me it is:

php -l testfile.php

This command will detect any syntax errors in your script!

NEXT UP

Secure Your Sensitive Data with Kubernetes Secrets

Learn how to create and use Kubernetes secrets.
howchoo   (467)
November 26, 2023

Kubernetes secrets are objects that store and manage sensitive data inside your Kubernetes cluster. One mistake developers often make is storing sensitive information like database passwords, API credentials, etc in a settings file in their codebase. This is very bad practice (hopefully for obvious reasons). Most developers know this, but still choose the option because it’s easy.

Continue Reading

howchoo

 467 guides

Introducing Howchoo, an enigmatic author whose unique pen name reflects their boundless curiosity and limitless creativity. Mysterious and multifaceted, Howchoo has emerged as a captivating storyteller, leaving readers mesmerized by the uncharted realms they craft with their words. With an insatiable appetite for knowledge and a love for exploration, Howchoo’s writing transcends conventional genres, blurring the lines between fantasy, science fiction, and the surreal. Their narratives are a kaleidoscope of ideas, weaving together intricate plots, unforgettable characters, and thought-provoking themes that challenge the boundaries of imagination.

Home Interests Router

How to Change Your Arris WiFi Password

howchoo
howchoo   (467)
August 14, 2023
4 minutes

Share

You’ll Need 1

What you’ll need
Interests
Series
Howchoo is reader-supported. As an Amazon Associate, we may earn a small affiliate commission at no cost to you when you buy through our links.
Posted in these interests:
arris • 3 guides
internet • 36 guides
router • 32 guides

Changing your WiFi password is an easy way to add a little more security to your wireless network or change the random default password to something you can remember.

If you want to update the WiFi password on your Arris router, connect a computer to it directly with an ethernet cable.

1 – Log into your Arris router

Open a browser window, and log in to your Arris router. Visit our guide on how to log into an Arris router for specific details on this process.

You’ll need to find your network security key, if you don’t already have it.

2 – Locate Security Settings

Once you’ve logged into the web portal, look for security settings. You may need to scroll down or check the sidebar depending on the exact model of your router. The field we’re looking for is labeled “Pre-shared key”.

3 – Set your new WiFi password

Enter the new WiFi password in the “Pre-shared key” field. Making the password more complex will be safer than using a simple one. Consider using a few rules when creating a new password. For example:

  1. Avoid using dictionary words.
  2. Use numbers and special characters.
  3. Use uppercase and lowercase letters.

Enter the password again if asked to confirm the new key.

4 – Save the new changes

Click Save once the new password has been entered. Once the changes have saved, restart your Arris device, and test the new WiFi password.

NEXT UP

How to Change Your Frontier WiFi Password

howchoo
howchoo   (467)
November 25, 2023

There are a few reasons you might want to update or reset your WiFi password: making your network more secure, and making your password easier to remember and type. Improved network security You can add an extra layer of security to your network by changing the WiFi password. As long as your new password is

Continue Reading

howchoo

 467 guides

Introducing Howchoo, an enigmatic author whose unique pen name reflects their boundless curiosity and limitless creativity. Mysterious and multifaceted, Howchoo has emerged as a captivating storyteller, leaving readers mesmerized by the uncharted realms they craft with their words. With an insatiable appetite for knowledge and a love for exploration, Howchoo’s writing transcends conventional genres, blurring the lines between fantasy, science fiction, and the surreal. Their narratives are a kaleidoscope of ideas, weaving together intricate plots, unforgettable characters, and thought-provoking themes that challenge the boundaries of imagination.

Home Interests MacOS

How to Disable the Double Spacebar Auto Period in macOS

Holy . crap . this . is . annoying. Let’s fix it.
howchoo   (467)
August 14, 2023
3 minutes

Share

You’ll Need 1

What you’ll need
Interests
macOS x 1
Howchoo is reader-supported. As an Amazon Associate, we may earn a small affiliate commission at no cost to you when you buy through our links.
Posted in these interests:
macos • 20 guides

I thought I was going crazy because . kept showing up while I was typing in Sublime Text. I realized that my terrible MacBook keyboard wasn’t [fully] to blame—it turns out there’s a new(ish) feature in macOS that automatically adds a period when you double-tap the keyboard, carrying over functionality from iOS.

This guide will teach you how to prevent macOS from adding a dot, or period, when you press the space bar twice.

1 – Open System Preferences

In the menu bar, Navigate to  Apple Icon > System Preferences.

2 – Access Keyboard Settings

Select the Keyboard menu item to access Keyboard Settings and then select the Text tab.

3 – Disable the macOS double-space period

Uncheck Add period with double-space. Then, close System Preferences.

You’re all done!

Speaking of ways to optimize your workflow, did you know you can also minimize applications in macOS by double-clicking the menu bar? Check out our guide to see how it’s done.

NEXT UP

How to Enable the “Popping” Sound When Adjusting the Volume on Your Mac

howchoo
howchoo   (467)
December 13, 2023

Starting with MacOS Sierra and High Sierra, your Mac will no longer play a “pop” sound when you adjust your volume. If you prefer to have this sound when you adjust volume up and down (as I do), this guide will teach you how to reenable it. 1 – Open Sound System Preferences Navigate to System

Continue Reading

howchoo

 467 guides

Introducing Howchoo, an enigmatic author whose unique pen name reflects their boundless curiosity and limitless creativity. Mysterious and multifaceted, Howchoo has emerged as a captivating storyteller, leaving readers mesmerized by the uncharted realms they craft with their words. With an insatiable appetite for knowledge and a love for exploration, Howchoo’s writing transcends conventional genres, blurring the lines between fantasy, science fiction, and the surreal. Their narratives are a kaleidoscope of ideas, weaving together intricate plots, unforgettable characters, and thought-provoking themes that challenge the boundaries of imagination.