Have you ever wanted Minecraft trees to look less blocky, but don’t want to install multiple mods to do so? What about seeing the water animated and clear? Both are possible, courtesy of a mod called OptiFine! This optimization mod allows Minecraft to run faster and look better with full support for HD textures, and paired with shaders, can change how your Minecraft world feels.
Not only does OptiFine add leaf texture to trees, it also adds swaying movement to foliage and lanterns. Plus, it turns grass blocks dynamic, so you no longer need to see excessive dirt on the side of mountains due to the limitations of the vanilla grass block. Even a non-modded Minecraft world can use OptiFine! This guide will go through the steps and to installing OptiFine with the Minecraft launcher.
1 – Download OptiFine
To install OptiFine, you’ll need to download the OptiFine JAR file from their website. Make sure to choose the latest version of Optifine that matches your game version.
Click the Download button to the right of the OptiFine version you want.
On the next page, you may need to wait for the Skip Ad button to appear after five seconds.
Click the Download OptiFine link in the middle of the next page.
We recommend saving OptiFine somewhere you can find it later.
Depending on your browser, you may need to click Keep or Allow if a warning pops up stating that OptiFine might be dangerous. Which, as long as you’re downloading from OptiFine’s official website, it’s not.
2 – Find your Minecraft file path
Before moving into the actual installation of OptiFine, it’s important to know where your Minecraft game is installed. To do so, follow these steps:
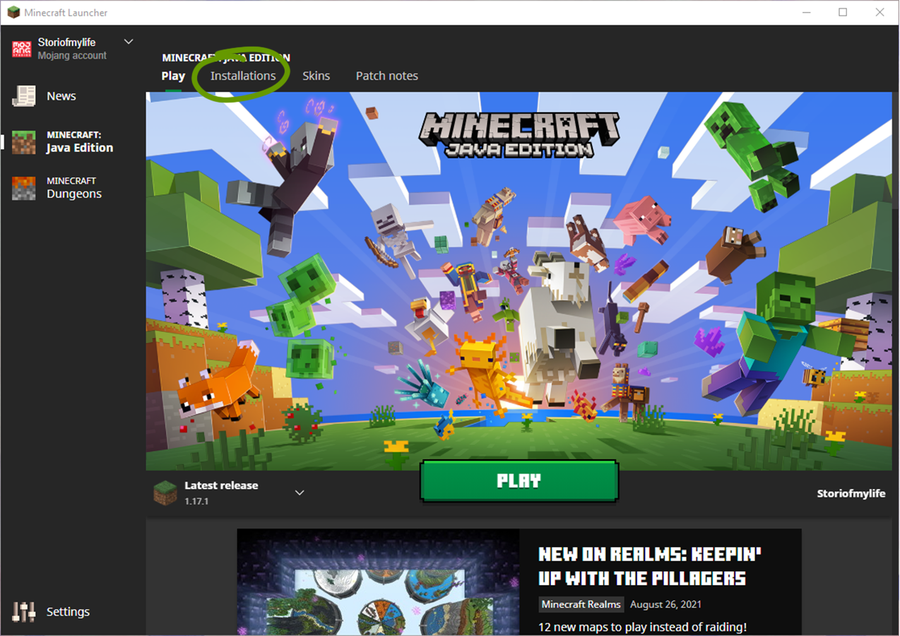
1. Open the Minecraft Launcher. 2. Make sure the launch option is the game version you plan on using with OptiFine. 3. Go to the Installations tab at the top of the window. 4. Hover your mouse over the game version you want to find and click the folder icon to the right of the Play button. See the image below for help.
5. The file path that opens in a new window is where you’ll install OptiFine in the next step! 6. Once finished, close the Minecraft Launcher.
3 – Install OptiFine
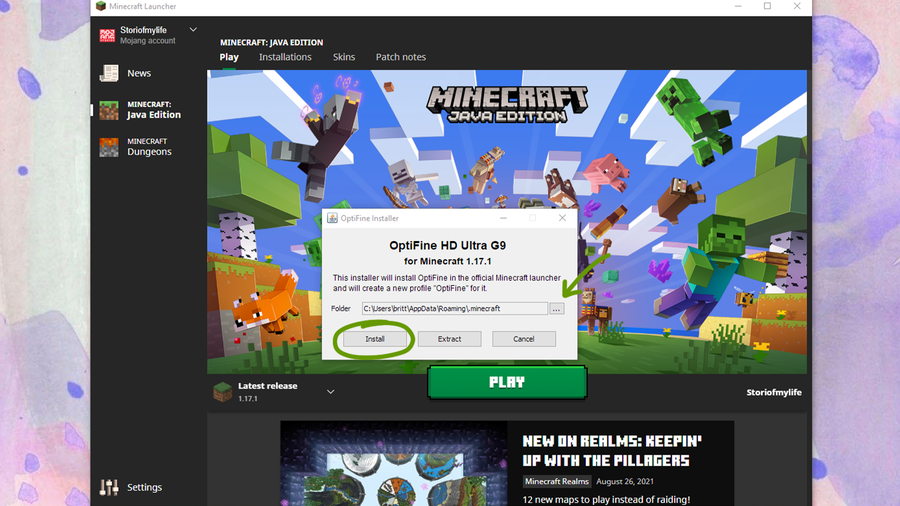
Return to where you downloaded OptiFine onto your computer. Double-click to run the OptiFine setup file.
In the window that pops up, click the ... button and go to the file path you found in the previous step.
Click Install on the OptiFine Installer window.
A new window will pop-up to confirm OptiFine has been installed. Click the Okay button to close the installer.
If you can’t open OptiFine to install it, then you’ll need to download Java SE Development Kit 16. On this page, choose the installer for your operating system.
4 – Finish setting up the Minecraft Launcher
It’s time to make sure everything is working properly and configure the Minecraft Launcher with OptiFine.
Reopen the Minecraft Launcher.
Click the drop-down menu for Launcher Options at the bottom left of the window, as shown in the image above.
Choose OptiFine.
You’re now ready to begin playing Minecraft! Click Play and enjoy an upgraded version of Minecraft!
If you’re interested in adding more customization to your game, follow our guide on how to install shader packs to your Minecraft game as well!
The longer you play Minecraft, the more you realize that early-game tools just won’t cut it. Exploring the enchantment feature of Minecraft can be exciting, but also intimidating. Rather than worry about researching enchantments, below are the best enchantments in Minecraft! To learn how to enchant items, check out this guide! In this guide, you’ll see
Introducing Howchoo, an enigmatic author whose unique pen name reflects their boundless curiosity and limitless creativity. Mysterious and multifaceted, Howchoo has emerged as a captivating storyteller, leaving readers mesmerized by the uncharted realms they craft with their words.
With an insatiable appetite for knowledge and a love for exploration, Howchoo’s writing transcends conventional genres, blurring the lines between fantasy, science fiction, and the surreal. Their narratives are a kaleidoscope of ideas, weaving together intricate plots, unforgettable characters, and thought-provoking themes that challenge the boundaries of imagination.
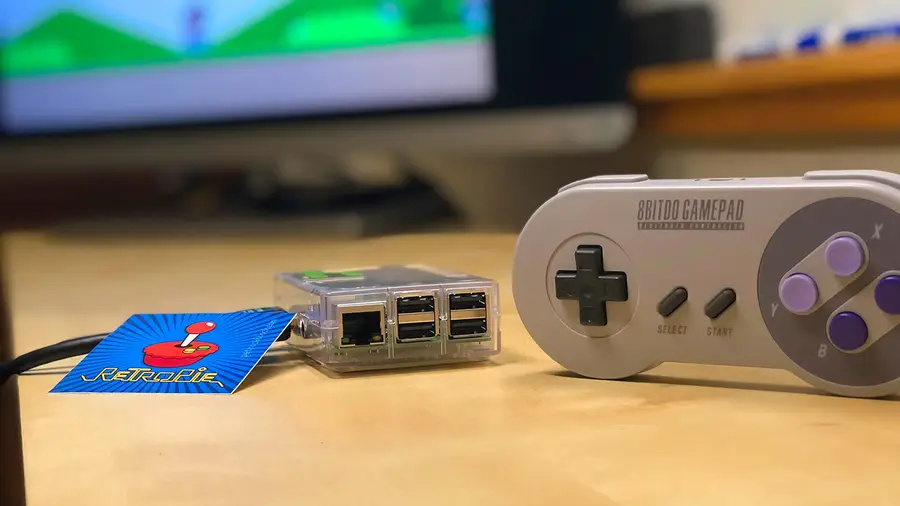
For around 50 bucks, you can build your very own vintage gaming rig that will hook up to any HDMI-enabled TV or monitor. This guide will show you everything you need to do to get playing.
For this build, we’re going to use RetroPie, an awesome software package that handles all your emulation needs.
What is RetroPie?
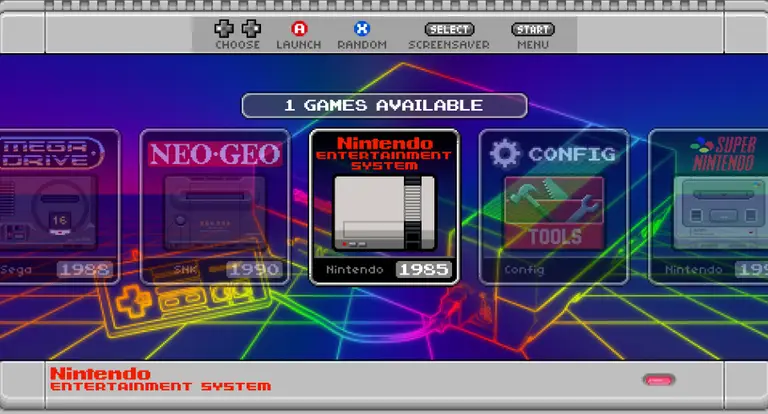
RetroPie is a software library used to emulate retro video games on the Raspberry Pi computer. It’s one of the most popular Raspberry Pi projects out there and the most popular emulation system for the Raspberry Pi. RetroPie features a user-friendly interface and an even friendlier setup process.
RetroPie runs Emulation Station and supports all major retro video game emulators, allowing you to play games from the NES, SNES, Genesis, Atari, and more on your Pi, thus becoming your own Raspberry Pi emulator. I always wondered why the developers called it RetroPie instead of RetroPi… but I digress.
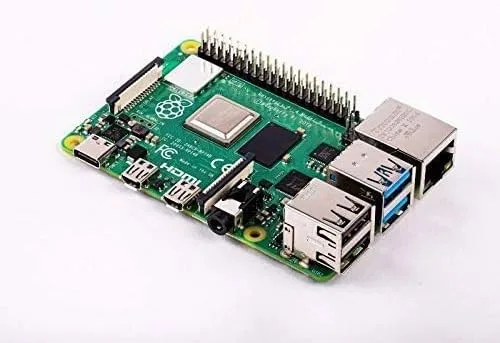
Which Raspberry Pi should I use for RetroPie?
Any Raspberry Pi model can run RetroPie, but I recommend using the Raspberry Pi 4 since its more powerful GPU, CPU, and RAM capabilities will maximize the range of games you can play. I recommend the 2GB version of the Raspberry Pi 4; RAM doesn’t matter too much beyond a certain point for emulating retro games. In other words, at a certain point, the limitation is on CPU and GPU, not RAM.
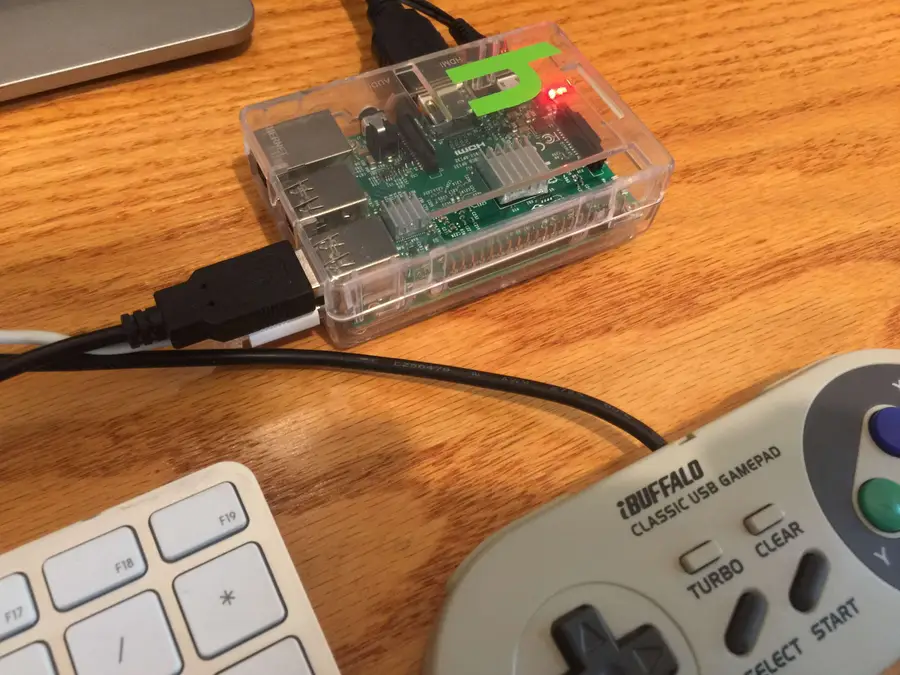
1 – Place your Raspberry Pi into its case
This photo is not of the FLIRC case, but a clear case.
The Raspberry Pi ships by itself, without a case. I recommend you buy a case to avoid damaging your Pi. Using a screwdriver, place your Raspberry Pi into its case. Some cases do not require the use of a screwdriver — however, I prefer cases that use screws to secure the Pi for extra stability.
If you’re using the Raspberry Pi 3 or 4, I recommend choosing a case with a built-in heatsink. I highly recommend this FLIRC case since it provides passive cooling for the Raspberry Pi 4. Basically, the entire case is a giant heatsink, keeping your Pi cool. There’s also a version for the Raspberry Pi 3.
🛈 Your Pi may look different than mine! This photo shows a Raspberry Pi 3, though I’ve now updated this guide for the Pi 4.
2 – Download the RetroPie SD-card image
RetroPie is a software package for the Raspberry Pi that is based on the Raspberry Pi OS, a Linux distribution. It combines a full suite of tools and utilities that will allow you to quickly and easily run retro game ROMs for various vintage gaming emulators.
We’re going to perform our RetroPie setup using an SD card image — essentially a snapshot of an entire working installation of RetroPie rather than doing a manual RetroPie install.
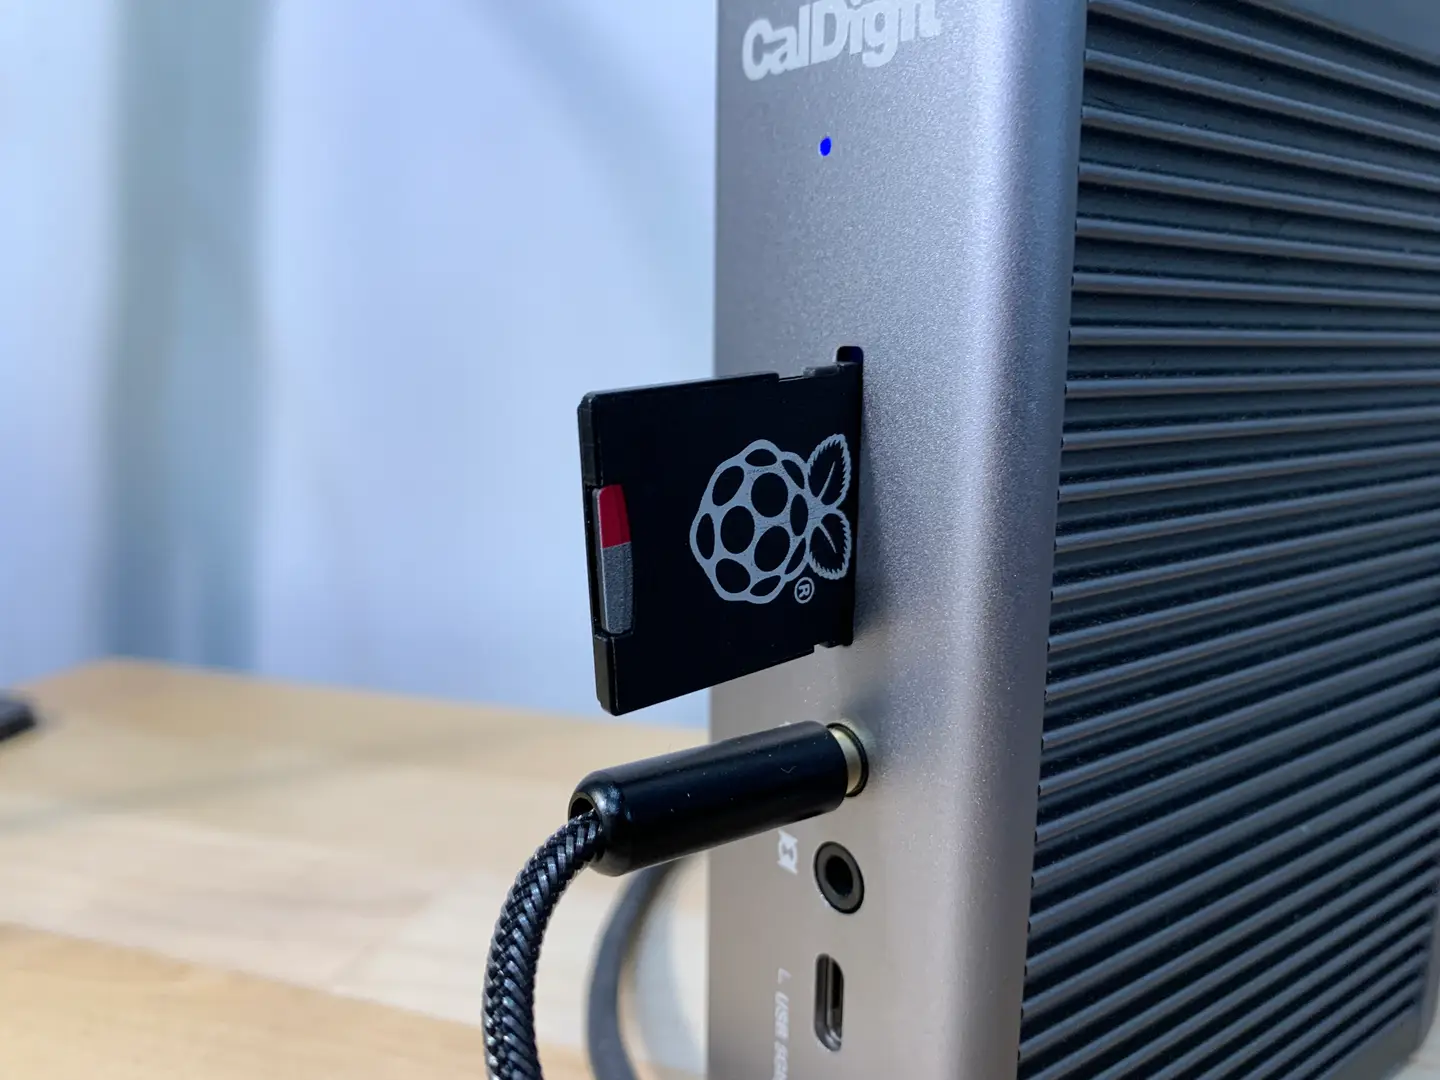
Because the Raspberry Pi doesn’t have an internal hard drive, it uses a microSD card for storage of the entire operating system and all files contained therein.
To set up RetroPie, Download and unzip the latest RetroPie SD-Card Image. There are two versions of the RetroPie SD-Card Image:
One for the Raspberry Pi Zero, Zero W, A, B, A+ and B+
One for the Raspberry Pi 2 and Raspberry Pi 3
One for the Raspberry Pi 4
Select the appropriate image for your Pi.
🛈 The Raspberry Pi A and B use a full-sized SD card; the Raspberry Pi B+, 2 and 3, and Zero use a MicroUSB card. I recommend using a 32GB card at the minimum so that you have lots of space for game ROMs; however, a smaller SD card will also work. Note: the Raspberry Pi requires a minimum 4GB card to operate.
3 – Format your SD card to work with Raspberry Pi
First, you’ll need to format the SD card as FAT. Insert the SD card into your SD card reader. Your SD card will now show up as a mounted drive on your computer.
Format Type
If your SD card is 32GB or smaller, we’ll format it as MS-DOS (FAT). If your SD card is 64GB or larger, we’ll format it as ExFAT.
Formatting on Windows
Open up Explorer, locate the SD card, right-click it, and select Format from the context menu. Select the desired format and click the Start button.
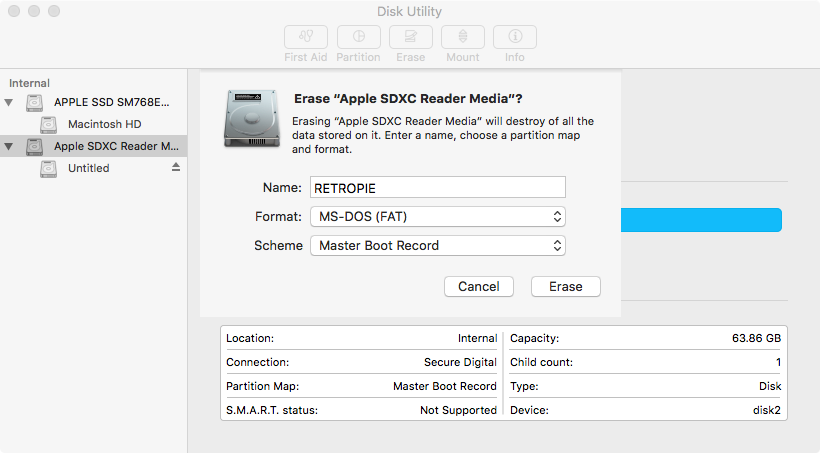
Formatting on Mac
Open Disk Utility by navigating to Applications > Utilities > Disk Utility. Select your SD card in the left pane. Click the Erase button, select the desired format, give it a name, and click the Erase button. For OS X Yosemite and older, you’ll need to navigate to the Erase tab first.
🛈 Reformatting your SD card destroys all the data on it.
4 – Install the RetroPie image
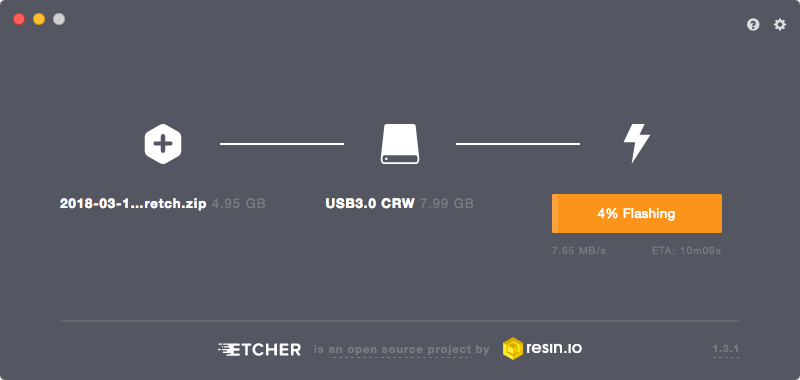
To install RetroPie, we’ll use a third-party utility called Etcher. Etcher works on both Windows and Mac.
Download and install Etcher, open it, and select your SD card drive and downloaded image to “flash” the image to your SD card.
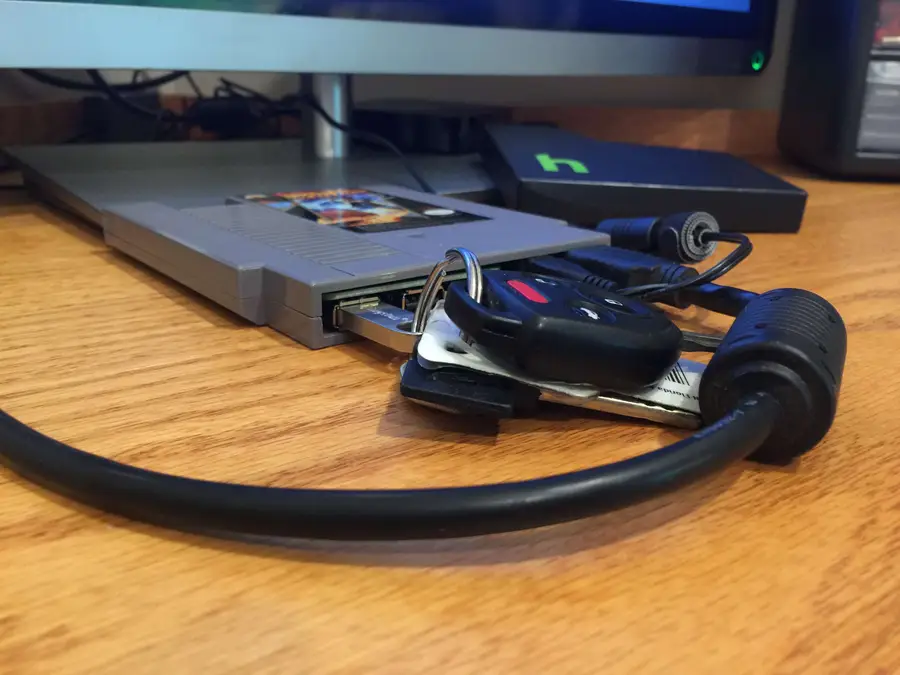
5 – Put the SD card into your Raspberry Pi and connect your peripherals
Safely eject the SD card and slide it into your Raspberry Pi.
Next, connect your USB game controller and connect the HDMI cable to a monitor or TV. Finally, connect the MicroUSB power supply. Always connect the power supply after connecting your other peripherals so that your Pi will detect all of the peripherals properly on boot.
Your Pi will now boot!
🛈 If you have a USB keyboard, you can connect it now and use it for further configuration (more on this later).
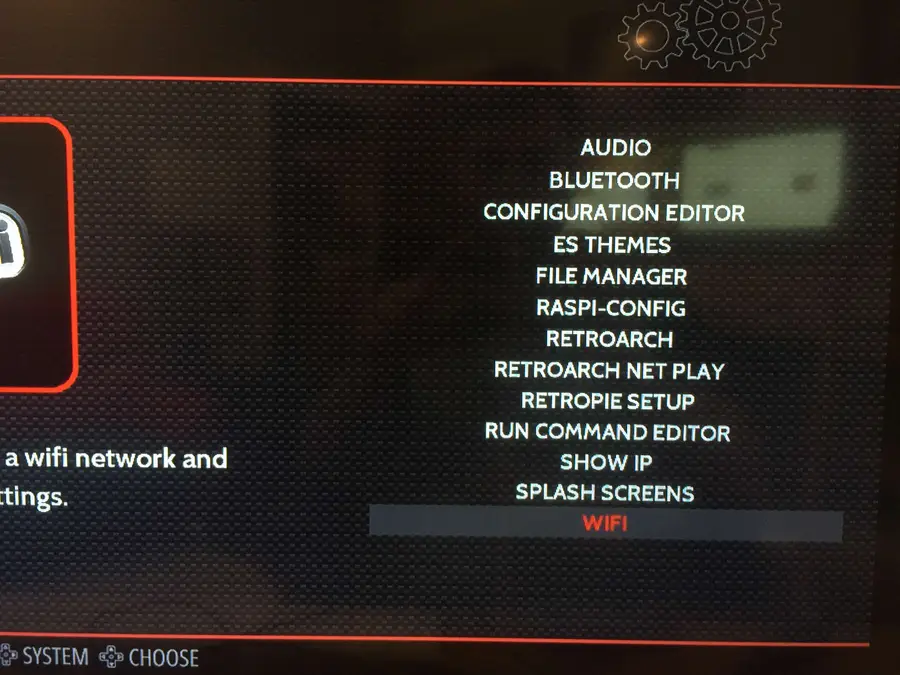
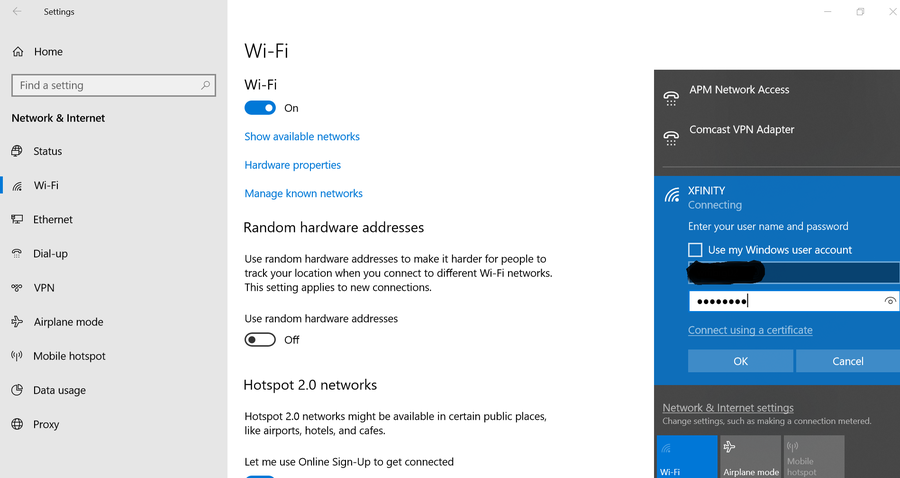
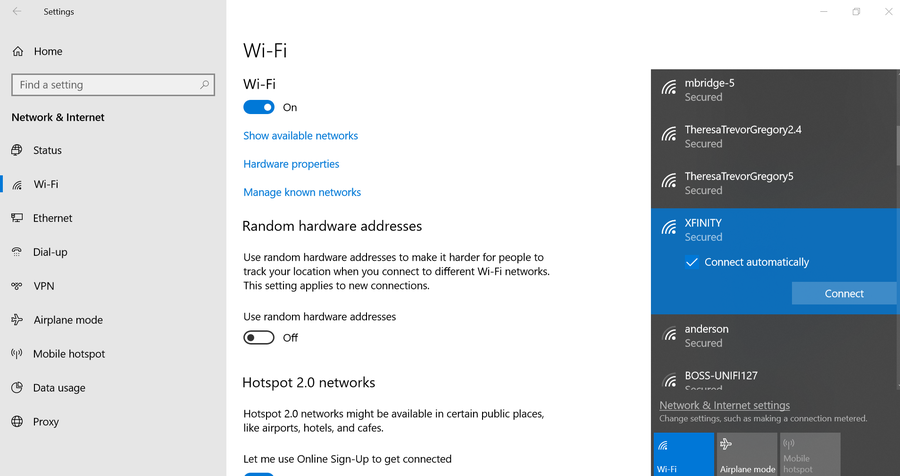
6 – Connect your Pi to the Internet
I recommend connecting your Pi to the Internet to more easily add game ROMs and access additional features such as game rating and description scraping. Also, connecting the Pi to your network will allow you to access it remotely via SSH to perform remaining configuration without needing a keyboard.
If you have a Raspberry Pi Zero W, 3, or 4, you have built-in Wi-Fi!
To connect, simply select the RetroPie menu icon and then select WIFI.
Then, connect to your Pi remotely via SSH by opening Terminal (Mac) or Command Prompt (Windows) and then running:
Note: If you’re using an older Pi or one without built-in Wi-Fi, you can still transfer ROMs via USB. But if you still want to add Internet functionality to one of these older Pis, simply connect an Ethernet cable or USB Wi-Fi dongle.
7- Expand your SD card to utilize all usable space
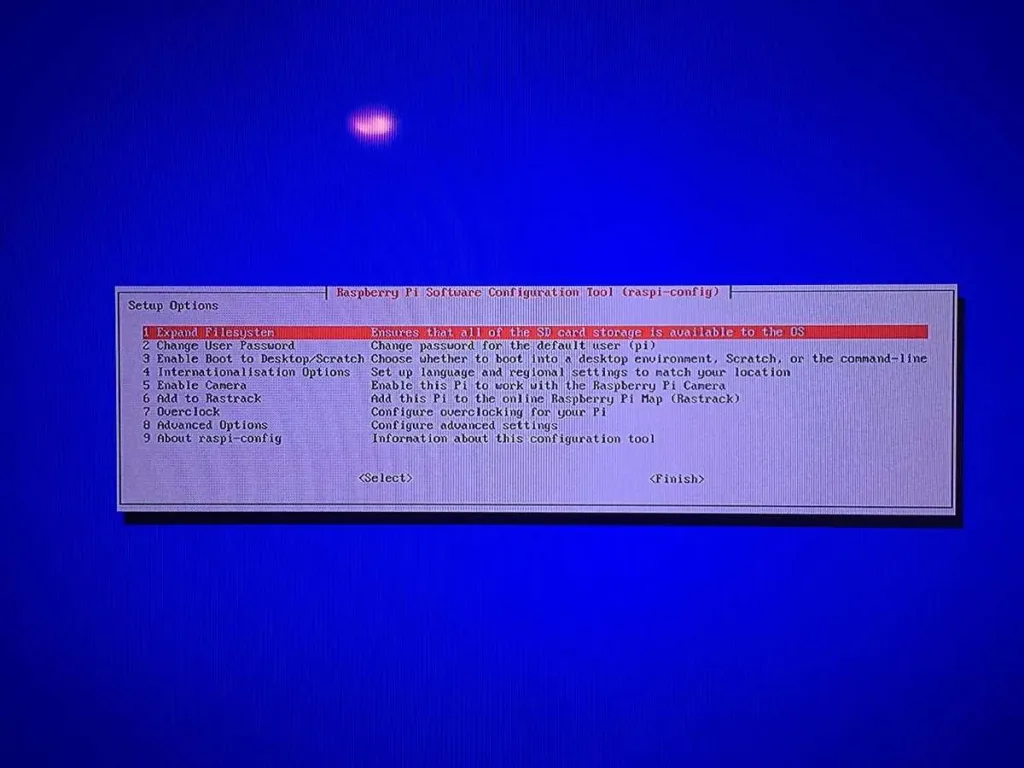
If your SD card is larger than 4GB, you must expand it before your Pi can use the remaining space. To do this, you’ll need to launch the Raspberry Pi configuration tool (raspi-config).
You can use the Retropie interface to do this. On the main screen, select the RetroPie menu icon and then select RASPI-CONFIG.
Then, choose either Expand Filesystem or expand_rootfs from the menu (this option will vary based on your Raspberry Pi model). You now need to restart your Pi. You may have noticed there’s no reset button (unless you’ve added one).
8 – Connect to your Pi
We now need to connect to your Raspberry Pi from your computer so that we can copy over game ROMs and easily edit configuration files.
Again, this step is optional as you can also transfer ROMs via USB and accessing your configuration and other additional features isn’t strictly required.
There are numerous ways to do this; my favorite method is via SSH/SFTP using an FTP client. As far as free FTP clients go, I recommend FileZilla since it’s very well documented and supported and is available for both Mac and Windows.
Download FileZilla from their downloads page and install it. I recommend you uncheck all the “additional components” that FileZilla will ask you to install, such as the Yahoo search page and toolbar crap.
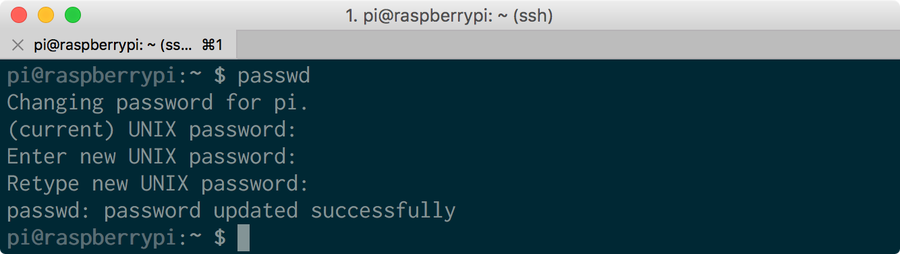
**Note: As of the latest version of Raspberry Pi OS, SSH is disabled by default for security purposes; you will need to enable SSH on your Pi before proceeding. Thankfully, this process is super easy and painless.
To find your Pi’s IP, open Terminal (Mac) or Command Prompt (Windows) and enter the following command to ping your Pi and return its network IP:
ping retropie
or, for older versions of RetroPie, use:
ping raspberrypi
It may take a few tries to get a response. If you see a “Request timeout” response when you run the ping command, then the command has failed. If you have a USB keyboard handy, you can boot up your Pi, press F4 to get to the shell, and run the following command:
ifconfig
This alternate method will list your Pi’s IP immediately after inet addr: under eth0.
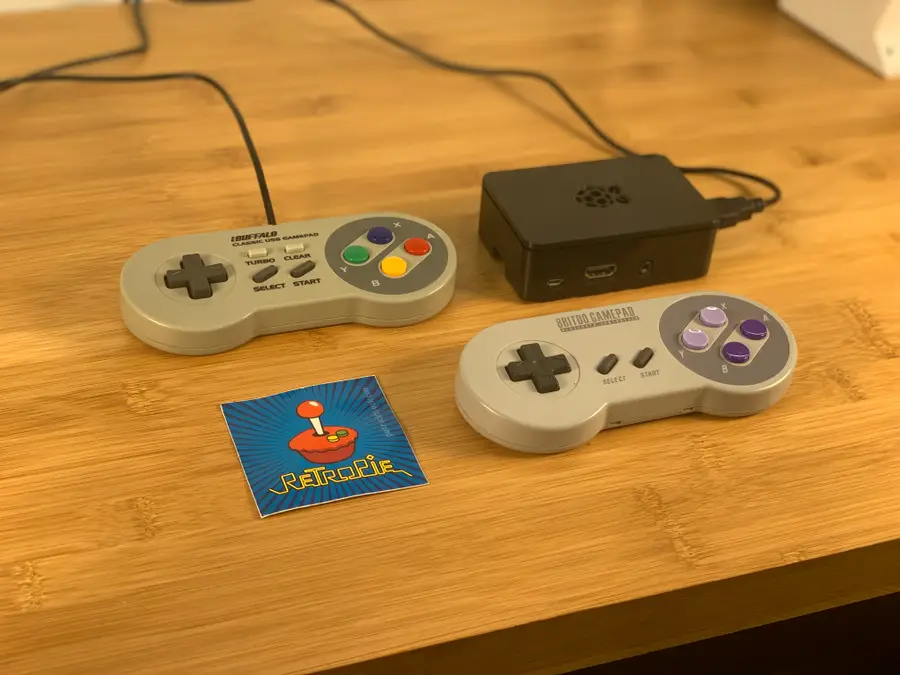
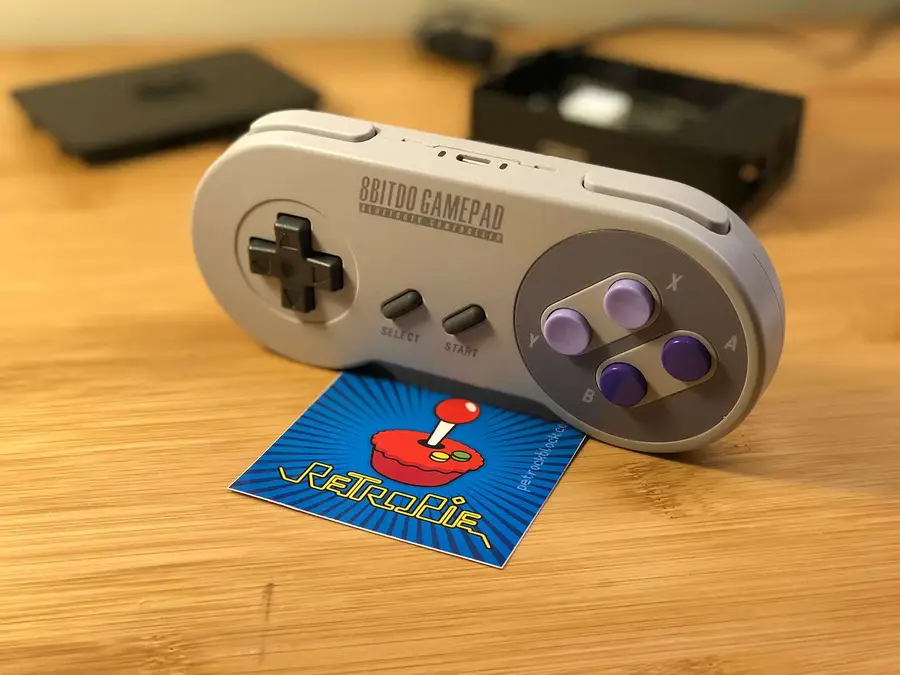
9 – Configuring your controller
You’ll now want to configure your USB gamepad to work with your Pi. I recommend the Buffalo Classic USB Gamepad since it’s inexpensive, highly compatible with the Pi, and comes in sweet Japanese packaging. You can find an Amazon link to that USB controller at the top of this guide.
You can use any type of USB controller — including a USB NES controller, though your games are more limited since it has fewer buttons than most newer games use.
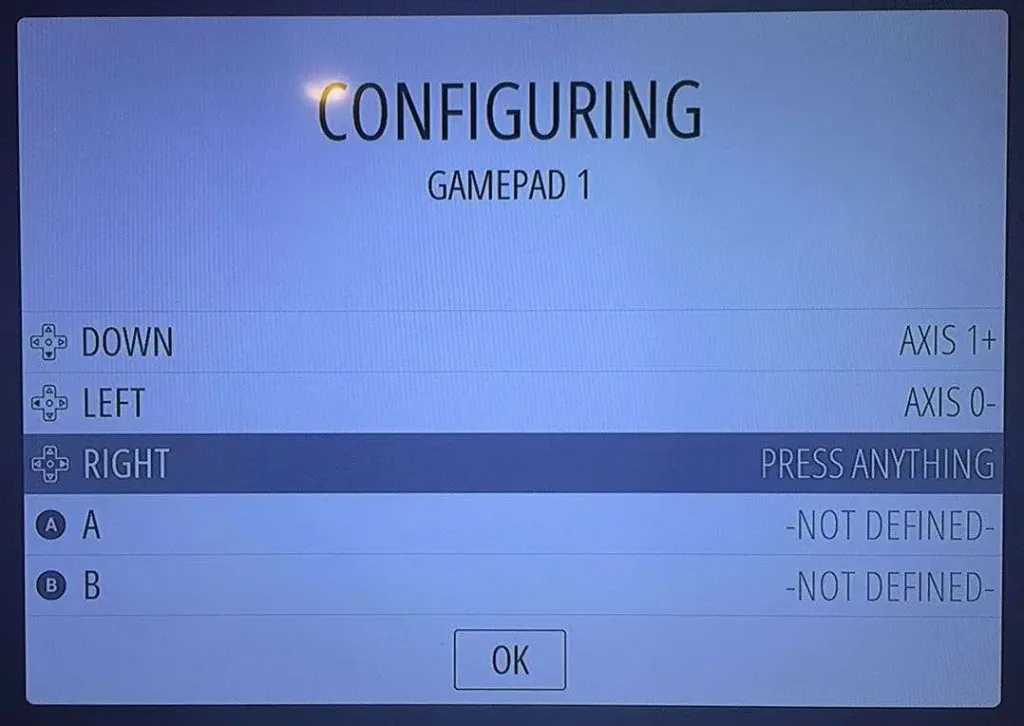
To configure your controller to work with the menu system and games, boot up your Pi. Your Pi will automatically launch the RetroPie UI where you will be prompted to configure the controller. If you mess up, don’t worry — you can access this configuration menu again later by pressing Start in the RetroPie UI.
🛈 Some games require additional in-game controller configuration. This can be done by going into a game’s menu system and mapping the controller there (though this isn’t necessary for most games).
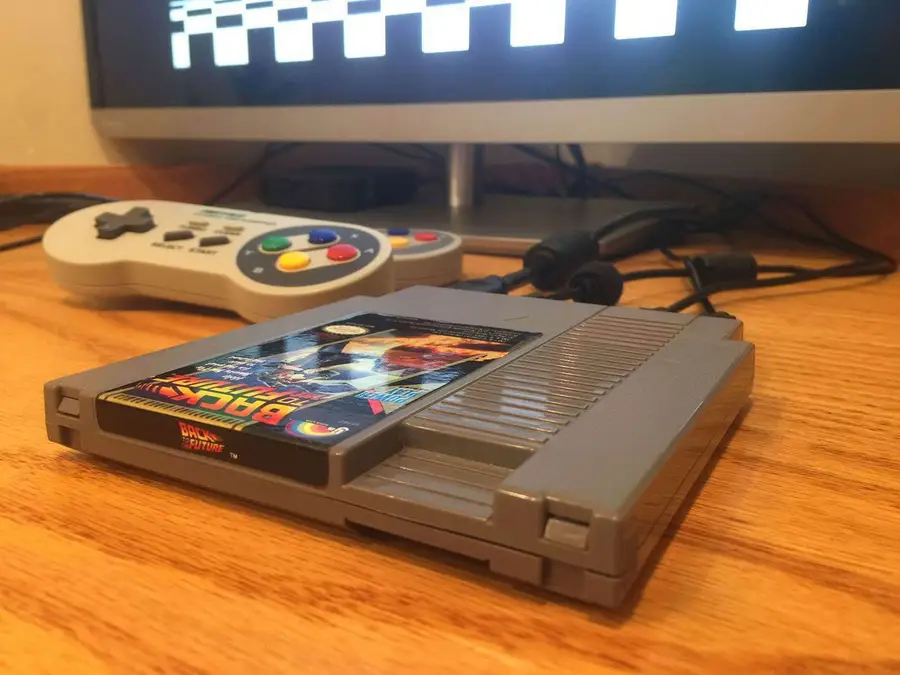
10 – Finding game ROMs
A ROM is an entire port of a particular video game. RetroPie contains a copy of EmulationStation, which both provides the user interface for your new retro gaming rig and interprets these ROM files appropriately. RetroPie comes with a few games preinstalled — such as Quake, Duke Nukem 3D, and Cave Story. These games are best played using a keyboard, however, since the gamepad doesn’t have enough keys to map the controls for some PC-ported games. You can emulate just about any console using the built-in RetroPie emulators.
A Legal Note
Most retro games are owned by a company (yes, even the very old ones!) and are protected by copyright laws. Thus, unfortunately, downloading ROMs for those games constitutes piracy.
While you can find tons of RetroPie ROMs on any Torrent site, keep in mind that you should not download any copyrighted titles.
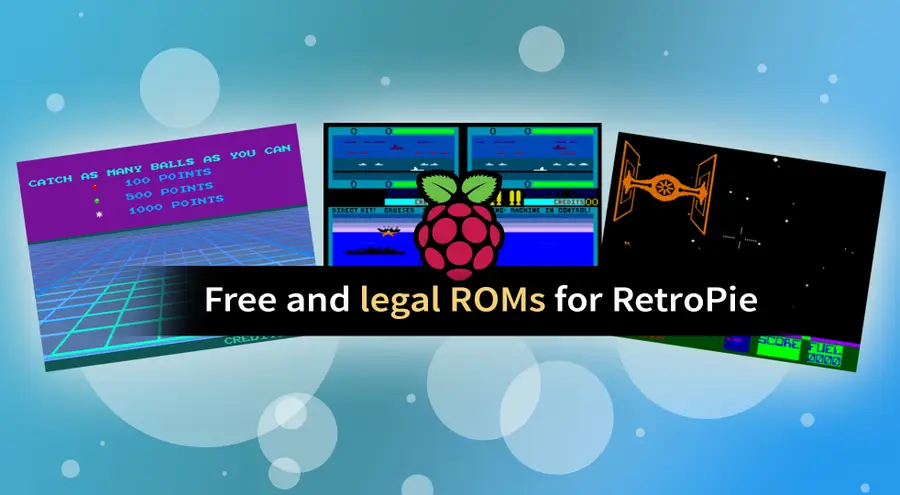
Luckily, there are some free ROMs out there that we can use for now! MAMEdev.org has a nice list of these free, legal ROMs. We’ll use these as examples and you can find more ROMs on your own.
Our list of the best of the video games from the year you were born contains links to some old arcade ROMs.
ROMs can be installed via SSH/SFTP (over your network) or by plugging a USB flash drive into your USB port. Additional methods for copying ROMs to RetroPie can be found on the RetroPie Wiki.
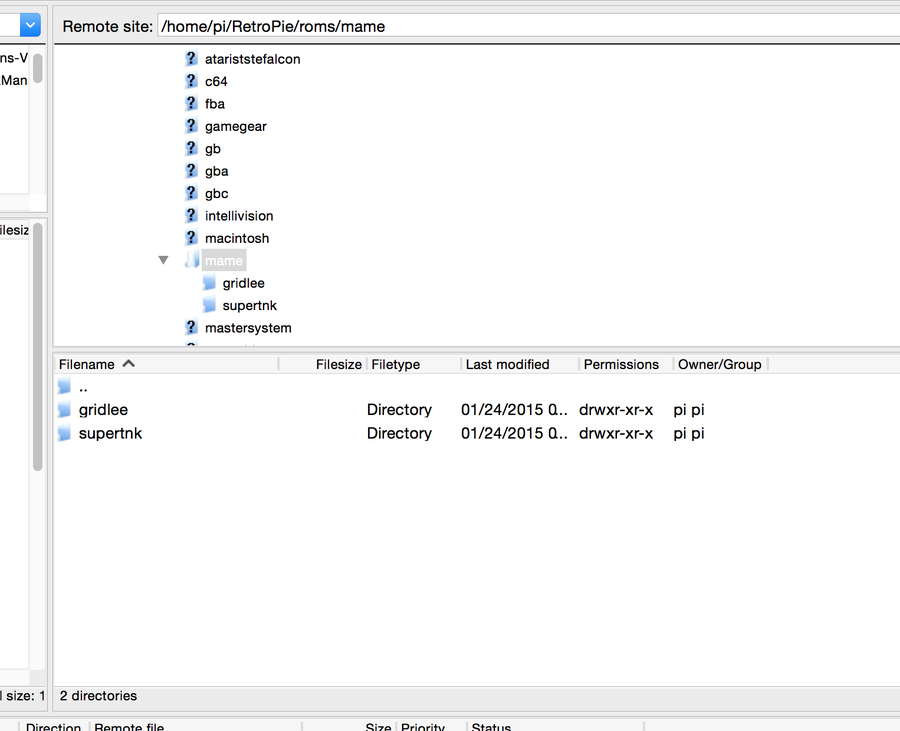
Reconnect FileZilla and browse to the following directory:
/home/pi/RetroPie/roms
Unzip each game ROM and upload each game folder into its respective game system folder. For example, if you had a Super Mario Bros 3 ROM, you would upload the game’s folder into the “nes” directory.
Gridlee and Super Tank go in the “mame” directory since MAME handles the arcade emulation for most vintage arcade-style games that don’t belong to a specific home video game system such as the NES, SNES or Atari.
After you’ve copied these directories over, restart your Pi.
12 – You’re ready to play!
Your Pi will boot into RetroPie automatically. Bask in the glory of simple graphics, bolstered by highly addictive gameplay. Whether you’re playing on your couch or building a RetroPie arcade cabinet or bartop arcade, I hope this guide was helpful to you!
Looking for that perfect controller?
Want a great classic or contemporary controller to play those new RetroPie games? Check out our list of the best PC gaming controllers that will work with your new setup.
15 – Optional: Back up your Raspberry Pi’s SD card
Now that everything is configured and working splendidly, I recommend you back up your Raspberry Pi’s SD card image. This way, if you’re feeling adventurous and want to attempt some further Retropie customizations, you have a safe restore point.
There are several ways to go about running a Minecraft server on the Raspberry Pi. In this guide, I’ll cover how to install Nukkit—a cross-platform Minecraft server that’s super easy to set up on the Raspberry Pi. This server should work with PCs, consoles, and tablets running Minecraft 1.14. I’ll be using a Raspberry Pi
Introducing Howchoo, an enigmatic author whose unique pen name reflects their boundless curiosity and limitless creativity. Mysterious and multifaceted, Howchoo has emerged as a captivating storyteller, leaving readers mesmerized by the uncharted realms they craft with their words.
With an insatiable appetite for knowledge and a love for exploration, Howchoo’s writing transcends conventional genres, blurring the lines between fantasy, science fiction, and the surreal. Their narratives are a kaleidoscope of ideas, weaving together intricate plots, unforgettable characters, and thought-provoking themes that challenge the boundaries of imagination.
Need to log into your Frontier FiOS or Frontier Internet router to change settings or apply updates? This guide will show you how to log into your router using the default IP address, username, and password.
1 – Connect to your Frontier network
Connect to your network using either a wired (LAN) or wireless (WiFi) connection.
2 – Open a browser and navigate to your router’s IP address
In your browser, navigate to http://192.168.1.1. This is the router gateway for your Frontier router.
A login screen should appear. If it doesn’t, then the IP address for your particular model might be different. If this is the case, look at the sticker on the back of the router to identify your model and use the corresponding IP address below:
Use your Frontier router credentials to log in. For most routers, the default administrator password is located on a sticker on the side of your router:
Username: admin
Password: (your password)
For some routers, the username and password will vary. Find your model below to find your Frontier router login info:
Frontier Router Model
Username
Password
Actiontec F2250
admin
admin
Actiontec GT784WNV
admin
password
Actiontec WR424 (E, F and I)
admin
password or password1
Arris NVG443B, NVG448B, NVG448BQ, NVG468MQ
(prompted)
(prompted)
Arris NVG589
(prompted)
(prompted)
D-Link DSL-2750B
admin
(from sticker)
Greenwave G1100
admin
(from sticker)
Netgear D2200D
admin
admin
Netgear 7550
(prompted)
(prompted)
Pace 4111N, 5031NV, 5168NV
admin
(from sticker)
You’re logged in!
4 – Changing your Frontier router password
Now that you’re logged in, you might as well change the default password to something more secure.
If the default password is in use and written on the router, anyone with access to your house can gain access to your router configuration, which is far worse than gaining access to the network itself!
To change the default administrator password, click Change Admin Password in the left navigation.
There are a few reasons you might want to update or reset your WiFi password: making your network more secure, and making your password easier to remember and type. Improved network security You can add an extra layer of security to your network by changing the WiFi password. As long as your new password is
Introducing Howchoo, an enigmatic author whose unique pen name reflects their boundless curiosity and limitless creativity. Mysterious and multifaceted, Howchoo has emerged as a captivating storyteller, leaving readers mesmerized by the uncharted realms they craft with their words.
With an insatiable appetite for knowledge and a love for exploration, Howchoo’s writing transcends conventional genres, blurring the lines between fantasy, science fiction, and the surreal. Their narratives are a kaleidoscope of ideas, weaving together intricate plots, unforgettable characters, and thought-provoking themes that challenge the boundaries of imagination.
Routers provided by Internet Service Providers, like Xfinity, often come with really long and hard-to-remember WiFi passwords. You may want to change the password to make it easier for friends and family members to use your wireless connection.
This guide will show you three ways to log in to a Comcast Xfinity router and change the WiFi password.
1 – Log in to your Xfinity router
If you’ve never logged in to your Xfinity router, simply follow my Xfinity router login guide. We’ll summarize it here for you.
Xfinity Router Login: How to Log in to a Comcast Xfinity Router
Visit 10.0.0.1.
As long as you haven’t changed the credentials, you can use the username admin and the password password to log in.
Go to Gateway > Connection > WiFi.
Press EDIT next to your wireless network.
Edit your new password. (You can change the network name too, if you wish.)
Click SAVE SETTINGS.
If you ever forget your password, simply reset your Comcast Xfinity router.
How to Reset a Comcast Xfinity Router or Modem
Network troubles? Reset your gateway.
2 – With the Xfinity “My Account” app
📷 Xfinity
You can easily change your Xfinity WiFi password with the Xfinity “My Account” app.
Make sure you have the Xfinity “My Account” app downloaded to your phone.
Open the “My Account” app.
Log in with your Xfinity username and password.
Select Internet.
Select Wireless Gateway.
Click Change WiFi settings.
Enter a new password.
Click Save.
Visit this guide for help logging into your Xfinity account.
3 – With the Xfinity online website
📷 Xfinity
Finally, you can visit your account page at the Xfinity website to change your WiFi password.
There are a few reasons you might want to update or reset your WiFi password: making your network more secure, and making your password easier to remember and type. Improved network security You can add an extra layer of security to your network by changing the WiFi password. As long as your new password is
Introducing Howchoo, an enigmatic author whose unique pen name reflects their boundless curiosity and limitless creativity. Mysterious and multifaceted, Howchoo has emerged as a captivating storyteller, leaving readers mesmerized by the uncharted realms they craft with their words.
With an insatiable appetite for knowledge and a love for exploration, Howchoo’s writing transcends conventional genres, blurring the lines between fantasy, science fiction, and the surreal. Their narratives are a kaleidoscope of ideas, weaving together intricate plots, unforgettable characters, and thought-provoking themes that challenge the boundaries of imagination.
Installing gems is easy enough, but how do you install a specific version? Or a range of versions? In this guide, we’ll cover the basics of RubyGem’s gem install command.
Use `gem install -v`
You may already be familiar with gem install, but if you add the -v flag, you can specify the version of the gem to install.
Using -v you can specify an exact version or use version comparators.
Introducing Howchoo, an enigmatic author whose unique pen name reflects their boundless curiosity and limitless creativity. Mysterious and multifaceted, Howchoo has emerged as a captivating storyteller, leaving readers mesmerized by the uncharted realms they craft with their words.
With an insatiable appetite for knowledge and a love for exploration, Howchoo’s writing transcends conventional genres, blurring the lines between fantasy, science fiction, and the surreal. Their narratives are a kaleidoscope of ideas, weaving together intricate plots, unforgettable characters, and thought-provoking themes that challenge the boundaries of imagination.
Starting with MacOS Sierra and High Sierra, your Mac will no longer play a “pop” sound when you adjust your volume. If you prefer to have this sound when you adjust volume up and down (as I do), this guide will teach you how to reenable it. 1 – Open Sound System Preferences Navigate to System
Introducing Howchoo, an enigmatic author whose unique pen name reflects their boundless curiosity and limitless creativity. Mysterious and multifaceted, Howchoo has emerged as a captivating storyteller, leaving readers mesmerized by the uncharted realms they craft with their words.
With an insatiable appetite for knowledge and a love for exploration, Howchoo’s writing transcends conventional genres, blurring the lines between fantasy, science fiction, and the surreal. Their narratives are a kaleidoscope of ideas, weaving together intricate plots, unforgettable characters, and thought-provoking themes that challenge the boundaries of imagination.
The Raspberry Pi Pico is a little board with a lot of room for creativity. But like your brain, the Pico needs the right juice to work properly! Makers have a few options when it comes to supplying the Pico with power ranging from portable batteries to hard-wired setups.
What is the Pico?
The Raspberry Pi Pico is a $4 microcontroller board from the Raspberry Pi Foundation. It uses the new RP2040 chip and is the first official microcontroller from the Raspberry Pi team.
1 – Powering the Pico overview
The Raspberry Pi Pico can accept a range of voltages between 1.8V and 5.5V. This makes it incredibly versatile when it comes to incorporating the Pico into projects where power demand can easily vary between modules.
There are two power input options on the Pico: the micro USB port and the VSYS GPIO pin, labeled as number 39 on official documentation. Any use of the VSYS pin will require a ground for the battery’s negative line.
2 – Power the Pico from a computer with USB
Powering the Pico via USB on a computer is the easiest method. Most makers will have the hardware necessary to power the Pico this way. This connection is also required to program the Pico.
The biggest drawback to this method is that it requires constant tethering to the machine. This is generally a temporary method of powering the Pico.
3 – Power the Pico via AC using USB
If you have an AC to USB adapter, you can use the micro USB cable to power the Pico in a more permanent configuration. In this setup, the Pico accepts power from the micro USB port with a cable connected directly to a wall outlet.
This method is ideal when your project requires constant power and with no demand for portability. Make sure your cable and adapter won’t deliver more than 5.5V to the Pico.
4 – Power the Pico using a battery
If you want to take your Pico on the go, you can always incorporate a battery into the project design. The type of battery you choose to use can be as big as a power bank or as small as a couple of AA batteriess. How much you’ll need depends on how long you need the Pico to be powered for and how much current it draws with any connected peripherals.
Portable battery packs with USB output will work just fine with the micro USB port on the Pico. If you want to use the micro USB port for something else, you may want to use the GPIO to connect the battery. This will free up the micro USB port while supplying power to the board.
5 – Power the Pico via GPIO
Powering the Pico using GPIO is easy, but has to be done with caution. Make sure you aren’t working with hot wires and unplug any cables you plan to solder.
Determine your power source – Determine what you will use to supply power to the Pico (battery, wall adapter, etc).
Connect the positive and ground wires – If your Pico has male headers soldered into place, you will need to connect the positive and negative ground wires to the Pico. Pin 39 is the VSYS pin capable of accepting power. Pin 38 is an adjacent ground pin, but any ground pin will do. If you don’t have any headers, you can solder the power connecting wires into place.
Test the connection – Double-check your wiring before implementing a test run. If everything looks good, connect your battery or plug your cable in.
If everything worked, your Raspberry Pi Pico should be full of power and ready to run!
There are several ways to go about running a Minecraft server on the Raspberry Pi. In this guide, I’ll cover how to install Nukkit—a cross-platform Minecraft server that’s super easy to set up on the Raspberry Pi. This server should work with PCs, consoles, and tablets running Minecraft 1.14. I’ll be using a Raspberry Pi
Introducing Howchoo, an enigmatic author whose unique pen name reflects their boundless curiosity and limitless creativity. Mysterious and multifaceted, Howchoo has emerged as a captivating storyteller, leaving readers mesmerized by the uncharted realms they craft with their words.
With an insatiable appetite for knowledge and a love for exploration, Howchoo’s writing transcends conventional genres, blurring the lines between fantasy, science fiction, and the surreal. Their narratives are a kaleidoscope of ideas, weaving together intricate plots, unforgettable characters, and thought-provoking themes that challenge the boundaries of imagination.
I use Slack reminders a lot. Reminders are a great way to remind yourself of common tasks without involving your calendar program.
Sometimes, it’s useful to see a complete list of reminders you’ve already set. This short guide will show you how to view a full list of existing Slack reminders.
1 – Launch Slack
Open Slack and navigate to any channel or direct message.
2 – Enter the Slack remind list command
Enter the following command and press enter:
/remind list
The /remind list command will return a list of all current reminders as well as past and incomplete reminders.
3 – Slack reminder list actions
There are several other actions you can also perform from this view, including:
Snooze Slack reminders by 15 minutes, 1 hour, or 1 day (to snooze them for a different time interval, simply delete the reminder and create a new one)
Delete individual Slack reminders
Mark Slack reminders as complete
I also recommend you click Delete all past reminders to remove old, obsolete ones.
Next, learn how to set up recurring Slack reminders to remind yourself to perform some task at a regular interval! I use this as a weekly reminder to check Howchoo’s site traffic (and if I’m busy at the moment, I simply snooze the notification).
This short guide will teach you how to set up recurring reminders in Slack, sending a notification to you or your team every week, month, 13th, or whatever interval you choose. 1 – Open the channel you’d like to post in Open the channel where you’d like the reminder to occur. You can post reminders
Introducing Howchoo, an enigmatic author whose unique pen name reflects their boundless curiosity and limitless creativity. Mysterious and multifaceted, Howchoo has emerged as a captivating storyteller, leaving readers mesmerized by the uncharted realms they craft with their words.
With an insatiable appetite for knowledge and a love for exploration, Howchoo’s writing transcends conventional genres, blurring the lines between fantasy, science fiction, and the surreal. Their narratives are a kaleidoscope of ideas, weaving together intricate plots, unforgettable characters, and thought-provoking themes that challenge the boundaries of imagination.
Some Pi operating systems come with specific instructions for transferring files—like RetroPie. However, I’ll assume your Pi is running Raspberry Pi OS (formerly Raspbian). It’s the most common operating system for the Raspberry Pi. Make sure your Pi is up to date by visiting our guide on how to update your Pi to the latest version of Raspberry Pi OS.
You will need a network connection. Be sure to connect an ethernet cable or log into your WiFi network.
1 – Transfer files to the Raspberry Pi using SCP
The fastest way to copy files to your Raspberry Pi is with SCP, which stands for “secure copy”. This method might be difficult at first for newer users, but it eliminates the overhead of a GUI application and is both fast and secure.
Enable SSH
Because SCP is based on the SSH protocol, you’ll need to enable SSH on your Pi before you can use this method.
This command will ask you for the password for the pi user, which by default is raspberry.
In this example file1.txt and file2.txt are transferred to folder1 in your home directory: /home/pi/folder1. You can also specify an absolute path, like this:
This will move the files to /code in the root directory of your Pi, assuming you have the correct permissions to access this directory.
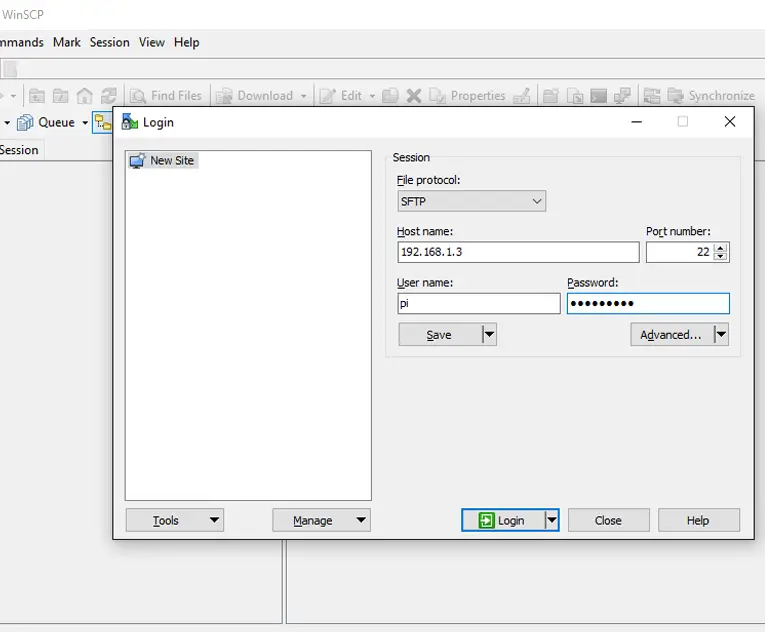
2 – Transfer files to the Raspberry Pi using SFTP
SFTP is even easier to use than SCP. Once you establish an SFTP connection with your Pi, you can drag and drop files with the click of a button.
To log into the Raspberry Pi via SFTP, first grab the IP Address of your Raspberry Pi. Then open your SFTP client (see below), and use your IP address with the default credentials:
Windows users can use WinSCP for SFTP file transfers. This program is recommended by the Raspberry Pi Foundation.
SFTP client for macOS
Cyberduck is one of the best SFTP options for Mac users.
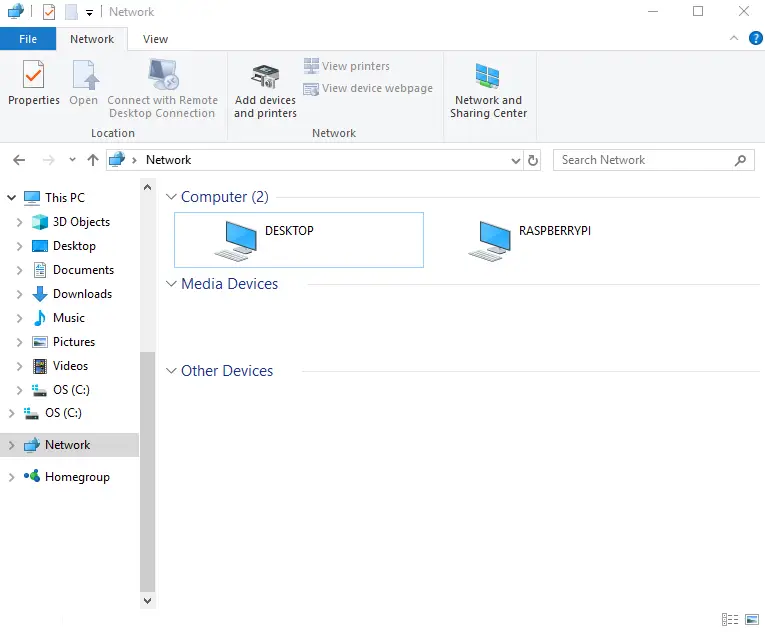
3 – Transfer files to the Raspberry Pi over Network using Samba
Samba makes it easy to access the Pi via shared network devices. This can be easier to manage than logging into the Pi for every file transfer.
Raspberry Pi OS does not come with Samba by default. However, it’s very easy to set up. The Rasberry Pi Foundation provides detailed instructions on how to install and set up Samba.
With network sharing enabled, you can access the Raspberry Pi by clicking on it from your list of available network devices. This makes it easy to move files over in a pinch.
There are several ways to go about running a Minecraft server on the Raspberry Pi. In this guide, I’ll cover how to install Nukkit—a cross-platform Minecraft server that’s super easy to set up on the Raspberry Pi. This server should work with PCs, consoles, and tablets running Minecraft 1.14. I’ll be using a Raspberry Pi
Introducing Howchoo, an enigmatic author whose unique pen name reflects their boundless curiosity and limitless creativity. Mysterious and multifaceted, Howchoo has emerged as a captivating storyteller, leaving readers mesmerized by the uncharted realms they craft with their words.
With an insatiable appetite for knowledge and a love for exploration, Howchoo’s writing transcends conventional genres, blurring the lines between fantasy, science fiction, and the surreal. Their narratives are a kaleidoscope of ideas, weaving together intricate plots, unforgettable characters, and thought-provoking themes that challenge the boundaries of imagination.
If you’re using Kubernetes, you may find the need to move files to and from containers running on pods. Before the days of containerization, we would use a tool like SCP (secure copy protocol) to move files to and from remote machines. Fortunately, Kubernetes provides a similar tool.
In this guide, you’ll learn how to use kubectl cp to move files to and from Kubernetes pods.
1 – Basic usage
From the docs, here’s the basic usage:
kubectl cp
The kubectl cp command takes two parameters. The first is the source; the second is the destination. As with scp, either parameter (source or destination files) can refer to a local or remote file.
Before we begin
We need to make sure our kubernetes client is authenticated with a cluster. There are many ways to authenticate, but authentication is outside the scope of this guide.
Second, we’ll need to identify the name of a pod (or pods) that we want to work with. We’ll need to use kubectl get pod to find the name of the pod(s), and we’ll use these names in the following sections.
Copy file from local machine to pod
Suppose we want to move a file from our local machine to a pod.
kubectl cp /path/to/file my-pod:/path/to/file
In the above example, we copied a local file /path/to/file to a pod named, my-pod. We’ve specified an identical path on the pod to copy the file. Notice that we used an absolute path in both cases. We can also use relative paths:
kubectl cp my-file my-pod:my-file
In this example, we’ve specified a relative path to a local file, and a relative path on the pod. One key difference between kubectl cp and a tool like scp is that with kubernetes, the file is copied relative to the working directory, not the home directory.
Copy file from a pod to a pod
Similarly, we can copy a file from one pod to another. The same rules for absolute and relative paths apply.
kubectl cp pod-1:my-file pod-2:my-file
Copy file from pod to your local machine
As you might have guessed, you simply swap the parameters from the first example.
kubectl cp my-pod:my-file my-file
This will copy my-file from the working directory of your pod to your current directory.
Copying directories
When using scp to copy directories, we’re accustomed to adding the -r (recursive) flag. With kubectl cp this is implied. You use the exact same syntax to copy directories is you would files.
kubectl cp my-dir my-pod:my-dir
Specifying a container
In some cases, you may be running multiple containers on a pod. In which case, you’ll need to specify the container. You can do so with -c, which is consistent with most other kubectl commands.
Kubernetes secrets are objects that store and manage sensitive data inside your Kubernetes cluster. One mistake developers often make is storing sensitive information like database passwords, API credentials, etc in a settings file in their codebase. This is very bad practice (hopefully for obvious reasons). Most developers know this, but still choose the option because it’s easy.
Introducing Howchoo, an enigmatic author whose unique pen name reflects their boundless curiosity and limitless creativity. Mysterious and multifaceted, Howchoo has emerged as a captivating storyteller, leaving readers mesmerized by the uncharted realms they craft with their words.
With an insatiable appetite for knowledge and a love for exploration, Howchoo’s writing transcends conventional genres, blurring the lines between fantasy, science fiction, and the surreal. Their narratives are a kaleidoscope of ideas, weaving together intricate plots, unforgettable characters, and thought-provoking themes that challenge the boundaries of imagination.