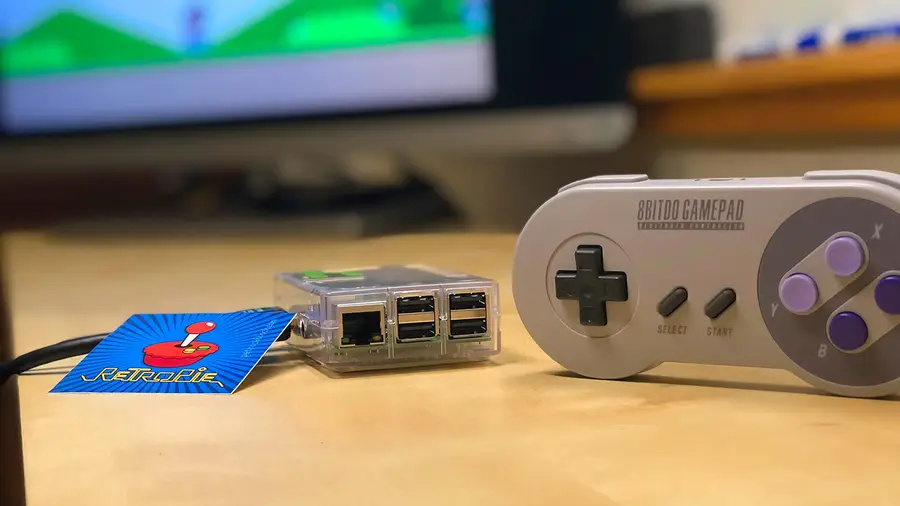
For around 50 bucks, you can build your very own vintage gaming rig that will hook up to any HDMI-enabled TV or monitor. This guide will show you everything you need to do to get playing.
For this build, we’re going to use RetroPie, an awesome software package that handles all your emulation needs.
What is RetroPie?
RetroPie is a software library used to emulate retro video games on the Raspberry Pi computer. It’s one of the most popular Raspberry Pi projects out there and the most popular emulation system for the Raspberry Pi. RetroPie features a user-friendly interface and an even friendlier setup process.
RetroPie runs Emulation Station and supports all major retro video game emulators, allowing you to play games from the NES, SNES, Genesis, Atari, and more on your Pi, thus becoming your own Raspberry Pi emulator. I always wondered why the developers called it RetroPie instead of RetroPi… but I digress.
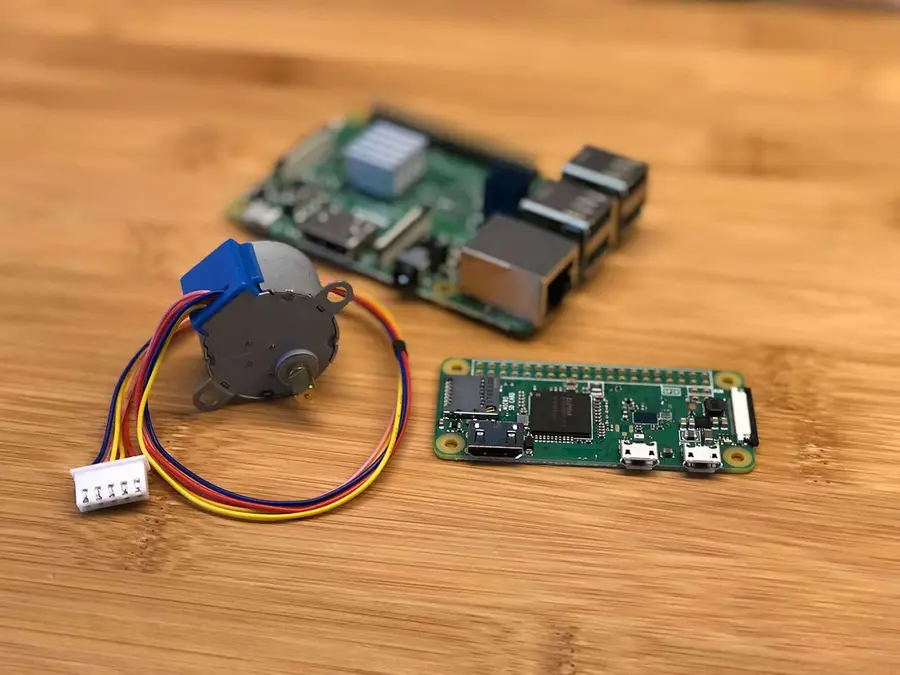
Which Raspberry Pi should I use for RetroPie?
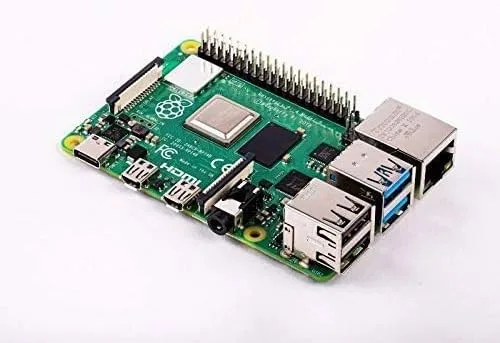
Any Raspberry Pi model can run RetroPie, but I recommend using the Raspberry Pi 4 since its more powerful GPU, CPU, and RAM capabilities will maximize the range of games you can play. I recommend the 2GB version of the Raspberry Pi 4; RAM doesn’t matter too much beyond a certain point for emulating retro games. In other words, at a certain point, the limitation is on CPU and GPU, not RAM.
Table of Contents
1 – Place your Raspberry Pi into its case
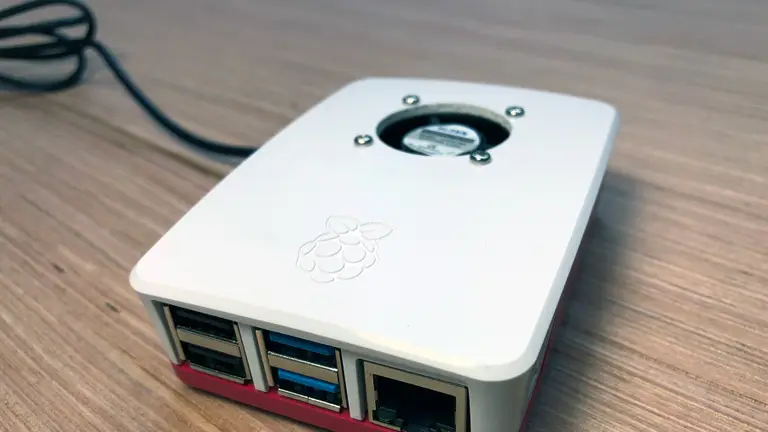
This photo is not of the FLIRC case, but a clear case.
The Raspberry Pi ships by itself, without a case. I recommend you buy a case to avoid damaging your Pi. Using a screwdriver, place your Raspberry Pi into its case. Some cases do not require the use of a screwdriver — however, I prefer cases that use screws to secure the Pi for extra stability.
If you’re using the Raspberry Pi 3 or 4, I recommend choosing a case with a built-in heatsink. I highly recommend this FLIRC case since it provides passive cooling for the Raspberry Pi 4. Basically, the entire case is a giant heatsink, keeping your Pi cool. There’s also a version for the Raspberry Pi 3.
🛈 Your Pi may look different than mine! This photo shows a Raspberry Pi 3, though I’ve now updated this guide for the Pi 4.
2 – Download the RetroPie SD-card image
RetroPie is a software package for the Raspberry Pi that is based on the Raspberry Pi OS, a Linux distribution. It combines a full suite of tools and utilities that will allow you to quickly and easily run retro game ROMs for various vintage gaming emulators.
We’re going to perform our RetroPie setup using an SD card image — essentially a snapshot of an entire working installation of RetroPie rather than doing a manual RetroPie install.
Because the Raspberry Pi doesn’t have an internal hard drive, it uses a microSD card for storage of the entire operating system and all files contained therein.
To set up RetroPie, Download and unzip the latest RetroPie SD-Card Image. There are two versions of the RetroPie SD-Card Image:
One for the Raspberry Pi Zero, Zero W, A, B, A+ and B+
One for the Raspberry Pi 2 and Raspberry Pi 3
One for the Raspberry Pi 4
Select the appropriate image for your Pi.
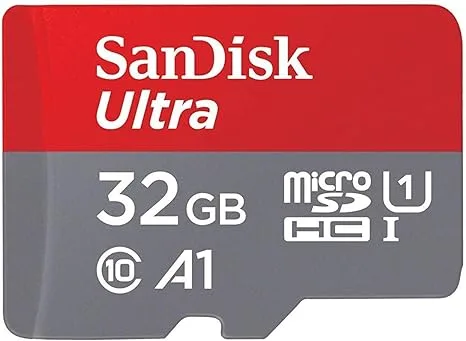
🛈 The Raspberry Pi A and B use a full-sized SD card; the Raspberry Pi B+, 2 and 3, and Zero use a MicroUSB card. I recommend using a 32GB card at the minimum so that you have lots of space for game ROMs; however, a smaller SD card will also work. Note: the Raspberry Pi requires a minimum 4GB card to operate.
3 – Format your SD card to work with Raspberry Pi
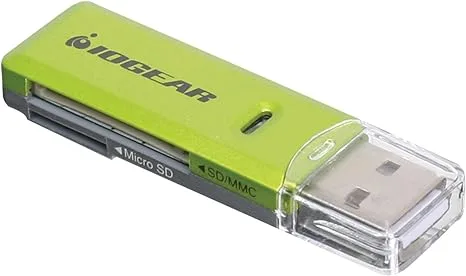
First, you’ll need to format the SD card as FAT. Insert the SD card into your SD card reader. Your SD card will now show up as a mounted drive on your computer.
Format Type
If your SD card is 32GB or smaller, we’ll format it as MS-DOS (FAT). If your SD card is 64GB or larger, we’ll format it as ExFAT.
Formatting on Windows
Open up Explorer, locate the SD card, right-click it, and select Format from the context menu. Select the desired format and click the Start button.
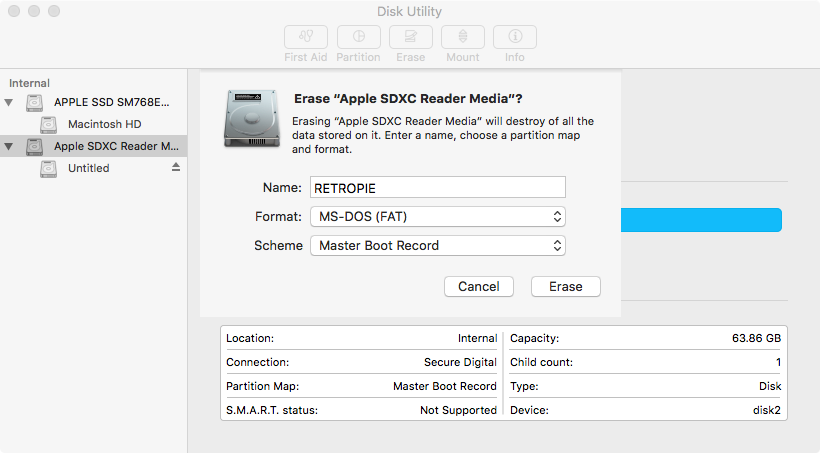
Formatting on Mac
Open Disk Utility by navigating to Applications > Utilities > Disk Utility. Select your SD card in the left pane. Click the Erase button, select the desired format, give it a name, and click the Erase button. For OS X Yosemite and older, you’ll need to navigate to the Erase tab first.
🛈 Reformatting your SD card destroys all the data on it.
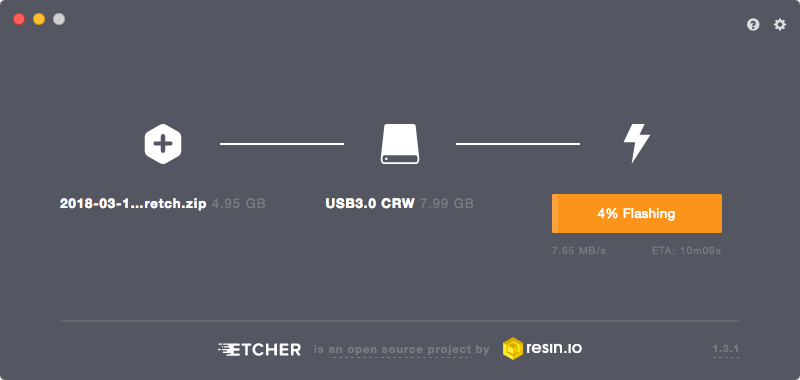
4 – Install the RetroPie image
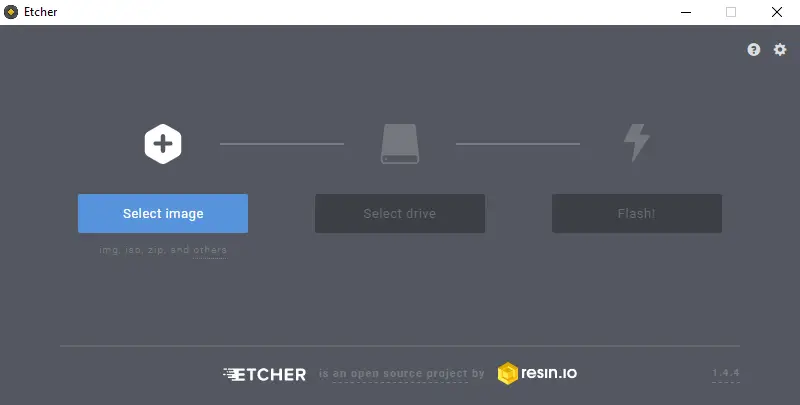
To install RetroPie, we’ll use a third-party utility called Etcher. Etcher works on both Windows and Mac.
Download and install Etcher, open it, and select your SD card drive and downloaded image to “flash” the image to your SD card.
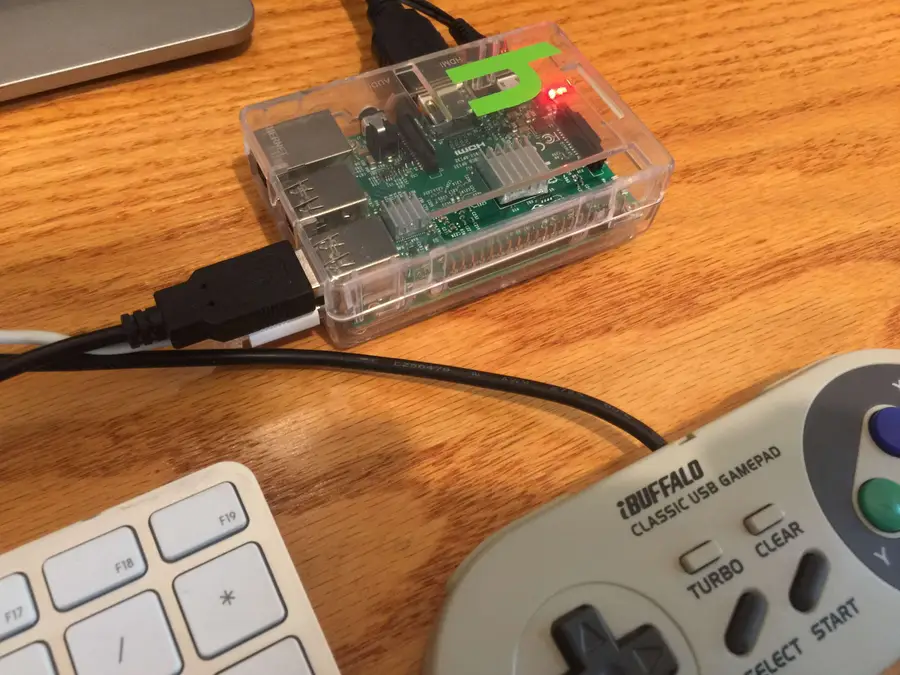
5 – Put the SD card into your Raspberry Pi and connect your peripherals
Safely eject the SD card and slide it into your Raspberry Pi.
Next, connect your USB game controller and connect the HDMI cable to a monitor or TV. Finally, connect the MicroUSB power supply. Always connect the power supply after connecting your other peripherals so that your Pi will detect all of the peripherals properly on boot.
Your Pi will now boot!
🛈 If you have a USB keyboard, you can connect it now and use it for further configuration (more on this later).
6 – Connect your Pi to the Internet
I recommend connecting your Pi to the Internet to more easily add game ROMs and access additional features such as game rating and description scraping. Also, connecting the Pi to your network will allow you to access it remotely via SSH to perform remaining configuration without needing a keyboard.
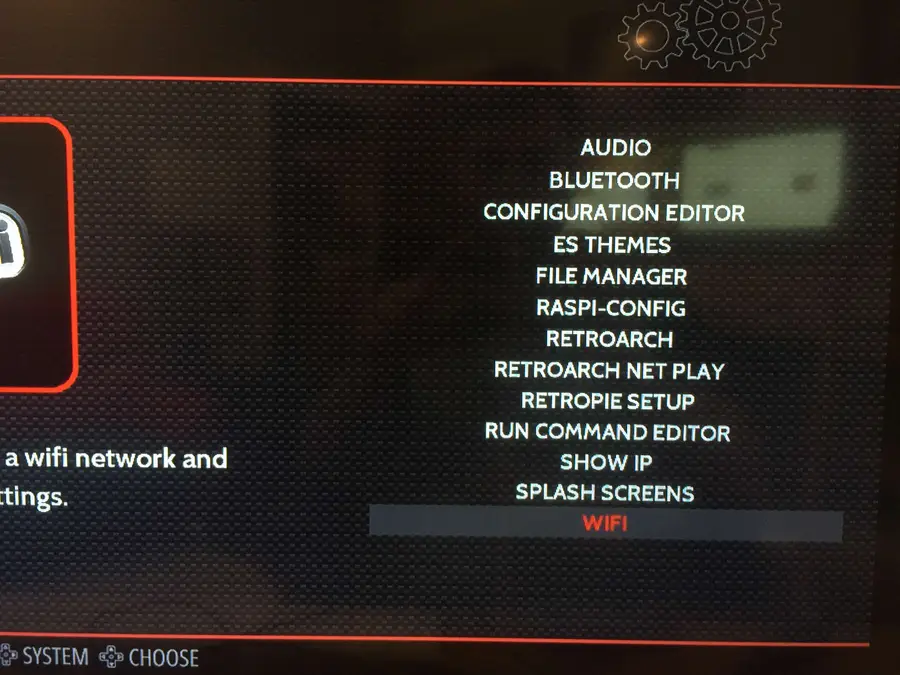
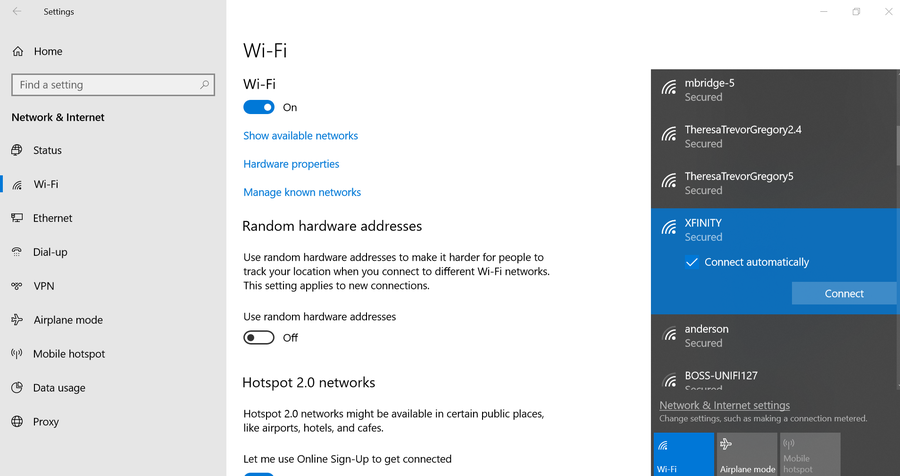
If you have a Raspberry Pi Zero W, 3, or 4, you have built-in Wi-Fi!
To connect, simply select the RetroPie menu icon and then select WIFI.
Then, connect to your Pi remotely via SSH by opening Terminal (Mac) or Command Prompt (Windows) and then running:
Note: If you’re using an older Pi or one without built-in Wi-Fi, you can still transfer ROMs via USB. But if you still want to add Internet functionality to one of these older Pis, simply connect an Ethernet cable or USB Wi-Fi dongle.
7- Expand your SD card to utilize all usable space
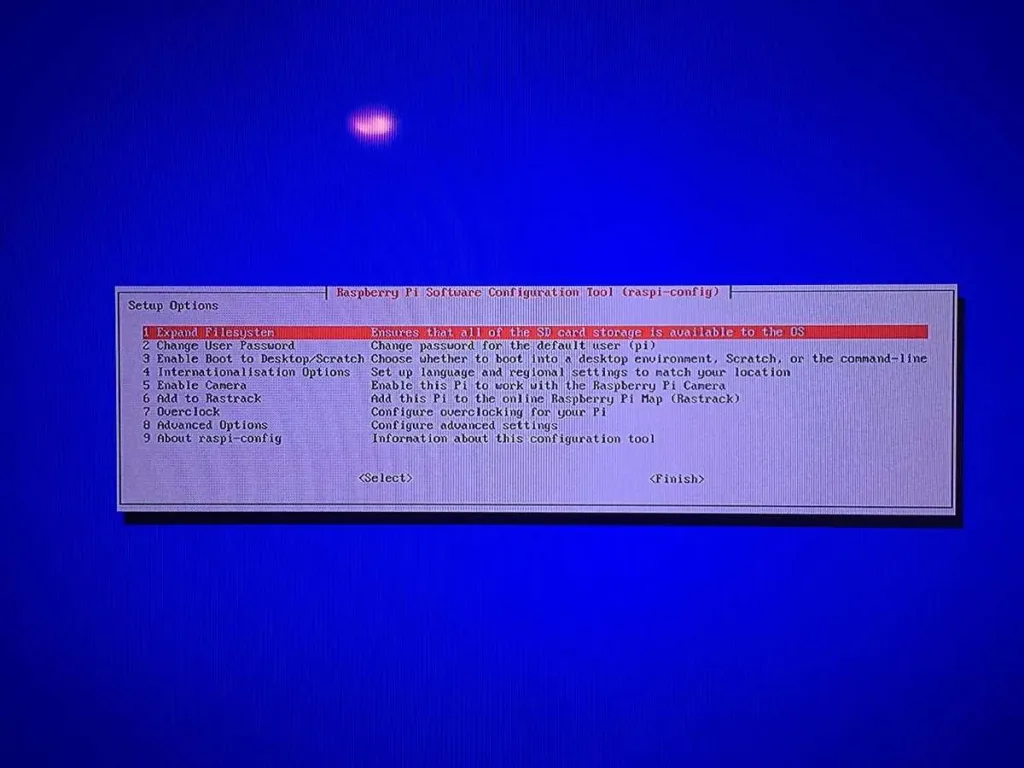
If your SD card is larger than 4GB, you must expand it before your Pi can use the remaining space. To do this, you’ll need to launch the Raspberry Pi configuration tool (raspi-config).
You can use the Retropie interface to do this. On the main screen, select the RetroPie menu icon and then select RASPI-CONFIG.
Then, choose either Expand Filesystem or expand_rootfs from the menu (this option will vary based on your Raspberry Pi model). You now need to restart your Pi. You may have noticed there’s no reset button (unless you’ve added one).
8 – Connect to your Pi
We now need to connect to your Raspberry Pi from your computer so that we can copy over game ROMs and easily edit configuration files.
Again, this step is optional as you can also transfer ROMs via USB and accessing your configuration and other additional features isn’t strictly required.
There are numerous ways to do this; my favorite method is via SSH/SFTP using an FTP client. As far as free FTP clients go, I recommend FileZilla since it’s very well documented and supported and is available for both Mac and Windows.
Download FileZilla from their downloads page and install it. I recommend you uncheck all the “additional components” that FileZilla will ask you to install, such as the Yahoo search page and toolbar crap.
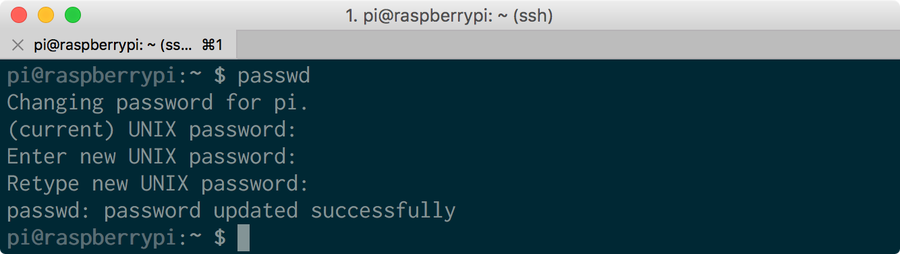
**Note: As of the latest version of Raspberry Pi OS, SSH is disabled by default for security purposes; you will need to enable SSH on your Pi before proceeding. Thankfully, this process is super easy and painless.
To find your Pi’s IP, open Terminal (Mac) or Command Prompt (Windows) and enter the following command to ping your Pi and return its network IP:
ping retropie
or, for older versions of RetroPie, use:
ping raspberrypi
It may take a few tries to get a response. If you see a “Request timeout” response when you run the ping command, then the command has failed. If you have a USB keyboard handy, you can boot up your Pi, press F4 to get to the shell, and run the following command:
ifconfig
This alternate method will list your Pi’s IP immediately after inet addr: under eth0.
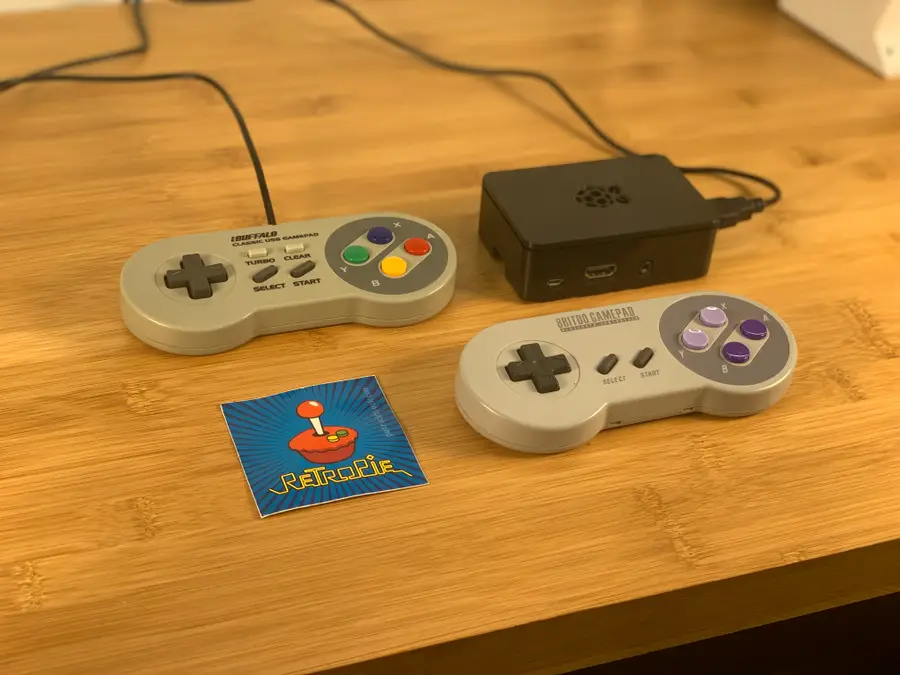
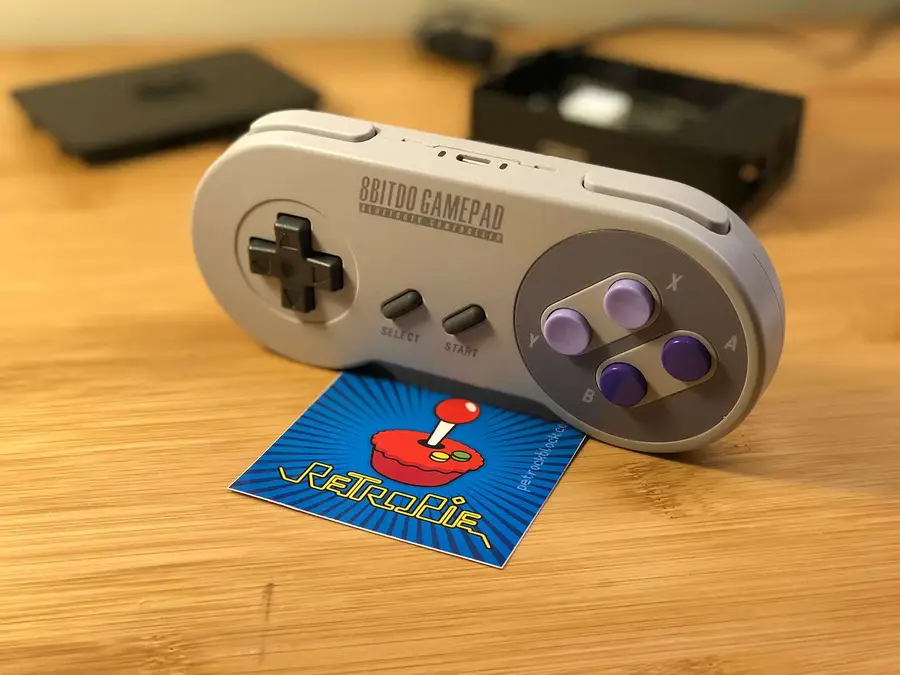
9 – Configuring your controller
You’ll now want to configure your USB gamepad to work with your Pi. I recommend the Buffalo Classic USB Gamepad since it’s inexpensive, highly compatible with the Pi, and comes in sweet Japanese packaging. You can find an Amazon link to that USB controller at the top of this guide.
You can use any type of USB controller — including a USB NES controller, though your games are more limited since it has fewer buttons than most newer games use.
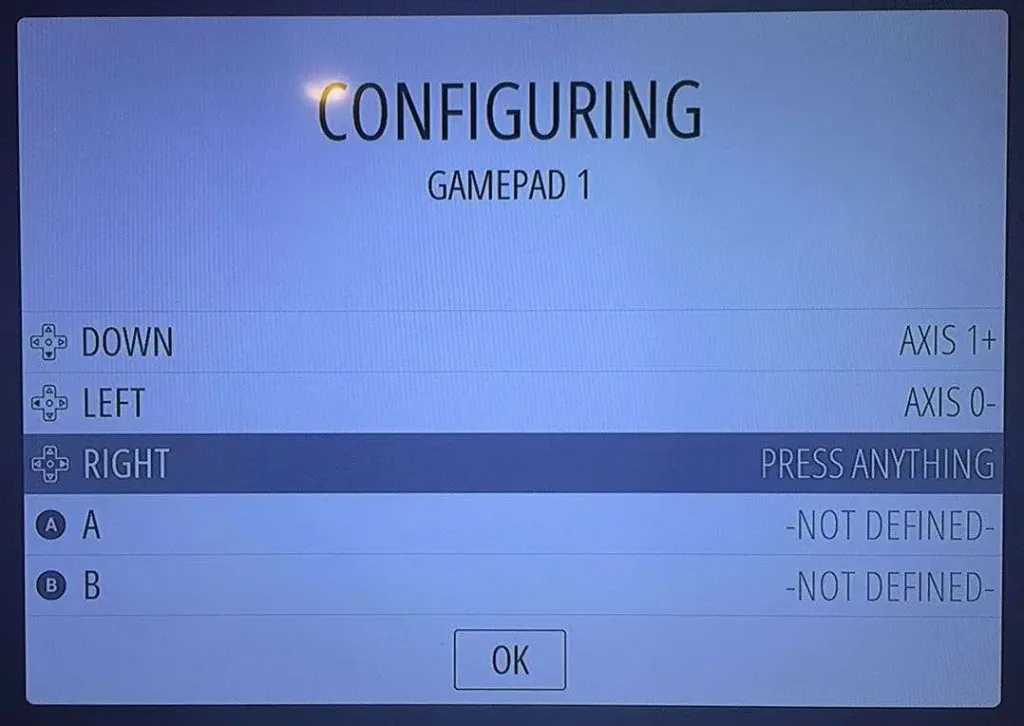
To configure your controller to work with the menu system and games, boot up your Pi. Your Pi will automatically launch the RetroPie UI where you will be prompted to configure the controller. If you mess up, don’t worry — you can access this configuration menu again later by pressing Start in the RetroPie UI.
🛈 Some games require additional in-game controller configuration. This can be done by going into a game’s menu system and mapping the controller there (though this isn’t necessary for most games).
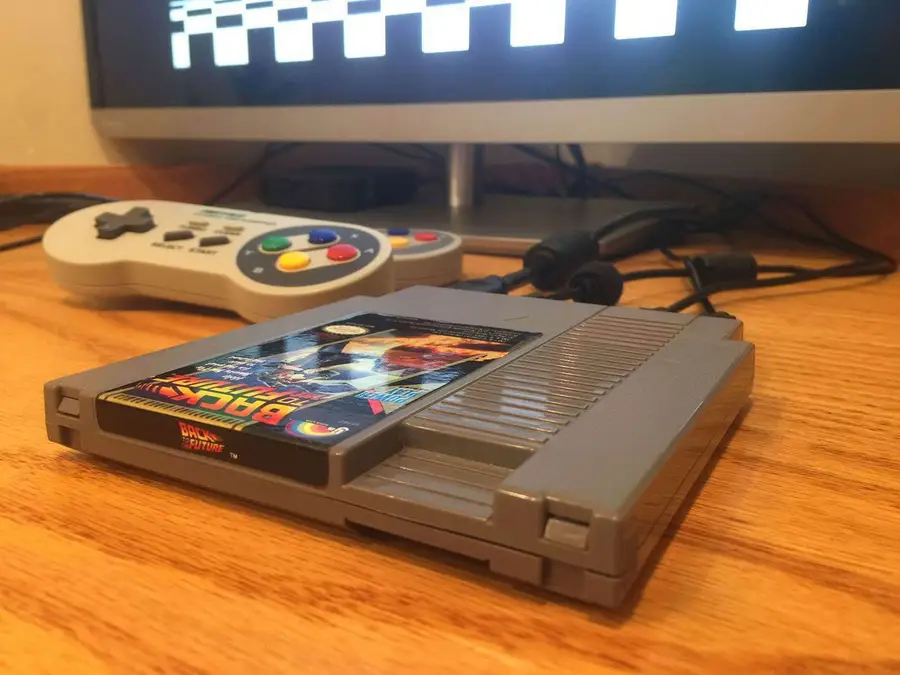
10 – Finding game ROMs
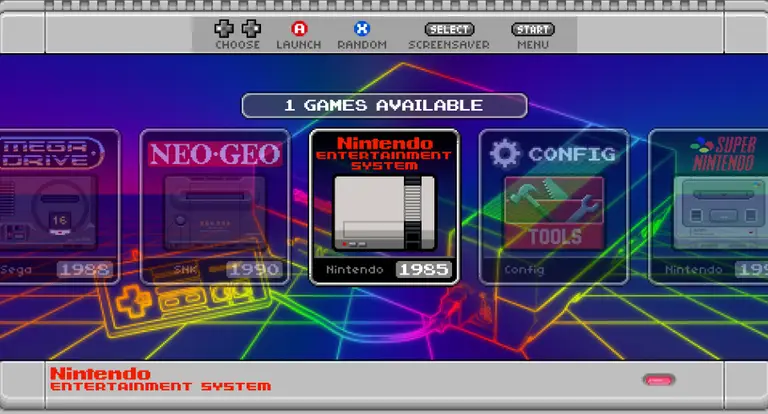
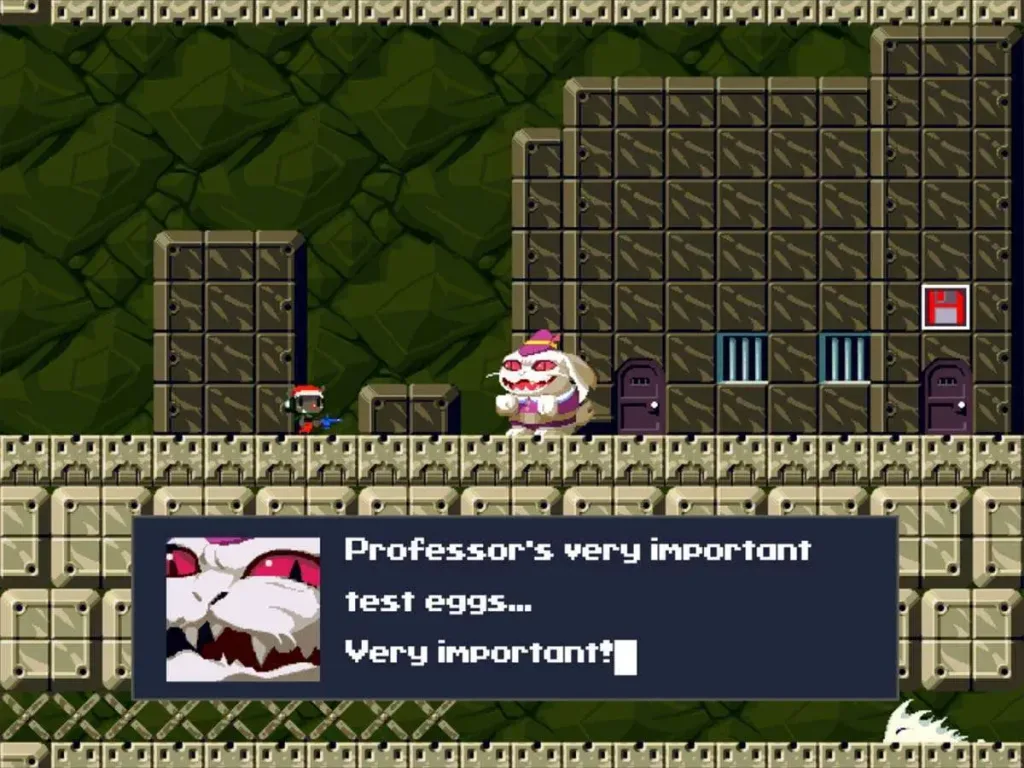
A ROM is an entire port of a particular video game. RetroPie contains a copy of EmulationStation, which both provides the user interface for your new retro gaming rig and interprets these ROM files appropriately. RetroPie comes with a few games preinstalled — such as Quake, Duke Nukem 3D, and Cave Story. These games are best played using a keyboard, however, since the gamepad doesn’t have enough keys to map the controls for some PC-ported games. You can emulate just about any console using the built-in RetroPie emulators.
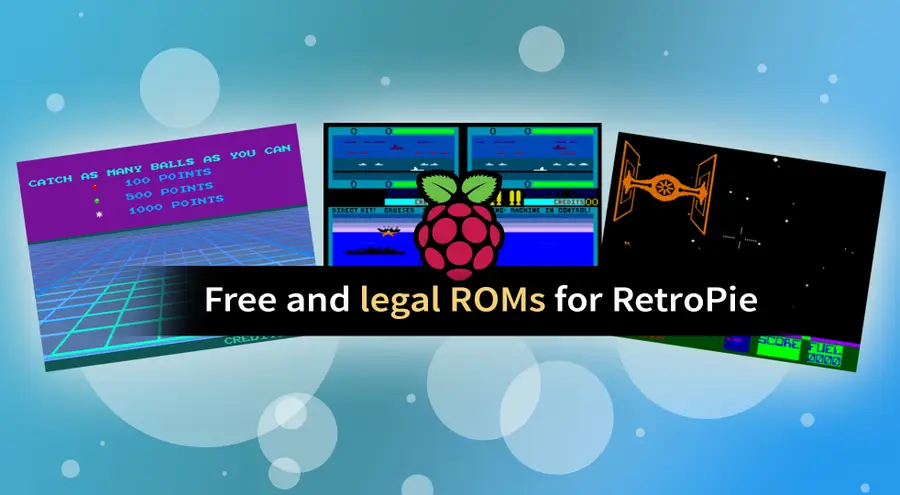
A Legal Note
Most retro games are owned by a company (yes, even the very old ones!) and are protected by copyright laws. Thus, unfortunately, downloading ROMs for those games constitutes piracy.
While you can find tons of RetroPie ROMs on any Torrent site, keep in mind that you should not download any copyrighted titles.
Luckily, there are some free ROMs out there that we can use for now! MAMEdev.org has a nice list of these free, legal ROMs. We’ll use these as examples and you can find more ROMs on your own.
Our list of the best of the video games from the year you were born contains links to some old arcade ROMs.
ROMs can be installed via SSH/SFTP (over your network) or by plugging a USB flash drive into your USB port. Additional methods for copying ROMs to RetroPie can be found on the RetroPie Wiki.
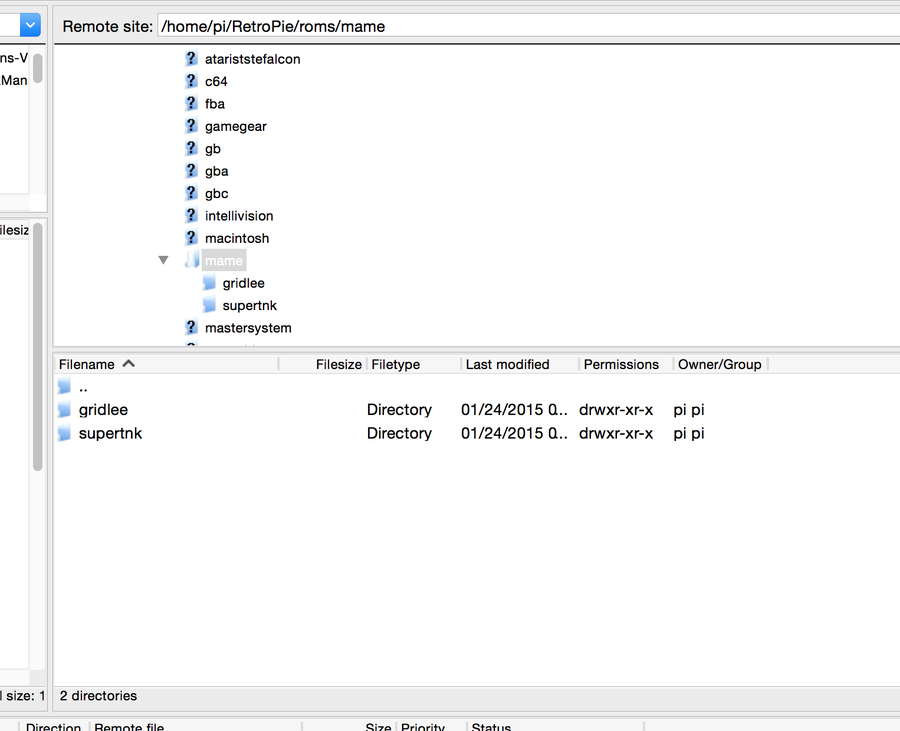
Reconnect FileZilla and browse to the following directory:
/home/pi/RetroPie/roms
Unzip each game ROM and upload each game folder into its respective game system folder. For example, if you had a Super Mario Bros 3 ROM, you would upload the game’s folder into the “nes” directory.
Gridlee and Super Tank go in the “mame” directory since MAME handles the arcade emulation for most vintage arcade-style games that don’t belong to a specific home video game system such as the NES, SNES or Atari.
After you’ve copied these directories over, restart your Pi.
12 – You’re ready to play!
Your Pi will boot into RetroPie automatically. Bask in the glory of simple graphics, bolstered by highly addictive gameplay. Whether you’re playing on your couch or building a RetroPie arcade cabinet or bartop arcade, I hope this guide was helpful to you!
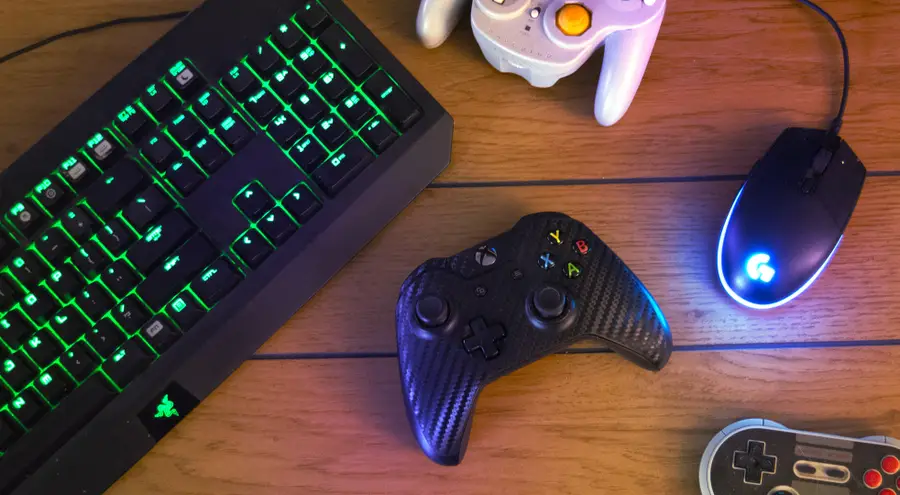
Looking for that perfect controller?
Want a great classic or contemporary controller to play those new RetroPie games? Check out our list of the best PC gaming controllers that will work with your new setup.
15 – Optional: Back up your Raspberry Pi’s SD card
Now that everything is configured and working splendidly, I recommend you back up your Raspberry Pi’s SD card image. This way, if you’re feeling adventurous and want to attempt some further Retropie customizations, you have a safe restore point.
With summer right around the corner, it’s time to fire up the grill! But who will watch the grill while you’re beating the heat? This year, kick things up a notch with your own Raspberry Pi-powered HeaterMeter. Don’t just throw a BBQ, be a part of it. HeaterMeter lets you keep a close eye on
Comcast offers a router to all of its internet customers for a monthly fee. If your Comcast router isn’t working, there may be something you can do to fix it.
If you suspect your Comcast router has malware or a virus, disconnect any connected devices from the router and contact Comcast for technical support. The support team will likely advise you to factory reset the router.
If the Comcast router or modem won’t power on, try these steps first.
Verify all cables are connected to the router.
Disconnect all of the cables from the router and reconnect them.
Test the power outlet the router is connected to. Ensure other devices are able to receive power when using it. If the outlet doesn’t work, try a different one.
If the router still will not power on, contact Comcast to report the faulty device.
4 – The Comcast router won’t connect to the internet
If your router loses connection to the internet, you can try these steps before reaching out to Comcast.
Reboot your router—this can be done using the web interface or power button (if your router has one). Test the internet connection.
Unplug the router from the wall, wait about 30 seconds, and plug the router back in again. Test the internet connection.
If you have access to the internet from another source, like a mobile phone, visit the Comcast website to verify there are no outages in your area.
As a last resort, you can factory reset the router.
If you still have no internet connection, contact Comcast directly for support.
5 – The Comcast router won’t assign an IP address
Occasionally, a router will malfunction by assigning IP addresses to some devices but not all of them. This is a somewhat common networking issue and can easily be fixed with a few steps.
Restart your router using the power button.
If there is no power button, unplug it from the wall, wait 30 seconds, and plug the router back in again.
If the router refuses to assign a new IP address, contact Comcast technical support.
6 – How to replace a Comcast router
If you’ve absolutely had it with your current device, you can always get a new one. Comcast can provide a replacement for your defective rental equipment. The rental fee is usually $5 each month for a modem and an additional $5 for a router. In many cases, it can be cost-effective to invest in a router of your own.
There are Comcast-compatible routers available on the market. In most cases, you can expect more control over your network with fewer hurdles from an ISP by owning your own router. If you’re not sure where to start, check out our recommended list of Comcast-compatible routers.
There are a few reasons you might want to update or reset your WiFi password: making your network more secure, and making your password easier to remember and type. Improved network security You can add an extra layer of security to your network by changing the WiFi password. As long as your new password is
Introducing Howchoo, an enigmatic author whose unique pen name reflects their boundless curiosity and limitless creativity. Mysterious and multifaceted, Howchoo has emerged as a captivating storyteller, leaving readers mesmerized by the uncharted realms they craft with their words.
With an insatiable appetite for knowledge and a love for exploration, Howchoo’s writing transcends conventional genres, blurring the lines between fantasy, science fiction, and the surreal. Their narratives are a kaleidoscope of ideas, weaving together intricate plots, unforgettable characters, and thought-provoking themes that challenge the boundaries of imagination.
With a few hundred plus unit tests, running a test suite can take minutes. And with so many tests being run, it’s hard to identify individual tests that are taking too long.
Fortunately, if you’re using pytest, you can easily get the execution times for your slowest unit tests.
1 – Use the –durations flag
When running unit tests with pytest, simply using the --durations flag to measure the execution time of slow running tests.
Take a look at the following test file:
# speed_tests.py

import time


def test_fast():
    x = 2 + 2
    assert x == 4


def test_slow():
    time.sleep(1)


def test_superslow():
    time.sleep(3)
Use --durations=n to get the execution time for the slowest n unit tests
Example:
pytest --durations=1 speed_tests.py
This will print the execution time of the slowest test. The output will look something like this:
======================= slowest 1 test durations ========================
3.00s call     speed_tests.py::test_superslow
======================= 3 passed in 4.02 seconds ========================
If your test suite is much larger, you can print any number of tests. For instance:
pytest --durations=100 many_tests.py
Use --durations=0 to get the execution time for all unit tests
If want to print the execution time for all unit tests, just use --durations=0. You can expect output like this:
======================== slowest test durations =========================
3.00s call     speed_tests.py::test_superslow
1.00s call     speed_tests.py::test_slow

(0.00 durations hidden.  Use -vv to show these durations.)
======================= 3 passed in 4.01 seconds ========================
Note that one of the tests is hidden because it executed too quickly.
2 – Conclusion
Measuring execution time for Python unit tests is pretty easy with pytest. Obviously, if you find any slow running tests you’ll need to spend time figuring out why they’re slow and fixing them if possible. Some of the most common reasons for slow tests are unintended network requests and un-mocked time delays, but there are plenty of other possibilities.
If you’ve used any other great tools for solving this issue or if you enjoyed this guide, let me know in the comments below!
When learning object oriented programming in Python, there can be a few gotchas when it comes to distinguishing between class and instance variables. In this guide I’ll explain the difference between class and instance variables and provide examples demonstrating various use cases. 1 – Class vs. instance variables First, a quick review if you’re new
Introducing Howchoo, an enigmatic author whose unique pen name reflects their boundless curiosity and limitless creativity. Mysterious and multifaceted, Howchoo has emerged as a captivating storyteller, leaving readers mesmerized by the uncharted realms they craft with their words.
With an insatiable appetite for knowledge and a love for exploration, Howchoo’s writing transcends conventional genres, blurring the lines between fantasy, science fiction, and the surreal. Their narratives are a kaleidoscope of ideas, weaving together intricate plots, unforgettable characters, and thought-provoking themes that challenge the boundaries of imagination.
An Empty Map is a type of map in Minecraft that players use to record and view the areas they have explored. It can also show a player’s location and any marker you leave within the map’s scope using Banners. With how big Minecraft is, an Empty Map is useful to have in your inventory if you want to keep track of your exploration progress and avoid getting lost on the way home, or back to your bed if you’re just starting out.
When Empty Maps are filled, they turn into Maps in your inventory. You can use these to decorate your base and let others know how to navigate the surrounding terrain.
To make an Empty Map in Minecraft, follow the recipe below.
Ingredients required:
8 Papers
1 Compass
Tool required:
Crafting Table
For Bedrock Edition, using these ingredients will give you an Empty Locator Map. To create an Empty Map in Bedrock Edition, you only need 9 Papers.
Let’s find out get these ingredients and make an Empty Map by following the steps in this guide.
1 – Make Paper
Harvest at least 9 Sugar Canes. Sugar Canes generate naturally beside bodies of water, so you can find them growing near rivers, lakes, and oceans.
Once you have the Sugar Canes, put three in a Crafting Table to make 3 Papers.
Do this 3 times to get the 9 Papers required for the Empty Map.
2 – Craft a Compass
A Compass requires 1 Redstone Dust and 4 Iron Ingots to craft. Both can be acquired by mining or looting.
To get Redstone Dust, you need an Iron Pickaxe or higher to mine a Redstone Ore or Deepslate Redstone Ore. You can also get Redstone Dust from looting.
To get Iron Ingots, you have to mine Iron Ores for some Raw Iron using a Stone Pickaxe or higher. Smelt the Raw Iron using a Furnace to get an Iron Ingot. You can also smelt Iron Ores or Deepslate Iron Ores, put 9 Iron Nuggets or a Block of Iron in a Crafting Table, or loot chests to get Iron Ingots.
Once you have Redstone Dust and Iron Ingots, combine them in a Crafting Table to make a Compass.
3 – Make an Empty Map
Prepare your Papers and Compass and combine them in a Crafting Table as shown below.
Take the result in the output slot and you have your Empty Map!
How to Use an Empty Map in Minecraft
An Empty Map can be filled out and turned into a Map.
Maps can be displayed using an Item Frame and expanded when you run out of space. You can also add map markers to signify important locations, clone a filled Map, and lock it to prevent new details from being recorded. However, it needs to be filled first.
To fill an Empty Map, go to the area you want to record and equip the Empty Map through your hotbar or the off-hand slot in your inventory.
For the Java Edition, simply right-click to immediately record your surrounding terrain. For other editions, you can use the following controls:
Bedrock Edition:
Keyboard & Mouse: Right-click and hold.
Controller: Press the LT/L2/ZL button and hold.
Mobile: Tap the screen and hold.
Education Edition: Right-click and hold.
The Empty Map will then turn into a Map in your inventory.
A Map can be viewed on your hand once it’s filled. It will update and fill out automatically as you explore the world as long as you have it equipped.
A downside to this is you can’t undo what is already recorded, so use your Empty Maps wisely. If you have the resources, you can craft a few extras for emergencies. You can also expand the Map if you want it to record more terrain in the same area by combining the filled Map with Paper using a Cartography Table.
How to Get an Empty Map in Creative Mode
You can get an Empty Map using the Creative Inventory Menu in Creative Mode either by looking for it or searching for its name.
If you have access to console commands, you can also input the following in the chat window:
/give @p minecraft:map 1
give: This is the main command. You can learn more about this command in the Minecraft Wiki.
@p: This refers to the nearest player. You can also replace this with your username.
minecraft:map: This is the item you want to have. In this case, this will give you an Empty Map.
1: This is the amount of the above item that you want to have.
What are Other Ways to Get an Empty Map in Minecraft?
Empty Maps have a chance of generating naturally in chests found in shipwrecks, strongholds, and villages. You can also get them by trading with cartographers in villages.
Where Do Empty Maps Work in Minecraft?
Empty Maps can only record areas and structures on the surface level. This means it cannot display underground or underwater details once used. It also does not work in the End.
Using Empty Maps in the Nether technically works, but they will not display the terrain. A workaround for this is leaving Banners behind, which will still show on the Map. However, it can still be difficult to navigate to them due to the unpredictability of the Nether.
What Are the Differences Between an Empty Map and an Empty Locator Map?
Both Java and Bedrock Editions have an Empty Map item, but only Bedrock has an Empty Locator Map. All Empty Maps in Java Edition require a Compass and 8 Papers. Meanwhile, Empty Maps in Bedrock Edition are created using only 9 Papers.
In Bedrock Edition, an Empty Map does not show player markers, but adding a Compass to create an Empty Locator Map allows it to show where players are once the map is filled.
Empty Maps in Java Edition automatically show the owner’s location. However, needing to craft a Compass to make one can be expensive for beginners. The advantage of being able to craft Empty Locator Maps in Bedrock Edition is that players have the option to only record terrain if they do not need to see player markers as well.
How to Make an Empty Locator Map in Bedrock Edition?
To create an Empty Locator Map in Bedrock Edition, you only need to combine an Empty Map with a Compass using either a Crafting Table or an Anvil. This also works with a Map that has already been filled out.
How to Show Other Players Using an Empty Map in Java Edition?
On its own, an Empty Map cannot show the location of other players. If you want to see other players’ location markers, you have to clone a filled Map and have each player carry a copy so their locations can appear on it.
You can clone a Map by combining it with an Empty Map using a Crafting Table or a Cartography Table.
The longer you play Minecraft, the more you realize that early-game tools just won’t cut it. Exploring the enchantment feature of Minecraft can be exciting, but also intimidating. Rather than worry about researching enchantments, below are the best enchantments in Minecraft! To learn how to enchant items, check out this guide! In this guide, you’ll see
Introducing Howchoo, an enigmatic author whose unique pen name reflects their boundless curiosity and limitless creativity. Mysterious and multifaceted, Howchoo has emerged as a captivating storyteller, leaving readers mesmerized by the uncharted realms they craft with their words.
With an insatiable appetite for knowledge and a love for exploration, Howchoo’s writing transcends conventional genres, blurring the lines between fantasy, science fiction, and the surreal. Their narratives are a kaleidoscope of ideas, weaving together intricate plots, unforgettable characters, and thought-provoking themes that challenge the boundaries of imagination.
The Potion of Slow Falling in Minecraft is a consumable item that grants players the Slow Falling status effect. This effect allows you to fall slower and prevents you from taking fall damage. A regular Potion of Slow Falling lasts for 1 minute and 30 seconds, but you can extend the duration of the effect to 4 minutes by adding Redstone Dust.
This potion can be used to float safely down from high altitudes, gain better mobility in air, and survive aerial attacks. Players typically use the Potion of Slow Falling in The End when battling the Ender Dragon. This deadly boss mob has an attack that can send you flying high enough to kill you when you fall down. Drinking the potion before the fight can save you from dying this way.
How to Brew a Regular Potion of Slow Falling in Minecraft?
To brew a regular Potion of Slow Falling in Minecraft, gather all the required ingredients and brewing tools, then follow the below recipe:
Ingredients required:
1 Water Bottle
1 Nether Wart
1 Phantom Membrane
Tools required for the brewing process:
Brewing Stand
Blaze Powder
1 – Craft a Glass Bottle
Find a Crafting Table and place 3 Glass Blocks in the 3×3 grid. This will give you 3 Glass Bottles.
You only need one bottle to make the potion, but you can also place up to three bottles in the Brewing Stand using the same ingredients, so plan ahead!
2 – Create a Water Bottle
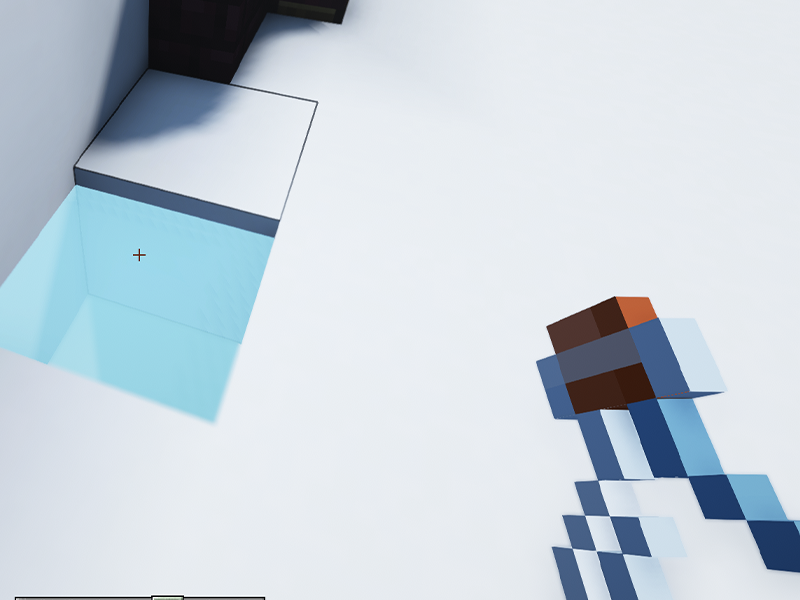
To get a Water Bottle, equip a Glass Bottle and look for a water source to fill it up.
3 – Get Fuel for Brewing
Now, you need Blaze Powder to fuel your Brewing Stand. You can craft this from Blaze Rods which are dropped by Blazes found in Nether fortresses.
Once you have your Blaze Rod, use the Crafting Table to create Blaze Powder. 1 Blaze Powder is enough to make 20 batches of potions, so one is more than enough.
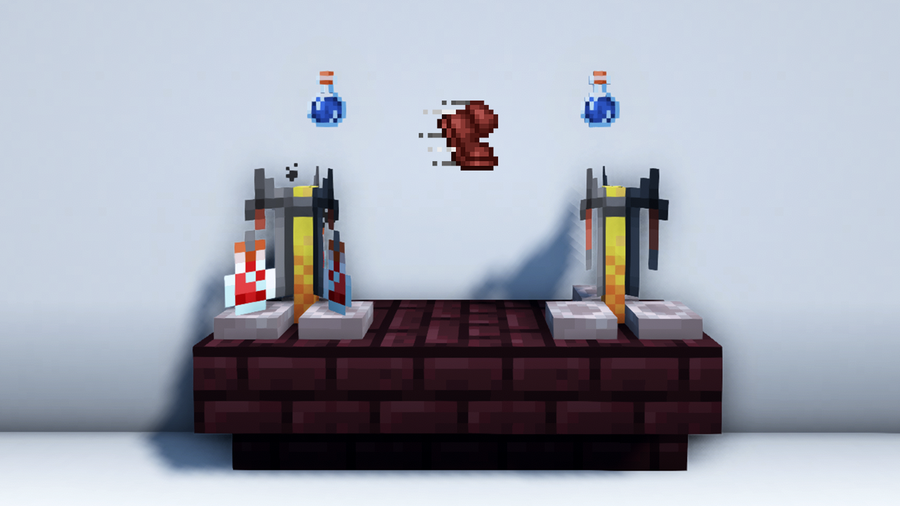
4 – Gather the Potion Modifier
Minecraft potions need a modifier so you can alter its properties. For this potion, we need a Nether Wart.
You can find Nether Warts growing on Soul Sand in the Nether, so while you’re looking for Blazes, be sure to grab some on the way!
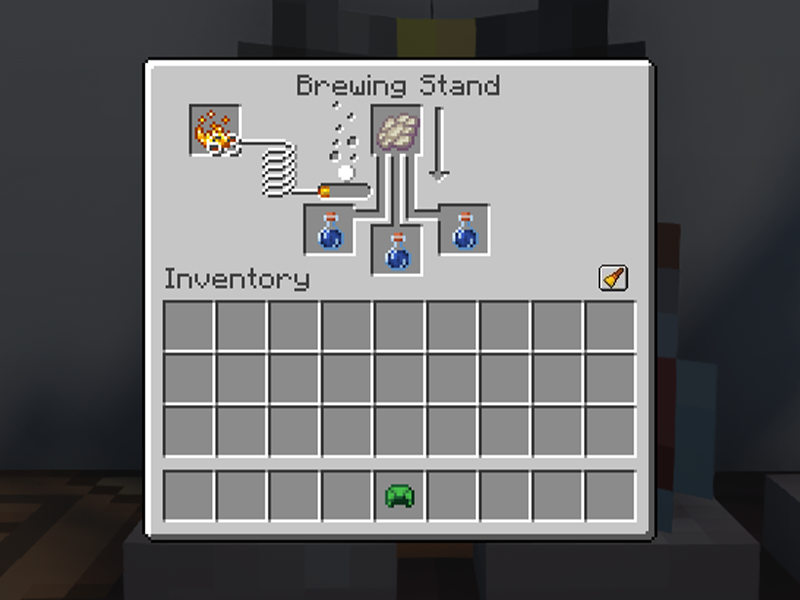
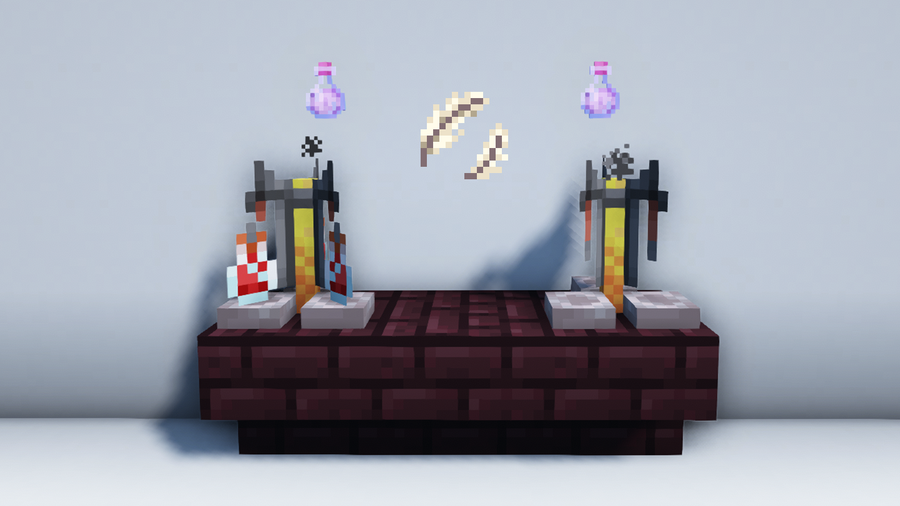
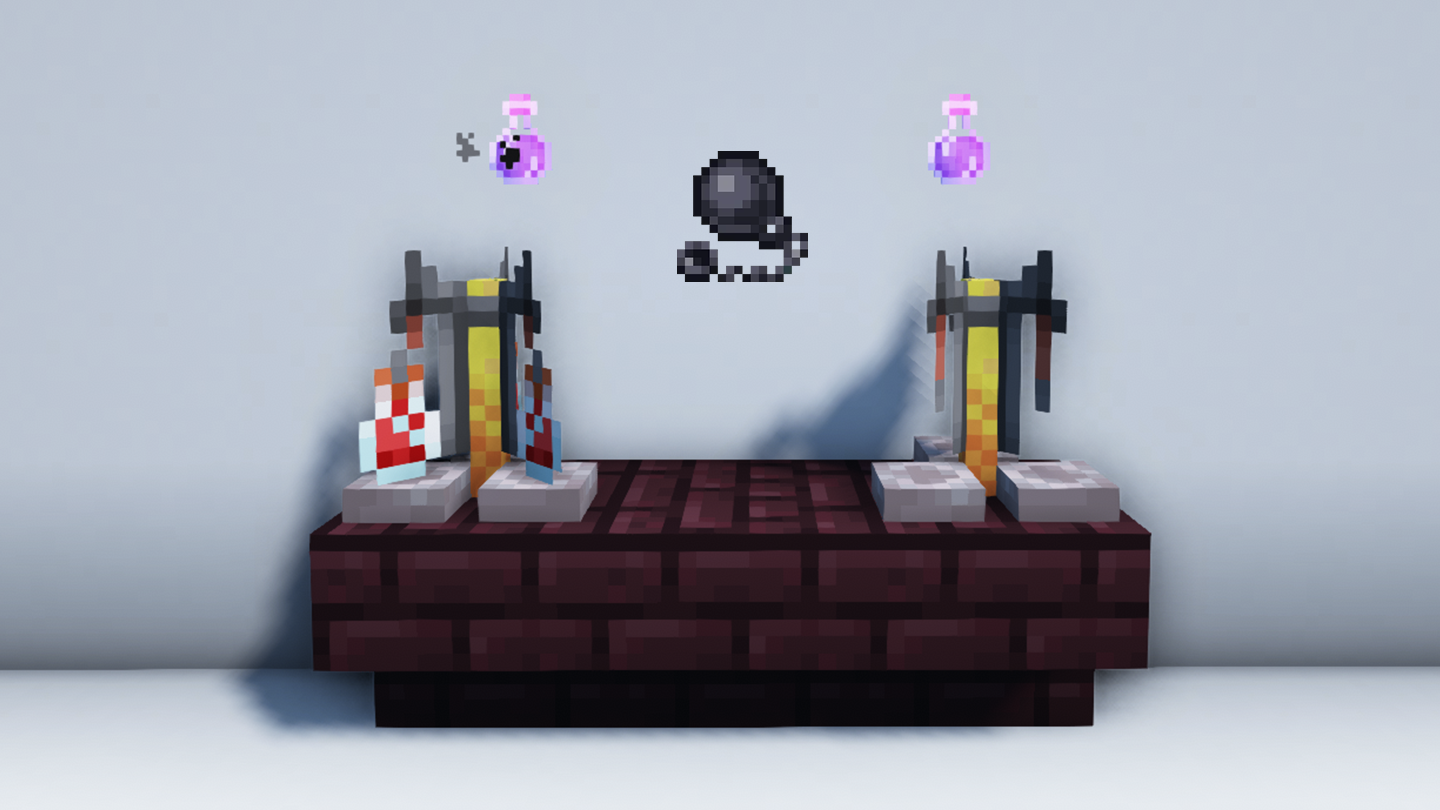
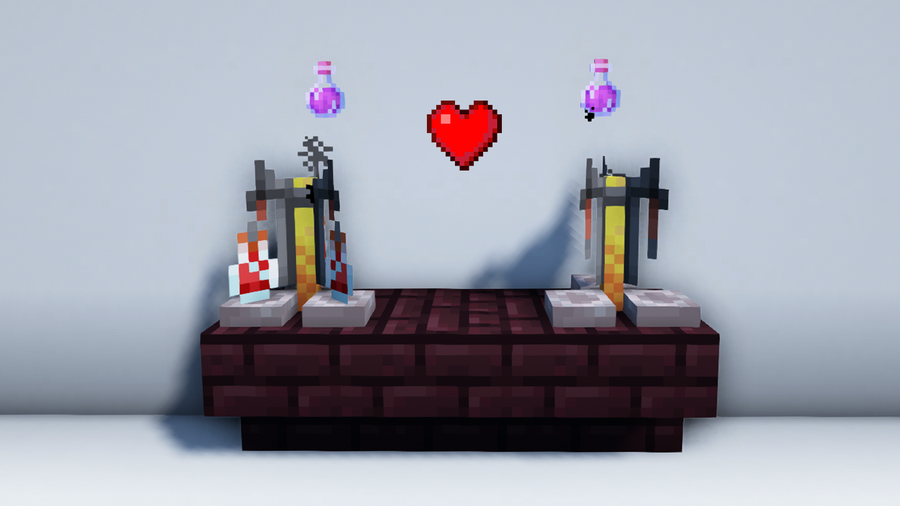
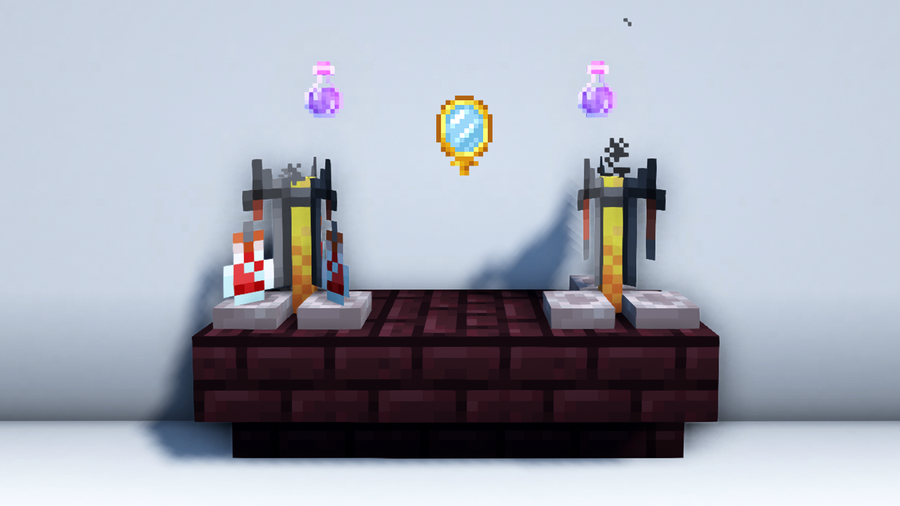
5 – Brew an Awkward Potion
Before making the Potion of Slow Falling, you need to brew a base potion called an Awkward Potion. To get one, place the Water Bottle, Blaze Powder, and Nether Wart in the Brewing Stand as shown above.
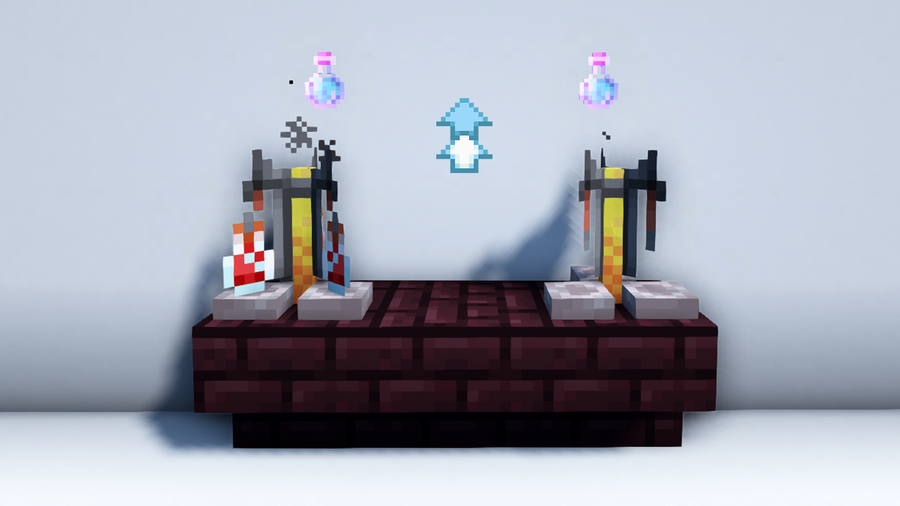
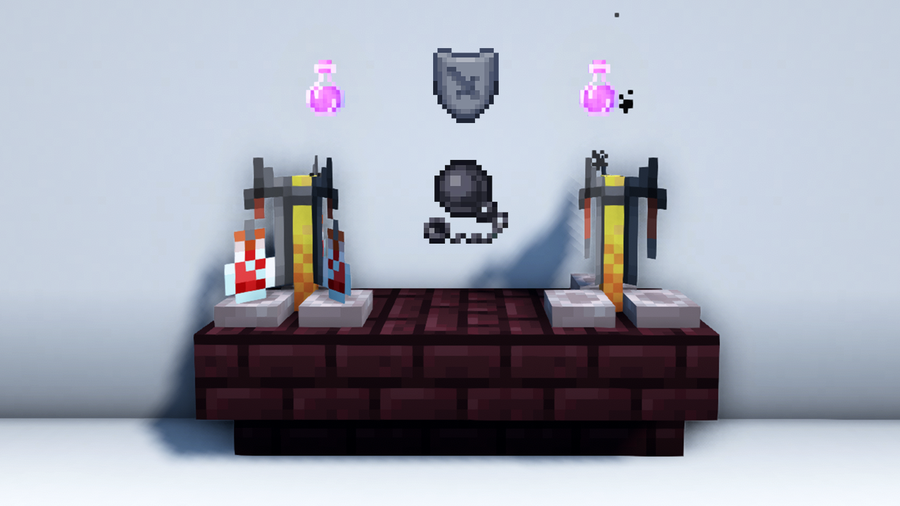
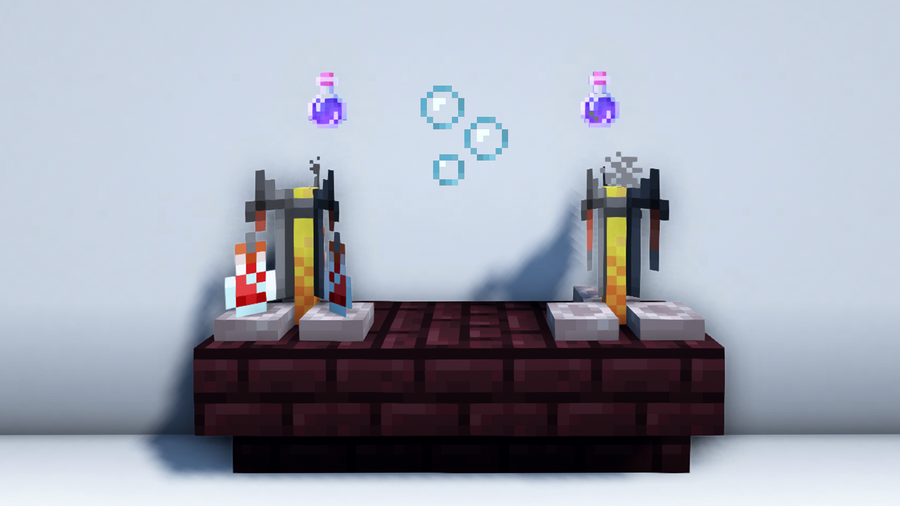
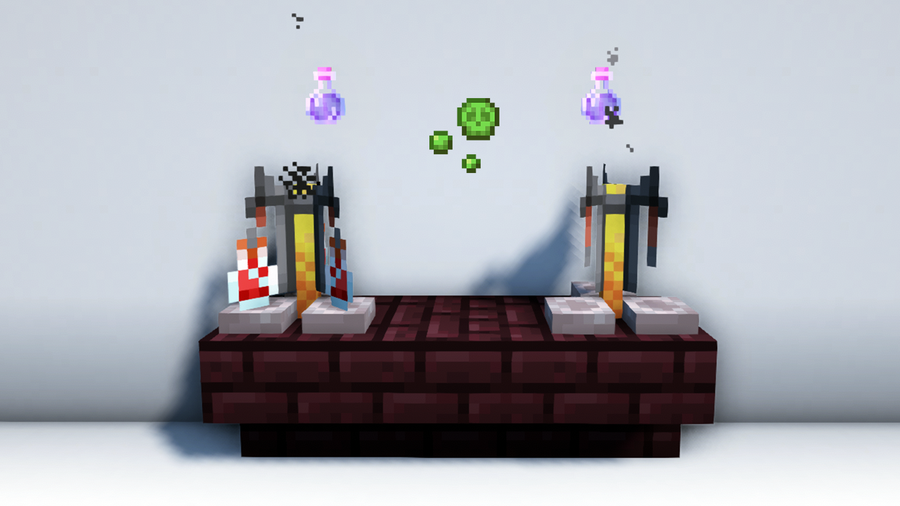
6 – Brew a Potion of Slow Falling
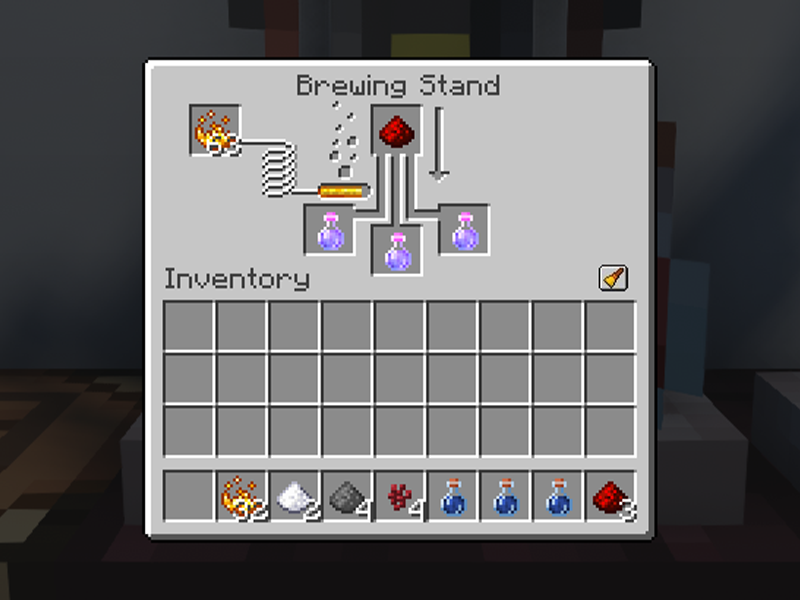
For the final step, you need a Phantom Membrane, which you can get by defeating Phantoms. These mobs spawn at night when you spend three or more Minecraft days without sleeping or dying.
Leaving everything how it was from the last step, place the Phantom Membrane in the Brewing Stand. Wait for the brewing to finish, and you’ll get a Potion of Slow Falling that lasts for 1 minute and 30 seconds.
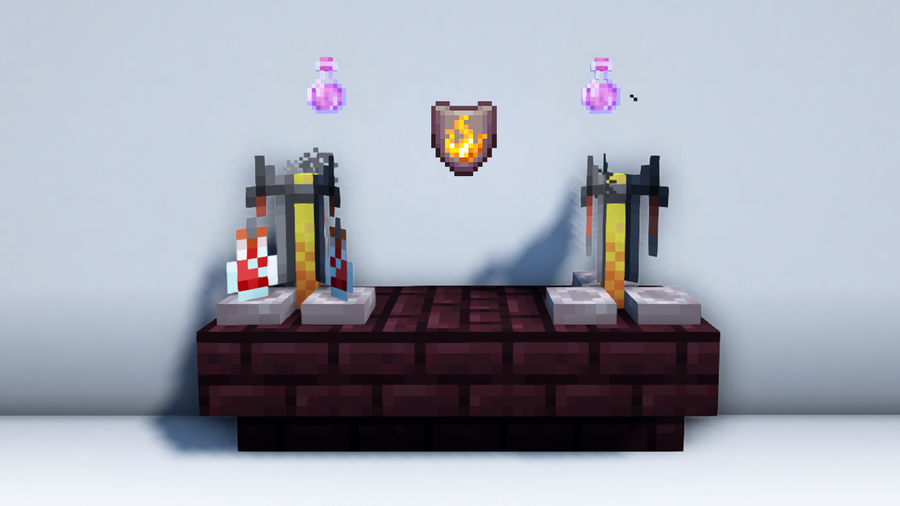
How to Extend the Duration of a Regular Potion of Slow Falling?
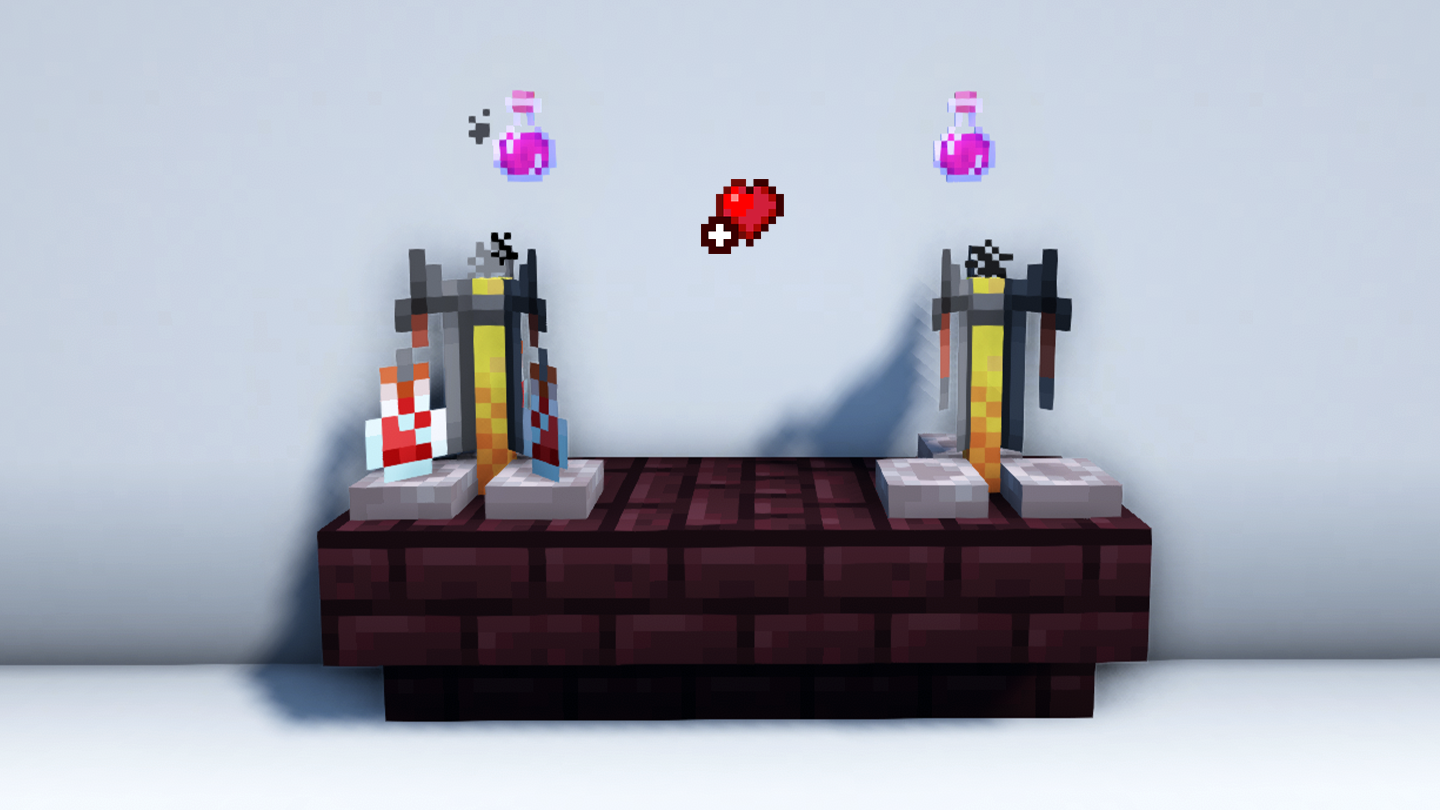
You can extend the duration of the regular Potion of Slow Falling from 90 seconds to 4 minutes by placing Redstone Dust in the base ingredient slot of your Brewing Stand.
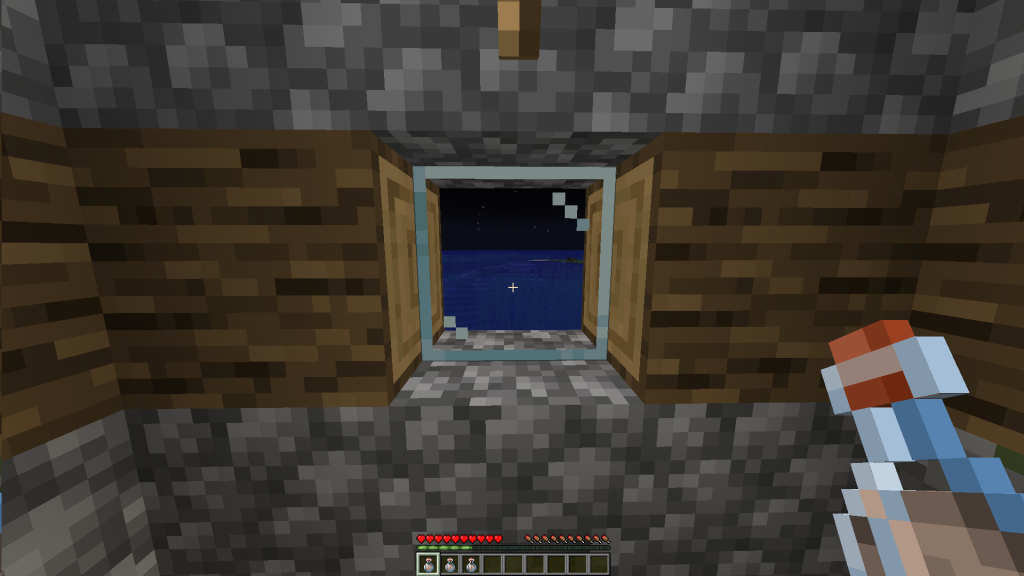
How to Use the Potion of Slow Falling?
You can use a Potion of Slow Falling by drinking it. To do this, select the Potion of Slow Falling from the hotbar.
Then, drink the potion by using the following controls based on your Minecraft version:
Java Edition: Right-click and hold.
Bedrock Edition:
Keyboard & Mouse: Right-click and hold.
Controller: Press the LT/L2/ZL button and hold.
Mobile: Tap the screen and hold.
Education Edition: Right-click and hold.
An empty Glass Bottle will be left after use. You will know the potion works when you see particle effects. You can also check this by opening the inventory menu to see your current status effects.
What are the Advantages of Using A Potion of Slow Falling?
Aside from using it against the Ender Dragon, The Potion of Slow Falling is useful for navigating high areas, gliding with an Elytra, and defending against Shulkers and Wardens.
Scaling High Altitudes: Ravines and mountains can be tricky to navigate. Using a Potion of Slow Falling to slow your descent can save you from accidentally falling to your death.
Elytra Usage: Using an Elytra while affected by Slow Falling allows you to glide at a slower rate but with more efficiency. It also prevents you from taking fall damage while using it.
Fighting Shulkers: Shulkers have the to ability to continuously inflict the Levitation effect with their bullets, floating you upward when hit. Using a Potion of Slow Falling can prevent you from dying from fall damage if the bullets take you up too high.
Evading Wardens: The Warden is a powerful mob that can detect vibrations, smell, and touch, but it can be avoided by sneaking. The Potion of Slow Falling can be used to evade it as it softens your landing and muffles your steps.
What Are the Risks of Using A Potion of Slow Falling?
The Potion of Slow Falling has its advantages, but it also comes with possible risks such as difficulty with acquiring Phantom Membrane, inability to prevent Ender Pearl damage, and inefficiency of falling at a much slower rate. Here are things you may find helpful to know before investing in one:
Getting Phantom Membrane: Getting Phantom Membrane can be challenging since Phantoms only spawn after 3 or more days without the player sleeping or dying. Alternatively, you can get a cat which has a 3.22% chance of gifting you Phantom Membrane.
Ender Pearl Damage: Using this potion does not prevent damage from traveling using Ender Pearls.
Falling Slowly: While this is the intended effect of the potion, it can be time-consuming to wait to reach the ground if the player is in a hurry.
What Are the Alternatives to Using A Potion of Slow Falling?
Instead of using a Potion of Slow Falling, you can use certain tools, items, and blocks from your environment to prevent fall damage. Here is a list of alternatives:
Water: Fall into a water source to avoid fall damage completely.
Water Bucket: Use a Water Bucket right before hitting the ground to break your fall.
Beds: Land on a bed to reduce fall damage by 50%.
Hay Bales: Land on Hay Bales to reduce fall damage by 80%.
Sweet Berries: Fall on Sweet Berry bushes to nullify all fall damage. Unfortunately, this will not prevent you from taking damage from the Sweet Berries.
Feather Falling: Enchant your boots with Feather Falling. This effect does not change the rate at which you fall, but it does reduce fall damage when worn.
Cobwebs: Fall into a Cobweb to slow your descent and avoid fall damage.
Slime Blocks: Land on a Slime Block. This will cause you to bounce instead of taking fall damage.
Boats: Ride a Boat when exploring or falling from high areas to negate fall damage.
What are some variants of the Potion of Slow Falling?
The Potion of Slow Falling has two throwable variants called the Splash Potion of Slow Falling and the Lingering Potion of Slow Falling. We will explain below how to brew each of these.
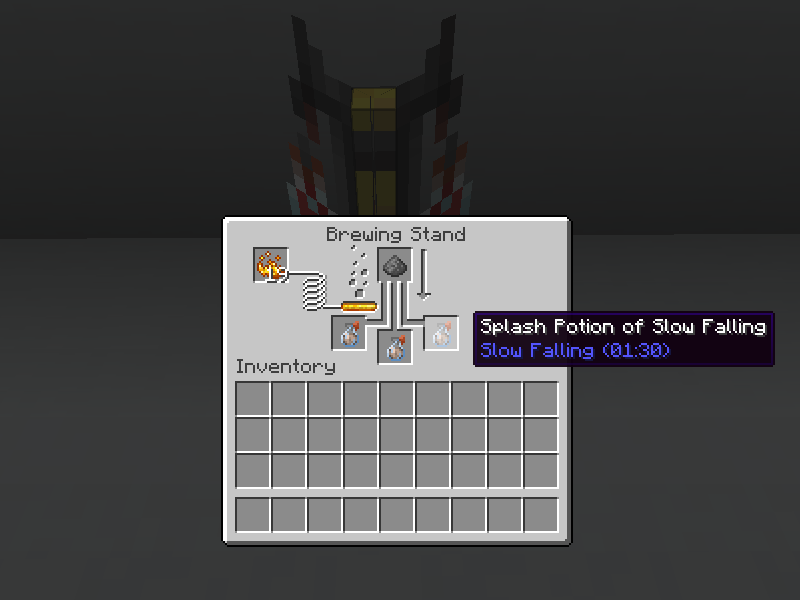
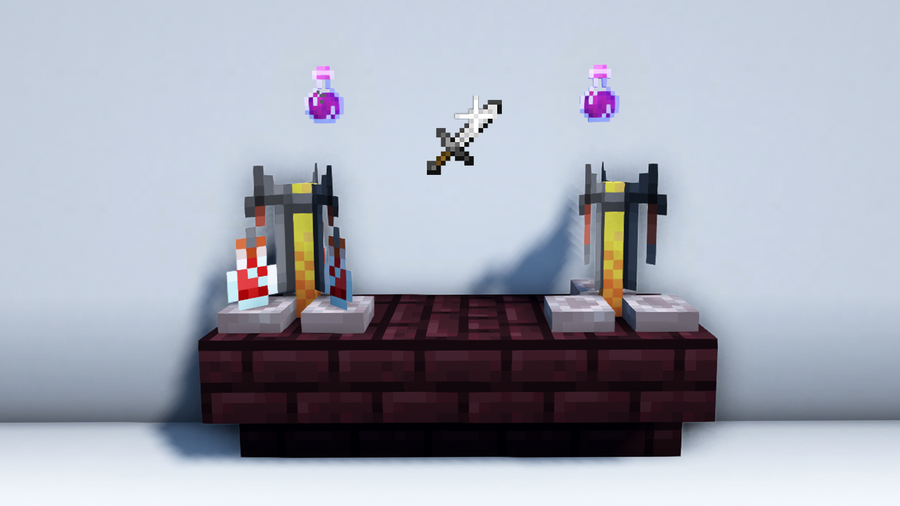
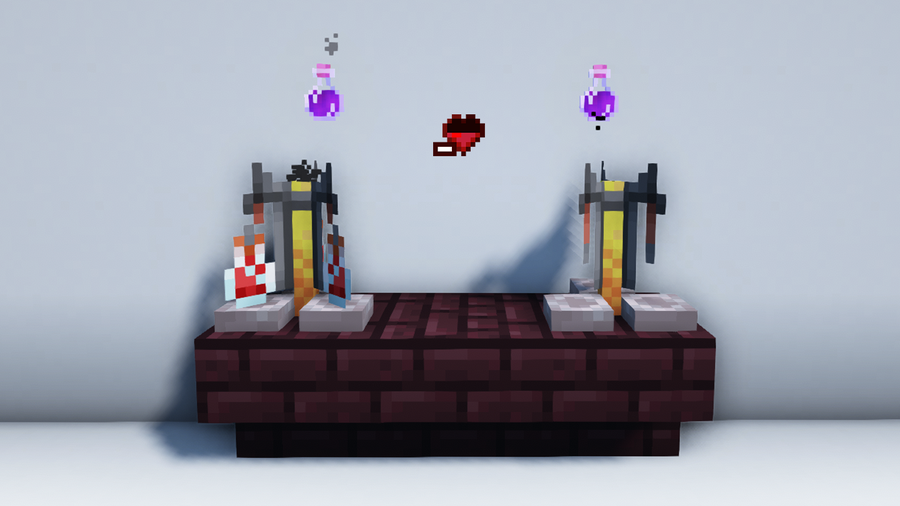
How to Make a Splash Potion of Slow Falling
To make a Splash Potion of Slow Falling, add 1 Gunpowder to a Potion of Slow Falling (01:30) in your Brewing Stand. Once it finishes brewing, you can throw it at mobs or other players to give them the Slow Falling effect for 1 minute and 30 seconds.
If you want to extend the effects of a Splash Potion of Slow Falling to 4 minutes, use a Potion of Slow Falling (04:00) with the Gunpowder instead.
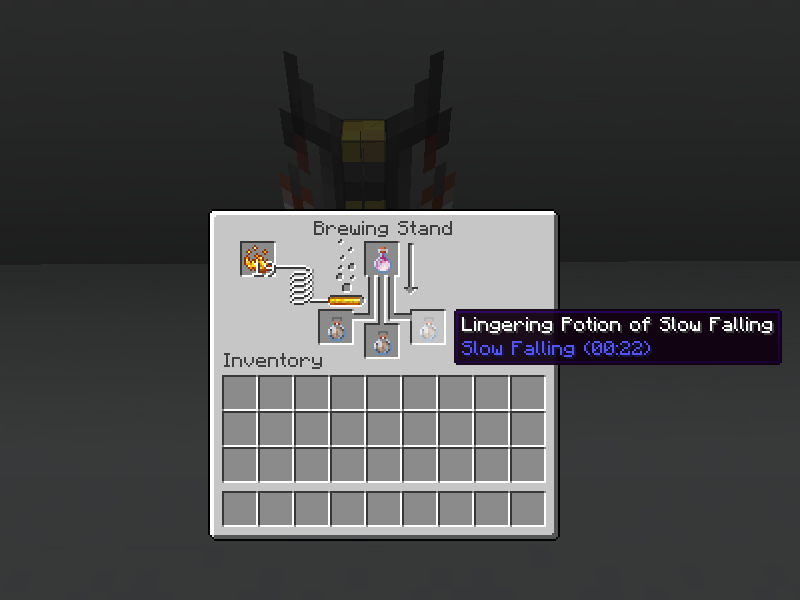
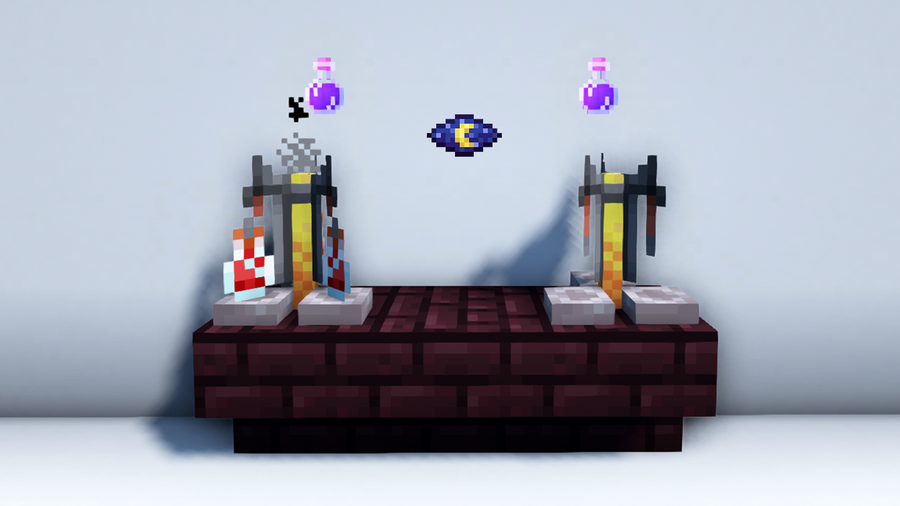
How to Make a Lingering Potion of Slow Falling
To make a Lingering Potion of Slow Falling, add 1 Dragon’s Breath to a Splash Potion of Slow Falling (01:30) in your Brewing Stand. Throwing a Lingering Potion of Slow Falling creates a cloud of Slow Falling. Mobs or players that pass through this cloud will get the Slow Falling effect for 22 seconds.
To extend the effects of a Lingering Potion of Slow Falling to 1 minute, use a Splash Potion of Slow Falling (04:00) with the Dragon’s Breath.
You can also make Arrows of Slow Falling that lasts for 11 seconds by combining 1 Lingering Potion of Slow Falling (0:22) and 8 Arrows in the Crafting Table. To make the Arrow of Slow Falling last for 30 seconds, use a Lingering Potion of Slow Falling (01:00) instead.
Where to find the Potion of Slow Falling in Creative Mode?
You can find the Potion of Slow Falling and its variants in the Creative Inventory menu. The location varies depending on the version of Minecraft you have.
Java Edition: you can find it in Brewing or Food & Drinks.
Bedrock Edition: you can find it in Equipment or Brewing.
The longer you play Minecraft, the more you realize that early-game tools just won’t cut it. Exploring the enchantment feature of Minecraft can be exciting, but also intimidating. Rather than worry about researching enchantments, below are the best enchantments in Minecraft! To learn how to enchant items, check out this guide! In this guide, you’ll see
Introducing Howchoo, an enigmatic author whose unique pen name reflects their boundless curiosity and limitless creativity. Mysterious and multifaceted, Howchoo has emerged as a captivating storyteller, leaving readers mesmerized by the uncharted realms they craft with their words.
With an insatiable appetite for knowledge and a love for exploration, Howchoo’s writing transcends conventional genres, blurring the lines between fantasy, science fiction, and the surreal. Their narratives are a kaleidoscope of ideas, weaving together intricate plots, unforgettable characters, and thought-provoking themes that challenge the boundaries of imagination.
The notification sounds in Slack leave much to be desired. From harsh thumps to the word “hummus” spoken out loud—these are some seriously grating audio bites to take in throughout the day. A bad notification sound can make a simple message a stressful reminder that your attention has been interrupted. That’s why we’re here to help! Improve your workflow by adding a custom notification sound.
Slack doesn’t officially support custom notification sounds. We can get around this by overwriting one of the existing Slack sound files. All you need is an mp3 file and about 5 minutes. In this guide, I’ll show you how to set a custom Slack notification sound for both Windows and macOS.
1 – Customize the Slack notification sound on macOS
First, open Applications. Right click on Slack and choose Show Package Contents.
Navigate to Contents > Resources. This location stores the notification files used by Slack.
Your replacement file needs to be an .mp3 with the exact same name as the file you want to replace. For example: knock_brush.mp3. Once you have your file ready prepared, place it in the Resources folder to override the existing file. Make sure to back up the original sound files so you can easily restore them if necessary.
If your file is not an mp3, visit this guide to learn how to convert any audio file to an mp3.
Restart the Slack desktop application.
🛈 You will have to replace the notification audio file again if you update Slack. Keep a backup of the replacement sound.
2 – Customize the Slack notification sound on Windows
To replace the existing notification file, give your replacement sound file the exact same name as the one you want to replace. Make sure the replacement file is a .mp3 file. For example: knock_brush.mp3.
Place the custom audio file you want to use in the following folder:
Replace [Username] with your Windows username. Restart Slack.
🛈 You will have to replace the notification audio file again if you update Slack. Keep a backup of the replacement sound.
3 – Set your custom notification sound in Slack
Open the Slack community you want to adjust notification audio for. Expand the drop-down menu in the upper left-hand corner. The menu is labeled with the name of your currently active Slack community.
Select Preferences > Notifications.
Scroll down to Sound & appearance. Choose the custom file you replaced in the Slack installation folder. Congratulations! You’ve got a custom slack notification sound.
🛈 These settings are saved for each community and do not apply to global Slack preferences.
4 – Where to find free notification sounds
You can find replacement audio files online for free. There are entire websites dedicated to providing free notification sound libraries. Here are a couple of sources to get you started.
Orange Free Sounds – This website hosts audio files that can be downloaded for free. You can find specific licensing information available for each file. They even have a category just for notification sounds.
Notification Sounds – This website is dedicated exclusively to notification audio. Everything is available for free.
5 – Back up your audio clip
Save a copy of your chosen .mp3 file, and keep it somewhere safe as you might need to repeat this process when you update Slack.
You’re all done! Now the next time your coworker leaves his computer unlocked, you can play a prank that he’ll never figure out how to undo. 😉 Unless he finds this guide, I guess.
This short guide will teach you how to set up recurring reminders in Slack, sending a notification to you or your team every week, month, 13th, or whatever interval you choose. 1 – Open the channel you’d like to post in Open the channel where you’d like the reminder to occur. You can post reminders
Introducing Howchoo, an enigmatic author whose unique pen name reflects their boundless curiosity and limitless creativity. Mysterious and multifaceted, Howchoo has emerged as a captivating storyteller, leaving readers mesmerized by the uncharted realms they craft with their words.
With an insatiable appetite for knowledge and a love for exploration, Howchoo’s writing transcends conventional genres, blurring the lines between fantasy, science fiction, and the surreal. Their narratives are a kaleidoscope of ideas, weaving together intricate plots, unforgettable characters, and thought-provoking themes that challenge the boundaries of imagination.
The Raspberry Pi Foundation recently announced the release of Raspberry Pi OS—a new update and name change for the classic Raspberry Pi operating system Raspbian. Raspberry Pi OS is available for installation immediately and comes with everything you need to support the new Raspberry Pi 4 8 GB module. If you want to install the new OS, there are a couple of ways you can do it.
Be sure to back up your current Raspberry Pi image before you upgrade to the new OS—just in case something goes wrong. You can visit our guides on how to back up your Pi image on Windows or Mac for help with this process.
1 – Install using Raspberry Pi Imager
You can easily install Raspberry Pi OS using the Raspberry Pi Imager. This is an official imaging application that makes the microSD card flashing process much easier and more welcoming to new users. You can find a thorough overview of how to use the Raspberry Pi Imager here.
Run the installer and complete the setup by following the prompts.
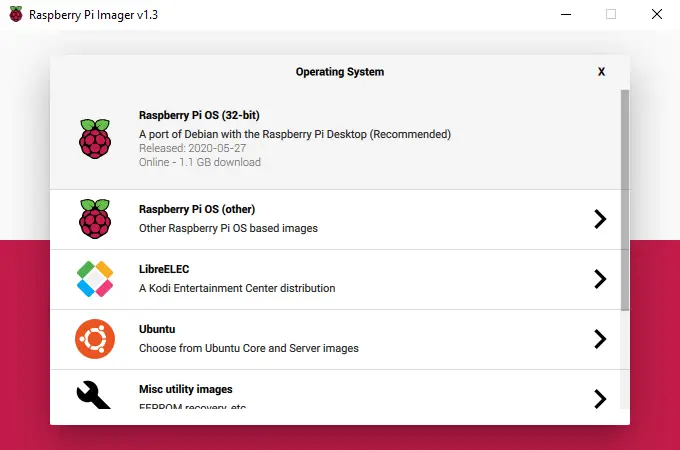
Launch Raspberry Pi Imager and click Choose OS.
Select Raspberry Pi OS from the list.
Click Choose SD card and choose the microSD card you want to flash the new OS to and click Write.
When the imager is finished, you can connect your microSD card to the Pi and boot it up.
2 – Using third-party imaging software
You can also use third-party imaging software to write the Raspberry Pi OS image to a microSD card. Turn off the Raspberry Pi, remove the SD card, and connect it to your computer.
There are several options when it comes to imaging software, a popular application known to work well with Raspberry Pi images is Etcher. This program can be used to flash any compatible image to the microSD card for your Pi.
Download and install the imaging application of your choice.
Point the imager to the Raspberry Pi OS image file and set the microSD card to the one you want to use for your Pi.
When the image has been flashed, you can test it by connecting it to the Pi and trying to boot.
3 – Troubleshooting
There are a few issues you’re likely to run into while trying to set up the new Raspberry Pi OS.
OS Not Loading
If the Raspberry Pi OS image isn’t booting, format the SD card and try to image it again. If it still won’t boot properly, make sure the SD card is large enough. You may want to revert to Raspbian Buster to determine if the issue is with the OS or the Pi hardware.
Incompatible Software
You may find that some software is completely incompatible with the new OS. You can wait for the developers to update the program to work with the new changes or revert to an older edition like Raspbian Buster.
Imaging Issues
If you receive an error when trying to image the microSD card, research the error verbatim online to determine exactly what the problem is. If you can’t find anything specific to your issue, make sure the microSD card is big enough to support Raspberry Pi OS. You may need to try formatting the card before trying to reimage it.
There are several ways to go about running a Minecraft server on the Raspberry Pi. In this guide, I’ll cover how to install Nukkit—a cross-platform Minecraft server that’s super easy to set up on the Raspberry Pi. This server should work with PCs, consoles, and tablets running Minecraft 1.14. I’ll be using a Raspberry Pi
Introducing Howchoo, an enigmatic author whose unique pen name reflects their boundless curiosity and limitless creativity. Mysterious and multifaceted, Howchoo has emerged as a captivating storyteller, leaving readers mesmerized by the uncharted realms they craft with their words.
With an insatiable appetite for knowledge and a love for exploration, Howchoo’s writing transcends conventional genres, blurring the lines between fantasy, science fiction, and the surreal. Their narratives are a kaleidoscope of ideas, weaving together intricate plots, unforgettable characters, and thought-provoking themes that challenge the boundaries of imagination.

 kitchen


 1 Water Bottle
 1 Nether Wart
 1 Phantom Membrane